
Whoah! Did time fly that fast? It’s only 4 months before another year’s bound to enter our lives.
While some dread adding another year to their life, more people look forward to seeing their goals realized in the incoming year.
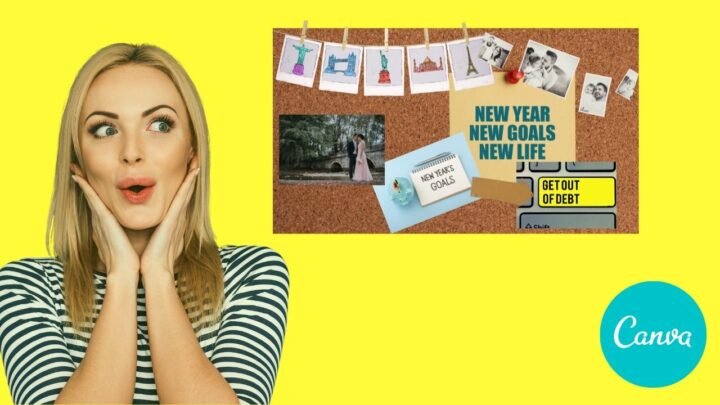
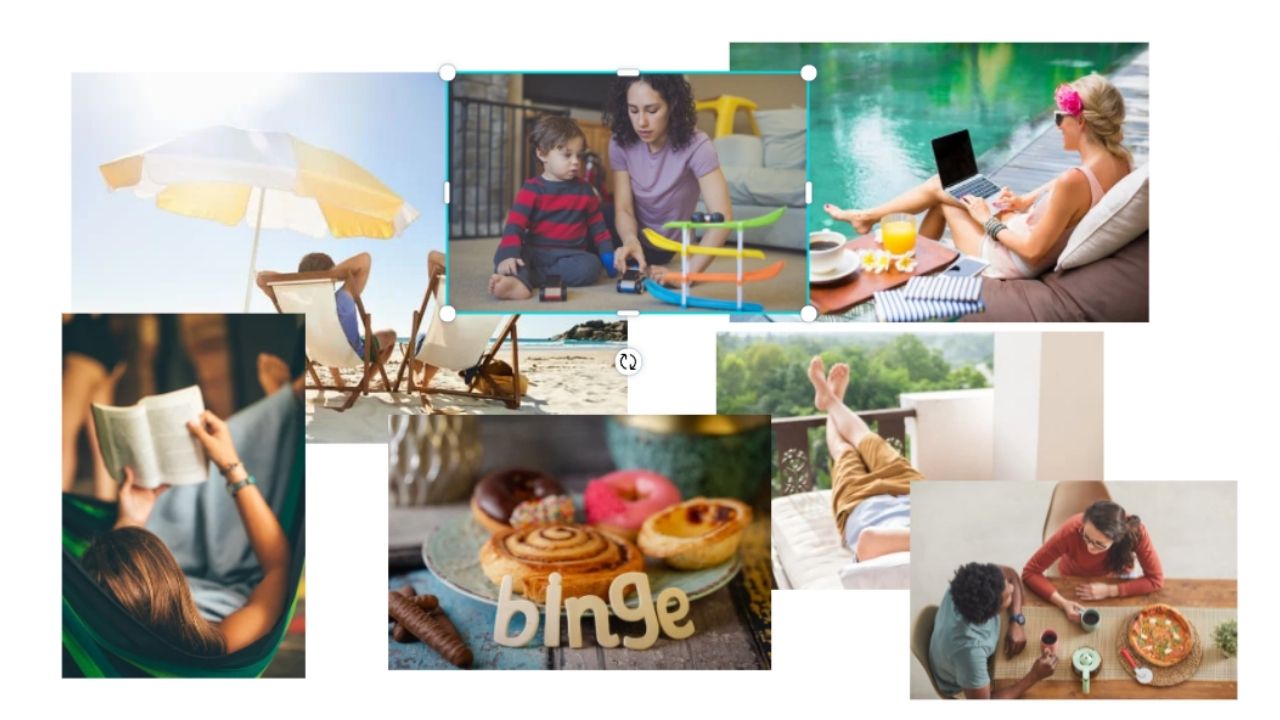
And, what a great way to put the law of attraction to good use by creating a visual reminder of your goals — a vision board!
For those who don’t know what a vision board is, it’s a visual reminder of what you aim to achieve for the next year, the next quarter, the next month, etc.
Think of it like a photo reminder that constantly reminds you what you’re supposed to do.
And, while it’s fun to create physical vision boards, creating a digital one on Canva gives it a more modern yet flexible vibe.
So, if you’re ecstatic to create your very own vision board on Canva, don’t stop reading here.
How to Make a Vision Board in Canva
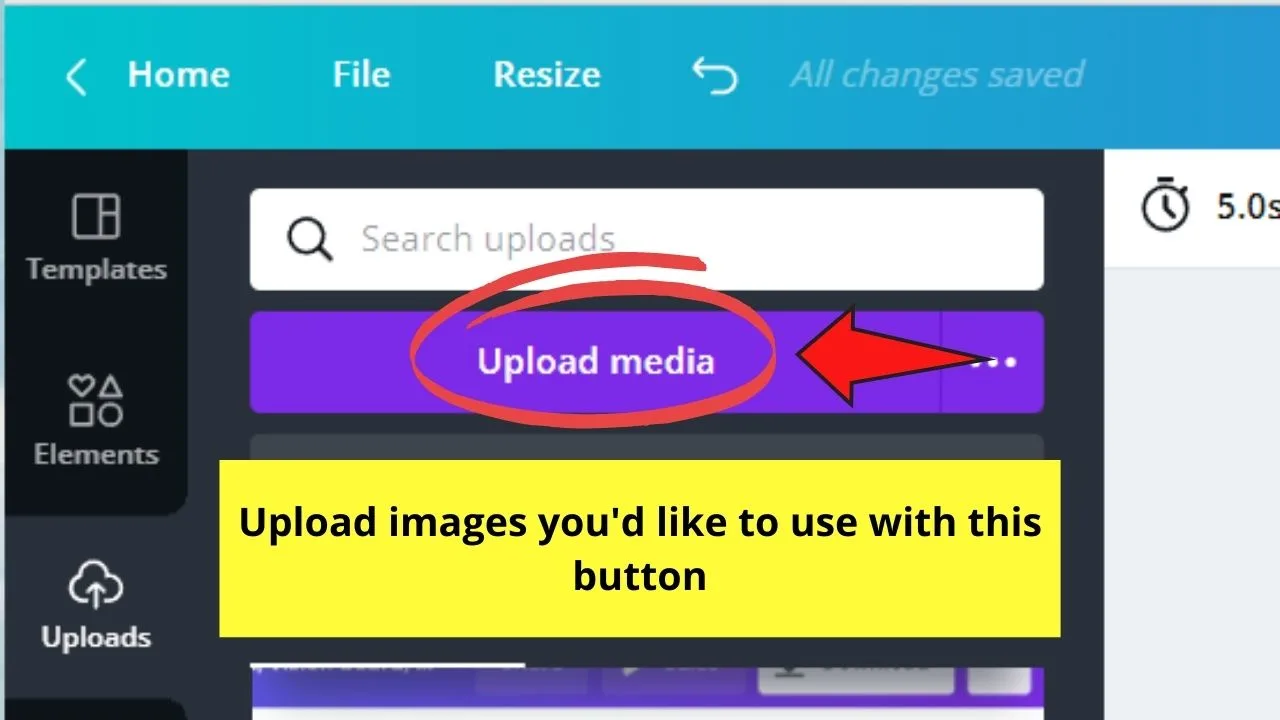
First, choose pictures from Canva’s photo library or upload your own images with the help of the “Upload” button. Then, add and layer the images on top of each other using the “Position” option. If you want a less cluttered look, make use of Canva grids (go to Elements and search for “Grid”).
Creating Vision Boards in Canva: The Basics
Before we jumpstart with the process of creating vision boards in Canva, you need to know that there’s no specific rule about how you choose to do it.
Whether you prefer a more scrapbook-style vision board by adding and grouping layers or take the more refined approach of using Canva frames and grids, it’s all up to you.
But, of course, you need to start with these basic steps:
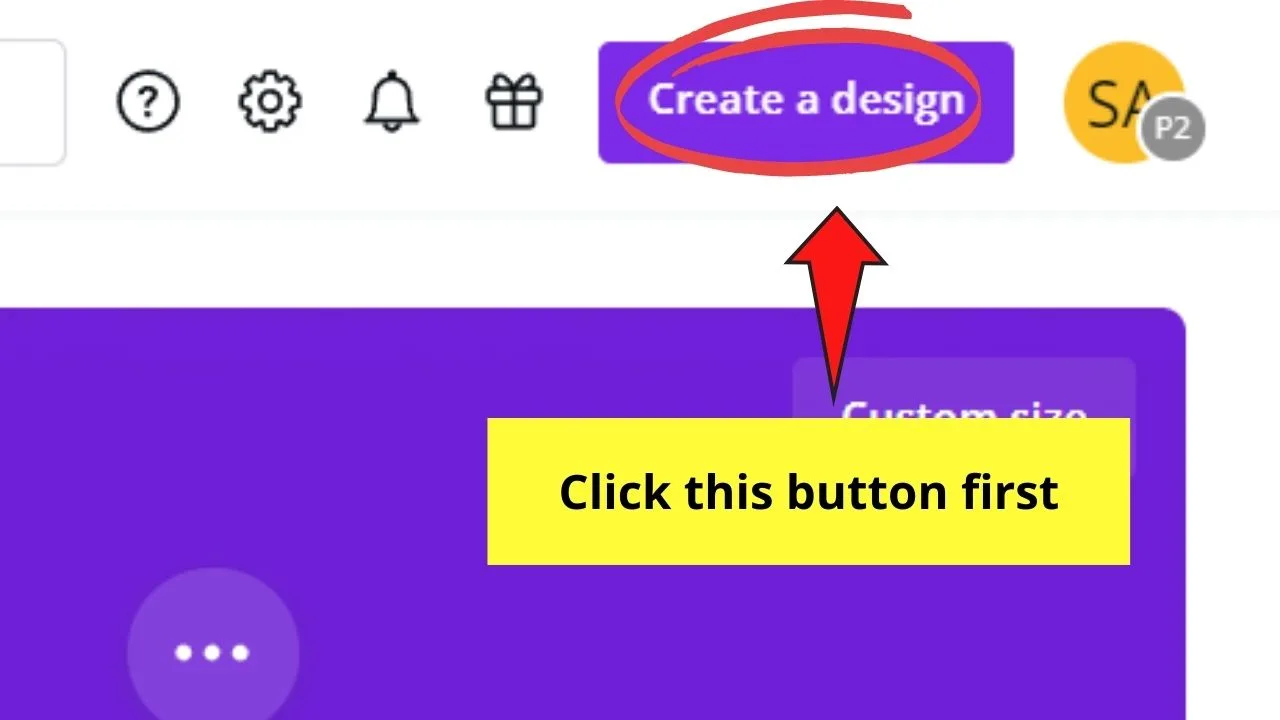
Step 1: Create a new design file on your Canva account by tapping on the “Create a Design” button.

From there, you can choose to use a custom size document size (if you know your desktop, laptop, or mobile phone’s screen size) or start with an image using the “Edit Photo” option (take a screenshot of your device’s screen and use this as a reference to your document size).
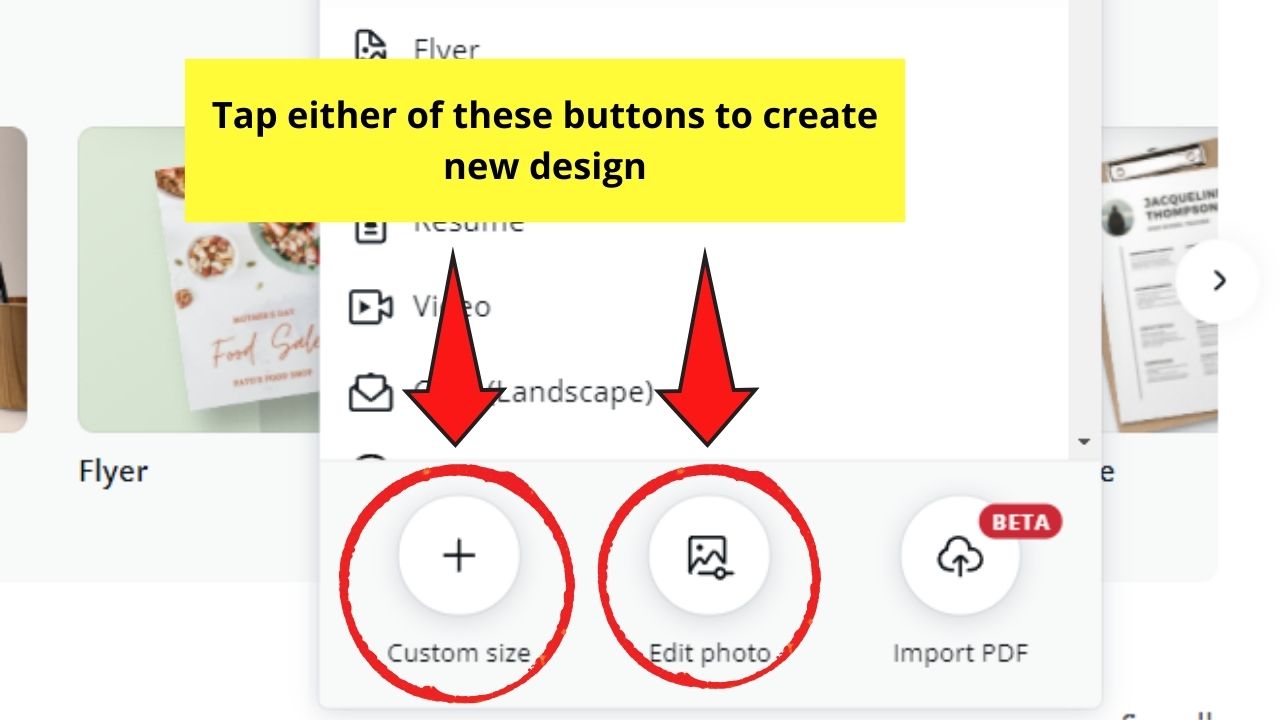
But, if the Start with an Image isn’t available on your end, just research the dimensions of your screen size and use the custom dimensions option instead.
Step 2: On the editor page, tap the “Uploads” button on the side-panel menu.
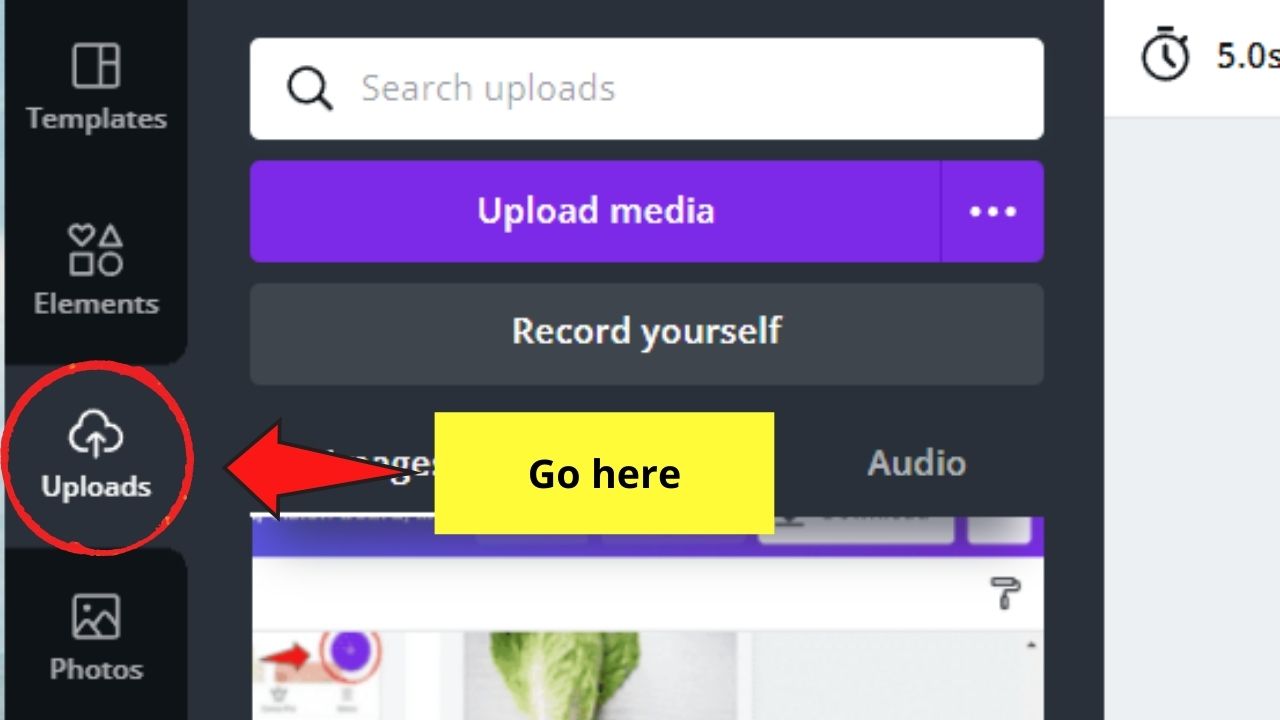
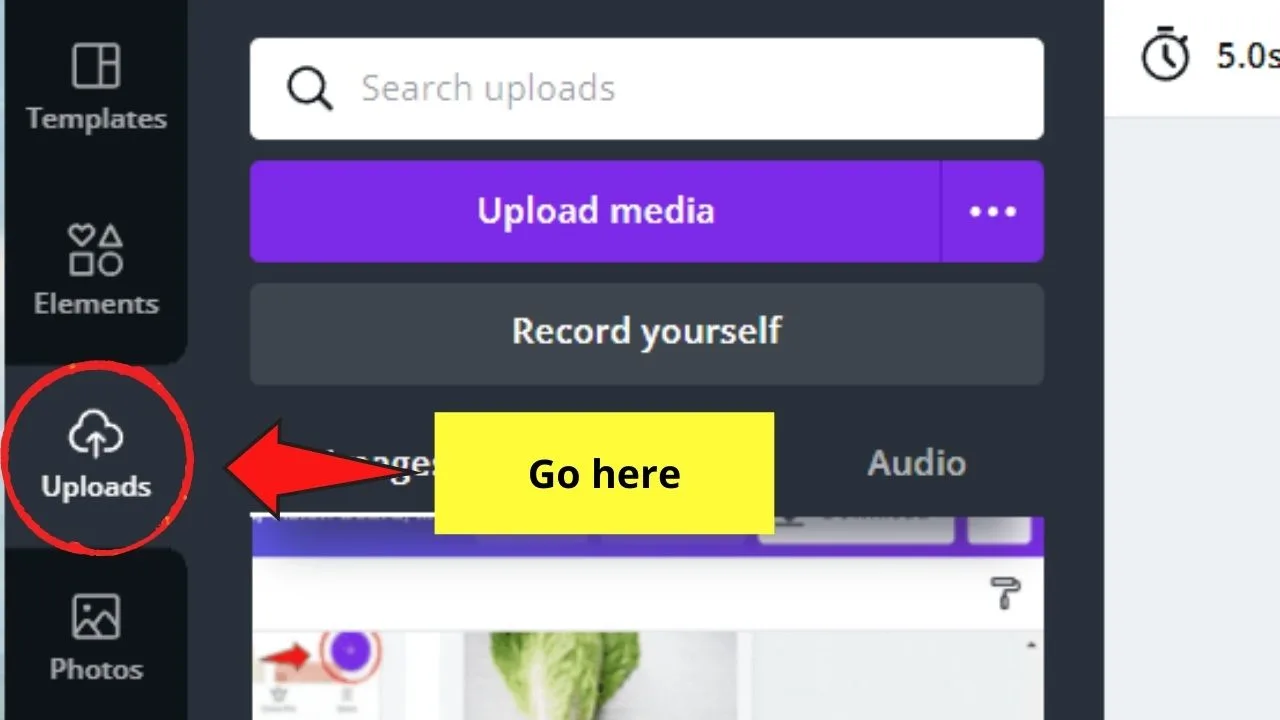


Step 3: Once you’re in the Uploads menu, begin importing the photos you’ve collected for your vision board by tapping on the “Upload” button.

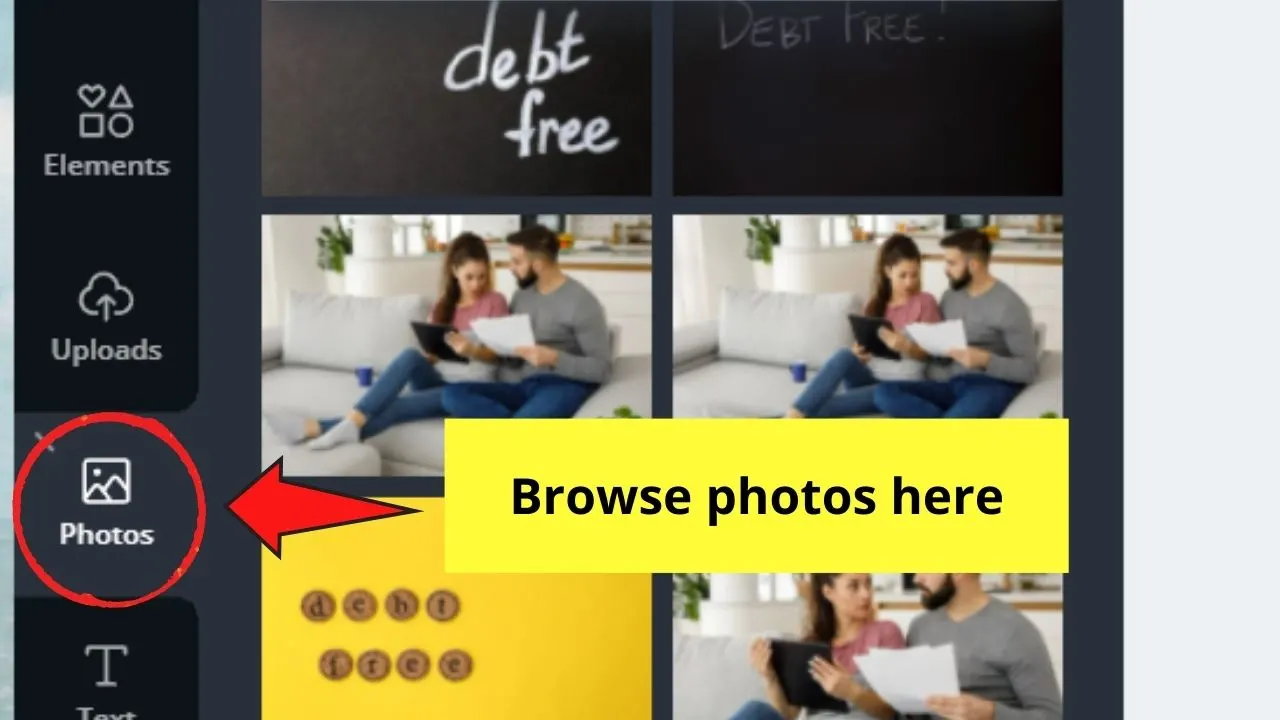
If you’re more of the laid-back type and opt to use whatever image’s found on Canva, tap “Photos” and browse through the picture options on Canva’s photo gallery.

Step 4: After selecting the photos that you’d like to use for your vision board, add them to the blank canvas by clicking and dragging them to it.

At this point, you can leave them cluttered for a bit and go back to arranging them later.
Step 5: Once you’ve added all the pictures you wanted for your vision board, it’s time to arrange them.
Now, here’s the fun part, as it will be you who will ultimately decide how you want to arrange your vision board.
But, no matter what your style is, let’s lump them together into 2 groups: scrapbook style and photobook style.
Create a Scrapbook Style Vision Board
With the scrapbook style of creating your vision board, it simply means placing one image on another photo. Think of it as artistically layering your photos.
Since we’re creating a digital vision board, layering photos has never been easier.
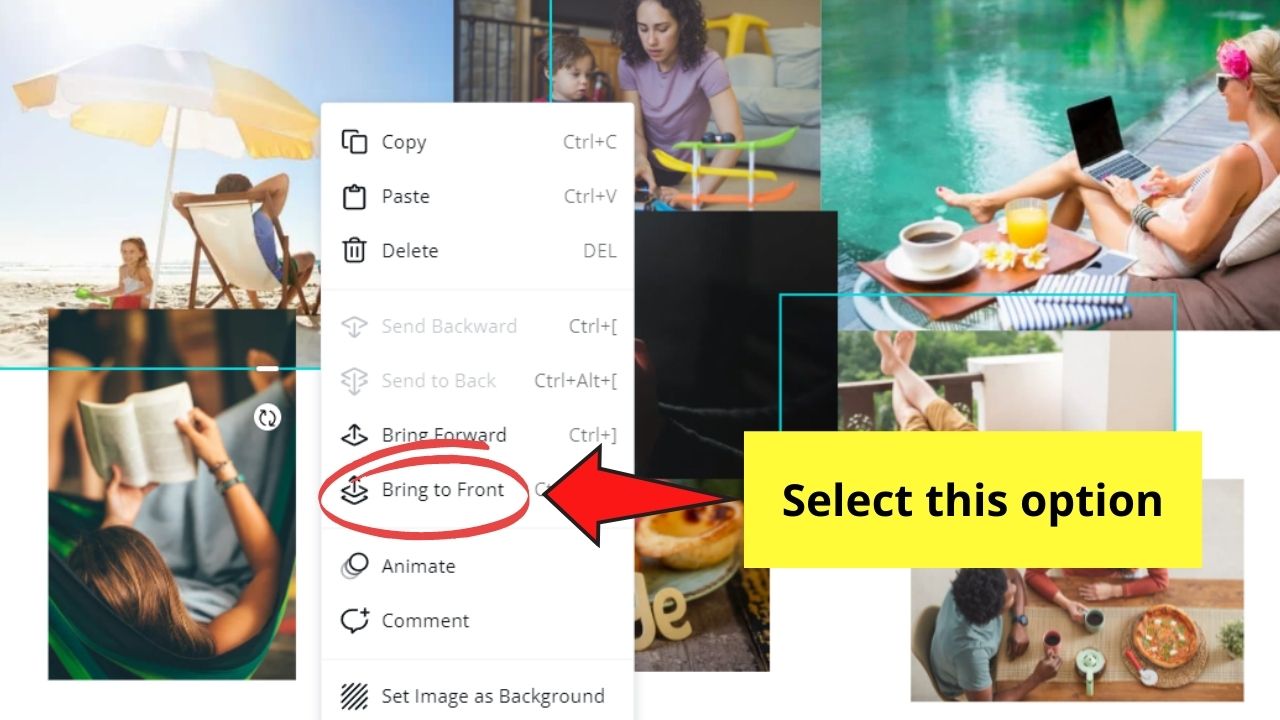
Move one image across the canvas by dragging and positioning it accordingly. Now, drag another photo on top of the first picture.
Now, select what image you love to be in front. Right-click and select “Bring to Front.” This will automatically bring that photo on top of the second image.

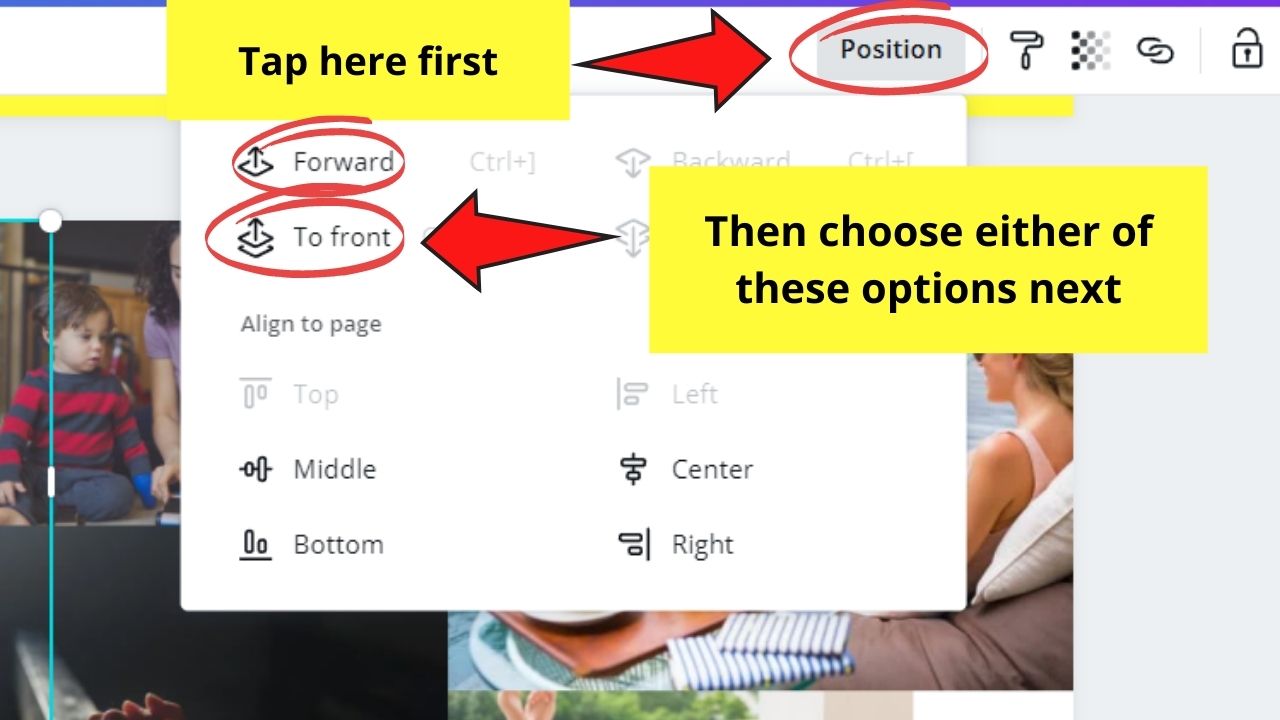
Another way to do this is by selecting one of the pictures. Then, head over to the editor toolbar on top of the canvas and tap the “Position” button.
You will then see options on how you’d like to layer the photos. In this case, since you want the first picture to be in front, select the “Move Forward” or “Bring to Front” option.

Keep on repeating the process for all the photos you’ve added.
You can even spice things up by making a picture round or whatever shape you put into (as long as that’s shape is featured in Canva’s gallery, of course).


But, if this style isn’t your go-to, then check out the next one.
Create a Photobook Style Vision Board
With photobook style, you’re more refined in terms of the alignment of your photos.
Yes, you can opt to keep them a bit cluttered, but this time, you make use of grids, frames, and even shapes for a bit of organization.


It’s even possible to add a border to your vision board for a more stylish finish.
In short, you have somewhat what some would call organized chaos.
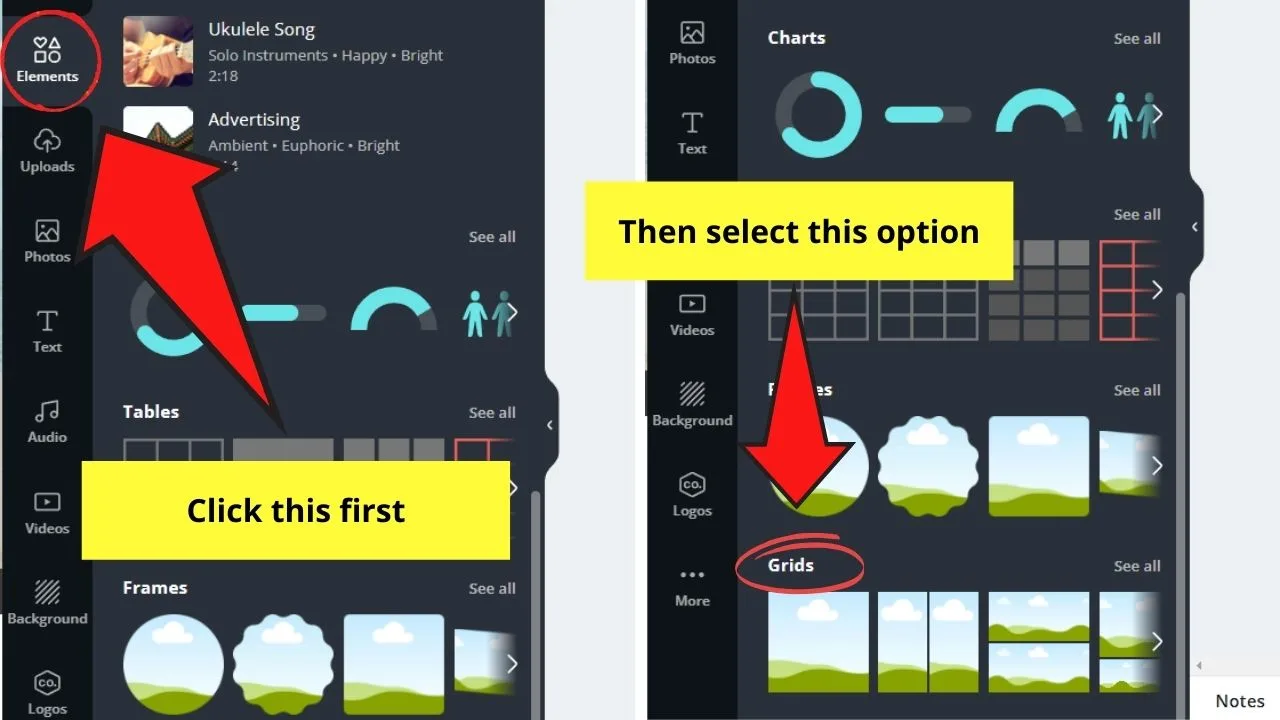
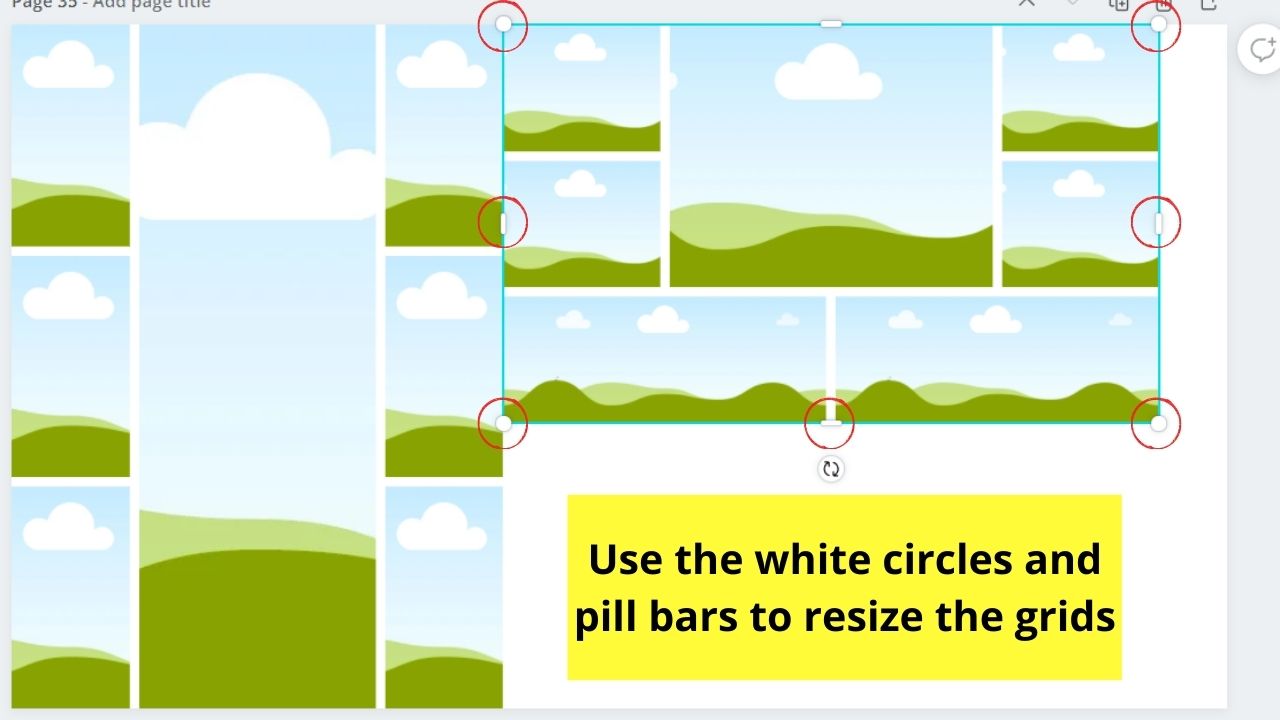
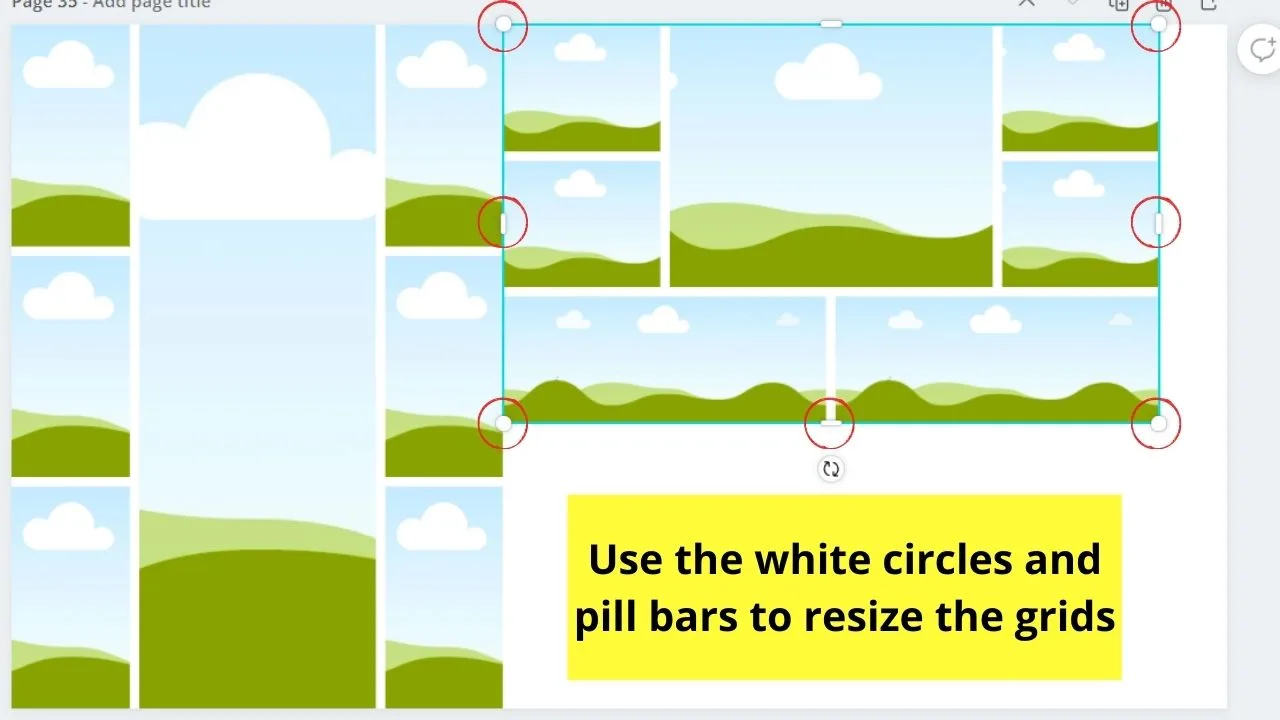
For this style, you first need to select the grid or grids (yes, you can add many if you like) you want for your vision board.
Simply head to the “Elements” tab and scroll down until you see the “Grids” section. Tap on it to see what Canva’s got in store in its grids gallery.

Click and drag on the grid or grids you chose and resize them accordingly using the white circles/pill bar handles you’ll see on the corners.
But, if you’re unable to resize some (or worst, all) of the grids or photos you’ve added, then read on the possible reasons why Canva won’t let you resize them.
Now, if you’ve sorted the issue out and managed to put all your grids accordingly, click and drag the photos onto the grids.
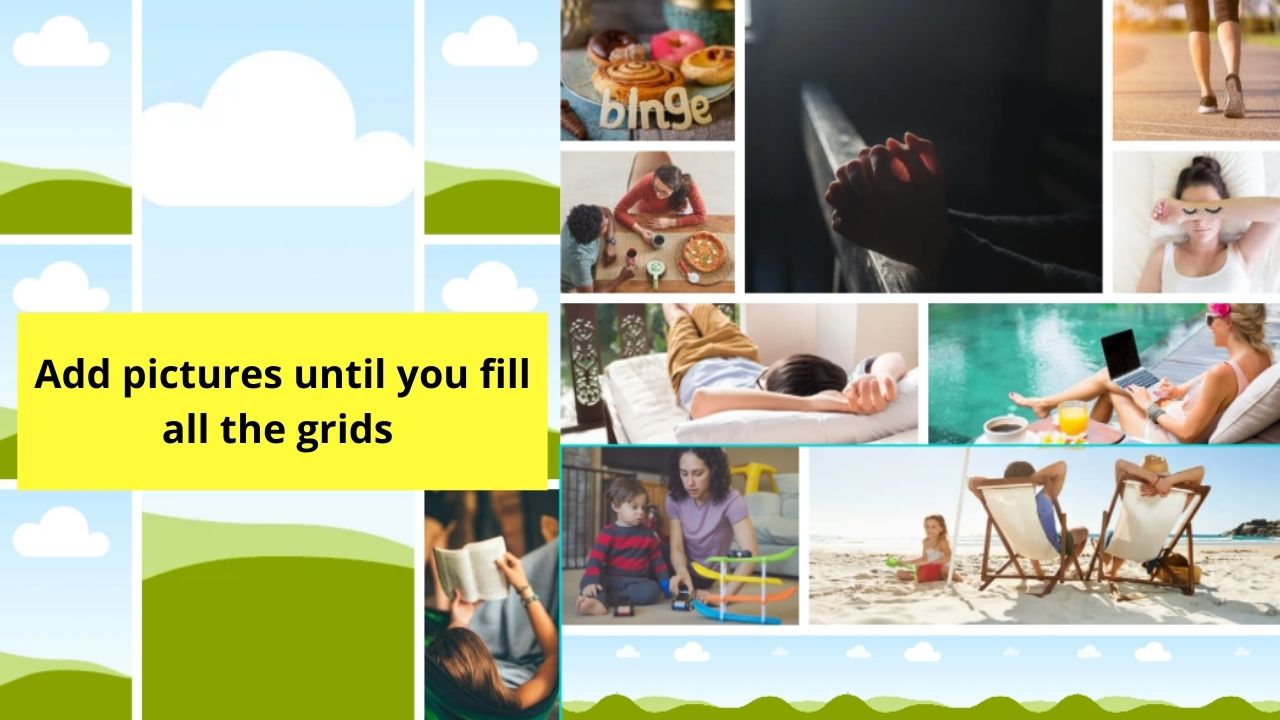

And, once the pictures are on the grids, you’ll have to adjust them to how you want them to look as they’ll ultimately be cropped.
Continue repeating the process until you’ve filled all the grids with pictures.
Step 6: If you want a more dramatic effect on your photos, you can always edit them.
Whether you choose to add filters to change your uploaded image’s color or crop them into shapes, it’s your choice.
Step 7: Though a vision board’s more of using images, you can add text to your design.
To do this, simply add text boxes to your design so you can input the words onto it. You can also curve your text for a fun effect.
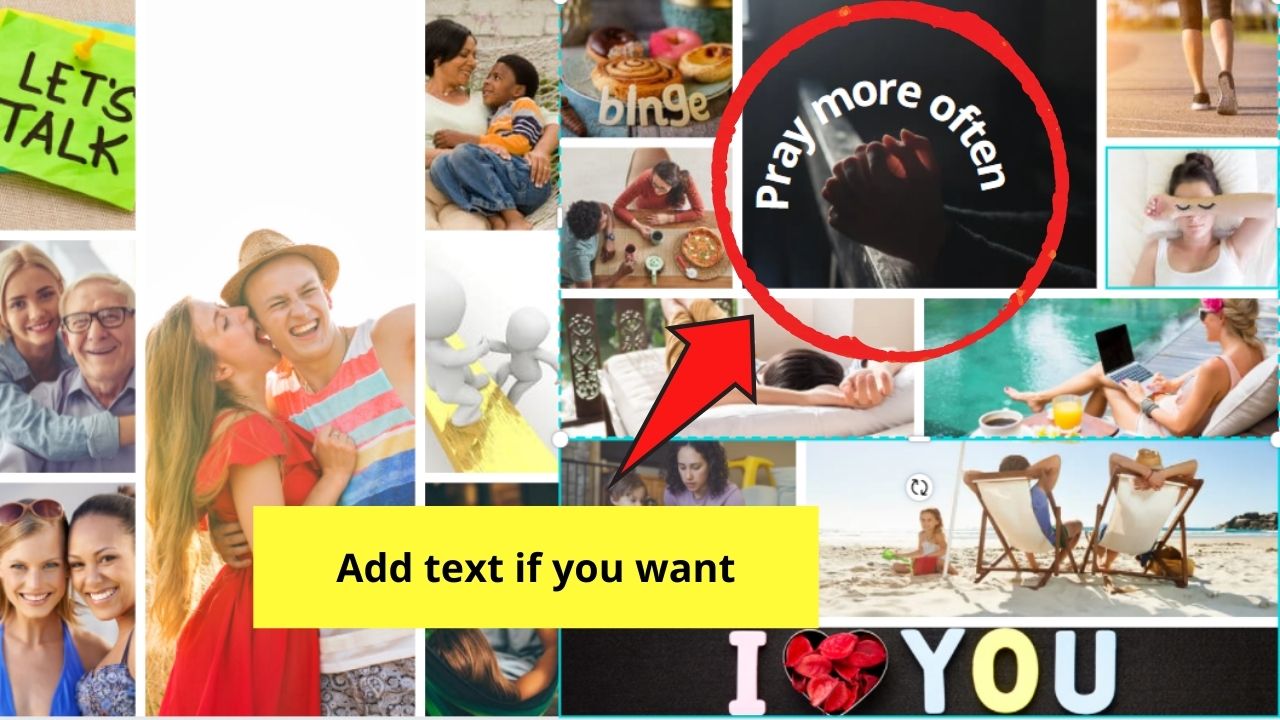

Move the text boxes accordingly by dragging them across the canvas. If Canva doesn’t allow you to move text boxes, investigate first what could cause it.
Step 8: Once you’re done designing, hit the “Download” button, select the file type, and export it to your device.

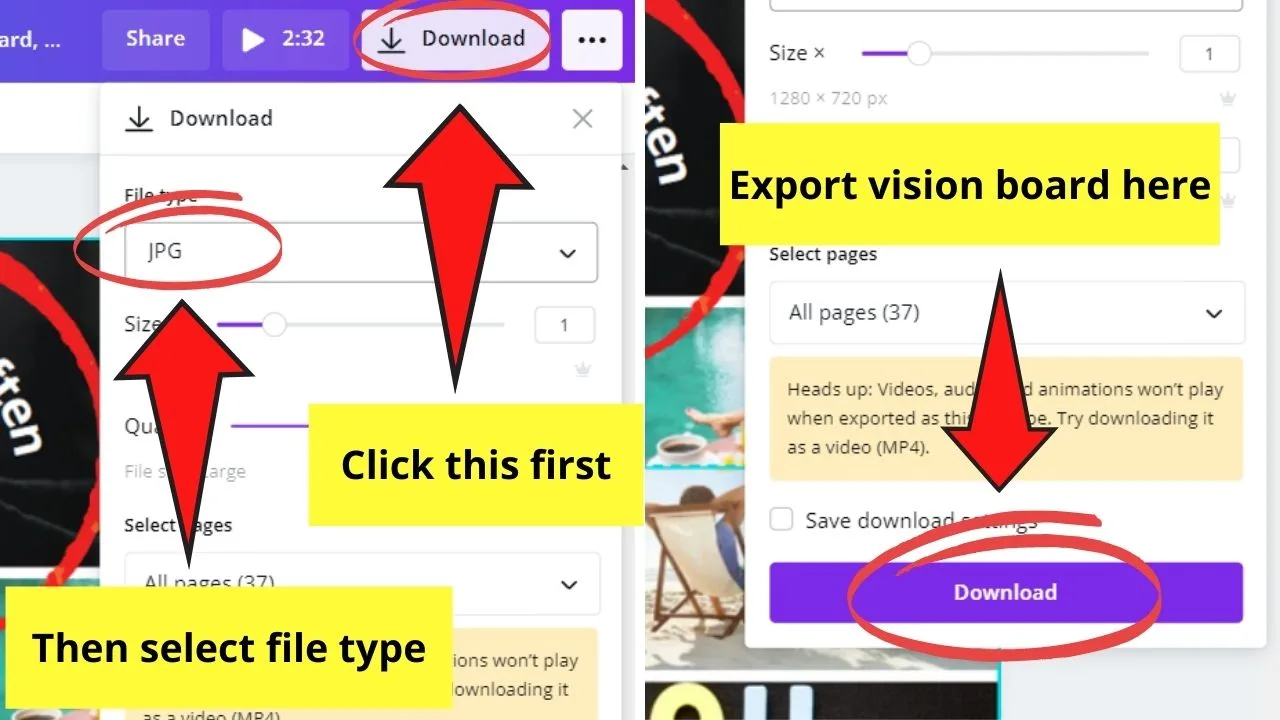
Make sure you know how to download good-quality images for a picture-perfect vision board.
And, that’s it!
Once you’ve successfully exported your newly-created vision board, set it as your desktop or mobile phone wallpaper.
Pretty neat, right?
So, what’re you waiting for? Get started with your vision boards now!
Frequently Asked Questions about How to Make a Vision Board on Canva
Can I add graphic elements to my vision board?
Since it’s a vision board, it’s best to use photos that visually represent your goals. But, if you want to add a more fun element (or there aren’t any photos you can find to represent a particular goal), a still graphic will do.
What if I can’t start creating my design from an image. How will I know my screen size?
First, google your screen’s dimensions. If you’re not too sure about this, you can always take a screenshot and take note of the photo’s dimensions. Then, simply enter the image dimensions through the Custom Dimensions feature.


Hey guys! It’s me, Marcel, aka Maschi. On MaschiTuts, it’s all about tutorials! No matter the topic of the article, the goal always remains the same: Providing you guys with the most in-depth and helpful tutorials!

