One thing you should master when editing videos on CapCut is syncing the audio with the video transitions.
Doing this enhances the watching experience of the audience aside from setting the mood.
But how do you extract audio on CapCut PC to sync it with the video?
How to Extract Audio on CapCut PC
To extract audio on CapCut PC, follow these steps:
- Select the video clip on the timeline
- Right-click on the selected video clip
- Click the “Separate the audio” option
CapCut is more commonly used on mobile phones, for instance if you want to add motion blur to a video quickly.
However, whatever you can do on CapCut mobile, you can also do — and so much more — on CapCut PC.
So to extract audio on CapCut PC, you only have to follow these three steps.
Step 1: Select the video clip on the timeline
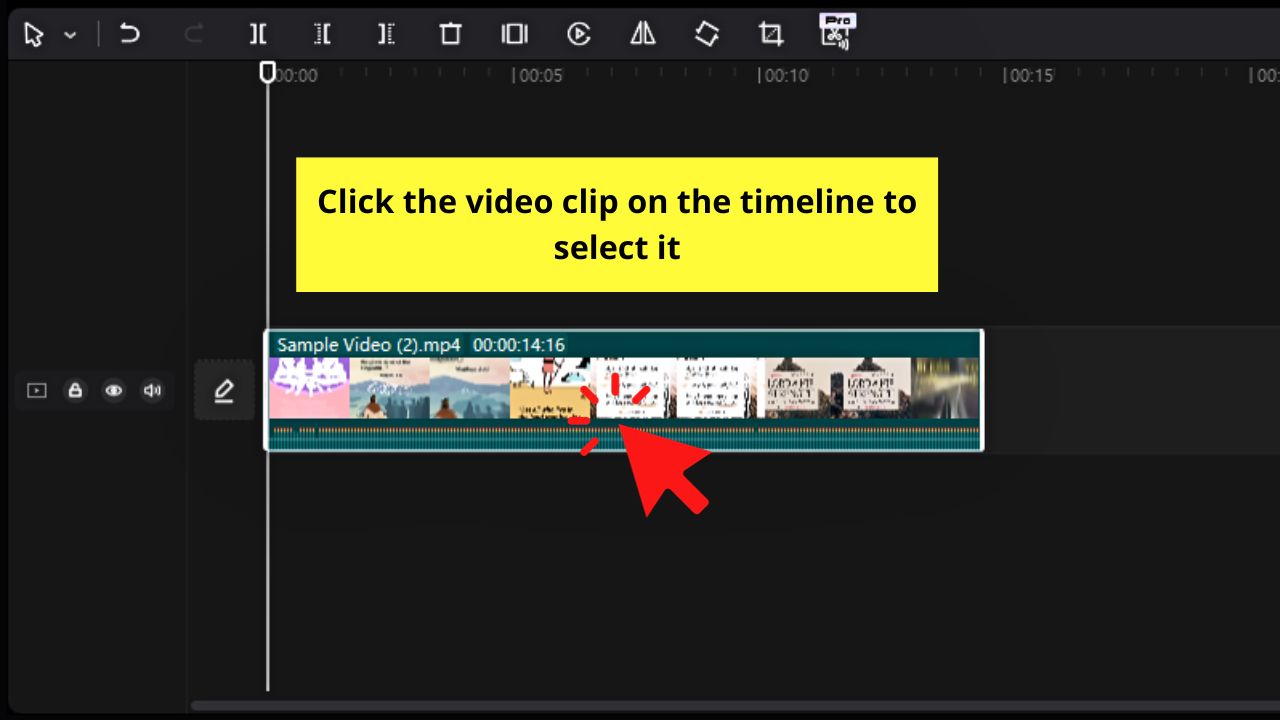
You will see a white outline surrounding the video clip you selected on the timeline.
Step 2: Right-click on the selected video clip
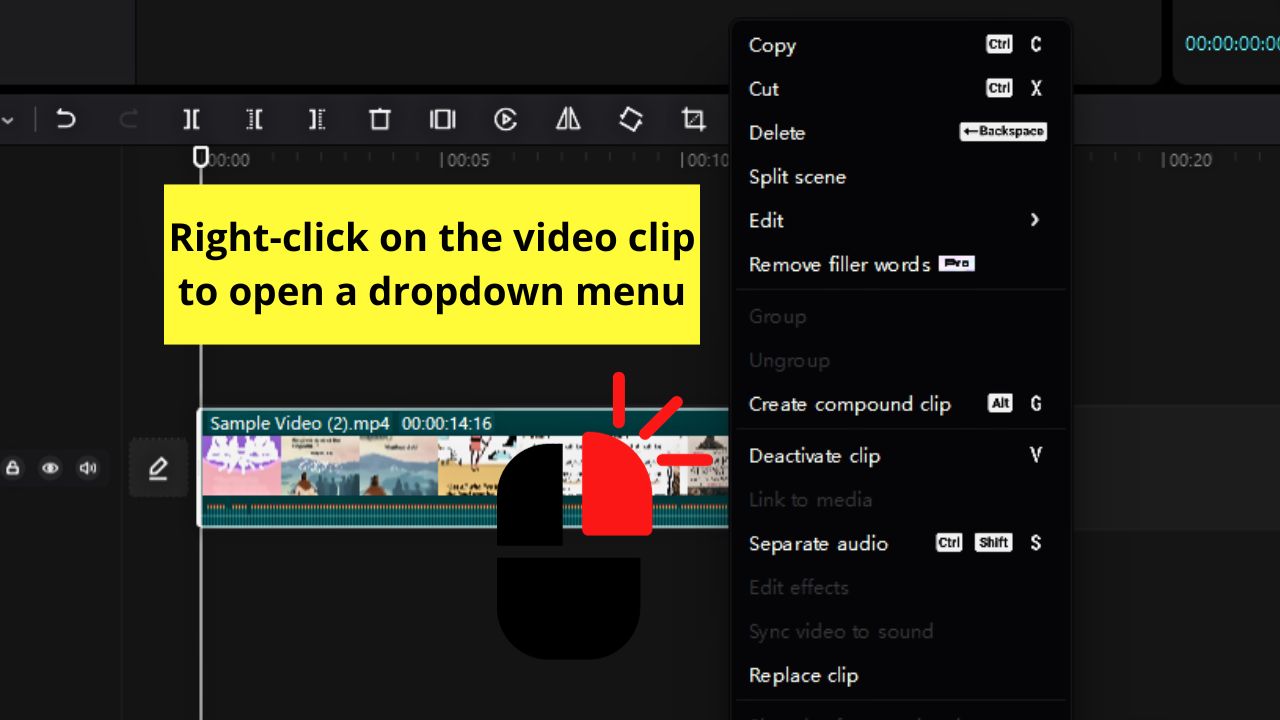
You will then see a dropdown menu appear beside the video clip.
Step 3: Click the “Separate the audio” option
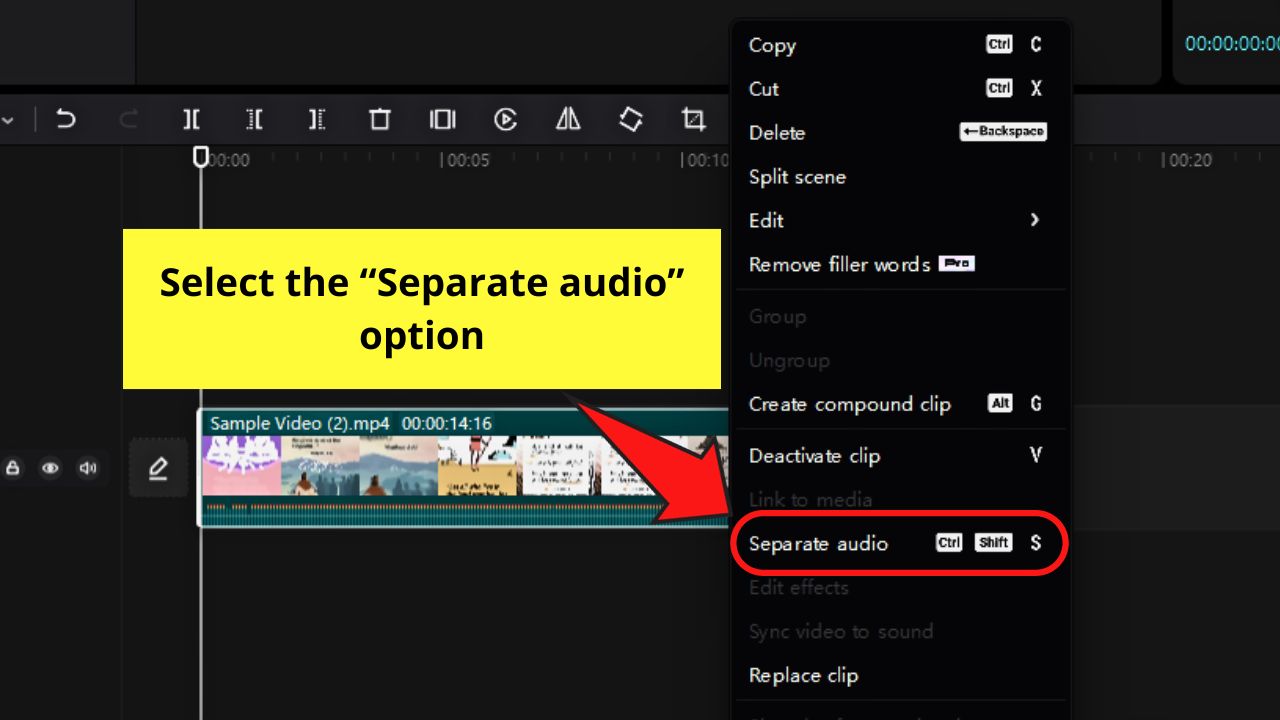
This is the option you’ll see between the grayed-out “Link to media” (if you’re on CapCut free) and “Edit Effects.”
You can also press “Ctrl + Shift + S” instead.

After selecting “Separate the audio” or using the keyboard shortcut, you should see the audio track below the video clip.
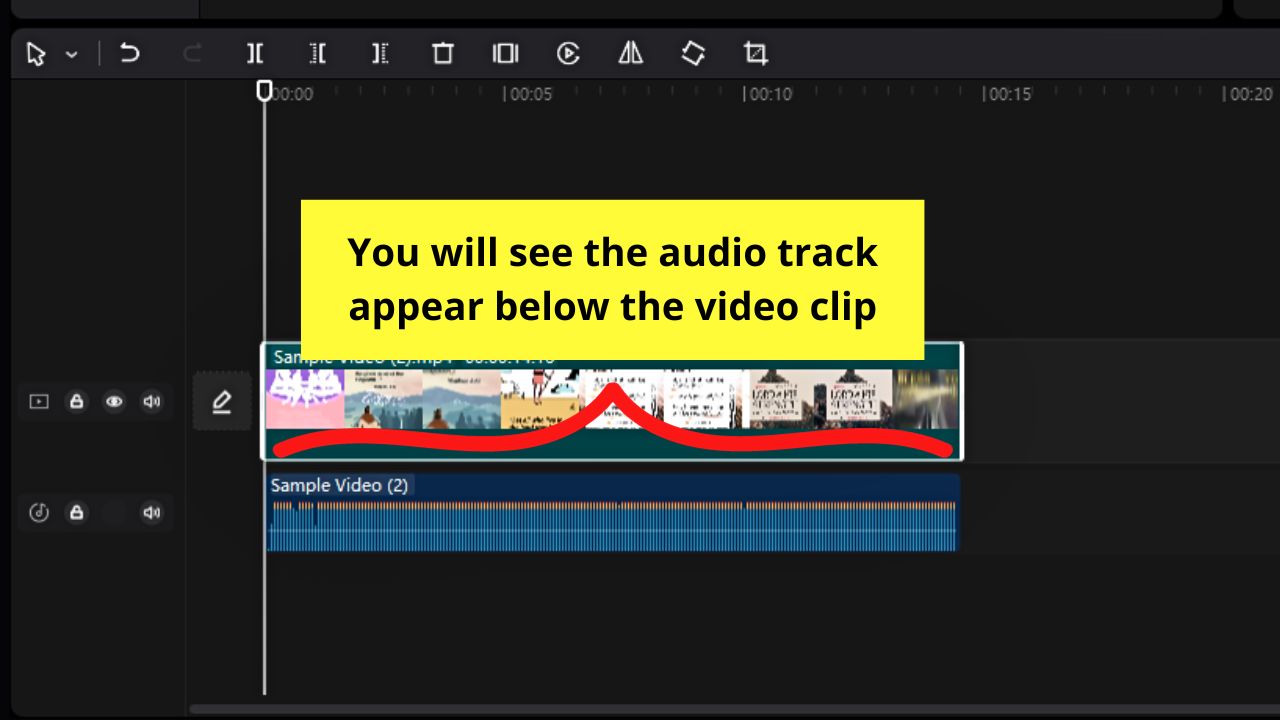
You can then edit the video further and sync or align a part of the audio track to a scene on the video.
Now, if you want to export the audio only without the video you created, keep reading below.
How to Export Audio Without Video on CapCut PC
It’s easy to export audio without its accompanying video on CapCut PC.
Since you have already separated the audio from the footage, you can also download it separately from the video.
To export audio without video on CapCut PC, follow these steps:
Step 1: Click the “Export” button
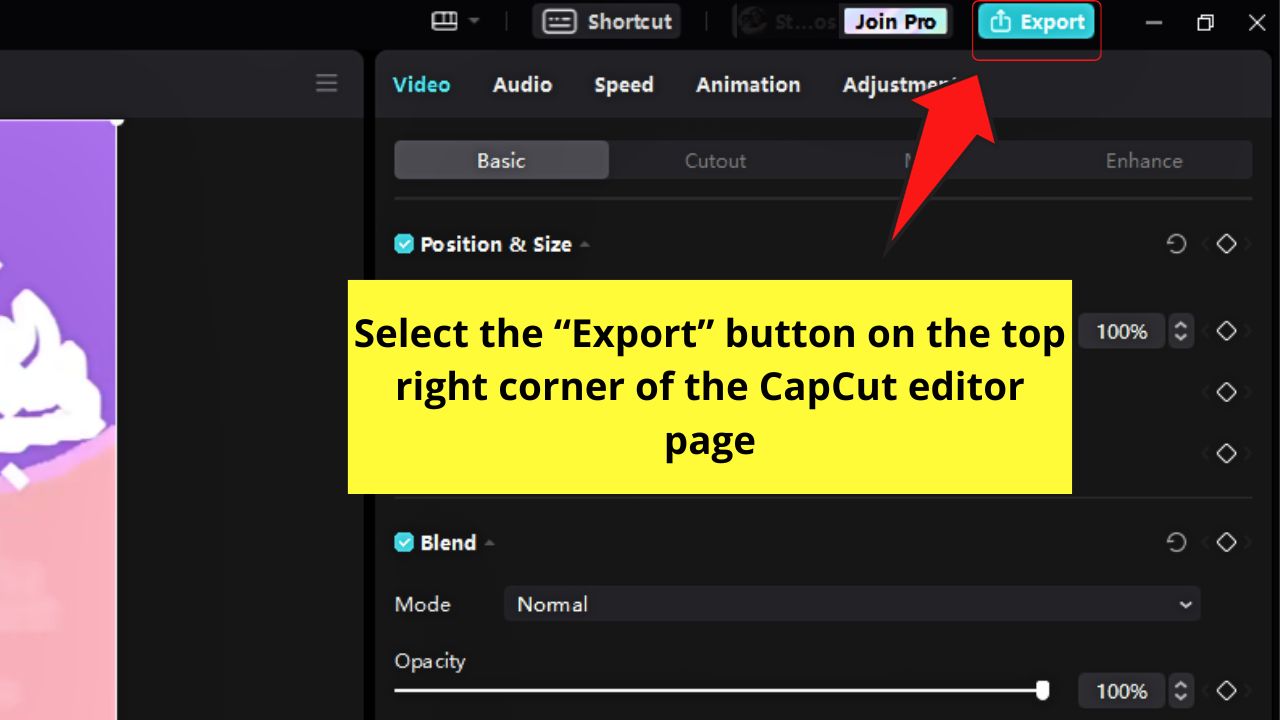
This is the teal button on the menu bar after the “Join Pro” button (if you are still on CapCut free).
A right-side panel then opens on the editor page.
Step 2: Uncheck the “Video Exporting” box
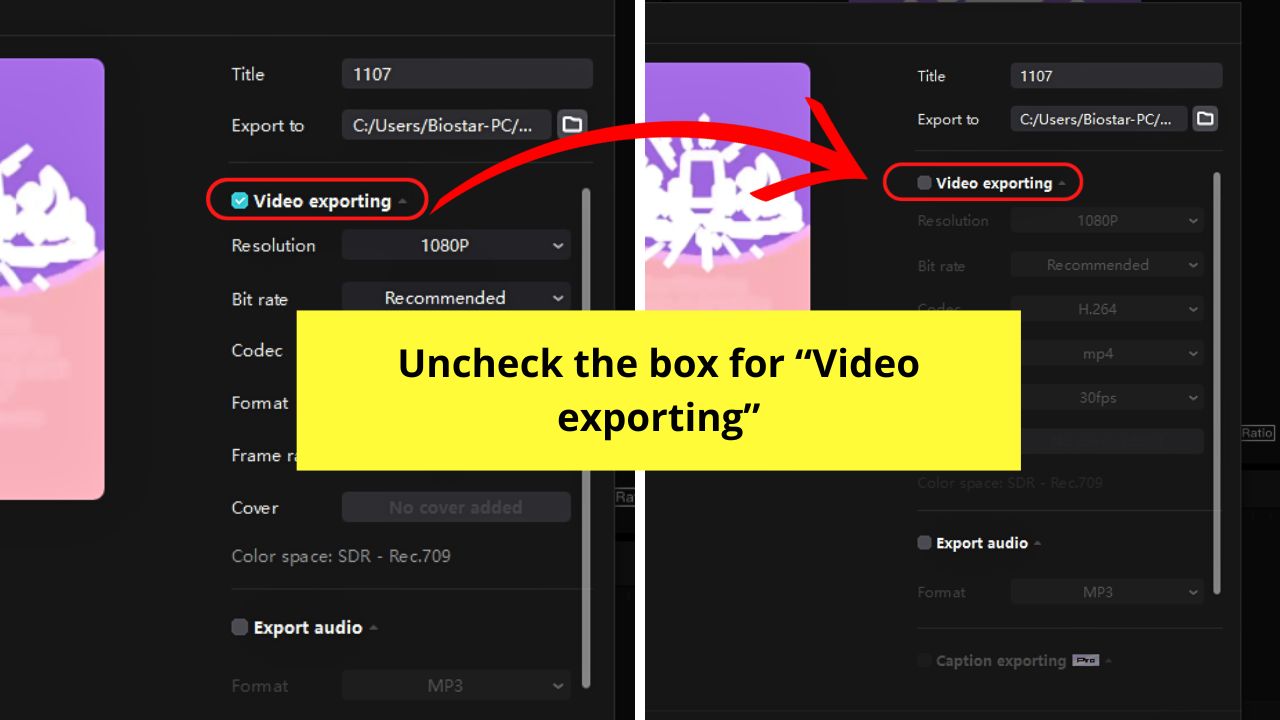
By default, this option is checked on the right-side panel.
Uncheck this option since you only need the audio you separated from the clip earlier.
Step 3: Check the “Export audio” box
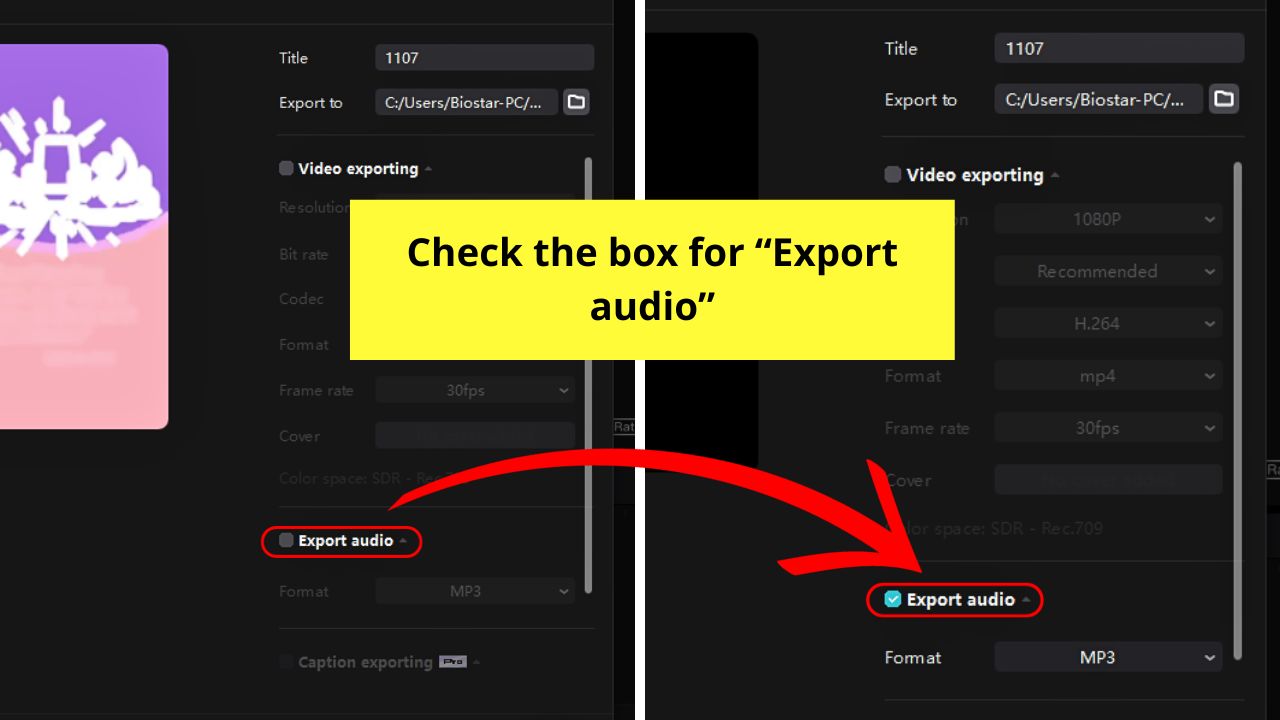
This option is unchecked by default. You can then select the audio file’s format.
Step 4: Select the audio file format
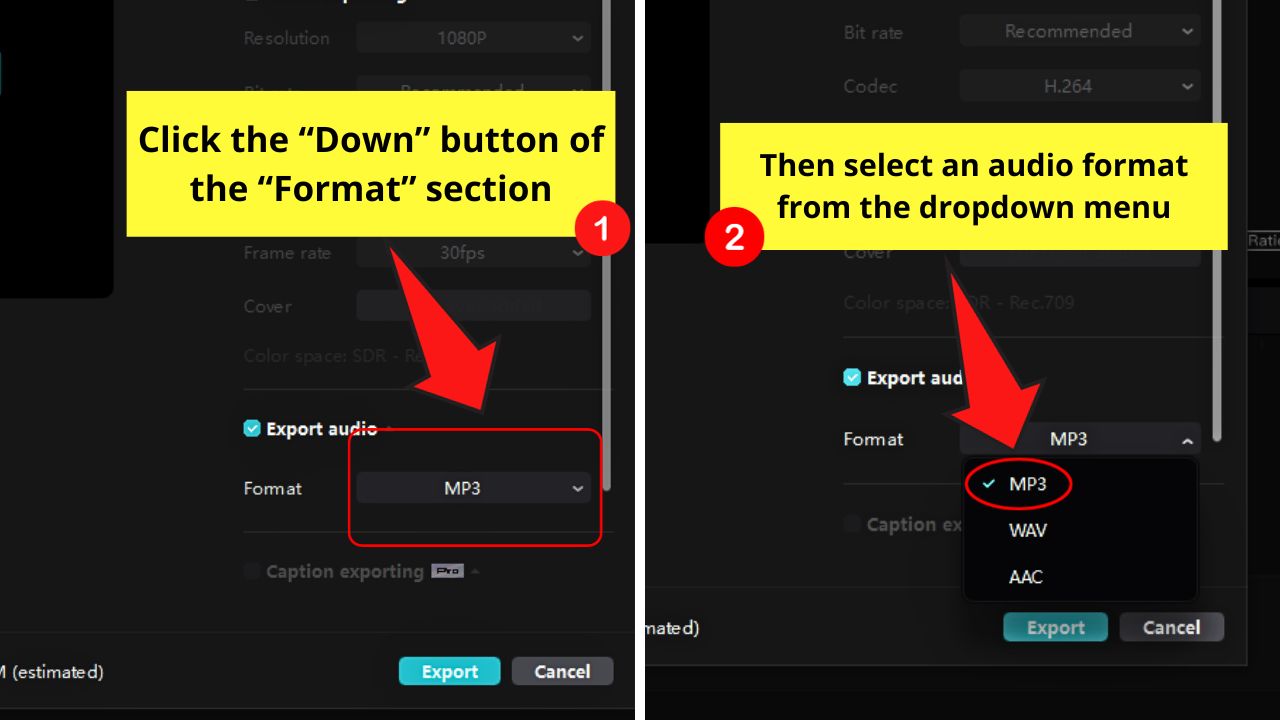
There are three audio file formats available: “MP3, “WAV,” and “AAC.”
Though you can select any of the three, each has its pros and cons.
If you prefer a smaller file size, the “MP3” format is your best option. But the audio’s quality isn’t as great as that of a “WAV” or “AAC” format.
If you prefer good audio quality despite having a larger file size, “WAV” is the best format.
Now, if you prefer a file format that is not big on file size but has better audio quality and is compatible with most platforms, AAC (Advanced Audio Coding) is the one for you.
Regardless of the format selected, click on the down-arrow button beside the “Format” section and select the file format.
Step 5: Click the “Export” button
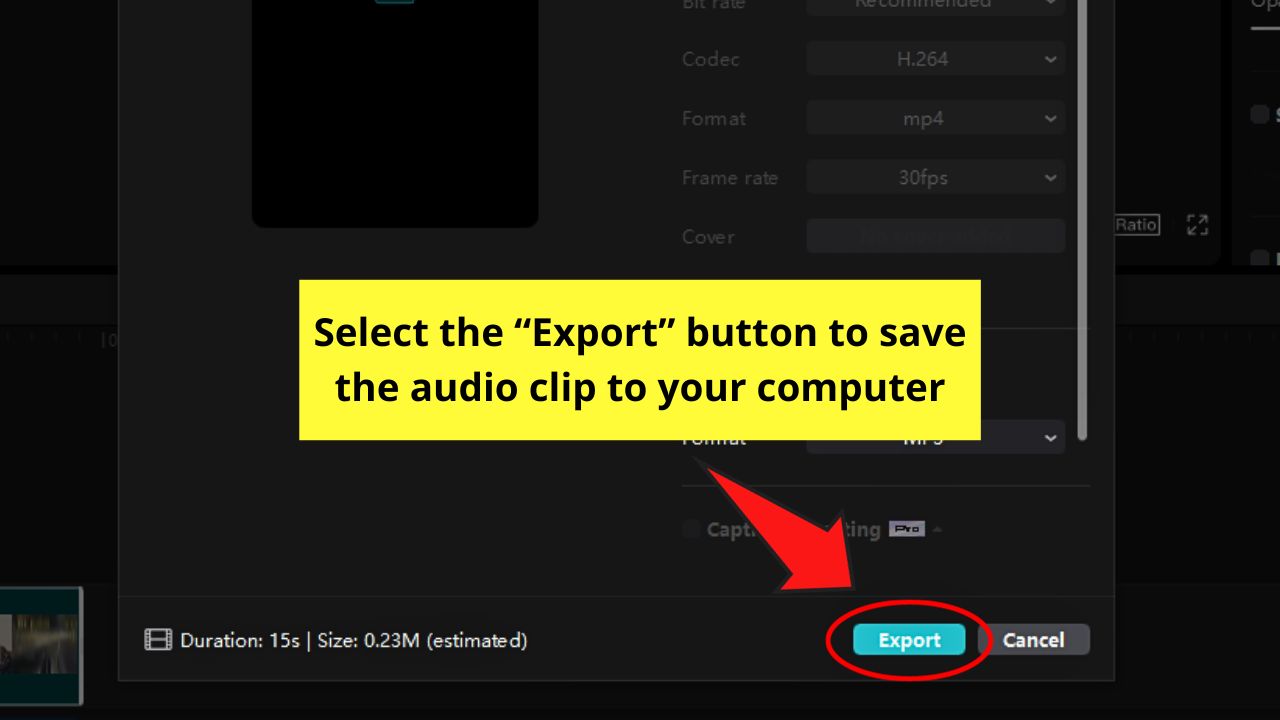
This is the teal button on the lower left of the right-side panel.
You should now see the audio file on your computer under the “Downloads” folder.
Frequently Asked Questions about How to Extract Audio on CapCut PC
How do you extract audio on CapCut PC?
To extract the audio on CapCut PC, click the video clip on the timeline to select it and then right-click on it. On the dropdown menu, click “Separate the audio.” The audio track appears below the video timeline.
Which among the three audio format options on CapCut PC should I save the exported audio file as?
If you value smaller file size regardless of audio quality, select “MP3” format. If you want good audio quality regardless of the file size, select “WAV” format. But, if you want a smaller file size without loss of audio quality and is compatible with most platforms, select “AAC” instead.
Can you also extract audio on CapCut mobile?
You can extract audio on CapCut mobile. Tap “Audio” on the bottom taskbar and choose “Sounds.” Press the folder icon and tap “Extract sound from video.” Then select the video clip before tapping “Import sound only.” You can also tap the video clip and click “Extract audio.”