Are you looking for a perfect tool to make symmetrical shapes in Illustrator?
Are you having trouble designing a perfectly symmetrical logo, or icon?
Want to create a stunning book cover?
We have a solution. And not just that we have it, but it is also a very simple solution.
Yes, simple, but once you master it, even the sky won’t be a limit for your creativity.
And on top of all that, it is super fun! We bet you will find yourself playing with this tool for hours, even days.
Now, without furder ado, let’s get straight into it.
How to Make Symmetrical Shapes in Illustrator?
Make one vertical and one horizontal line in two layers, over the canvas. Select the horizontal line, go to Effect > Distort & Transform > Transform. In the “Transform Menu” check “Reflect X”, and enter ”1” as a number of copies. Hit “OK”. The right side of the canvas is reflected on the left.
How to Make Symmetrical Shapes in Illustrator: In-Depth Tutorial
Step 1:
Create a New File in Adobe Illustrator. For this tutorial, you should make 1920x1080px canvas. In the future, you are free to choose any size of canvas.
Here is one handy shortcut for creating a new file: CTR+N (Windows) or Command + N (MAC).
Set your document name, set “Width” to 1920px, and “Height” to 1080px. Click on “Create”, and let’s make something awesome.

Step 2:
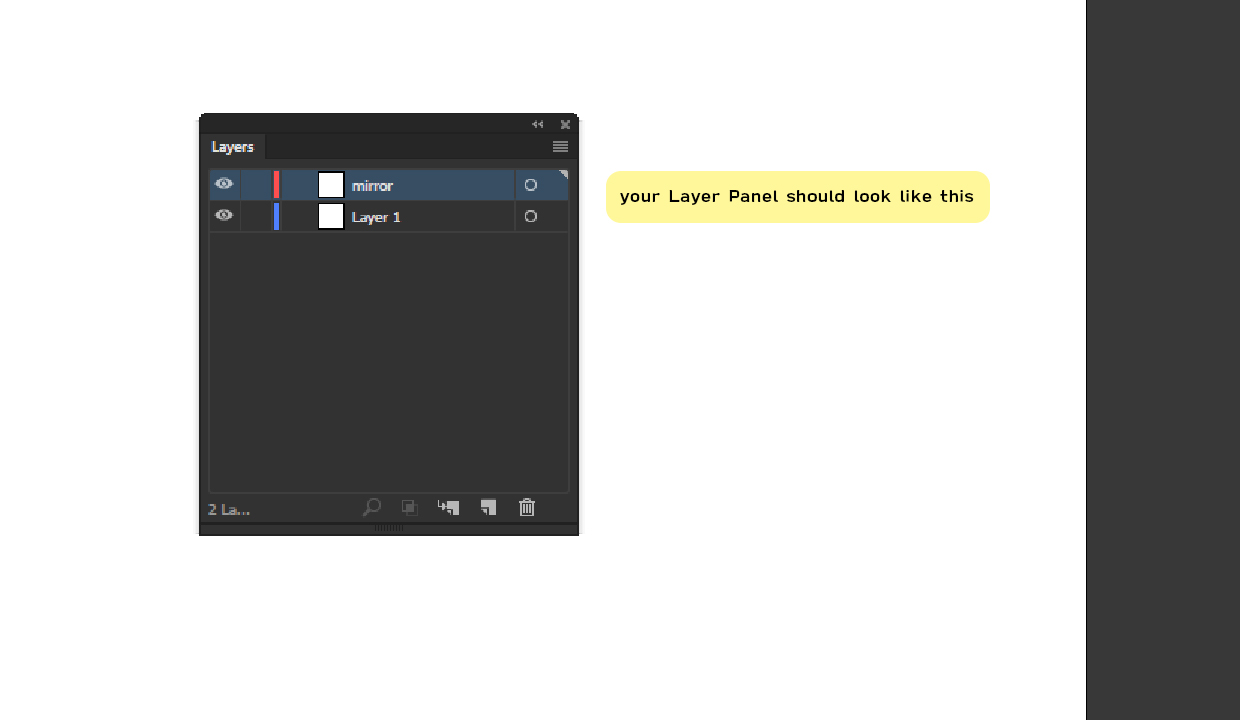
Create a new layer. Create a new layer in the Layers panel, and name it “mirror”. If you are not able to find the “Layers” panel, open it by choosing “Window” > “Layers”.
Step 3:
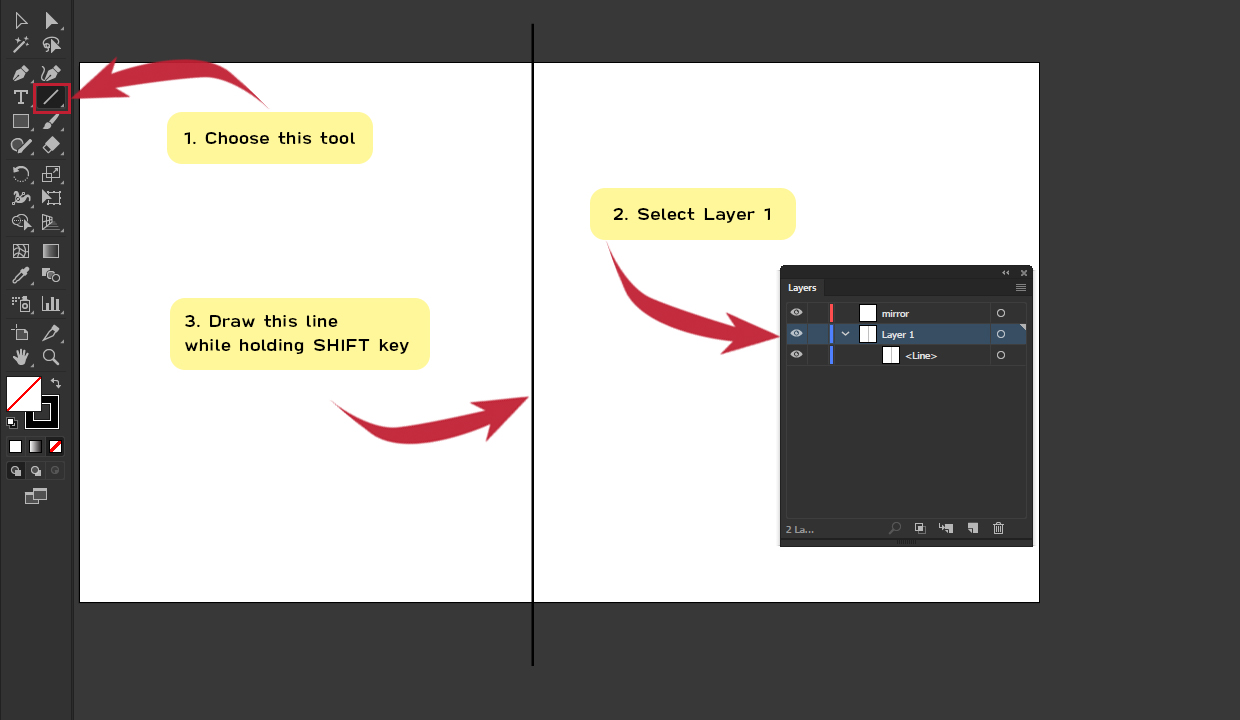
Draw a vertical line. Select Layer one, and draw a vertical line on canvas using “Line Segment Tool”. To draw the line, press and hold “Left Click” and “SHIFT” simultaneously.
It is necessary to hold the “SHIFT” key to ensure that line is going to be straight. This step is really important because that line will divide the canvas into two parts.
One side will be the side where any kind of object or shape goes, and the other side will simply reflect that object. Let’s move forward.
Step 4:
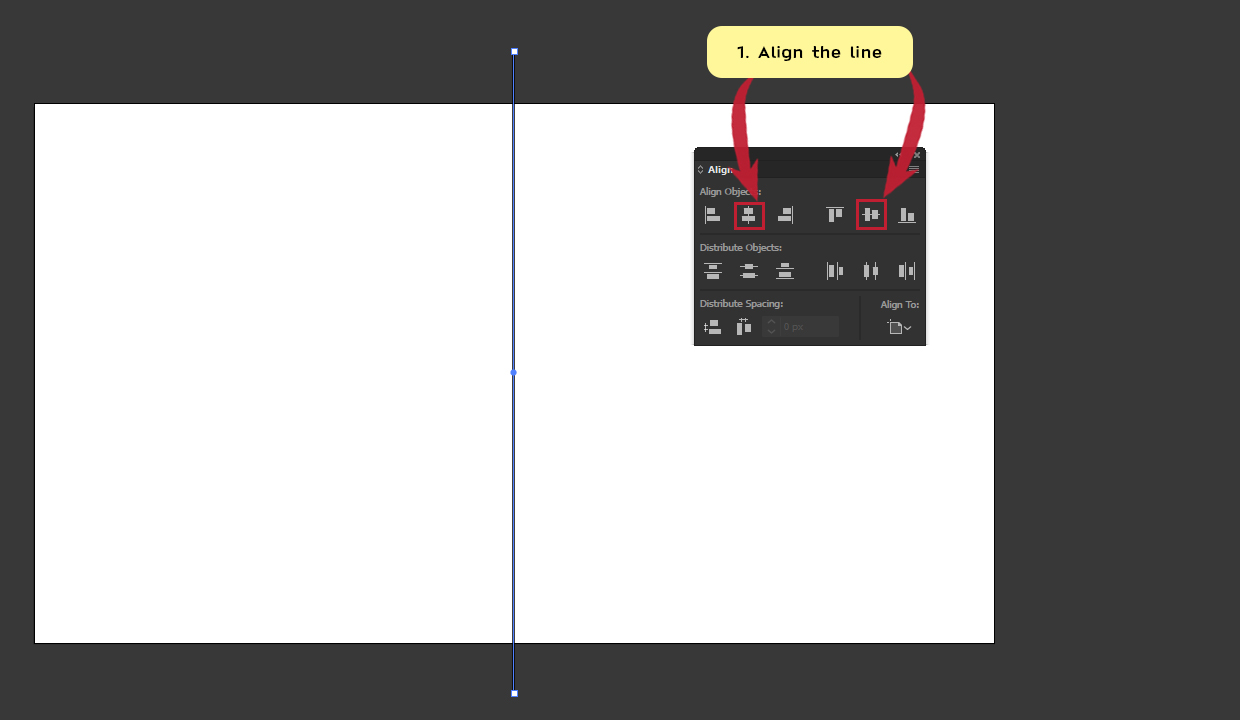
Center the line horizontally and vertically. Open up the “Align” menu by Choosing “Window” > “Align”. Select the line with Left Click.
After that, choose options “Horizontal Align Center” and “Vertical Align Center”. Your line should be aligned both vertically and horizontally after this.
Step 5:
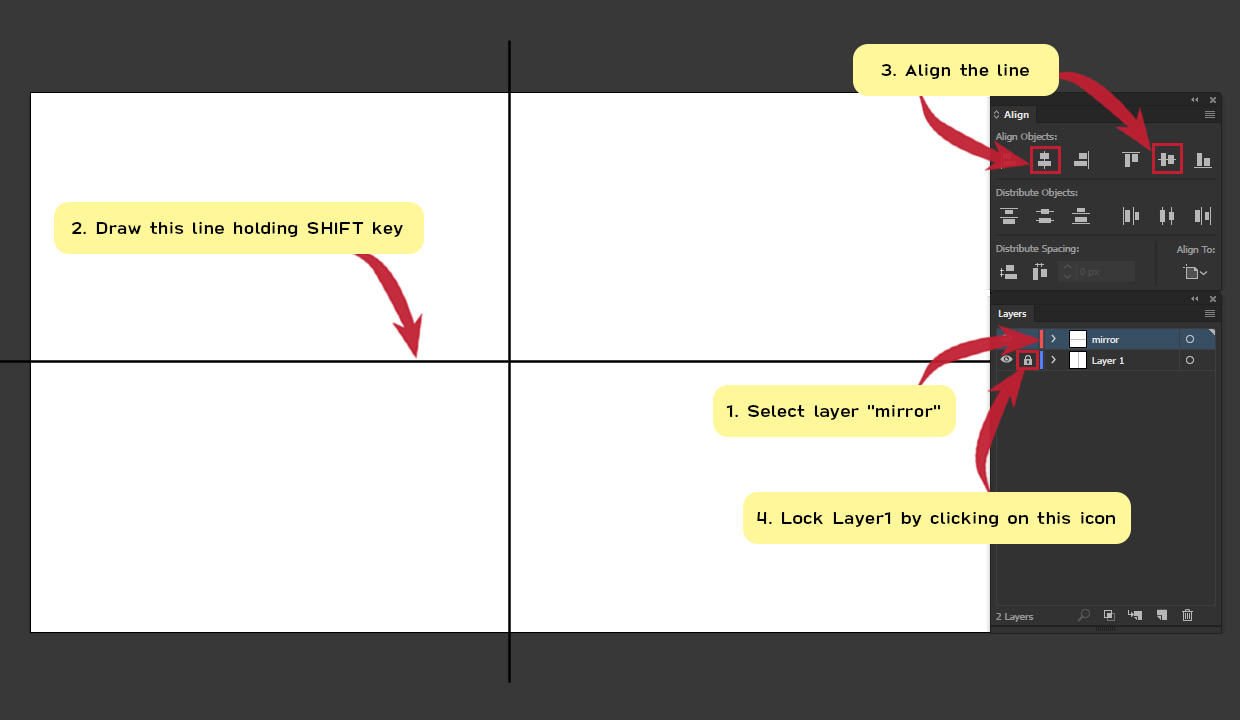
Draw a horizontal line and center it. Select Layer ‘’mirror’’, and draw a horizontal line on canvas using “Line Segment Tool”. To draw the line, press and hold “Left Click” and “SHIFT” simultaneously.
It is necessary to hold the “SHIFT” key to ensure that line is going to be straight. After that, center the line horizontally and vertically following the method from the previous step.
After this is completed, make sure to lock Layer 1 by clicking on the empty rectangle right after the rectangle with an eye icon, like shown in the image below.
Step 6:
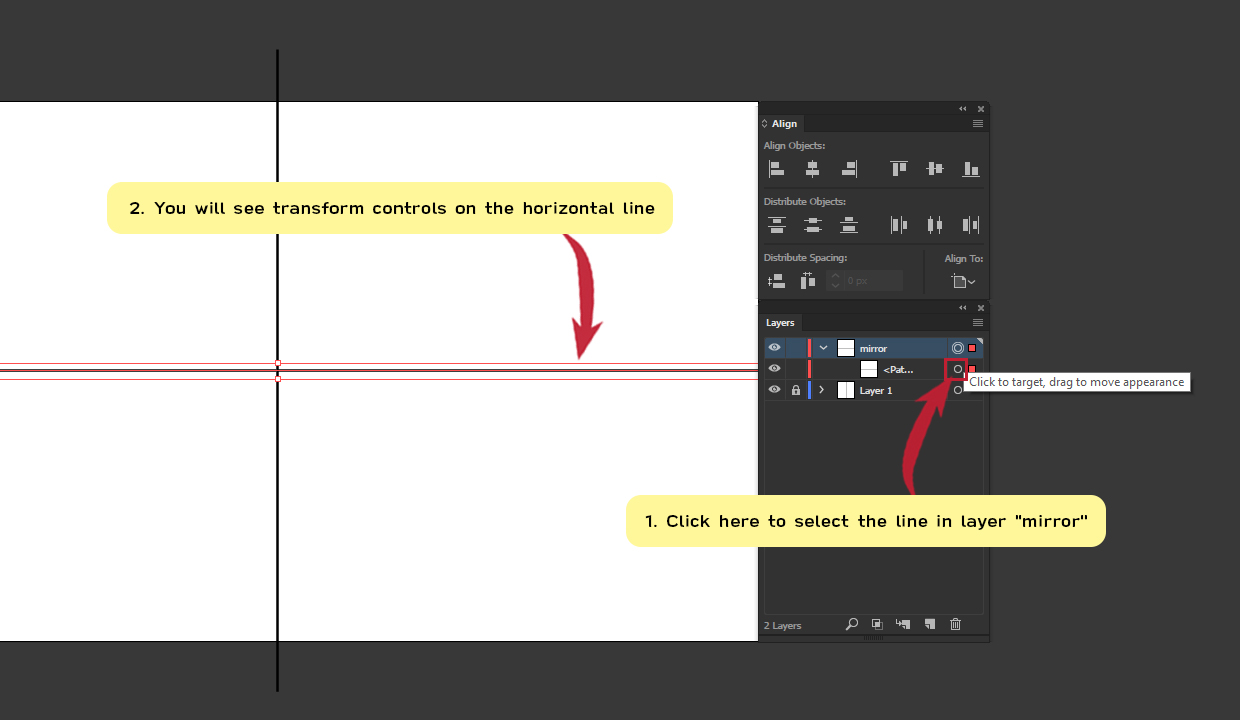
Select the horizontal line from the Layers panel. In the “Layers” panel select the line by clicking on the check box shown in the image below.
It is really important to use this method for selecting the line in layer “mirror” instead of just selecting it with LeftClick. If the line is selected properly, you will see transform controls on it.
Step 7:
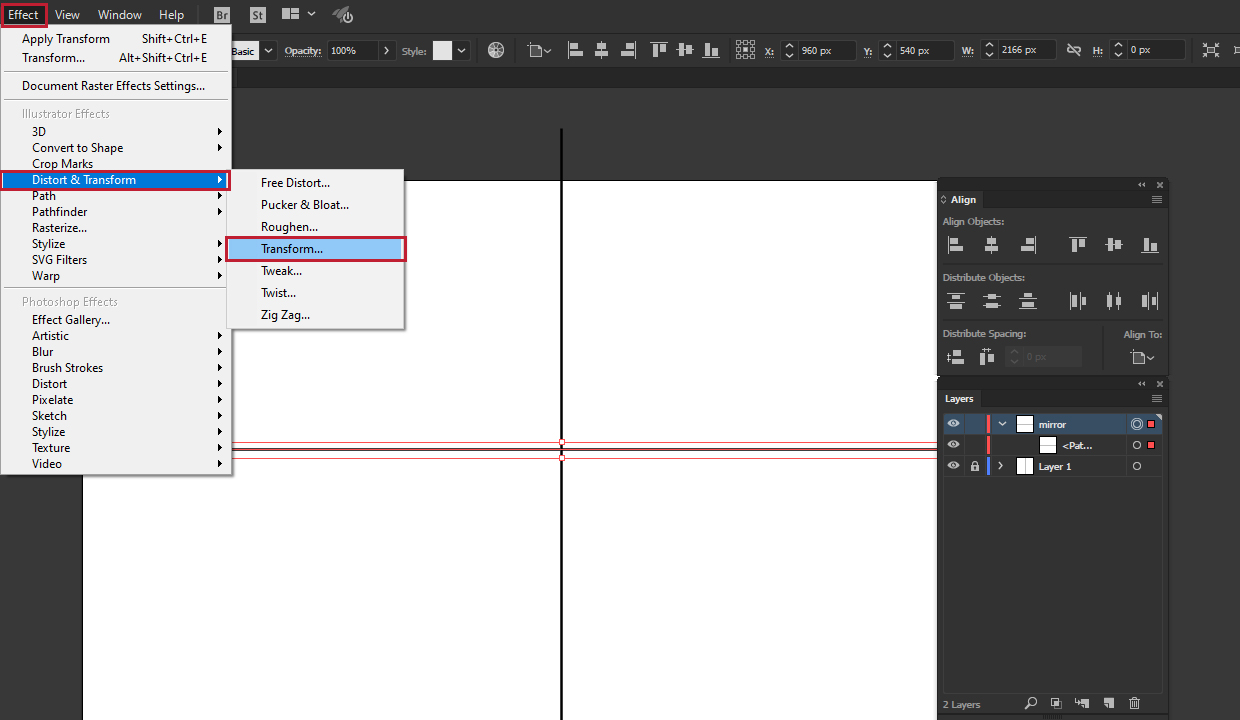
Applying Effect on the line. In the previous step, you selected the horizontal line in the “Layers” panel. In this step choose “Effect” > “Distort & Transform” > “Transform”.
The Tool window should appear on your screen. More about that, in the following step.
Step 8:
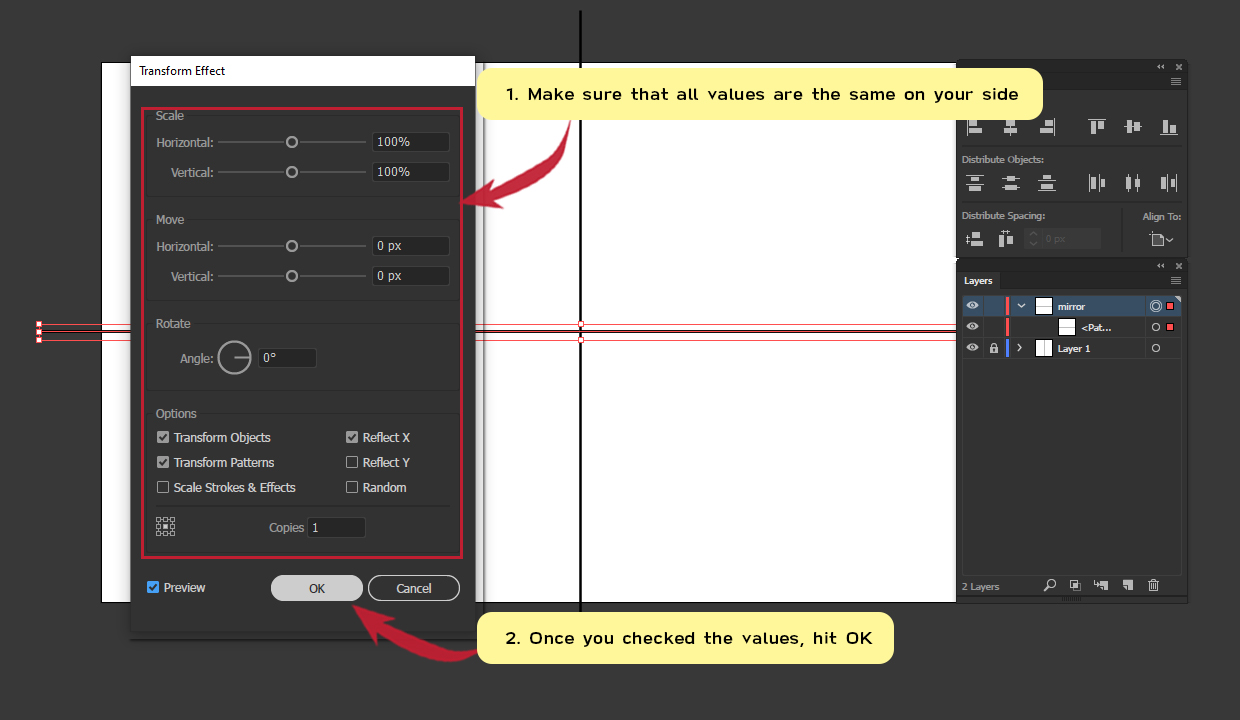
Making the reflect effect. There are several settings in the Transform Effect tool panel. You only need to check the “Reflect X” option. And enter “1” as a number of “Copies”.
Also, make sure that the other values are the same as the ones in the image below. If everything looks exactly the same, click “OK”.
Step 9:
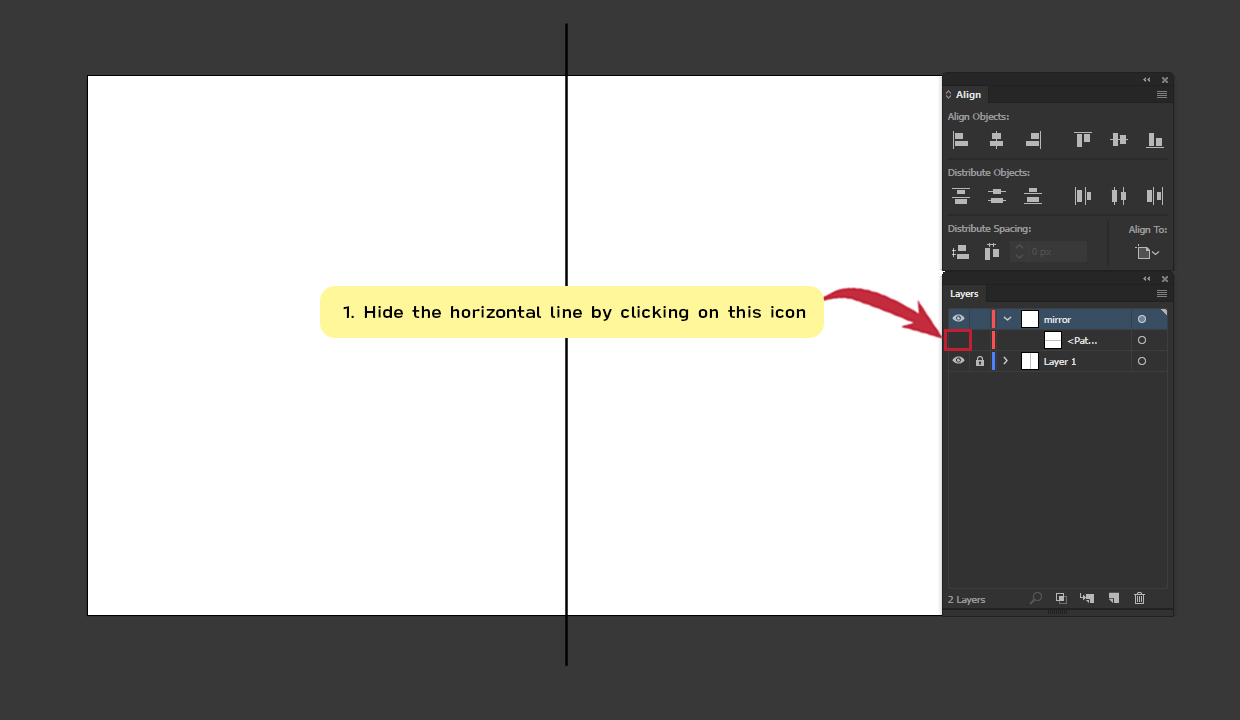
Hide horizontal line. There is no need for a horizontal line to be visible at this point, so you can turn its visibility OFF in the “Layers” panel by clicking on the “Eye Icon”.
You can also turn OFF the visibility of the vertical line, once you feel comfortable with that. In the beginning, it is better to have it as a guideline.
Step 10:
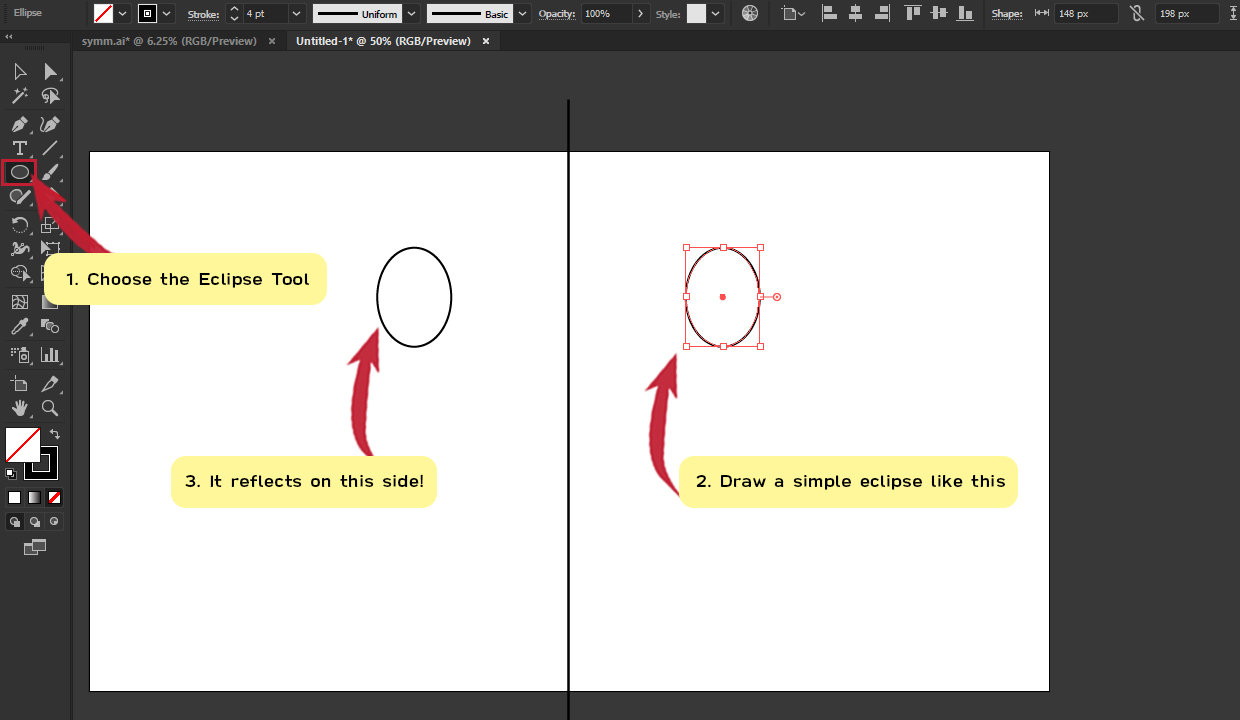
Making symmetrical shapes. Now, when previous steps are completed, it is about time to have some real fun. Let’s begin with some simple shapes and then move to something more complex. Pick “Ellipse Tool” from the tools panel.
Draw a simple eclipse on the right side of the canvas.
This shape will automatically reflect on the other side of the canvas. And any other shape you make on the right side of the canvas will also reflect on the left side and it will look exactly the same.
Let’s explore more options in the following step.
Step 11:
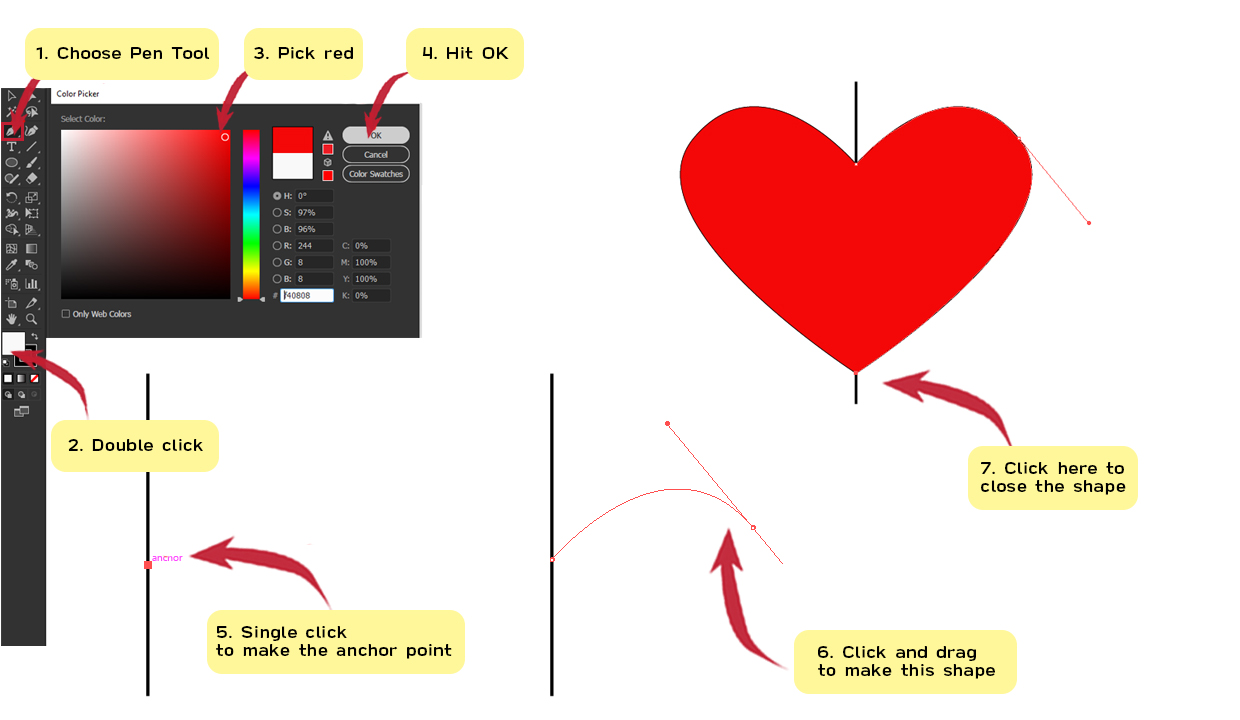
Let’s draw a simple heart. Choose the “Pen Tool” from the Tools panel.
Double click on the “Fill” and choose the red color with the color picker, and then hit “OK”.
Choose one point on the vertical line in the canvas, and make the first anchor point with the “Left Click”.
Move your cursor to the right side, slightly above the first anchor point. Click and drag until you make a similar curve to the one on the image below. When you feel satisfied with the look of that curve, release the left click.
Move your cursor down on the vertical line and single click to make another anchor point. And just like that, in a couple of clicks, you made a beautiful heart!
Step 12:
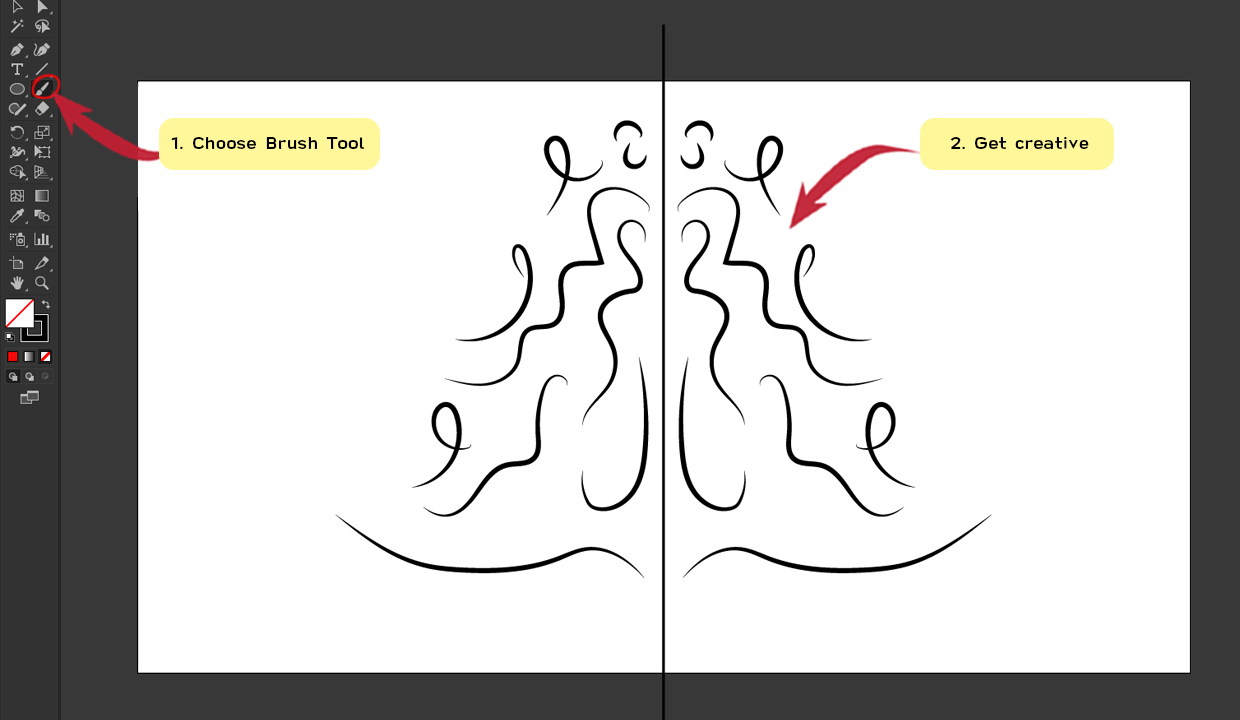
Get creative! Pick one of your favorite tools for drawing and explore all benefits of drawing symmetrical shapes. For example, you can choose a “Brush Tool”, start drawing, and see where it goes.
You can very simply make some astonishing pieces! Take your time for practicing this simple technique, and your portfolio will be floated with masterpieces in no time!