
It’s not unknown to most of us now how intuitive Canva is in graphic designing. It’s one of the most indispensable tools that any budding graphic designer should have.
But, with all the great customization features that Canva has, is it also possible to change the color of the images we’ve uploaded in the tool?
Say, for instance, you have a ready-made logo that you’d like to align the colors with your brand palette. Is it possible to edit it?
If you’re curious about the answer, better stay and continue reading this text.
Canva: How to Change Color of Uploaded Image
There is no perfect way to change the color of an uploaded image in Canva. But, you can adjust the tint, make use of the Duotone effect, or add a filter to somehow “edit” the photo’s colors.
Changing the Colors of Uploaded Images in Canva: 3 Methods You Can Use
As mentioned earlier, Canva is more of a graphics design tool.
Though it’s thoughtful for the developers to include a bit of photo editing effects, the tool certainly has limits.
Hence, changing the colors of any uploaded images in Canva isn’t as intuitive as you’ll expect.
But, it isn’t a total bummer, as you can definitely tweak a bit with some of the effects available in the tool to achieve your feat.
So, let’s go and see what these techniques are.
Method 1: Use of Tint
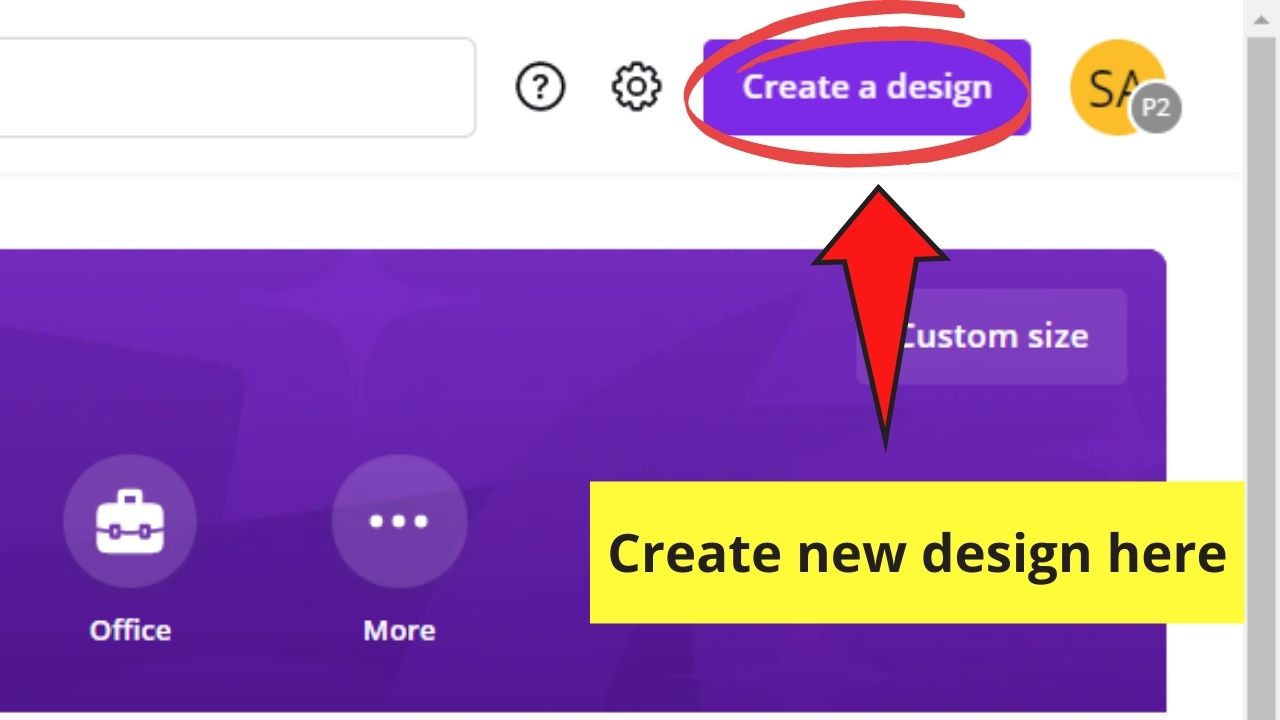
Step 1: Create a new template by clicking on the “Create a New Design” button on Canva’s home page.

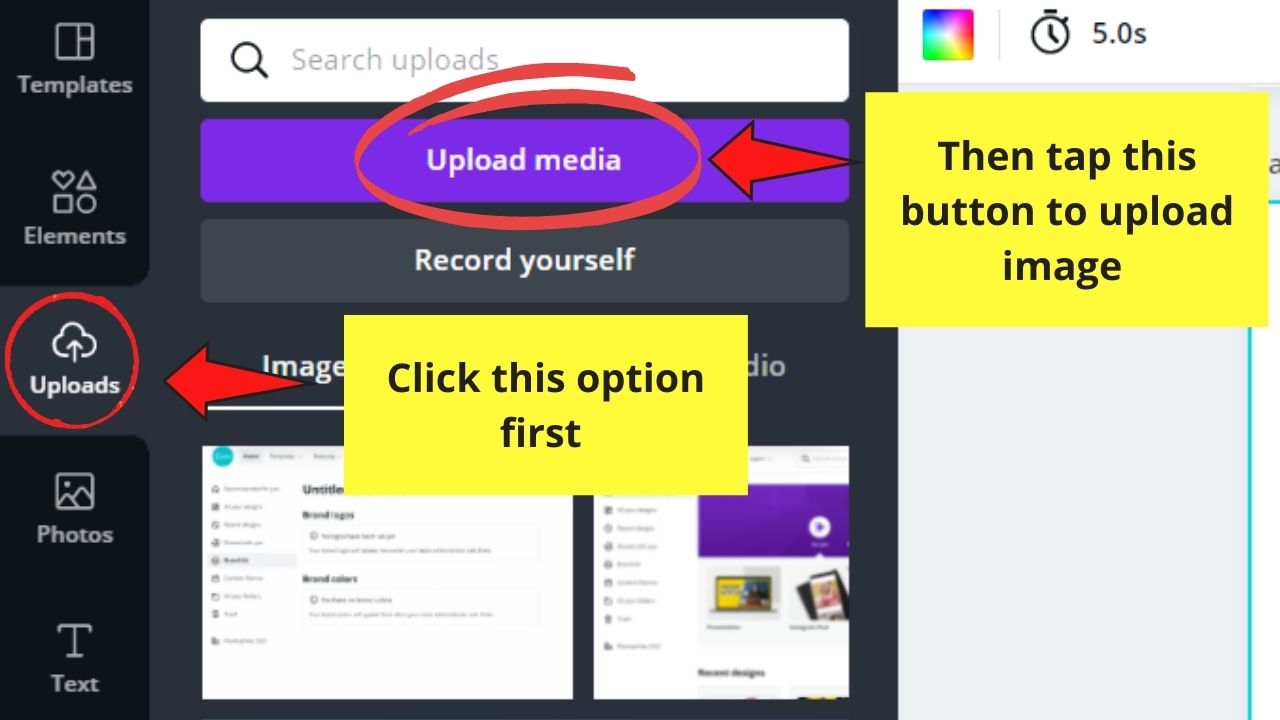
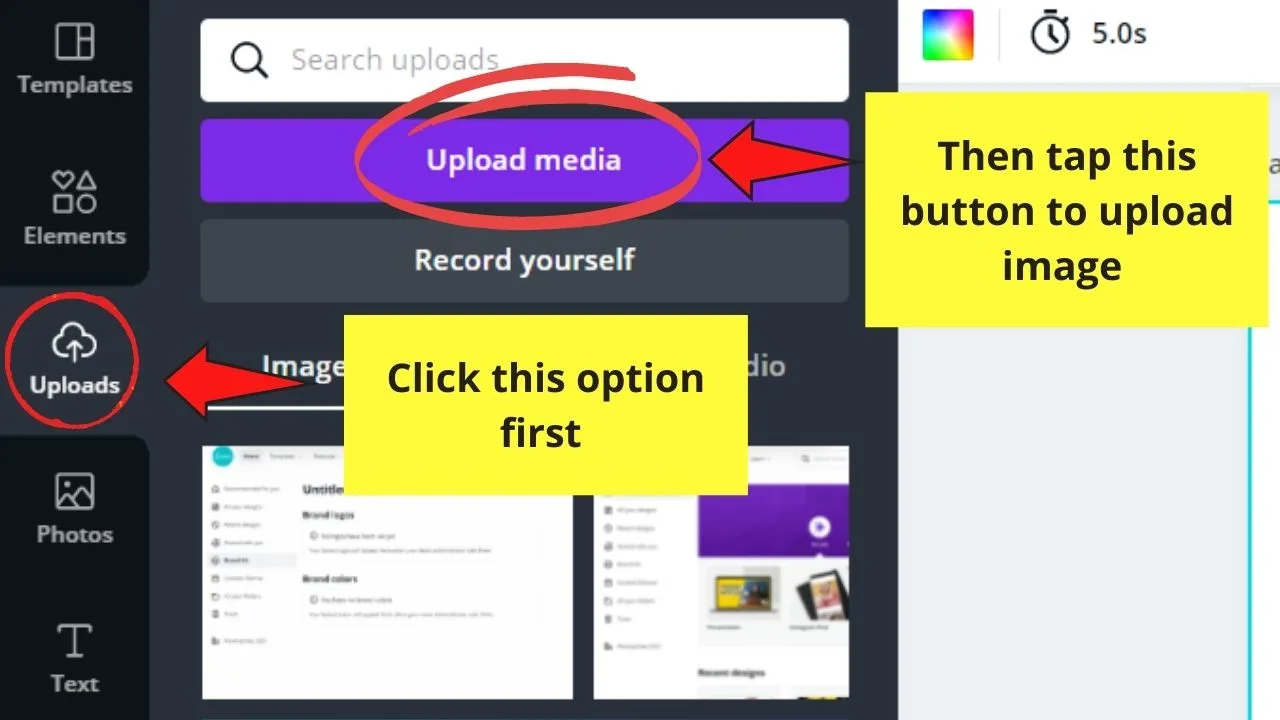
Step 2: Upload the image you’d like to edit on Canva by heading over to the “Uploads” tab. Tap on the “Upload an image” button.
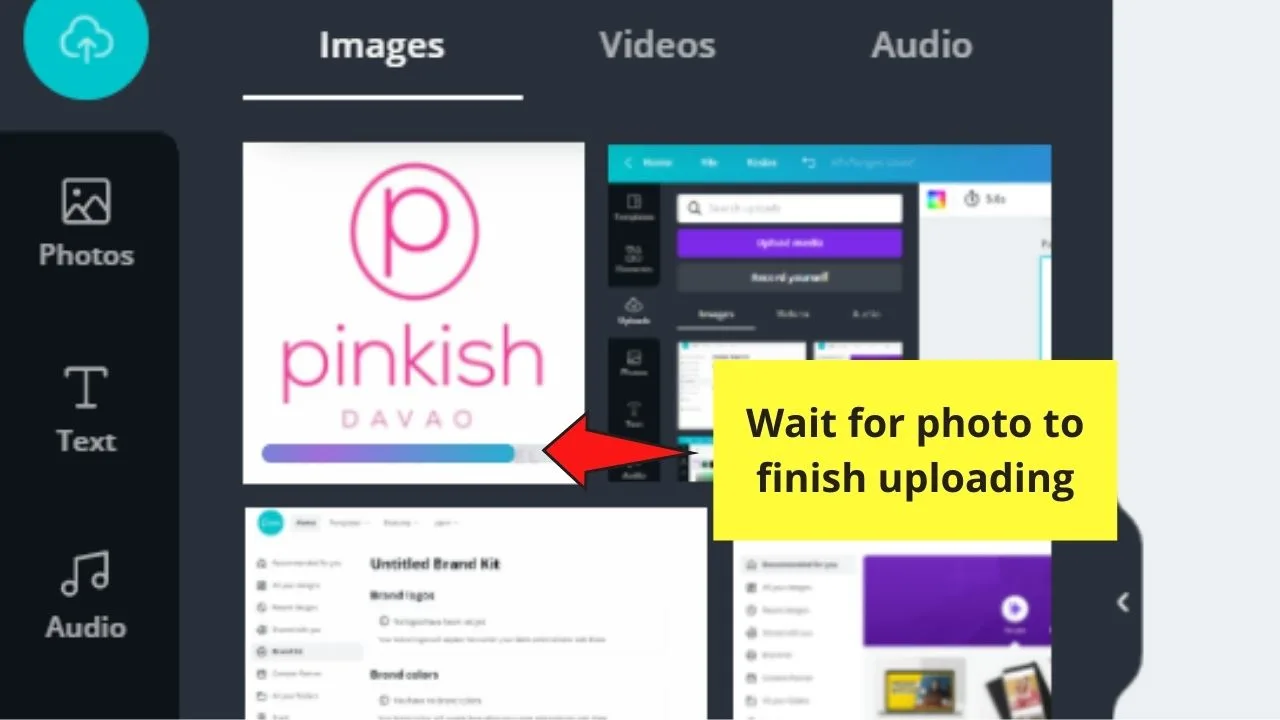
Step 3: Wait for Canva to finish uploading the image. A gradient bar will show to you the progress of your upload.


Step 4: Click and drag the newly-uploaded picture on your blank template. Adjust it accordingly.


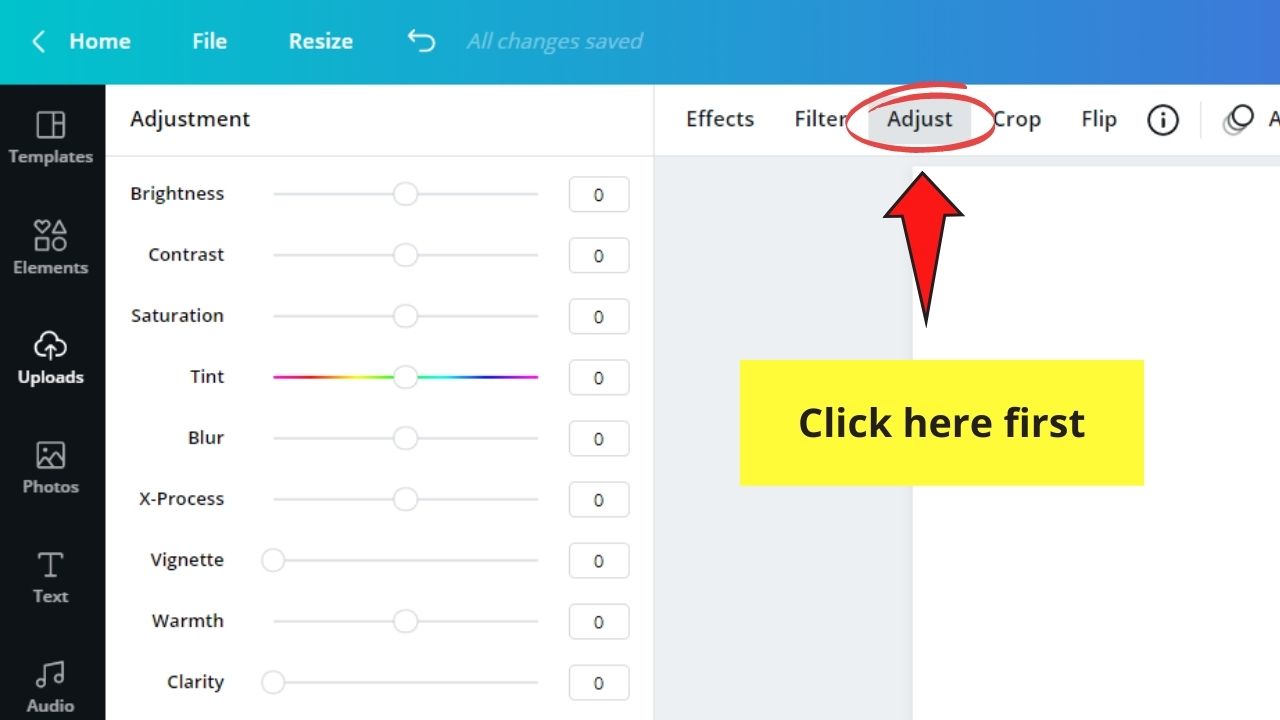
Step 5: To change the color of the uploaded picture, click on it before heading over to the “Adjust” option on the toolbar.

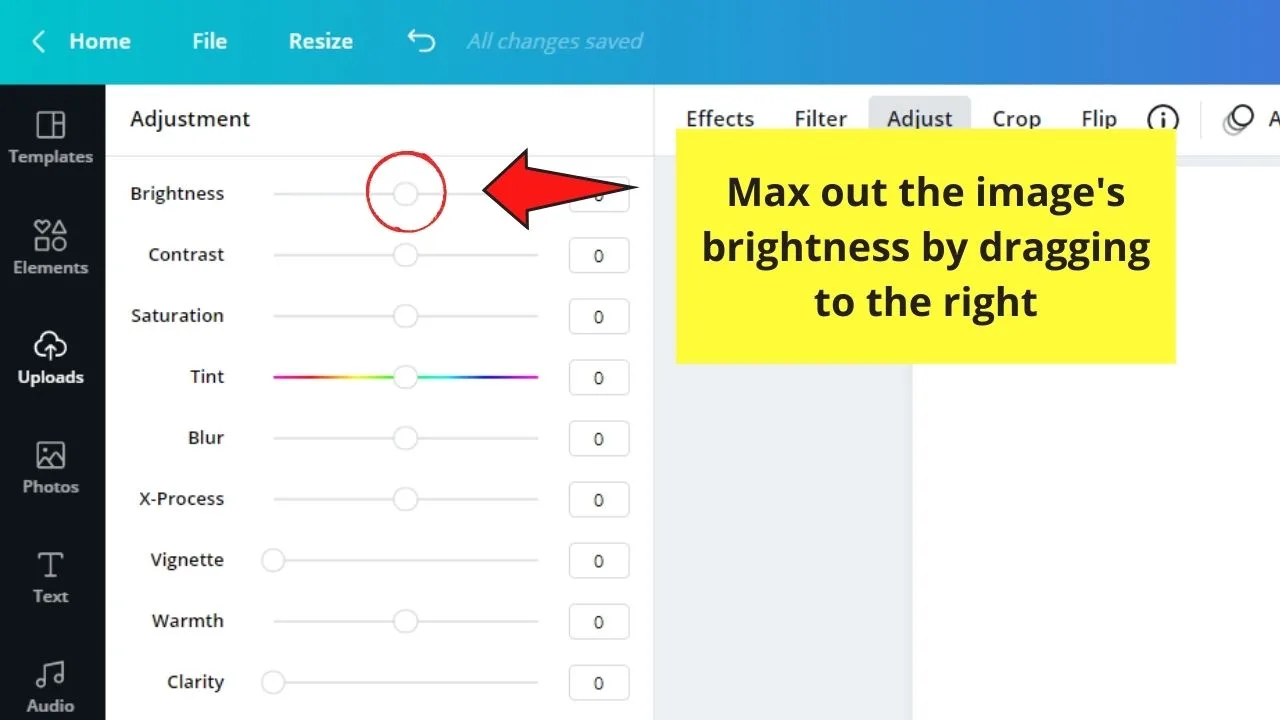
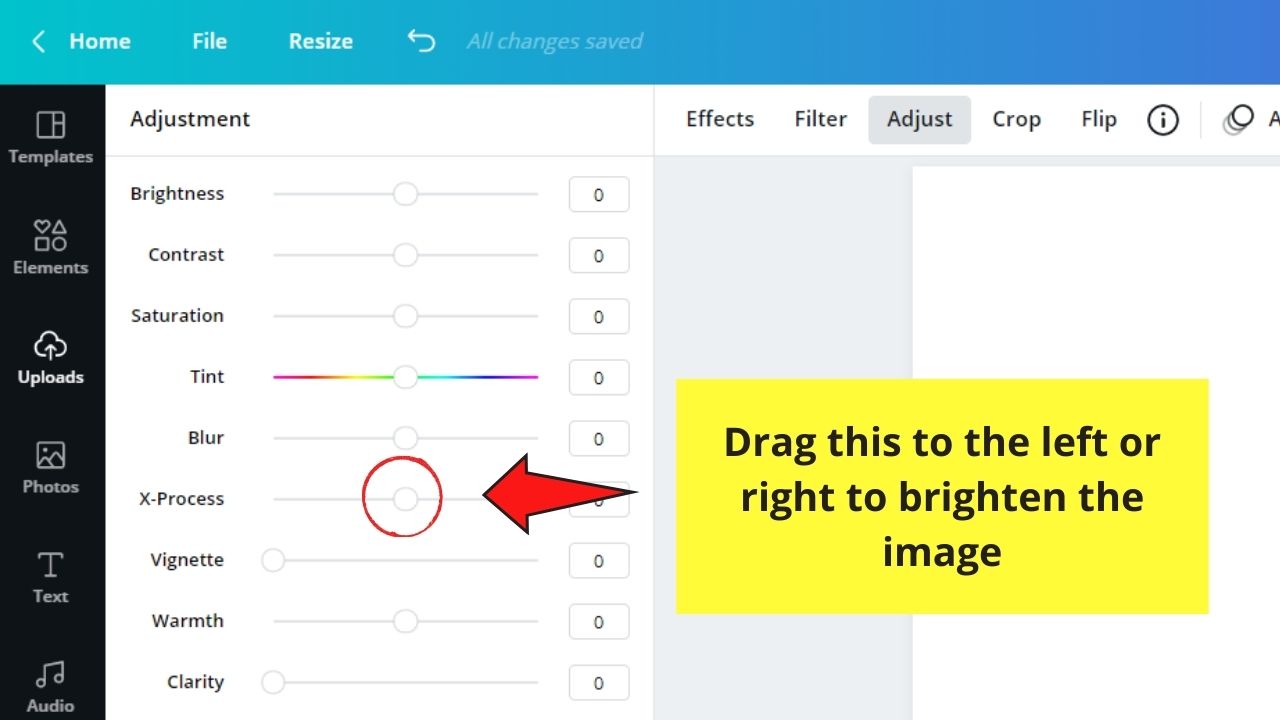
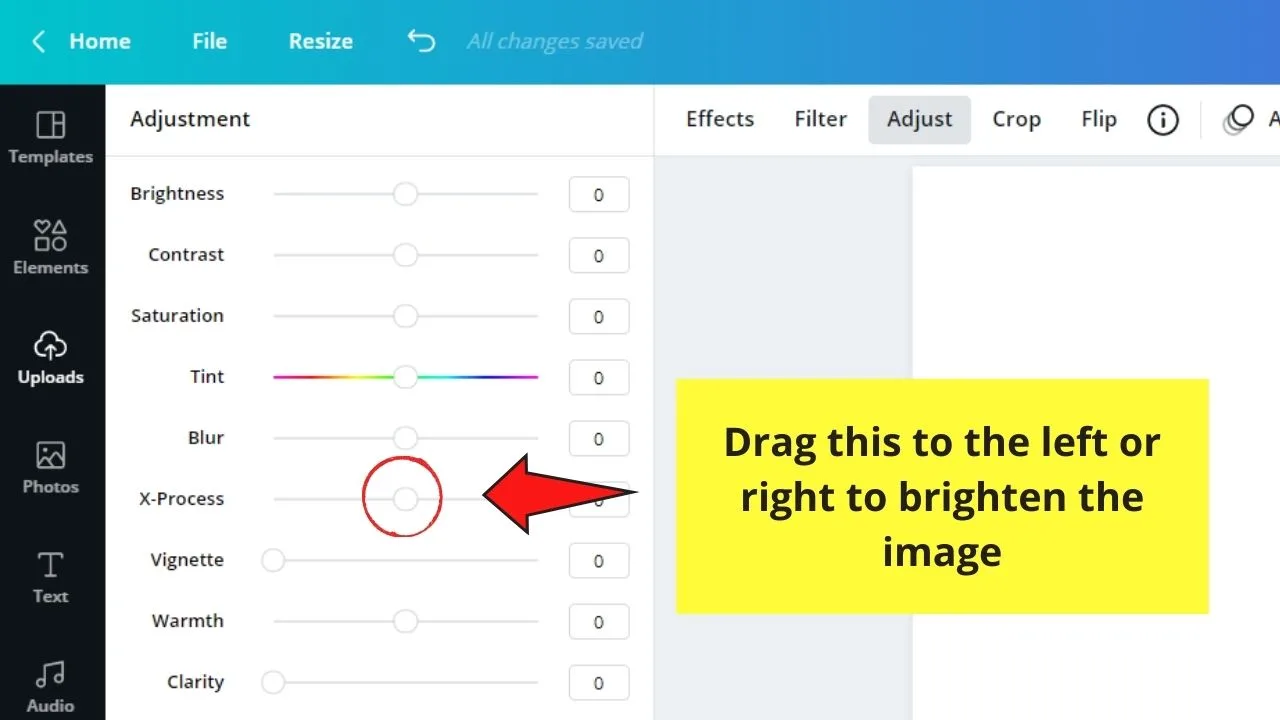
Step 6: In the side-panel menu that appears, head over to the “Brightness” slider and drag it all the way to the right to increase the photo’s brightness.

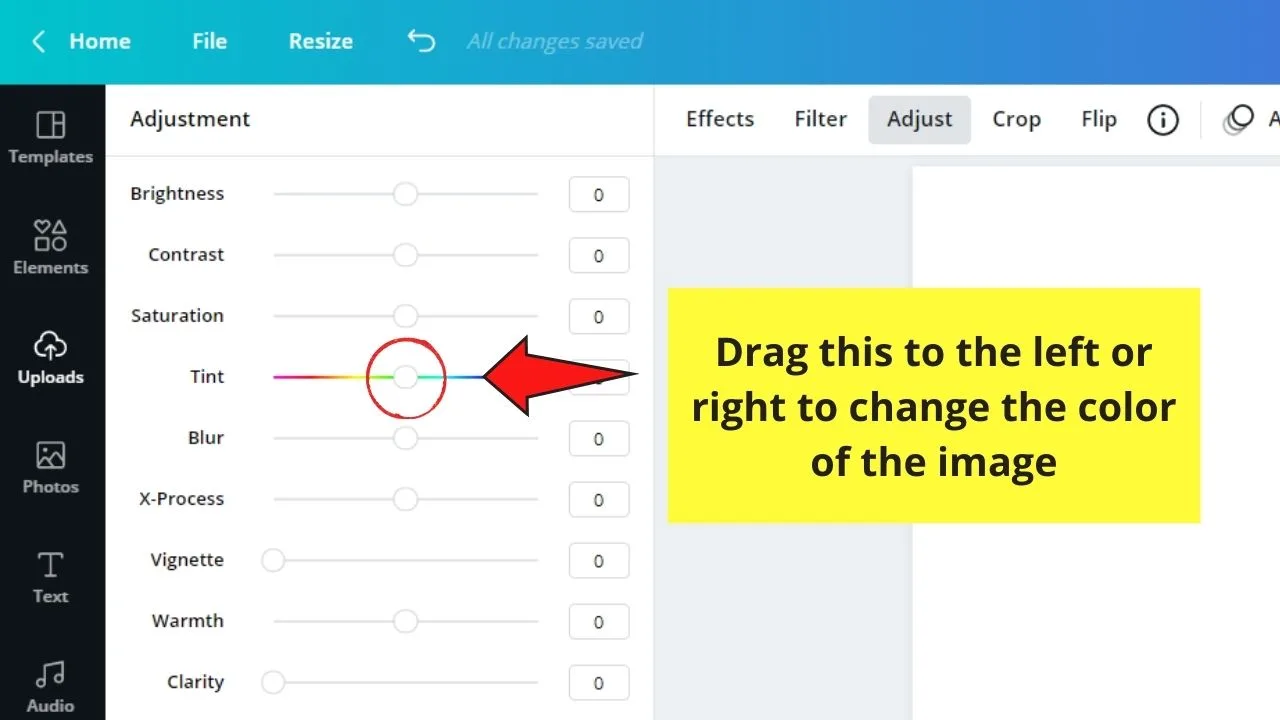
Step 7: Go to the “Tint” slider and drag it either to the left or the right side, depending on what color you’d like to use on your image.

Step 8: If you want the colors to be more vibrant, adjust the “X-Process” slider. You can also experiment with the other sliders to see how it affects the way your uploaded image looks.
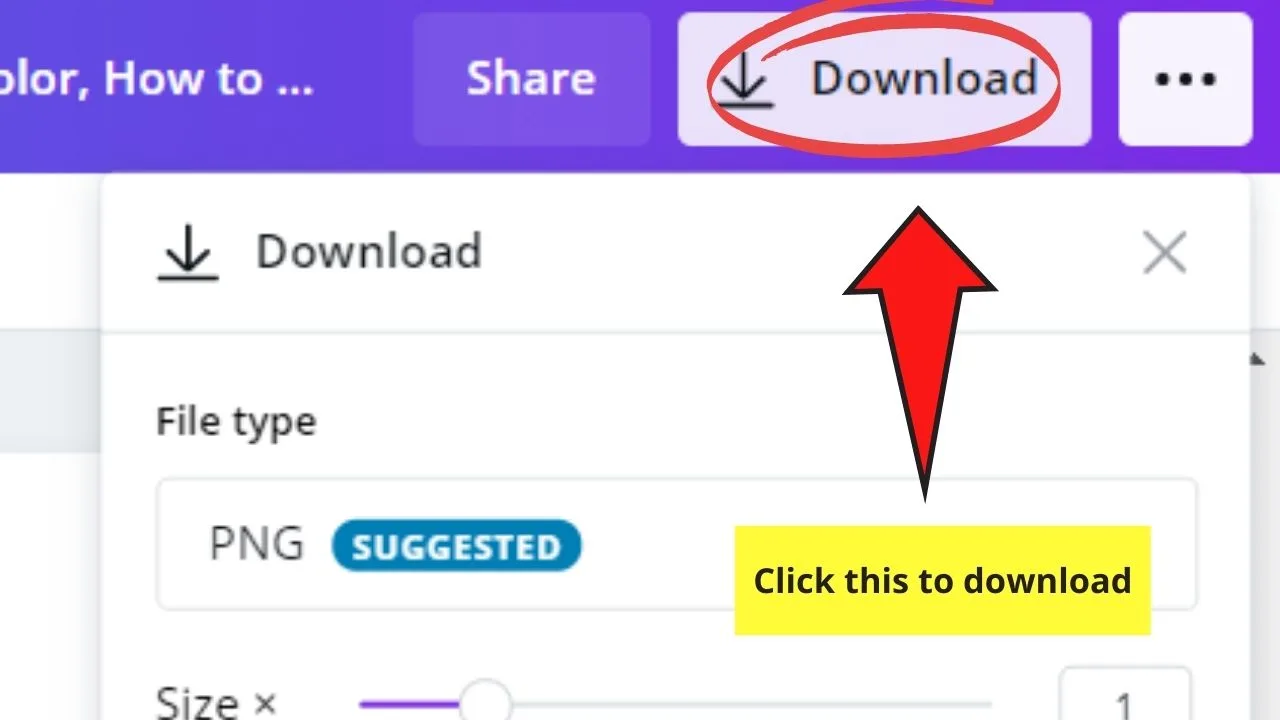
Step 9: Once you’re done changing the color, tap the “Download” button on the top of your Canva screen to save it on your device.

So, that’s just the first method. Now, on to the next one.
Method 2: Duotone
Step 1: After creating a new design file from Canva’s home page, upload the image you’d like to edit from your device in the “Uploads” tab.
Step 2: Once the picture’s uploaded, click and drag it on your blank canvas.
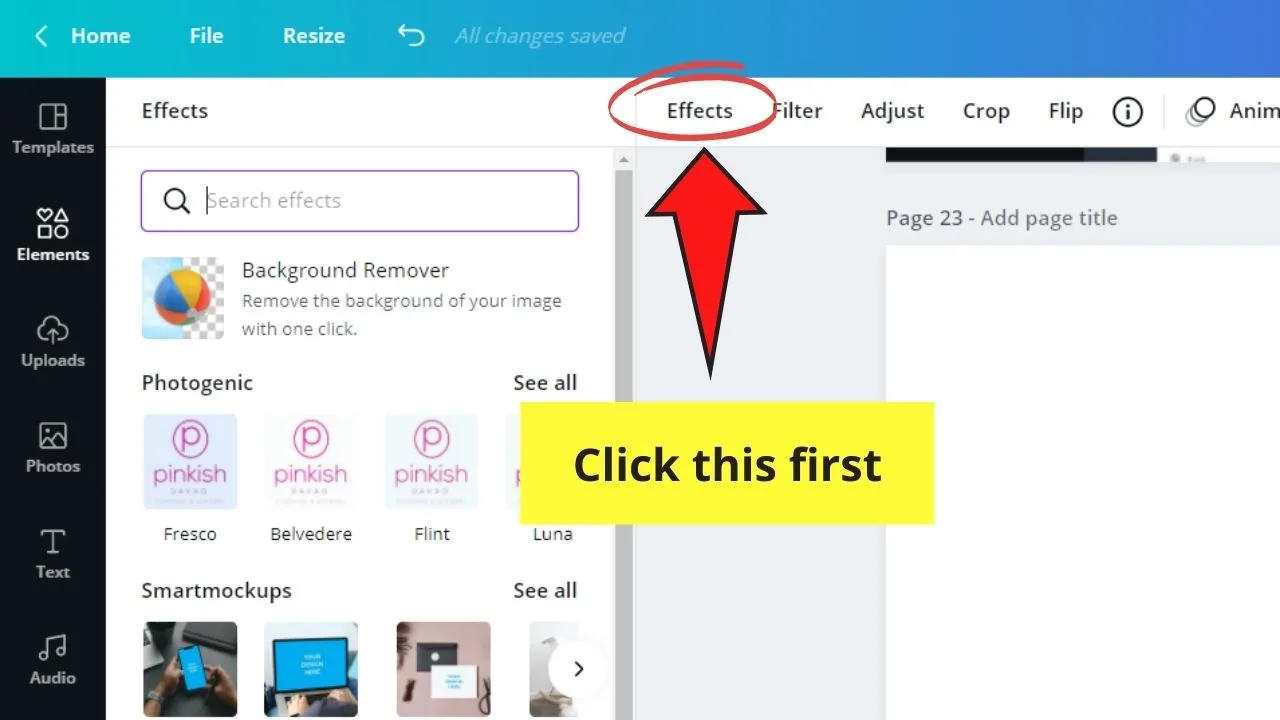
Step 3: Select the image by tapping on it. Go to the “Effects” tab on the toolbar above the canvas.
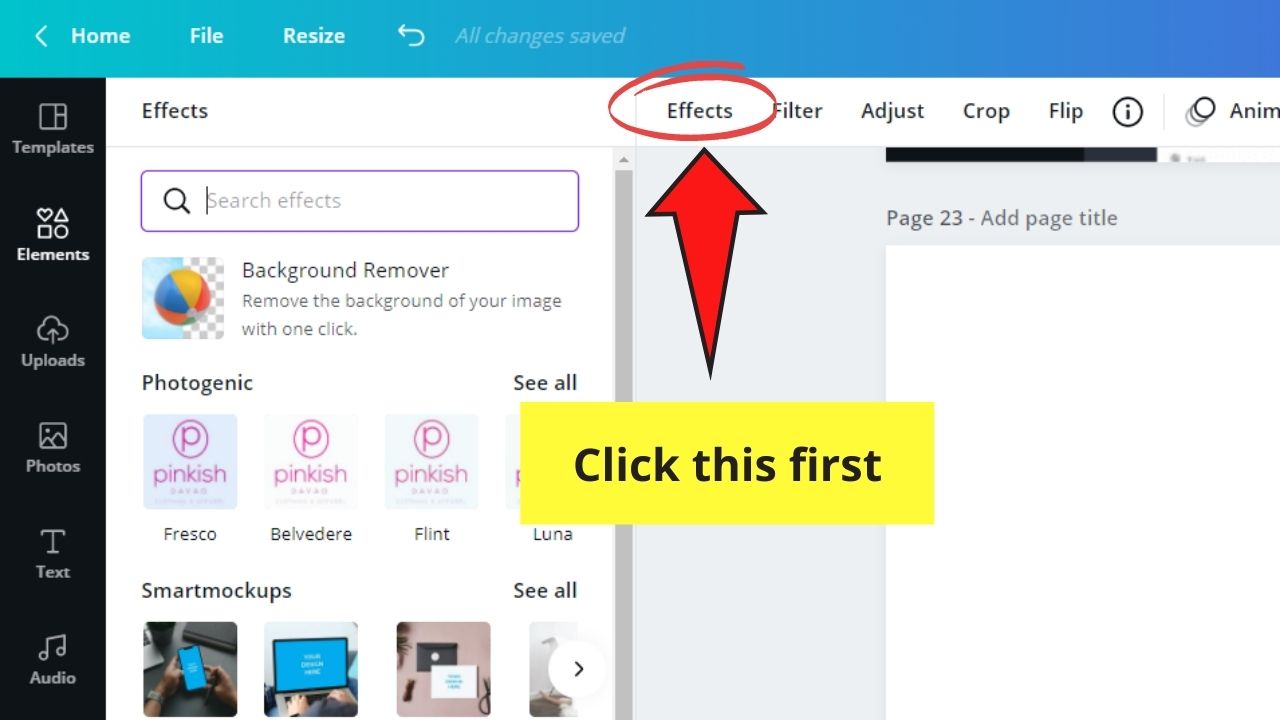
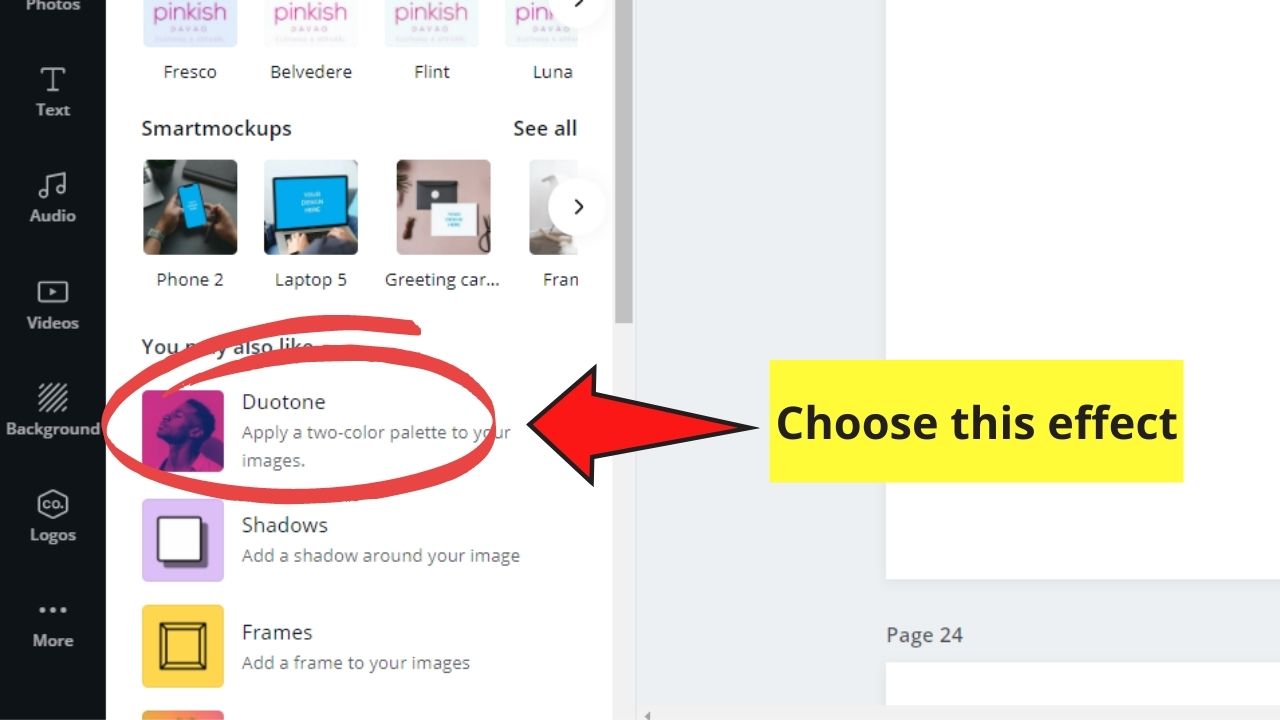
Step 4: Head over to the “Duotone” option and select what color you’d like to use on your photo.

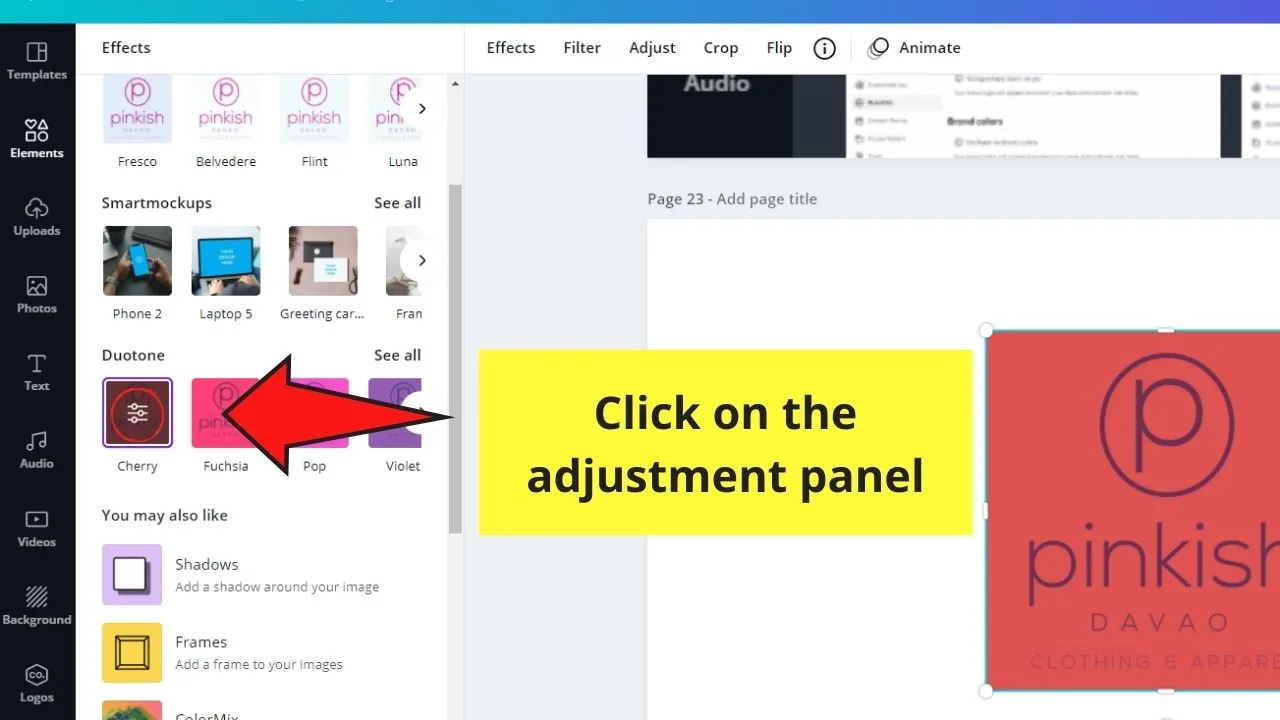
Step 5: Once you’ve selected the color you’d use, tap on the adjustment option that appears on the duotone color you tapped earlier. Click on it.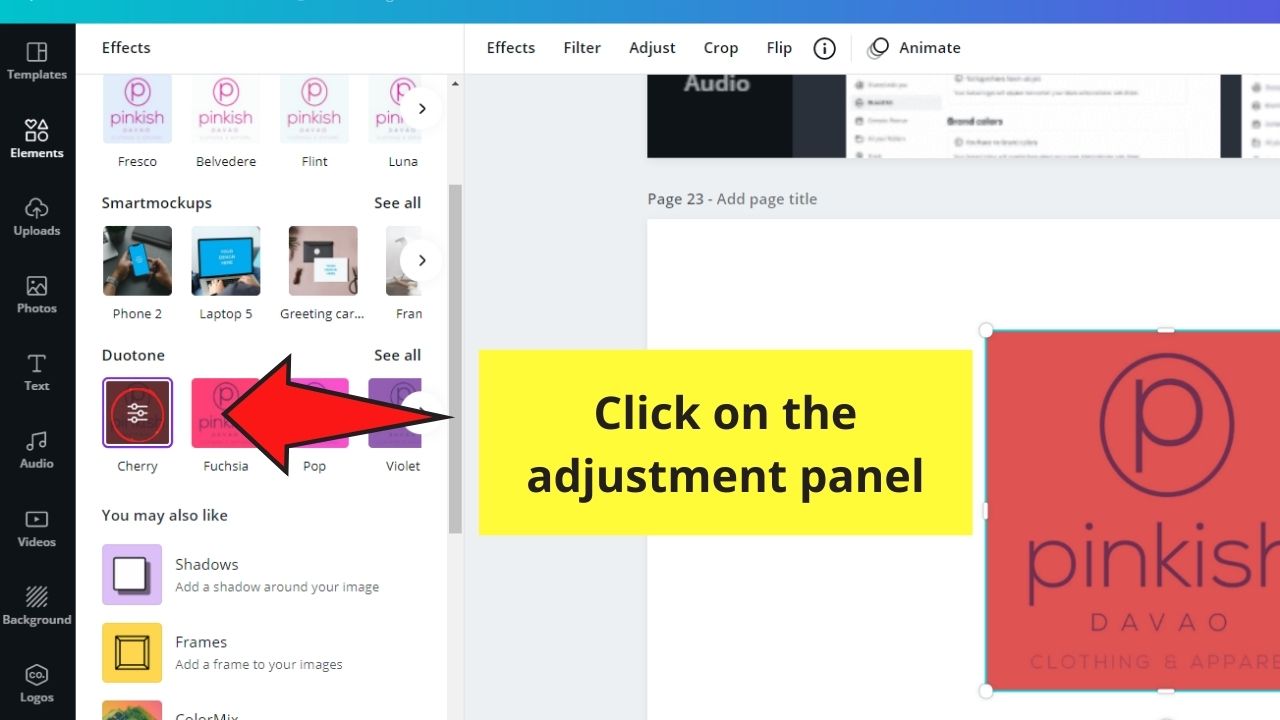
Step 6: On the window that appears, set the “Highlights” to black.

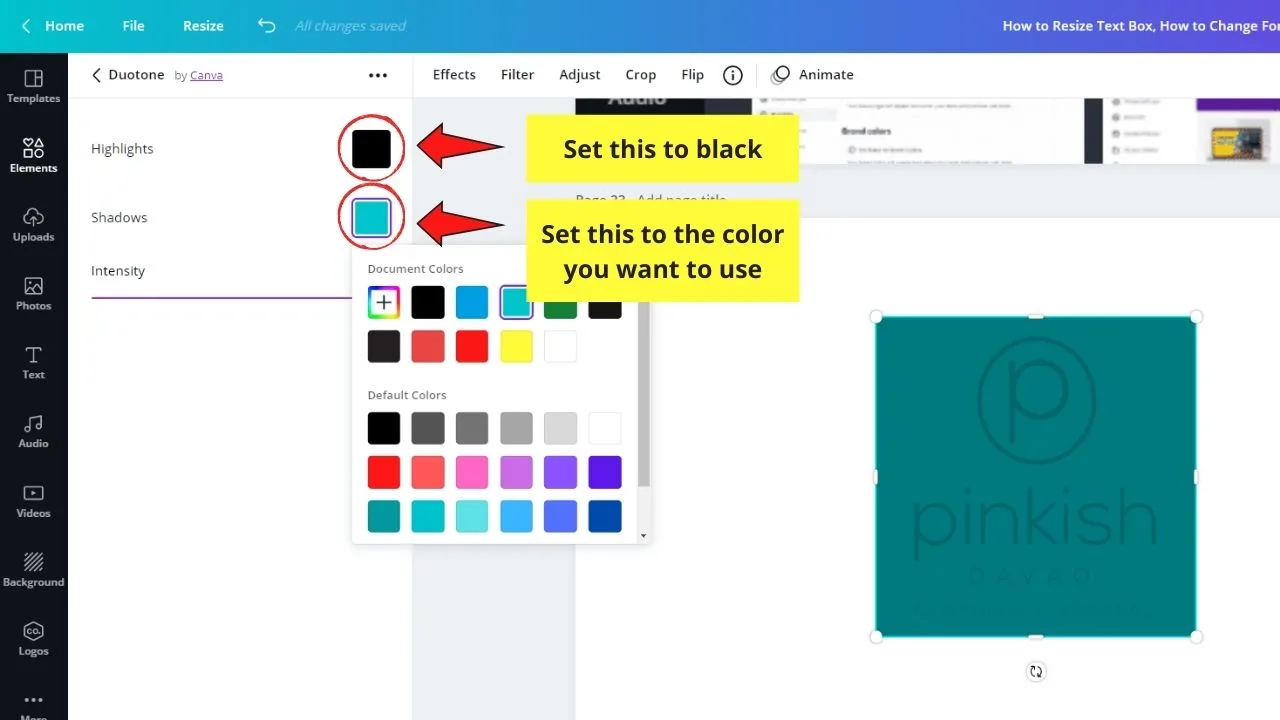
Step 7: Click on the colored box beside the “Shadows” option to adjust the color using the color palette that appears. You can also use hex codes if you want a particular color shade for your image.
Step 8: Once you’re done, save your newly-edited photo on your device by hitting the “Download” button.
However, this strategy only works for basic text-type logos.
Method 3: Adding Filters
Step 1: Create a new design from Canva’s home page. You’ll then be redirected to a blank canvas.
Step 2: Upload the image you’d like to use on your design by heading over to the “Uploads” tab. Wait for the importing process to finish.
Step 3: Once uploading’s done, click and drag the said photo towards the blank canvas. Readjust accordingly.
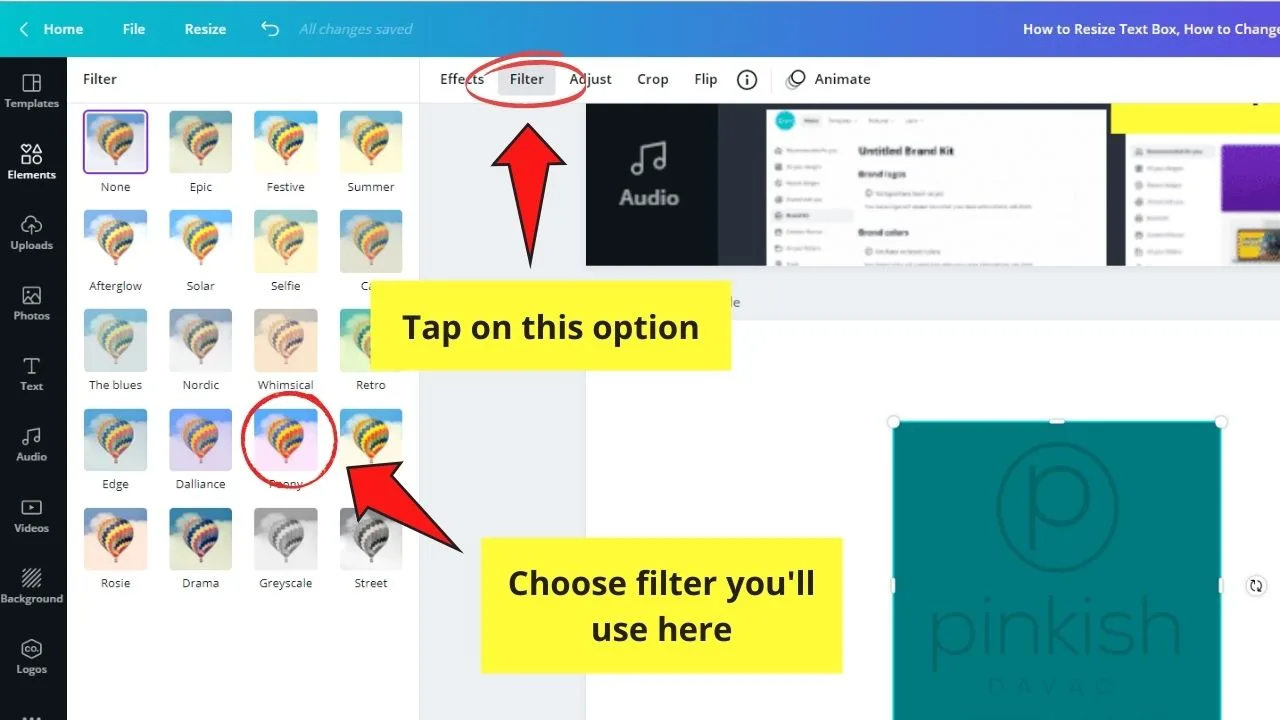
Step 4: To add a filter, click on the picture and select the “Filter” option on the toolbar. Select the filter that you’d like to use.

Step 5: Save your newly-edited image on your computer by tapping the “Download” button.
Though this method won’t allow you to change the image’s colors individually, filters will change the overall mood of the said photo.
Bonus Method: Color Mix
Step 1: After uploading the image to Canva, click or drag and drop the said photo to the blank canvas you added.
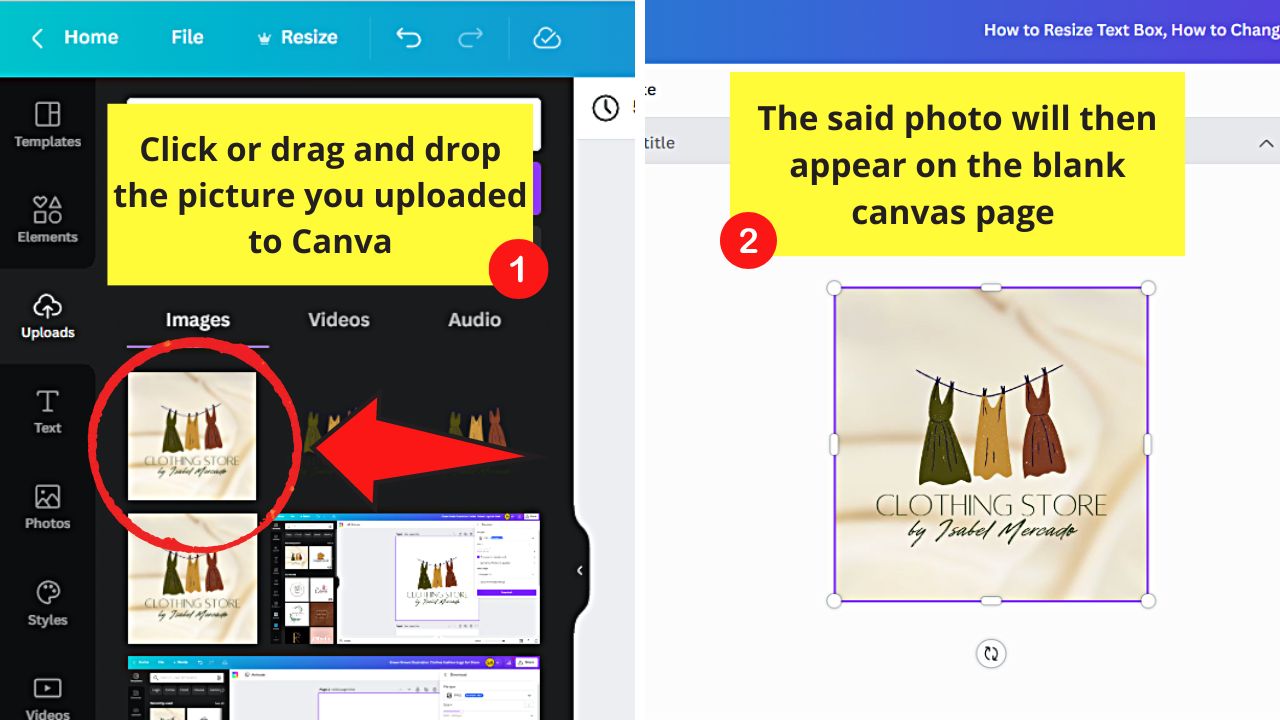
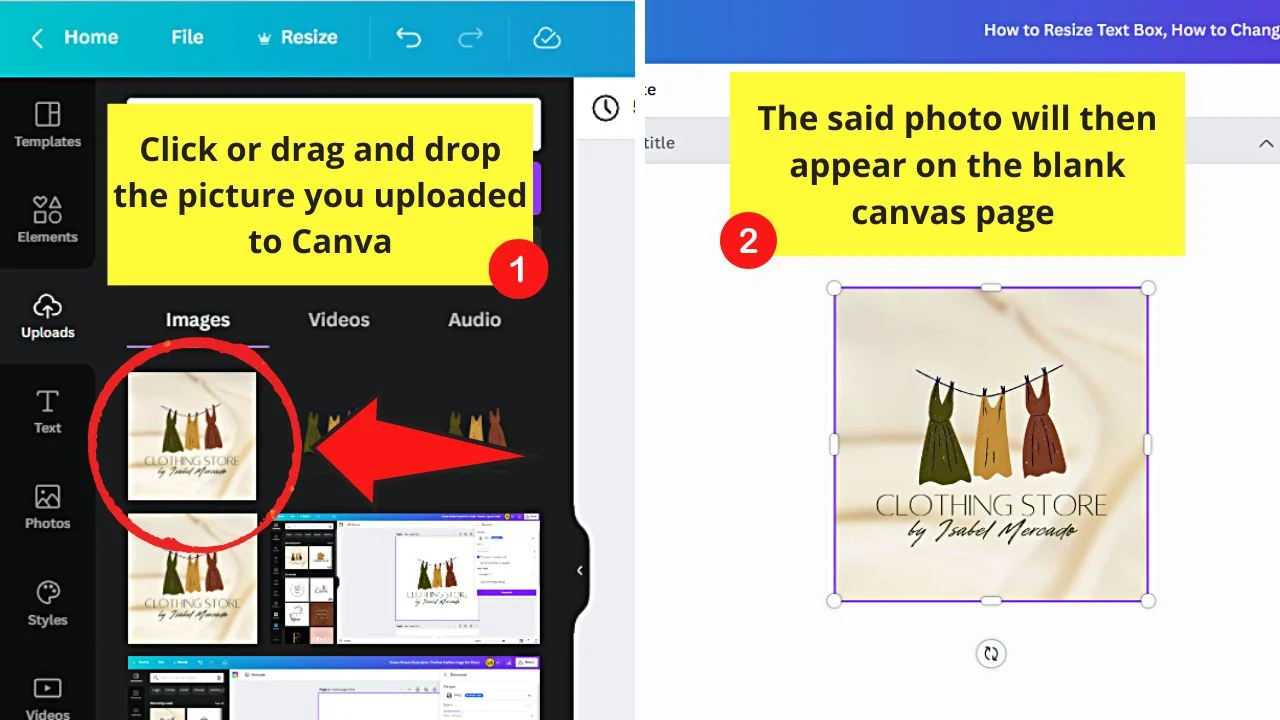
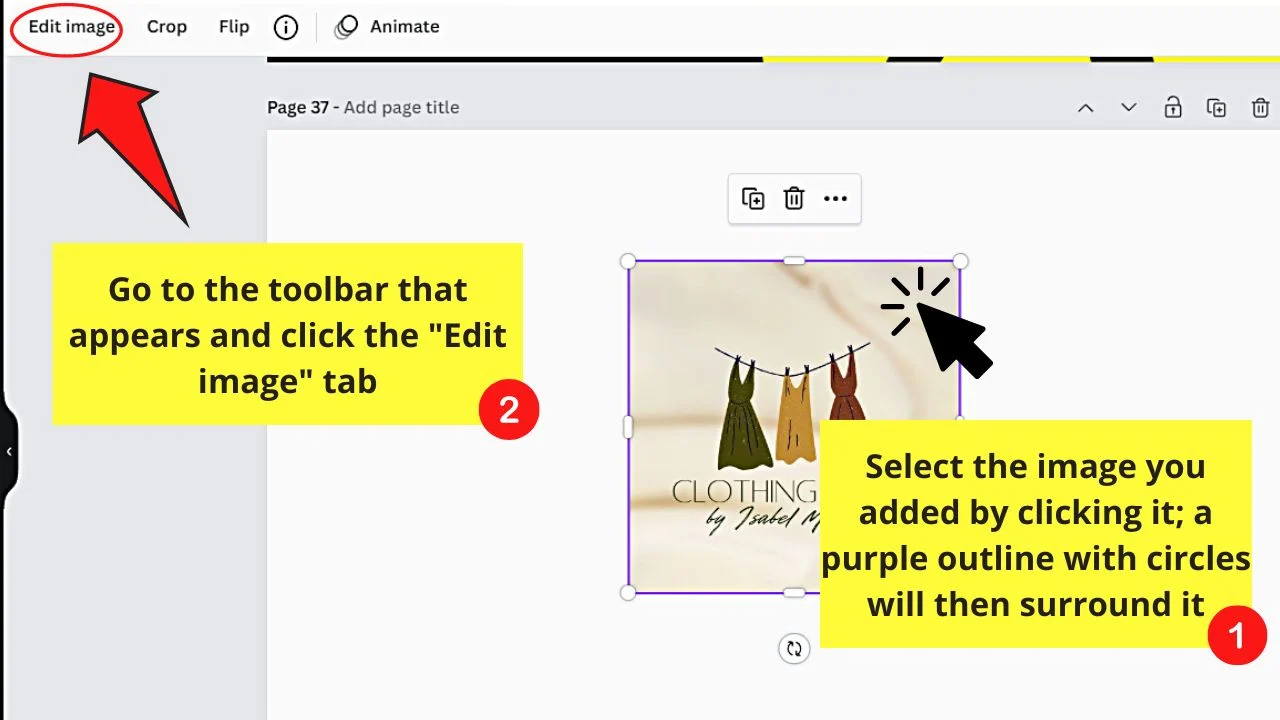
Step 2: Once you see the image on the blank canvas, click to select it.
Once a purple outline with circles surrounds the said image, select the “Edit image” tab on the toolbar that appears.

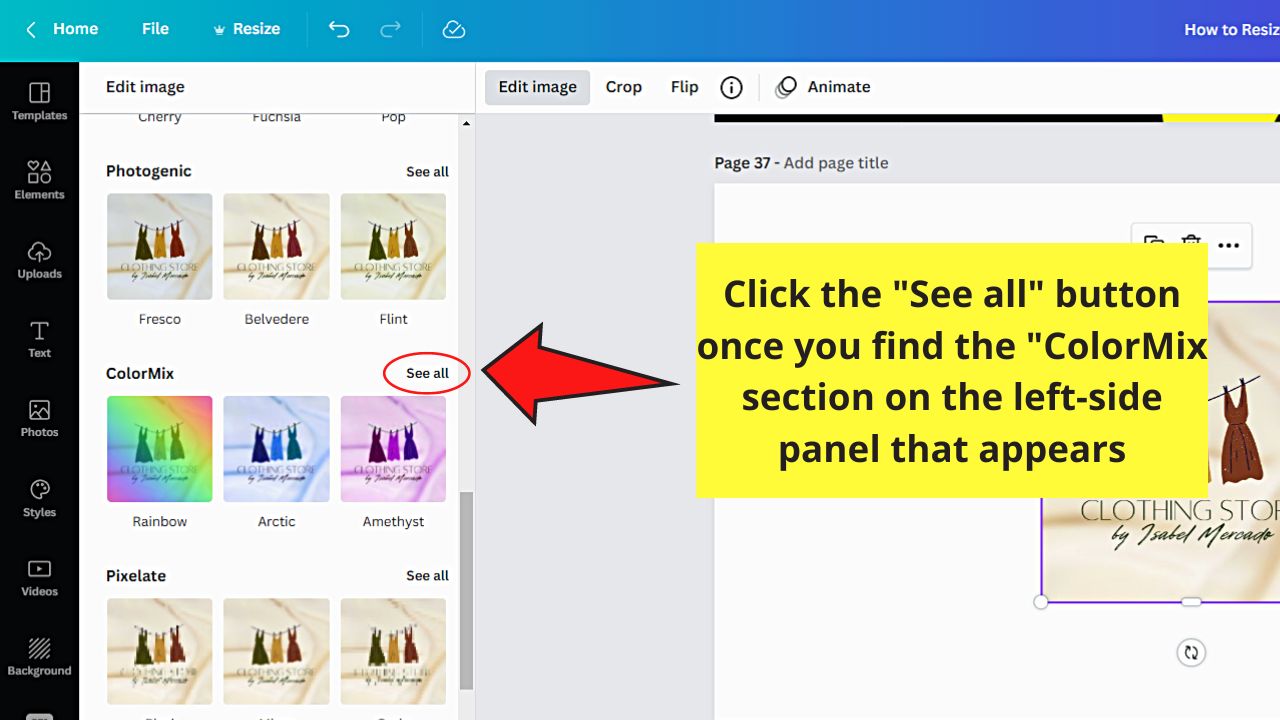
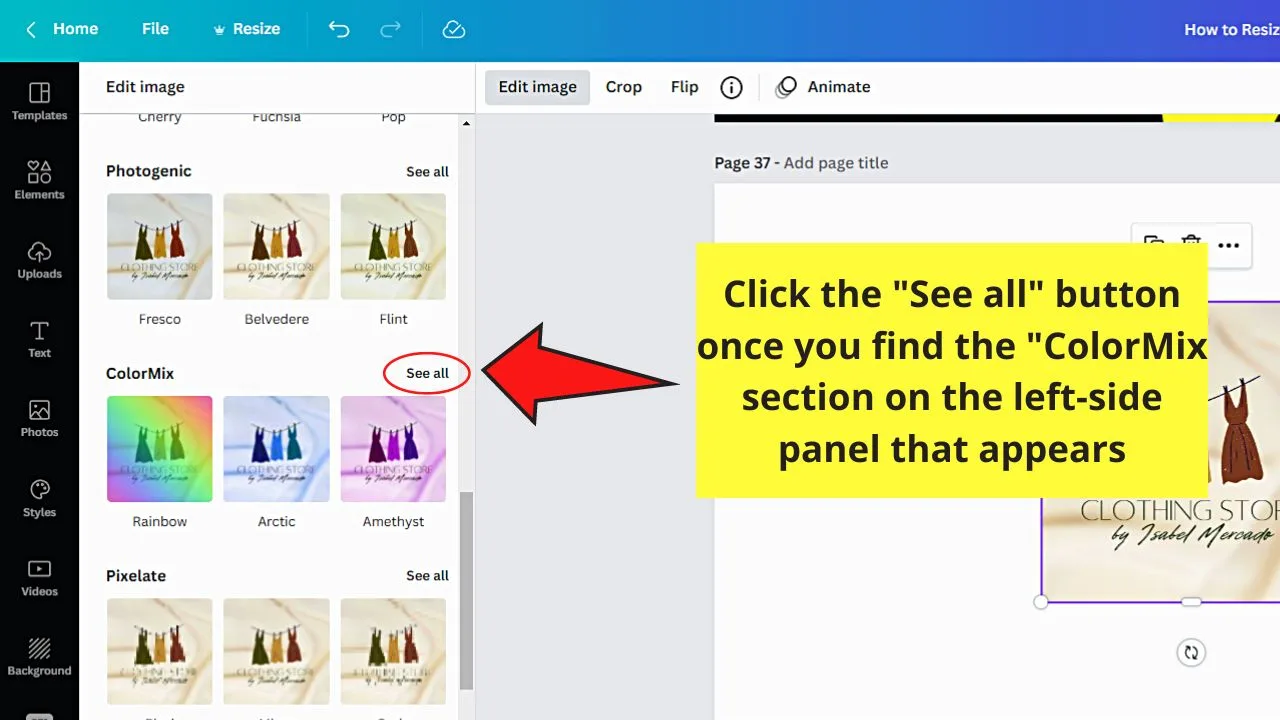
Step 3: Scroll down on the left-side panel that appears until you see the “Color Mix” section. Click “See all” to view all the color options in the said section.
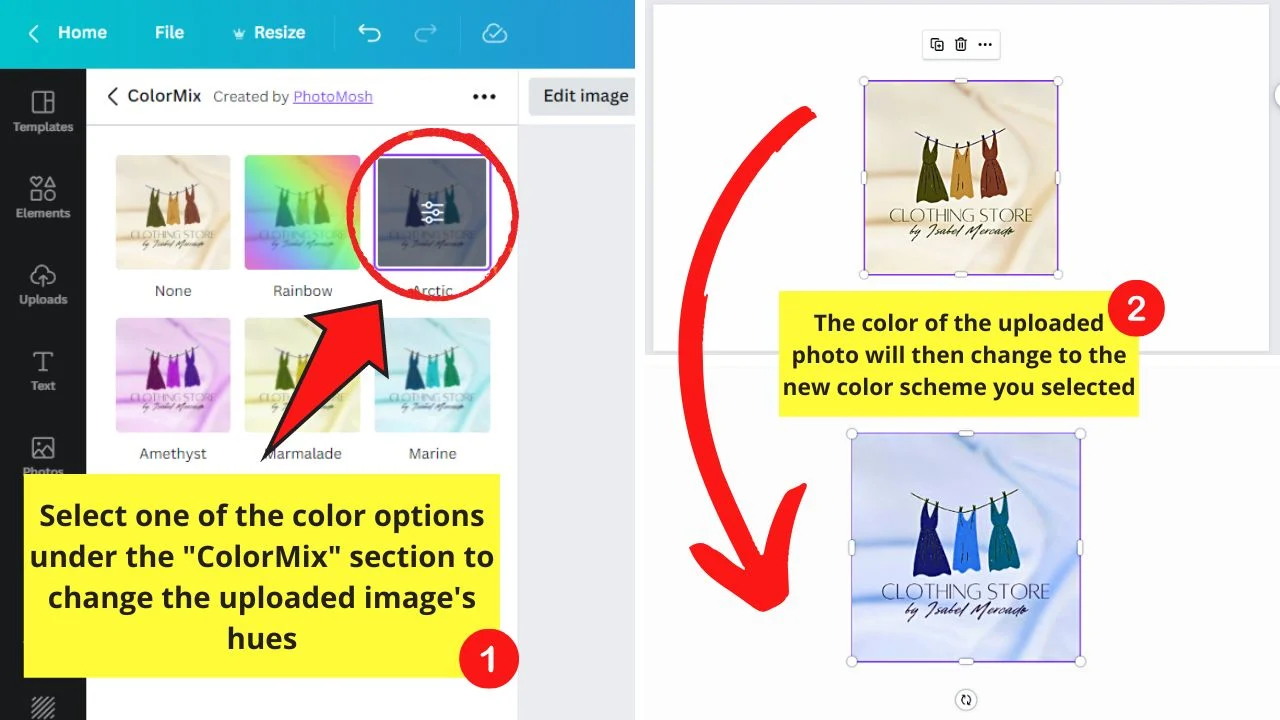
Step 4: Choose one of the “ColorMix” options available by clicking on it. Automatically, the color of the uploaded photo will change to the hue you selected.

Step 5: If you don’t want the original color of the “ColorMix” hue you selected, click the “Settings” button inside its thumbnail.

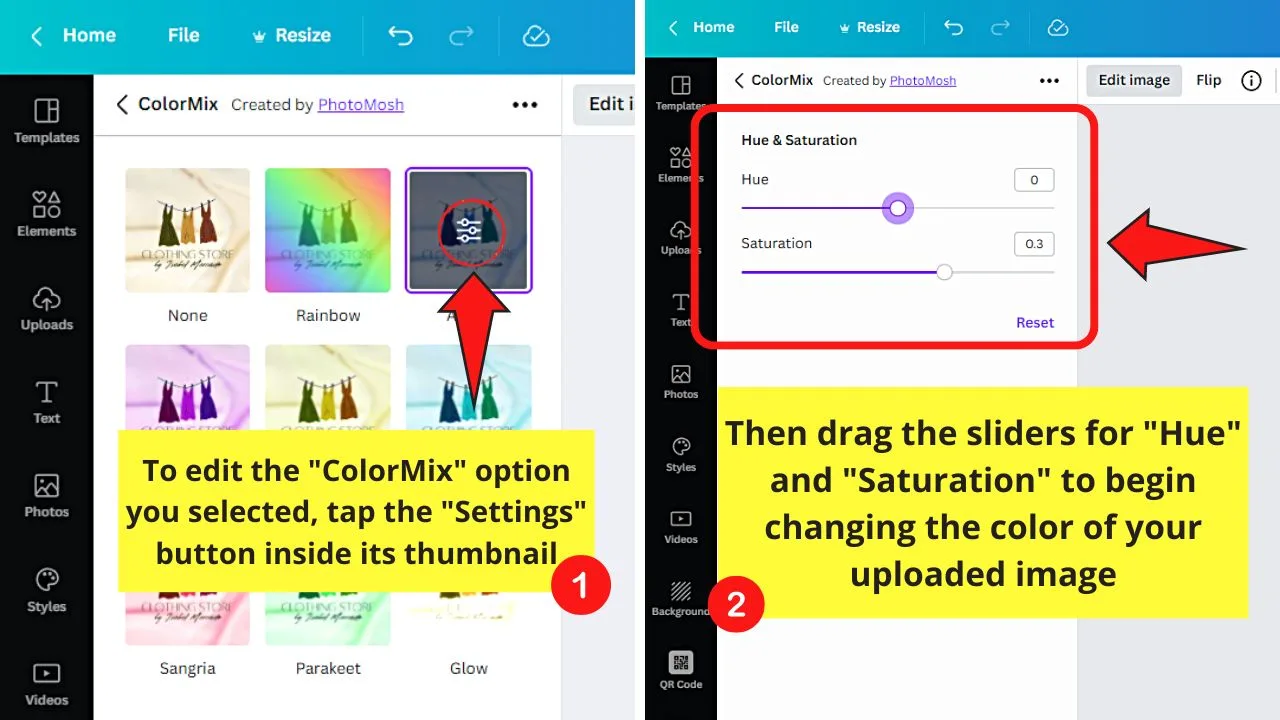
You’ll then see the sliders for “Hue” and “Saturation.” Simply drag the said sliders until you find the color that you want for the photo you uploaded.
If you’re good with how your uploaded image looks, then select the “Apply” button.

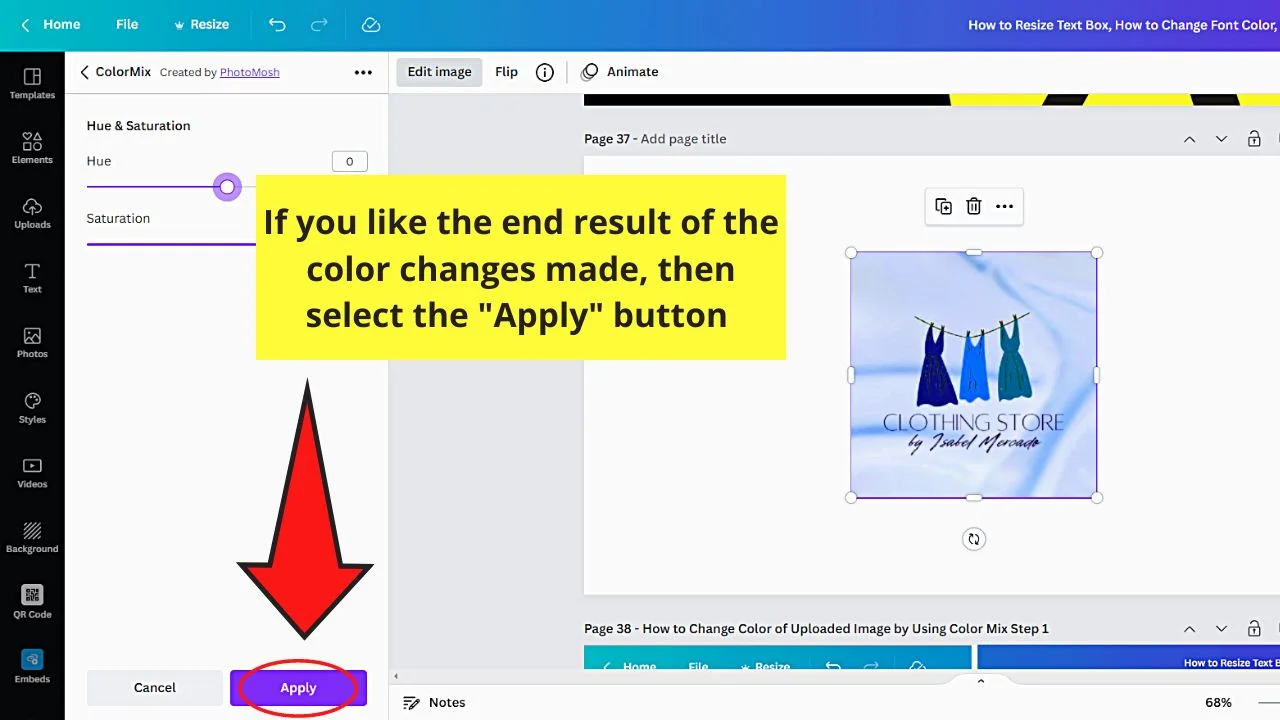
After which, proceed with saving your image to your device by clicking the “Share” and “Download” buttons consecutively.
As you have seen in this article, changing the color of an uploaded element is an easy feat in Canva. However, it also became apparent that there are certain limitations when trying to adjust the color of an uploaded image in Canva.
These limitations also apply when you upload a logo to Canva and then adjust the logo color in Canva.
With that said, if you are looking to get more granular and professional with adjusting colors of an image/picture/logo, you might want to use some graphic design software such as Gimp or Krita (these are both free) or some paid software such as Adobe Photoshop or Adobe Illustrator on top of using just Canva.
How to Invert Colors in Canva

Another question that we are often getting is: How do you invert colors in Canva?
Unfortunately, there is no easy answer to this, as there is no “Invert color” option in Canva.
With that said, inverting colors in Canva does only work in cases where you have complete control over the colors of your design.
Often, as is the case with uploaded images and elements to Canva, inverting colors in Canva won’t work because Canva won’t allow you to manually change parts of your design.
However, inverting colors in Canva often does work for existing elements that you can find in the left sidebar under “Elements” because the colors for these elements are often customizable.
How do you know if the different colors of a Canva element are customizable or not?
Once you have selected an element under “Elements,” simply look out for “Color Squares” on top of your design (situated in the left corner).
The more color squares you will find there, the more customization options you get as far as changing and inverting colors go.
For instance, if you do select an element on your design and 4 color squares appear above your design, you know that there are 4 different parts of your design for which the color can be adjusted for.
On the other hand, if you just get 2 color squares with an element, you will know that the changes to the colors of the element that can be made are less granular.
To know exactly which parts of the design colors can be adjusted, simply click on one of the color squares and then change the color. You will then immediately see which part of the design is affected as the color for that part will be updated immediately.
With that said, to invert colors in Canva for a certain Canva element, you would need to switch out the colors of the color squares that you can find when you select the element on your design.
For example, if your element displays a black color square and a white color square, then you would simply change the color of the first color square to white and change the color of the second color square to invert the colors.
Please note that this won’t work on uploaded elements, though, as the different parts of uploaded images are not customizable independently.
Frequently Asked Questions about How to Change Color of Uploaded Image
Why do you need to change the highlights to black first before adjusting the shadows if you’re using the Duotone method?
Setting the highlights to black first will allow for a more accurate hue to be reflected on your uploaded image.
Can you directly change the colors of any uploaded image in Canva?
As mentioned earlier, you can’t directly change the color of imported pictures or graphics in Canva with a single click. But, you can use either of the 3 methods (Filter, Duotone, and Tint) mentioned earlier to tweak the photo’s color settings.
Is it possible to download your newly-edited graphics or image with a transparent background if you’re using Canva Free?
Unfortunately, you cannot download your photo or graphics with a transparent background if you’re only using Canva’s free version. Better upgrade to the Pro account to enjoy this feature, or head over to remove.bg website.


Hey guys! It’s me, Marcel, aka Maschi. On MaschiTuts, it’s all about tutorials! No matter the topic of the article, the goal always remains the same: Providing you guys with the most in-depth and helpful tutorials!

