CapCut is one of the easiest and most affordable video editing tools anyone can master using.
Today, we are going to have a look at a very basic video editing technique called “cutting” or “splitting.”
It is essential to know how to cut or split video footage in half, so that you can cut out parts that you actually don’t want or need in your video. Also, cutting footage is essential to reorder and rearrange video clips.
So let us learn how to do this properly in CapCut Mac!
How to Cut on CapCut Mac
To cut on CapCut Mac, follow these steps:
- Position the playhead on the part of the video clip you want to cut
- Select the “Split” button
This method is the usual method that newbie CapCut users use to cut certain parts of the video. No need to remember keyboard shortcuts or special codes to activate this feature.
Just familiarize yourself with the button you’ll click after opening your video project.
Step 1: Position the playhead on the part of the video clip you want to cut
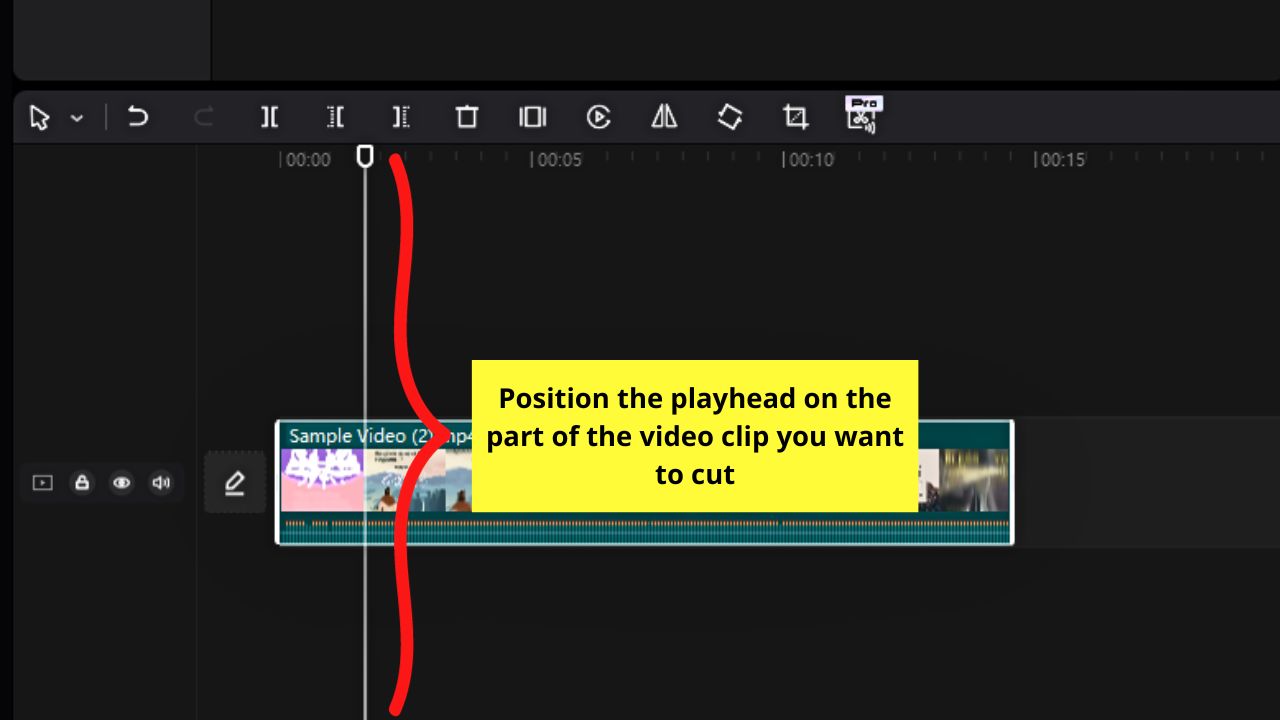
This playhead is the vertical white line you’ll see on the video timeline. Moving this tool marks the part where the cut will be made.
Step 2: Select the “Split” button

This is the button between the “Undo” and “Delete Left” buttons on the editing toolbar.
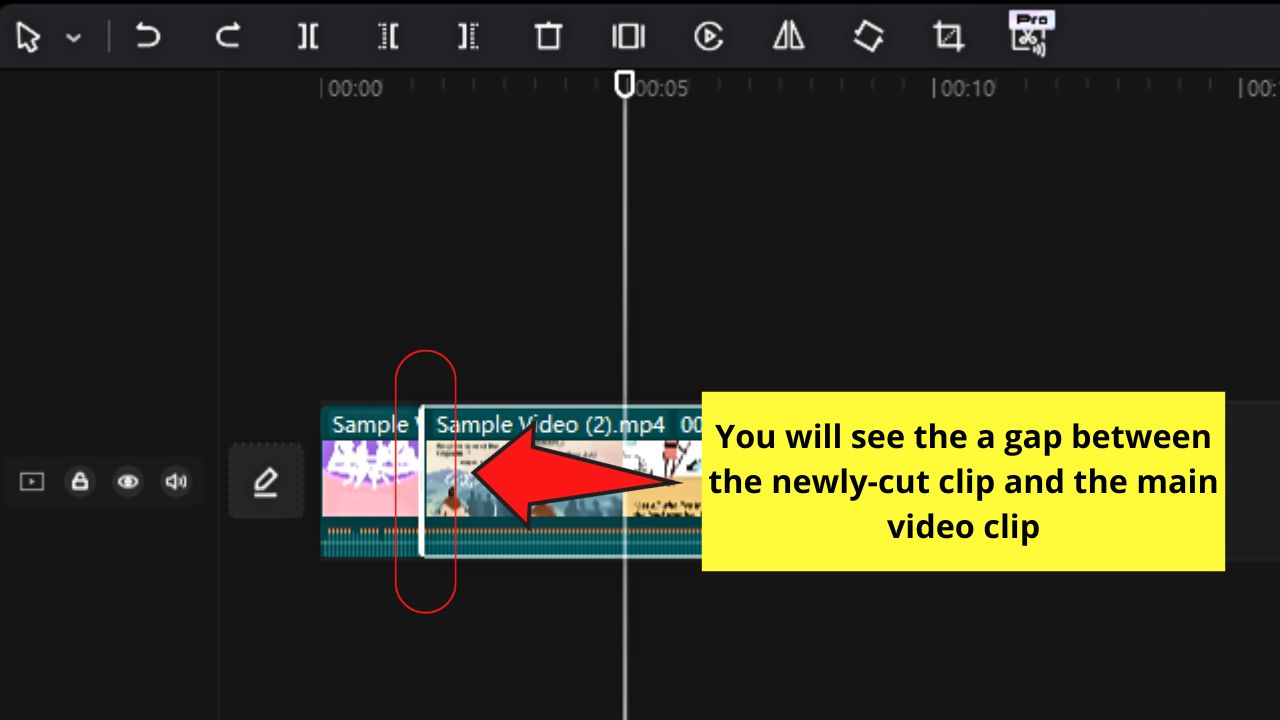
You should now see a line on the area where you cut. The left side of the video clip is now separate from the rest of the footage on the timeline.
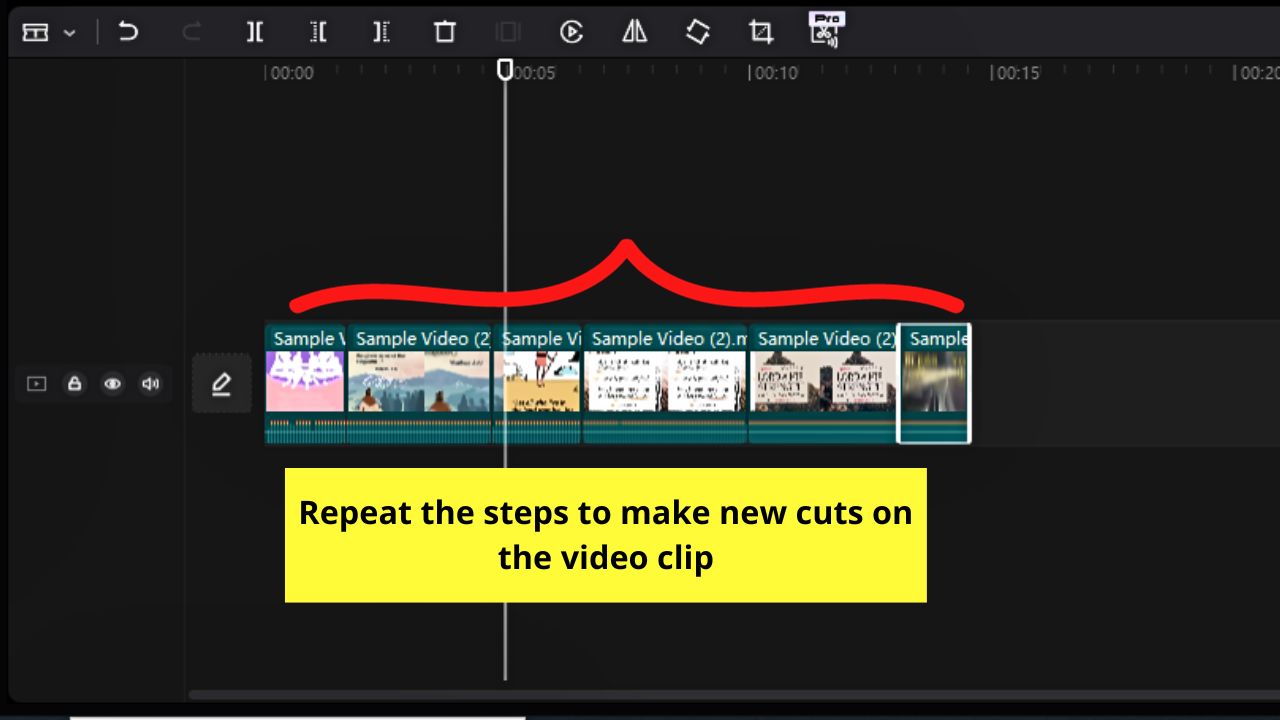
Then repeat these two steps until you have cut all the unnecessary parts on the video clip.
If you prefer a quicker method, cut the video clip using a keyboard shortcut.
How to Cut on CapCut Mac Using Keyboard Shortcuts
Keyboard shortcuts hasten any process that they stand for. And this includes cutting on CapCut Mac.
To cut on CapCut Mac using the keyboard shortcut, follow these steps:
Step 1: Move the playhead on the part of the video clip you’ll cut
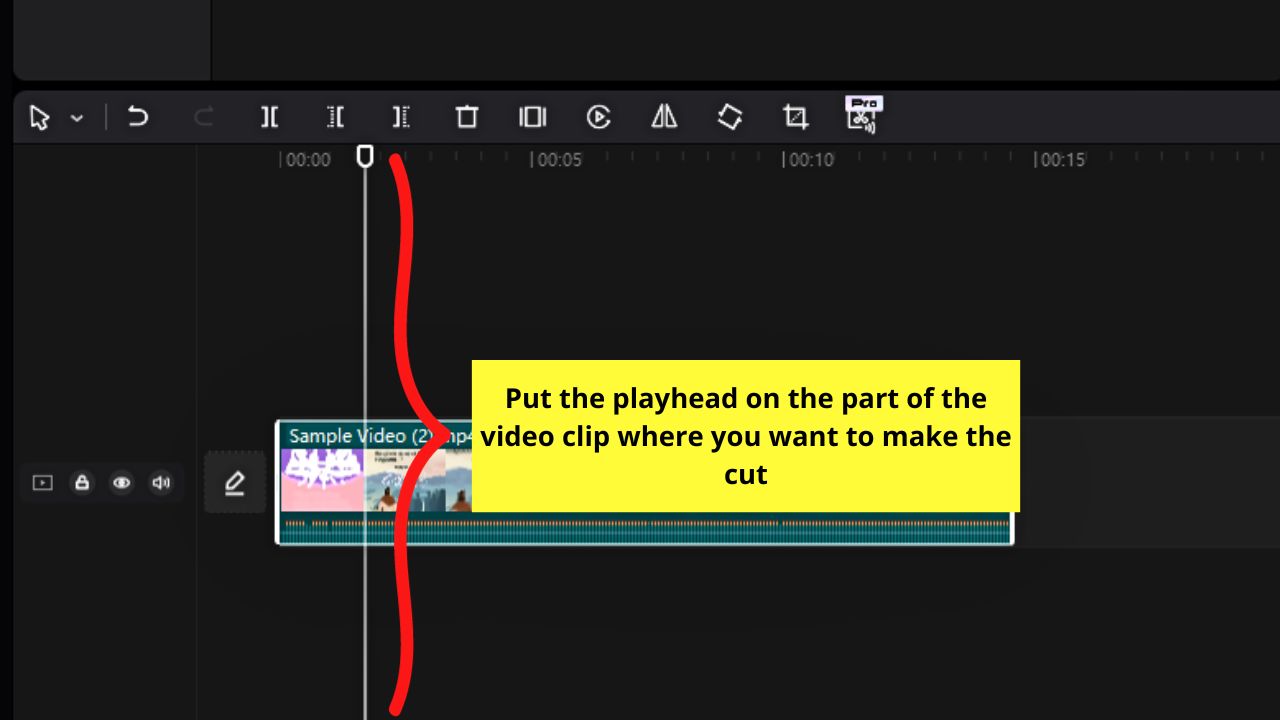
This marks the spot where you want to make the cut or split on the video clip.
Step 2: Press “Cmd + B” on your keyboard

And like the previous method, you will see a line separating the cut portion of the clip from the rest of the footage.
Repeat these two steps until you have cut all the scenes you want to separate from the main video clip.
Now, if you prefer a quicker cutting method on CapCut Mac, the third method below might be the one you need.
How to Cut on CapCut Mac Using Split Mode
“Split Mode” on CapCut is a useful video editing feature in that you can make several cuts in one go.
No need to repeatedly reposition the playhead and click “Split” or press “Cmd + B.”
To cut on CapCut Mac using Split Mode, follow these steps:
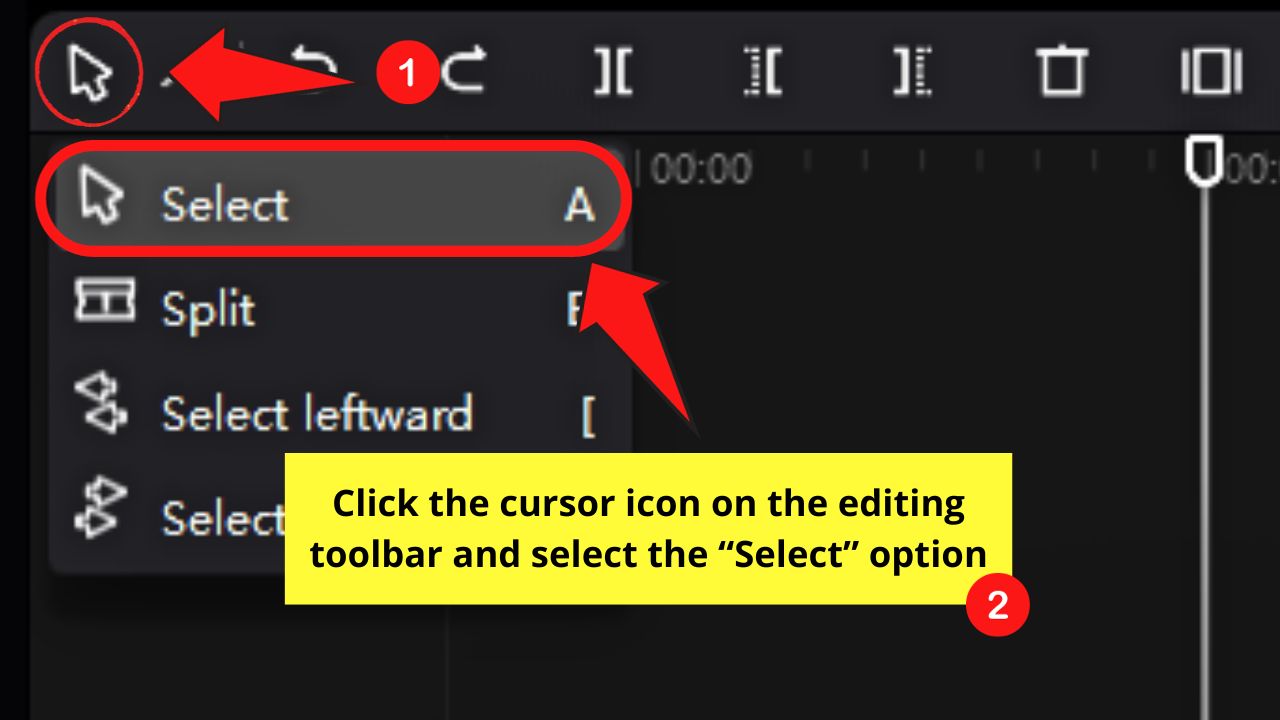
Step 1: Click the cursor icon
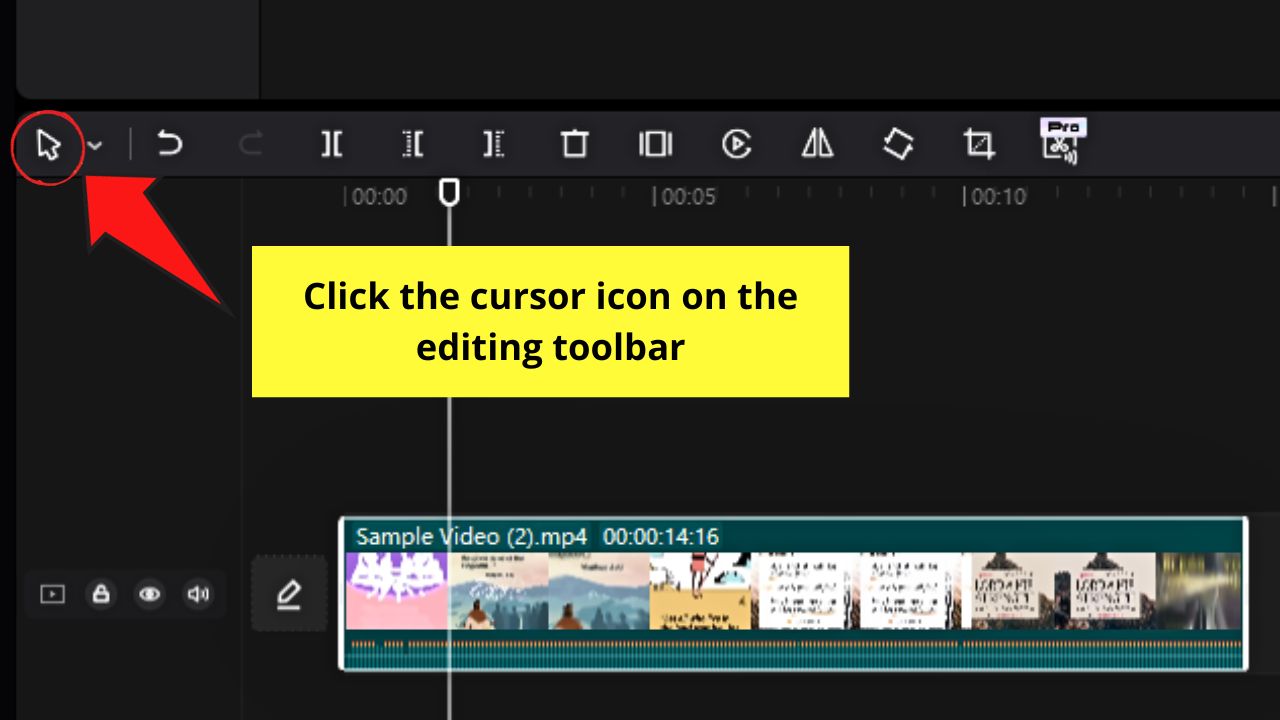
This is the leftmost button on the editing toolbar above the video timeline area.
Step 2: Select the “Split” option
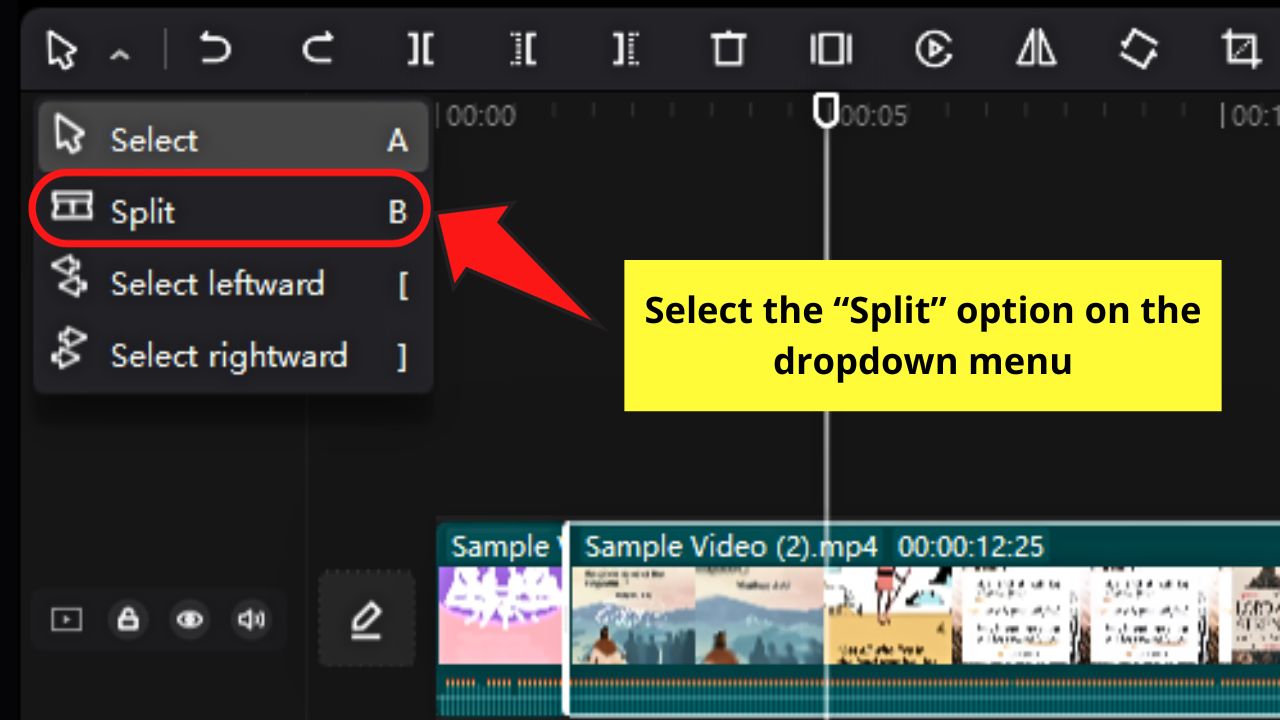
You’ll find this after the “Select” option on the dropdown menu.
You’ll also see a “B” on its right side.
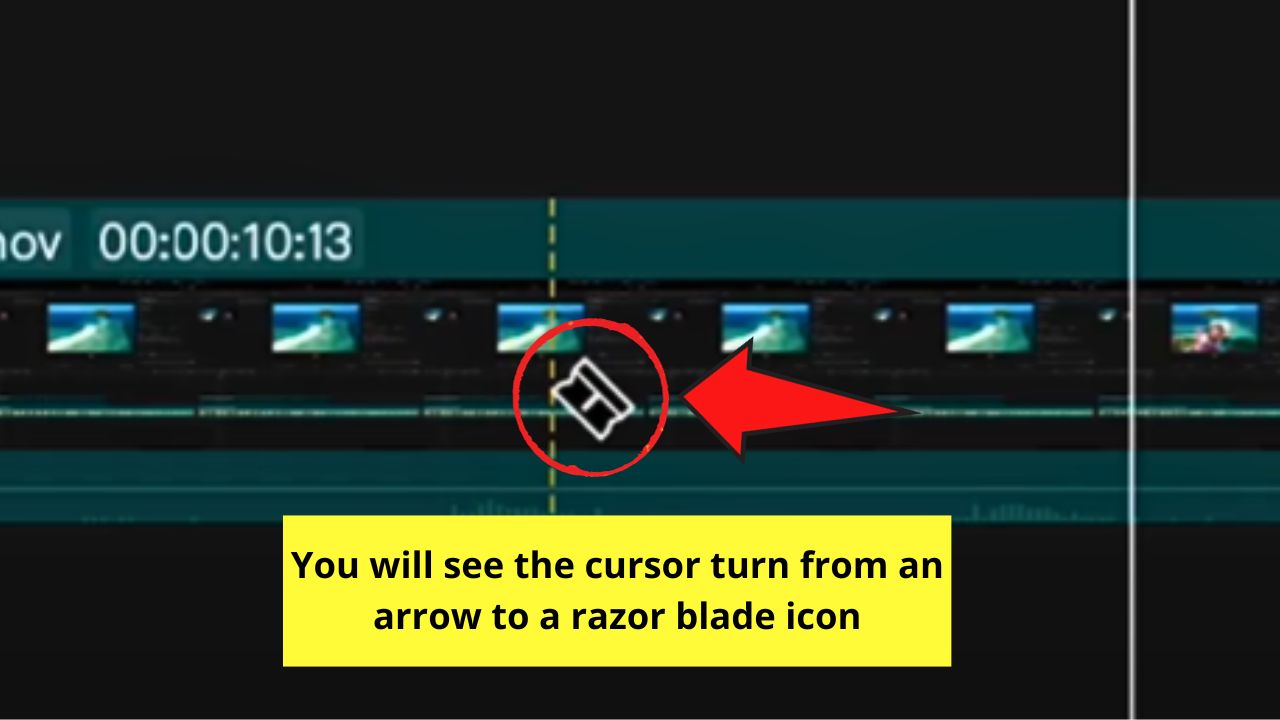
After clicking “Split,” the cursor changes from an arrow to a yellow razor blade once it hovers over the video clip.
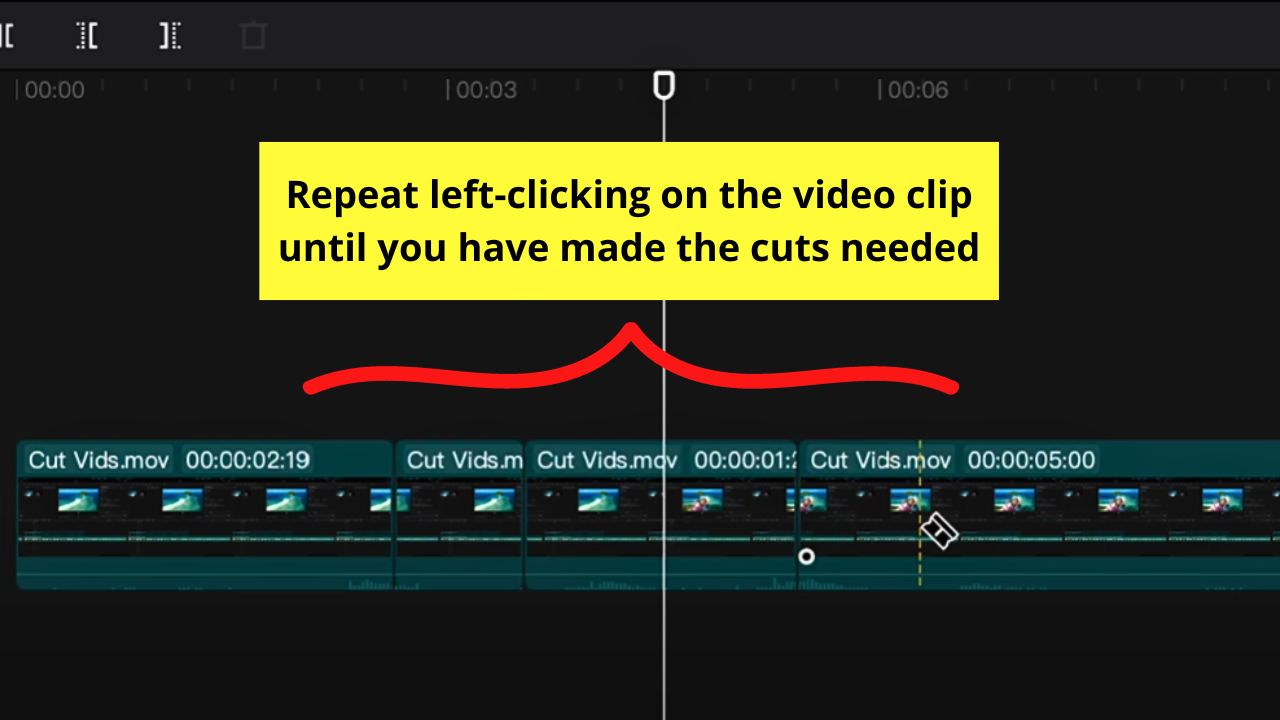
Step 3: Left-click on the part of the video clip you’ll cut
The part you clicked is then separated from the main video clip.
Repeat until all the cuts needed on the video clip are made.
Then click the cursor icon again on the toolbar and click “Select” to return to using the arrow cursor.
With all these methods mentioned, you can now separate or even remove a part of the video clip on CapCut.
And, if the cut part of the footage is still needed, add motion blur to make the transition between the two clips smoother.
Frequently Asked Questions about How to Cut on CapCut Mac
What is the “Cut” feature on CapCut for?
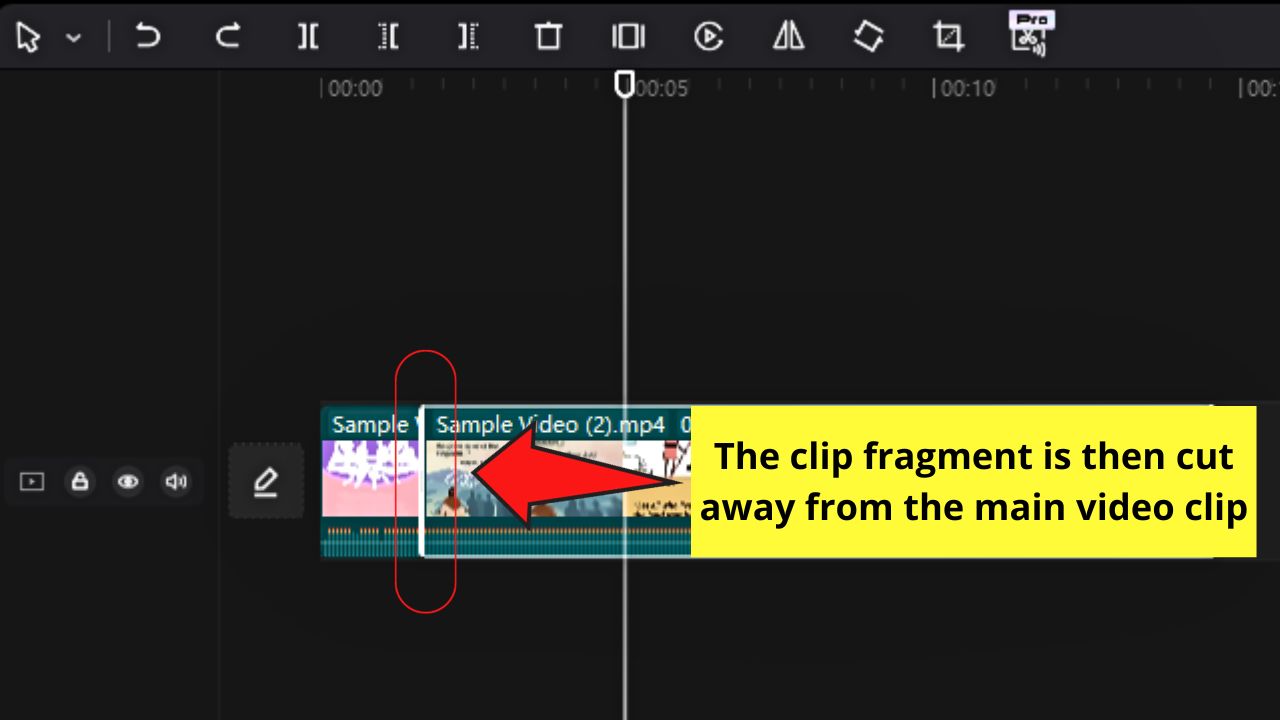
CapCut’s “cut” feature can be used to shorten the video clip’s duration by removing certain parts. Another reason is that you can split one fragment of the clip from the main one and insert a new clip between those scenes.
How many cuts can you make when editing a video on CapCut?
As the “Cut” feature in CapCut is an essential tool for creating professional videos, there is no limit to the number of cuts you make. But, the more cuts you make on the video clip, the less editing space to work on.
What happens after cutting a video clip on CapCut?
After you cut a video clip on CapCut, fragments are made on it. There will be a gap between the split or cut portions of the clip that you can address by adding motion blur or transitions.