

Wait! I want to create a notebook effect on my design without using a template or even a graphic element from Canva’s gallery.
But that involves many lines, and I don’t even know how to draw a single line in Canva.
Well, it turns out there are two very easy methods you can use to draw lines in Canva, depending on what way you choose to do so.
How to Draw a Line in Canva
To draw a line in Canva, simply use the “Draw beta” app and then free-draw a line using your mouse. If you are looking for a perfectly straight line, you can also drag & drop pre-existing lines from Canva’s very own “Elements” library.
Drawing Lines in Canva: Steps Any Beginner Should Know
What makes Canva so great is that you’ve got plenty of options to choose from when it comes to adding design elements to your project.
And that includes the way you draw lines in Canva. As mentioned above, there are 2 methods of how you can draw lines in the graphic design tool.
But, whatever you choose, you’ll have to know how to do the task either way. Let’s start by learning the first method.
Granting that you’ve already created or opened a design file, let’s head to the editor page.
Freehand Method of Drawing Lines in Canva
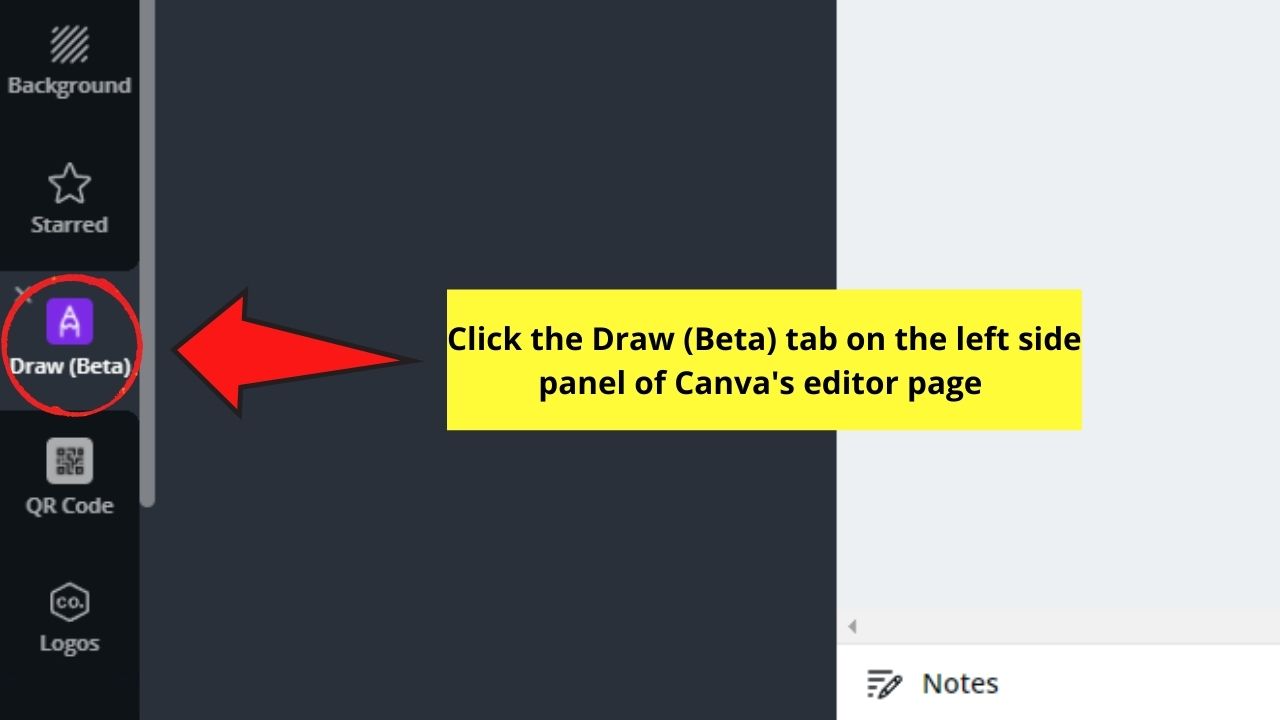
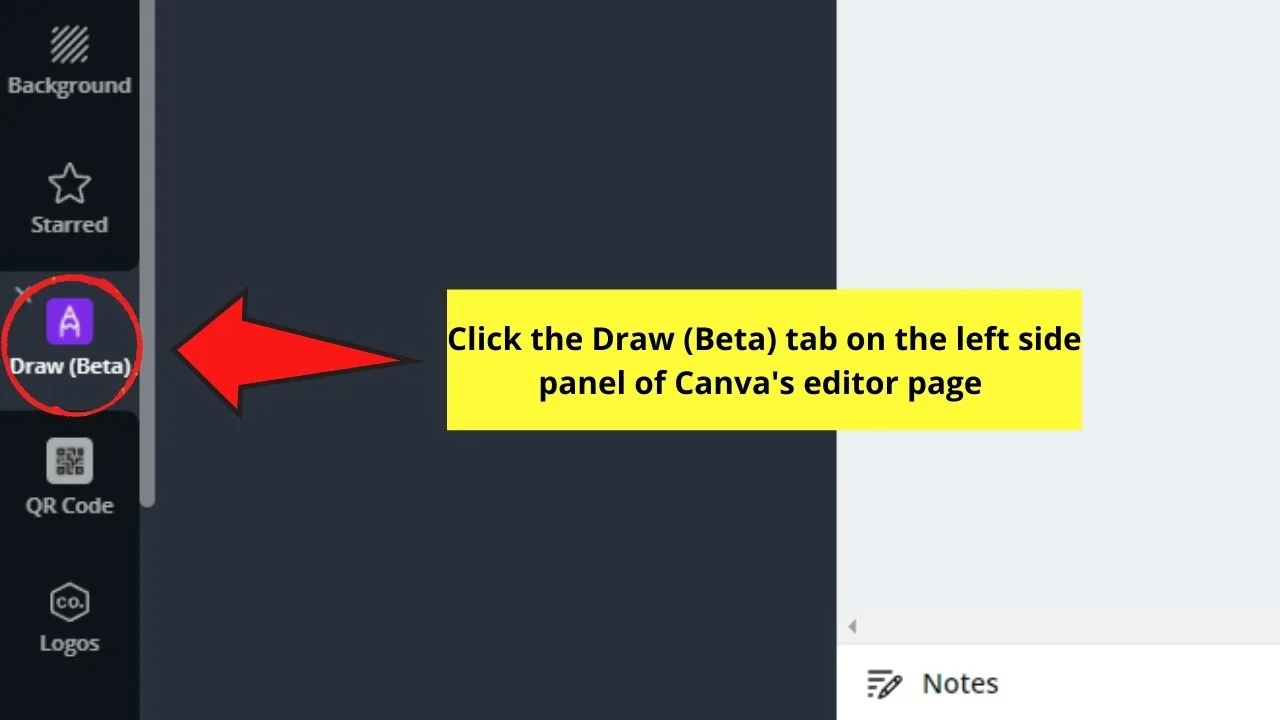
Step 1: On the editor page, head to the left side panel and select the Draw (Beta) tab.
If, however, you haven’t added the Draw (Beta) app, head to More and scroll through the apps and integrations in the gallery until you find it.

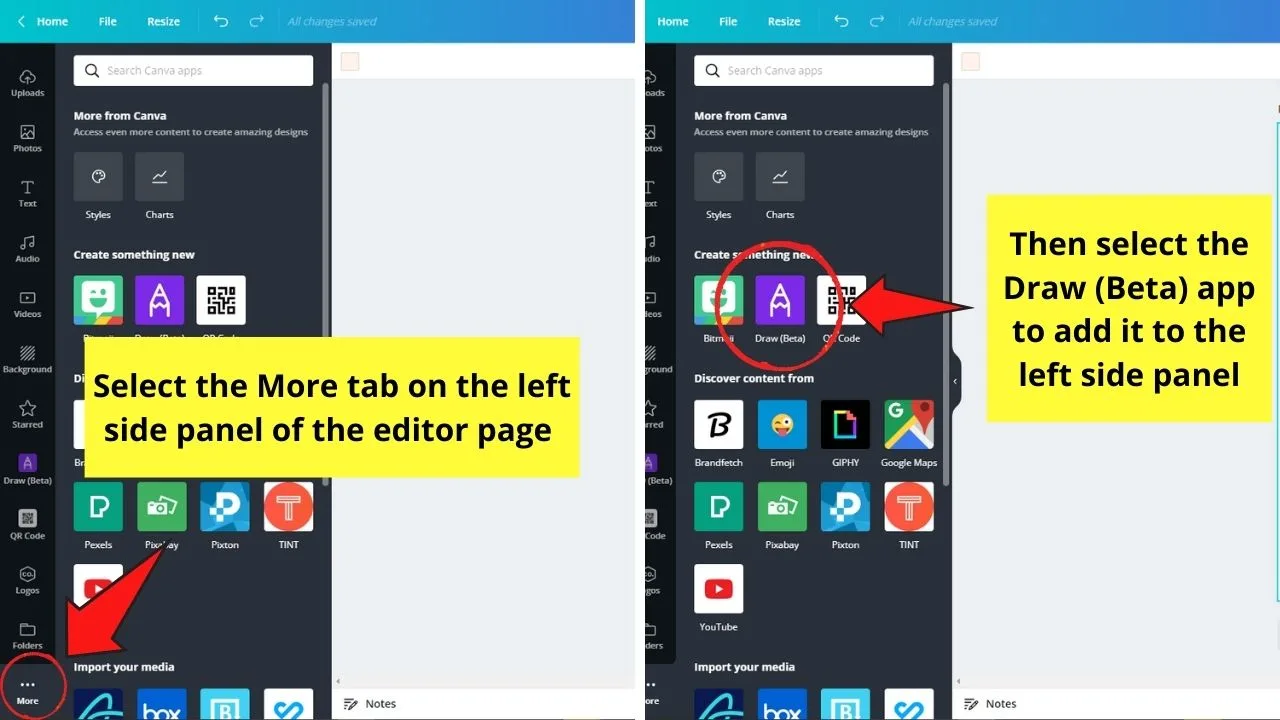
Once you’ve located the Draw (Beta) app, click on it to make it appear on your left side panel.
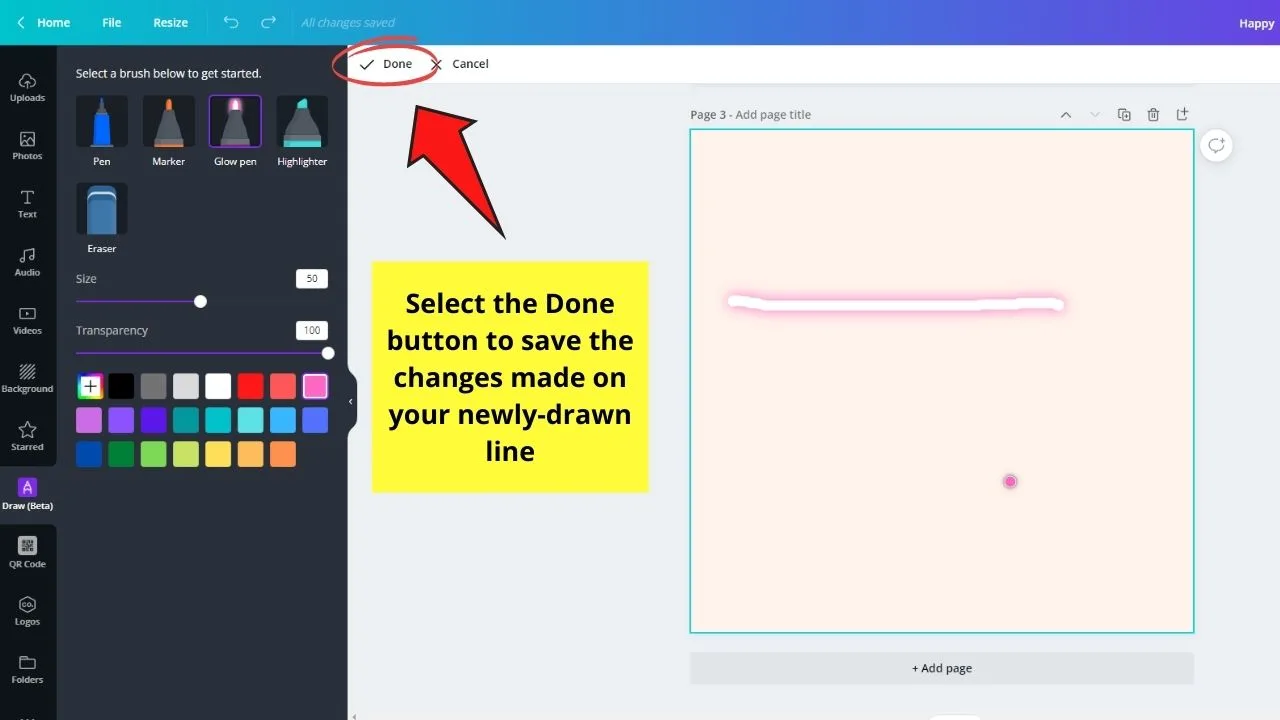
Step 2: In the Draw (Beta) gallery that appears, select what kind of brush you’ll use. There are 4 options up for grabs, depending on your purpose.
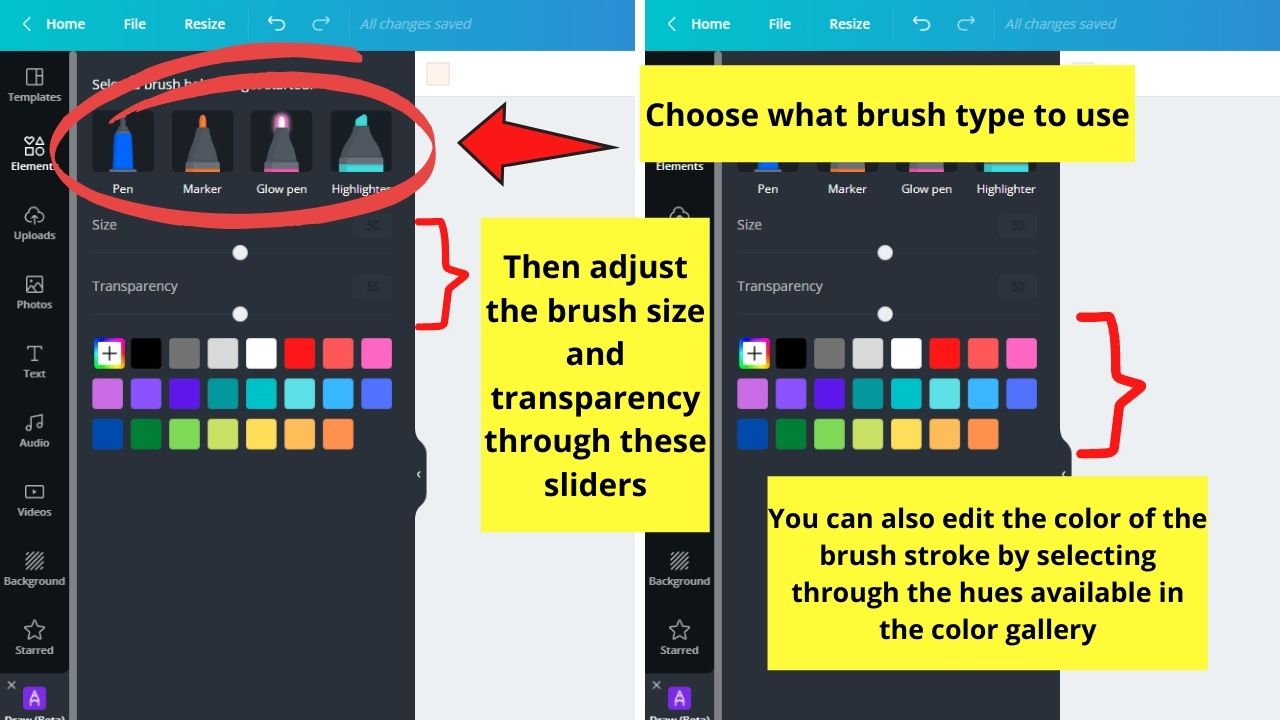
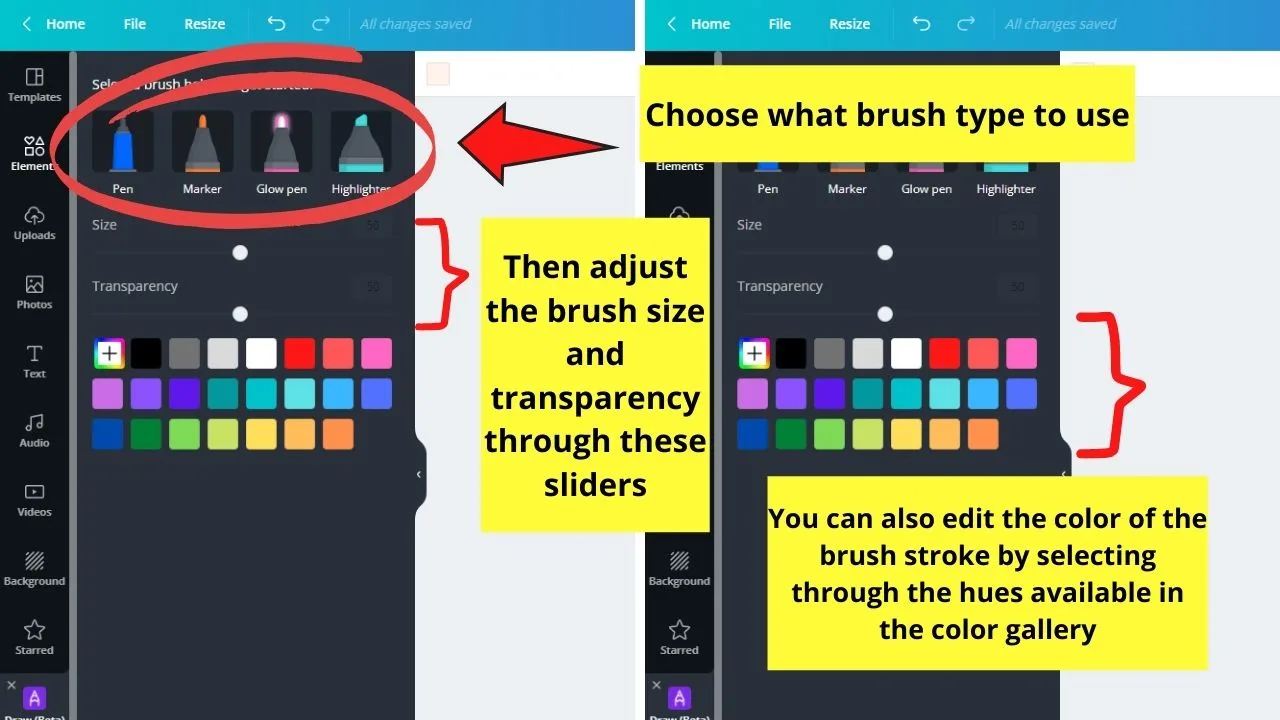
Click on one of the brush options. You can adjust the brush size and its transparency by dragging the respective sliders.


You can even change the color of the line you’re making by choosing from the hues available on the color gallery presented.
Step 3: After you’ve set how the brush stroke looks like, it’s time to draw a line.
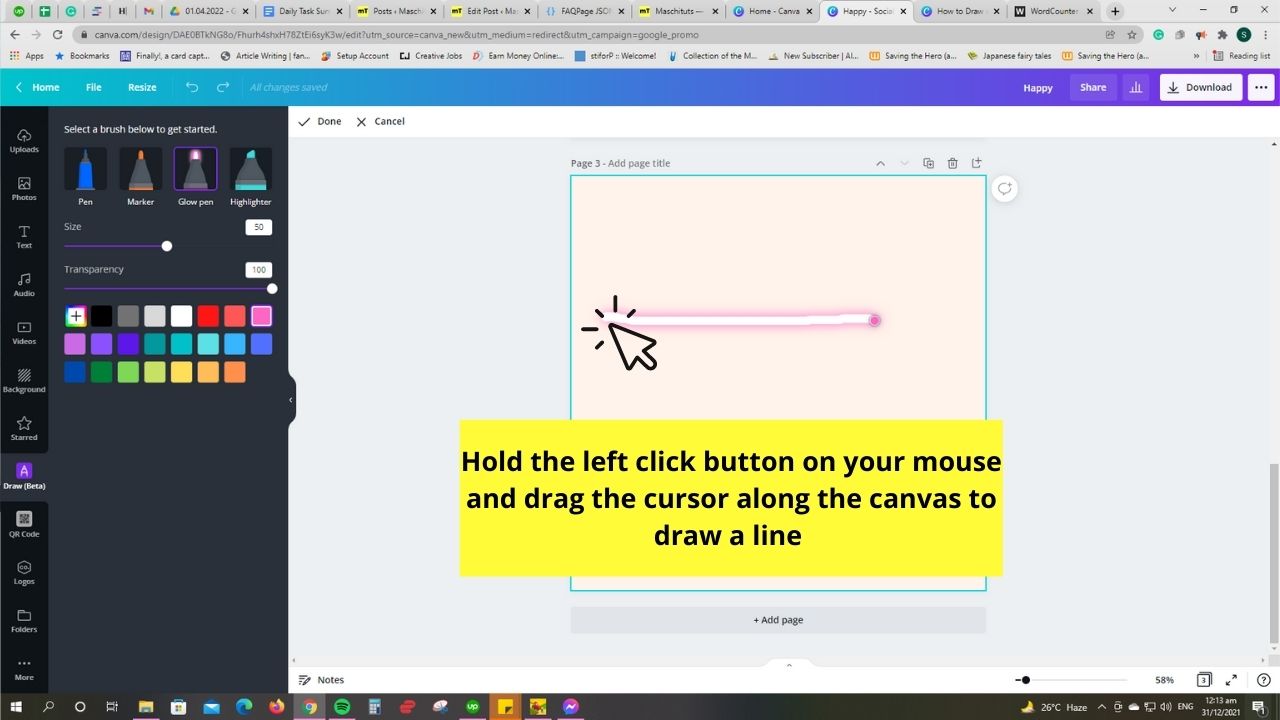
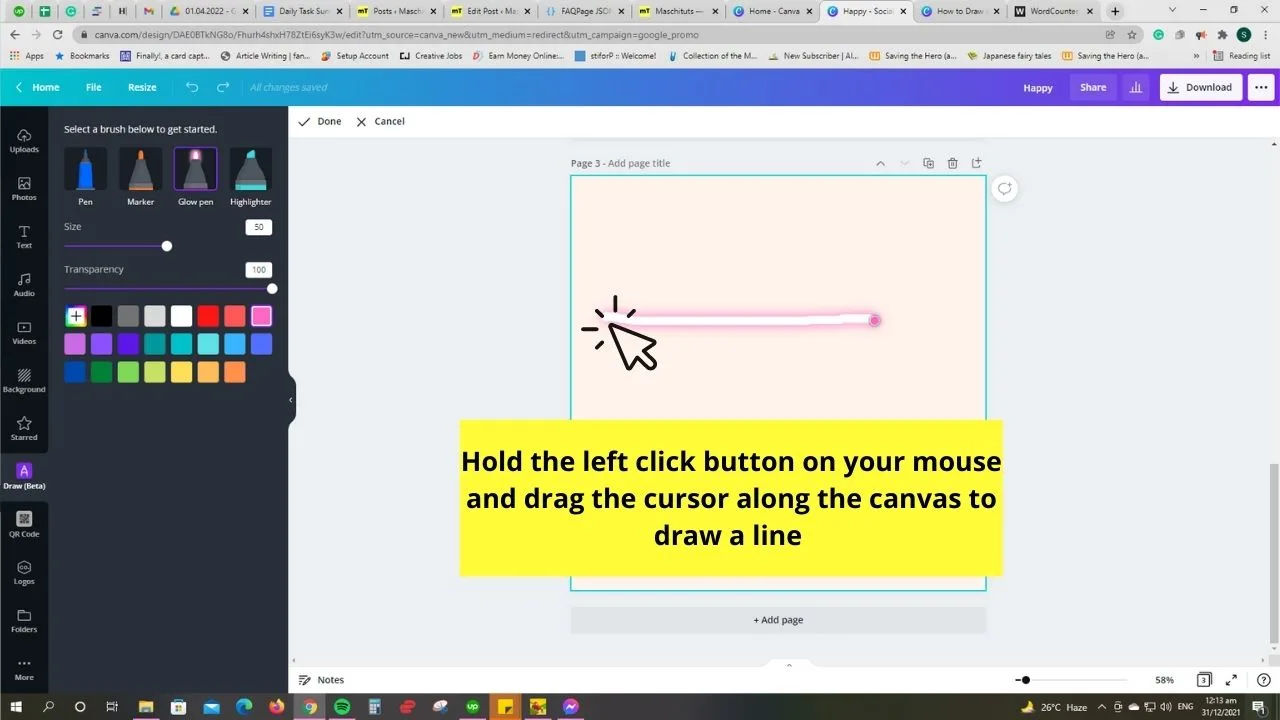
To do this step, hold the left click on your mouse as you drag the cursor across the canvas. Keep on doing this step until you’ve reached the desired length of the line.
Step 4: Once you’re good with how the line looks like, head to the editor toolbar and select the Done button to save the changes you created.
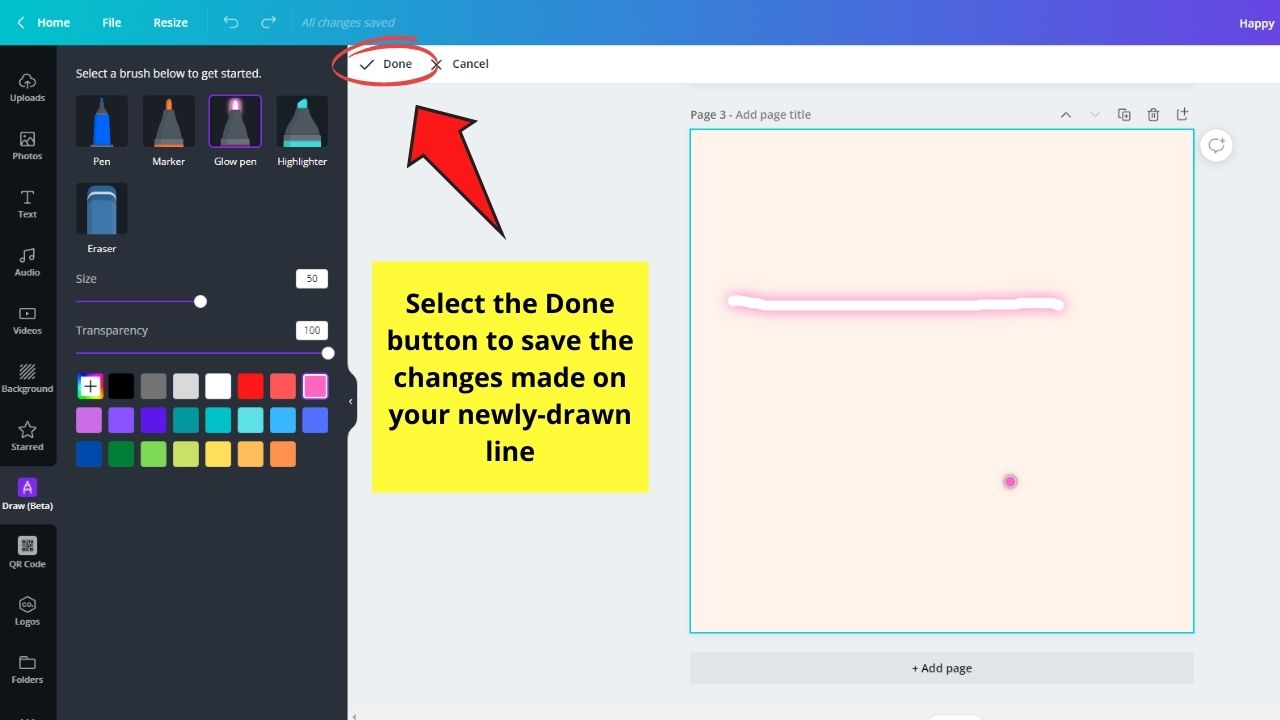
Allow Canva a few moments to refresh the page and save the newest changes you created.
If you prefer to create a straight line rather than a squiggly one, then by all means try the second method.
Drawing Perfectly Straight Lines in Canva Through Elements
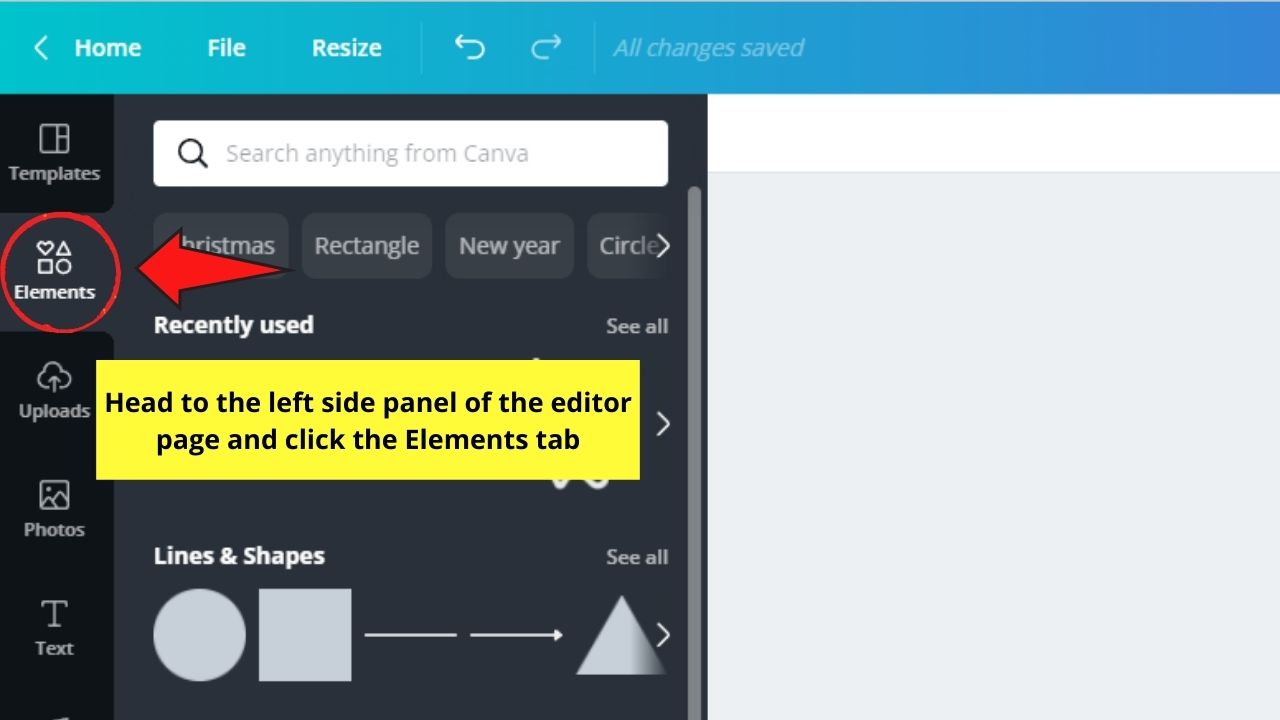
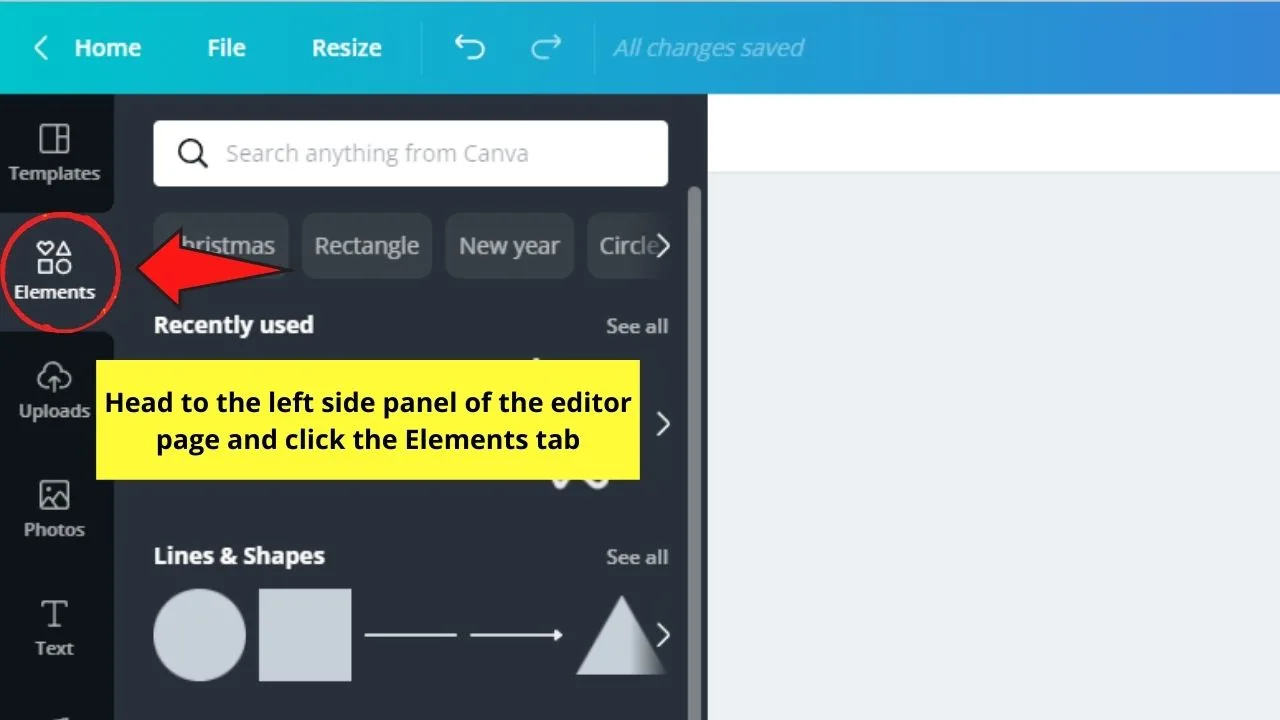
Step 1: On the editor page, head to the left side panel and click the Elements tab.
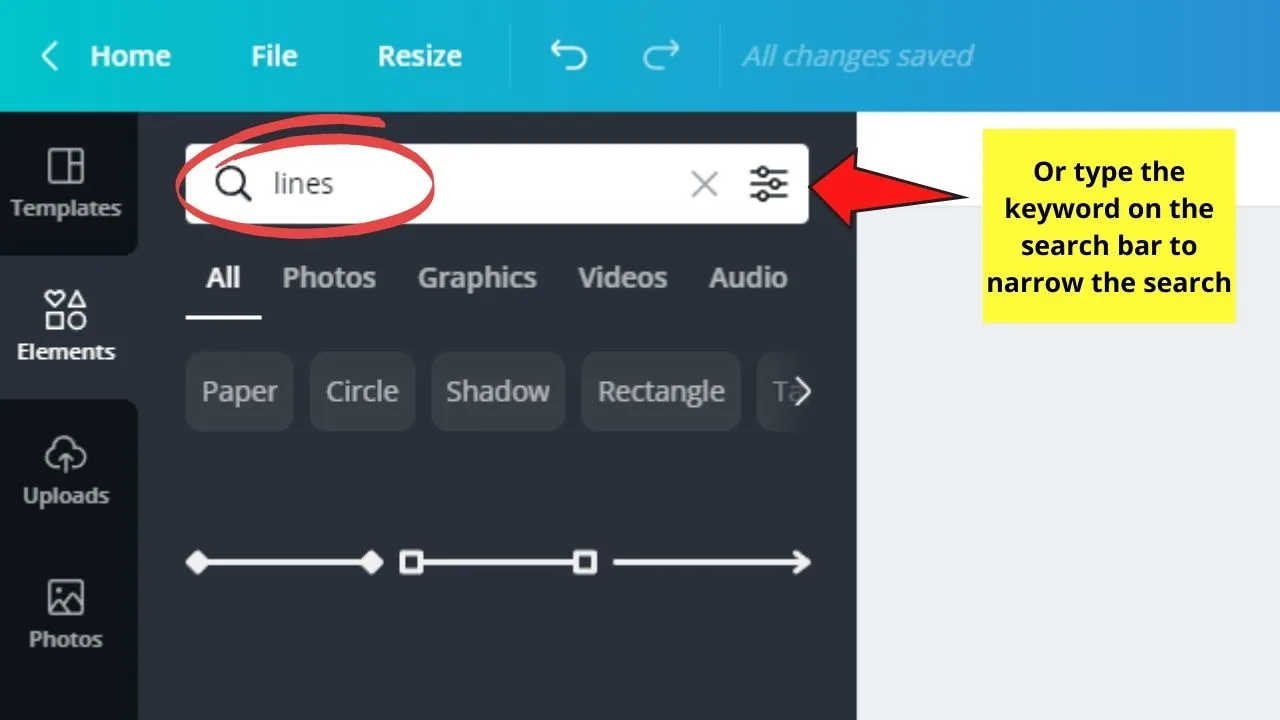
Step 2: In the gallery that appears, locate the Lines & Shapes category. Once you find it, select the See all button.
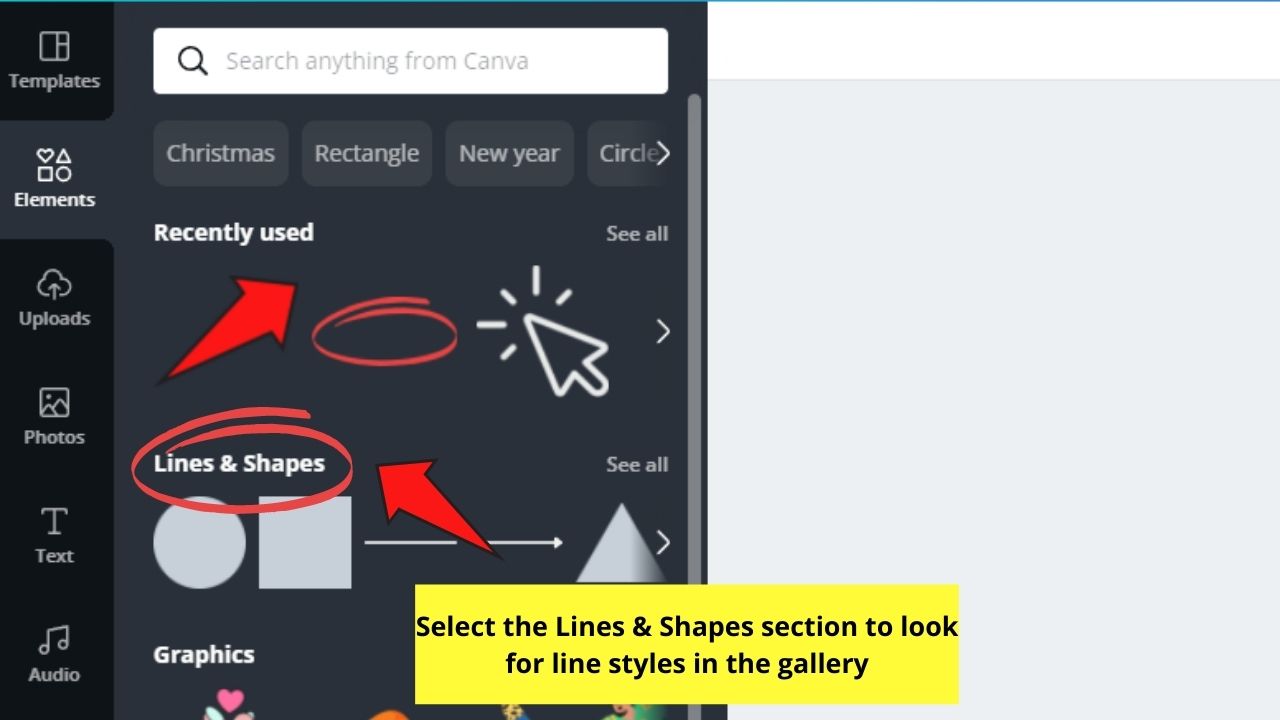

You can also browse for line styles using the search bar function.

Step 3: Once you see the line styles in the gallery, scroll down until you see what you want to use.
For sample purposes, let’s choose a simple straight line. Select that line style by dragging and dropping it on the canvas.
Step 4: If you’re satisfied with the look of your line, just leave the line as it is.
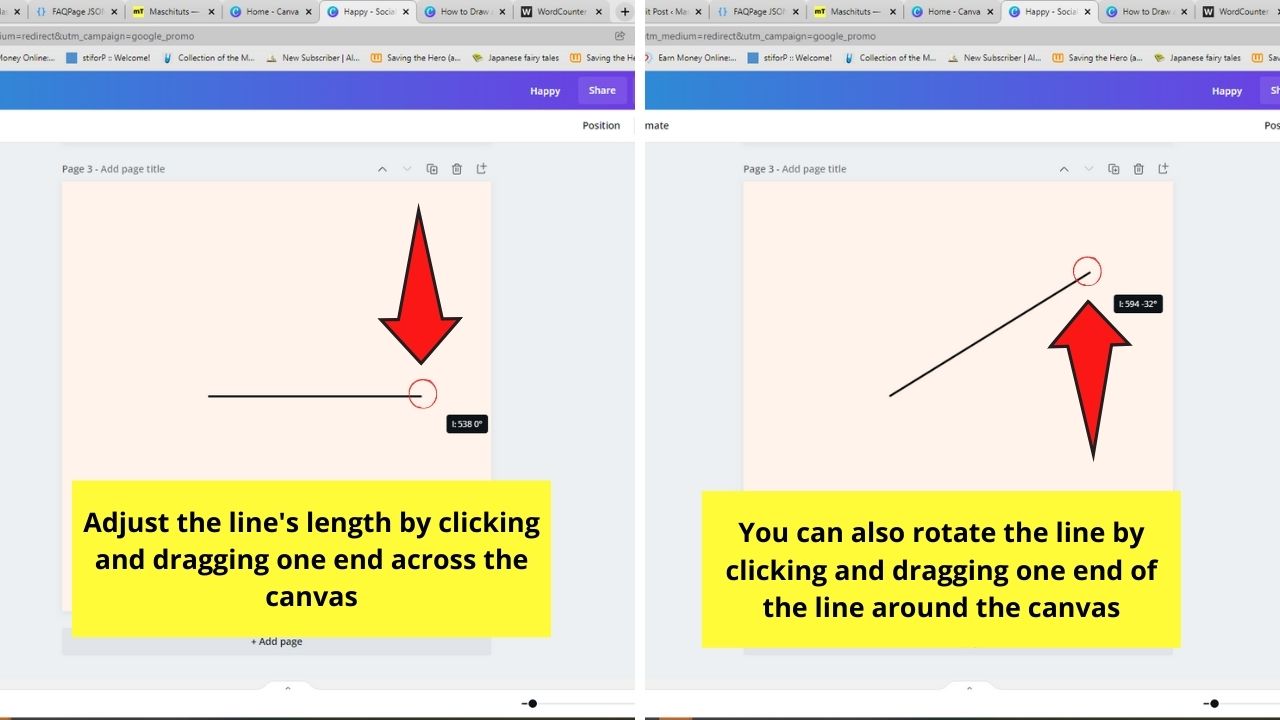
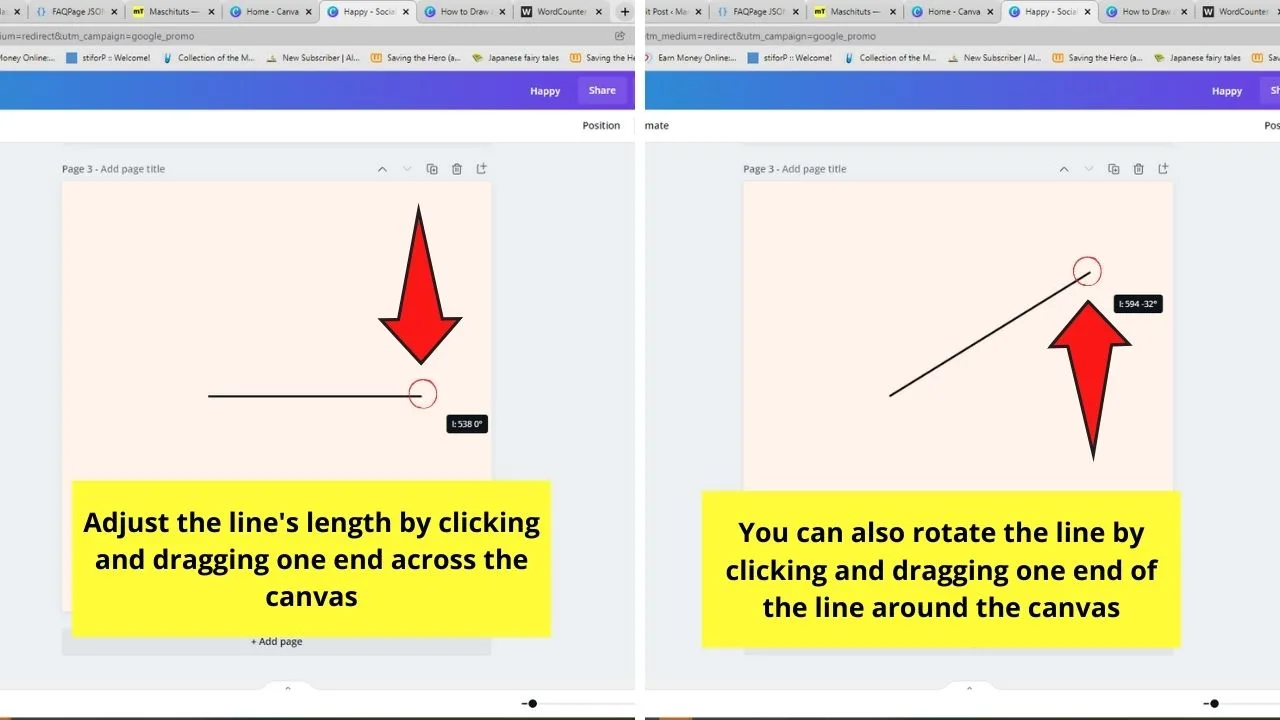
But, if you want to edit its looks, you can begin by adjusting its length. Simply click one end of the line and drag the cursor until you achieve the length you want.
You can even continue holding on to the other end of the line to rotate it.
It’s also possible to rotate lines the same way you rotate elements and images in Canva through the rotate icon.
Step 5: To adjust the thickness of your line (in simpler terms, make it thinner or thicker), simply select it and head to the editor toolbar.
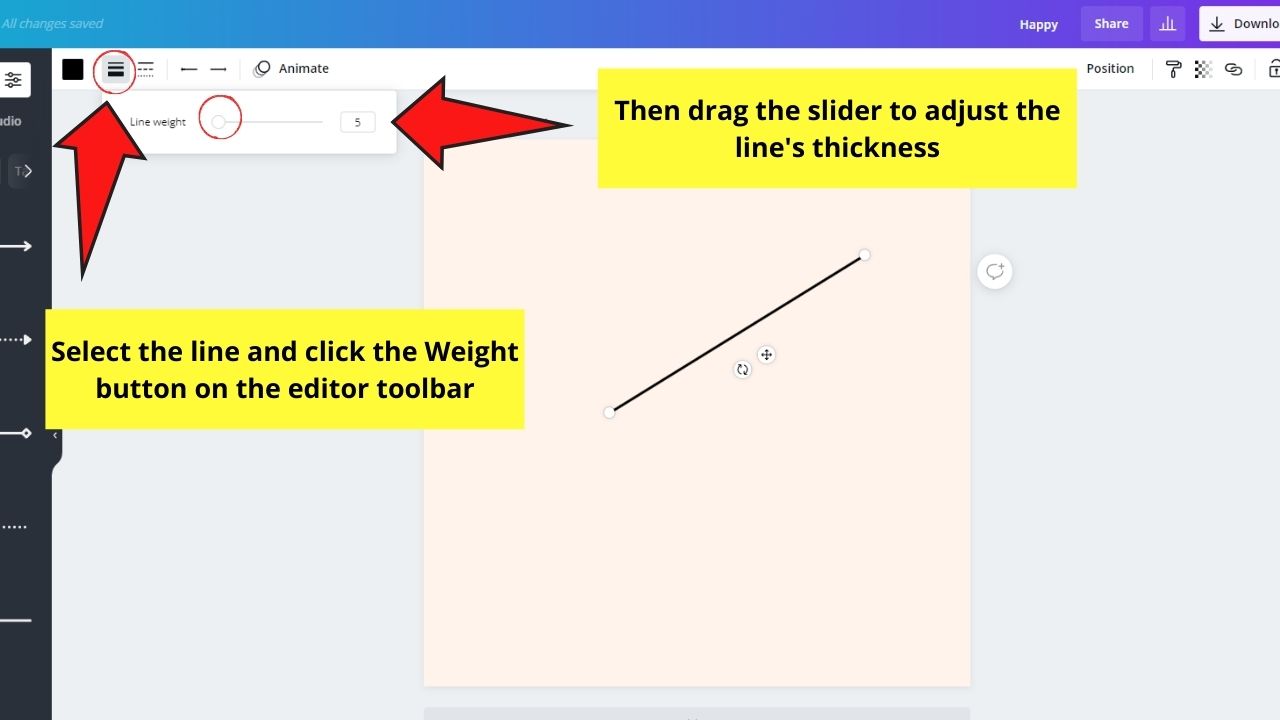
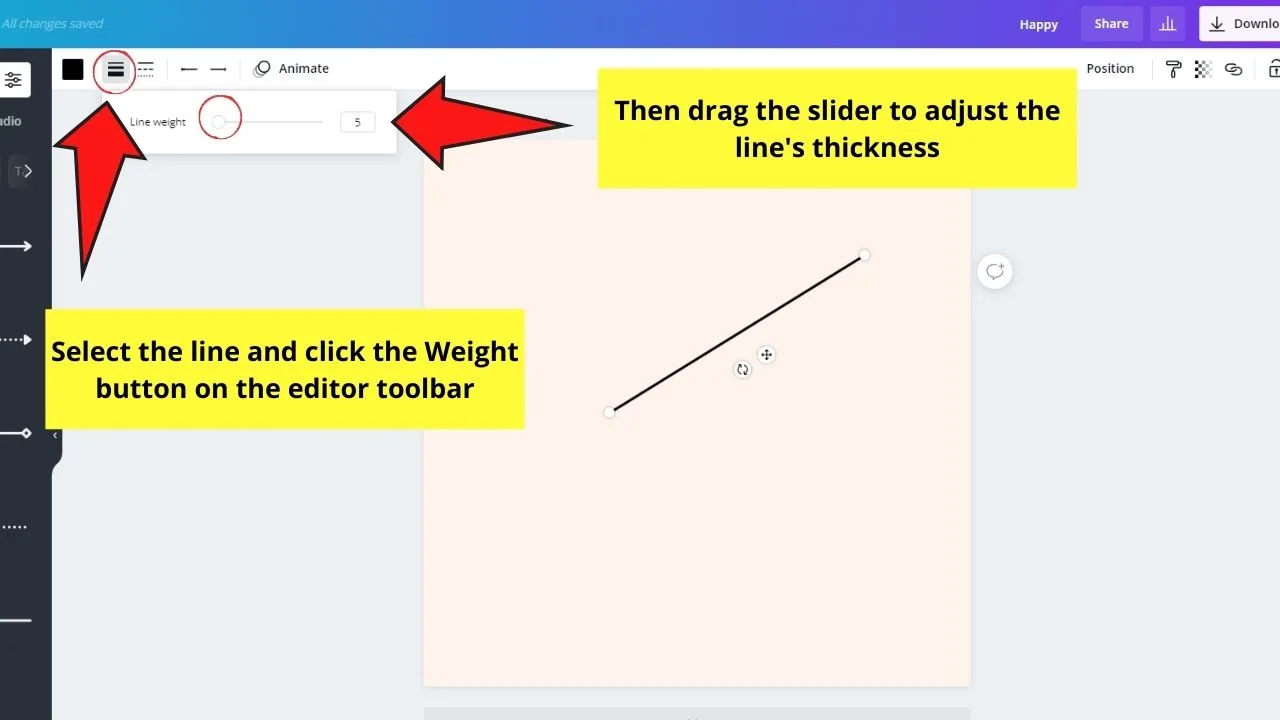
From there, click the Weight button. This will show you a slider that you can drag to increase or decrease the thickness of the line.
Step 6: Now, if you don’t want to use a simple straight line or you just want to add more effect to your design, you can change its style.
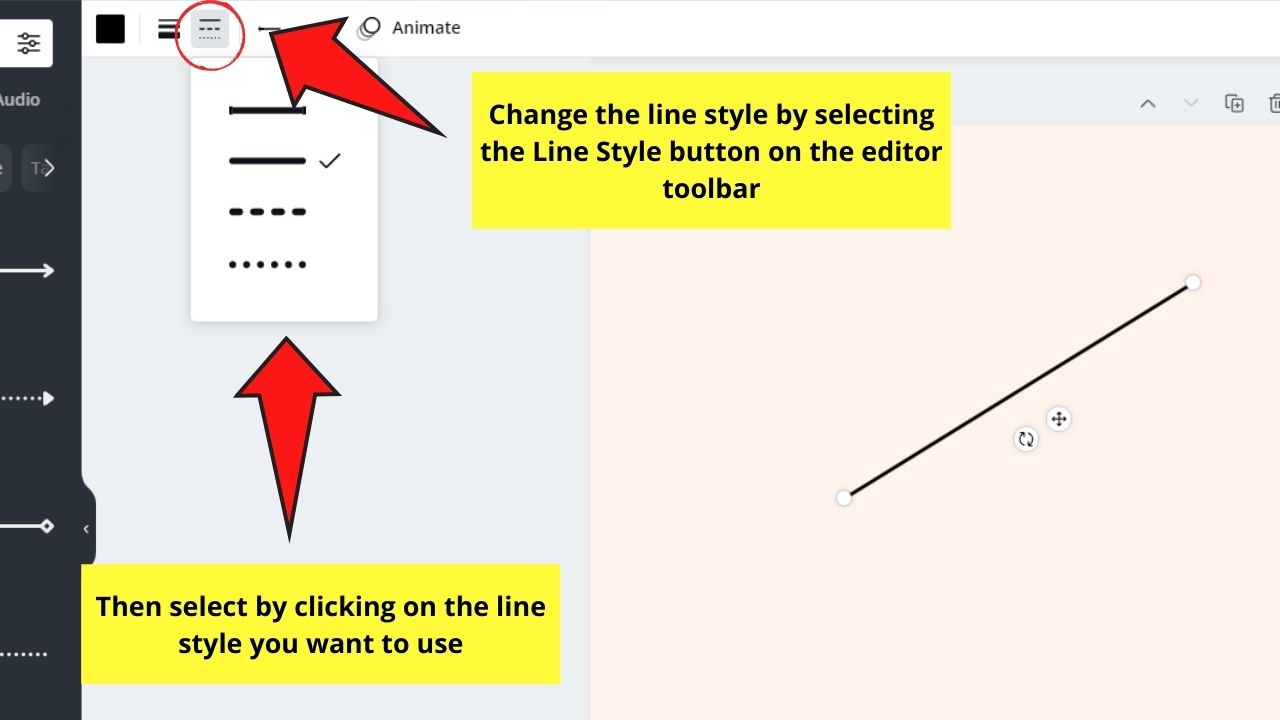
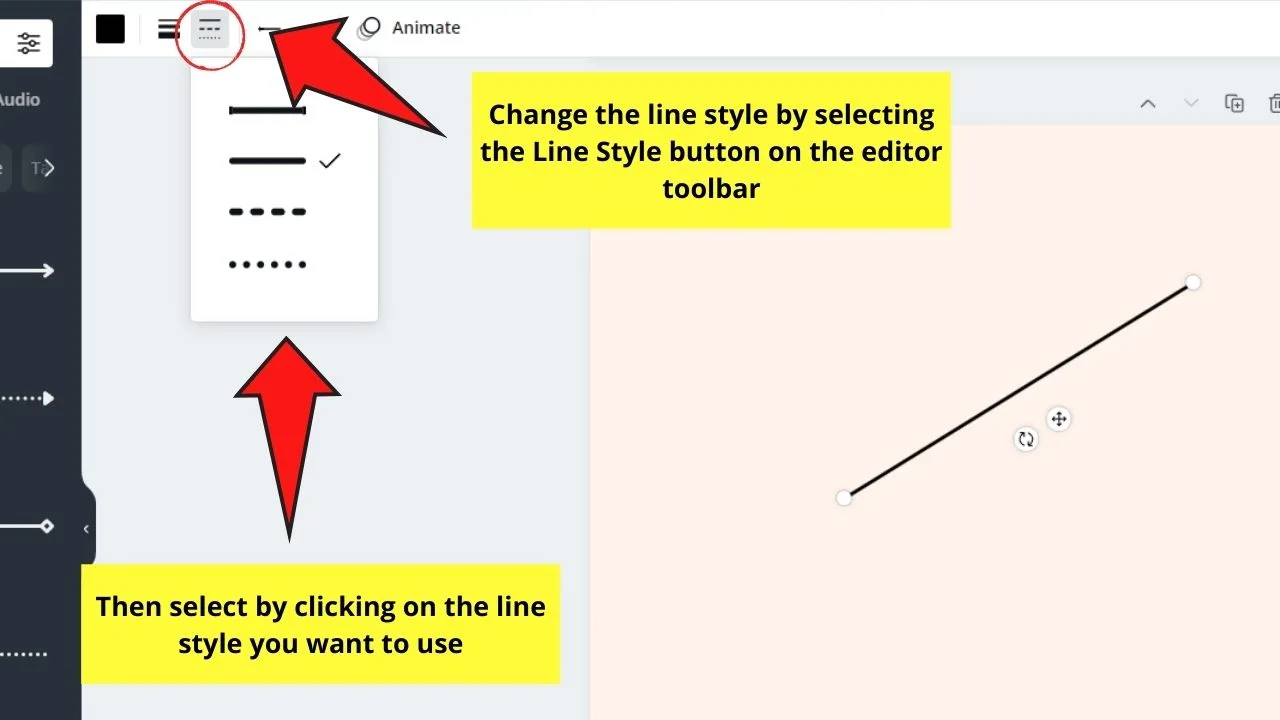
Again, select the line by clicking on it and head to the Line Style button on the editor toolbar. From there, you’ll see various line styles you can apply to the current line you’re working on.
Step 7: If you want to add more fun to your line, you can even add animations. But first, make sure you’ve selected the line by clicking on it.
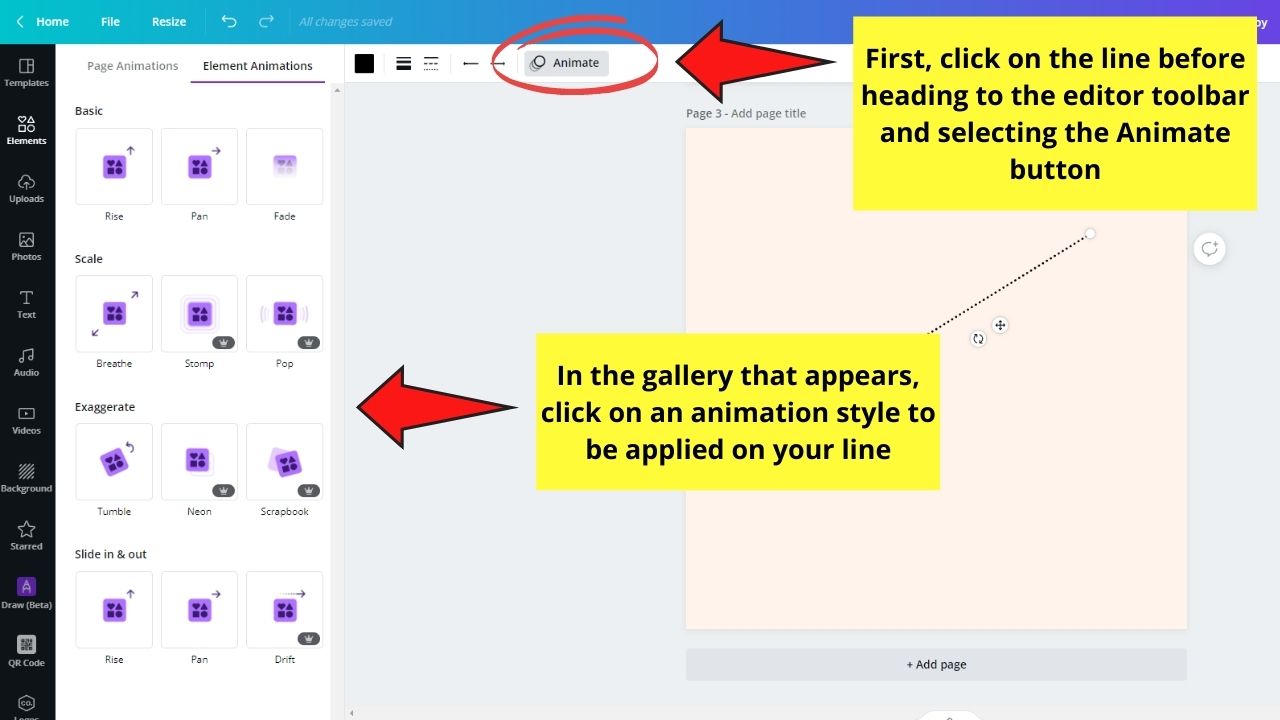
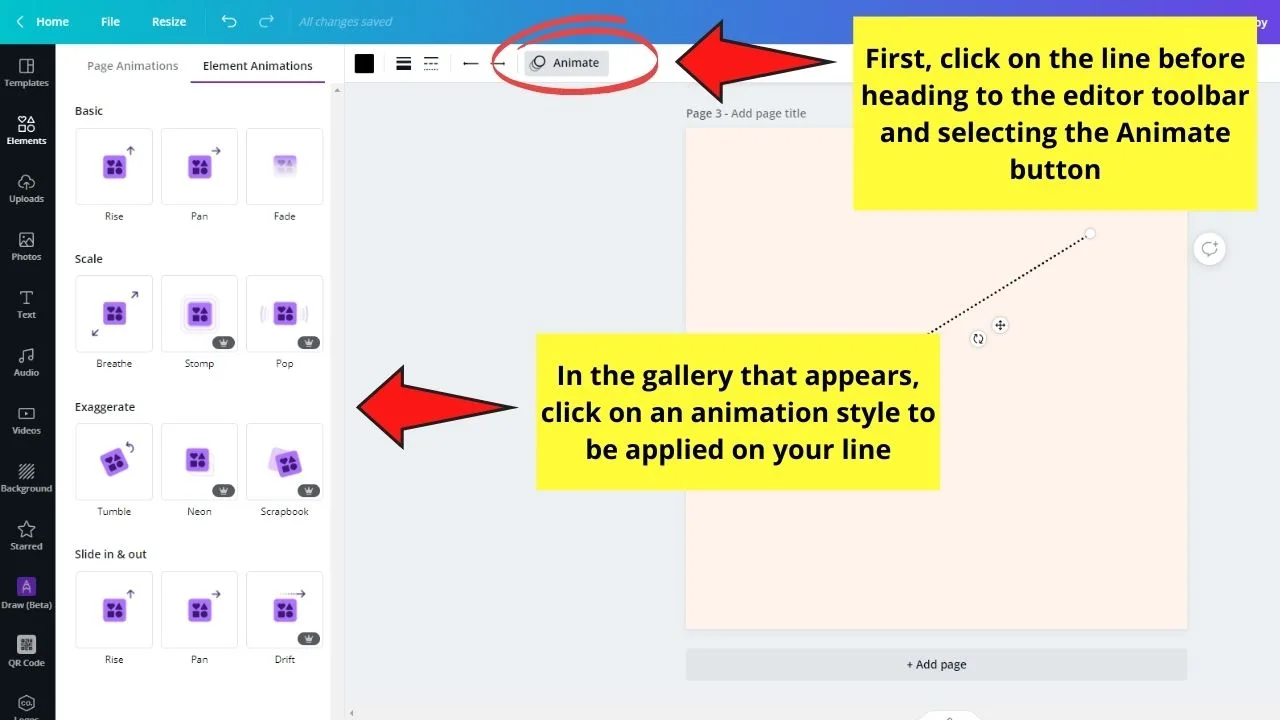
Then, head to the editor toolbar and select the Animate button. From there, choose what animation style you want to add to your line from the gallery.
And, just like that, you’ve drawn lines on Canva as professional graphic artists do. Just remember the steps I taught you, and you’ll never go astray.
How to curve a line in Canva
Now that we have sorted out how to make a straight line in Canva, let’s have a look at whether you can also do curved lines in Canva.
In fact, there are ways to get curved lines into your Canva design.
However, you can’t turn a straight line into a curved line in Canva.
That’s really a pity because the absolute best way to curve lines in Canva would be to simply add a straight line by pressing “L” on your keyboard and then have some “curving or bending” option that will let you curve the line according to your needs.
For the moment, this is wishful thinking, though.
With that said, for the moment, to make use of curved or bended lines, what you need to do is to go to “Elements” in the left sidebar and then search for “Curved Line.”
You will then find a handful of different curved lines that you can simply drag & drop into your design.
The downside of this is obviously that you can’t change the “arch” of the line itself. So you would need to find one in the “Elements” tab that fits your purpose and does not need to be customized.
While you can’t curve lines in Canva, you can actually curve text, which is pretty cool.
If you are interested in knowing more about that very feature, check out our article: “How to curve text in Canva.”
It would be nice to get a feature like that for lines as well…
…so let’s hope Canva will take care of this in one of the upcoming updates.
Fingers crossed.
Making arrows in Canva
There are two ways to make use of arrows in Canva.
First of all, if you want to make your life easy, simply go to the “Elements” tab in the left sidebar and then search for “arrows.”
You will find plenty of arrow elements to choose from. Simply drag & drop these onto your design to use them.
If you would like to make your own arrows (only straight arrows can be created in Canva as of now), here’s how you would do that:
- Press “L” on your keyboard to add a straight line to your design
- Make sure to select your line by left-clicking on it
- On top of your design, click on “Line end” and then choose the arrow style (if you do want to have an arrow that points in both directions, you would have to do the same with “Line start” as well
How to make curved arrows in Canva, though?
The answer here is that you can’t make curved arrows in Canva. And this is because you can’t curve lines in the first place.
With that said, to make use of curved arrows in Canva, you would need to find such an element under Canva’s “elements” tab in the left sidebar. There are plenty of curved arrows for you to choose from there. Simply drag and drop the desired curved arrow onto your design to make use of it.
Frequently Asked Questions about How to Draw a Line in Canva
How to bend a line in Canva?
Canva does not let you bend lines. For the moment, if you would like to make use a bended line in Canva, you will need to choose a bended line element from Canva’s “Elements” tab.
Where is the line tool in Canva?
Strictly speaking, there is no “Line tool” in Canva as we know it from other graphic design software such as Photoshop and Illustrator. However, there are certain parameters you can adjust as far as lines go. To access these options, simply left-click on your line and then above your design, you will find “Line color,” “Line Style,” “Line start” and “Line end” options that you can customize.
Can you draw a line in Canva?
To draw a line in Canva, go to “Apps” and then install the “Draw Beta” app. Alternatively, if you would simply like to use a straight line in your design, you can just press “L” on your keyboard and a straight line will automatically be added to your design.
How to make a line straight in Canva?
There is currently no way to make a line straight in Canva.


Hey guys! It’s me, Marcel, aka Maschi. On MaschiTuts, it’s all about tutorials! No matter the topic of the article, the goal always remains the same: Providing you guys with the most in-depth and helpful tutorials!

