

Lines. Lines. Lines.
These seemingly plain design elements can do so much for your Canva design — if you know how to use them accordingly.
Whether they’re straight, wavy, thick, thin, or zigzag in form, lines have a way of changing how your design ends up.
You just need to discover its usage — and how to make — them properly.
But, if you’re aiming to create thin lines in Canva, unfortunately, there isn’t a one-click button to make one.
Yet, it doesn’t mean that you can’t do anything to achieve it.
So, how indeed do you make thin lines in Canva?
How to Make Lines Thinner in Canva
The simplest way to make a line thinner in Canva is to click on the line, then select “Line style” in the toolbar above the design and then simply decrease the “Line weight.”
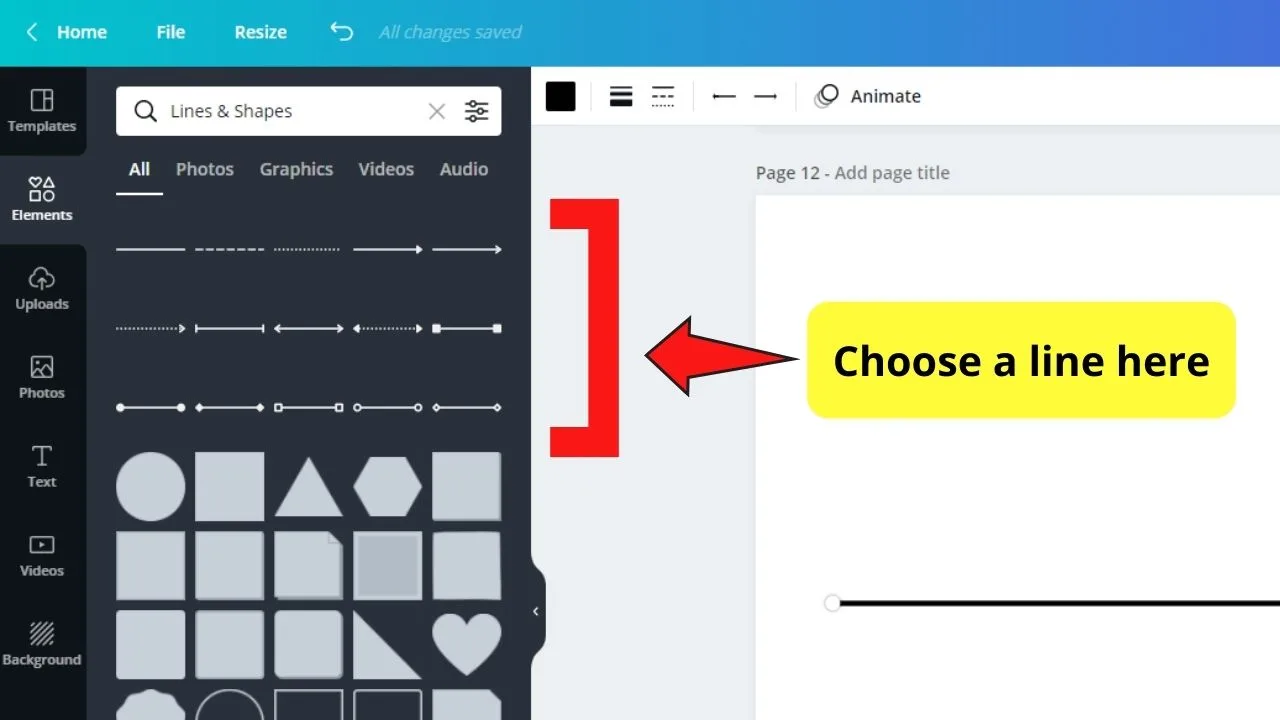
Step 1: Head over to the “Elements” tab on the left-side menu of Canva’s screen.
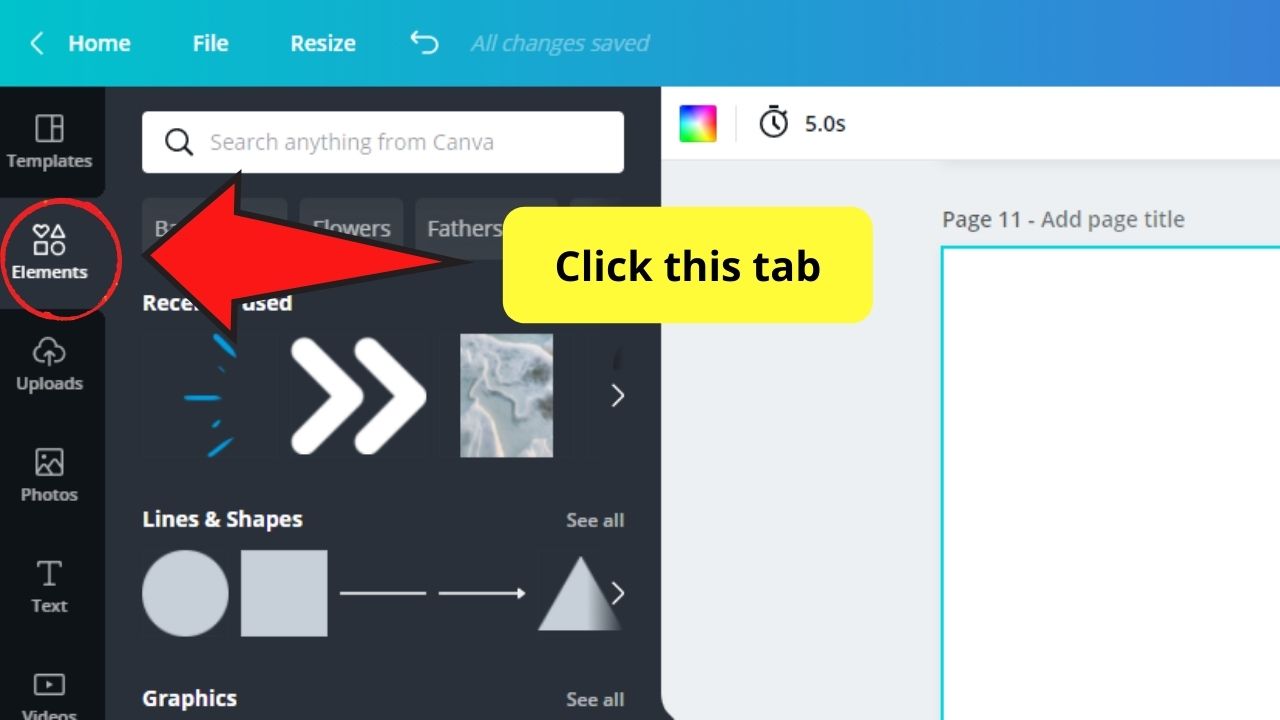
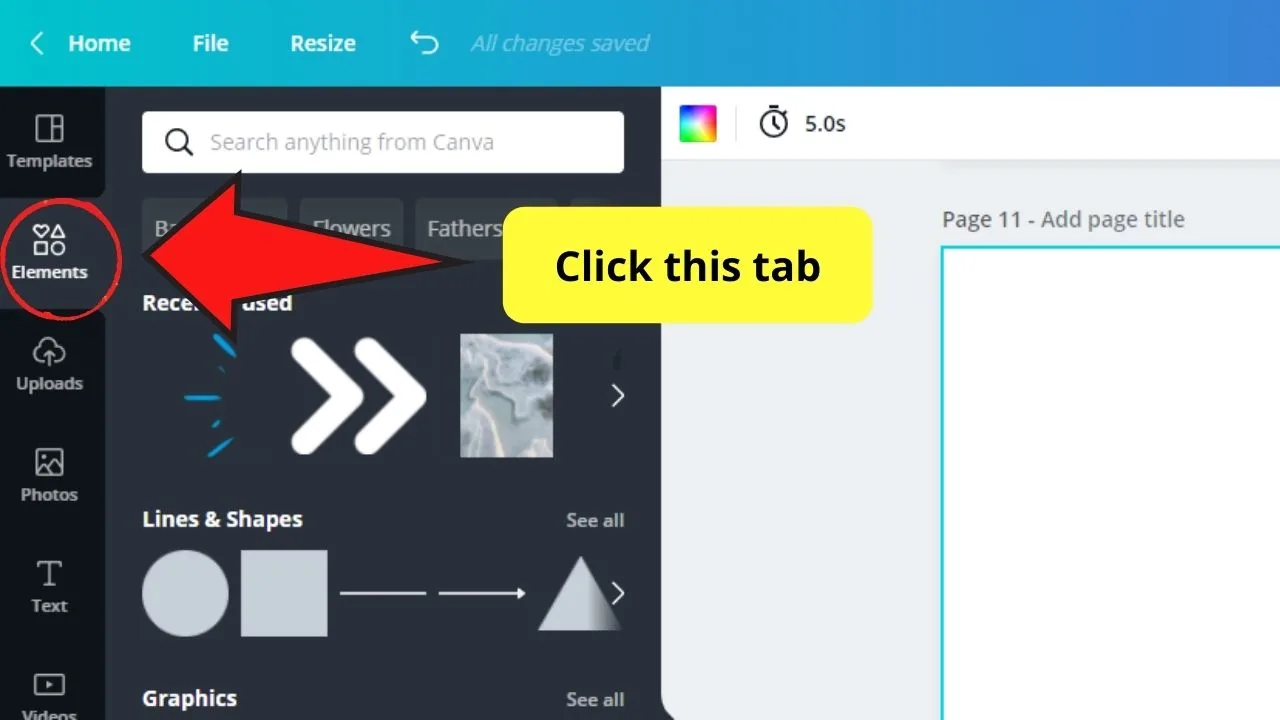
Step 2: Select the “Lines and Shapes” option to pick out a line to use.
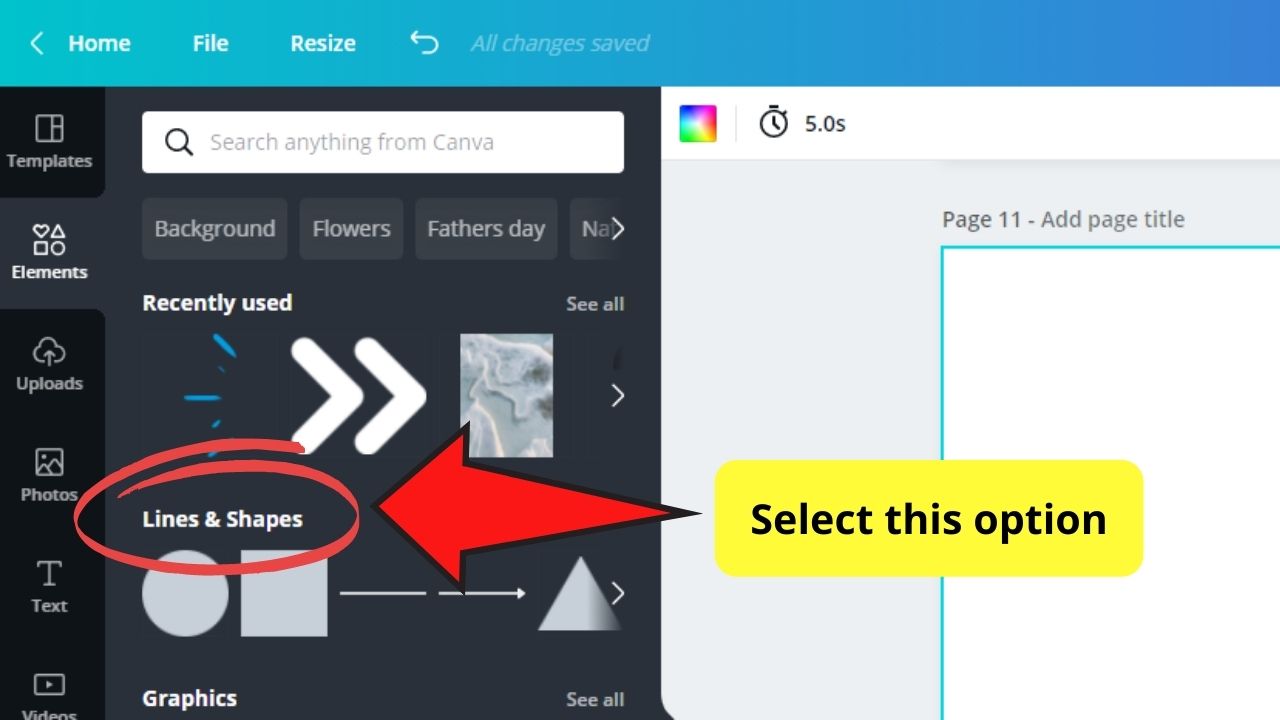

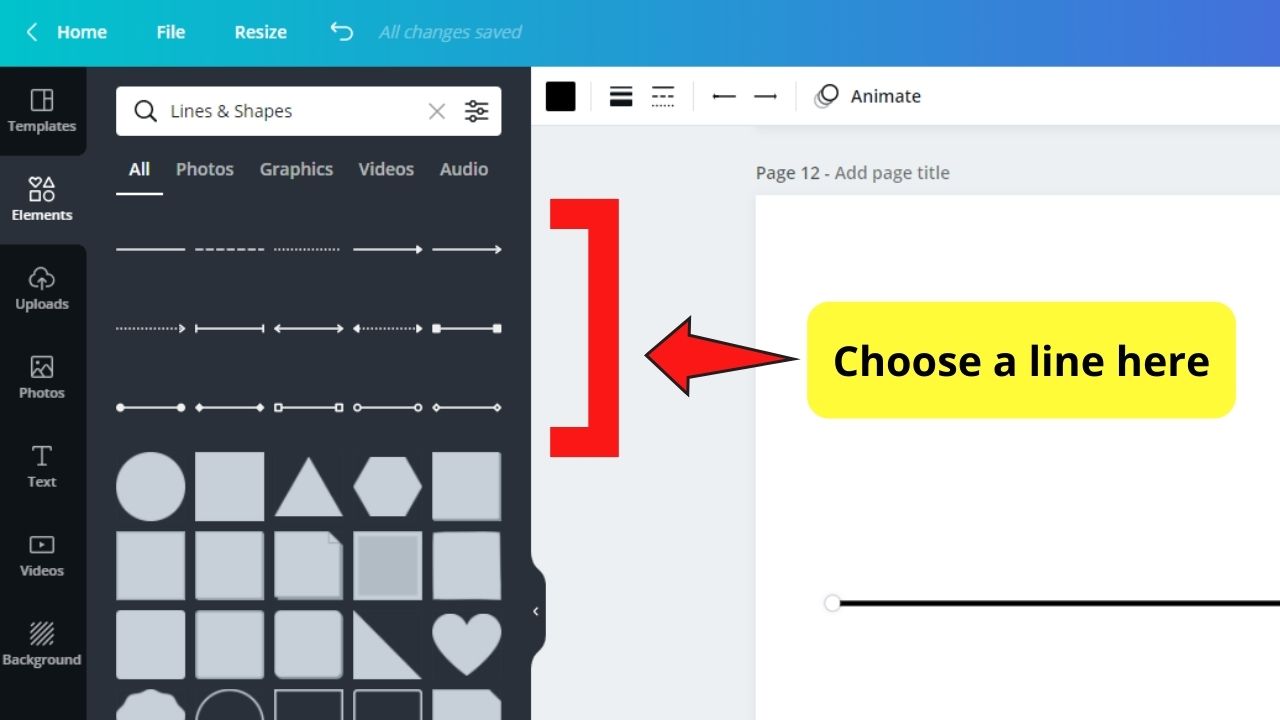
Step 3: Click on the line type you’d like to use and drag it to the blank canvas.
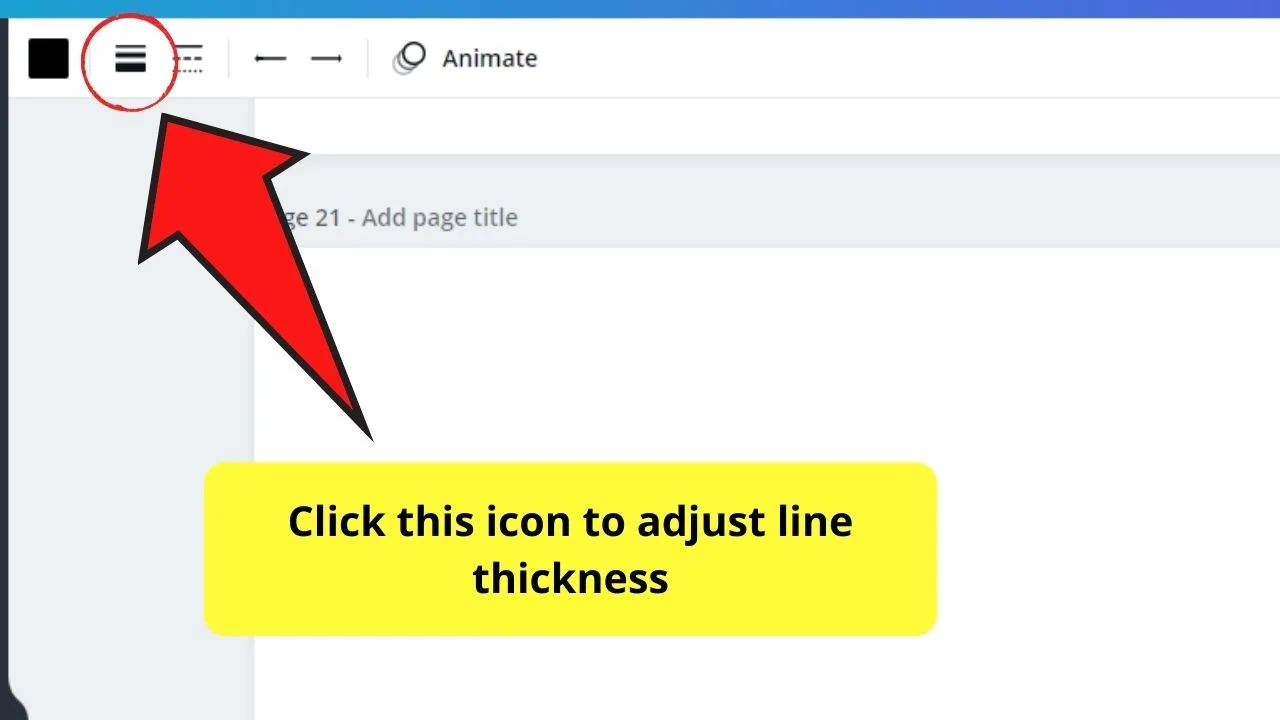
Step 4: Tap on the line once to activate the toolbar. Click on the “Border style” button, which appears as a triple line icon.

Step 5: In the dropdown menu that appears, drag the slider to the left to make the line thinner.
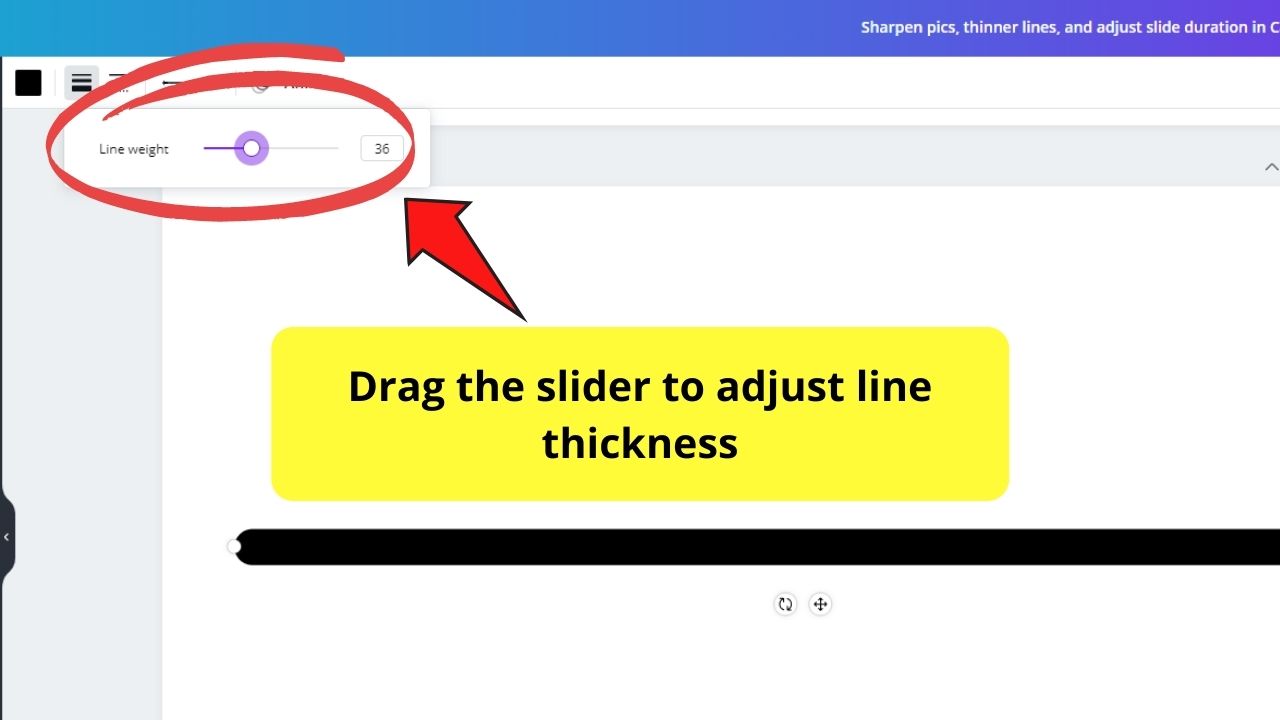


Step 6: Once you’re satisfied with how thin or thick your line is, click on the canvas to exit the slider and activate the changes made.
Amazed by how simple it is to create thin lines in Canva?
No matter what strategy you use from the ones mentioned above, it doesn’t matter. They will still allow you to make thin lines in Canva.
Just allow your imagination to run free so you can have the design you’ve been imagining to achieve.
Adding Lines in Canva — Shortcut
Instead of having to choose a line element from Canva’s elements tab, you can simply press “L” on your keyboard to add a line to your design at any time.
In the very same manner, you can also add rectangles to your design by pressing “R” on your keyboard or “C” to add circles.
This is obviously way faster than having to go to Canva Elements each and every time to add a line or shape.
How to Adjust the Border Thickness
Whenever you are planning to use a border in Canva, the easiest way to go about it is to use Canva shapes. Simply press “R” on your keyboard to add a rectangle to your design.
Then, click on the rectangle and select the color square above the design. On the left side, under “Document Colors” make sure it is set to none.
After that, you will want to to click on “Border style” in the toolbar. Finally, to increase or decrease the border thickness, simply adjust the “Border weight.”
Now, as you are surely aware, our rectangle is still relatively small but just know that you can resize this rectangle/border element to any size. Simply use the white handles along the rectangle to make it fit the border of your design.
This is definitely my favorite way of adding a border to a Canva design!
Frequently Asked Question on Working with Lines in Canva
How to resize a line in Canva?
The easiest way to resize a line in Canva is to click on the line, then click on “Line Style” in the toolbar and then decrease the “line weight.”
How to make lines thicker in Canva?
To make a line thicker in Canva, click on the line element, then choose “Line style” from the topbar menu and then increase the “Line weight.”
How to make a line shorter in Canva?
To make a line shorter in Canva, select the line and you will then see a white circle on each end. To make the line shorter, simply left-click on the white circle and hold and then drag. This can be done from the start or the end of the line.
How to add a line to your design in Canva?
To add a line to your design in Canva, all you need to do is to press “L” on your keyboard. This is the best way to add lines to Canva because it allows for the most flexibility.
How to curve a line in Canva?
There is no way to really curve a line in Canva. However, you can now “elbow” your line in Canva. To do that, select your line and click on “Line Type” above your design.
How to add stroke in Canva?
Stroke is called “Line weight” in Canva when working with lines and “Border weight” when working with shapes such as rectangles and squares. To adjust the line weight, after clicking on your line, simply click on “Line Style” in the toolbar and adjust the “Line Weight.” To adjust the border weight, click on your shape, then choose “Border style” and then adjust the “Border weight.”


Hey guys! It’s me, Marcel, aka Maschi. On MaschiTuts, it’s all about tutorials! No matter the topic of the article, the goal always remains the same: Providing you guys with the most in-depth and helpful tutorials!

