
For any graphic design to stand out, you need to sweat out a bit on small details.
And those small details include the alignment of the design elements, most especially the text.
Why should we line up the text properly? Can’t their “misalignment” be just part of the design?
Lining up your text properly on your designs makes them more visually appealing and logical to your target readers. Properly aligned elements will also tell you that the design’s carefully made.
So, if the text’s alignment is such a vital element in graphic design, how can you achieve this in Canva?
How to Line Up Text in Canva
The easiest way to line up text in Canva is to use the “Position” feature. Another way is to justify the text using “Alignment.” Now, if you have to line up text with other text boxes or elements added to the design, the use of guide lines is the best method.
Method 1: Use of “Position” Feature to Line Up Text in Canva
This first method of lining up text in Canva is best used when you have more than one text box on your design.
You can also use this method if you need to line up text with other design elements on your project.
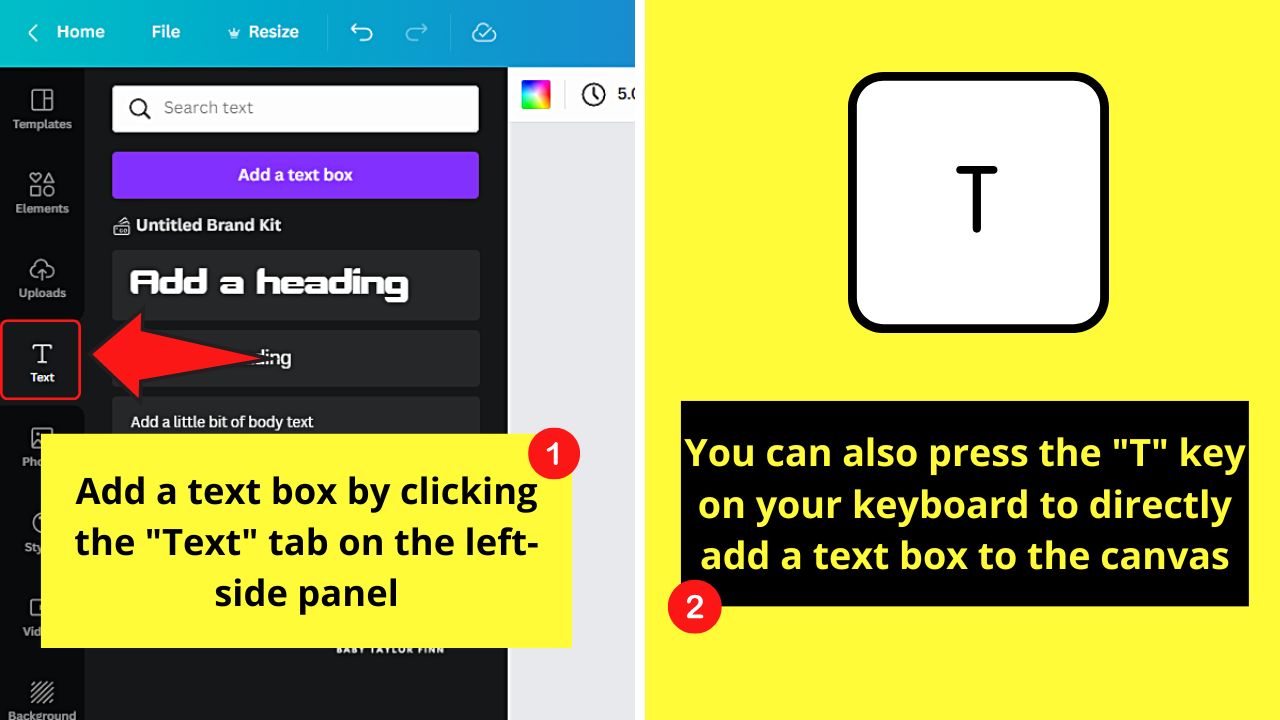
Step 1: Add text boxes to the Canva design you’re editing by clicking “Text” on the left-side panel.


Then, select whether you’ll add a heading, subheading, or body of the text.
You can even choose to add text by clicking any font style in the “Font combinations” category.


But, if you prefer the shortcut method of adding text boxes, then just tap the “T” button on your keyboard.
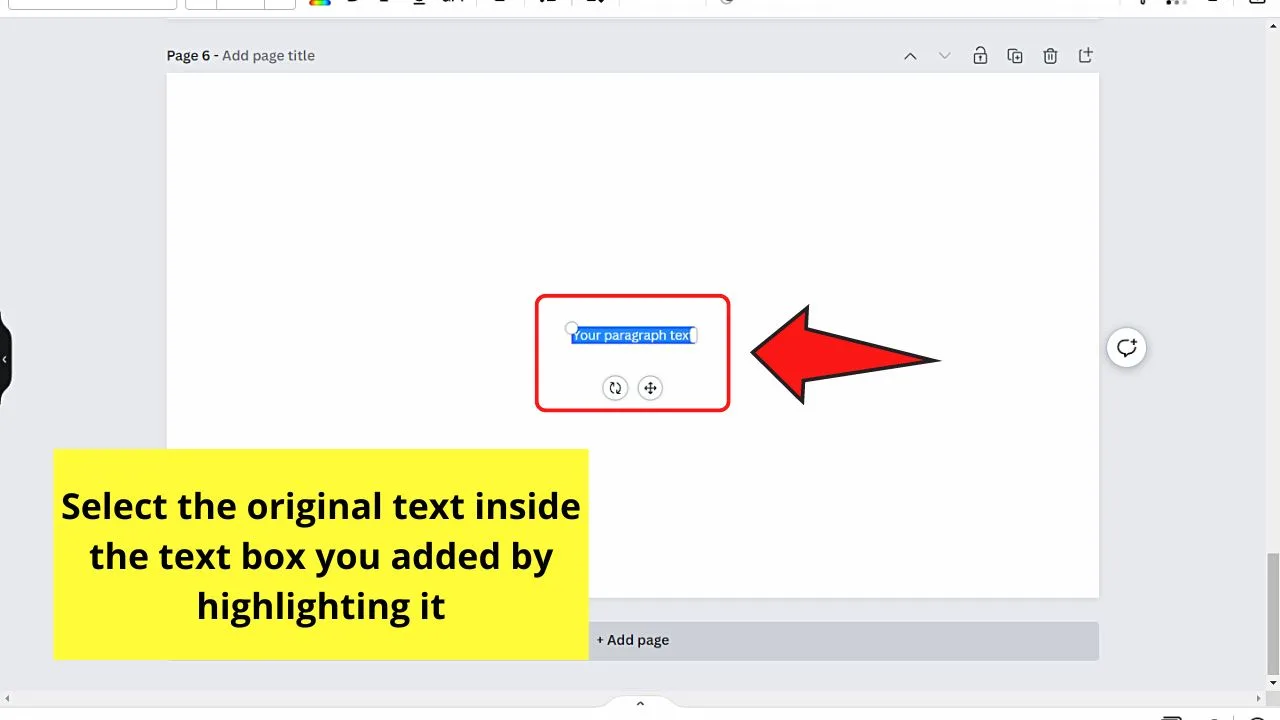
Step 2: Select all the original text inside the text box first before you begin typing out the new message inside it.

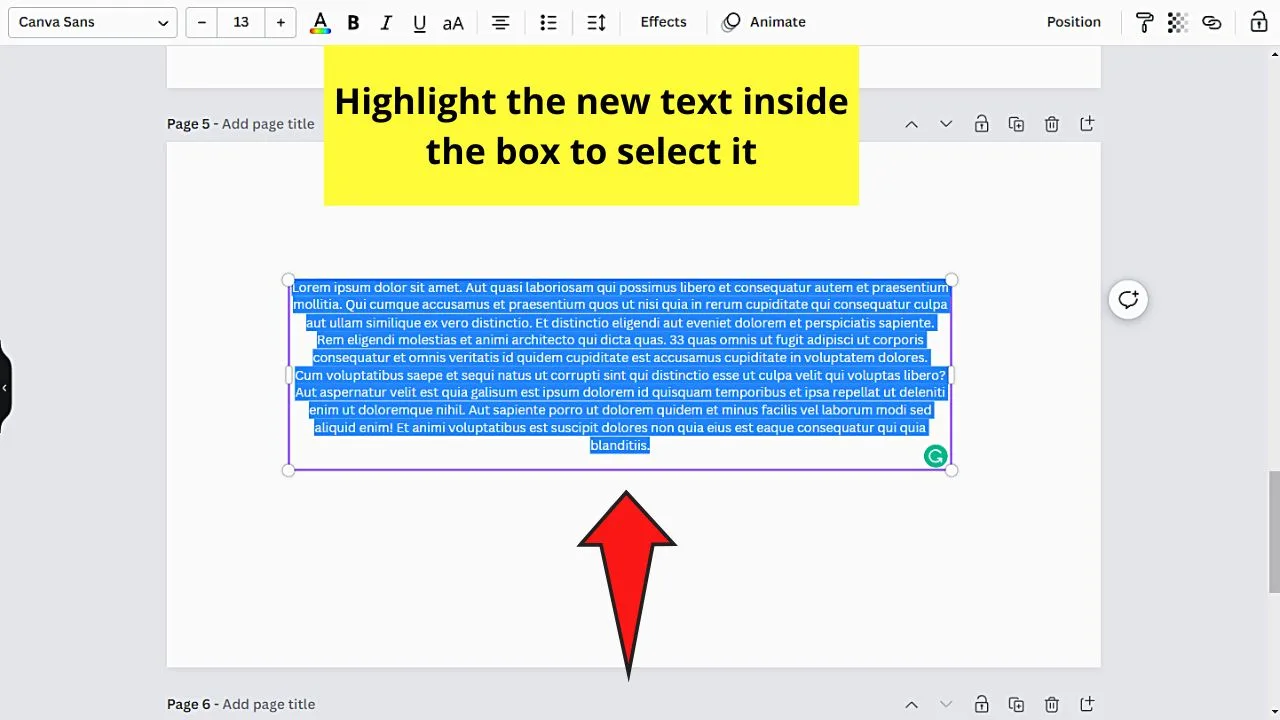
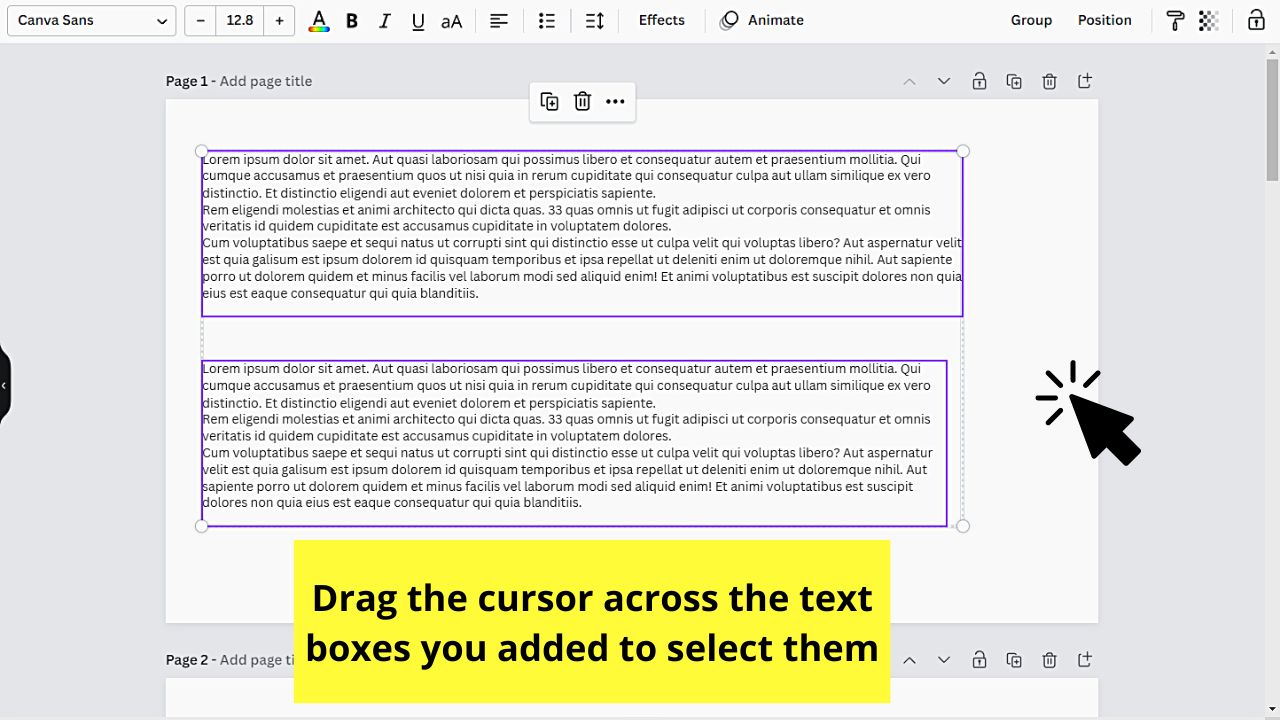
Step 3: After typing your new message, highlight it by dragging the cursor across it.


If you have more than one text box on your Canva design, press “Shift” on your keyboard and then click each of them.
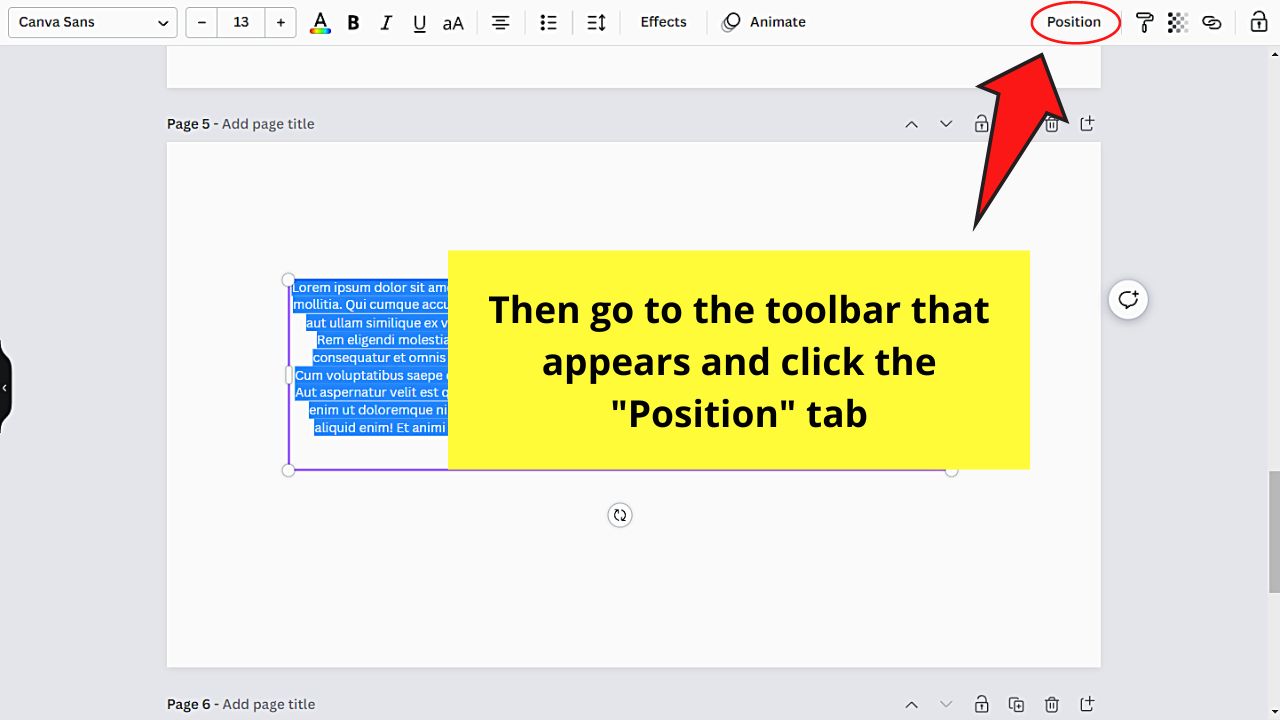
Step 4: On the toolbar that appears after selecting the text boxes, select “Position.”
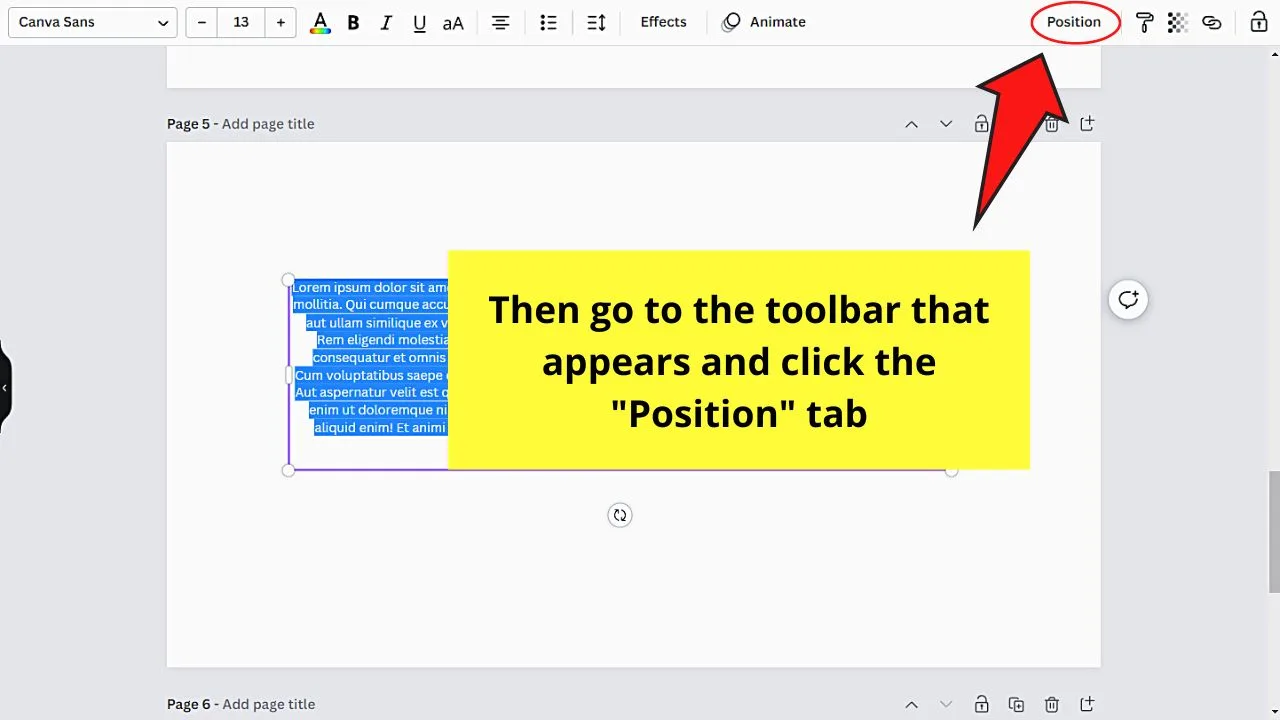
A menu then appears below the said button.
Step 5: Align the text by going to the “Align to Page” section of the menu that appears and choose from “Top,” “Middle,” “Bottom,” “Left,” “Center,” and “Right.”
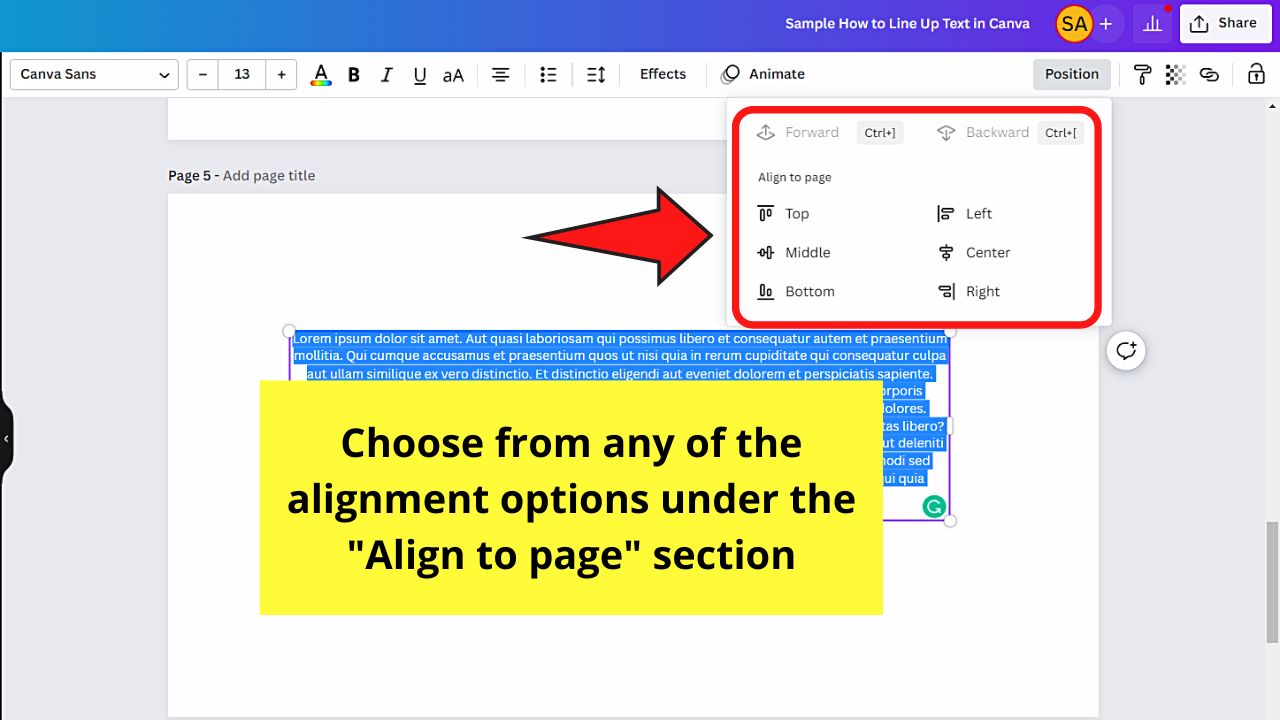

But, if you selected more than one element, the “Align to Page” section will become “Align Elements” instead.
Step 6: If you think you need to polish the alignment further, go to the “Space Evenly” section and click “Tidy Up.”

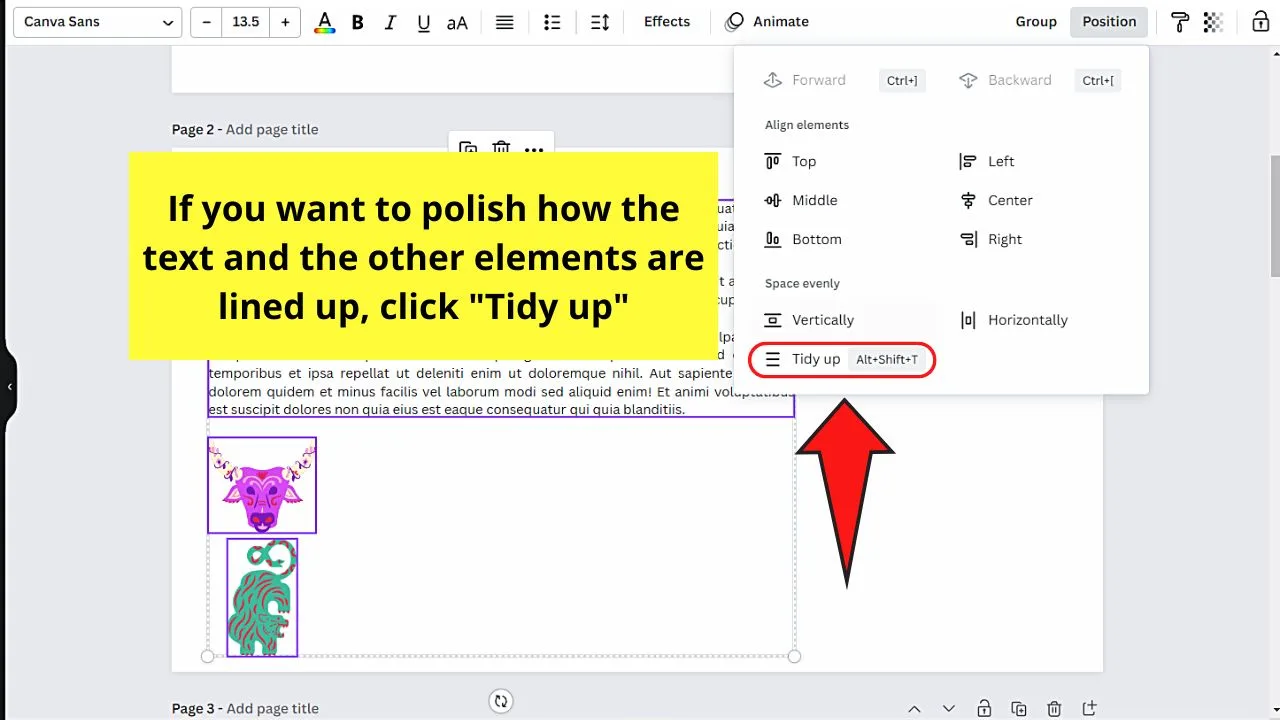
This feature will automatically fix any misalignments in the text you added.
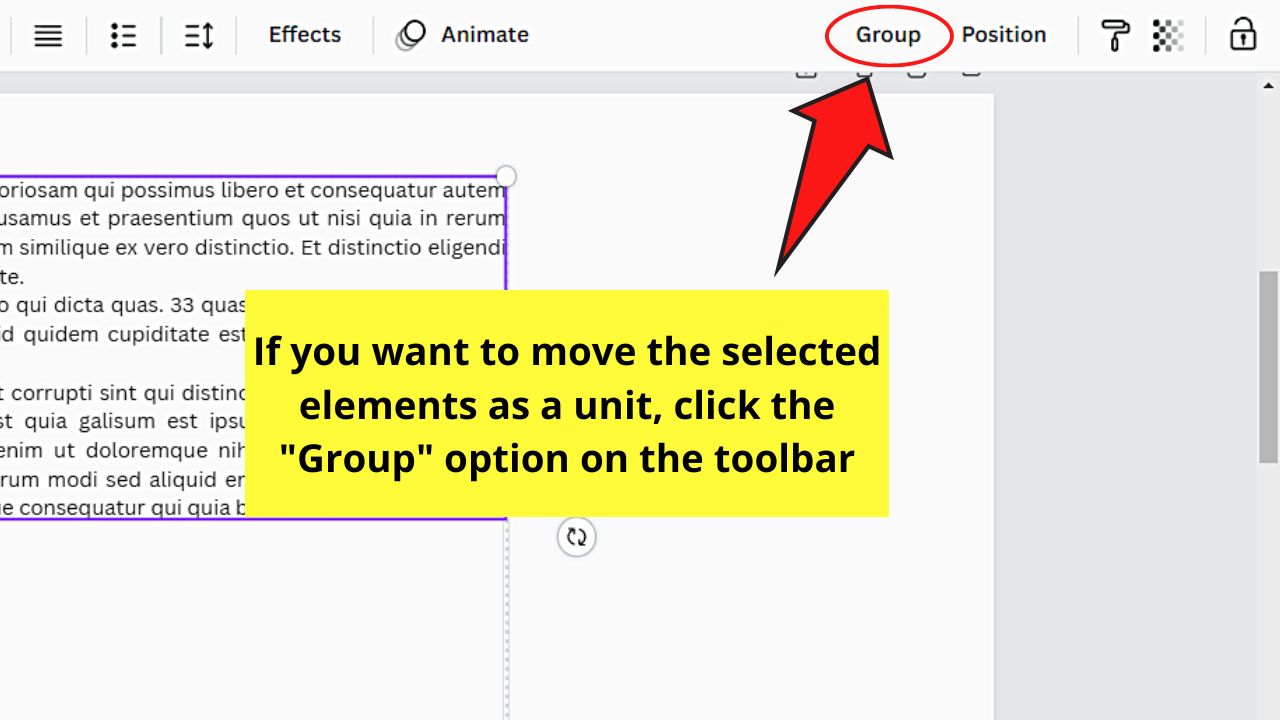
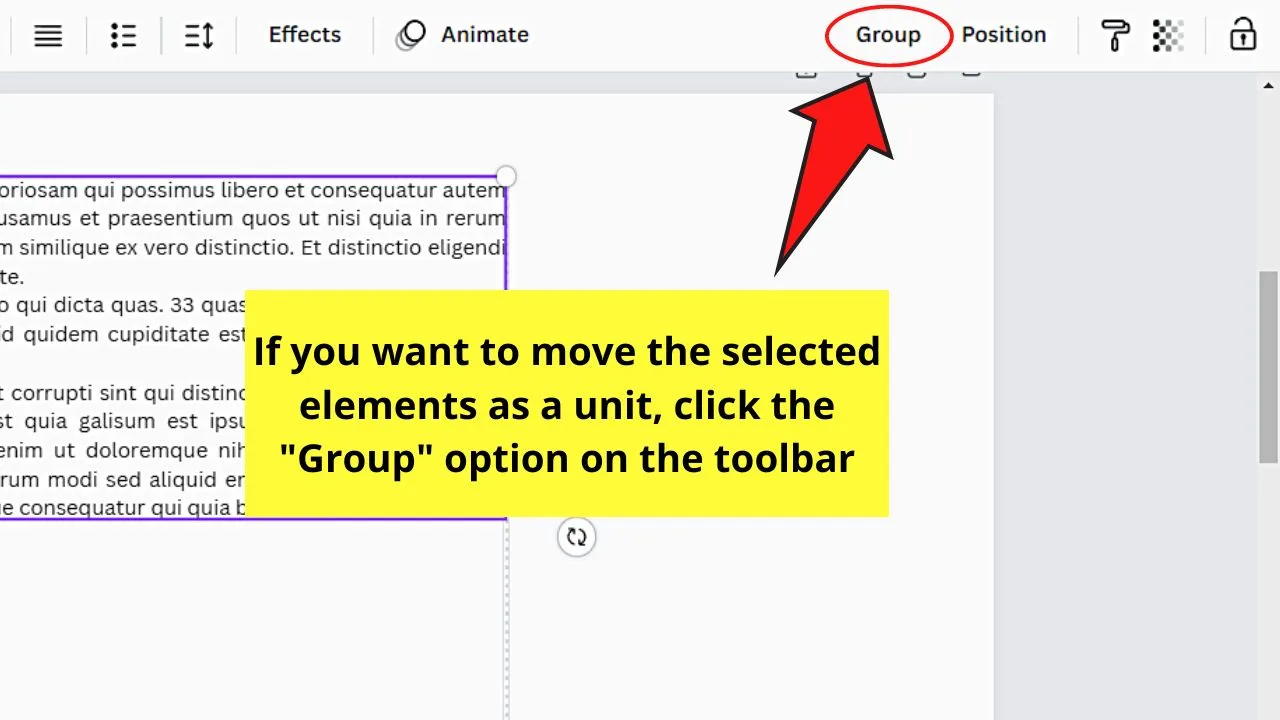
Step 7: After lining up the text, you can select them again and group the said text using the “Group” button on the toolbar.
If you have a large chunk of text, like a paragraph, the second method is the one you should use.
Method 2: Justify the Text to Line Up Text in Canva
Justifying text on Canva means the same as when it’s used Word or any other text processing tool known to most of us.
It simply means keeping the text straight on both sides of the paragraph. Hence, the text in each line will automatically stretch to the left and right margins.
So, if you want this method of lining up text in Canva, here are the steps you should remember:
Step 1: Add text boxes to your design either by pressing “T” on your keyboard or clicking the “Text” tab on the left-side panel.

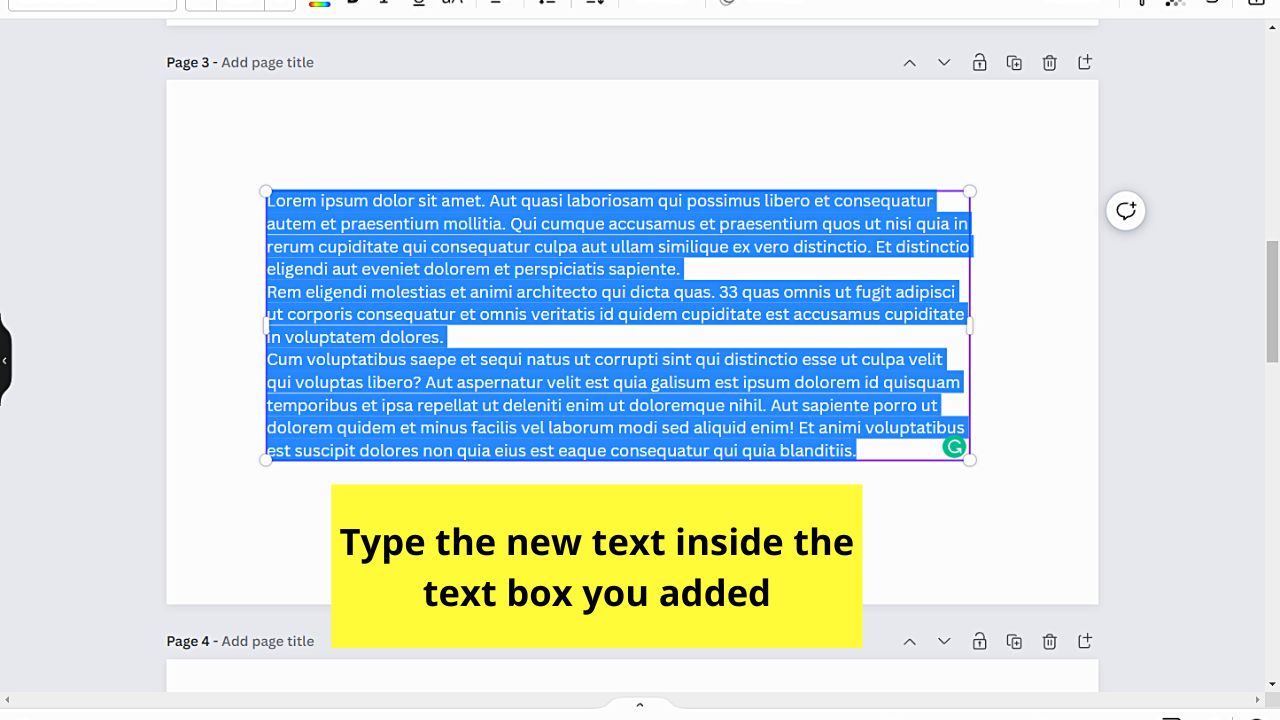
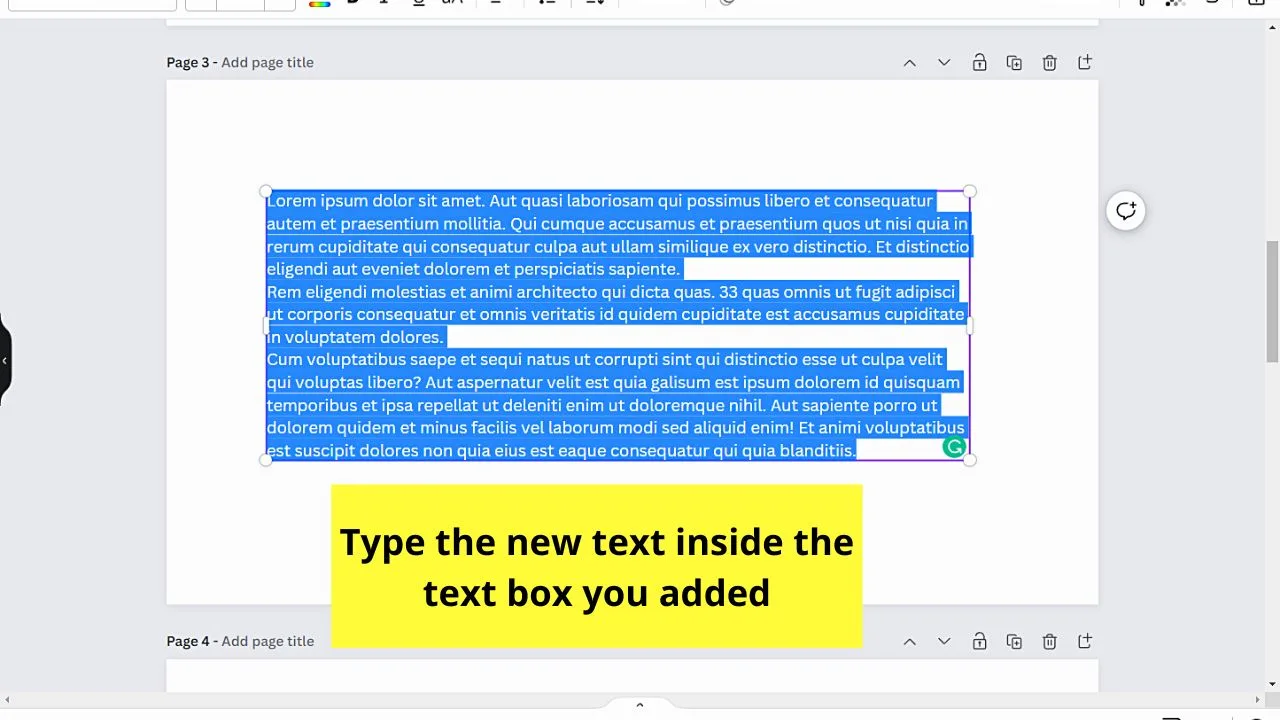
Step 2: Once you have added the text boxes, proceed with typing the new text inside them.
Step 3: After adding the new text, select the new text boxes by dragging the cursor over them.
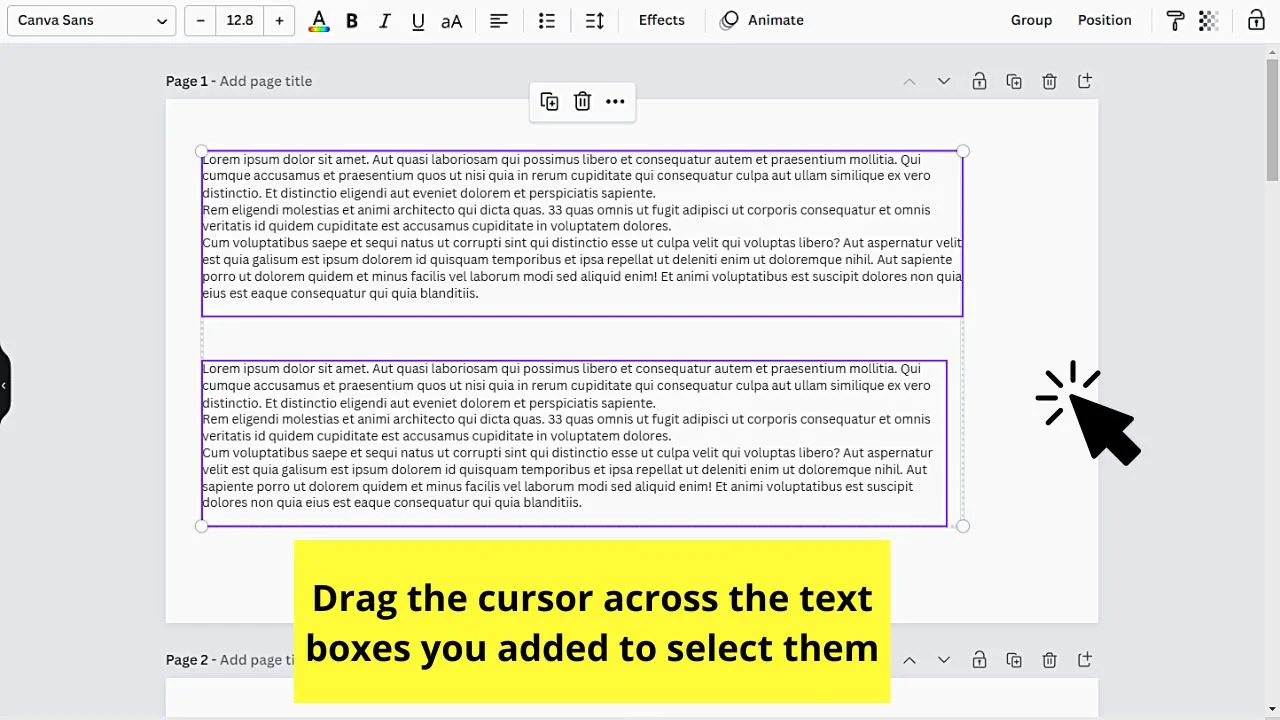
They will then be highlighted.
Step 4: Now that the text is highlighted, click the “Alignment” option on the toolbar that appears above the canvas.


By default, the “Alignment” option is set to “Left Align.” Since you want to justify the text, keep clicking the said button until the “Justify” alignment option appears.


Automatically, the text you added will be stretched to both the left and right borders of the text box where you added them.


Method 3: Using Canva Guide Lines to Line Up Text
You may think that the guide lines I’m talking about here are those that you’ll find when you activate the Canva rulers.
But those guide lines I’m referring to are those that appear when you attempt to line up different elements in your design, including text.
Technically, this method is almost the same as the first method of lining up text in Canva, yet this is more manual. Hence, it’s best used for a more precise alignment of elements.
Step 1: Add new text boxes to your Canva design by clicking the “Text” tab on the left side panel.


You can also directly add them by pressing “T” on your keyboard.
Repeat Step 1 until all the text boxes you need are added.
Step 2: If you need to add other design elements, go back to the left-side panel and select the “Elements” tab.

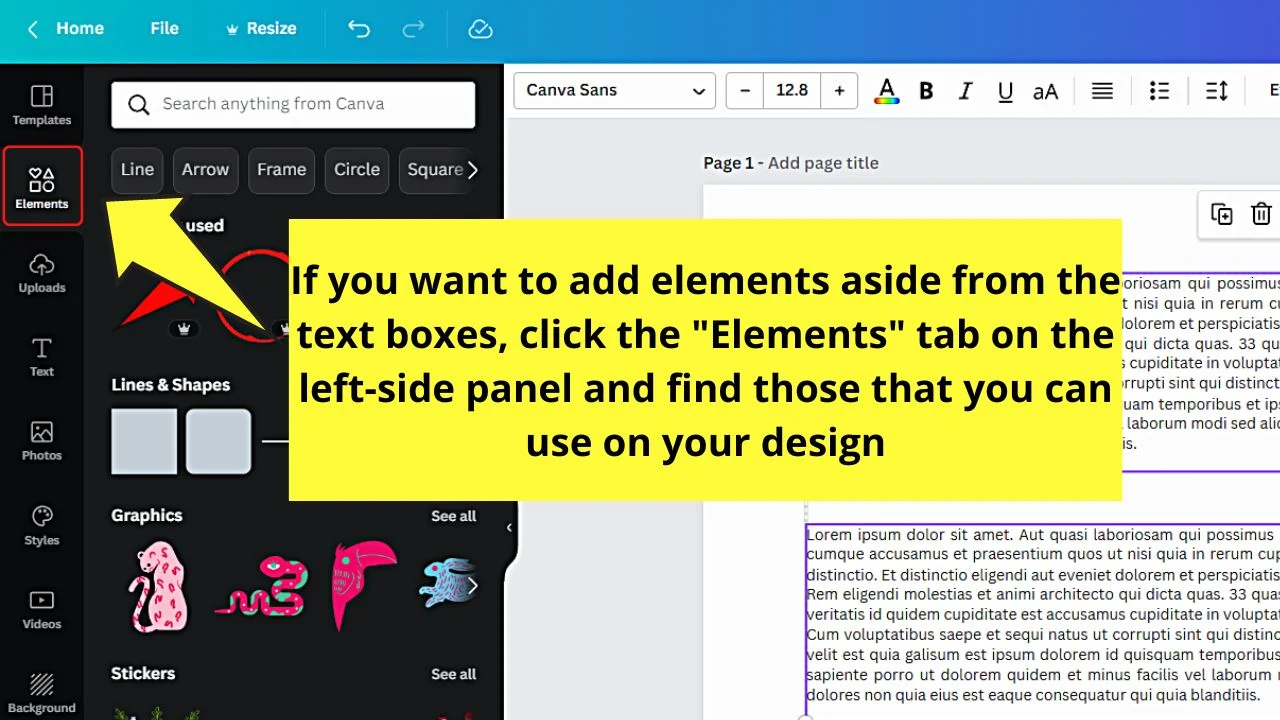
Find the elements you’ll use by using the search bar. Then, make the elements appear on the canvas by clicking on them.
Step 3: Drag one of the text boxes to the part of the canvas where you want it positioned.


Do the same for the other text boxes or elements you want to be lined up with the first text box.
The moment you do this, you’ll notice dotted purple lines beside the element you’re moving and the previous one. These are the guide lines I’m referring to earlier.
Once the text boxes and/or elements have lined up perfectly, allow them to snap in place.


Repeat until all the text and elements are lined up. You can even group them and drag them across the canvas as one element.
But, lining up isn’t only applicable to text.
You can also do some lining up with other elements in Canva. How do you do it?
And, can you line up the text with the other elements in Canva together?
How to Line Up Text and Elements in Canva Horizontally
To line up text and elements in Canva horizontally, select at least 3 elements by dragging the cursor over them. Clicking on the elements while pressing “Shift” is another way of selecting those elements. Then, click “Position” and select “Horizontally” under the “Space evenly” section.
The other option to do this is by using the purple dotted guide lines that appear between them during placement or positioning.
But, as you’ll have to be precise with your eyeballing, use this shortcut method of horizontally lining them up.
This will work best if you’re working on a title or heading of a page where you want the text in between design elements.
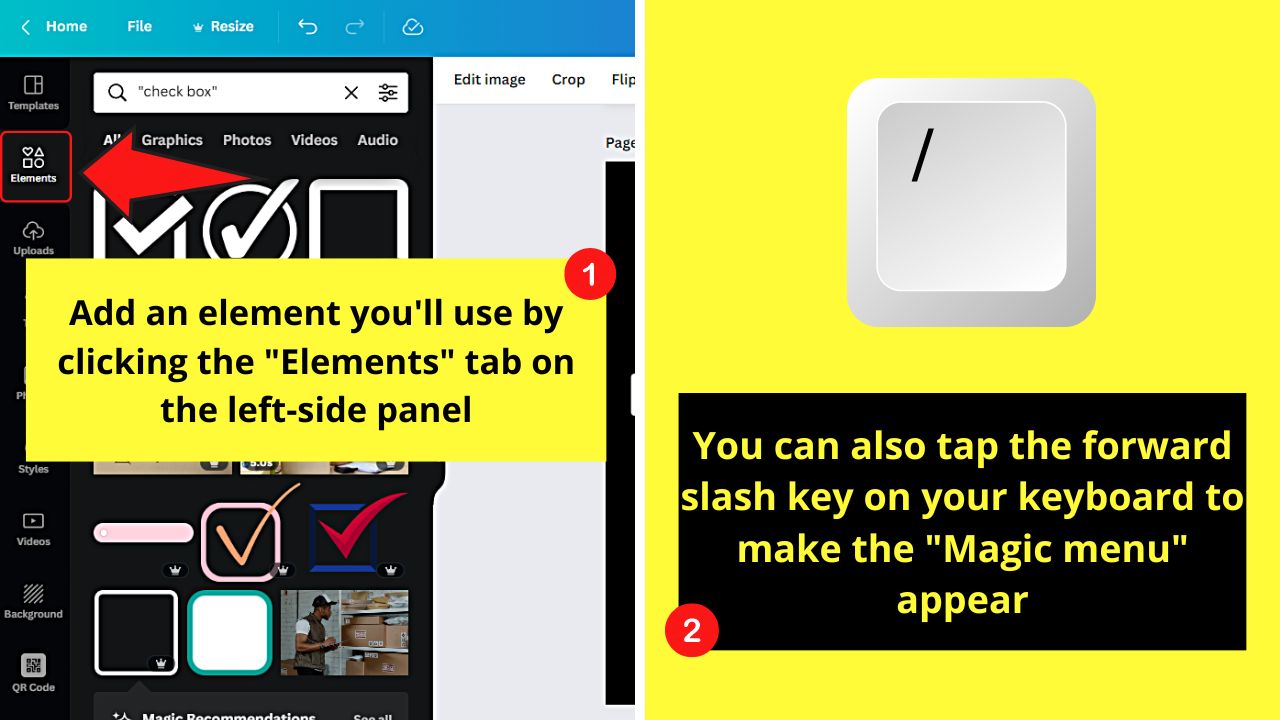
Step 1: Add the elements that you’ll need for your design by clicking on the “Elements” tab on the left-side panel.


Then, click inside the search bar and type in the keywords for the type of element you’ll use. Once you see it, click or drag and drop it into the blank canvas.


Another way is to press the “/” key on your keyboard to make a magic menu appear. From there, type in the search bar the element you’ll use and click the one you’ll use.


Step 2: If you need to add text, click “Text” on the left-side panel and choose whether you’ll add a heading, subheading, or body of the text.


If you prefer a more straightforward method, then just tap “T” on the keyboard to make a text box appear.
Replace the default “Your Paragraph Text” message by highlighting it and typing your new text.


Step 3: Once you have added all the elements for your design, select all of them. You need to highlight at least three for this method to work.
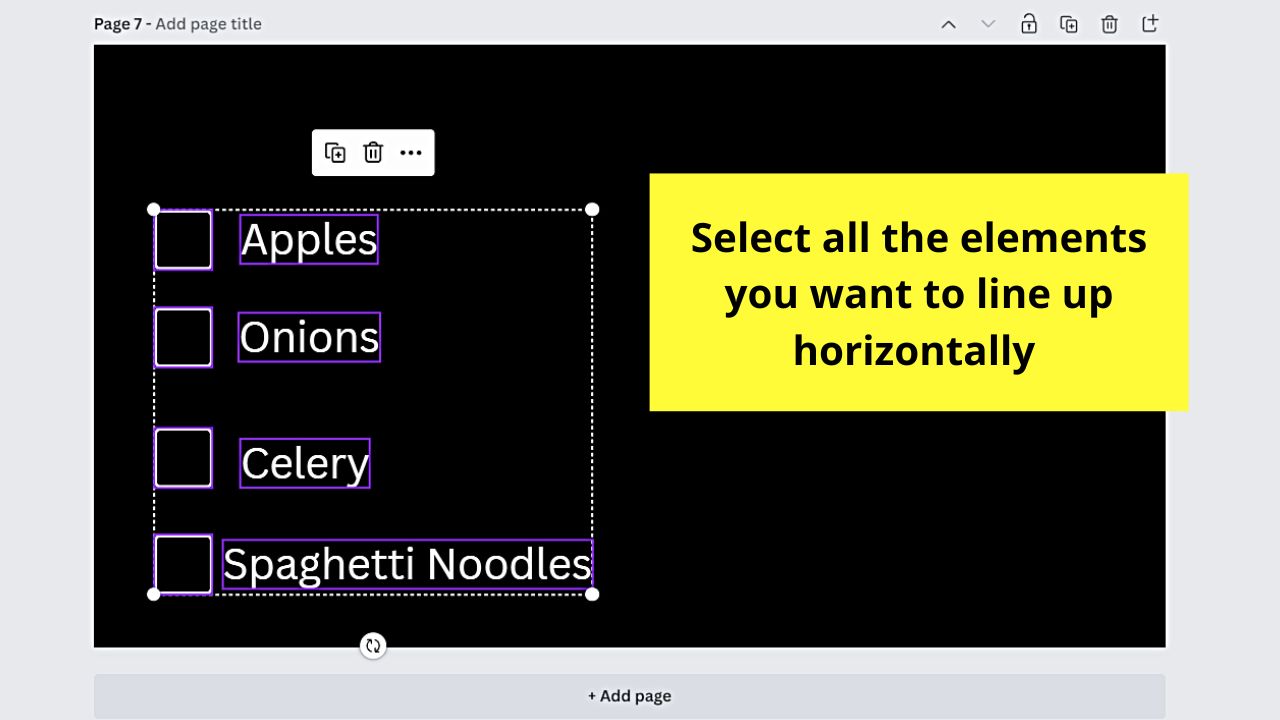

You can drag the cursor over all the elements you want to line up perfectly. You can also click on the elements individually while pressing “Shift.”
Regardless of what method you choose, you’ll know you have selected the elements if a purple outline surrounds them.
Step 4: Click “Position” on the toolbar.


And, just like in the first method discussed earlier, you’ll see a menu of alignment options appear.
But, this time, you’ll also see the “Space evenly” section. This section only appears if you have at least 3 elements selected.
Since you want to line up the text and elements horizontally, click the “Horizontally” option. This will automatically space out the text and the elements evenly.


If there are still any misalignments, click the “Tidy Up” option.


You’ll then have the text and elements properly aligned horizontally.


The same process would be needed if you need to line your design elements vertically, but you’ll have to read the more detailed process below.
How to Line Up Text and Elements in Canva Vertically
To line up elements in Canva vertically, first select 3 or more elements, including text by dragging the cursor over them. Pressing “Shift” while clicking on them individually achieves the same feat. Then, select “Position” and choose “Vertically” from the “Space evenly” section.
Again, you can use this method to include vertically lining up text with the other elements of your design.
This is best used when you’re going to make a checklist or a list of any sort. Just make sure though that you have already grouped the text with its text box.
You can even use this method when you’re creating a simple table of contents page in Canva.
Step 1: Add the elements you’ll need for your design by selecting “Elements” on the left-side panel and finding the ones you’ll add using the search bar.

You can also activate the magic menu and tap “/” on your keyboard. Type in the search bar that appears the keyword for the element you’ll use.
Then, once you find it, click to select it.
Step 2: To add text to your Canva design, you can click “Text” on the same left-side panel.
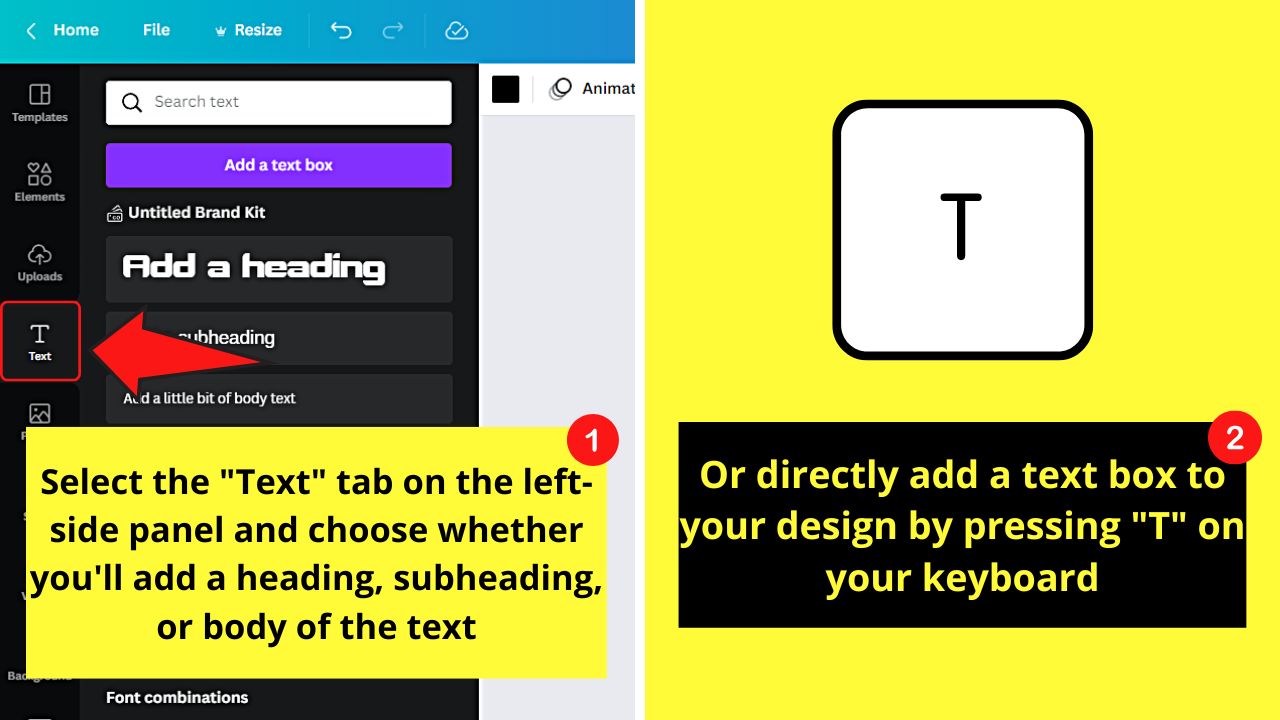

Then, select whether you’ll add a heading, subheading, or body of the text.
If you prefer a more direct method, tap “T” on your keyboard to make a text box appear on the canvas.
From there, replace the default text inside the text box with the message you want inside it.
Step 3: Once all your design elements are in place, press “Shift” while clicking on all of them or drag the cursor over them.
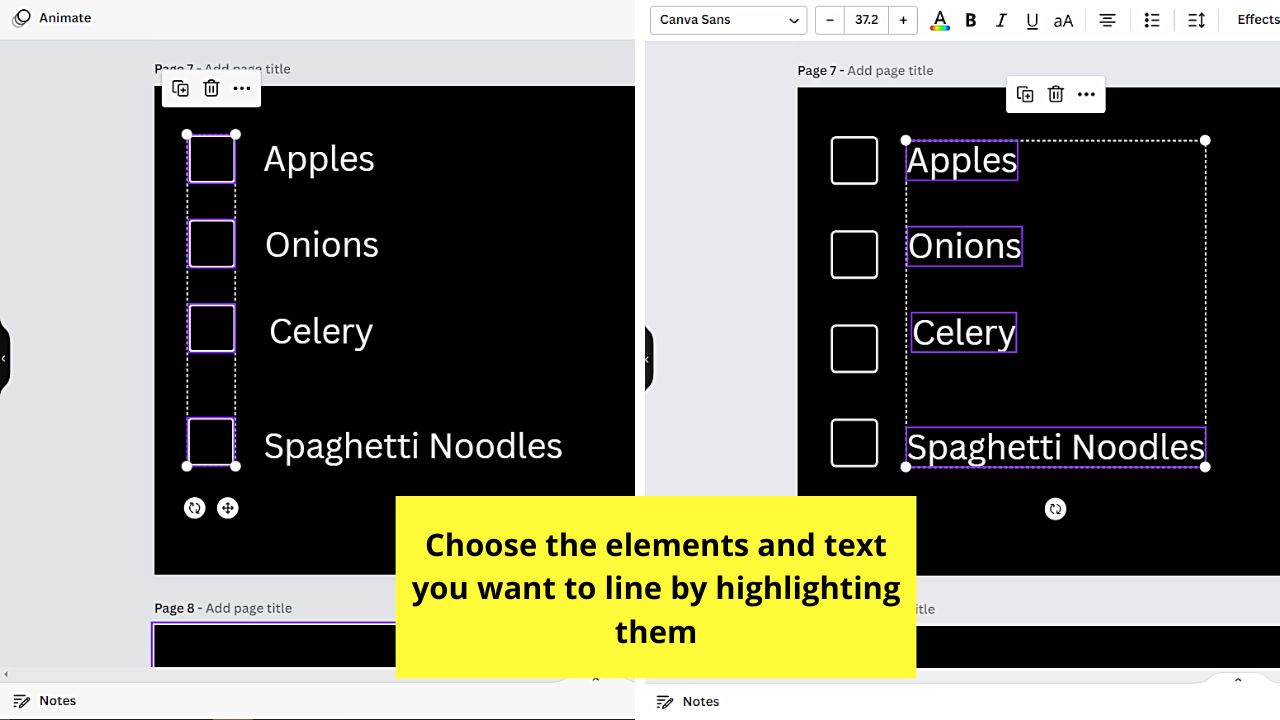

This will highlight all the elements you need to line up later. Again, just make sure that you select at least 3 elements (including text).
Step 4: Go to the toolbar that appears and select “Position.”


From there, choose the “Vertically” option under the “Space Evenly” section. After clicking it, Canva will automatically even out the vertical spaces between the selected elements.
Again, you can fix any misalignments with the “Tidy Up” option.


After which, you’ll see the elements and text you selected earlier properly lined up vertically.


The ones I discussed here are the quickest ways of lining up text and elements in Canva. If you want other lining-up methods, you can give “How to Evenly Space Elements in Canva” a quick read.
Frequently Asked Questions about How to Line Up Text in Canva
Can I change the way the elements and text in a Canva template are lined up?
You can change how the elements and text in a Canva template are formatted or lined up. But, you first need to ungroup certain elements. Then, use any of the methods discussed on how to line up text and other elements to achieve the design you want.
Do I need to activate Canva rulers to line up text in Canva?
While using the rulers feature in Canva is helpful to line up text and other elements as well, you don’t necessarily have to activate them. For simple alignment of text and elements, using the “Position” feature would suffice.
How does the “Tidy Up” feature in Canva work?
“Tidy up” in Canva automatically aligns the elements in all axes of your design. To use the “Tidy Up” feature in Canva, you first need to highlight all the elements you want to align. Then, select “Position” on the toolbar. Go to the “Space Evenly” section and click “Tidy Up.”


Hey guys! It’s me, Marcel, aka Maschi. On MaschiTuts, it’s all about tutorials! No matter the topic of the article, the goal always remains the same: Providing you guys with the most in-depth and helpful tutorials!

