

Trimming is one of the most essential features of Illustrator. Thankfully, it’s very simple to master.
The “Scissors” tool is the most commonly used for this task, but there is also another not that obvious tool that can save you a lot of time when you need to trim several lines. Let’s find out about this.
Trimming Lines in Illustrator
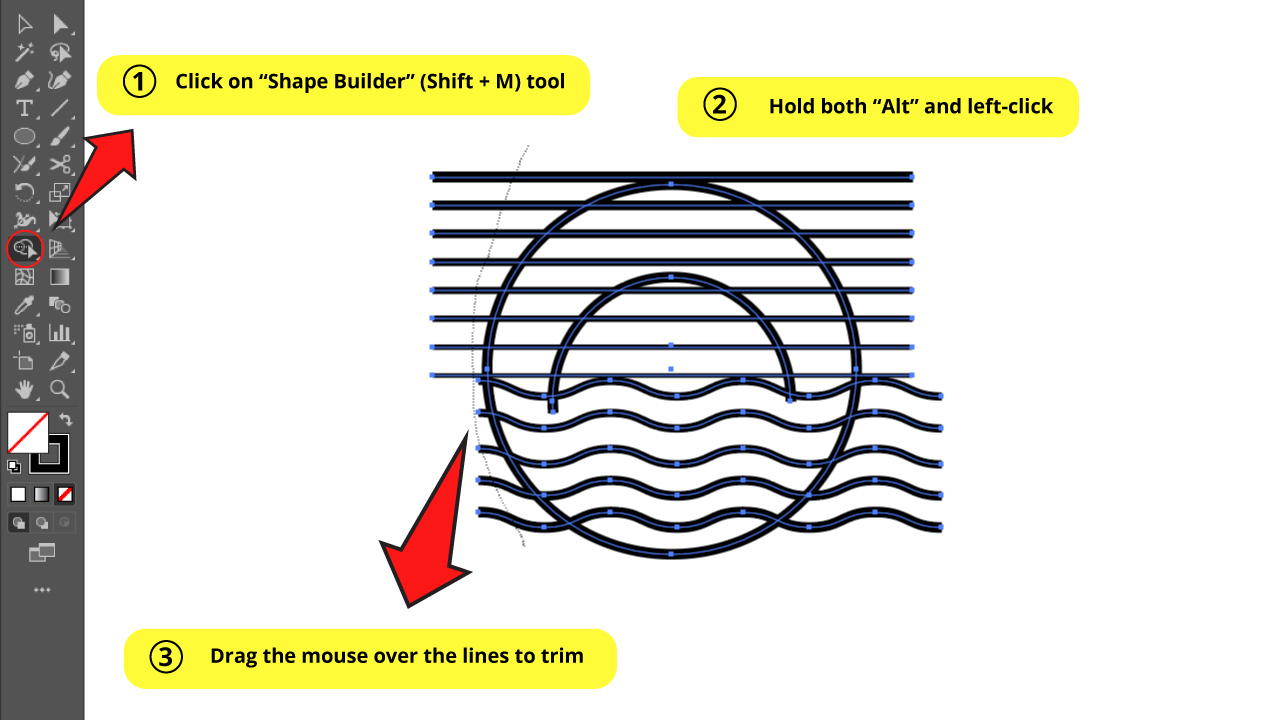
Select the lines you need to trim. Select the “Scissors” tool and then click on the lines to trim. Or press “Shift + M” to select the “Shape Builder” tool and hold both “Alt” and left-click as you’re dragging the mouse over the lines you want to trim. Release both Alt and click when you’re done.
How to Trim Lines Using “Scissors” (C) Tool in Illustrator
Select the lines with “Selection” (V) tool, or using “Ctrl + A” to select all. Press the “C” key to select the “Scissors” tool. Click on the line to trim.
This tool is very quick and easy to use. You can trim lines, shapes or any drawing that has stroke lines. The “Scissors” (C) tool is ideal for specific adjustments, or a small amount of lines.
Step 1: Select your Line

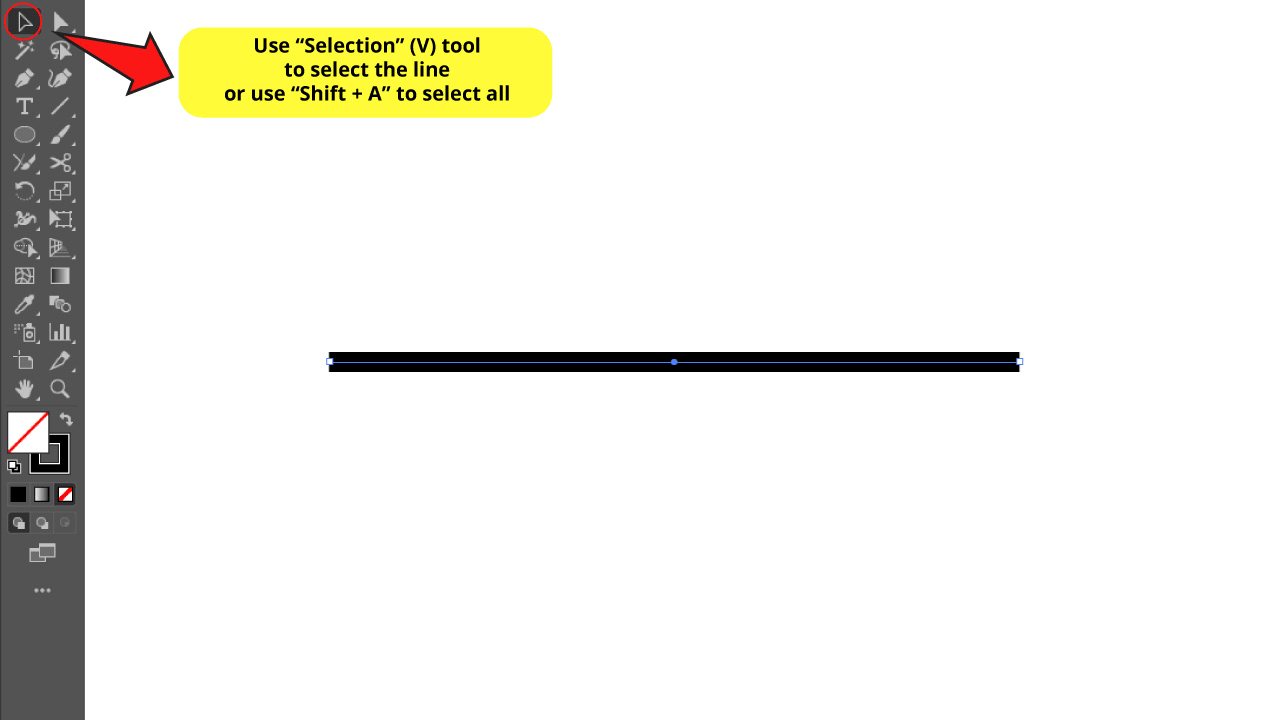
Select the line using the “Selection” (V) tool on the left side toolbar. You can also use the “Ctrl + A” command to select all at once.
Step 2: Use the “Scissors” (C) Tool

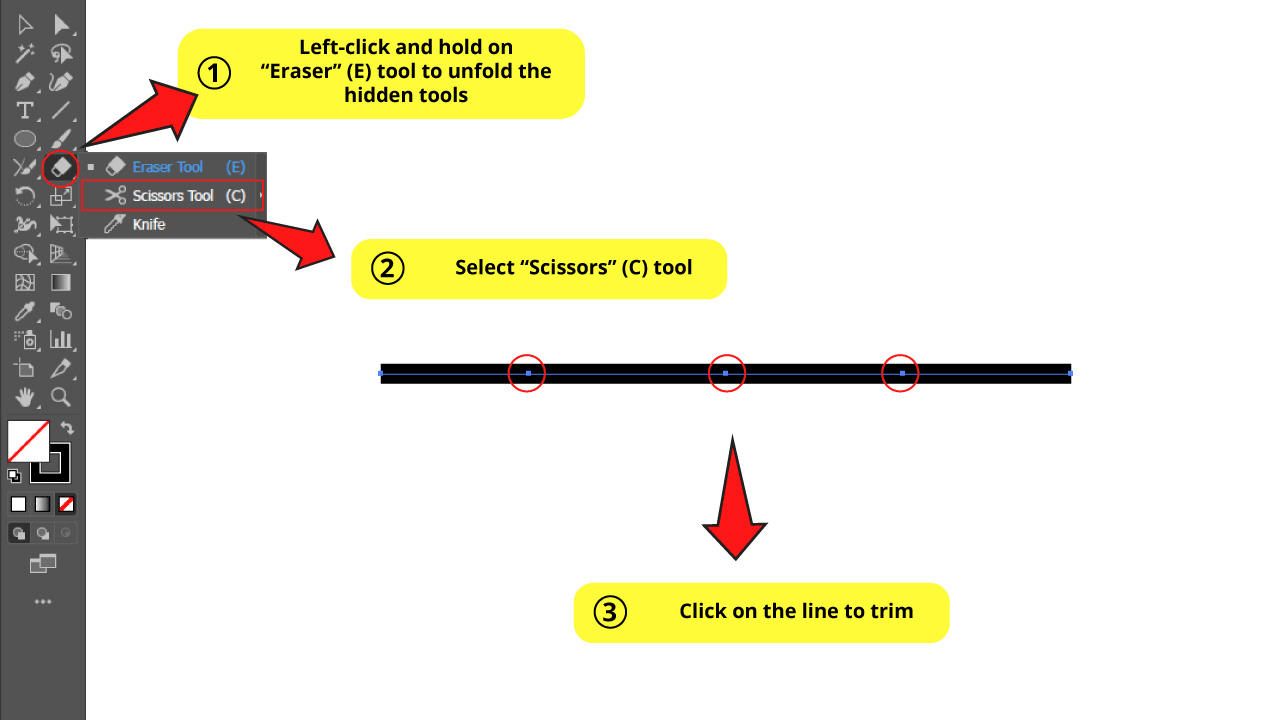
Left-click and hold on the “Eraser” (E) tool to unfold the hidden tools on the left side toolbar.
Select the “Scissors” (C) tool or press the “C” key shortcut.
Click on your line to trim it.
I trimmed my line three times, getting four total sections.
The Result of How to Trim Lines Using “Scissors” (C) Tool in Illustrator

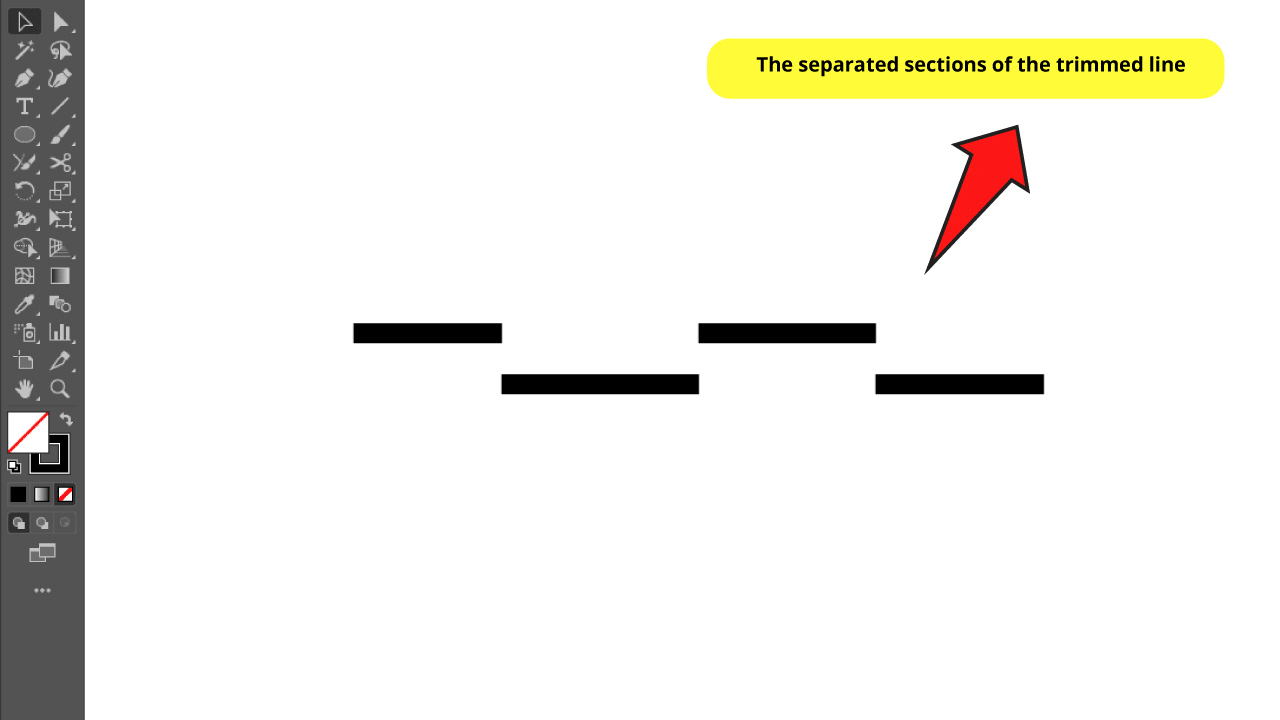
Once you have trimmed your line, you can handle its sections using the “Selection” (V) tool.
You can appreciate the separated sections in the image above.


How to Trim Lines Using the “Shape Builder” (Shift + M) Tool in Illustrator
Select the lines using the “Selection” (V) tool or the “Ctrl + A” command. Select the “Shape Builder” (Shift + M) tool on the left side toolbar. Hold both the “Alt” key and the left-click as you drag your mouse over to the lines you need to trim.
The “Shape Builder” (Shift + M) tool is recommended for trimming complex shapes or for when you need to trim several lines.
This is a very useful tool and it pretty much works by itself. The results of the trimming are very accurate and neat. Even more, you can use this for both lines and objects.
I’m going to use this logo as an example.
This logo was made of a circle that encloses the logo and a half circle representing the sun. The horizontal straight lines represent the sky and the wavy lines would be the sea.
We need to remove the surplus lines, which are many, so we’re gonna work with the “Shape Builder” (Shift + M) on this logo.
If you want to know how to make wavy lines, please check this tutorial: “The 3 Best Ways to Make a Wavy Line in Illustrator”.
If you’re looking for some tips to make your own logo, you can take a look at these tutorials about “How to Curve Lines in Illustrator” and “How to Draw in Illustrator in 5 Simple Steps”.
Step 1: Select your Drawing
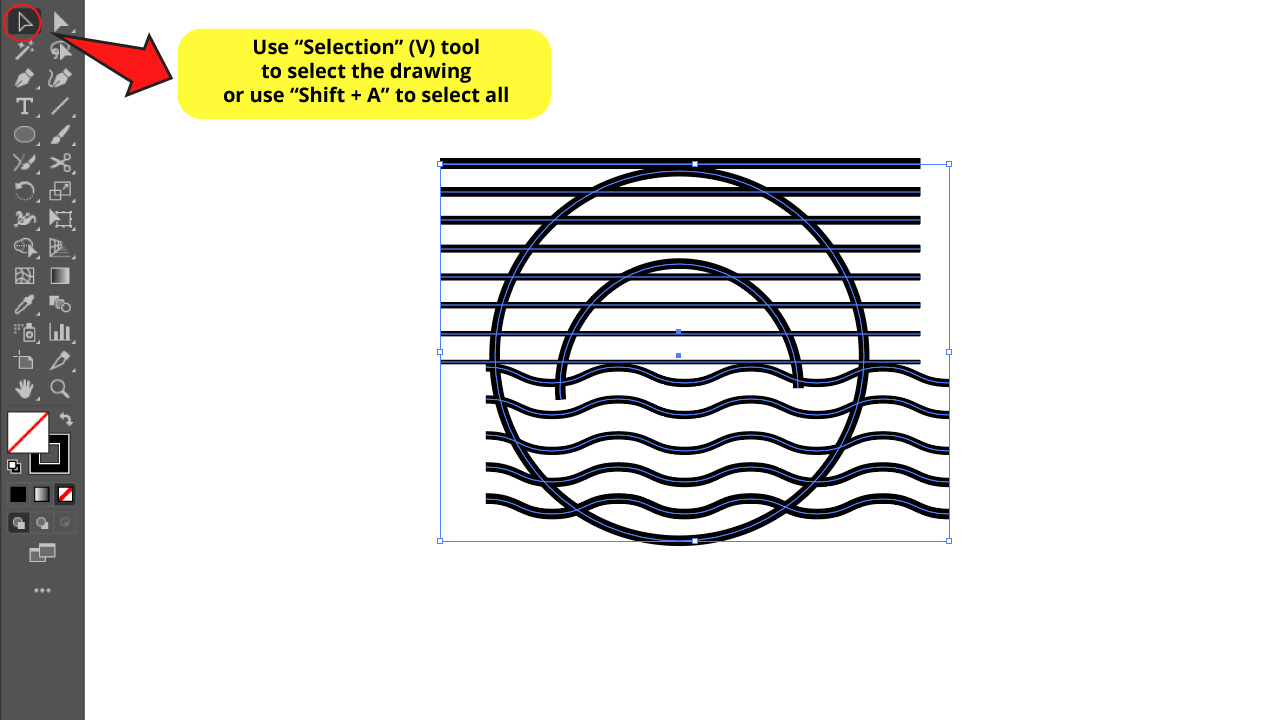

Select the drawing using the “Selection” (V) tool on the left side toolbar. You can also use the “Ctrl + A” command to select all at once.
Step 2: Use the “Shape Builder” (Shift + M) Tool

Select the “Shape Builder” (Shift + M) tool located on the left side toolbar by clicking on it.
You need to hold the “Alt” key to change the merge to eraser mode.
So, hold both the “Alt” key and the left-click as you’re dragging your mouse over the lines you want to trim.
A dotted trail will show you the trimmed path.
Release both the “Alt” key and the left-click to finish the trimming.
Repeat this process to trim all the lines you need to delete.
You can appreciate the different stages of the trimming process in the image below.
Learn all you need about the “Shape Builder” tool functions in these two tutorials “How to Combine Shapes in Illustrator” and “Illustrator: How to Use the Shape Builder Tool”.
The Result of “How to Trim Lines Using the “Shape Builder” (Shift + M) Tool in Illustrator”


Your trims can get this neat and clear with the “Shape Builder” tool.
Frequently Asked Questions on “How to Trim Lines in Illustrator”
Can I trim lines expanded to objects in Illustrator?
To trim lines expanded to objects, use the “Shape Builder” (Shift + M) tool. You can use this tool to trim both lines and objects. Just remember to hold both the “Alt” key and the left-click as you drag the mouse over the objects or lines.
What is the quickest way to trim a line in Illustrator?
The quickest method to trim a line would be using the “Scissors” (C) tool located on the left side toolbar. Just select your line, then press the “C” key to select the “Scissors” tool and then click on the line you want to trim.


Hey guys! It’s me, Marcel, aka Maschi. On MaschiTuts, it’s all about tutorials! No matter the topic of the article, the goal always remains the same: Providing you guys with the most in-depth and helpful tutorials!

