So you need to vectorize this icon right away, but you’re not sure how to do it in the quickest way possible.
This tutorial will go over one of the most useful and innovative tools that Illustrator has added to the software in recent years.
If you use Adobe Illustrator on a daily basis, you must be able to create new shapes quickly, perfectly, and most importantly: in the easiest way possible.
Don´t waste precious time you could spend hanging out with friends or watching your favorite Netflix show.
The way it works is really simple! When you’re on the file you are about to edit, select the objects you want to change and then switch to the “Shape Builder Tool” on your left toolbar.
Then, follow the steps I´m going to share with you in this article to achieve the best results.
You need to know that this is an amazingly intuitive tool that will give you a lot of freedom in your creative process!
You can use it mainly for three different purposes: The first mode is “Merge” and it’s the one that comes by default.
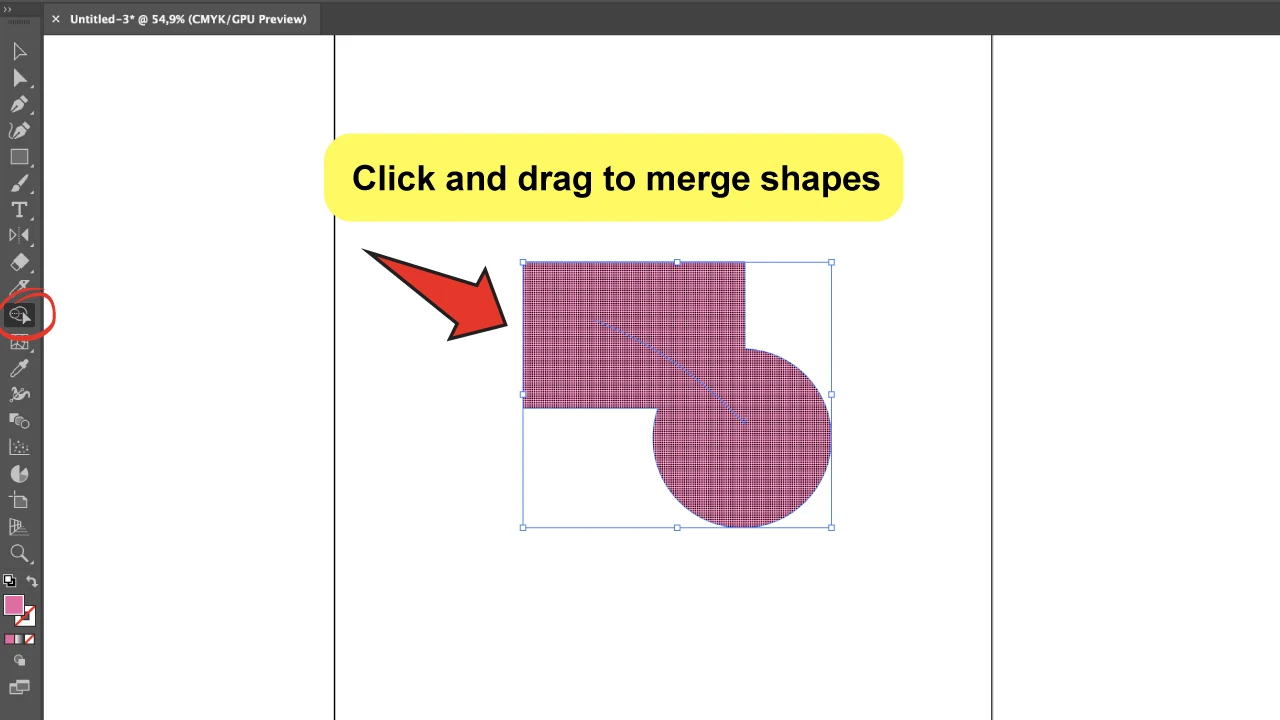
This mode will let you combine two or multiple elements into a single shape by simply clicking and holding while dragging over the objects you want to convert.
That’s probably my favorite aspect of this tool! If you are used to editing shapes with the “Pathfinder” tool, you’ll understand why I’m so impressed, because the process is much simpler in comparison, and you no longer need to duplicate shapes!
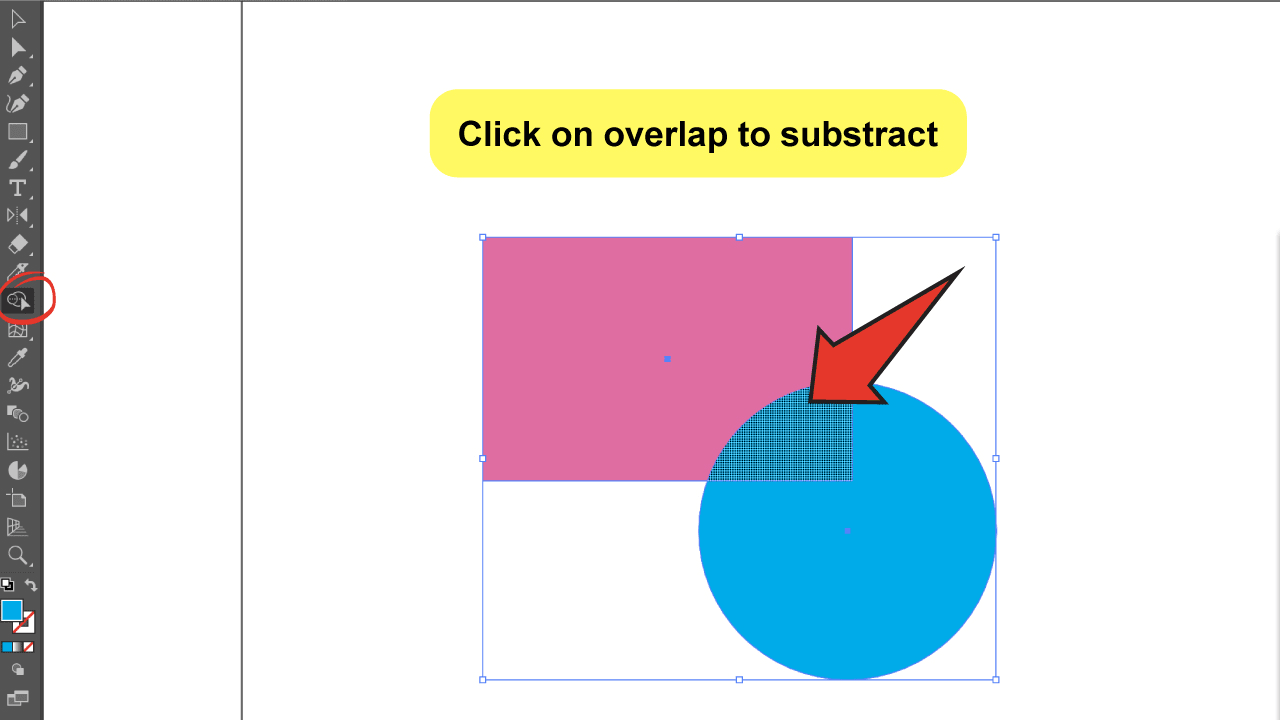
The second mode is “Extract”, and it will let you select any section of the overlapping objects to extract it from the larger object.
Once you click on it, it will become an object itself as touched by a magic wand.
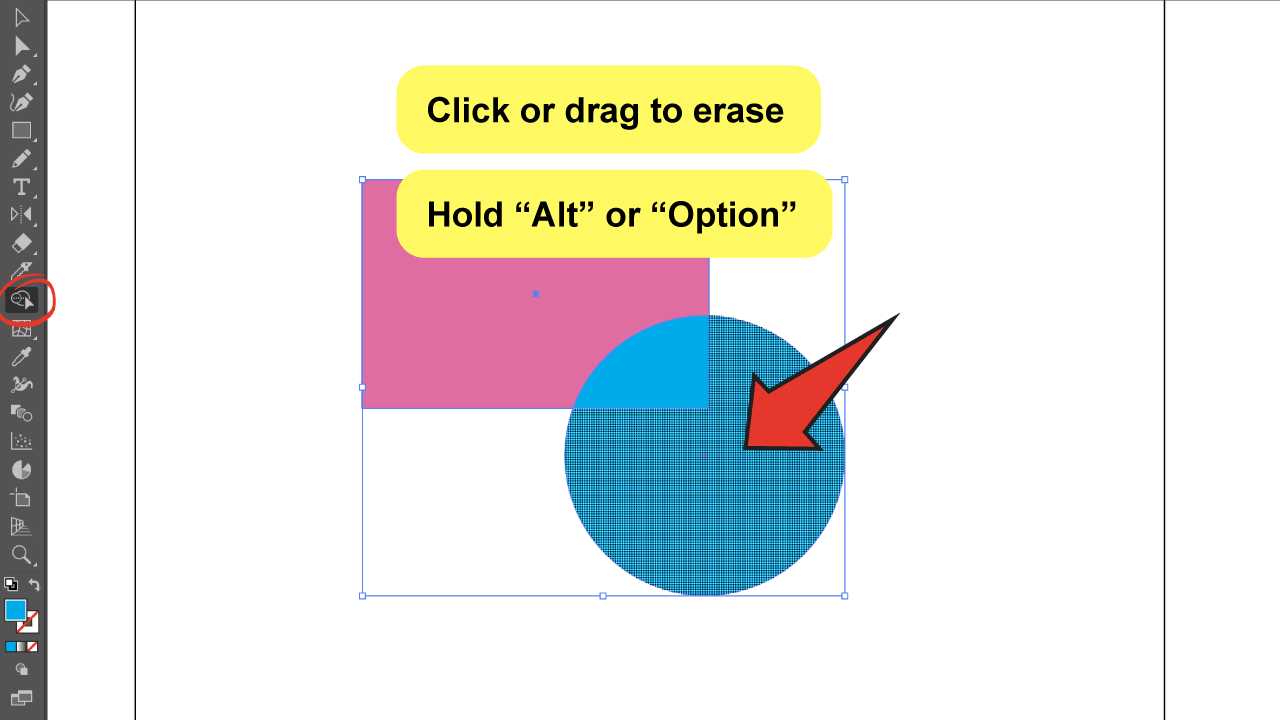
The third and last one, but not least, is “Erase” mode. This could be the easiest way to remove sections of any object by holding down the “Alt” or “Option” key and then dragging or clicking on the part of the shape you want to remove.
How to use the Shape Builder Tool in Illustrator
Select two or multiple objects, and then click on the “Shape Builder Tool”. Click and drag to combine the shapes with “Merge” mode; subtract by just clicking on an overlapping area to break a region apart from the rest with “Extract” mode; and delete any single or multiple parts that you want by holding the “Alt” or “Option” key with the “Erase” Mode.
How to Use the Adobe Illustrator Shape Builder Tool: In-depth Tutorial
You can merge, exclude or erase with the “Shape Builder Tool”. I wish we had this tool to solve everyday problems!
Once you’ve started using it, you’ll never let it go. You can transform any shape: from the ones you find on the presets to the ones you draw yourself.
And here’s a great trick that you also didn’t know: you can also create new shapes by using the negative space left by the shapes on your artboard.
If you have different elements on your canvas, you can just select them, grab the tool, click on the negative space between, and surprise! You have a new shape.
Before this tool appeared, that was a long and painful process (ok, not as bad as going to the dentist); so, enjoy it´s benefits!
Have a cup of tea and relax: it will become easier as you get familiarized with all the functions, and you will be able to create more complex shapes.
Step 1:
Select or create the shapes that you want to edit.
Open your Illustrator file and, while on “Selection Tool”, simply drag the arrow over the shapes you want to select. (You can click on them while holding the “Shift” key as well.)
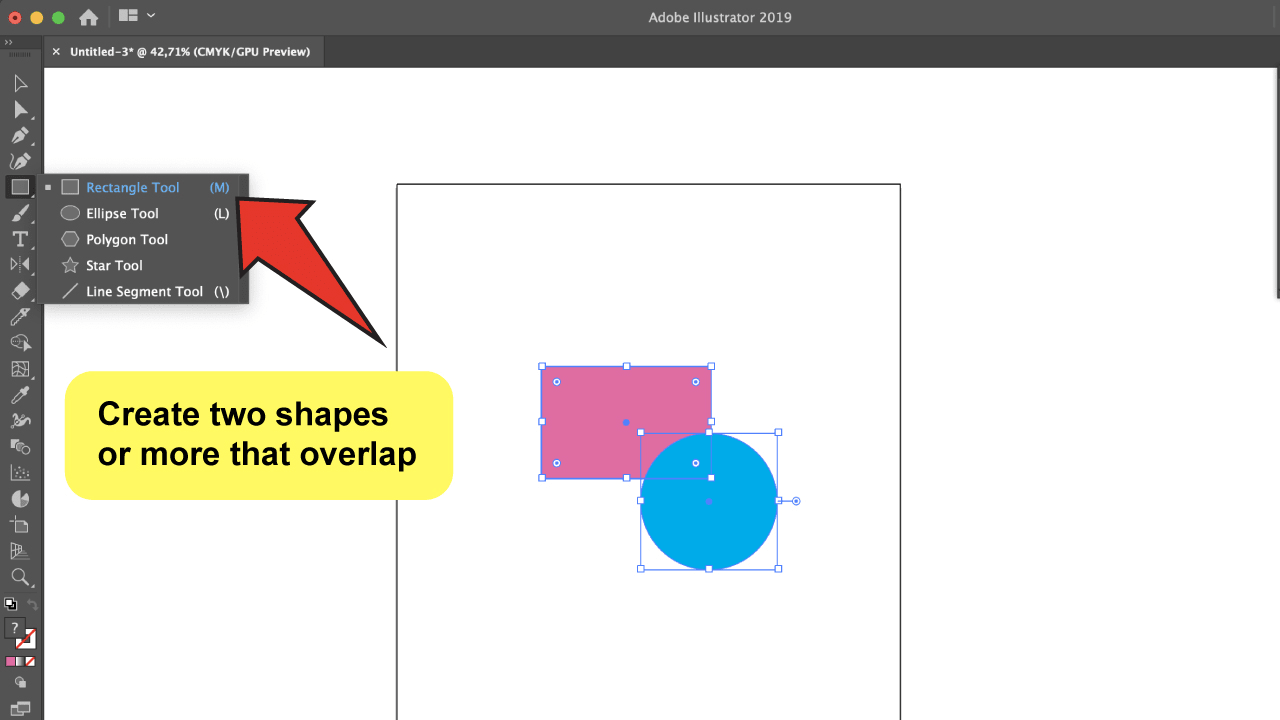
If you don’t have any shape yet, you can create one: go to click and hold over the “Rectangle Tool” on the left toolbar. This will bring up a submenu with a selection of the other shape presets available.
Step 2:
Select the tool from the menu.
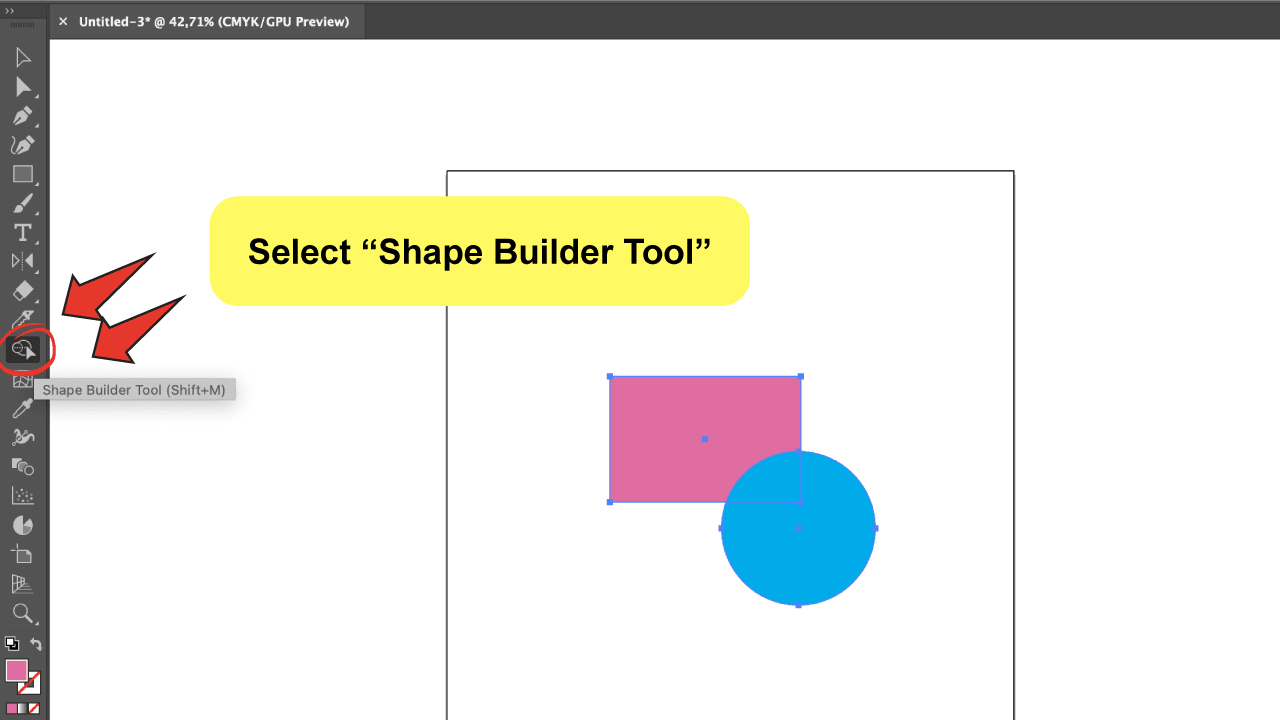
Head over the toolbar on the left to select the “Shape Builder Tool” (it looks like an arrow over a chat bubble).
Once you’re on it, you can hover over the shapes you´ve selected, and notice that each of the overlapping parts has become already a separated object.
Step 3:
Apply: Merge, Extract, or Erase
Now, adjust your seat belt: it’s time for action! Here are the instructions for each mode:
“Merge” mode. Simply click and drag the tool over the overlapping shapes. You‘ll see that all the overlapping sections were removed and your new shape was created.
“Extract” mode. To subtract from your selection, simply grab the tool and click on the overlapping area that you want to separate from the rest. Go back to “Selection Tool”, click on the same area, and you’ll see that it has already been separated from the main object. You will see additional anchor points were introduced where the shapes broke up.
“Erase” mode. Just click (or drag if you want to select multiple parts) on the area you want to remove while holding the “Alt” or “Option” key. The area you selected will disappear in a second!
Frequently Asked Questions About How To Use the Adobe Illustrator Shape Builder Tool
When I select the Shape Builder tool, nothing happens. What’s wrong?
The “Shape Builder Tool” is not going to work unless your objects are selected. So make sure you’ve done this, and try again.
Do I get better results with the Shape Builder tool than using the “Pathfinder”?
The truth is that the results are pretty similar, but the process will be way easier with the “Shape Builder Tool”.
Is the “Shape Builder Tool” available on any Adobe Illustrator version?
Actually, the tool was included in Illustrator CS5, so it´s only available in all subsequent versions, including that one.

Hey guys! It’s me, Marcel, aka Maschi. On MaschiTuts, it’s all about tutorials! No matter the topic of the article, the goal always remains the same: Providing you guys with the most in-depth and helpful tutorials!


