
People tend to believe that drawing in Adobe Illustrator is merely putting geometric shapes together.
But the fact is that if you learn how to use the right tools, you can have a truly seamless experience.
There is more than one method to draw in Adobe Illustrator, and it implies different tools, all of which are really effective and from which you may select depending on your needs.
But when I picture anyone drawing, I instinctively think of brushes and pencils. So, let me get you started with the tool that will offer you the most efficiency to draw free-hand, so you can have a more intuitive drawing experience.
If you want to draw in Illustrator, you have to know that having a drawing tablet could really make a difference. Otherwise, it will be hard to get the same results.
Tablets are pressure-sensitive devices that, when paired with some of the tools I’ve mentioned, can take you to a more realistic drawing experience and give you more creative freedom!
How to Draw in Adobe Illustrator
To begin drawing in Adobe Illustrator, use the “Paintbrush Tool” (B). Press “F5” to open the “Brushes” panel and pick a brush to work with. You can now freely draw on the canvas by just clicking and dragging.
How to Draw in Illustrator: Step-by-step Tutorial
Drawing with Illustrator basically consists in creating vector paths and then adding brushes to those paths based on the desired appearance.
You can either generate these paths by using any of the software’s preset shape tools, such as the square, rectangle, circle, and so on.
Or you can use the “Paintbrush Tool,” “Pencil Tool,” ”Blob Brush Tool,” or even the “Pen Tool,” which has a different mechanism than the previously mentioned.
But, when it comes to drawing, I believe the “Paintbrush Tool” stands out because you can add a brush stroke as you draw, creating a more pleasant and fluid drawing experience.
So, let’s get started with the fundamentals of drawing. And who knows, you might become a pro once you master the tools!
Step 1
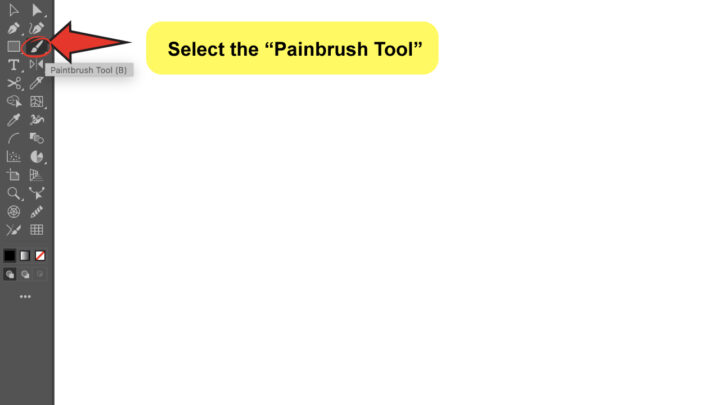
Select the “Paintbrush Tool”
Go to the toolbar on the left and pick the “Paintbrush Tool” or click “B” on your keyboard.
It should be easy to find as it actually looks like a brush.
Step 2
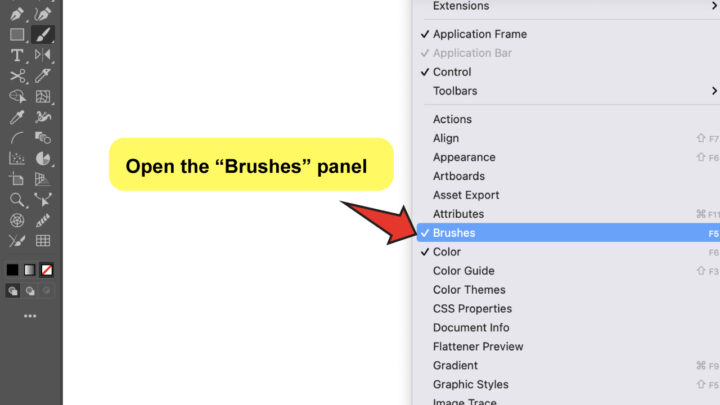
Choose a brush from the “Brushes” panel
Before you start sketching, you should select the brush you wish to apply from the “Brushes” panel. To access the panel, go to “Window”>”Brushes” or just press “F5”.
There are only a few default brushes available there. However, you can find a lot more by just clicking on the “Brush Libraries Menu” button in the panel’s lower-left corner.
I can’t leave out the fact that you can even design your own brush! But that’s another topic I won’t get into right now.
Feel free to experiment with as many brushes as you need before deciding on one. You can also return to the same panel at any time to change it, so there’s no need to feel rushed!
Step 3
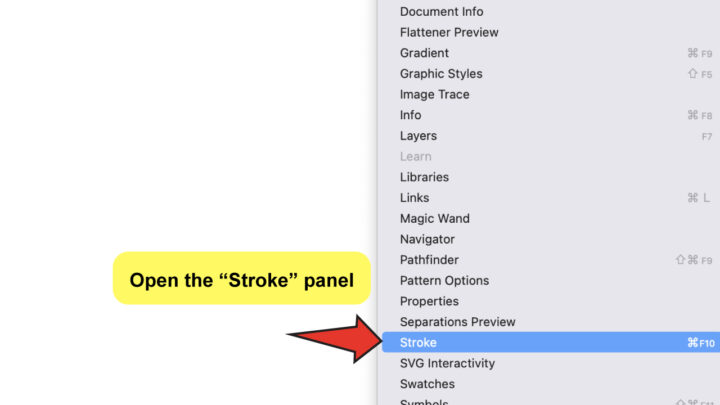
Set the “Stroke” size
To do so, go to “Window”>”Stroke” or press the “Control+F10” keyboard shortcut (“Command+F10” if you’re a Mac user) to open the “Stroke” panel.
Go to the “Weight” box and use the arrows to increase or decrease the number, or type it directly on the field.
Step 4
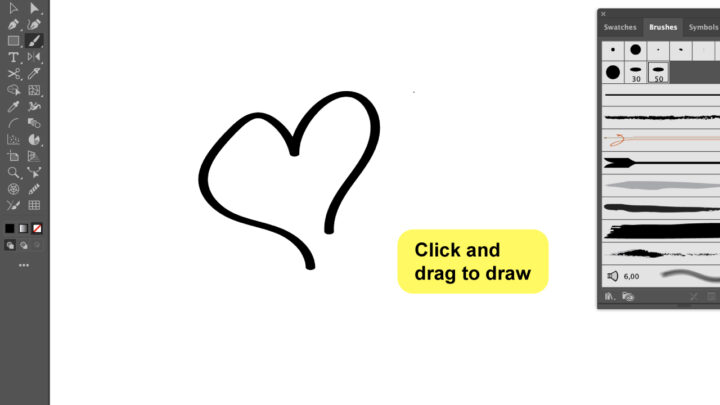
Draw!
Now that we are all set, the fun part begins! And, no, you don’t need to have drawing skills to do this.
To start drawing, simply click and drag anywhere on the canvas, and if you are working on a tablet, press your pen to the tablet and do the same.
This is the time to release your creativity and enjoy the process. So, go ahead and feel free to sketch, paint, trace over a picture, or whatever you have on your mind, this is an empty canvas and you are the artist!
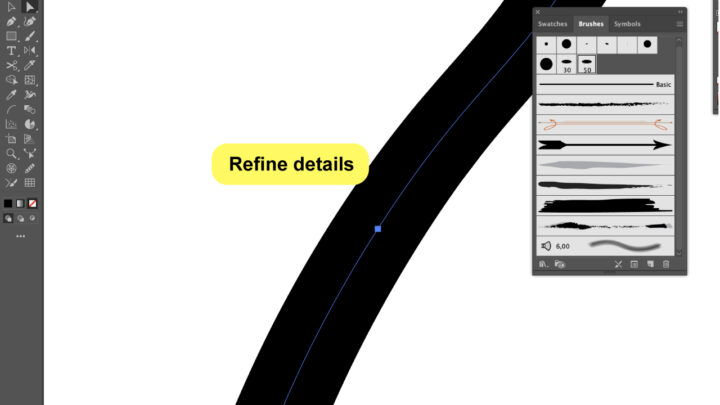
Step 5
Refine details
Now that we’ve proven that drawing with Illustrator is a lot of fun, I must tell you that you can edit the paths you’ve made infinitely!
So, if anything didn’t come through as planned, all you have to do is edit the path with any of the tools available.
Unless you’re a perfectionist, this step isn’t really necessary! So, I’m only going to recommend that you explore other tools that might serve as a complement or an alternative when you need to get more accurate.
Mostly tools that are best for editing anchor points and curvatures on your paths, such as the “Pen Tool” or the “Curvature Tool,” and, by the way, you can do a lot of magic by just editing your drawing with the “Direct Selection Tool.”
There are many tools that complement each other without being significantly different, and in some cases, these are just alternative presentations for an existing function.
I always advise using keyboard shortcuts when working in Illustrator, especially in this case, because the more shortcuts you utilize, the less you interrupt your workflow.
Frequently Asked Questions About How to Draw in Adobe Illustrator
Can I change the size of my drawing once I’ve done it?
Your drawing artwork is a vector path, which means you can freely scale, alter, and edit anything on it.
Can I continue to draw the same path after I’ve released it?
To continue drawing, just choose the route again with the “Selection Tool,” return to the “Paintbrush Tool,” and pick up where you left off.