

Suppose you want to draw a beach in Illustrator but have no idea where to start drawing a wavy line of the sea.
When I first started designing, I was very nervous about drawing wavy lines cause it appears to be more difficult than it really is.
But, luckily, we can create any shape that we want with Adobe Illustrator, and we always have the option of doing it automatically or manually also.
In this tutorial, I’ll show you three very different ways to create a wavy line.
1. Make a Wavy Line in Illustrator Using the “Zig Zag” Effect
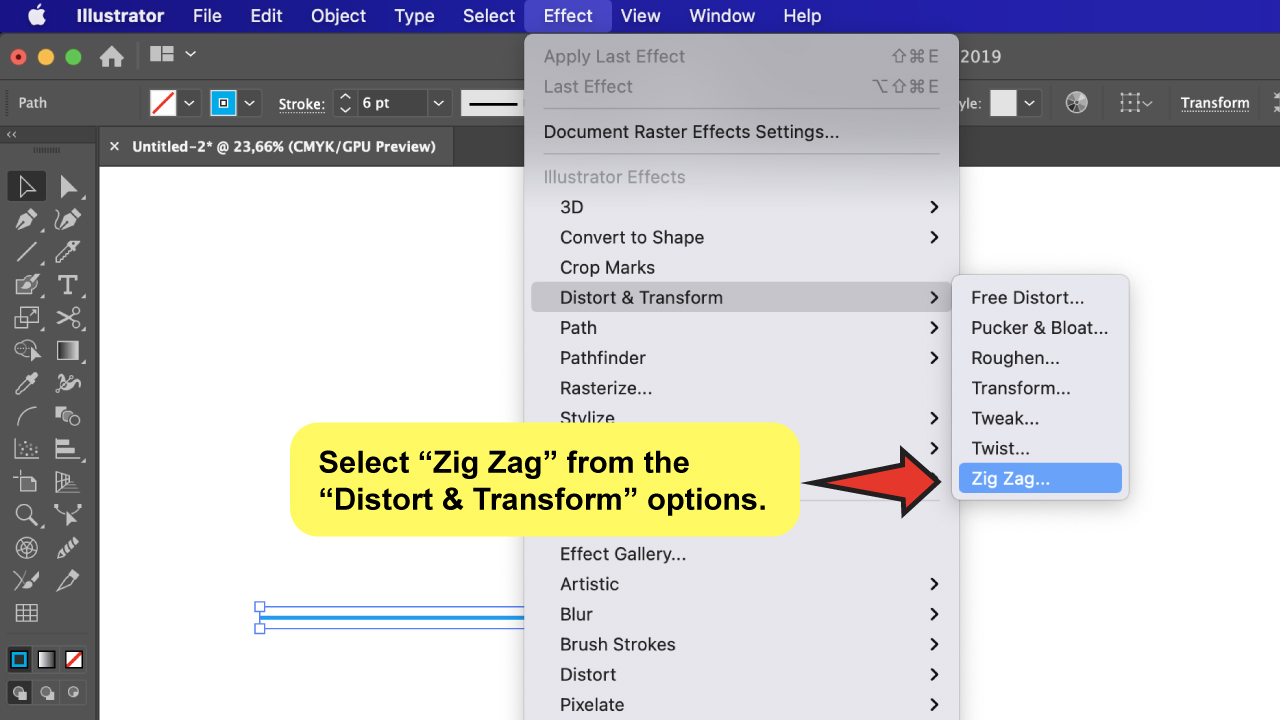
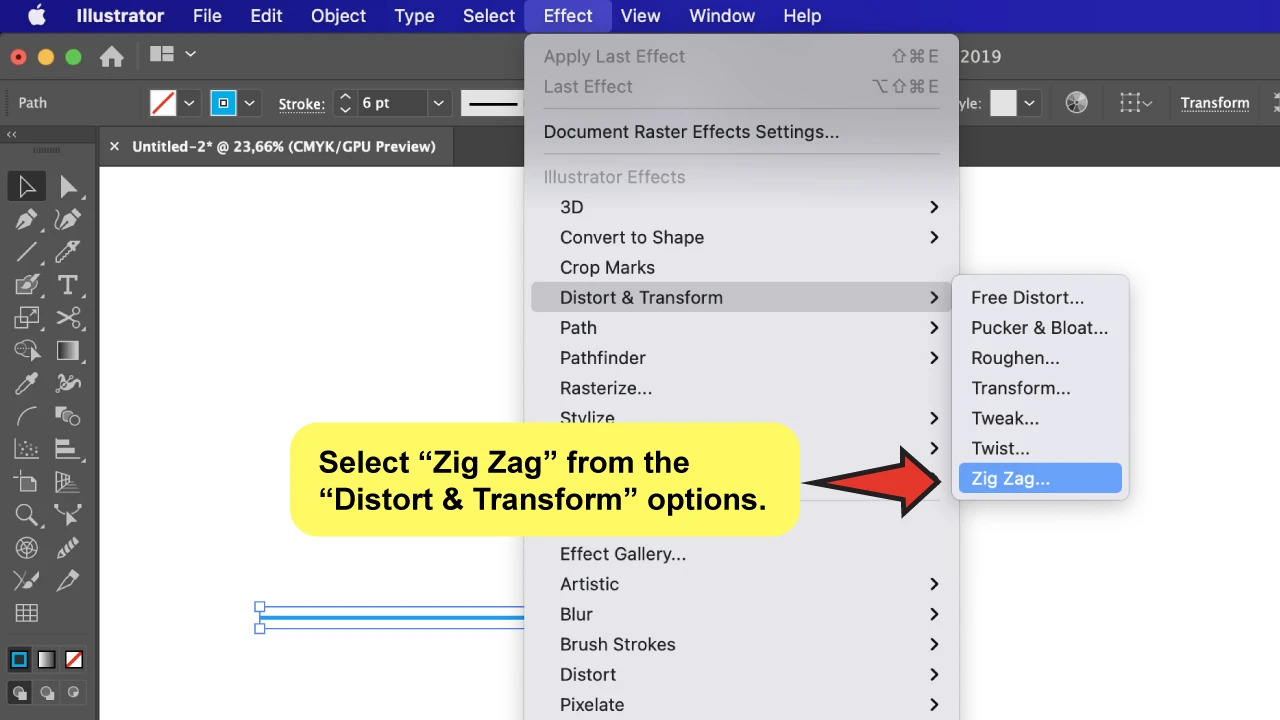
To make a wavy line in Illustrator, start by drawing a line using the “Line Segment Tool” or the “Pen Tool.” Select it with the “Selection Tool” (V), go to the top menu and go to “Effect” > “Distort & Transform” > “Zig Zag.” Change the “Points” option from “Corner” to “Smooth” and click “Ok.”
Step-by-step Guide
Step 1:
Choose a color for the stroke.
Check the color panel before drawing the straight line to see if you have a stroke color picked. If you don’t, go ahead and choose one.

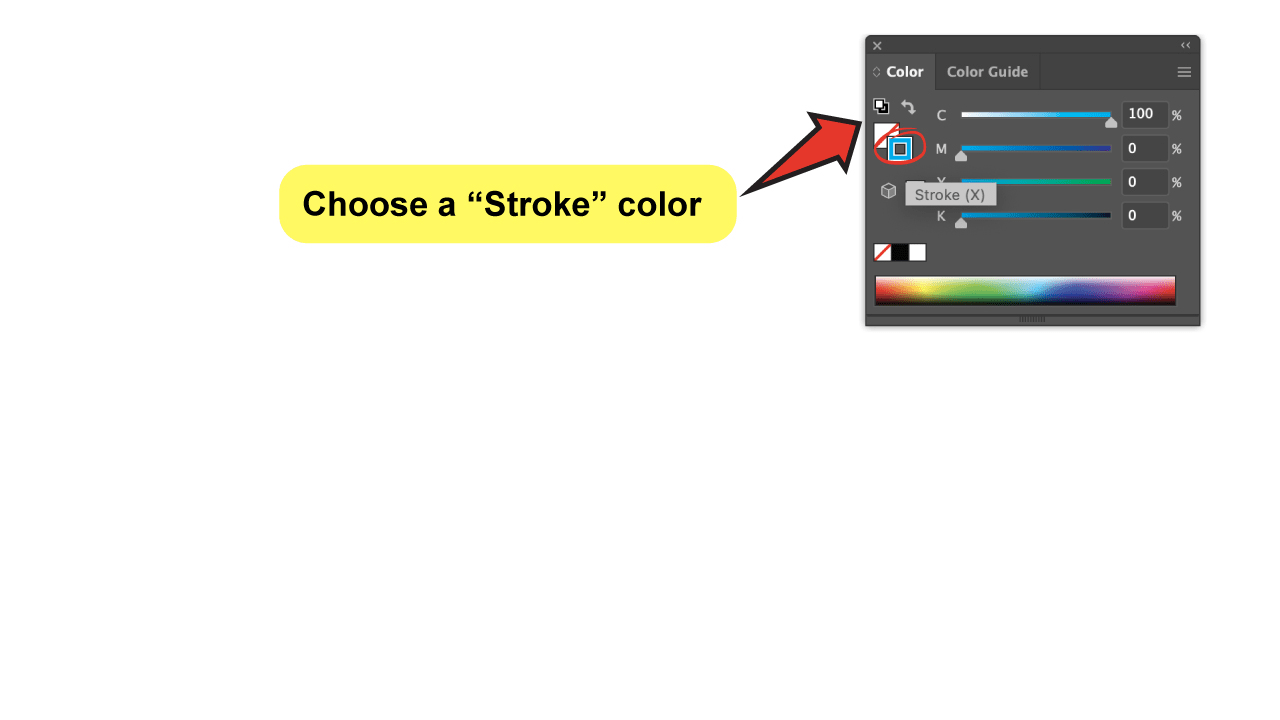
This is important because without the color, the stroke line will be transparent, and you will not be able to see it unless you select it. If you like, you can still change the color once the line is created.
Step 2:
Create a line.
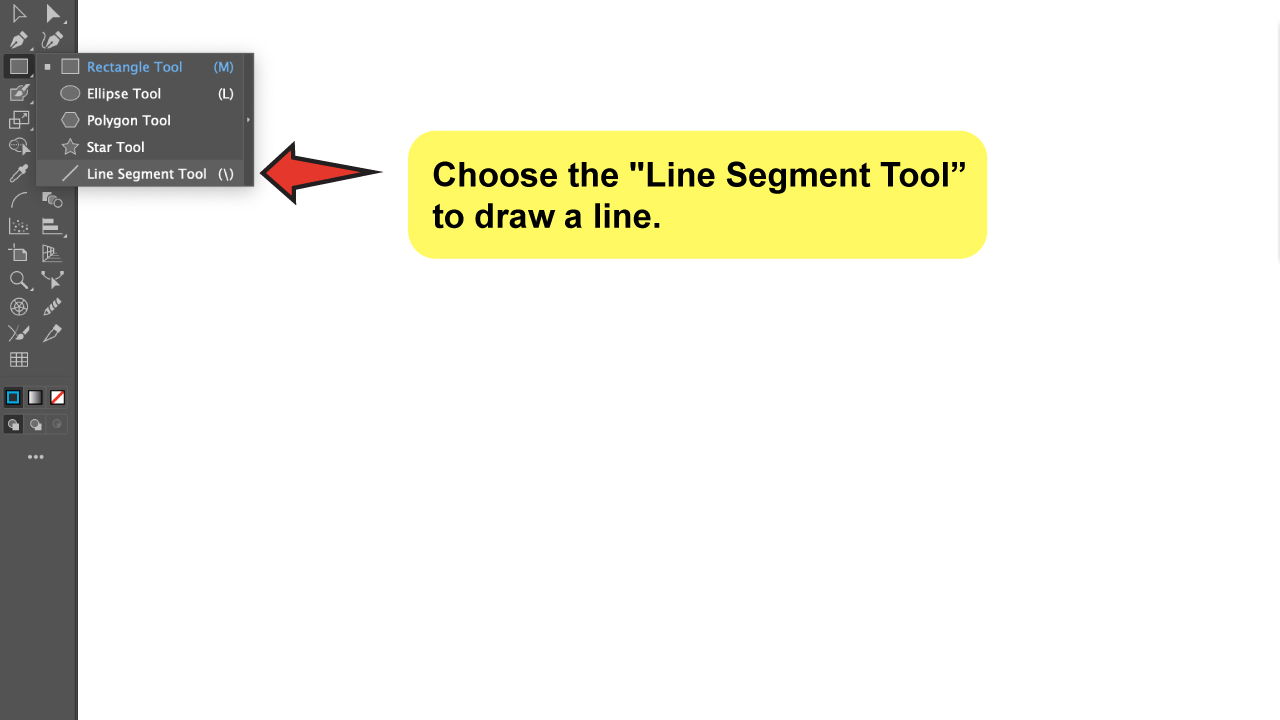
The first way to create a line is to click and hold on the “Rectangle Tool” located on the left toolbar. Select the last option from the menu, called “Line Segment Tool”.
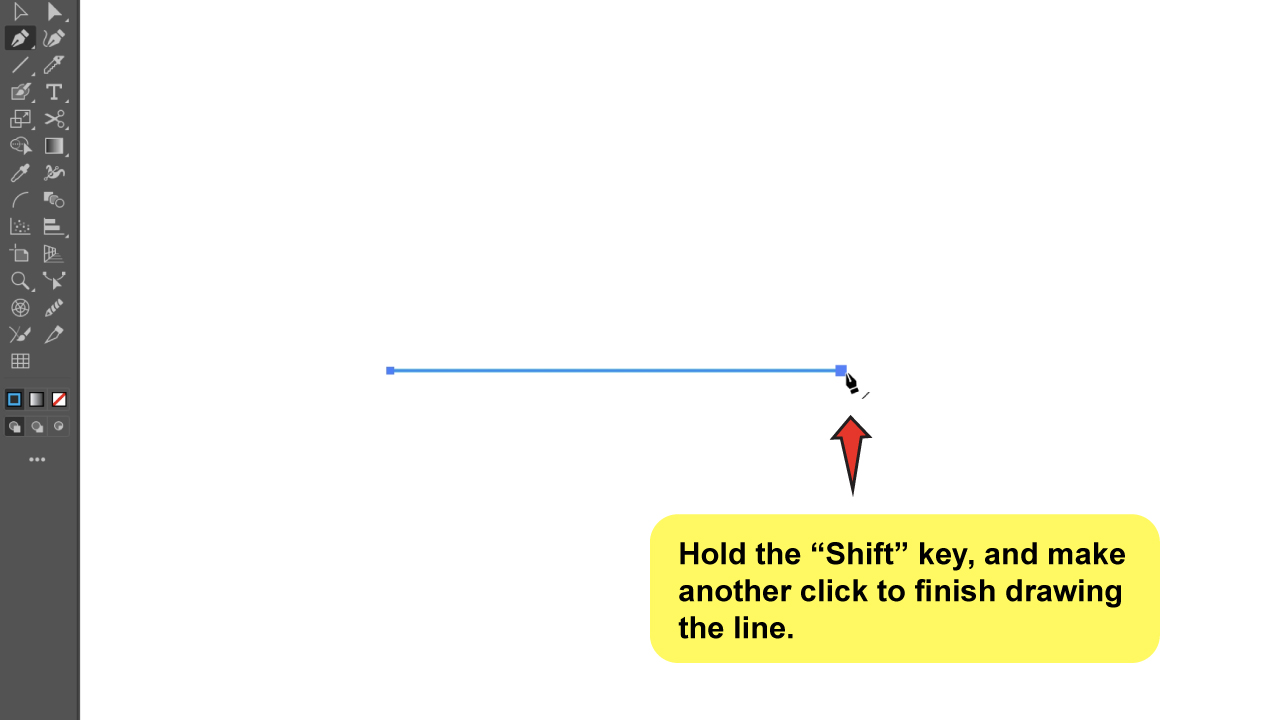
To draw a line with it, click on the canvas, and drag the cursor to a side while holding down the “Shift” key to keep the angle straight. Release when you’re done.

Another option is to use the “Pen Tool” to create a straight line. Just grab the tool from the left toolbar (or use the keyboard shortcut “P”) and click anywhere on the canvas.


All you have to do now is hold down the “Shift” key while clicking on another spot horizontally or vertically. The “Shift” key will allow you to preserve the angle while drawing the line, resulting in a perfectly straight line.

Step 3:
Apply the “Zig Zag” effect.
Select the line you just drew with the “Selection Tool” (V), go to the top-menu, and select “Effect”>”Distort & Transform”>”Zig Zag.” A menu-box will appear.
Step 4:
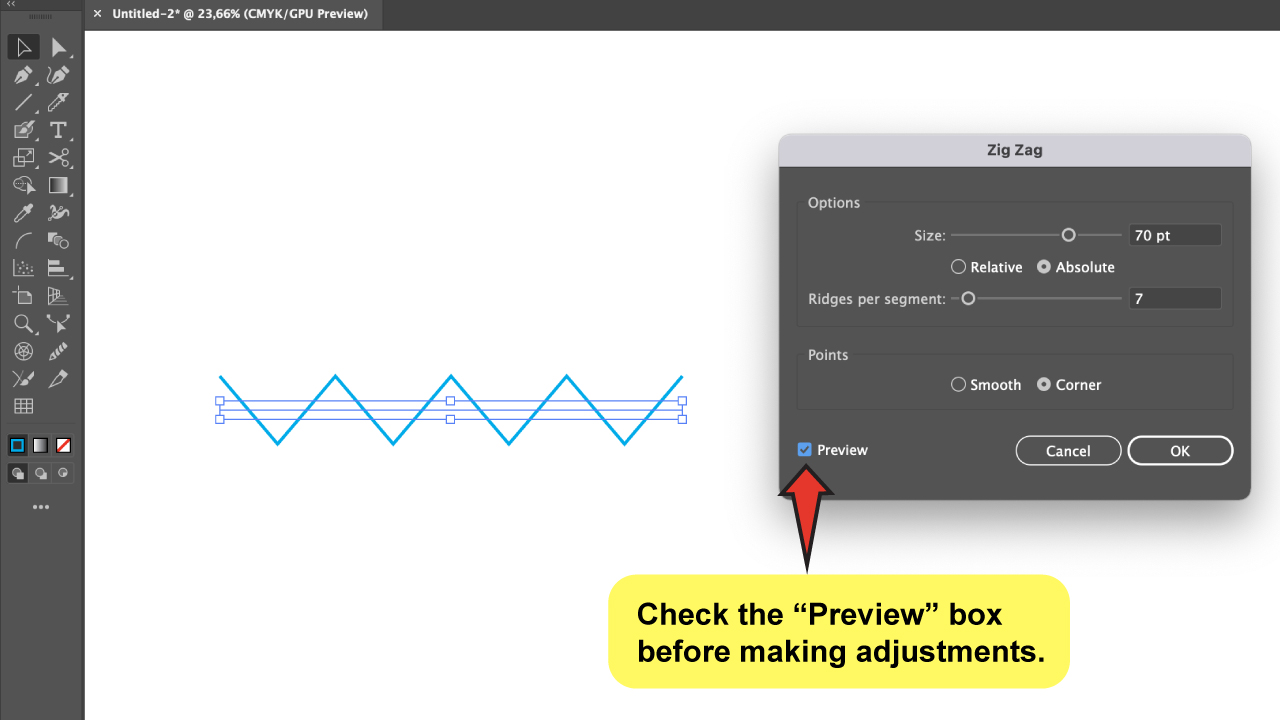
Adjust the “Zig Zag” settings.
Before making any adjustments, I recommend that you check the “Preview” box.

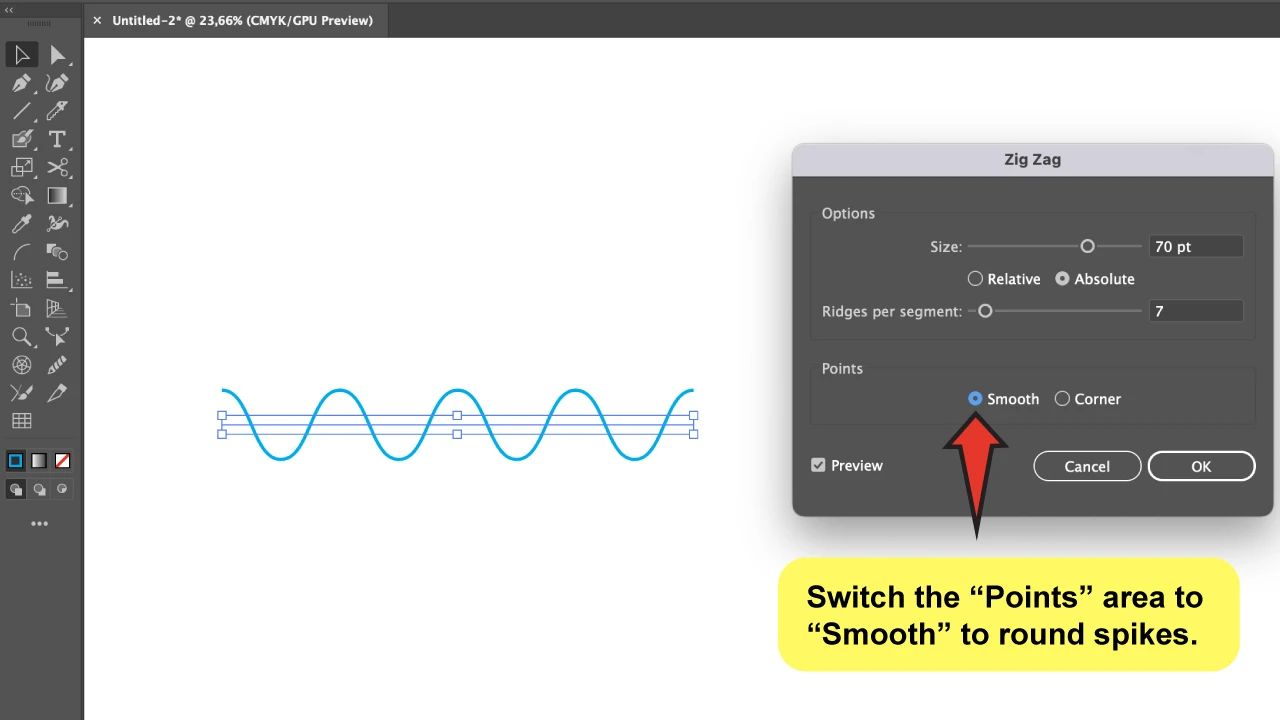
To begin, locate the “Points” area on the panel. You’ll see that this is already set to “Corner” by default, so what you’ll do is change it to “Smooth” to round the corners. This part is essential because here’s where you transform the spikes into waves.

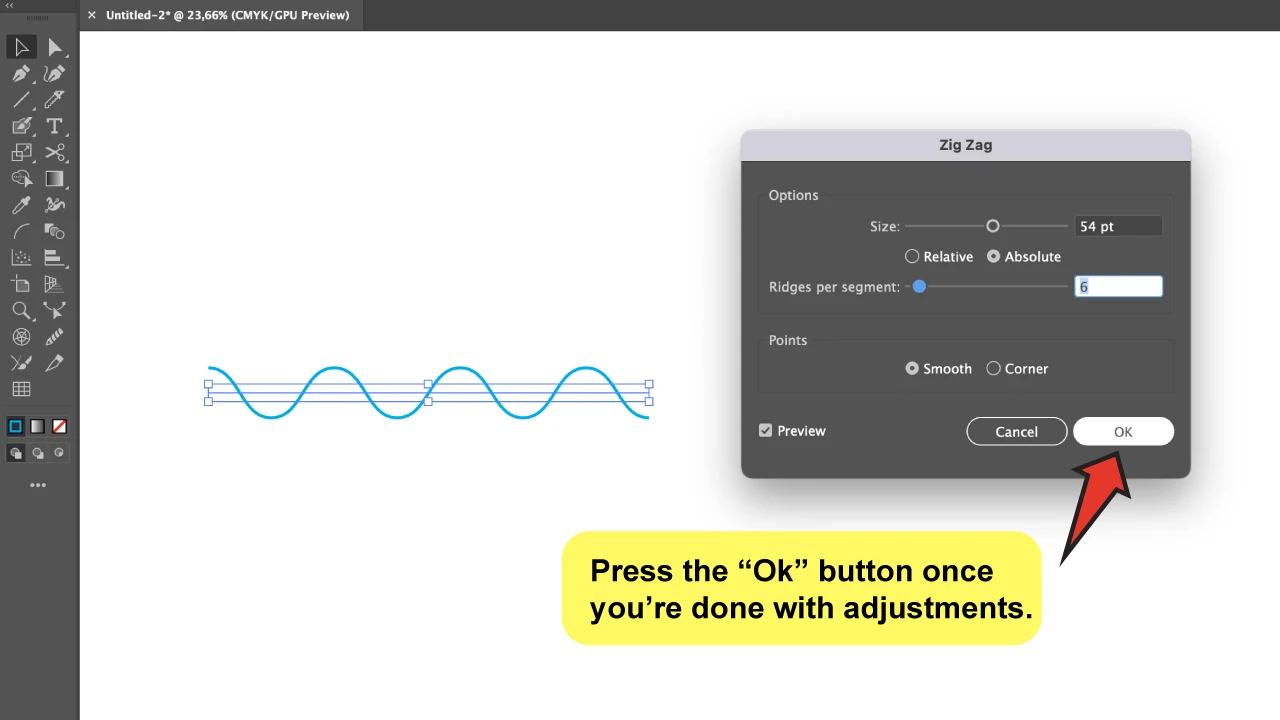
You can change the “Size” and “Ridges Per Segment” settings as needed. The “Size” defines how far the wave is from the baseline, while the “Ridges Per Segment” sets the number of waves.
When you’re done changing the settings, click “Ok.”

2. Make a Wavy Line in Illustrator Using the “Curvature Tool”
To make a wavy line in Illustrator, first, create a grid using the “Guides” and “Ruler”. Then, using the “Curvature Tool,” create the wavy line using the grid as a guide. Make the anchor points by clicking on the intersections. You will see that as you add anchor points, curves will be produced.
Step-by-step Guide
Because this is a more handmade method, it’s essential that you build a structure as a base before you begin if you want a more uniform wavy line at the end.
So, I’ll guide you through the first two steps so that you can make a basic grid.
However, if you want to create a more unstructured line, you may skip these first steps and get right to work.
Step 1:
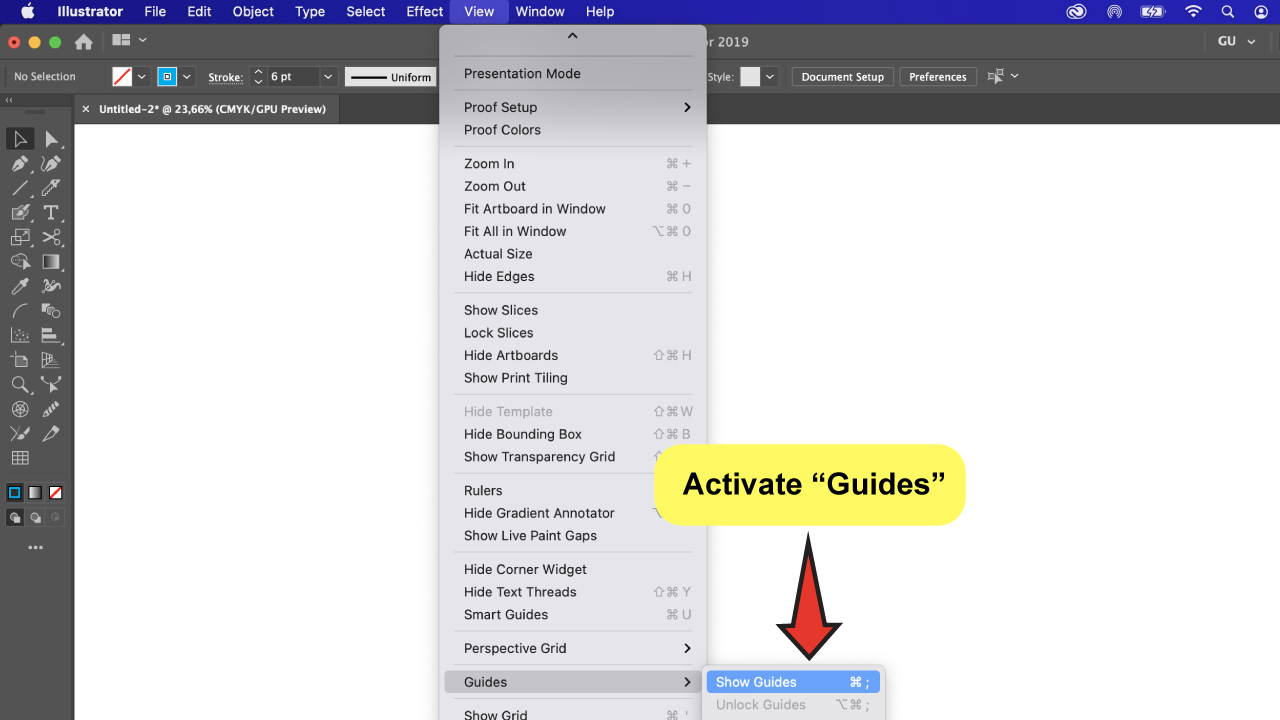
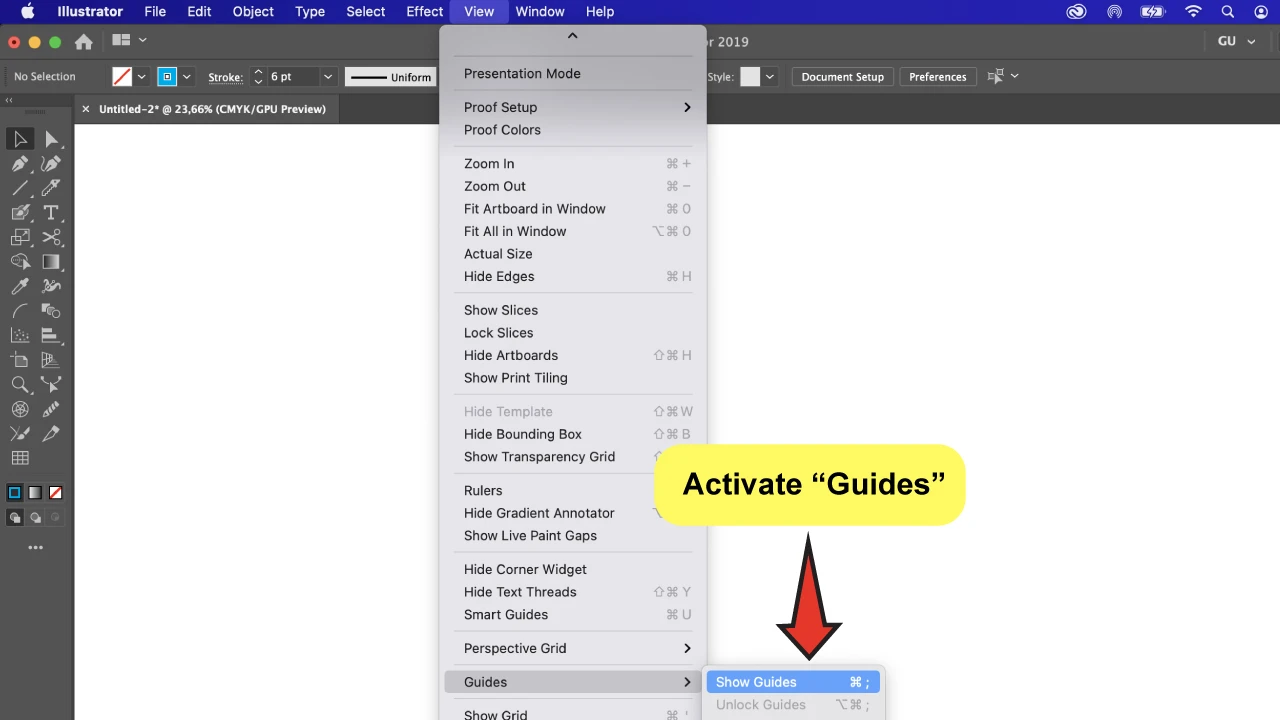
Activate the “Guides” and “Rulers”.
We’ll use the “Guides” to create a basic grid for creating the wavy line. So, to activate them, click on the top menu “View” option, and go to “Guides”>”Show Guides”.
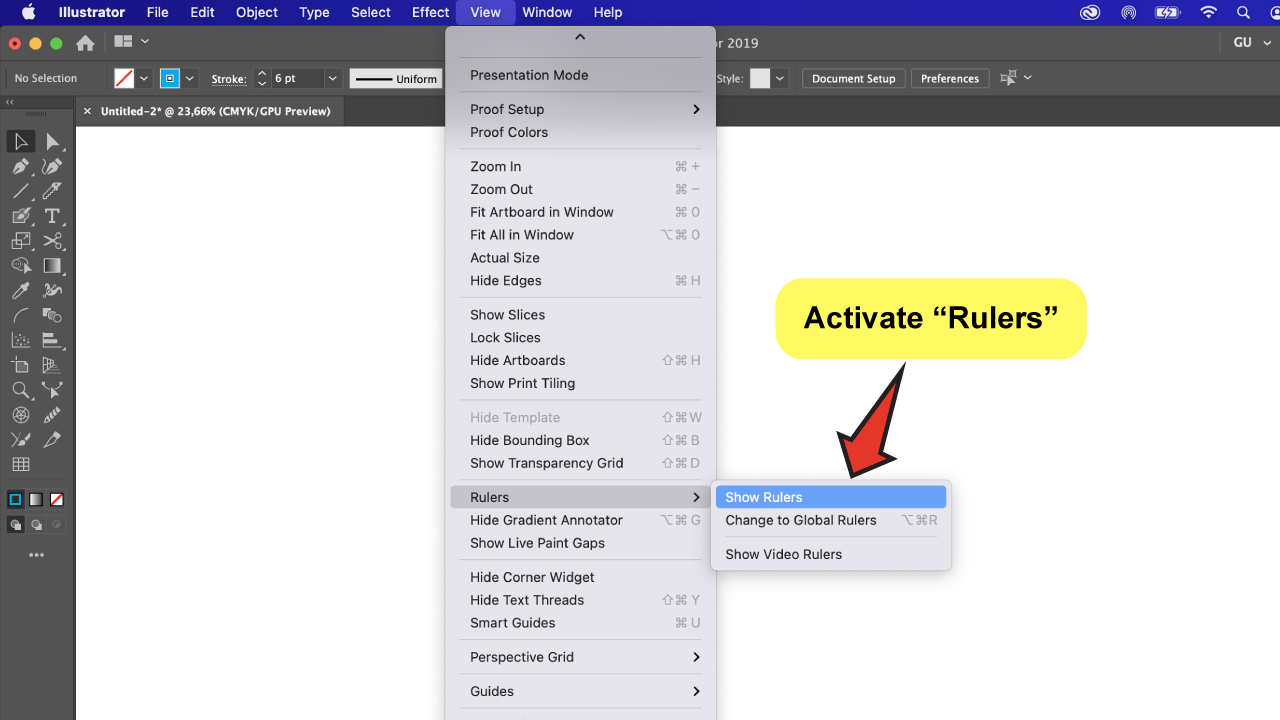
You will also want to display the “Rulers” because this is where you’ll get the new guides from. You can use the keyboard shortcut “Ctrl+ R” (Command if you are a Mac user) to do this or go to “View”>”Rulers”>”Show Rulers”.

Step 2:
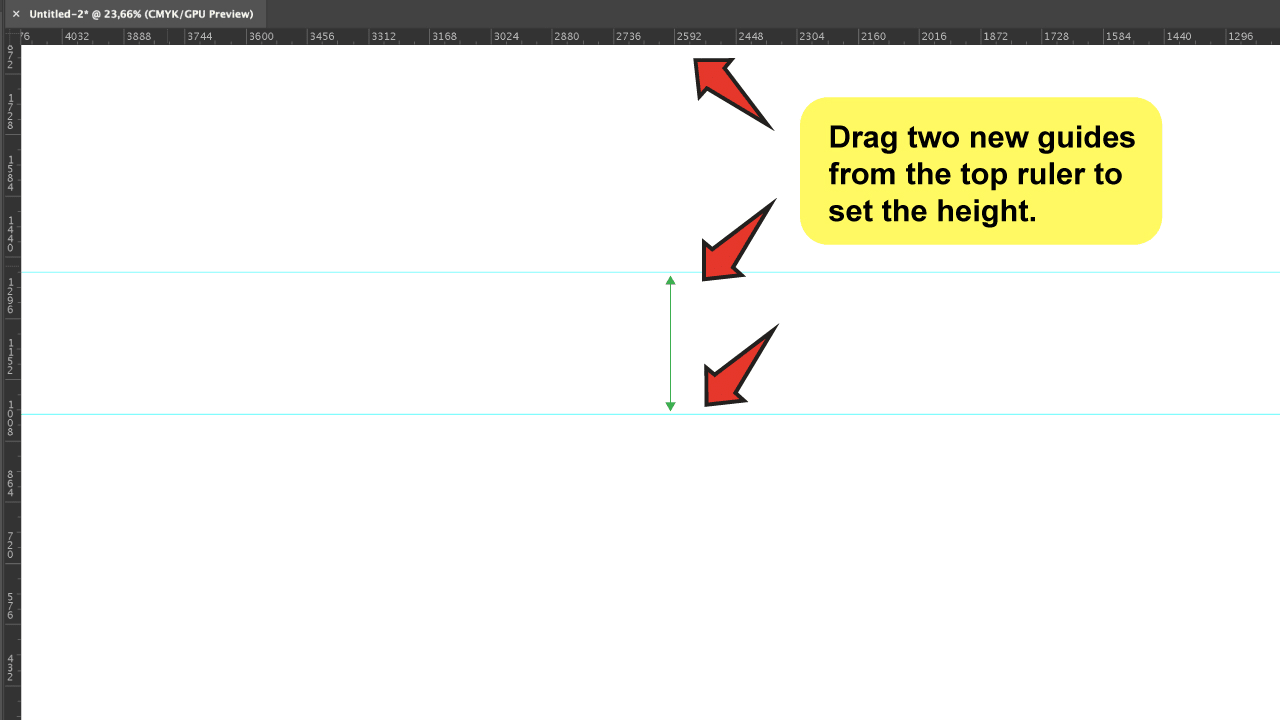
Create a grid with the “Guides”.
Drag a new horizontal guide into the canvas by clicking on the top ruler.
After that, bring in another guide to set the distance between them to equal the height of the wavy line you want to create.

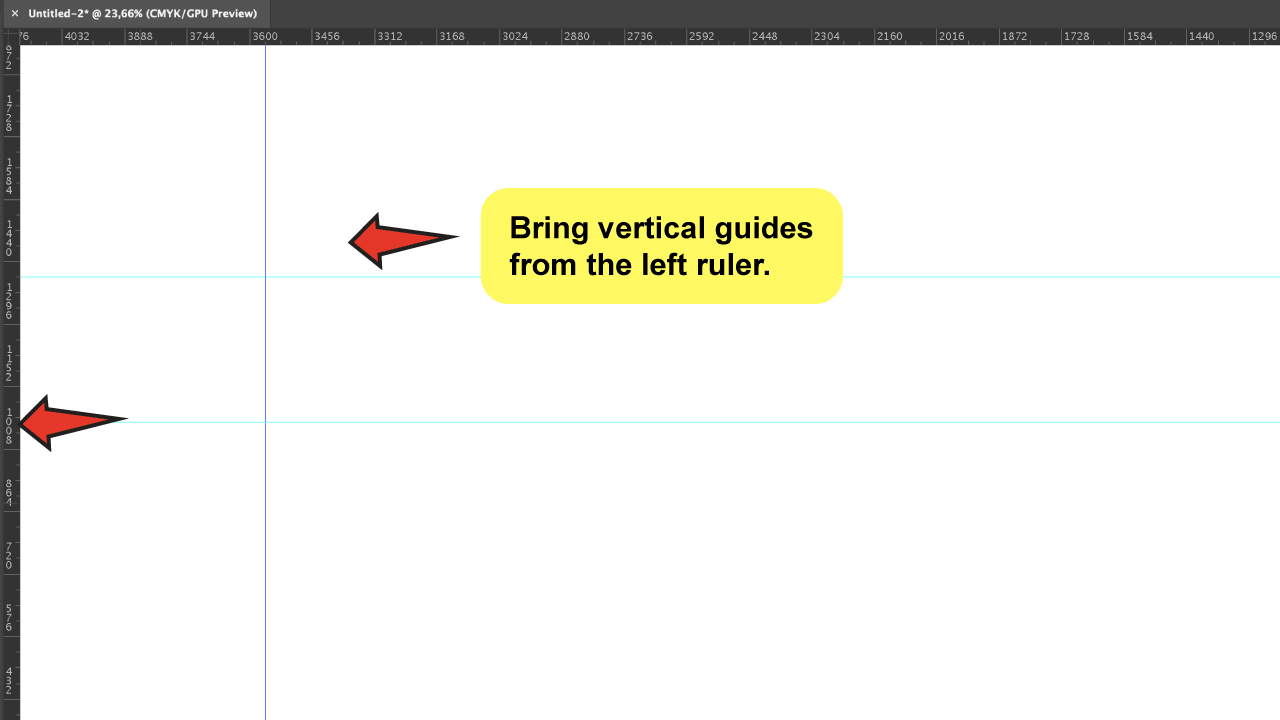
Repeat the process, but this time do it with vertical guides, that you will take from the left ruler.

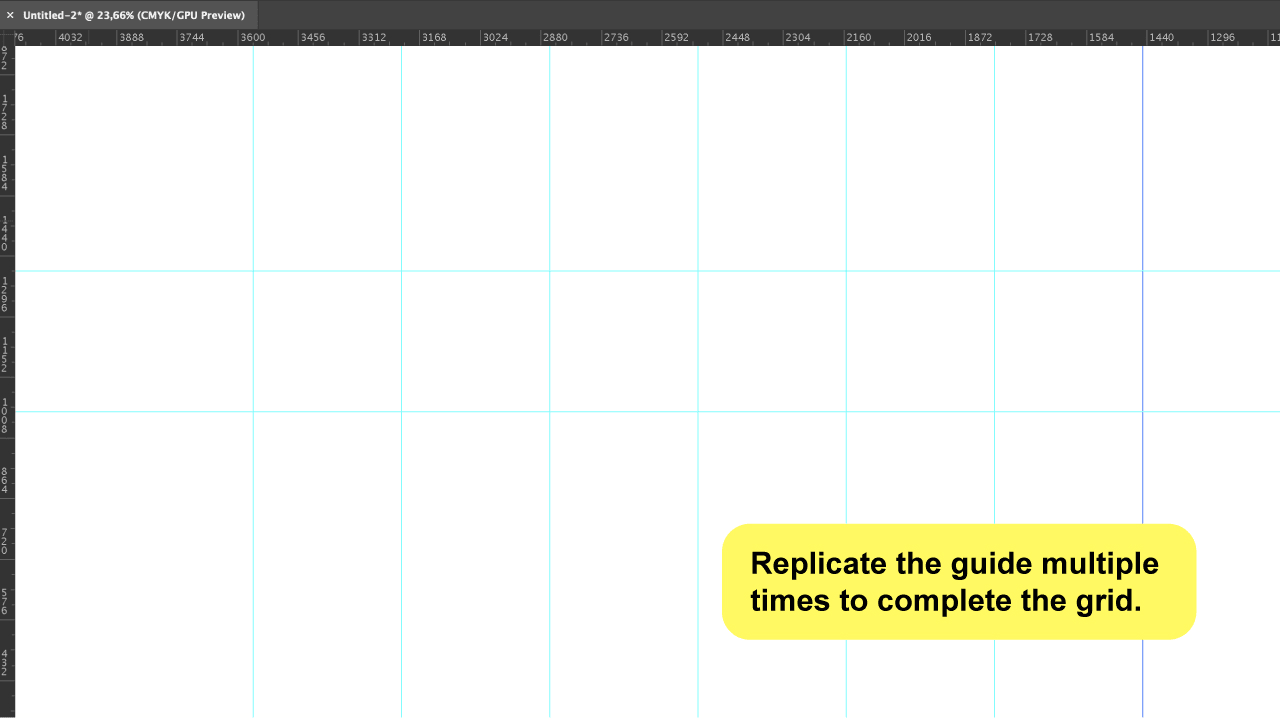
Now you are going to duplicate the guide you just drew. Click on it and hold the “Alt” key as you move the guide to the left or right side. This way you would be duplicating the guide, and so you can set the wave’s length.
To make multiple guides with the same distance as you just did, use the “Ctrl + D.” keyboard shortcut. This will replicate your last action as many times as you like. So, repeat as many times as the number of waves you want to have.

Step 3:
Create a wavy line with the “Curvature Tool”.
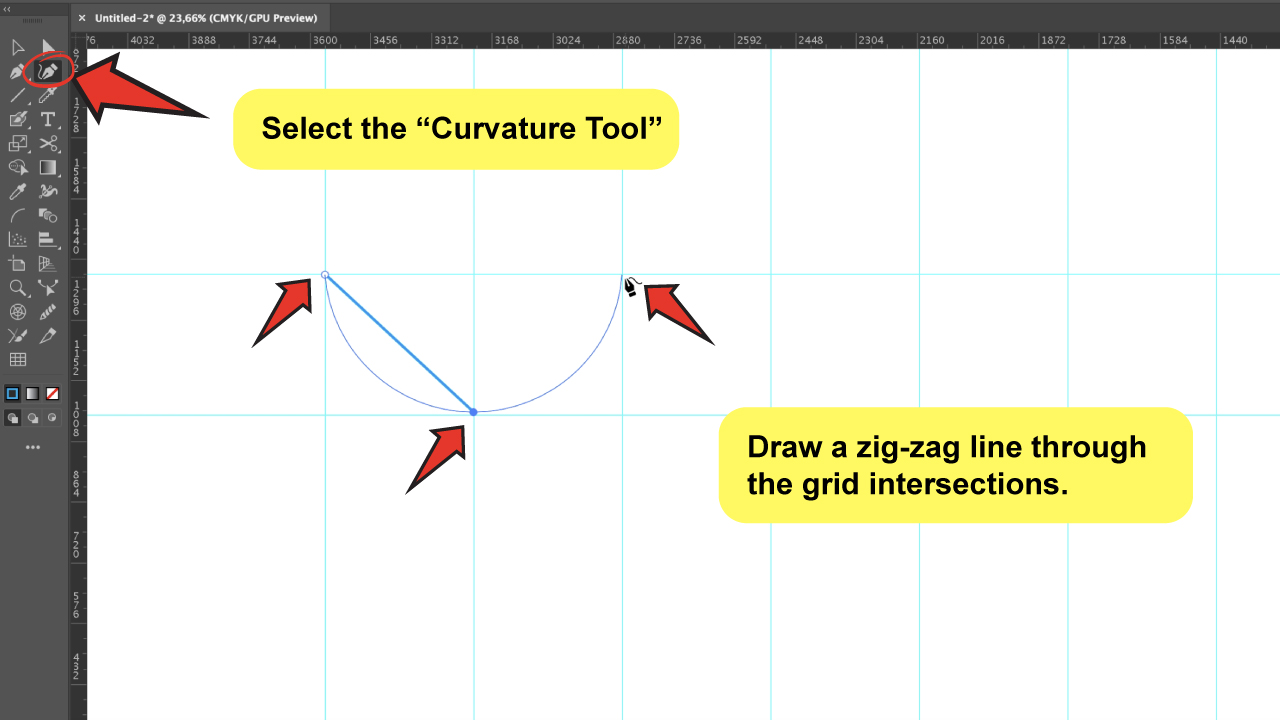
After you’ve created your grid, select the “Curvature Tool” from the toolbar on the left (It looks like a pen with a curve). What comes next is simpler than you think!
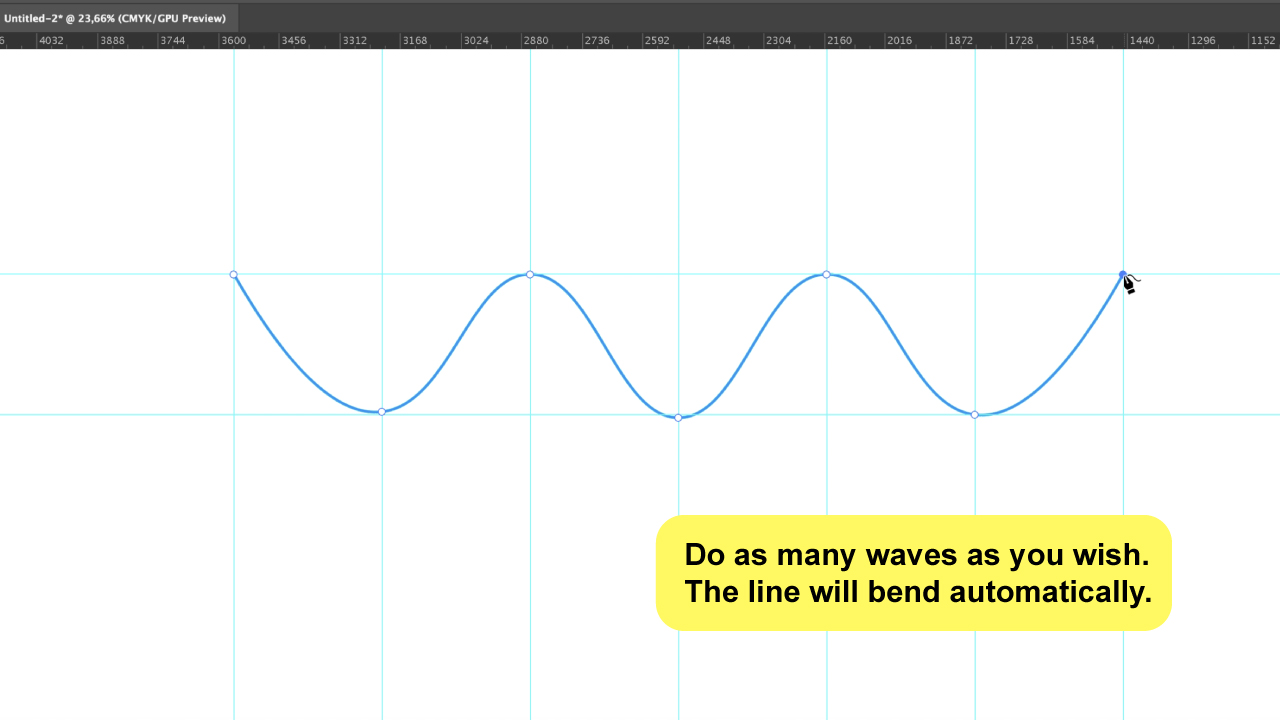
Draw a zig-zag line by clicking on the first intersection up, then the intersection opposite it down, and so on. As you add anchor points, you’ll see that the line begins to bend. Repeat this process until your wavy line is completed.

When you’re done, press “V” to choose the “Selection Tool” to release.

Step 4:
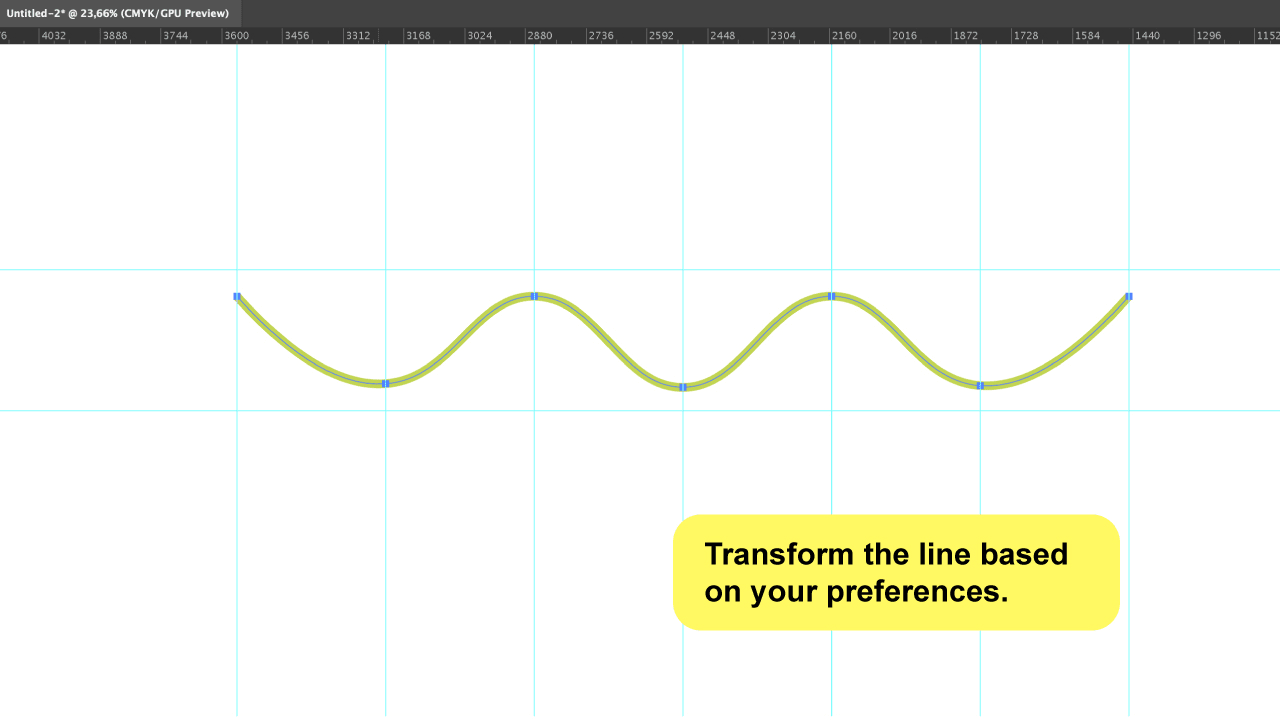
Transform your wavy line.
It is possible that we may be unhappy with the final result. So, now that you’ve created the line, you should know that you can still transform or edit it to meet your needs.
You can adjust the width or height, by just selecting the wavy line, and transforming it directly from the bounding box.
You may also apply a different color to it or alter the “Stroke” value to make it thinner or bolder. The possibilities are endless!

3. Make a Wavy Line in Illustrator Using the “Live Corner Widgets”
To make a wavy line in Illustrator first, activate the “Smart Guides” and make a zig-zag line with the “Pen Tool” (“P”). Select it with the “Selection Tool” and then switch to the “Direct Selection Tool” (“A”) to visualize the “Live Corner Widgets”. Drag it down to curve the spikes.
Step-by-step Guide
Step 1:
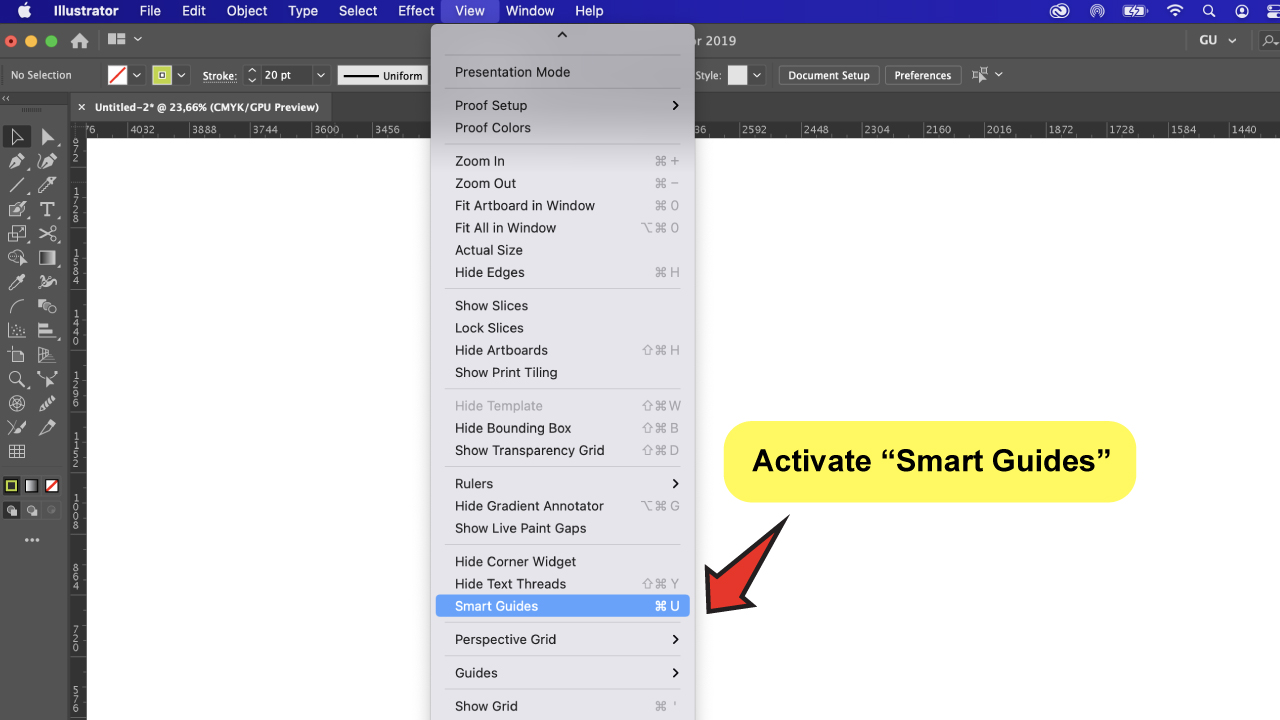
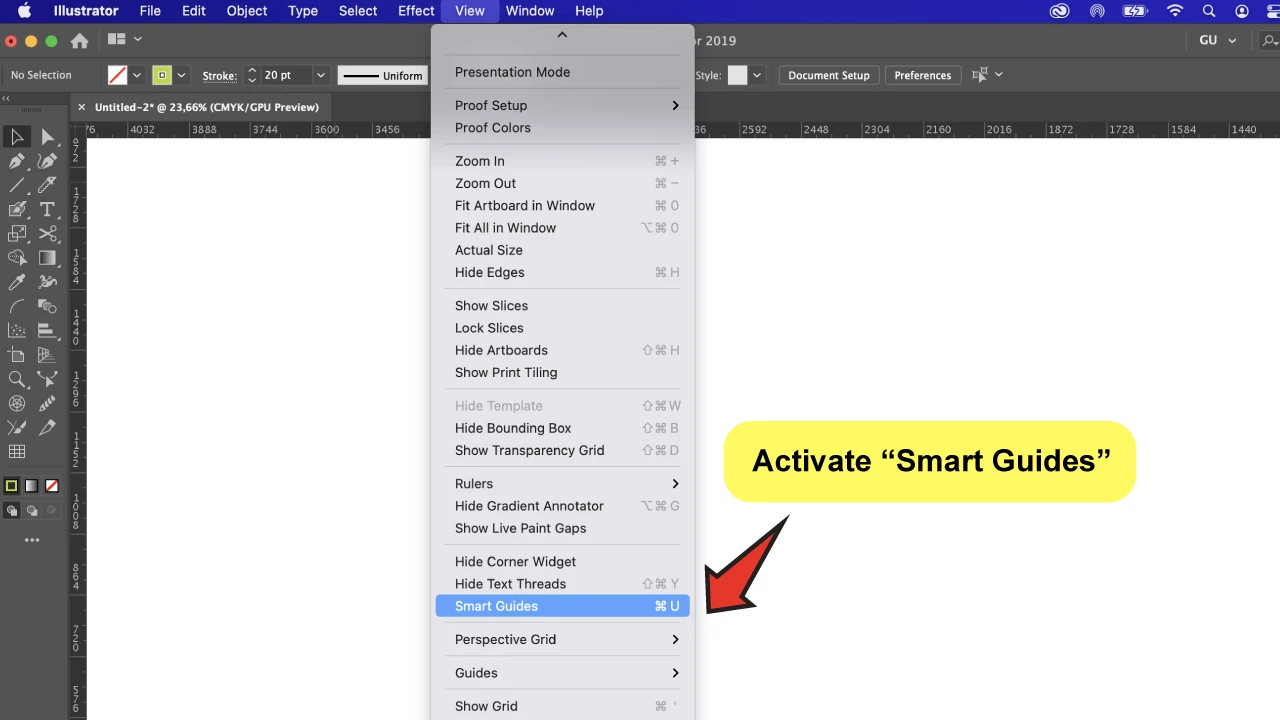
Activate the “Smart Guides”.
The “Smart Guides” will help you maintain your lines structured as you draw them. To activate them, go to the top menu and select “View”> “Smart Guides,” or use the keyboard shortcut “Ctrl+U.”
Step 2:
Create a zig-zag line.
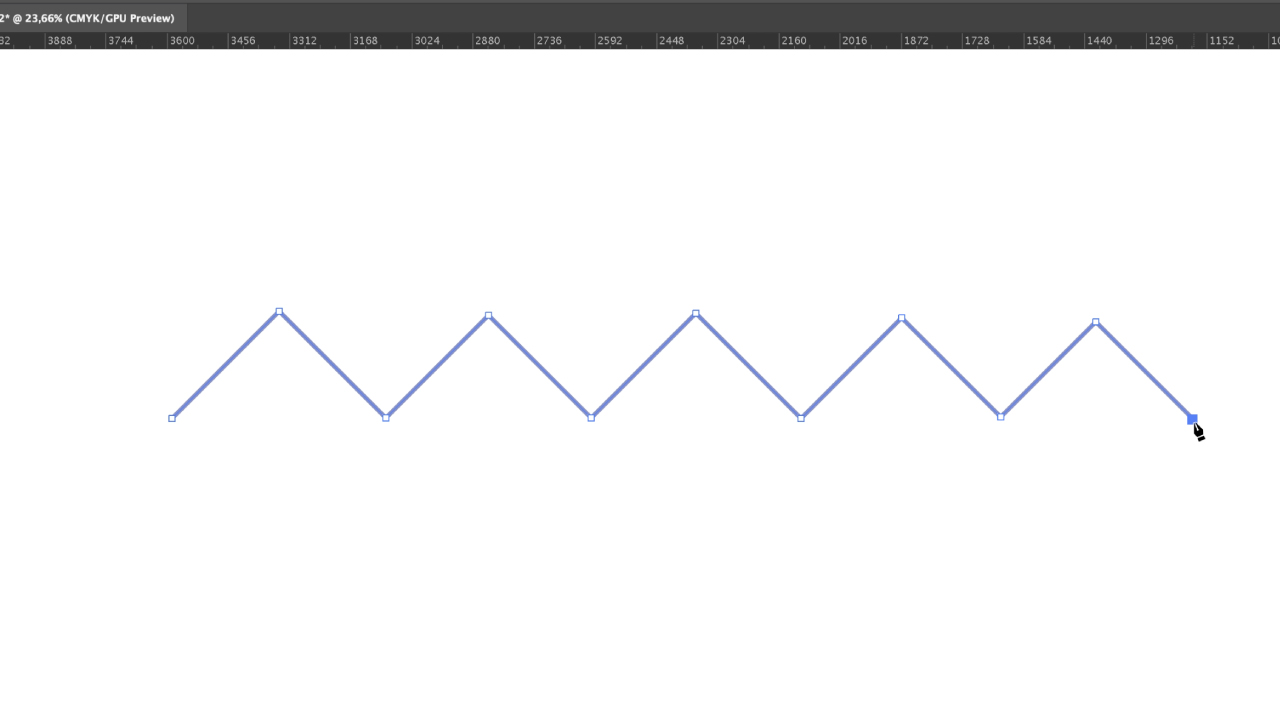
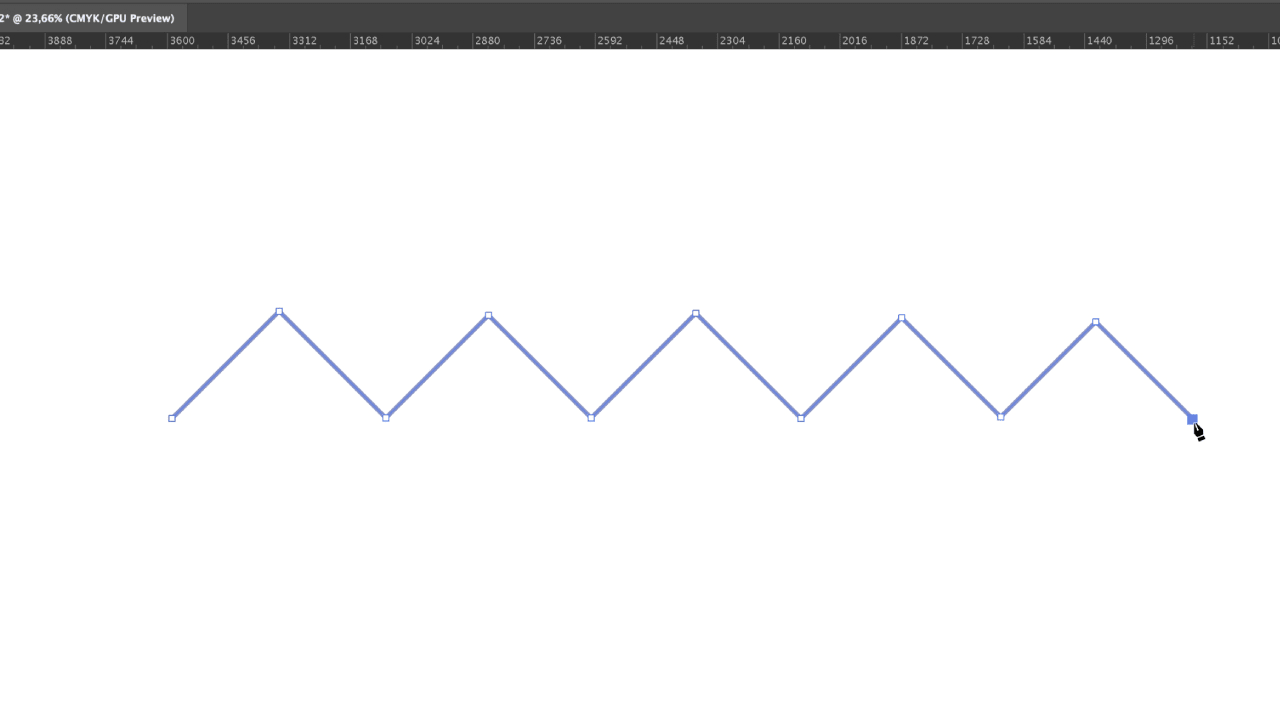
Take the “Pen Tool” (P) and draw a zig-zag line.
Make the first click on the canvas, then a second diagonally higher up. Finally, the third click diagonally lower down, and you’ll have a mountain so far!
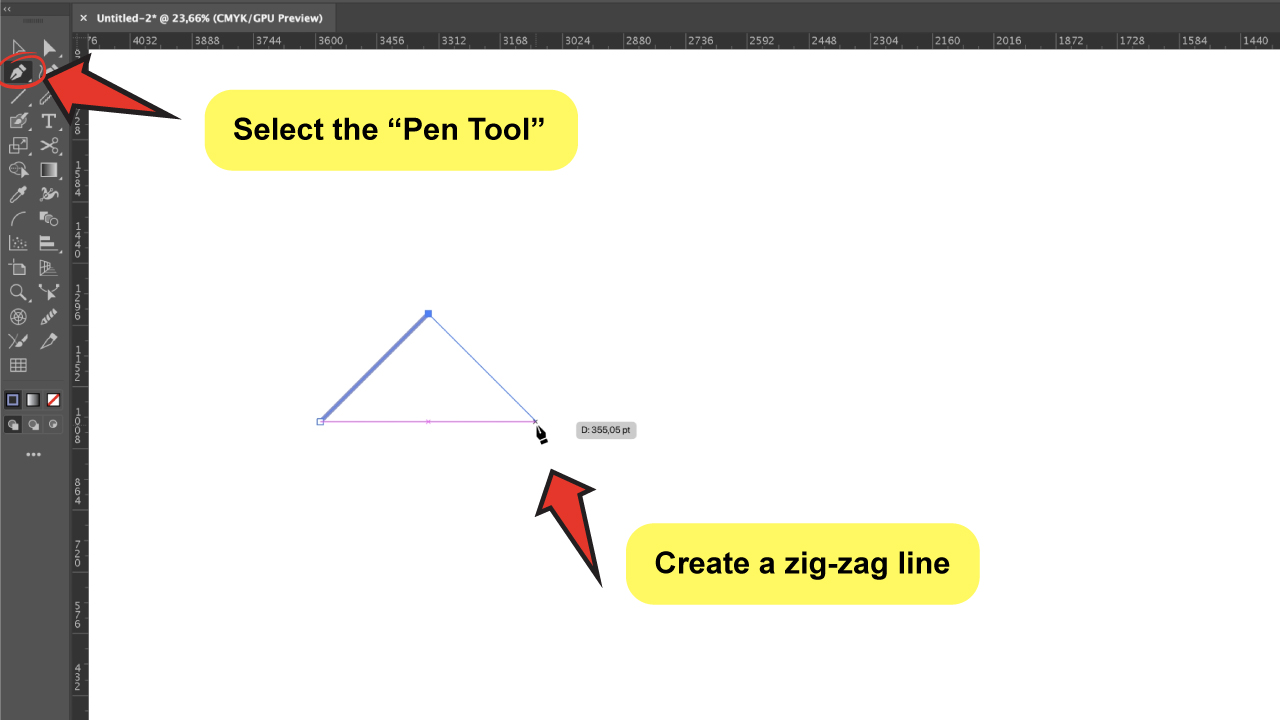

The “Smart Guides” will help you maintain the same height above and below by displaying a pink guide when it is the same height as you carry on with each click.
Keep it going as many times as you need. When you’re done, press “V” to choose the “Selection Tool” to release the anchor point.
Step 3:
Curve the spikes.
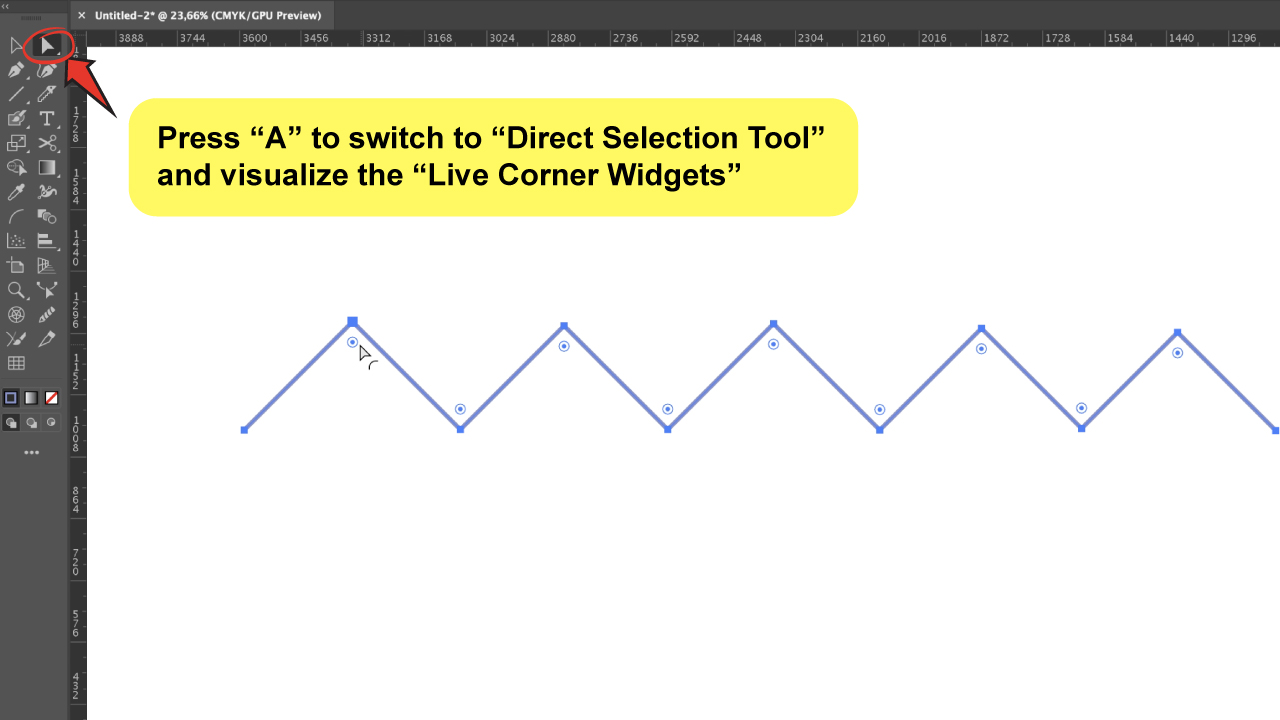
When you’re done with the zig-zag line, click on it with the “Selection Tool” (V) and switch to the “Direct Selection Tool” (A) while it remains selected.
Now you will notice that little circular handles appear on each of the pikes. Those are the “Live Corner Widgets”, and they are the feature that will help you round the corners of any shape in Illustrator in a matter of seconds!

Simply click on one of the handles to drag them down; the further you drag, the bigger the curvature you will get.
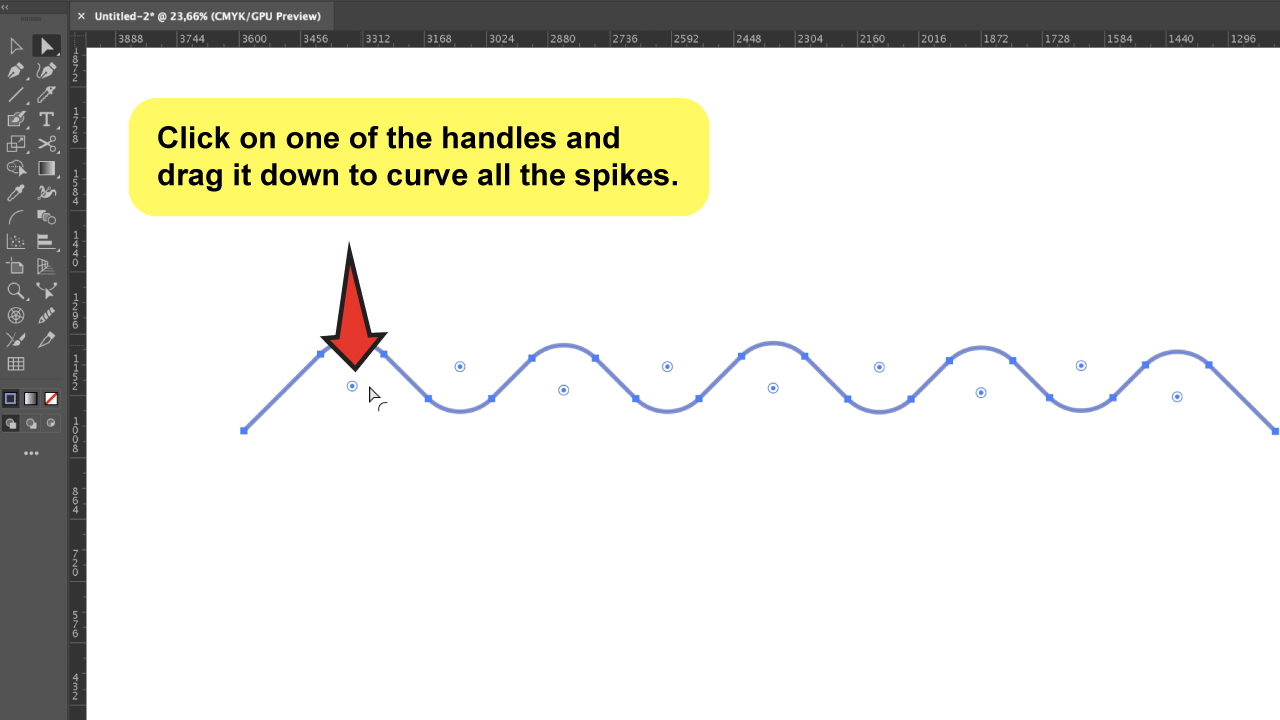

If you want to undo it, you can always drag them back up, and the shape will return to its original shape.


Hey guys! It’s me, Marcel, aka Maschi. On MaschiTuts, it’s all about tutorials! No matter the topic of the article, the goal always remains the same: Providing you guys with the most in-depth and helpful tutorials!

