Canva is a user-friendly platform for creating logos, YouTube thumbnails, and social media posts.
Their gallery offers a variety of customizable elements and photos. Canva Free users may encounter watermarks on Pro elements, but there are ways to legally remove them.
Keep reading to learn more.
How to Remove the Canva Watermark
To remove the Canva watermark, follow these steps:
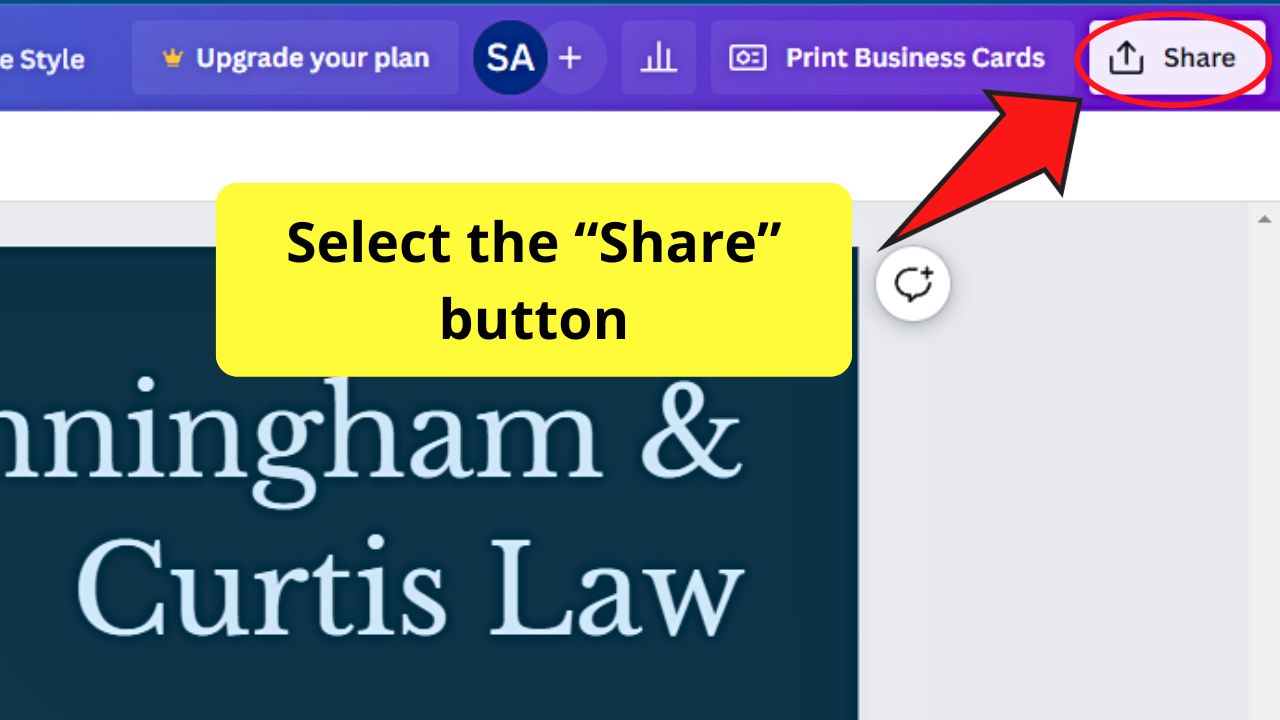
1. Click the “Share” button
2. Select “Download” on the dropdown menu
3. Click on a file type and select “Download”
4. Click “Try Canva for Teams for free”
5. Select the 3-dot icon
6. Click the “Purchase Pro Content License” button
7. Select a payment method and click the “Pay and Download” button
Once you’re satisfied with the layering of images and elements, do the following steps to remove the Canva watermark on your design.
Step 1: Click the “Share” button
Step 2: Select “Download” on the dropdown menu
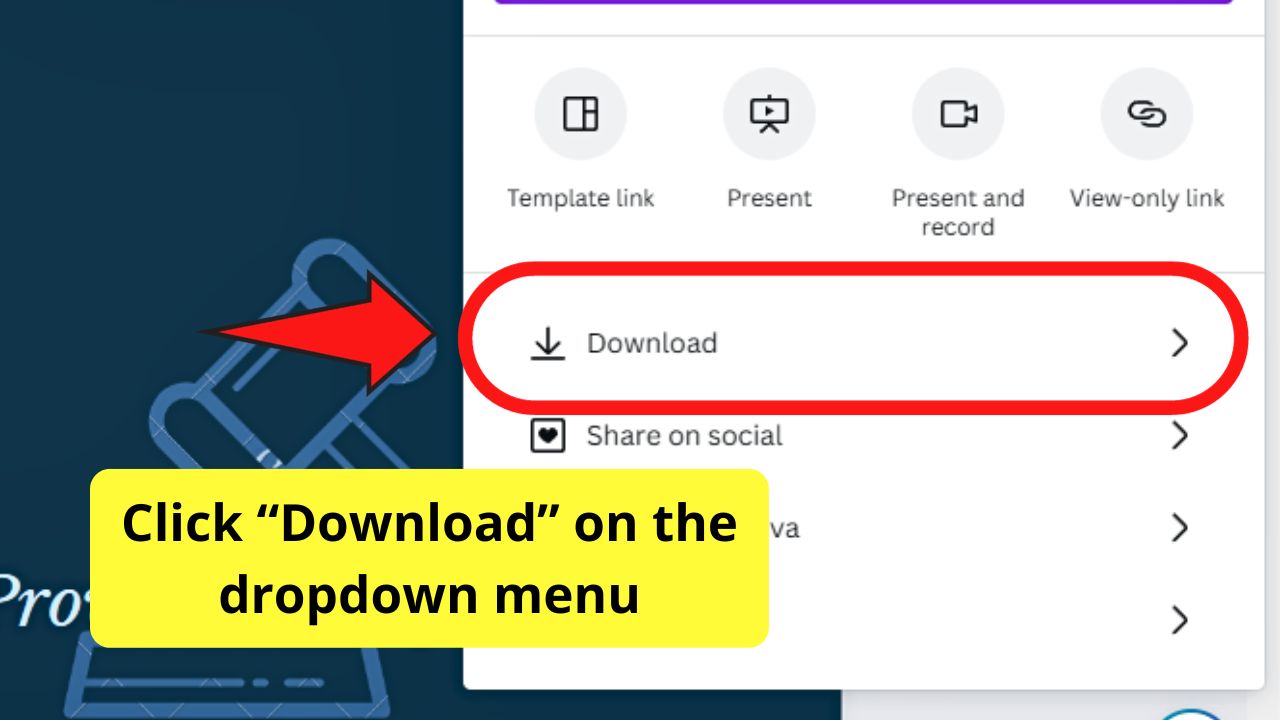
This is the option that follows the section presenting the other options that you can do with that particular Canva design.
Step 3: Click on a file type and select “Download”
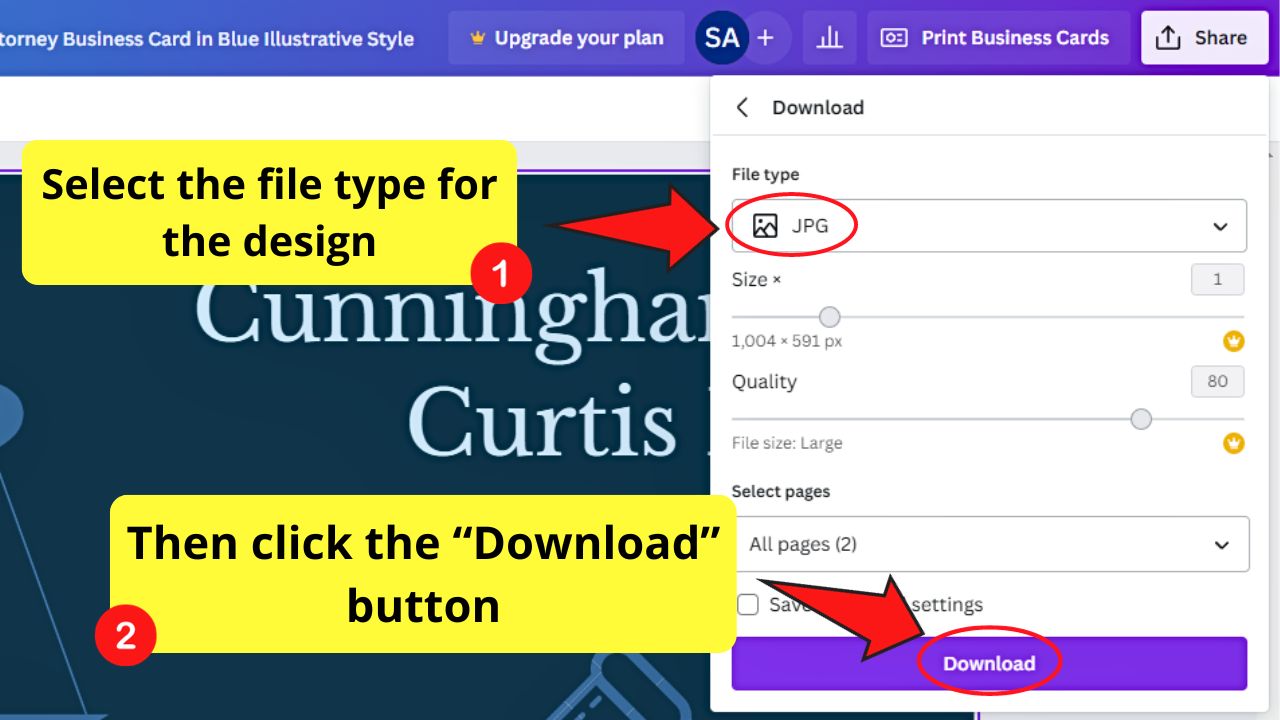
A dropdown menu appears, presenting the file type options that you can select for your Canva design.
If there are plenty of pages, you can tick the boxes of the pages you’d like to save on your device. Click “Done” once you’ve chosen the pages.
From there, click the purple “Download” button.
Step 4: Click “Try Canva Pro for free” or “Try Canva for Teams for free”
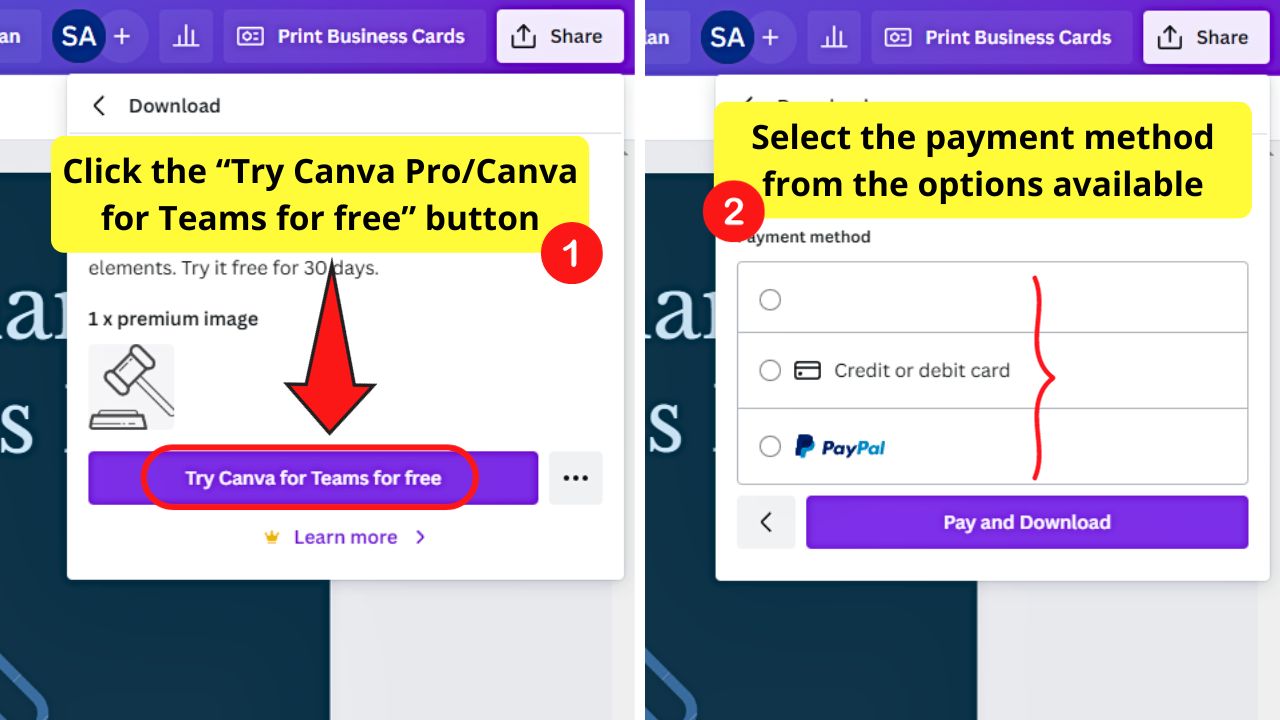
Before you click this button though, you will be informed what elements in the design are premium. Images of the premium elements are then listed.
This way, you can decide whether you’ll upgrade to a Pro Canva account or not.
If you decide to upgrade, select the “Try Canva Pro for free” or “Try Canva for Teams for free” button to avail of the 30-day trial period.
Then select your payment method.
But if you don’t want to upgrade to Canva Pro or Canva for Teams, the next step is what you should follow.
Step 5: Select the 3-dot icon
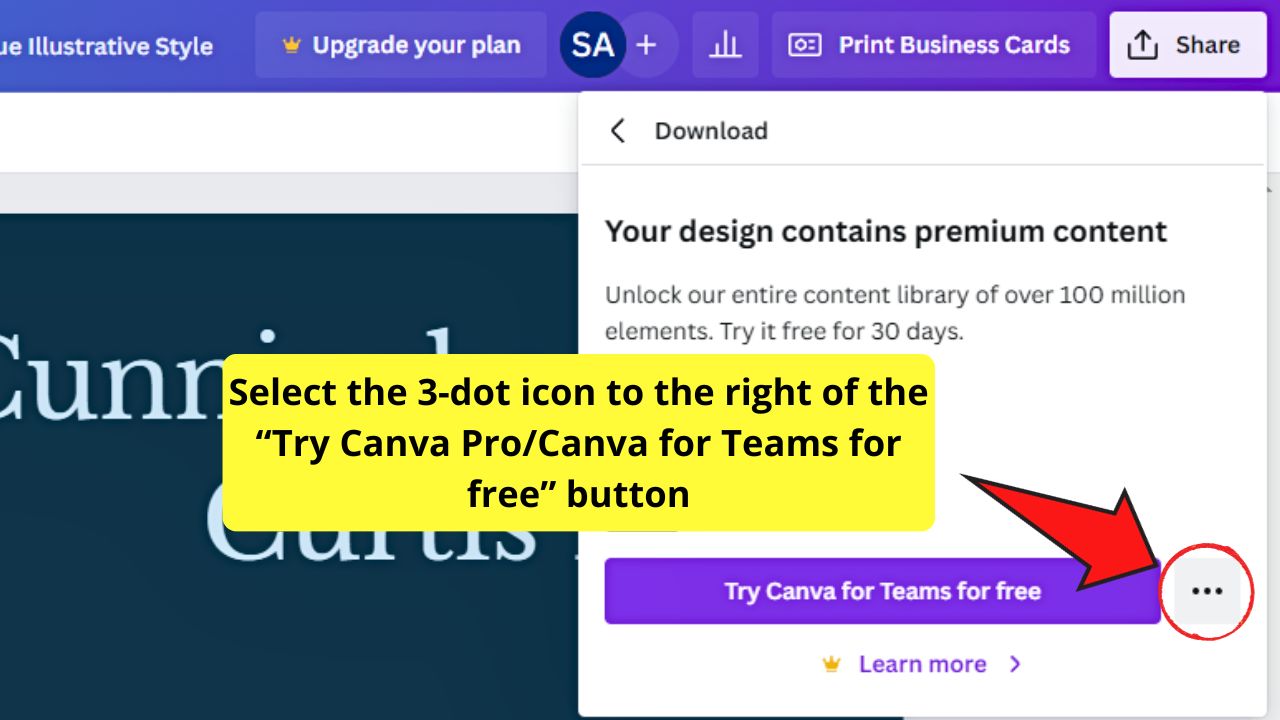
You’ll see this on the right side of the “Try Canva Pro/Canva for Teams for free” button.
A dropdown menu then appears.
Step 6: Click the “Purchase Pro Content License” button
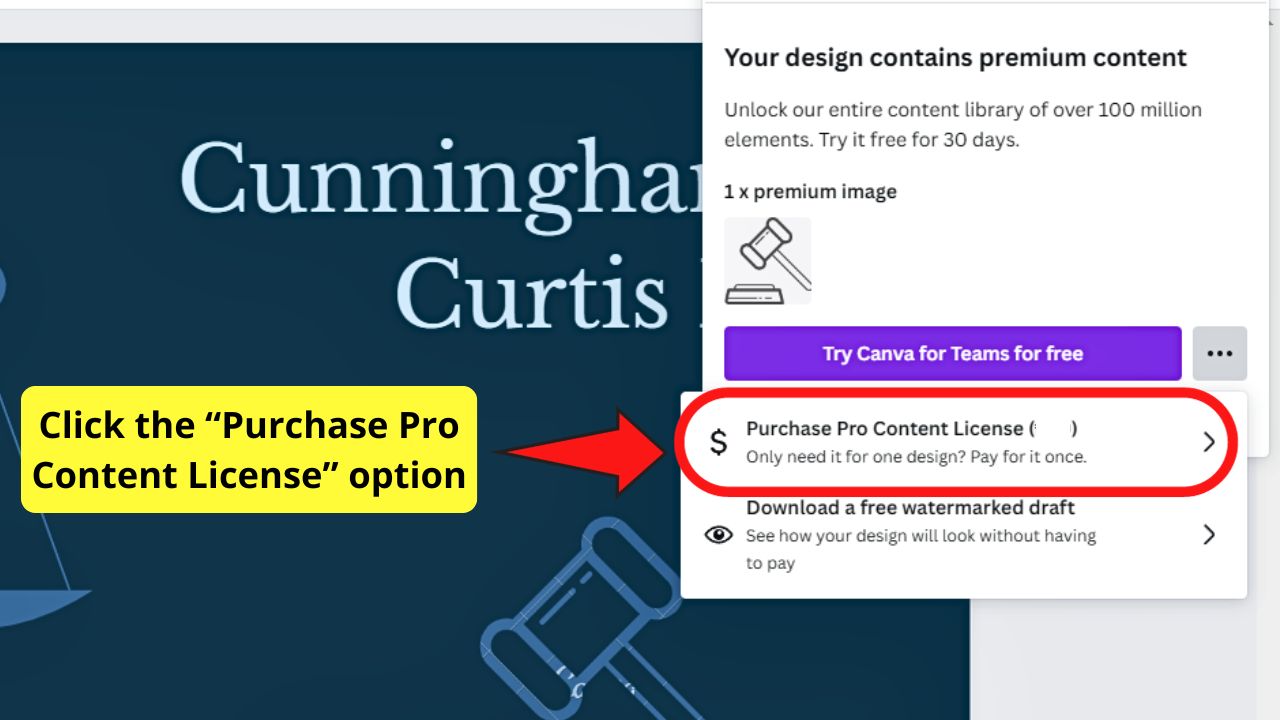
This is the best option for those who are still hesitant to upgrade to a Pro or Canva for Teams account but want to download the designs they created without the watermarks.
This way, you’ll only pay once for that specific design you created.
Step 7: Select a payment method and click the “Pay and Download” button
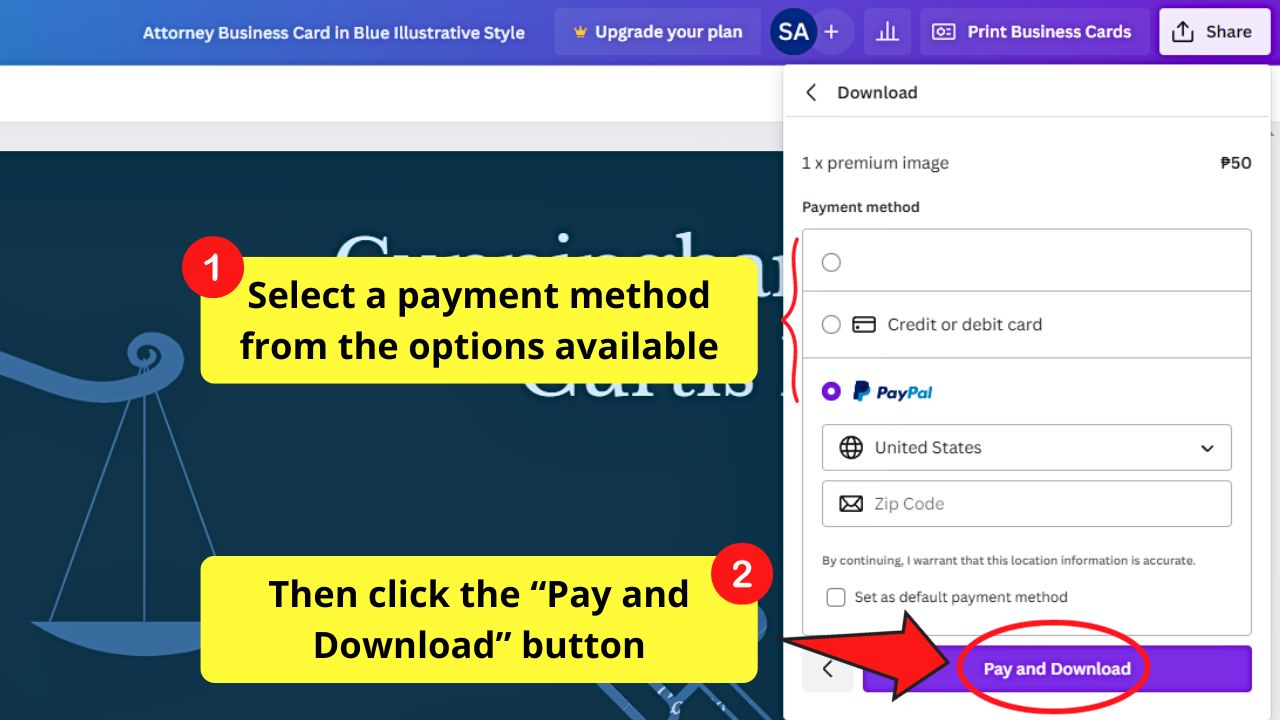
You will see the total price of all the premium elements you added to your design.
Then select the payment method you prefer before clicking the “Pay and Download” button.
Once your payment pushes through, the download process begins. Now, you’ve already downloaded premium elements and images as a whole.
Are you up to learn how to go about the individual way? Better continue reading if you’re that curious to find out.
How to Remove the Canva Watermark Using the “Remove Watermarks” Option
Now, if you’d prefer to buy certain premium elements and pictures while you’re designing, follow these steps:
Step 1: Click the premium element or image you want to download
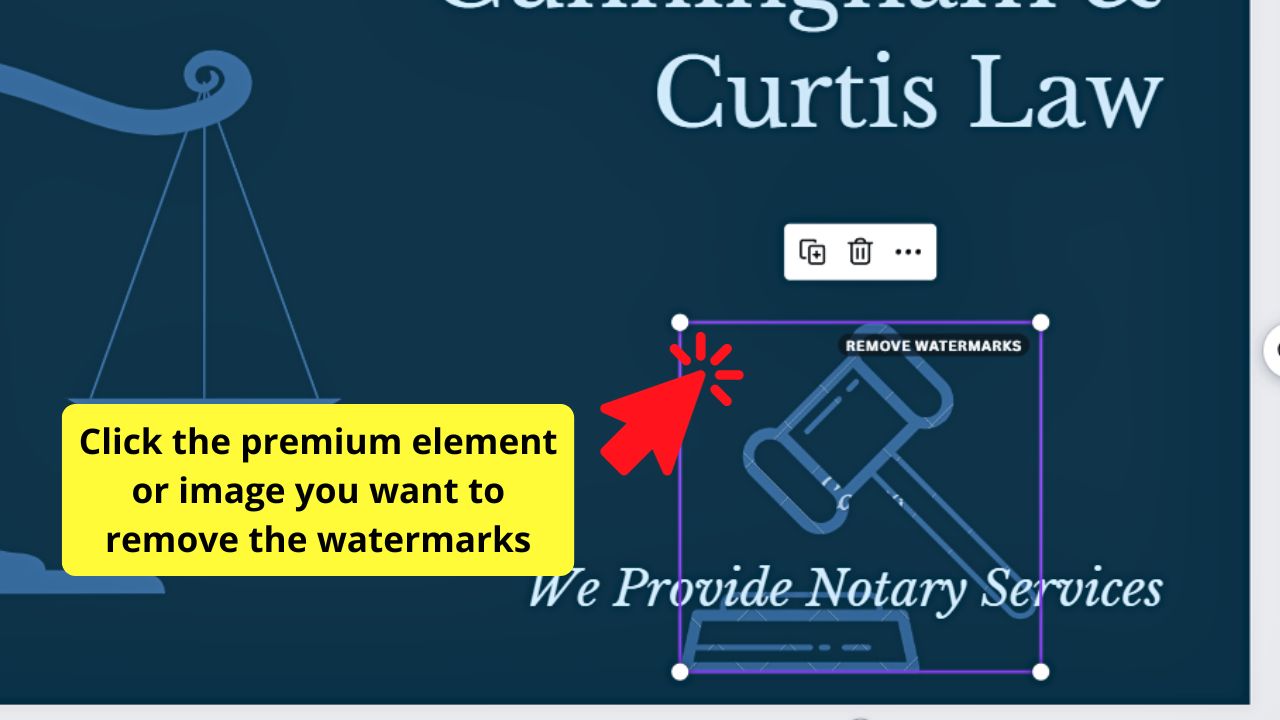
A purple square outline then surrounds the element or image you selected.
Step 2: Click the “Remove Watermarks” button
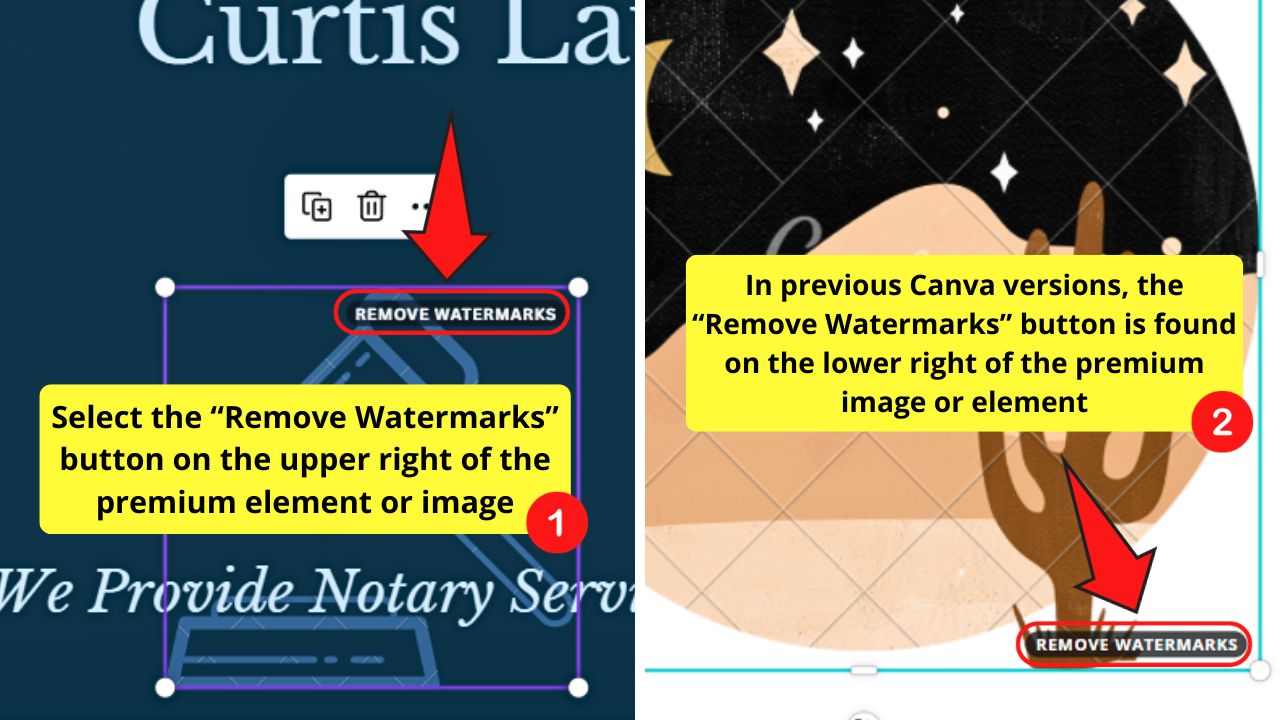
In previous Canva versions, you’ll see this button on the lower right corner of the image or element selected.
Now, you’ll see this in the top-right corner of the selected Canva image or element.
The “Purchase Premium Elements” pane then opens.
Step 3: Click “Try Canva Pro for Free” or “Try Canva for Teams for free”
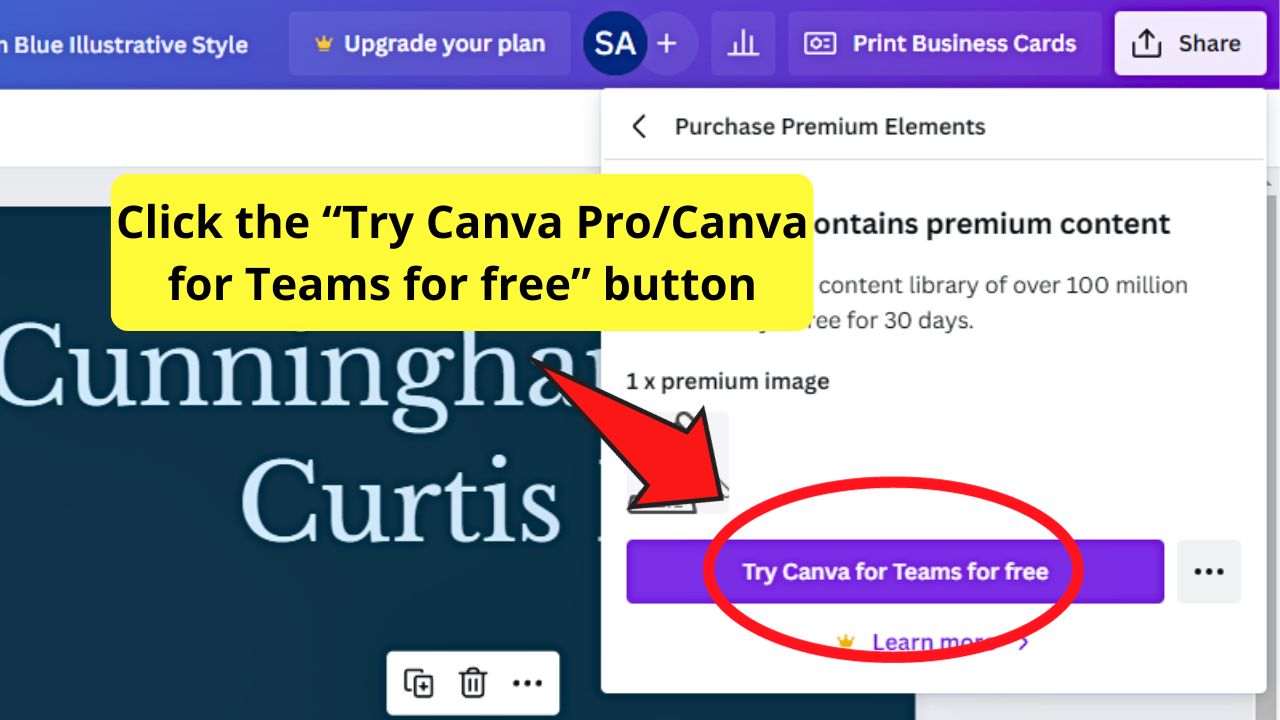
This is if you want to upgrade to a premium Canva account to access all the premium elements that the tool is offering.
Step 4: Select the 3-dot icon

Again, you’ll see this to the right of the “Try Canva Pro/Canva for Teams for free” button.
This will then open a dropdown menu.
Step 5: Click the “Purchase Pro Content License” button
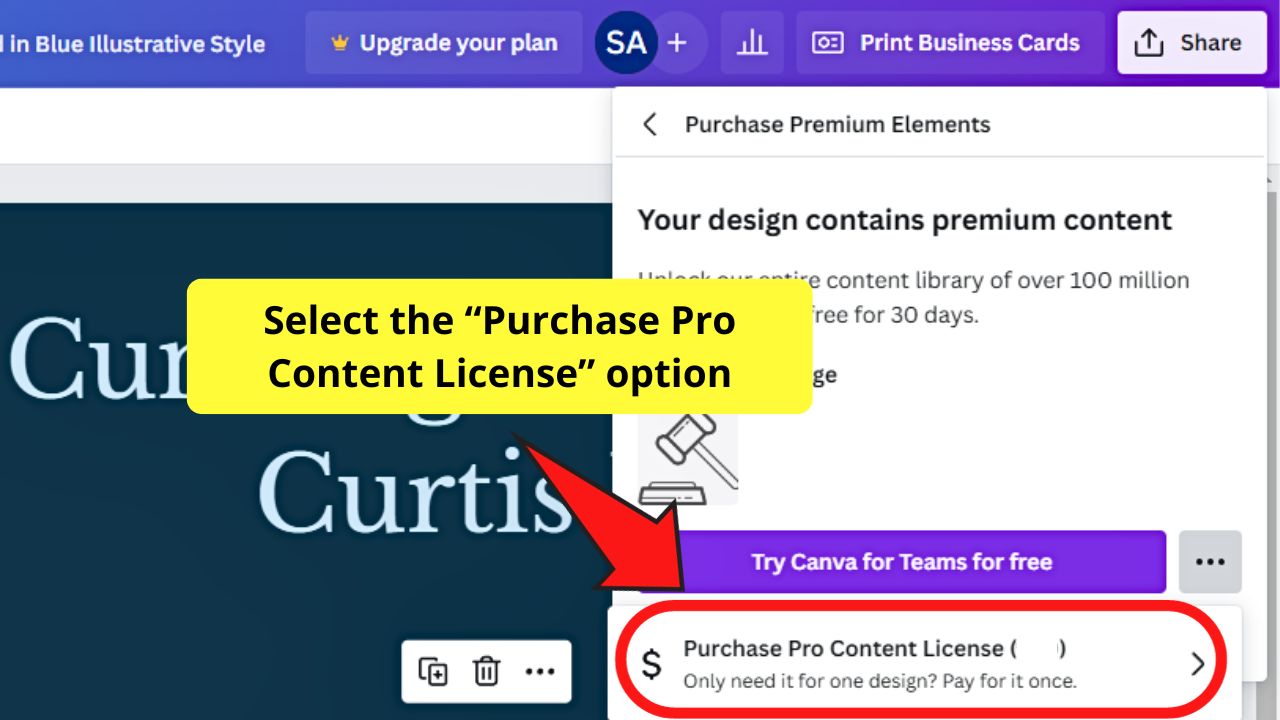
This will then take you to the “Purchase Premium Elements” page, wherein you’ll see all the premium elements you added to your design and their corresponding prices.
Step 6: Select a payment method and click “Pay”
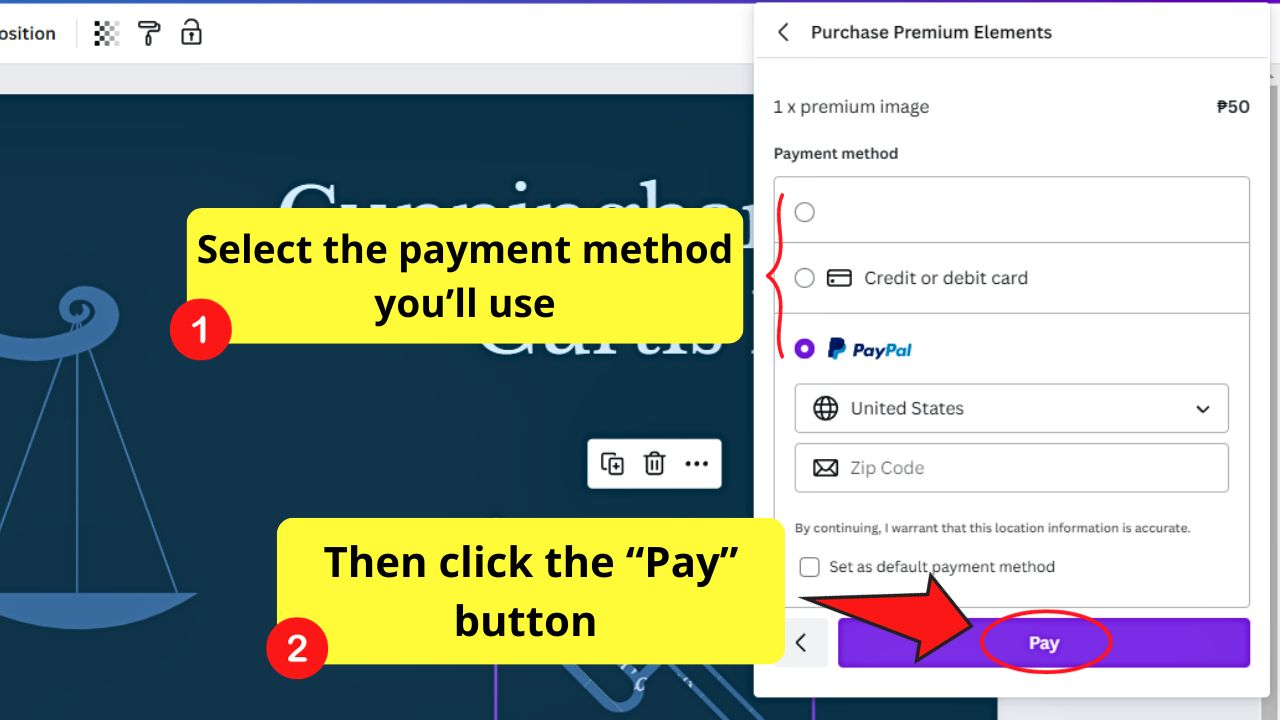
Simply tick on the payment option available (which can now include digital wallets) before you select the “Pay” button.
You might wonder why there is no “Download” option.
You’re only paying for the premium element and not downloading the entire design yet, hence you won’t see the option to save the design.
Once the payment pushes through, you can continue using it for the design you’re creating, but without the watermarks across it.
Easy, right? Whether you choose to download the images one by one or as a whole, it doesn’t matter much.
Just make sure that you’ve got enough funds to cover your Canva purchases. And, in case you’re guessing, take a look at the payment options that Canva supports:
- PayPal
- Credit or Debit card
- Canva Credits
- Sofort (Germany only)
- iDeal (the Netherlands only)
- Digital wallets available in your country
Other Methods to Remove Canva Watermarks
Now that you’ve learned the two basic ways of downloading premium pictures and elements, let’s see other ways how you can achieve the same feat.
If you’re the type of person who prefers less hassle, then upgrade your free Canva account for a Pro one. If you’re in a team, try the free “Canva for Teams” upgrade.
But what if you’re in a pinch lately?
Well, good news. Canva’s offering a 30-day free trial period for anyone who’d like to explore the full potential of this graphic design tool. And availing of such an offer isn’t challenging to do as well.
If you don’t have a Canva account yet, head over to the “Canva Pro 30-day free trial” page and click on the “Try free for 30 days” button.
From there, the Canva signup page will appear so you can create your account. If you want your account linked to your Facebook or Gmail account, you can certainly use those options as well.
After completing the registration process, a dialog box will appear with the “Try free for 30 days” button. Click on it so you can avail of your free Canva Pro trial.
But, before you can go ahead and enjoy the perks of a Canva Pro account, choose the “Monthly” plan you’d like to proceed with after the trial ends.
Input your payment details for you to tap on the “Claim my free trial” button.
After which, you’re done with the process and officially a Canva Pro user for the next 30 days.
However, availing of free trials in Canva isn’t only available to individuals. Even business owners can also avail of the same promo.
Only it goes by the name of Canva Enterprise.
Signing up for an Enterprise account on Canva follows the same steps as creating an individual one.
The only difference is that you can add your team members to the account after you’ve completed providing all the needed details.
However, if you want to have lifetime free access to Canva, better build a nonprofit organization. Though quite surprising, Canva does offer such a generous offer.
To do this, you must submit proof that your organization meets its eligibility criteria for the program. Head over to the Canva for Nonprofits page and click on the “Apply Now” button.
From there, you’ll create a new Canva account for your nonprofit. Yet, before you can proceed, you need to do some crosschecking if your organization fits the bill.
Here are the criteria if you’re too hesitant to visit the page itself:
- Should be a registered nonprofit,
- The mission of the organization is in line with community and public benefits, and
- Government offices and health organizations aiding with public health
If your organization is part of the lucky three, then congratulations! Proceed with filling up the form details and submit the documents needed.
After which, tick the box indicating your agreement with the terms and conditions for you to submit your application.
Then, wait for a response via email for you to proceed and enjoy your free Canva Pro!
Teachers and students can also avail themselves of such a generous offer through the Canva for Education program. Follow the same steps as that for nonprofit organizations, and you’re good to go.
Canva Licenses Defined
Now, you’re all aware that the premium pics and images in Canva have licenses. And, we only know that if such an element or photo has a license, you’ll need to pay for it to use it in your design.
But, what are these licenses in Canva about?
Technically, there are two known licenses in Canva: the one-design use license and the multi-use or extended license.
From the terms themselves, you’ll get a gist of what each license type entails.
One design use license means you’re only allowed to use that image or element on a single design. No more, no less.
On the other hand, the multiple or extended license type allows users to avail of that element or photo for a certain period.
After paying, those pictures and elements you bought will be stored in the “Purchased” folder so you can have easy access to them.
If you’re interested in learning more about Canva, perhaps a good reading on its affiliate marketing program will get you up and excited to try it out immediately.
Frequently Asked Questions about Removing Canva Watermarks
How do I use Canva credits in purchasing premium images and elements?
Canva credits serve as virtual tokens that you can use to buy premium elements and images for those who don’t know. Buy credits from the “Pay and Download” tab, choose a credit pack, and finish by paying for the said credits. Whenever you use a premium element or picture, hit the “Remove watermarks” button and pay for it using your Canva credits.
Is it possible to pay for a particular element or image and still have watermarks on them?
Though it’s rare, such an incident can still occur. If you’re experiencing this, it can either mean you logged into a different Canva account or only paid for a one-design use license. In any case, you’ll have to check your emails and Canva account for your purchases.