

If you’re in search of a video editing tool that is simple to use, consider using Canva.
Though it’s known as a graphic design tool, it recently has brought many changes to the way it edits videos as well.
Aside from adding page and text animations, as well as effects to design elements, you can now time the text you added in Canva.
Keep reading for you to learn how the exact process of timing text elements in Canva works.
How to Time Text Elements in Canva
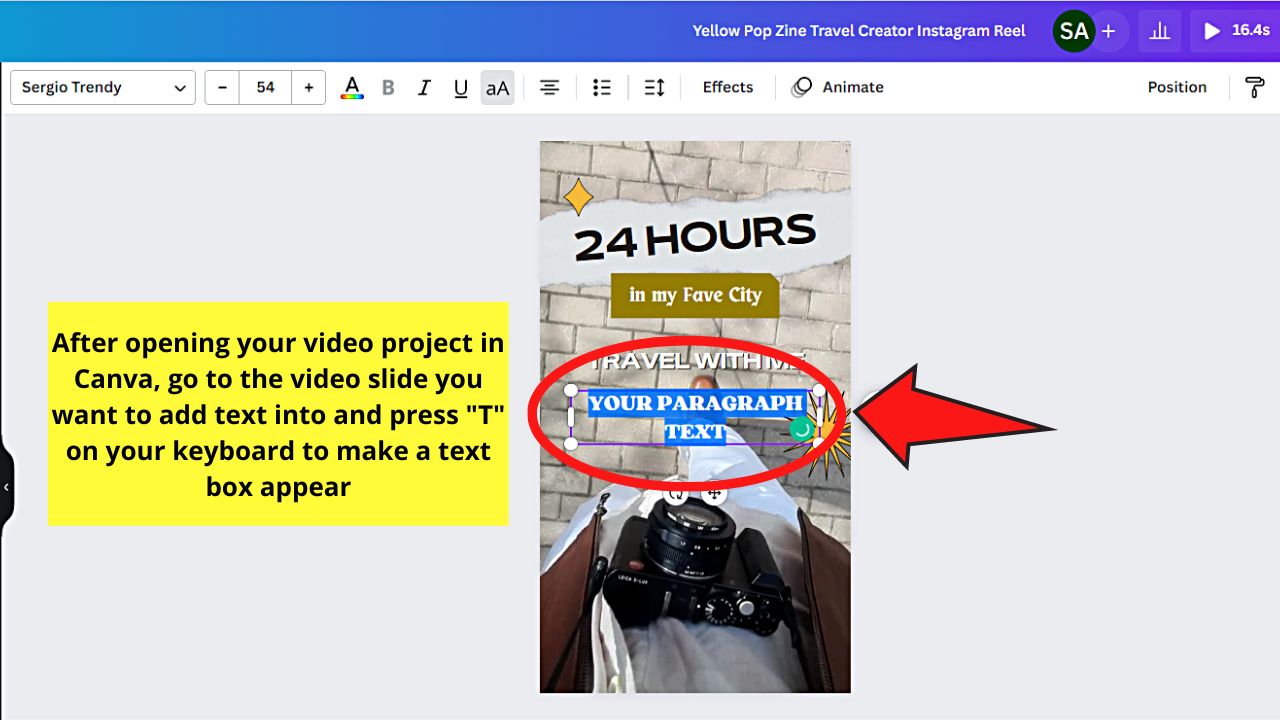
- Add text to the video snippet by pressing “T” on your keyboard.
- Select all the elements, including the text you added, by dragging the cursor across them.
- Choose the “Show timing” option from the dropdown menu after right-clicking on the elements you selected.
- Expand the element timeline by clicking the “Up” icon on its right end.
- Click the text element timeline so you can select it.
- Hover the cursor over the text element’s trim handles until it becomes an arrow.
- Click and drag the trim handles to the time duration where you want the text to appear. Repeat for the other text or design elements on the video snippet.
- Drag the playhead until it reaches the start of the video to review how the adjustments made plays out.
- Add animations to the text, adjust its speed, and set when the animation will start on the text animation object panel.
The good news is, you can adjust the element timing whether you’re on Canva Free or Canva Pro. Just remember though that not all text animations are available to Canva Free users.
So, if that does not bother you a bit, proceed with the steps to time text elements in Canva videos below.
Step 1: Once you opened a video project file (new or an existing one), add a text box by pressing the “T” button on your keyboard.

There is a long way to achieve the same feat, which is to go to the left-side panel of the editor page and select “Text.” You can then choose to add a subheading, body of the text, or heading.
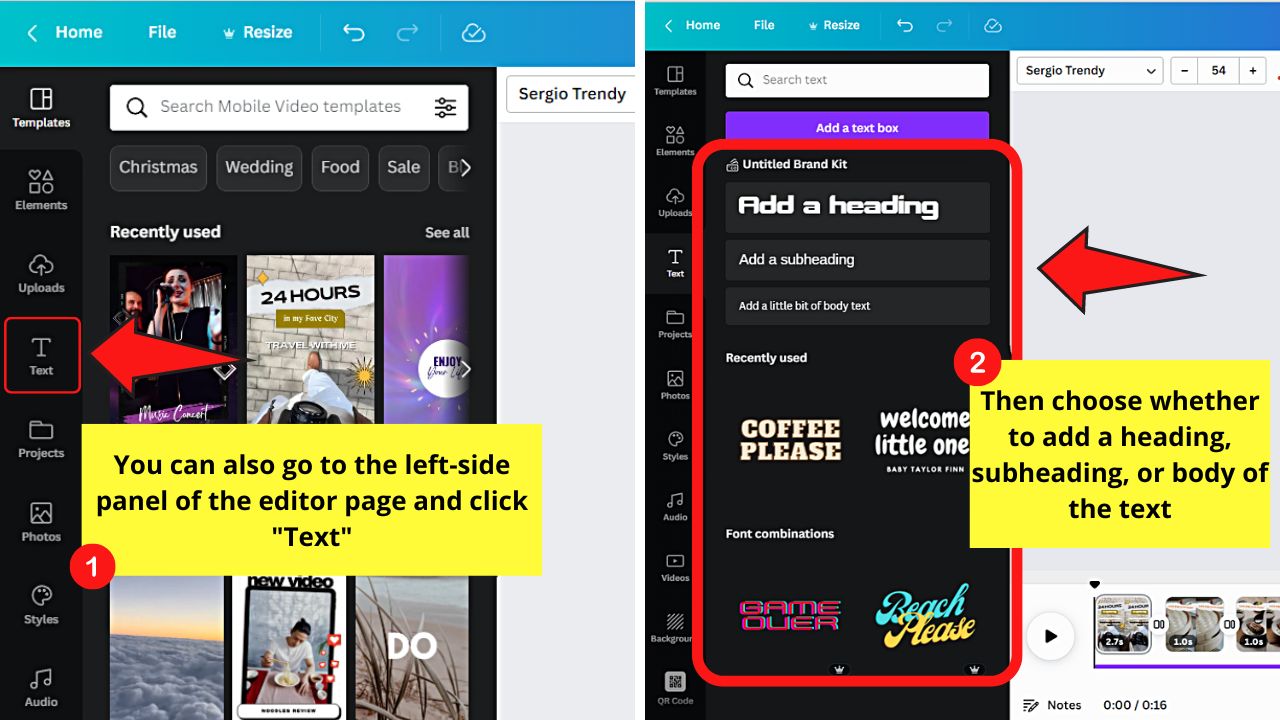

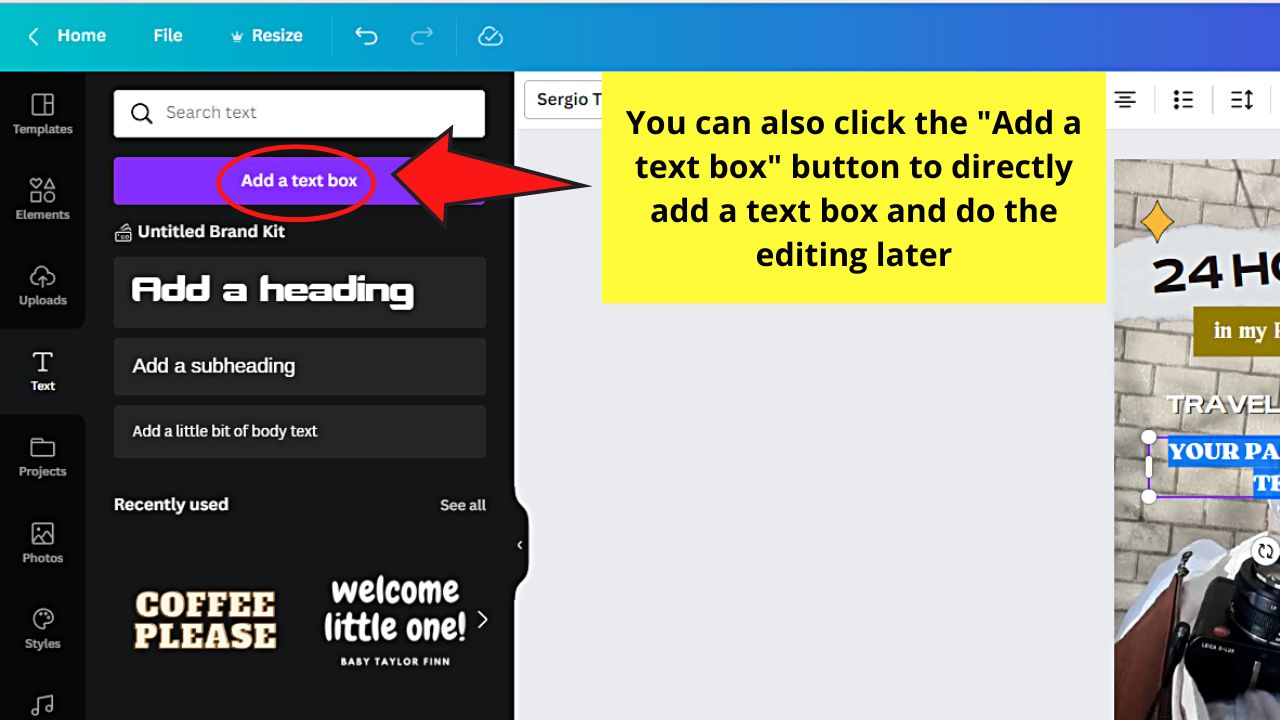
Or, if you simply want to add a text box and do the editing of the sizes and font style later, just click the “Add a text box” button.

Then change the text’s color by selecting the “Font Color” tab on the toolbar that appears.
Keep adding text elements to your video until you have all that you need. Just don’t group the text yet.
Step 2: After adding the text and other design elements, select them.
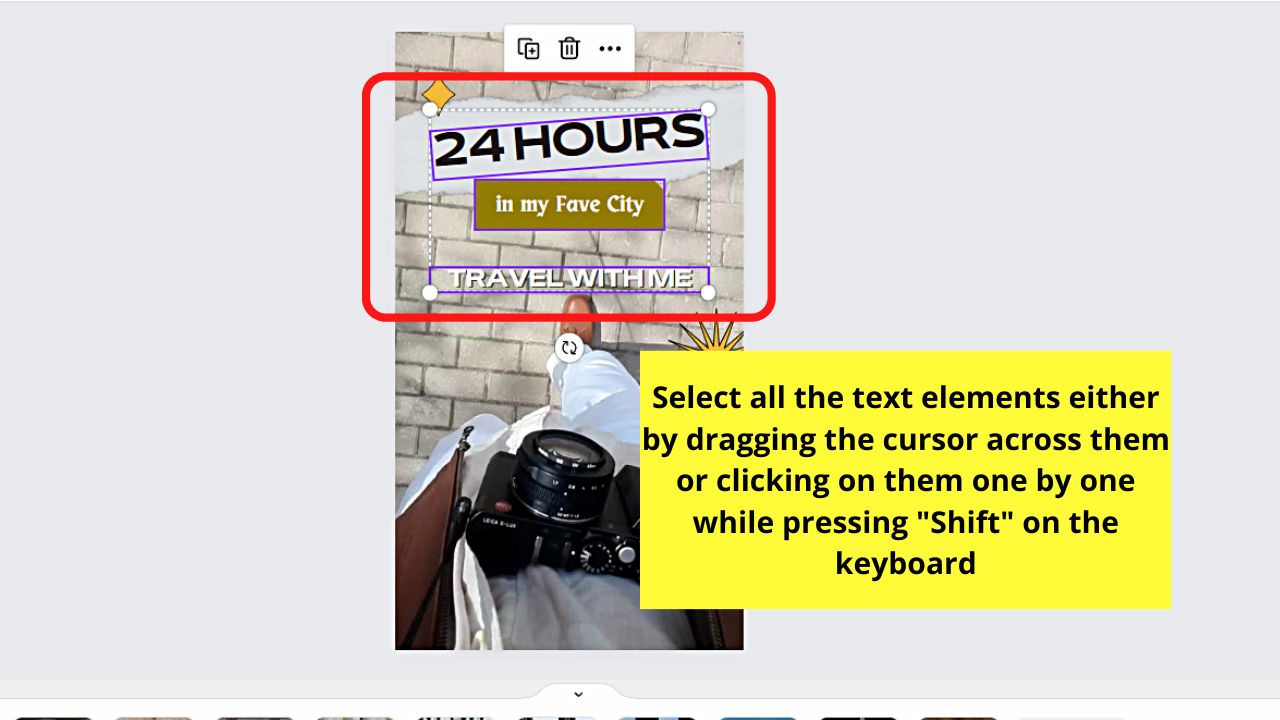

Drag the cursor across them until you see a purple or white-dotted outline surround them. You can also click the elements individually while you tap “Shift” on your keyboard.
Step 3: Right-click on the selected design and text elements to make a dropdown menu appear.

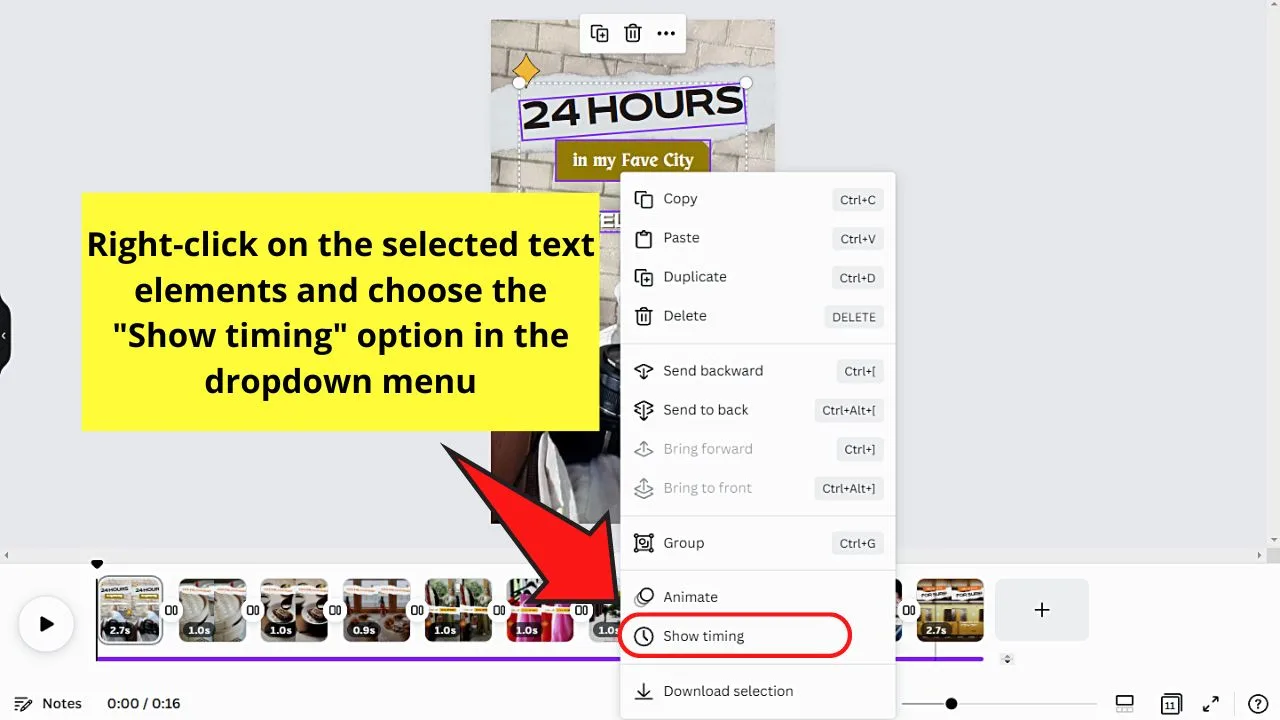


From there, choose the “Show timing” option.
Step 4: To adjust the sequencing of the design elements, select the “Up” icon on the right of the said element timeline.
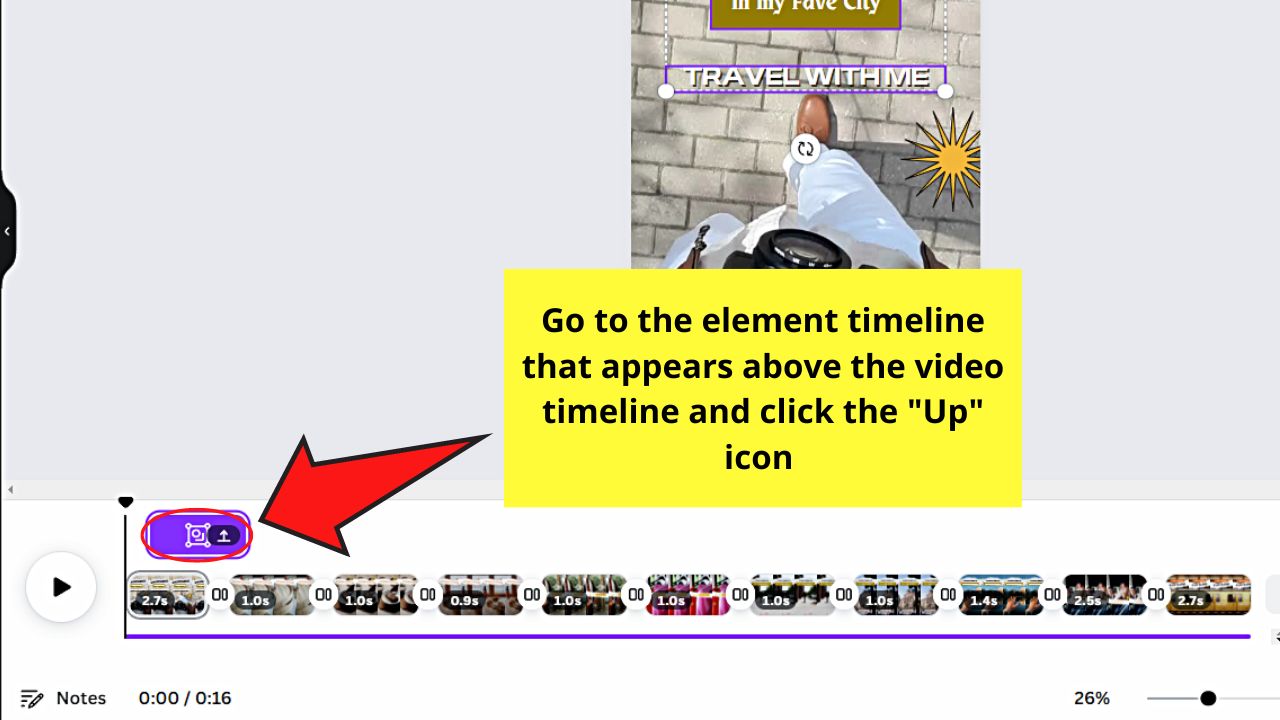
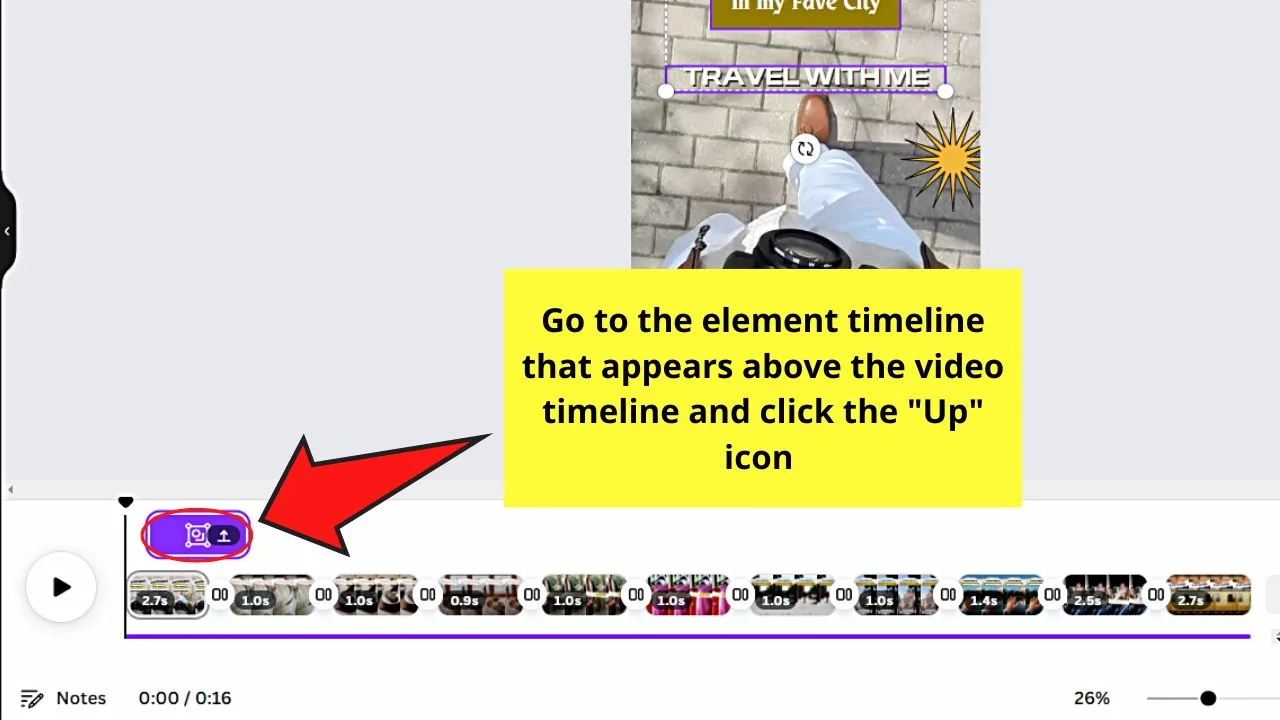
This move will expand the said timeline to the individual design elements.
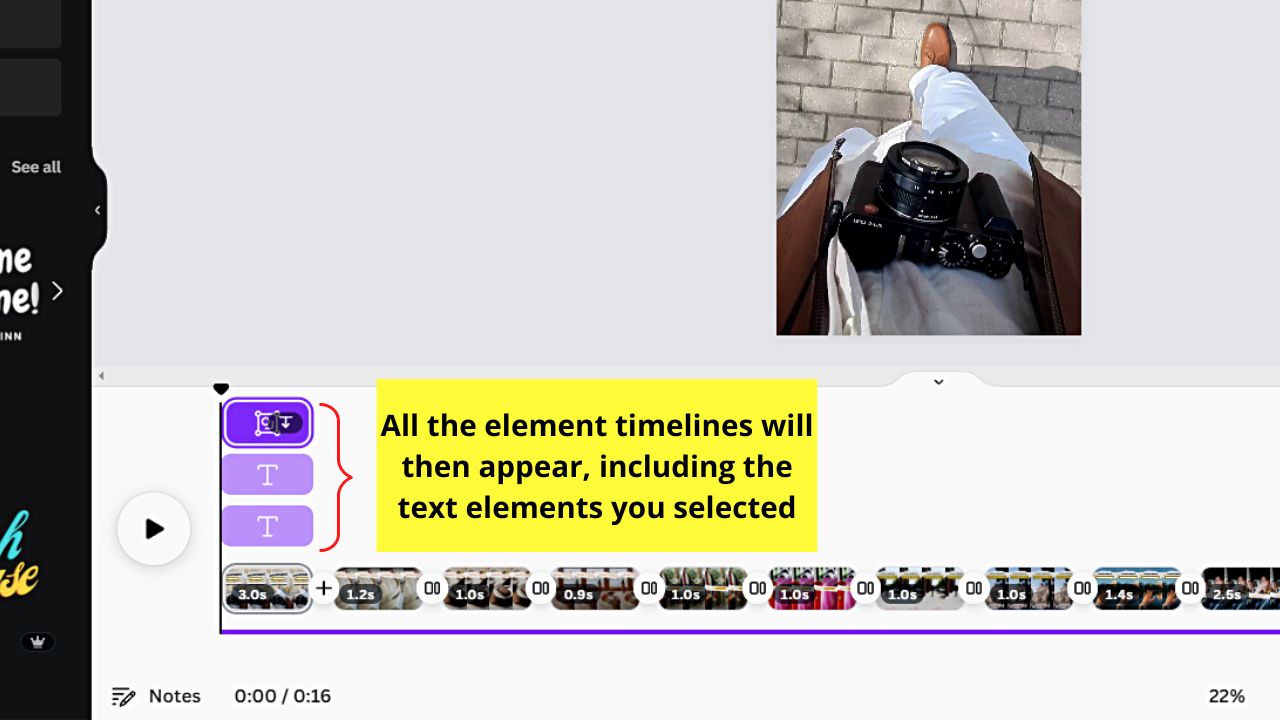
Now, you’ll see the individual text timeline.

Step 5: Select the text timeline that you want to appear first on the video by clicking on it.
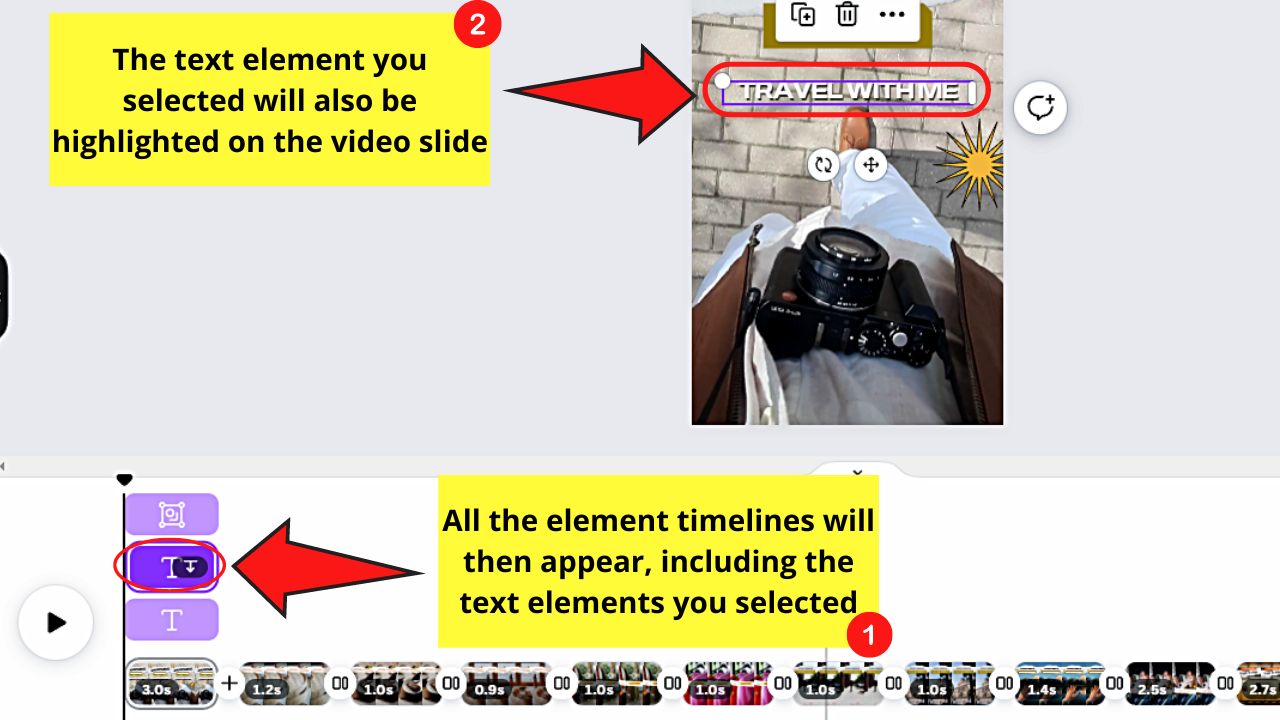
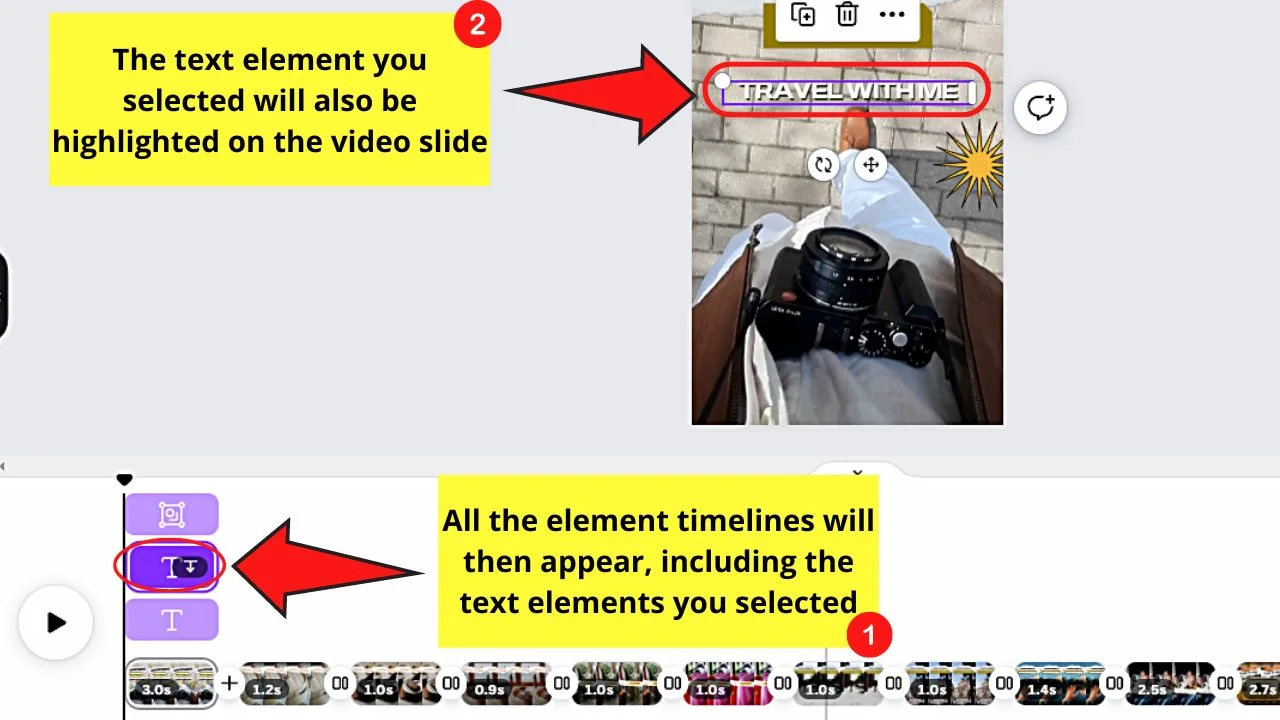
Hence, it is important not to group the text elements first if you want to make them appear separately in the video.
If you grouped them, the said text elements will appear as one unit, and you’ll only be able to adjust them as a group.
Step 6: After the text timeline is selected, hover your cursor over the timeline’s trim handles until the cursor becomes an arrow.
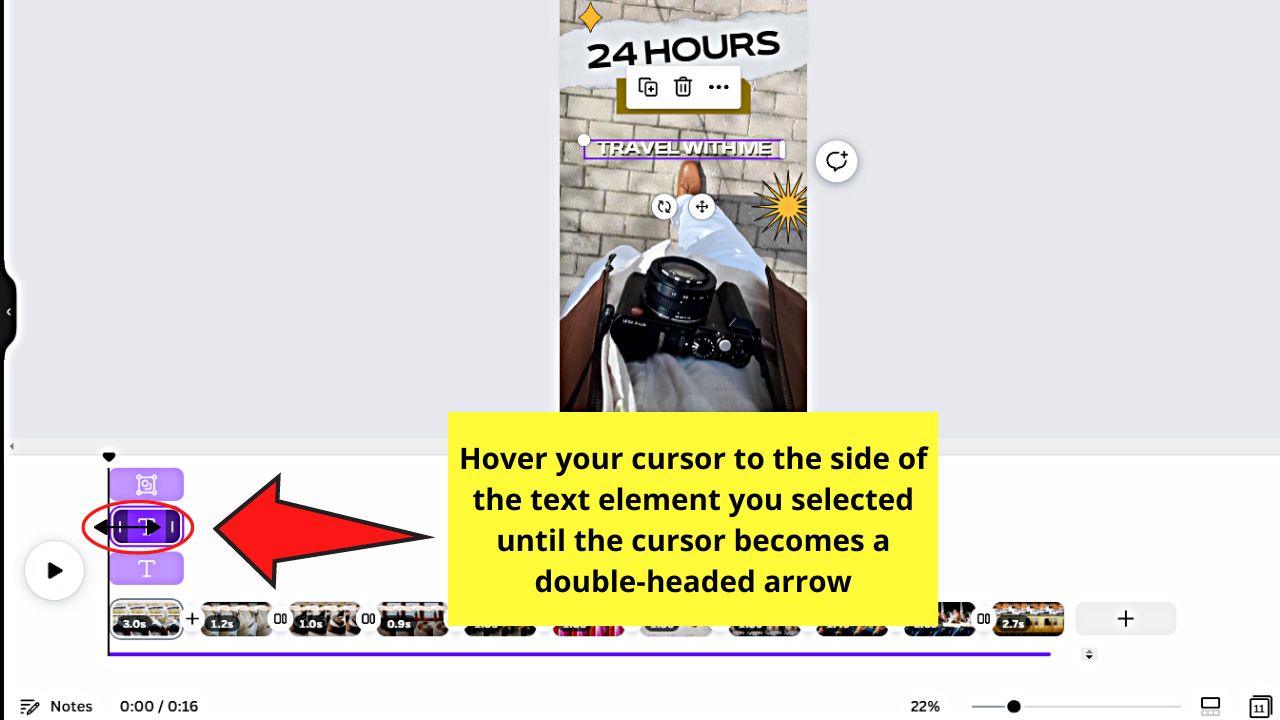
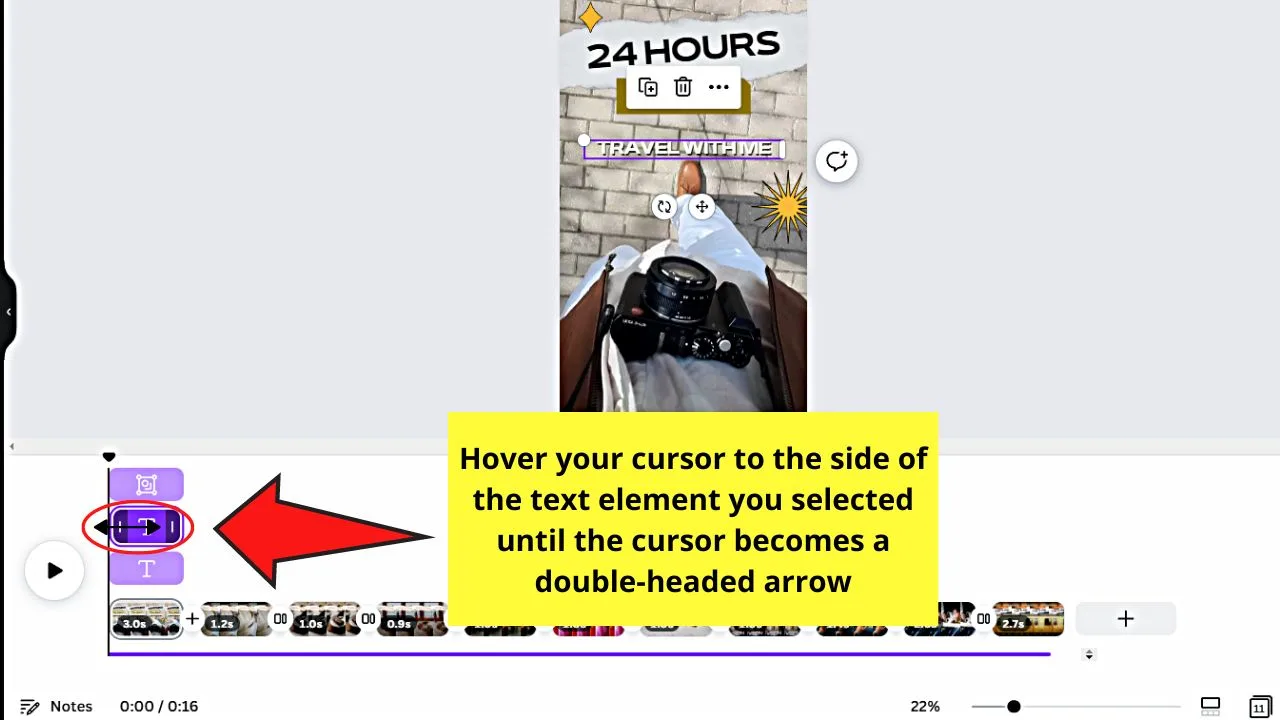
Step 7: Now that the cursor has become an arrow, click and drag the trim handles to the left or right to adjust the text’s timing.
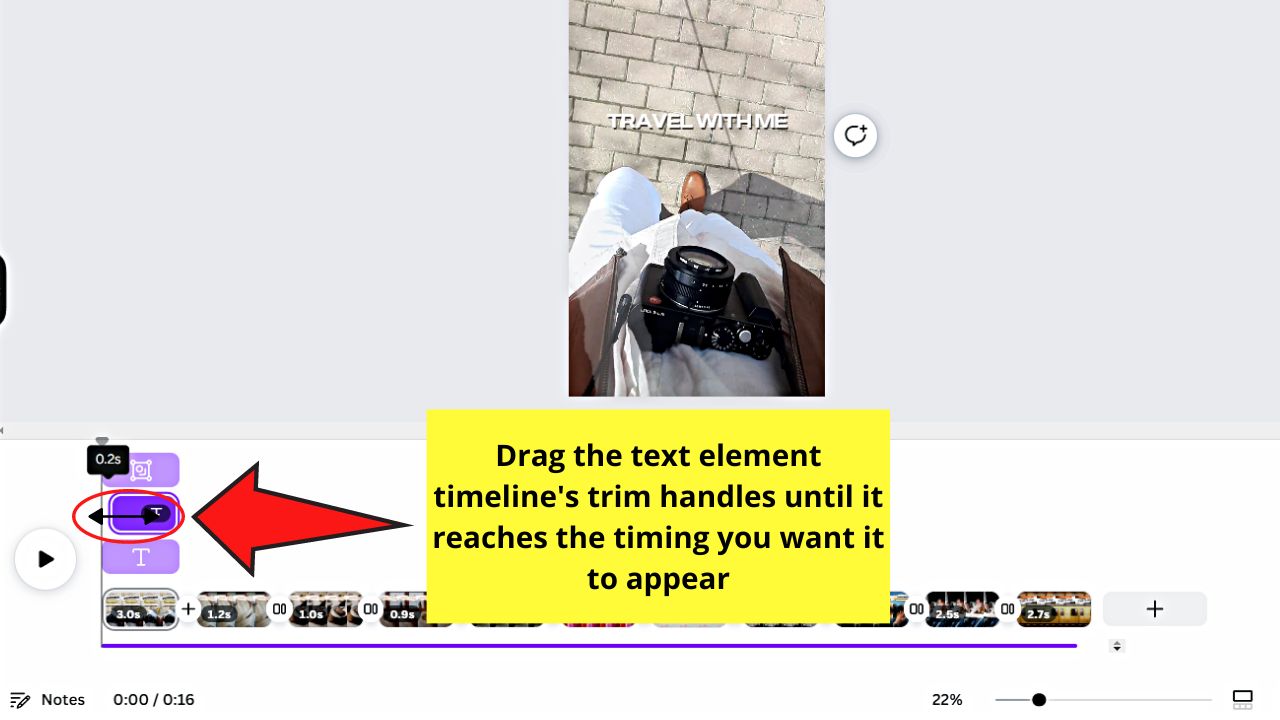
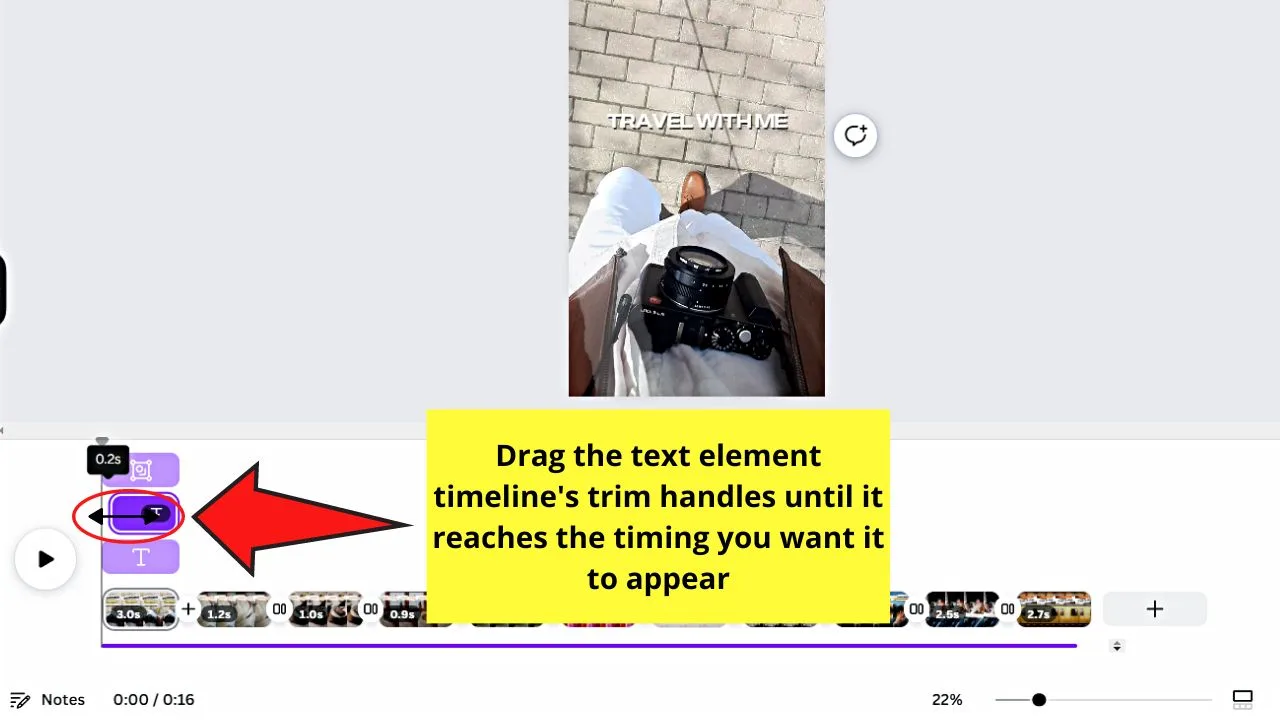
Then, release your hold on the left mouse to finalize the time setting made.
Do the same for the other design elements added, making sure to click the individual element timelines according to the sequence you want.
Step 8: After setting the timing of the text and design elements, drag the playhead to the beginning of the video and click the “Play” button.
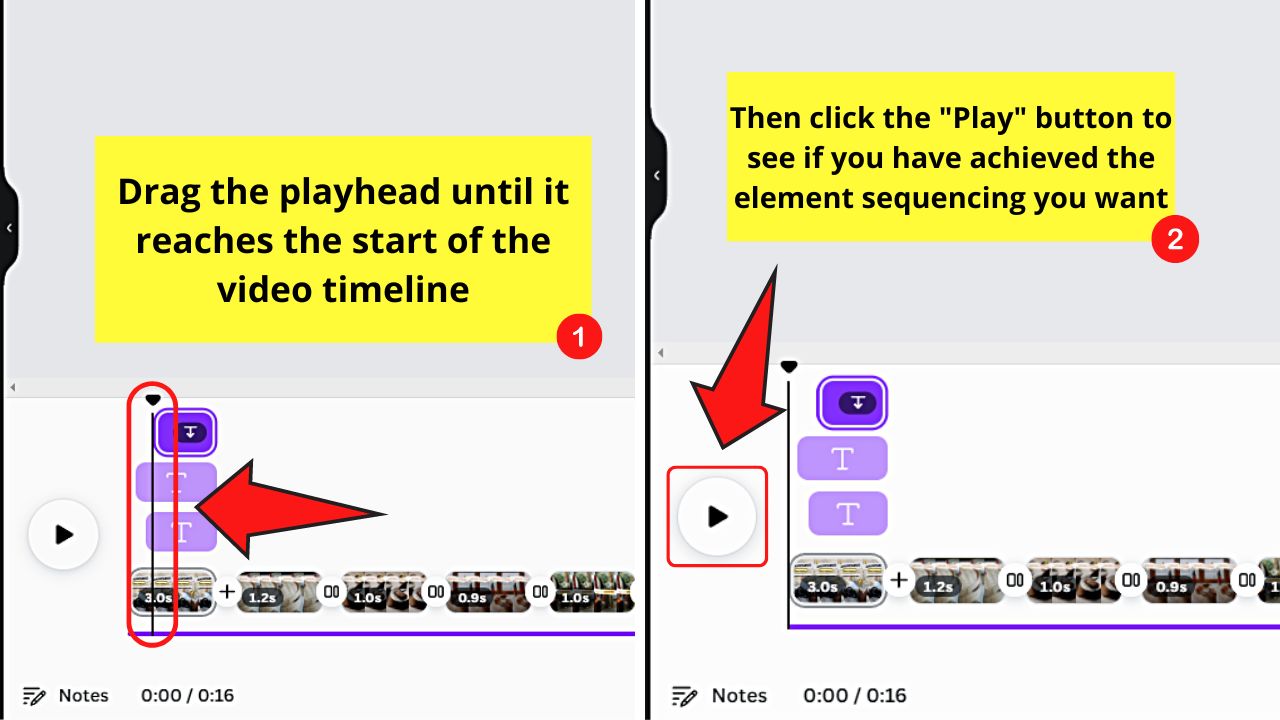
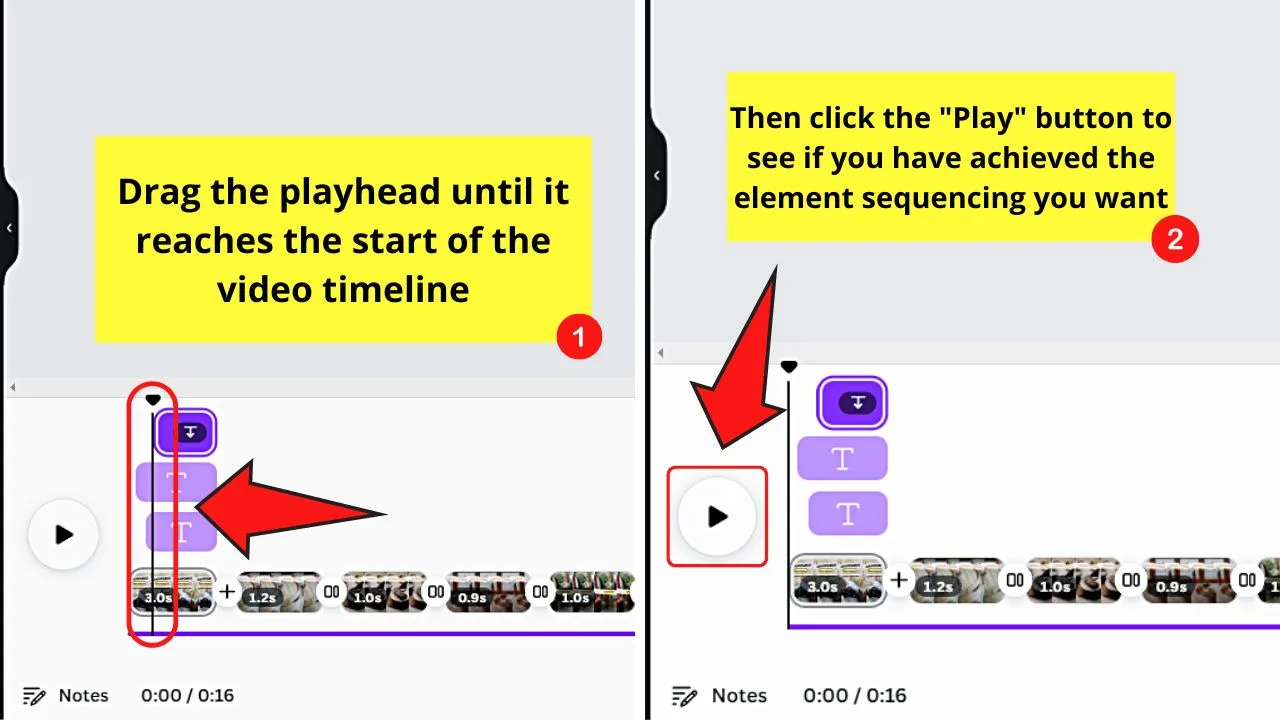
You can now then review how the video looks after adjusting the individual element timelines.
Step 9: If you’re good with the changes made, add text animations, adjust its speed, and set when those animations enter next by selecting the text first.

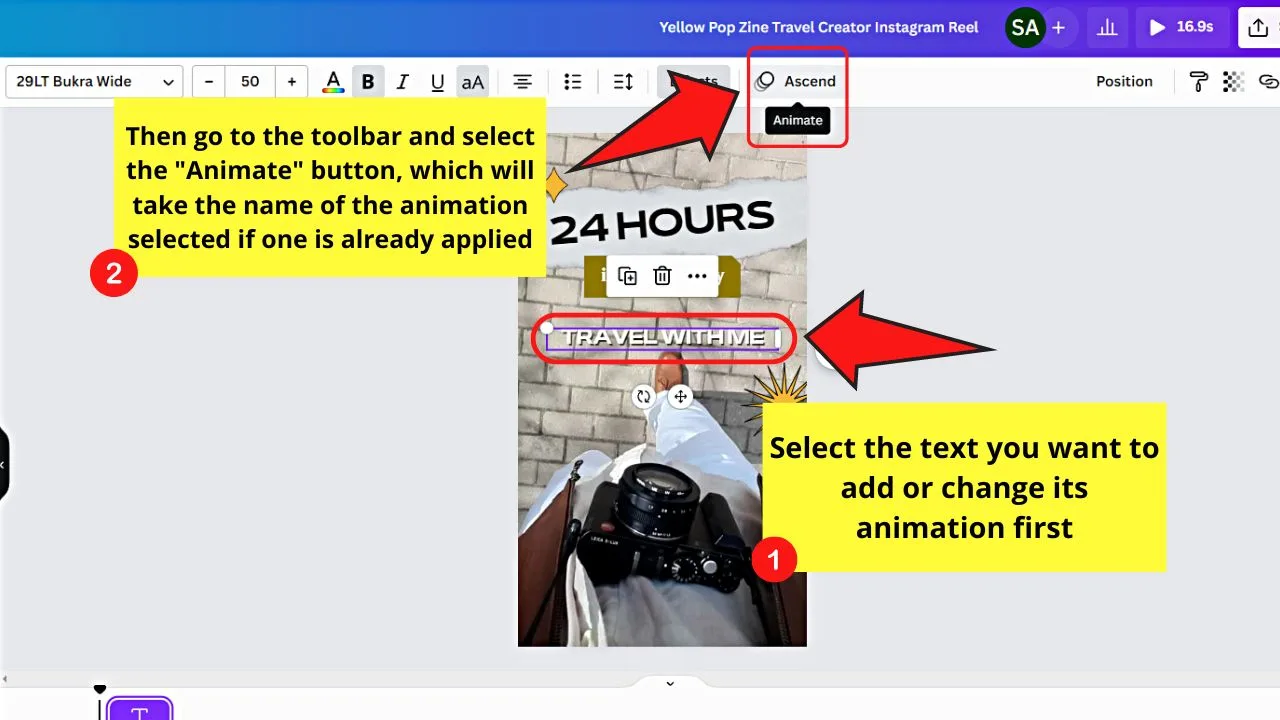
Then, choose the “Animate” tab. You’ll then see 2 categories in the object panel: “Page Animations” and “Text Animations.”
Select “Text Animations” so you can hover over the text animation options available and see how they look on your video.
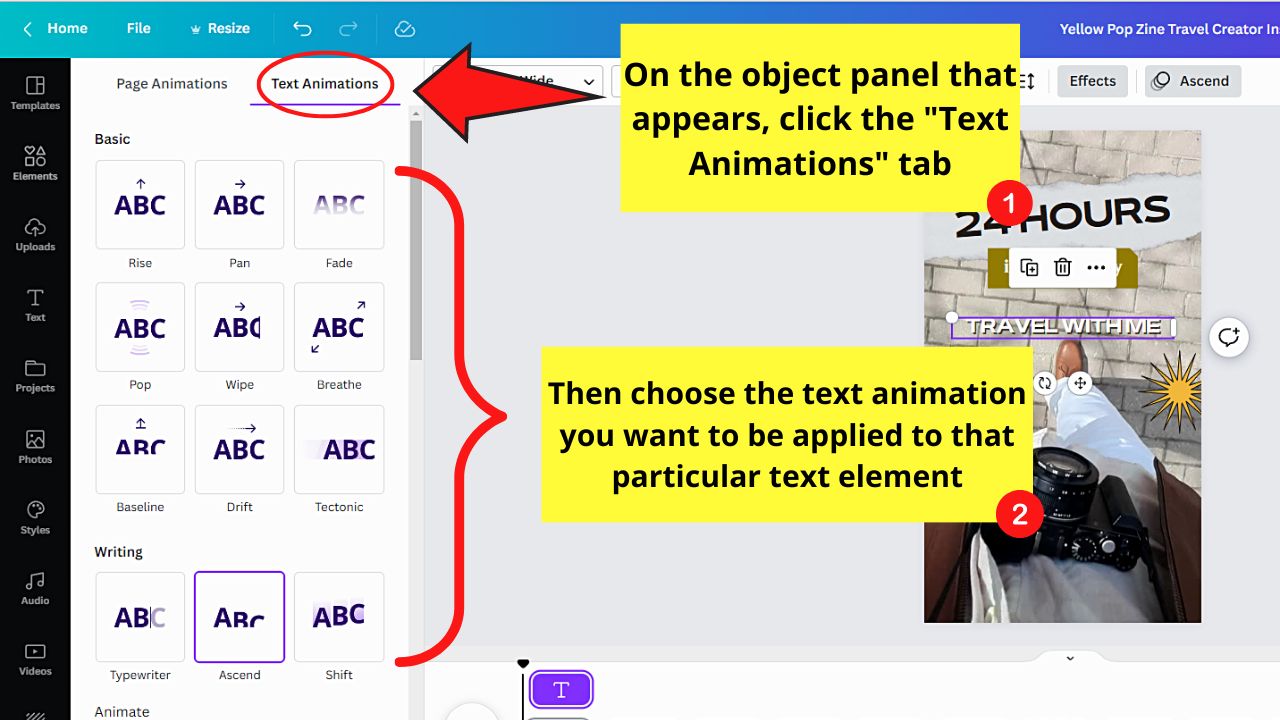

Next, click on the text animation you want to use. Another object panel will then appear, listing all the adjustment sections available.
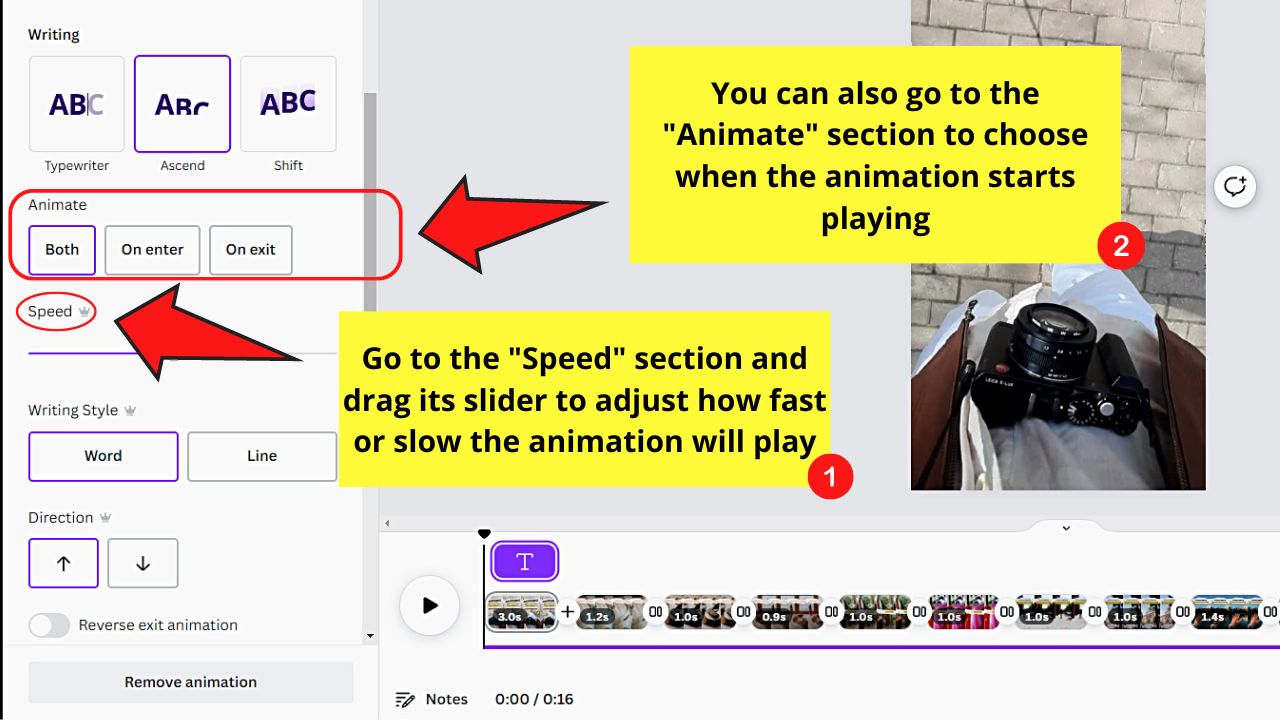
To speed up or slow down a particular text animation, go to the “Speed” slider and drag it to the left or right.
You can even choose when the text animation plays in the “Animate” section. Simply click any of the three options available: “Both,” “On Enter,” and “On Exit.”

Then, all you need to do is proceed with further editing of your video before you can watch its preview. Don’t forget to click the “Down” icon to close the expanded element timeline.


If you’re new to Canva and don’t understand any of this yet, read up on video editing and adding video transitions within the tool.
Changing the duration of the video slides is another must-read topic if you want to perfect your Canva video editing skills.
How to Time Text Elements in Videos on the Canva Mobile App
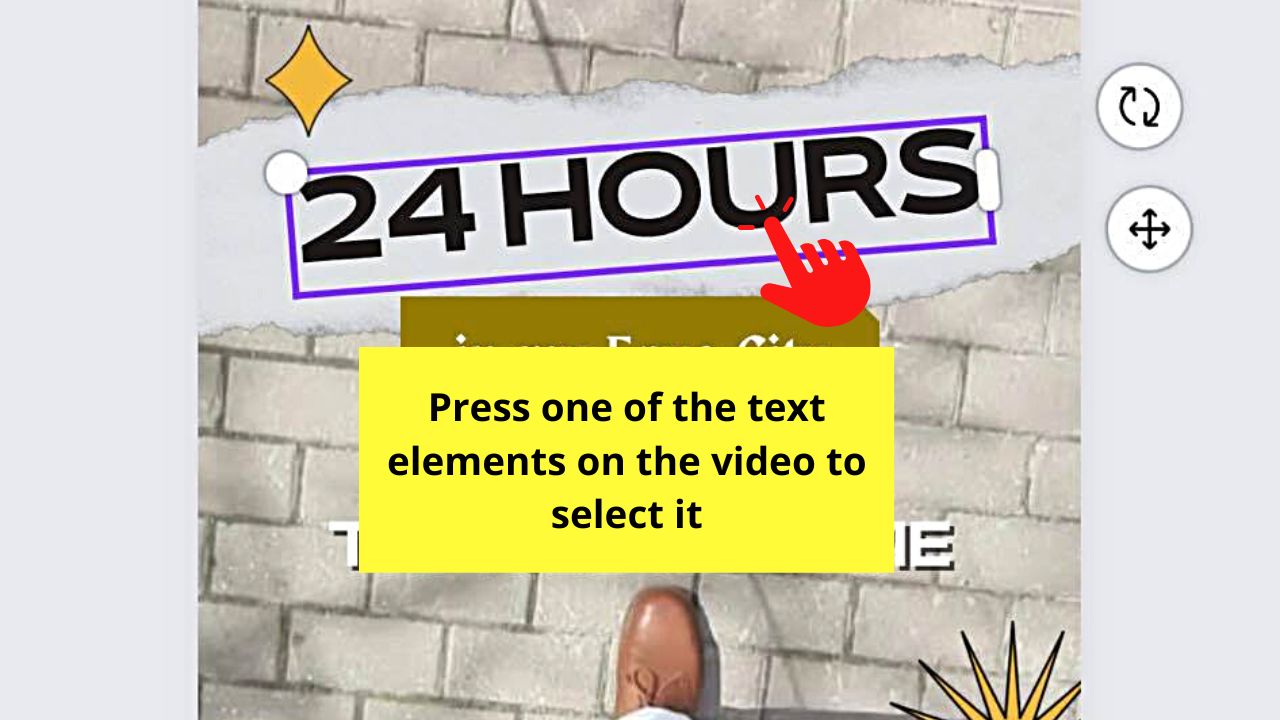
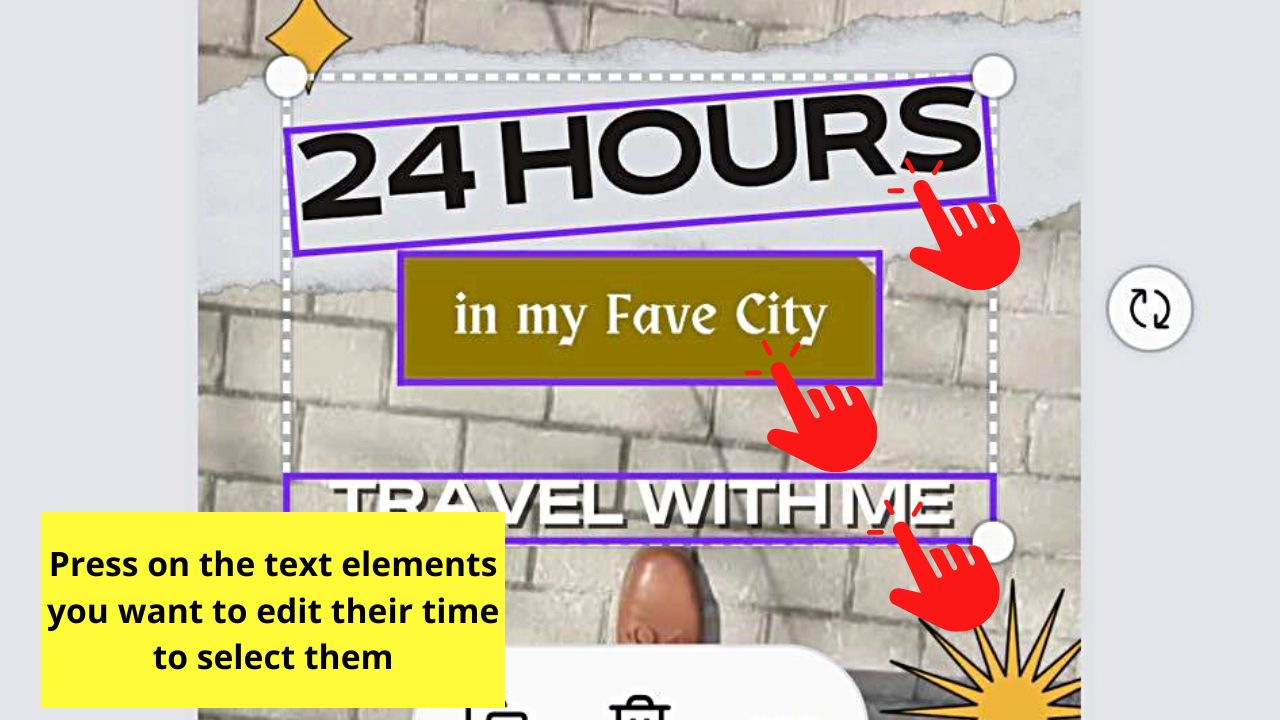
- After opening a video project file from Canva’s home page, tap on the text element you want to adjust its timing.
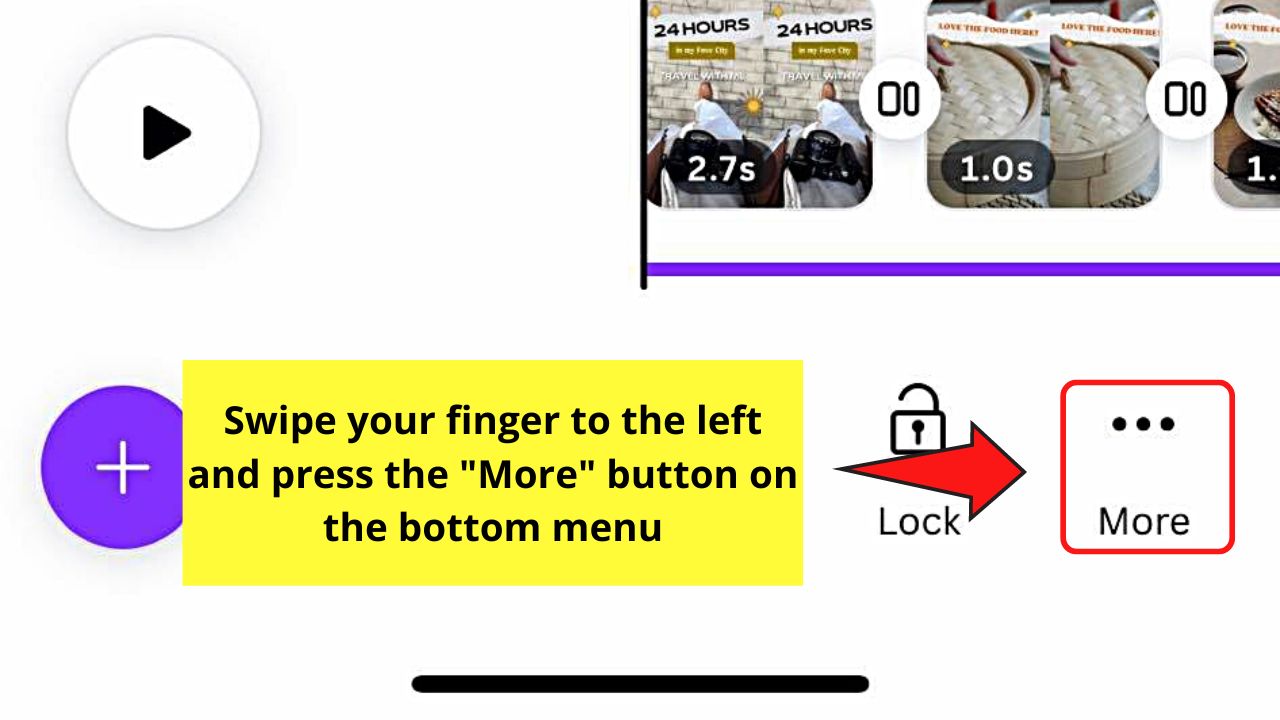
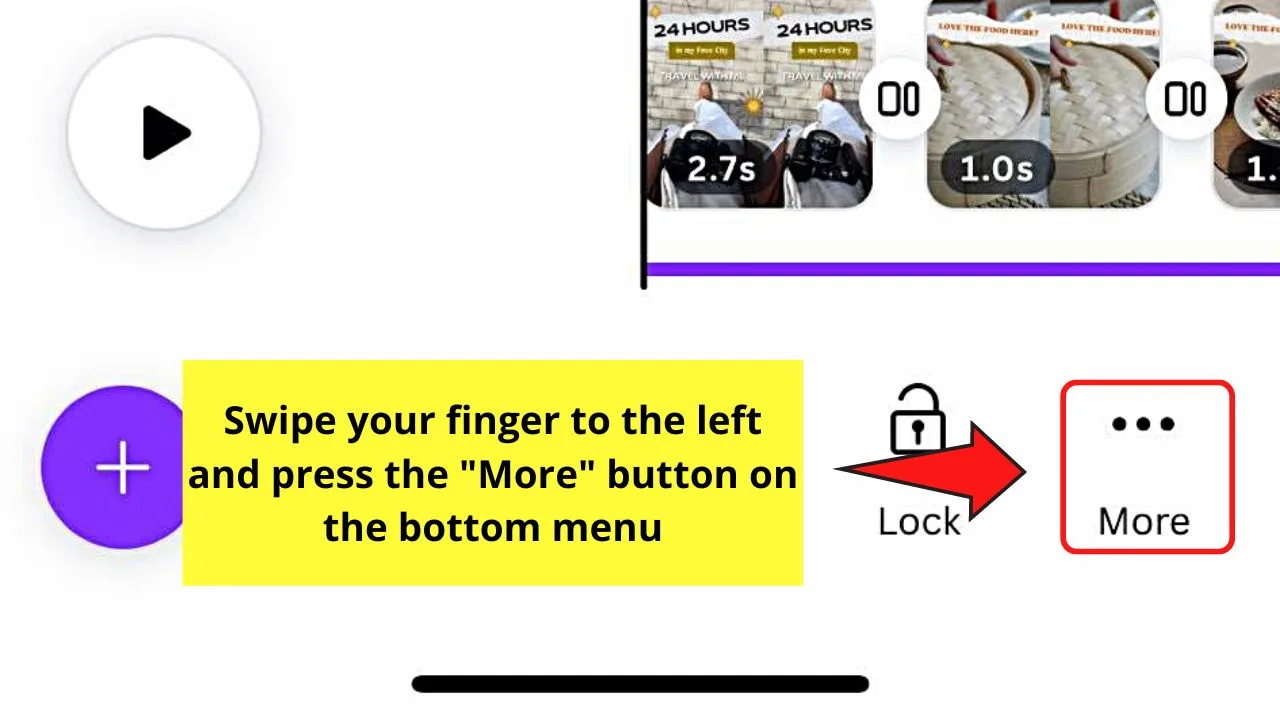
- If you have more text elements to adjust, press “More” on the bottom toolbar.
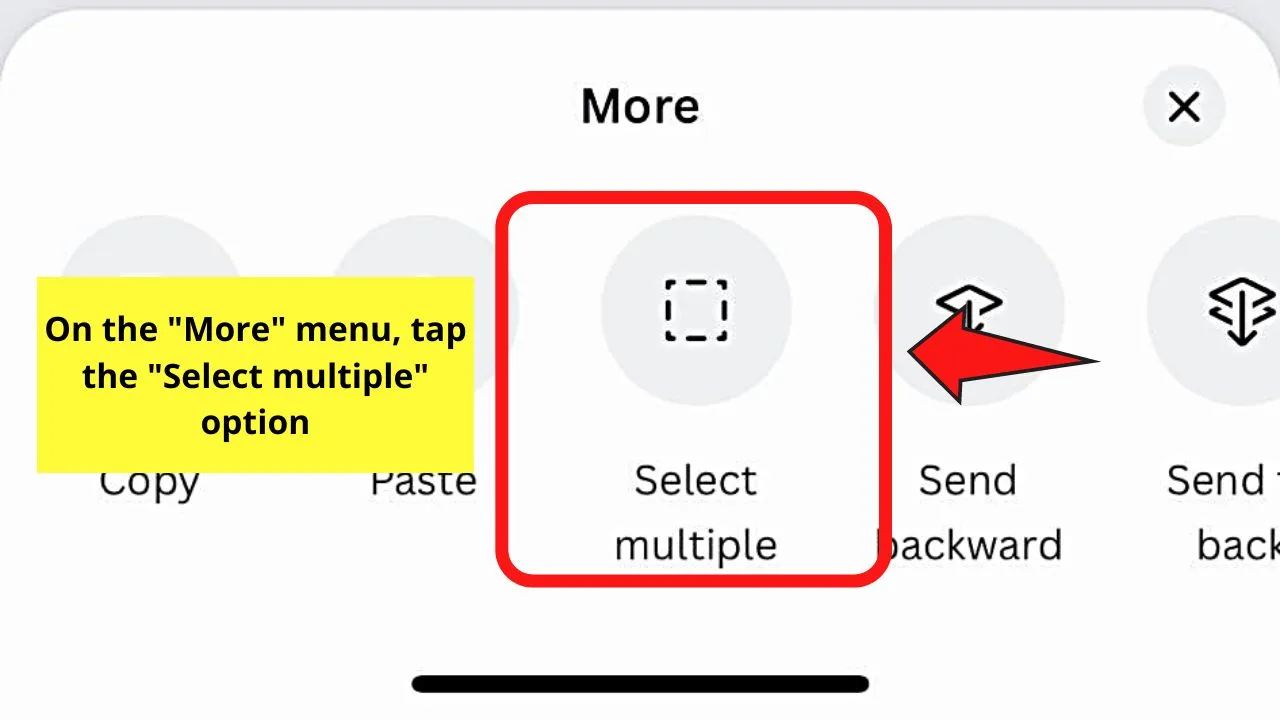
- Tap the “Select multiple” button.
- Add text and other design elements you want to adjust their time by tapping on them individually.
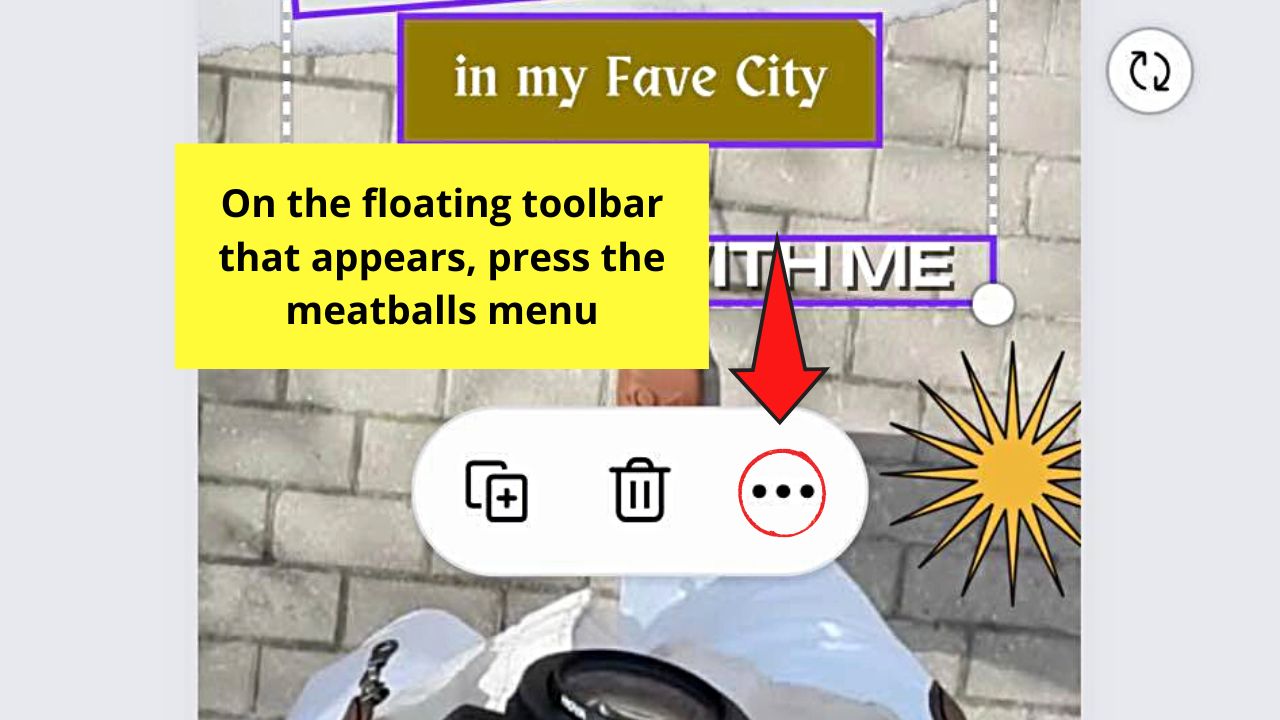
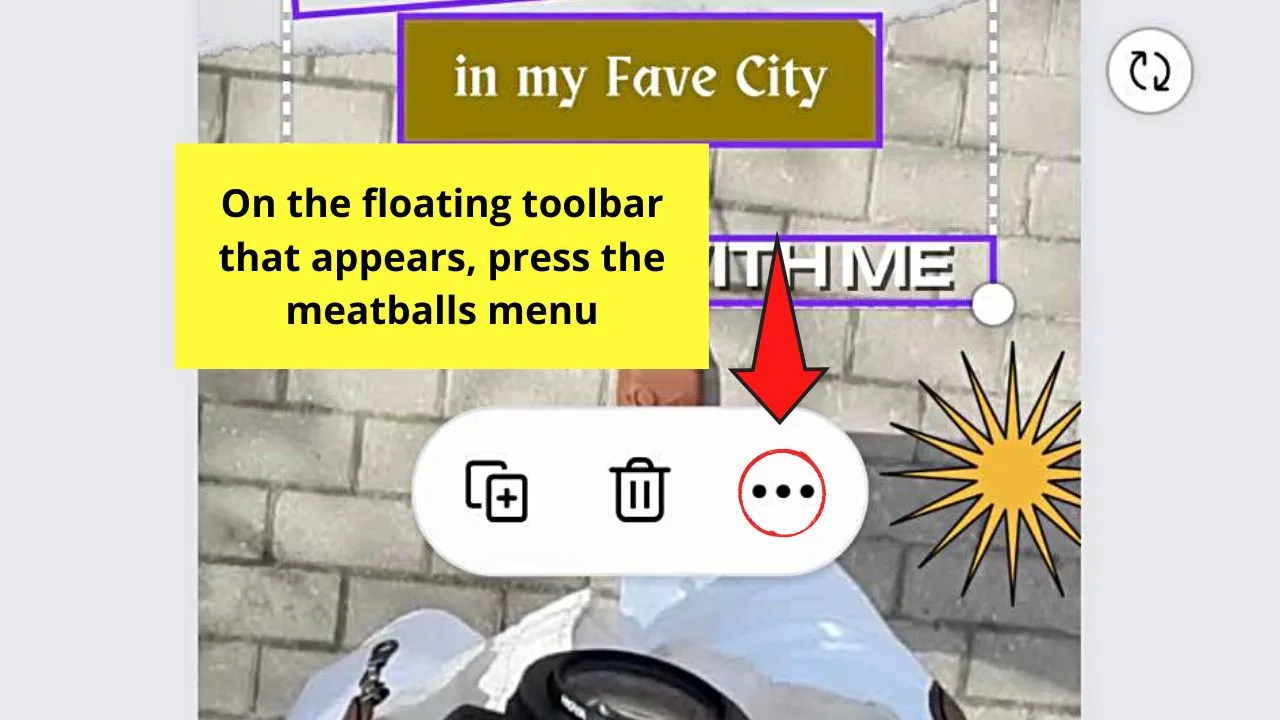
- On the floating toolbar, press the meatballs menu.
- Tap the “Show Timing” option on the bottom menu to show the element timeline above the video timeline.
- Press the “Up” icon to expand the element timeline.
- Tap on the text element timeline and drag its trim handles to the right or left to adjust its timing and duration. Repeat for other text and design elements.
And, just like in Canva’s website version, you can proceed with adding text animations and adjust the speed accordingly.
The steps are the same for timing text elements on Canva online and on the mobile app; just where to access the buttons is a major difference.
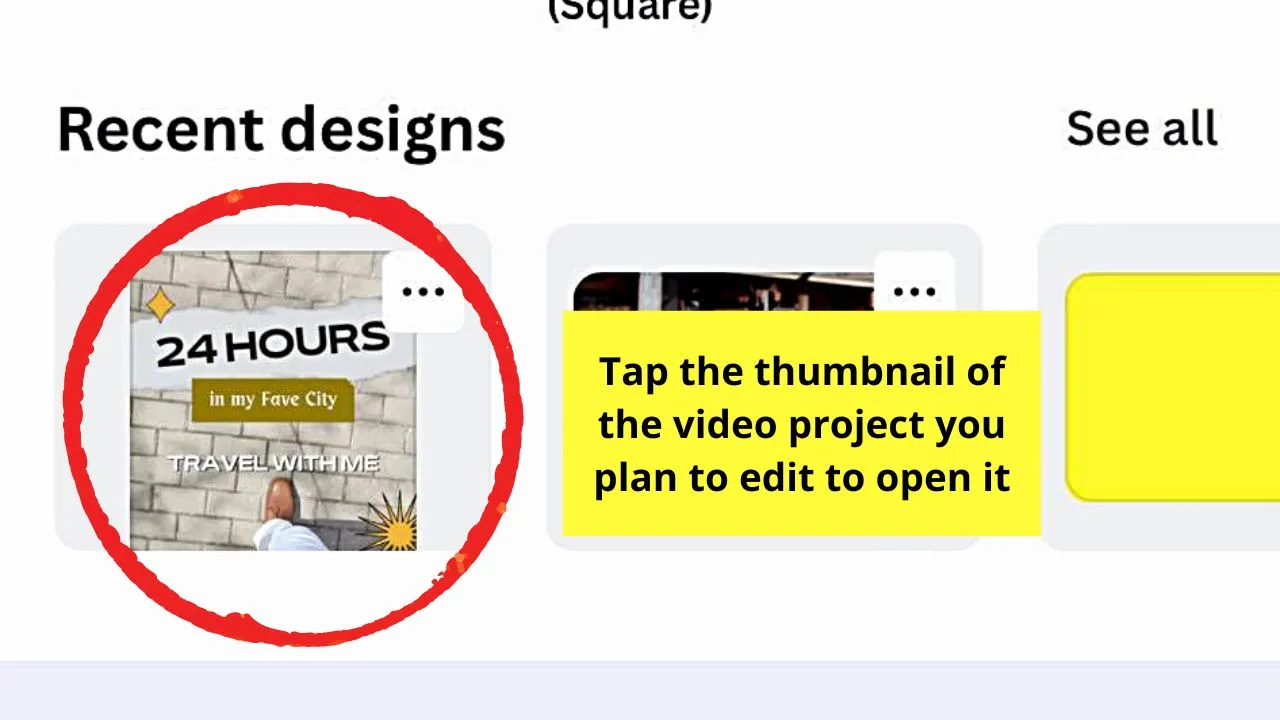
Step 1: Open a blank video template or an existing one from Canva’s home page by tapping it.

Step 2: After adding the text elements you need for the footage, press one of the text to select it.

If you want to time other text and design elements, swipe to the left and press the “More” tab on the bottom toolbar.
Step 3: On the “More” page, swipe to the left until you see the “Select multiple” option. Press to select it.

Step 4: You can now select more text and design elements on the video. Just tap on them one by one until a purple or white-dotted outline surrounds them.

Step 5: After choosing the elements to adjust their timing, press the meatballs menu on the floating toolbar that appears.
Step 6: On the bottom menu that then appears, tap the “Show timing” option.

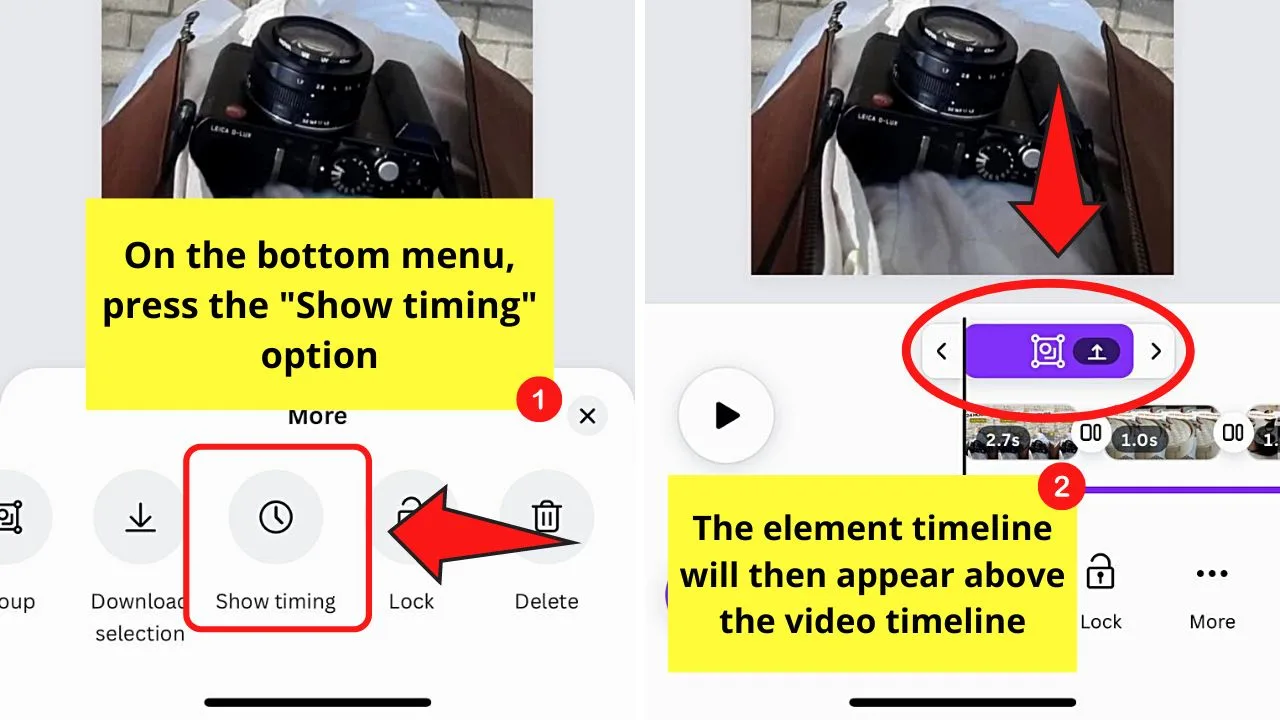
You will then see the element timeline above the video timeline.
Step 7: To see the individual element timelines press the “Up” icon.
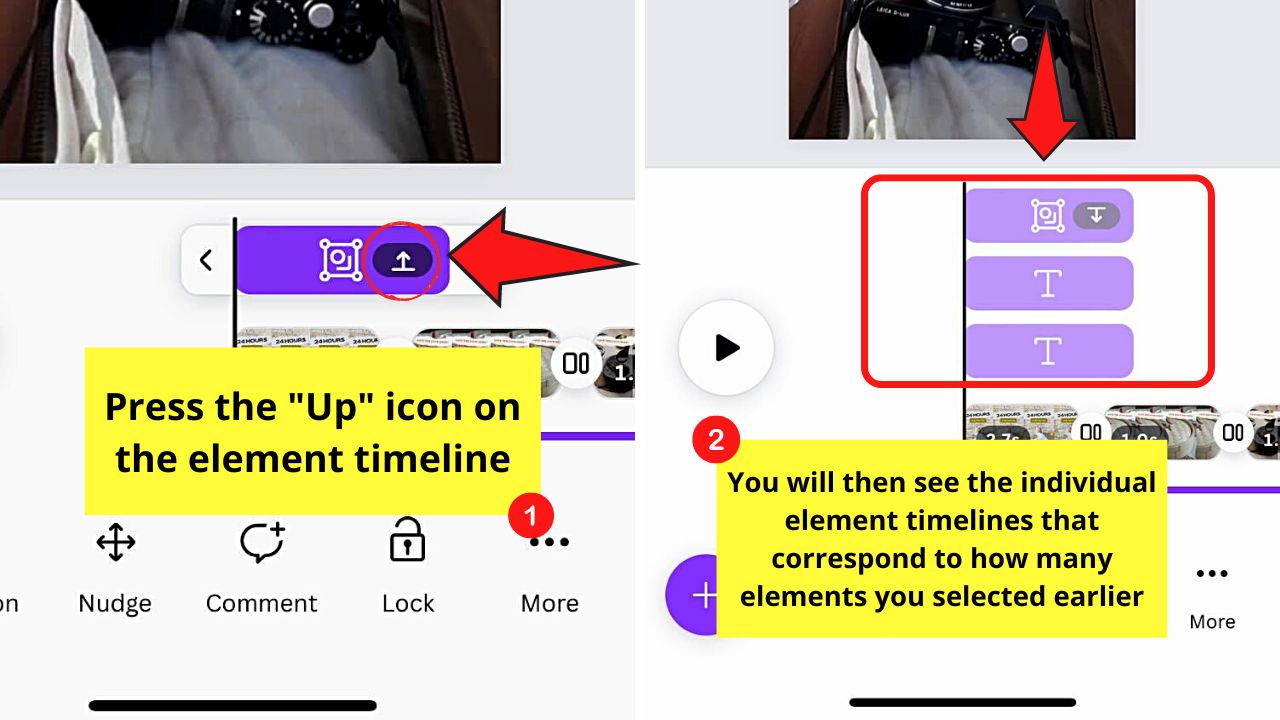
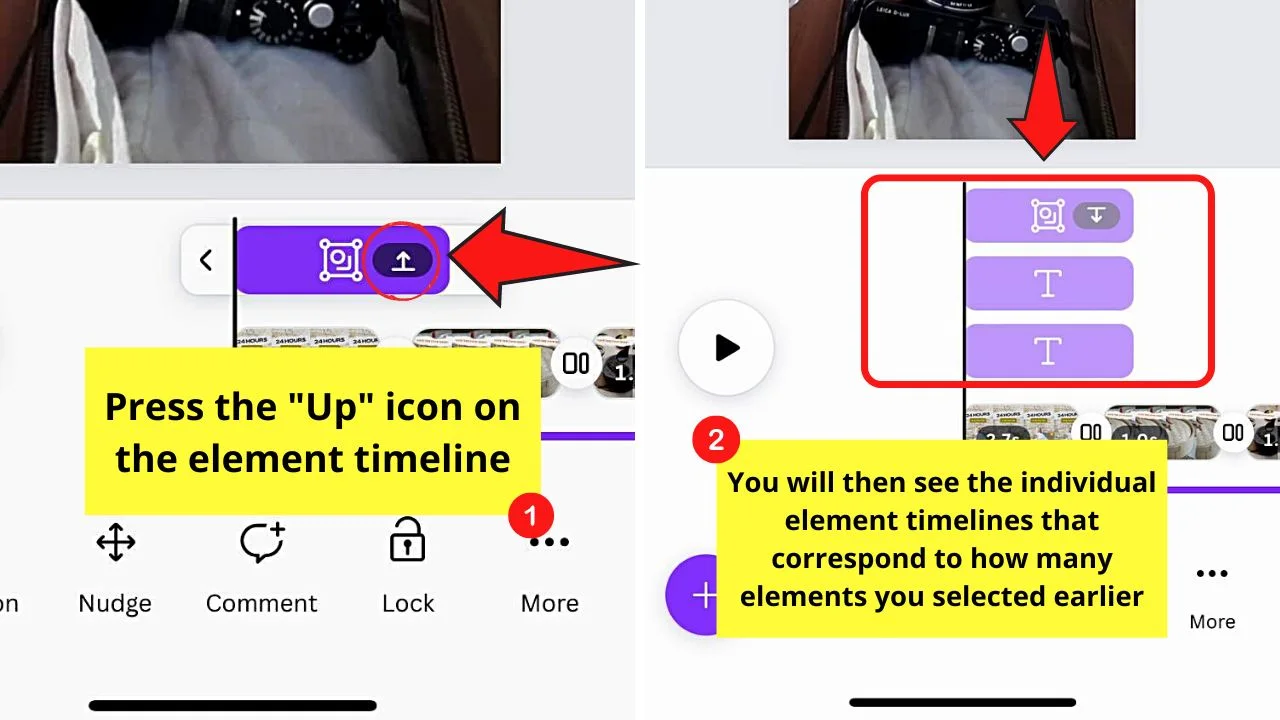
Depending on the number of elements selected, you’ll also see the corresponding number of timelines.
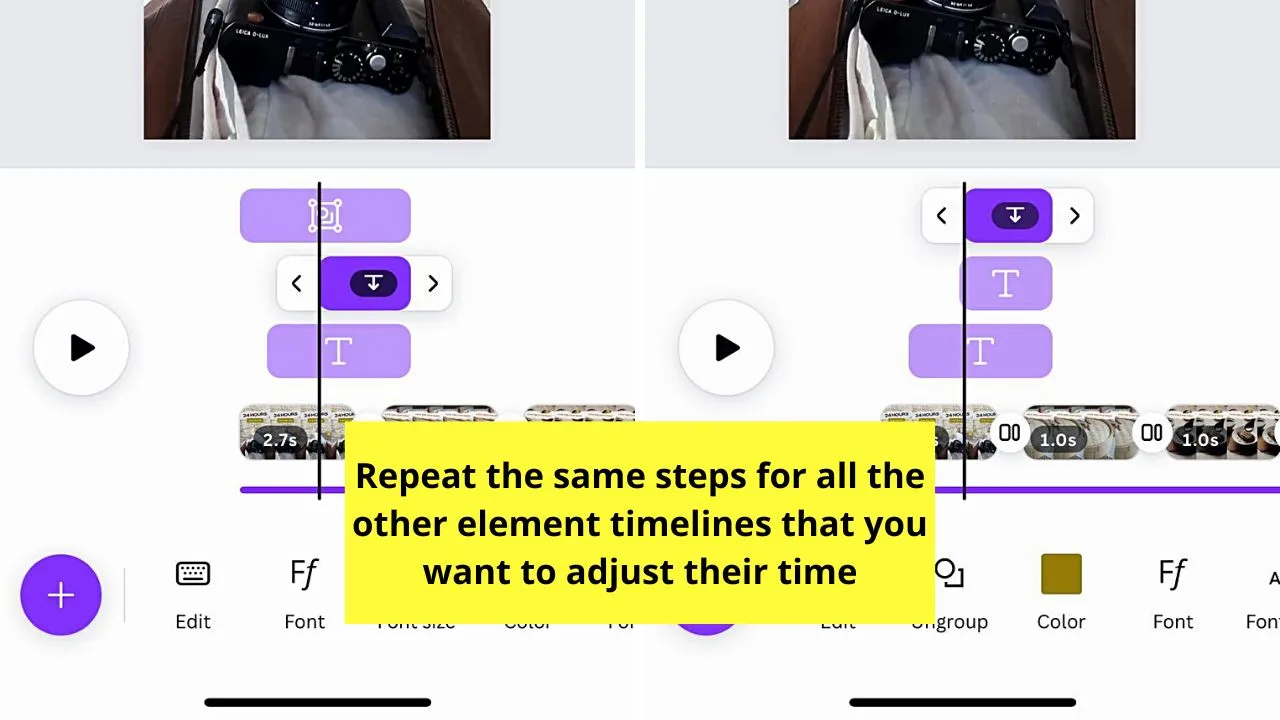
Step 8: Go to the text element timeline you want to adjust its time and tap it.


Then, press and drag the trim handles to the left or right to adjust the text’s time and length (if you drag the other trim handle as well).
Repeat the same steps for all the text and design elements you added.

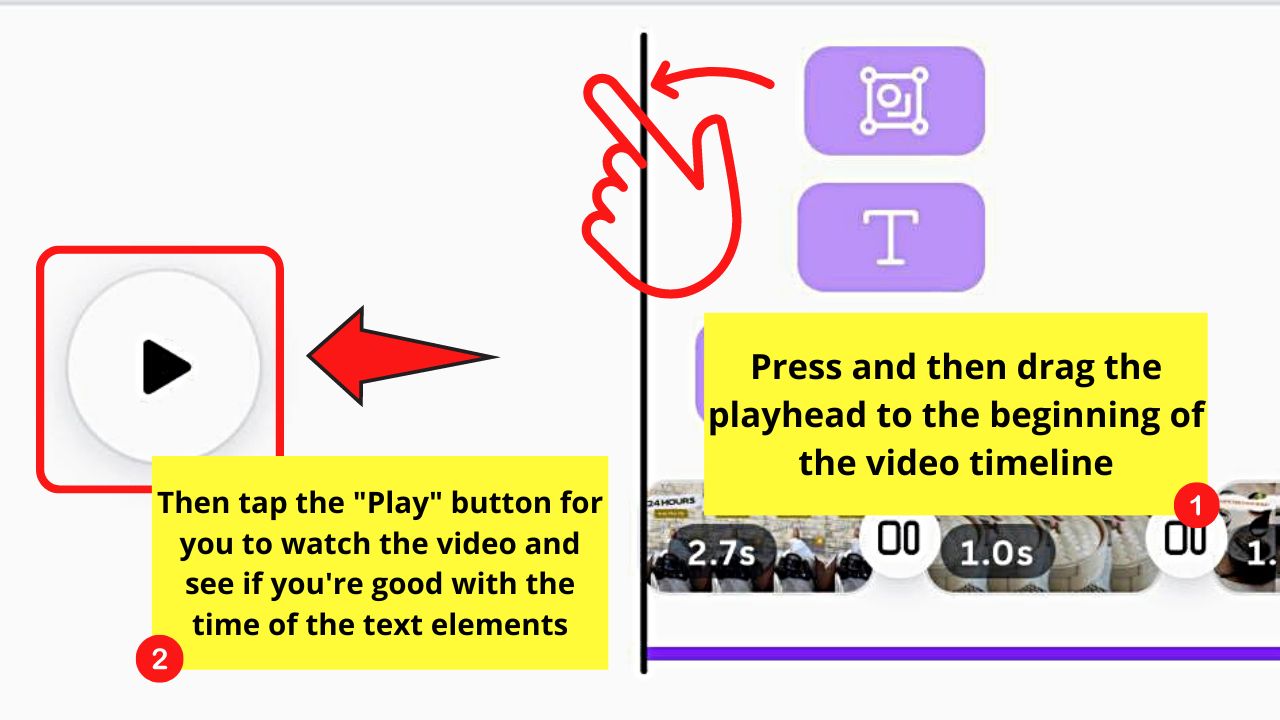
After which, drag the playhead to the beginning of the video to check how the elements appear on the video slide. Then, press “Play” to view the video.

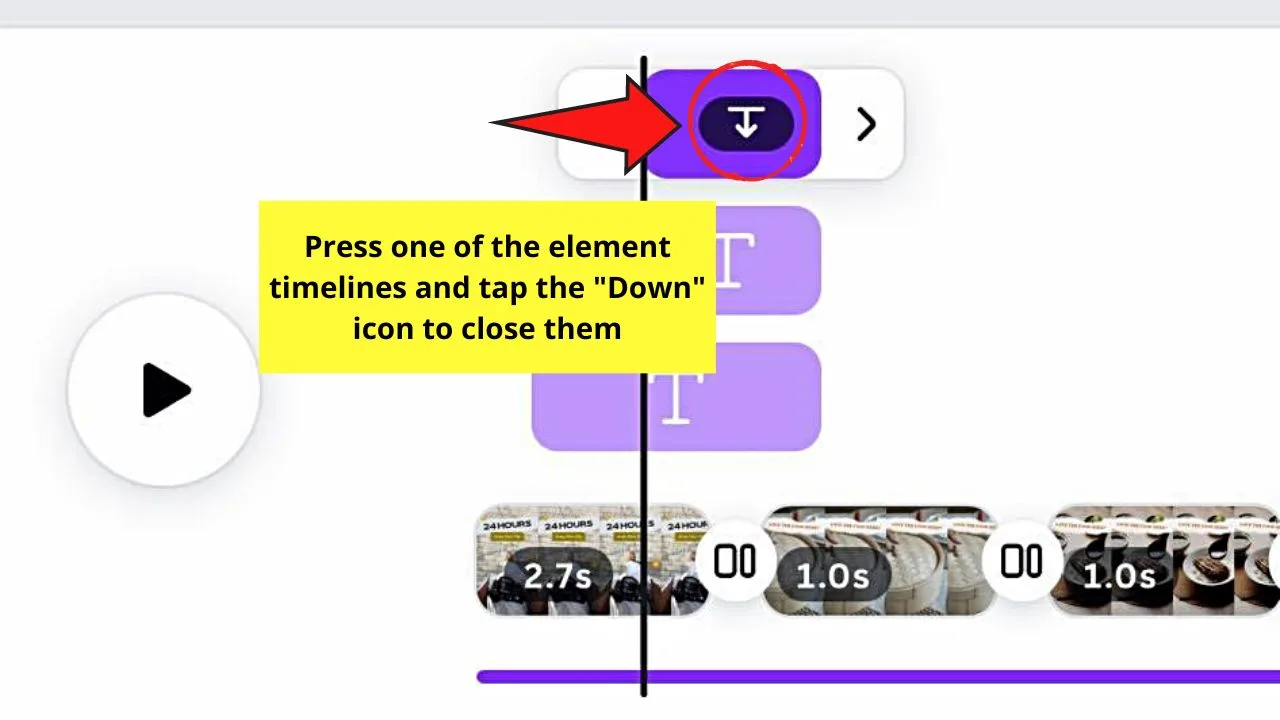
If you’re good with the adjustments made, tap the “Down” icon on the right side of the topmost element timeline to close it.

Then, proceed with adding text animations, effects, and other design elements like stickers if you like.
Frequently Asked Questions about How to Time Text Elements in Canva Videos
Do I need to be on Canva Pro for me to adjust element timelines?
You don’t need to be on Canva Pro to adjust element timelines. But, having a Pro account will help you access the text animations that are exclusive to Canva Pro users.
How do I sequence the text elements I added to the Canva video I made?
To sequence the text elements on a Canva video, select those elements one by one. Right-click and select “Show Timing” and click the “Up” icon to expand the element timeline. Choose a text timeline and drag its trim handles to make it appear first. Click another text timeline to do the same steps.
Why should I not group different text elements when I adjust their time on a Canva video?
When you group text elements, you make them act as a single unit. The moment you click or tap on those grouped texts, they will be surrounded by only one purple-dotted outline. If you don’t want them to appear at the same time, ungroup them and adjust their element timelines separately.


Hey guys! It’s me, Marcel, aka Maschi. On MaschiTuts, it’s all about tutorials! No matter the topic of the article, the goal always remains the same: Providing you guys with the most in-depth and helpful tutorials!

