
Have you ever wondered how graphic artists manage to create stunning layered effects on their designs?
Well, if you’re like the rest of us that wonder how to achieve such a feat, Canva has already covered most of the work for us.
But, before you can start making the designs you have in your mind, it’s best to understand how layering images and elements work in Canva.
So, if you’re raring to start learning, then better be on high alert for all the information you’re about to read.
How to layer images and elements in Canva?
Layering in Canva starts with choosing the elements or images that you want to use for the project. Once you’ve made your selections, you first tap on the photo or element you’d like to layer. After which, head over to the “Position” tab on the taskbar. Then, click on the upward-pointing arrow icon in the toolbar to bring that particular image or element upward. If you want to bring another element downward, then click on the downward-pointing arrow icon to achieve the feat. If you’re satisfied with your design’s look, click the “Done” option to save your work.
Step-by-step instructions on layering elements and images in Canva
As stated earlier, achieving the layered effect in Canva need not be that complicated. But, if you want to learn the process itself, you better continue reading here.
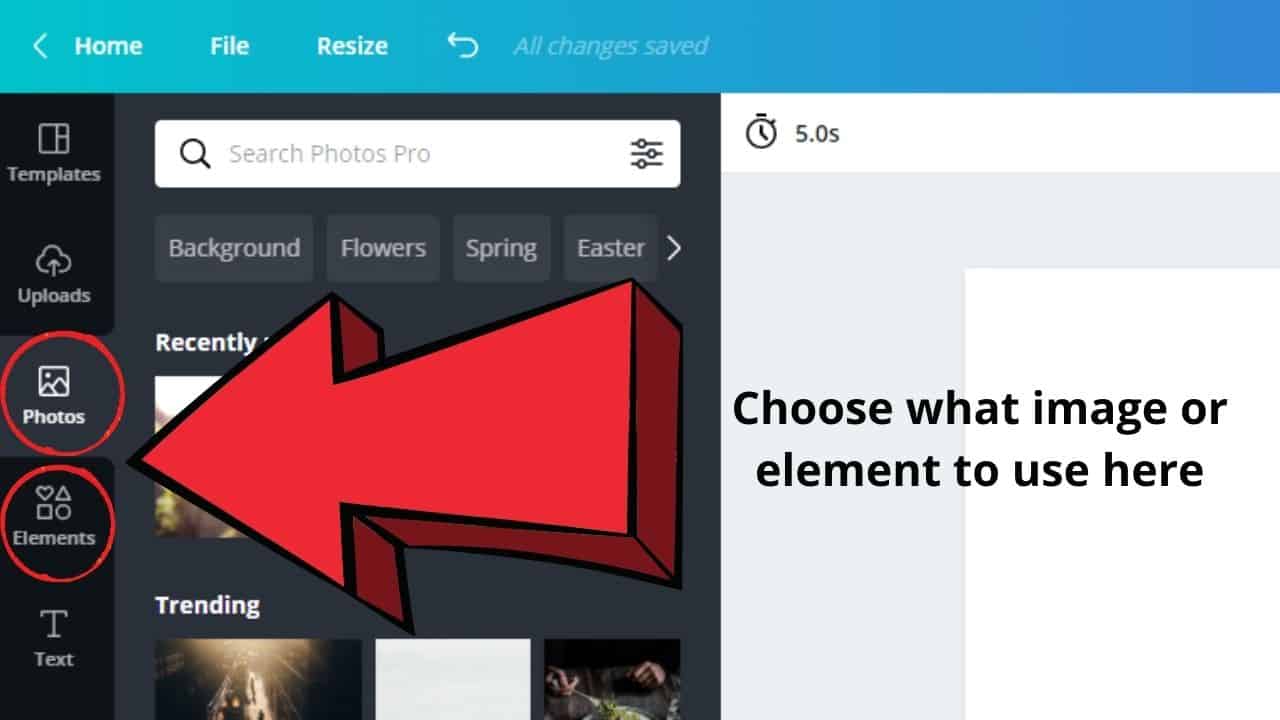
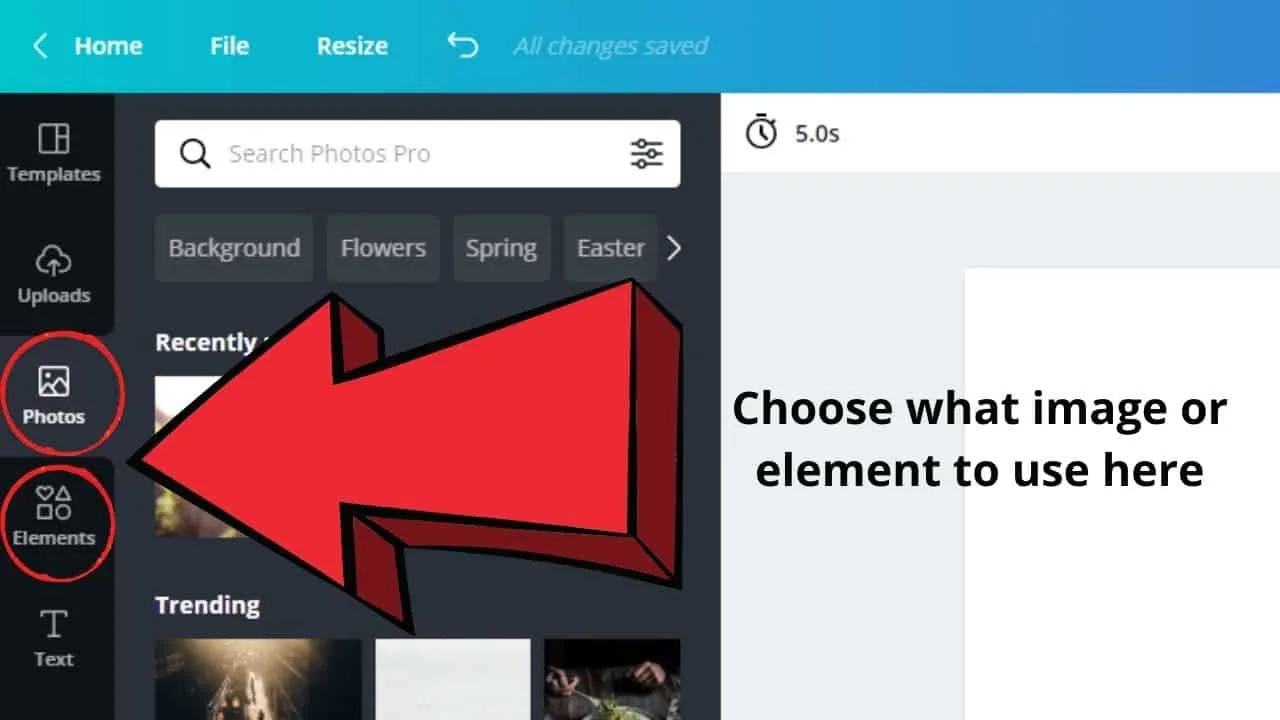
Step 1: Choose the images or elements you’d like to use for your project. You can then head over to the left-side menu of the Canva screen and tap on “Photos” and “Elements.”
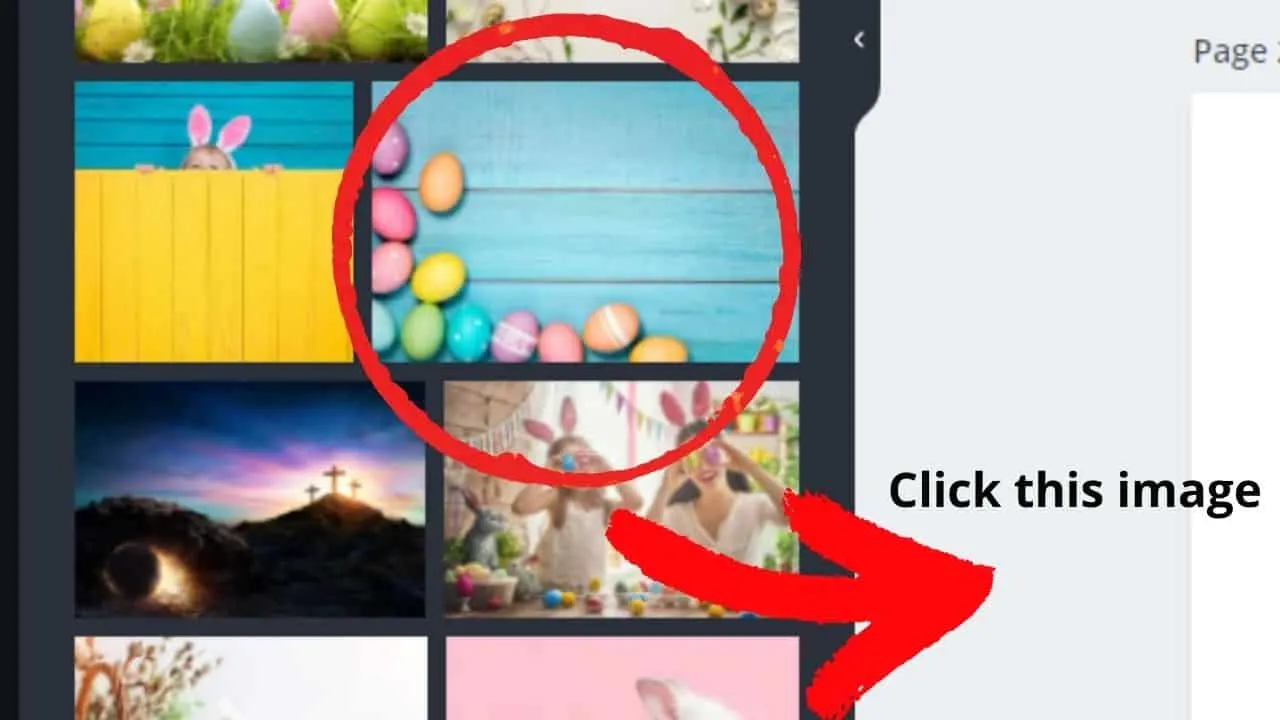
Step 2: Once you’ve selected the photos and elements you’d like to use, drag them over the blank template. Arrange them according to how you’d want them to appear on your design.
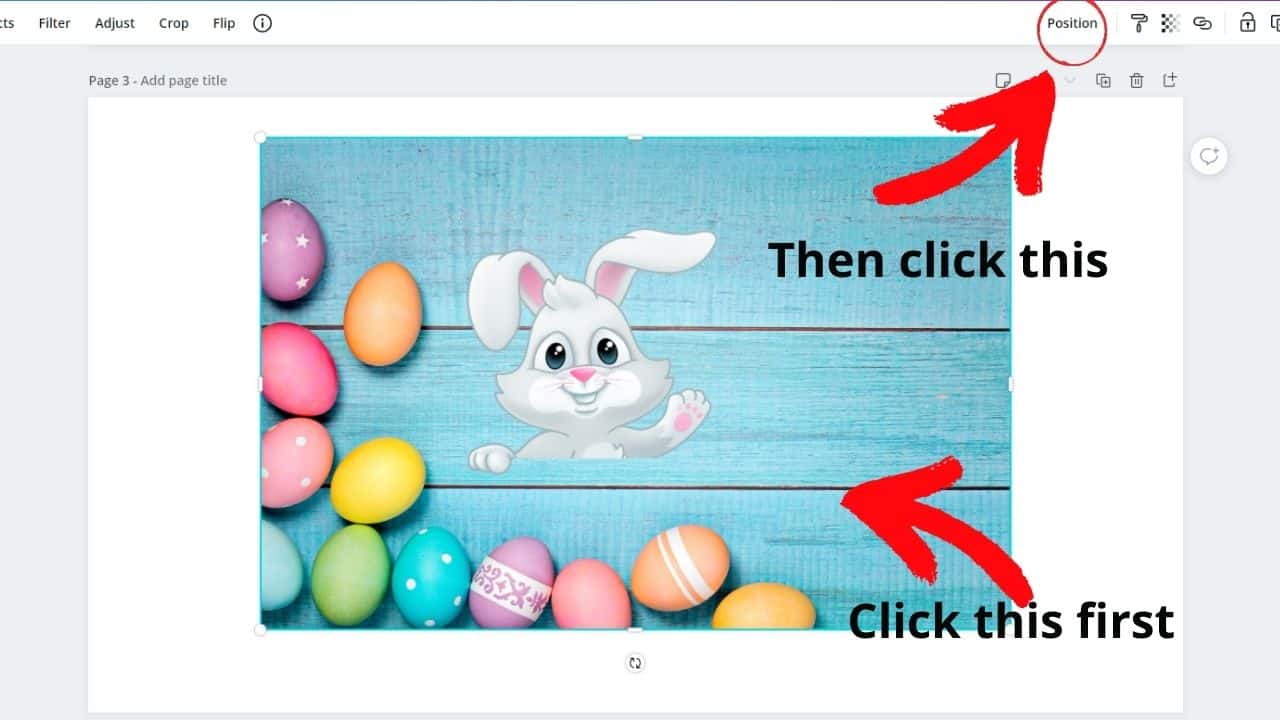
Step 3: Select the photo or element you’d like to start layering with by clicking on it.

Step 4: After clicking the element or image, head over to the toolbar above the project template and click on the “Position” tab.

Step 5: If you want that image or element to appear in front of the others you’ve selected, click on the “Forward” tab. You can also press the Control and close bracket (Ctrl + ]) keys on your keyboard.
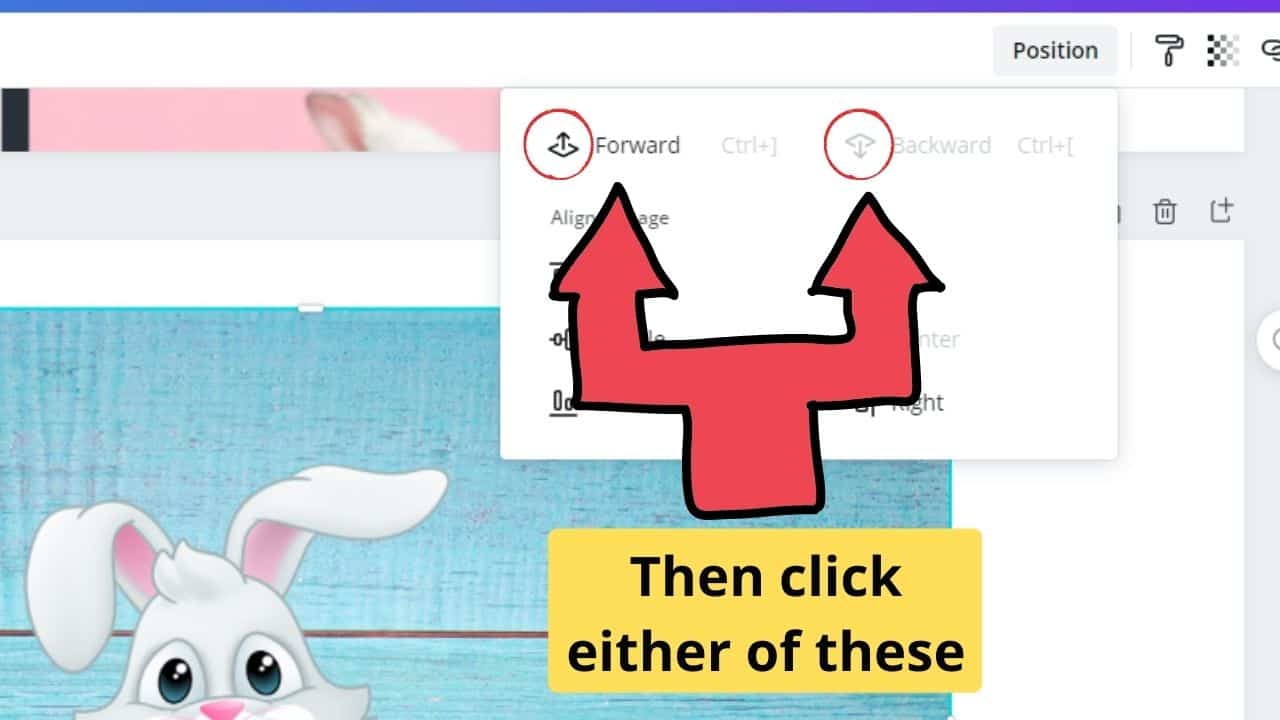
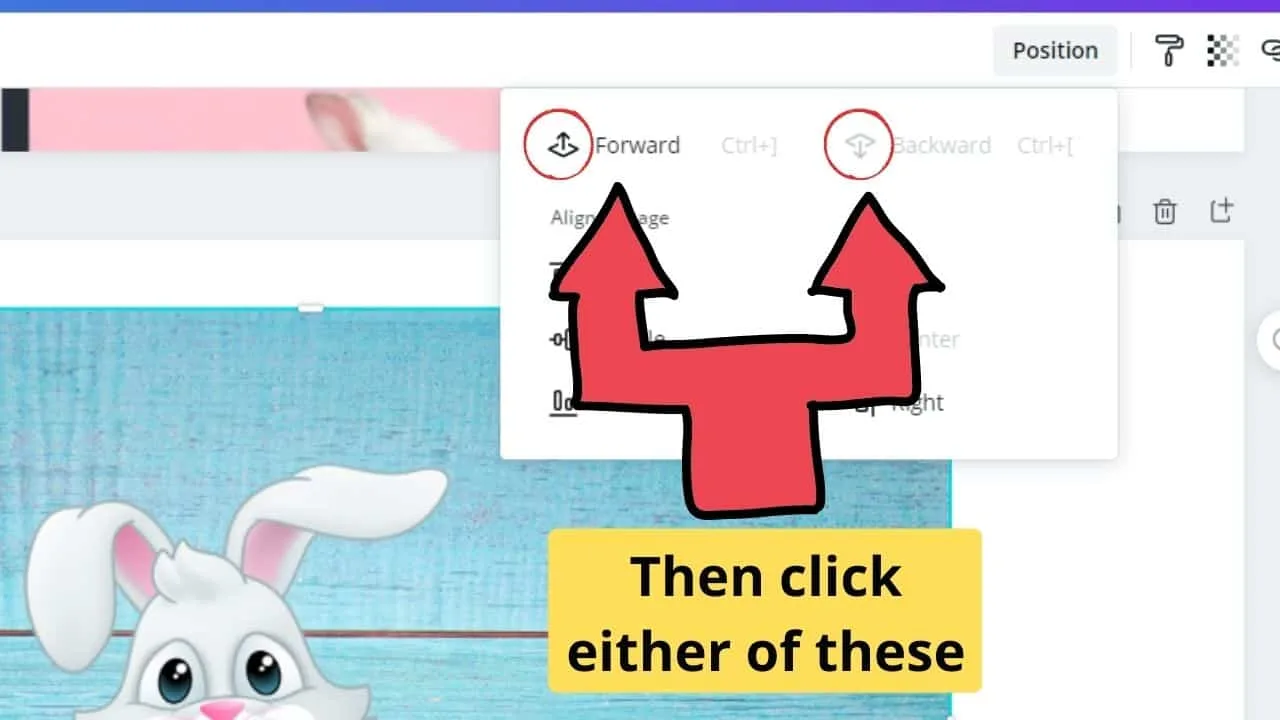
Step 6: If you want that element or photo to move backward, click on the “Backward” option instead. You can also press Control and the open bracket (Ctrl + [) keys together on your keyboard.
But, if you don’t want to go the long way of doing these steps, you can right-click on the image or element you’re working with. A dropdown menu will then appear.
After which, click what option works best for you. Be it “Send it back”, “Send backward”, “Bring Forward”, or “Bring to Front”, it doesn’t matter. You’re the ultimate judge of what works best for your design.


And, if you’re just curious, you can layer any kind of elements together. Be it a frame, shape, or sticker, there’s no limitation on what you can pile on top of one another.
You simply need to be creative enough to develop new shapes and designs by maximizing this layering technique.
Now that you’ve learned the basics of layering photos and elements in Canva, are you now ready to apply your new skills?
But, while you’re ecstatic to try this new skill of yours, what if you’re only stuck using a mobile device like a tablet or a phone.
Can you still create that layered effect even on a smaller screen? Let’s find out below.
How to overlay images and pictures in Canva
Overlaying images and pictures in Canva is very straightforward. All you need to do is to drag a picture or image on top of another picture.
To change the layering order of an image, simply right-click on it and then select one of the 4 possible options which are “Send backward,” “Send to back,” “Bring forward” or “Bring to front.”
In case these options do not appear after clicking on the image or picture, then the problem usually is that you have a certain image/picture set as the background of the design. Images that are set as the background of a design always spread over the whole design.
With that said, check whether you do have such a picture set that is spreading over the whole design and then right-click on it.
If it is indeed set as the background, you will see the option “Detach image from background.” Click on that option.
After doing this, whenever you right-click on any image or photo in your design, you should indeed see the 4 layering options as pointed out above.
Instead of right-clicking on the images and pictures, you could also just select an image or a picture and then click on “Position” in the upper-right corner of the screen.
There, you will find the 2 options “Forward” and “Backward.”
These options are essentially doing the exact same as the 4 options that you get when you right-click on an image or picture with the slight difference that the functionality has been packed into 2 options instead of 4.
This simply means that instead of “Bring to front,” you would probably need to click several times on “Forward” until the image is finally in front of all other items.
In the same manner with “Backward,” you would likely need to press this option several times until your image finally arrived at the back.
Overlaying and layering images in Canva can become a bit troublesome when you are dealing with lots of different layers. This is partly due to the fact that we don’t have a dedicated “Layers panel” in Canva.
One problem that often arises when using overlays is that certain elements are “hidden” behind these top layers.
Have a look at our Canva Hacks video to understand how to solve this sort of issue (focus on Hack Nr. 29, “Selecting Hidden elements.”
How to layer images in Canva on a mobile phone
If you’re hesitating to create layers on your Canva template because you’re only using a tablet or a cellular phone, you don’t need to.
Well, the feel and the controls will undoubtedly be different than using a laptop or PC to edit your project.
But, the effect that you want to achieve (which is layering in this case) is still feasible if you know how to activate such features.
So, to start with, you’ll need to create a blank project template to begin with the process.
And, like earlier, you’ll need to choose the photos and elements you’d like to use for your project. You can still do this by heading over to the left-side menu and clicking on the “Photos” and “Elements” tabs.
Once done, click and drag the images and elements you’ve chosen towards the blank template. Arrange them accordingly on how you want them to appear on your design.
After which, head over to the toolbar above the template and click on the three-dot (ellipsis-like) tab. A couple of options will then appear on the dropdown menu.
Once there, click on the “Position” tab. The page “Forward” and “Backward” options will then appear.
Tap on either of those two options until you achieve the look you’d want to appear on your design. If you need to repeat the whole process, you can go ahead and do so.
Speed isn’t what matters here the most. Take your time until you achieve the intended look of your design.
Once finished, click on the checkmark button to save your work.
Amazing how two options can create a difference in the design you’re working on? Well, if you’re still raring to learn more, then better head over to the next topic below.
Layering grouped elements or pictures in Canva
Now, if you’ve been attentive enough, you’ll notice that the steps mentioned above are for layering photos and elements individually.
But, is it even possible for you to stack together a group of elements or images with another set of pictures on the same template?
Well, you most certainly can! But, you’ll need to add a few more steps to the tricky process.
However, once you get the hang of how to do it, you’ll never have difficulty achieving the layered effect, even with many elements and pictures involved.
To start with, you’ll need to select the images and elements you’d like to use. Once you’ve done so, proceed with arranging those elements and pictures you’ve chosen on the template.
Yet, unlike earlier where you’ll move the image or element individually, you have to group them first.
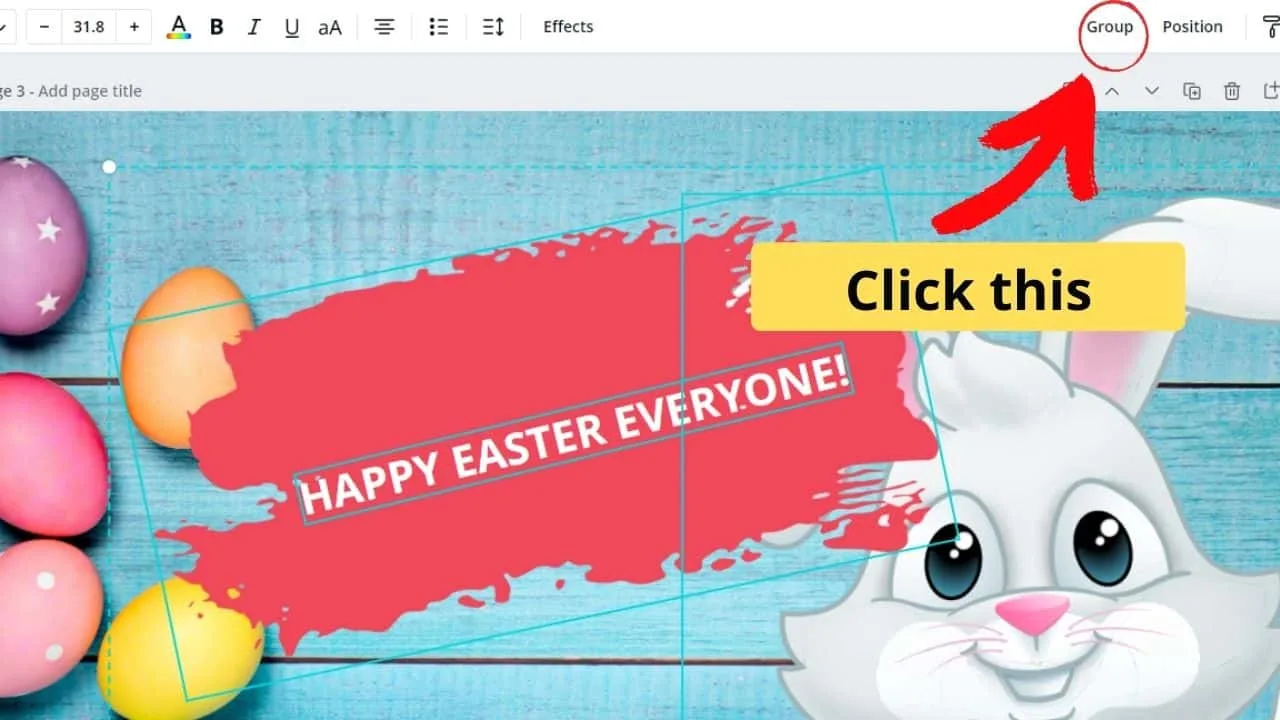
To group them, click and drag your cursor across the images and elements you’d like to stick together.
You can also tap the Shift key on your keyboard while tapping on the images or elements you’d like to group.
Once done, head over to the toolbar above the template and click on the “Group” tab. This will automatically “lock” the two elements or pictures together as a single unit.

You can also hit Ctrl + G (for Windows users) or Cmd + G (for Mac users) to achieve the same command.
Repeat the same steps above for grouping another set of elements or pictures together.
After which, proceed to layer the two grouped units together. Just click on the grouped components you’d like to use and tap the “Position” tab.
You can then opt to click the “Forward” or “Backward” tab to layer the unit behind or in front of the other group.
Do this a couple more times until you’re satisfied with the results.
If you feel that the combination you made isn’t working, then simply ungroup those pictures or elements by clicking on the “Ungroup” tab in the toolbar.
However, there are items in Canva that are considered an exception to the rule. Simply put, you cannot group these elements together.
These components include grids and charts. You’ll need to move them individually compared to the rest of the images or elements you’ve chosen if you want to include them in your layering project.
So, as you can see, the possibilities are precisely endless when designing in Canva. You simply need to use your imaginative mind to achieve the effects you want to put.
What are you waiting for then? Hit the “Create a Design” button and let your imagination lead the way to your impending graphic design success.
Frequently asked questions
Does Canva have layers?
There is no dedicated layers panel or layering tool in Canva. However, you can still send images forward or backward in your design by right-clicking on the element and then using one of the 4 options “Sent to back,” “Sent backwards,” “Bring forward” or “Bring to front.”
How to layer photos in Canva?
To layer photos in Canva, select the photo and then in the upper-right corner click on “Position.” Then choose either “Forward” or “Backward.” If you do have a photo set as the background of your design, you will need to select it and then click on “Detach image from background” before you can actually layer it.
How to merge layers in Canva?
There is no direct way to merge layers in Canva. However, if you would like to put certain photos, images or elements on the same layer, what you can do is to group these elements together by selecting all of the desired elements and then by pressing “G” on your keyboard. After grouping these elements together, make sure to right-click on the grouped elements and then define the layer by using one of the 4 layering options “Sent backward,” Sent to back, ” “Bring forward” and “Bring to front.”


Hey guys! It’s me, Marcel, aka Maschi. On MaschiTuts, it’s all about tutorials! No matter the topic of the article, the goal always remains the same: Providing you guys with the most in-depth and helpful tutorials!

