One reason why Canva is so popular is because it lets you add things to your images extremely quickly and efficiently.
But what about if would like to erase certain things out of an image rather than adding something to it?
Does Canva excel in this matter as well?
Well, let’s find out!
How to Erase in Canva
To erase in Canva, use Canva’s Magic Eraser tool. To access it, left-click on your image, select “Edit Photo” and then click on “Magic Eraser.” Now, brush over the part of the image that you want to erase. Repeat the process if unwanted fragments are remaining.
Please note that the Magic Eraser is a Canva Pro feature only. So, if you are on a Canva Free plan, erasing things in Canva is only partially possible.
Watch the videos below to learn more on how to erase both in Canva Free and Canva Pro.
How to Erase a Background Image in Canva (only for Pro users)
To erase a Background Image in Canva, follow these steps:
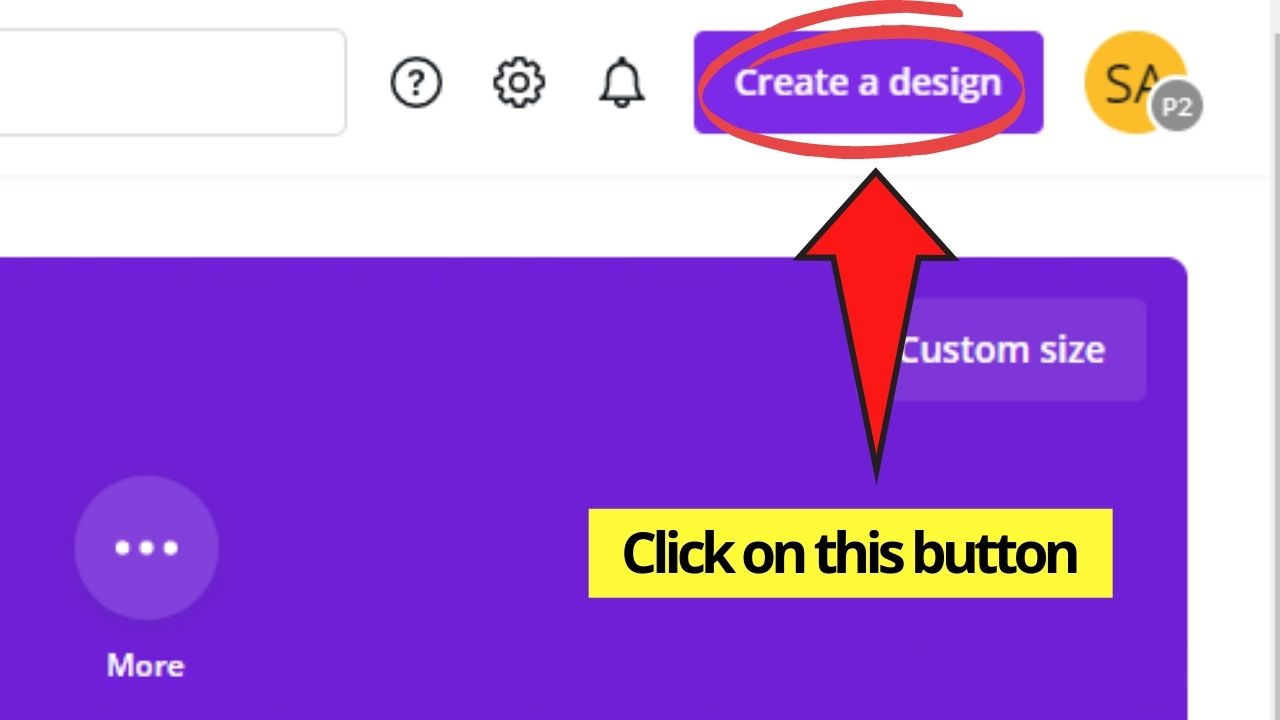
Step 1: Log into your account and create a new design by tapping the “Create a New Design” button. You can also open an existing design by double-tapping on a folder.
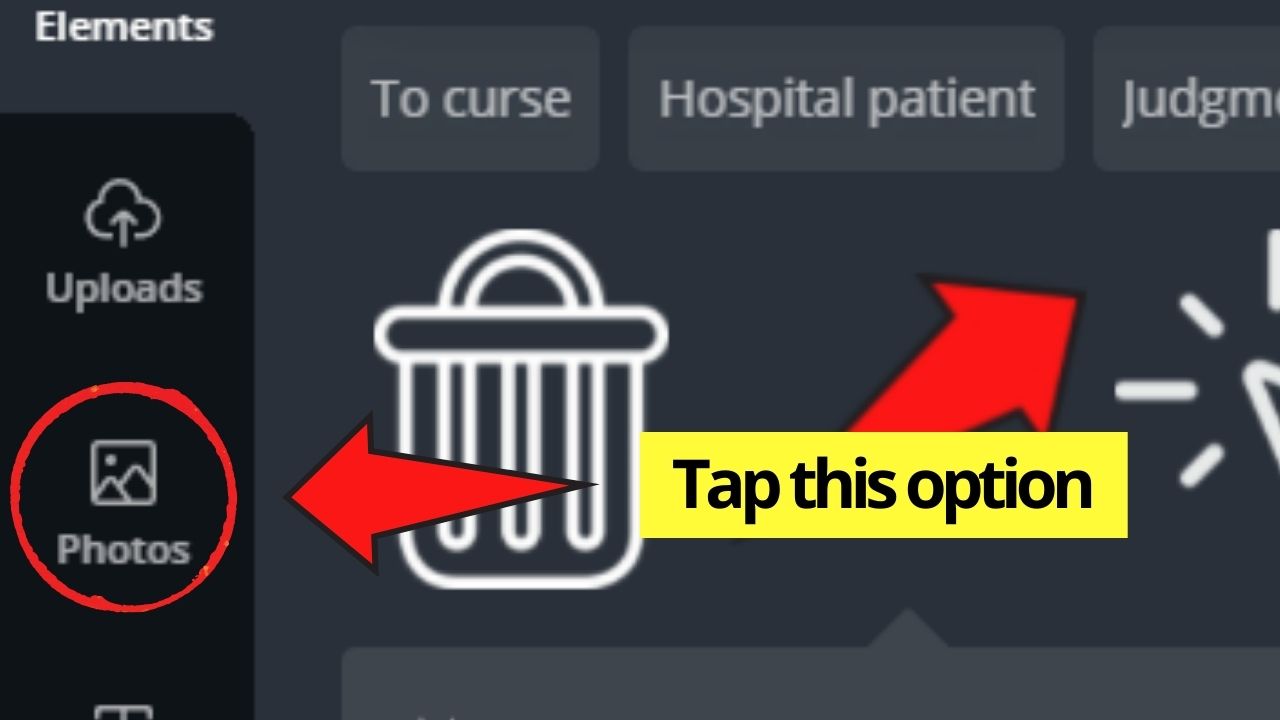
Step 2: If you’re in a new design, head over to the “Photos” tab on the left-side menu to choose an image.
If you’re in an existing design file, simply click on the picture you’d like to edit.
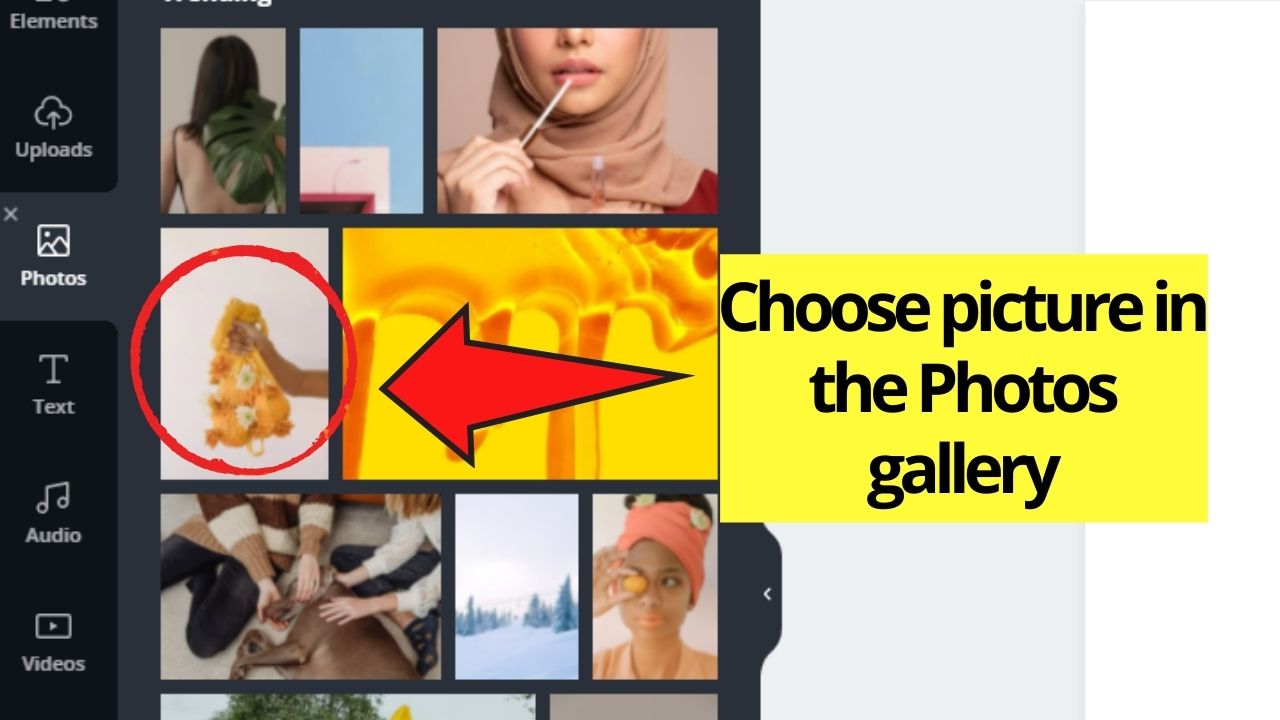
Step 3: In the “Photos” menu, drag and drop the photo you’d like to use.
Step 4: Click on the image you want to remove its background and head over the “Effects” tab in the toolbar.
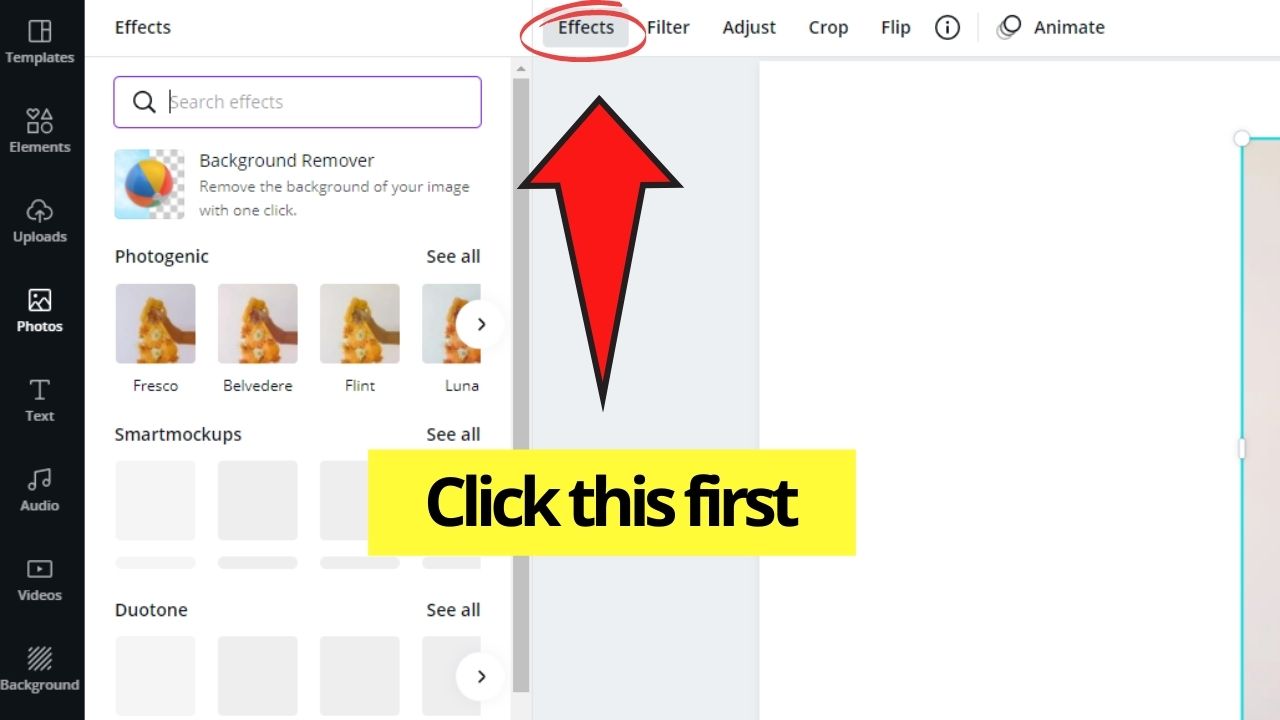
Step 5: In the menu that appears, select the “Background Remover” effect. Wait for Canva to process the removal of the background.
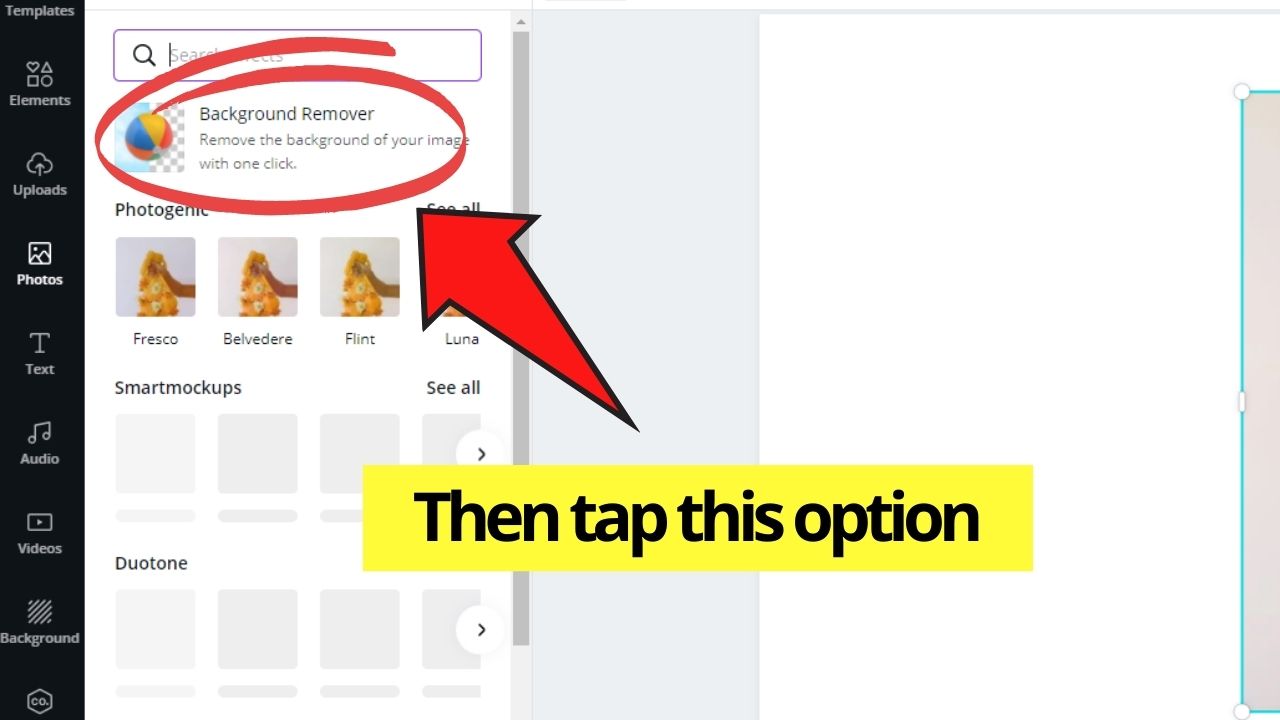
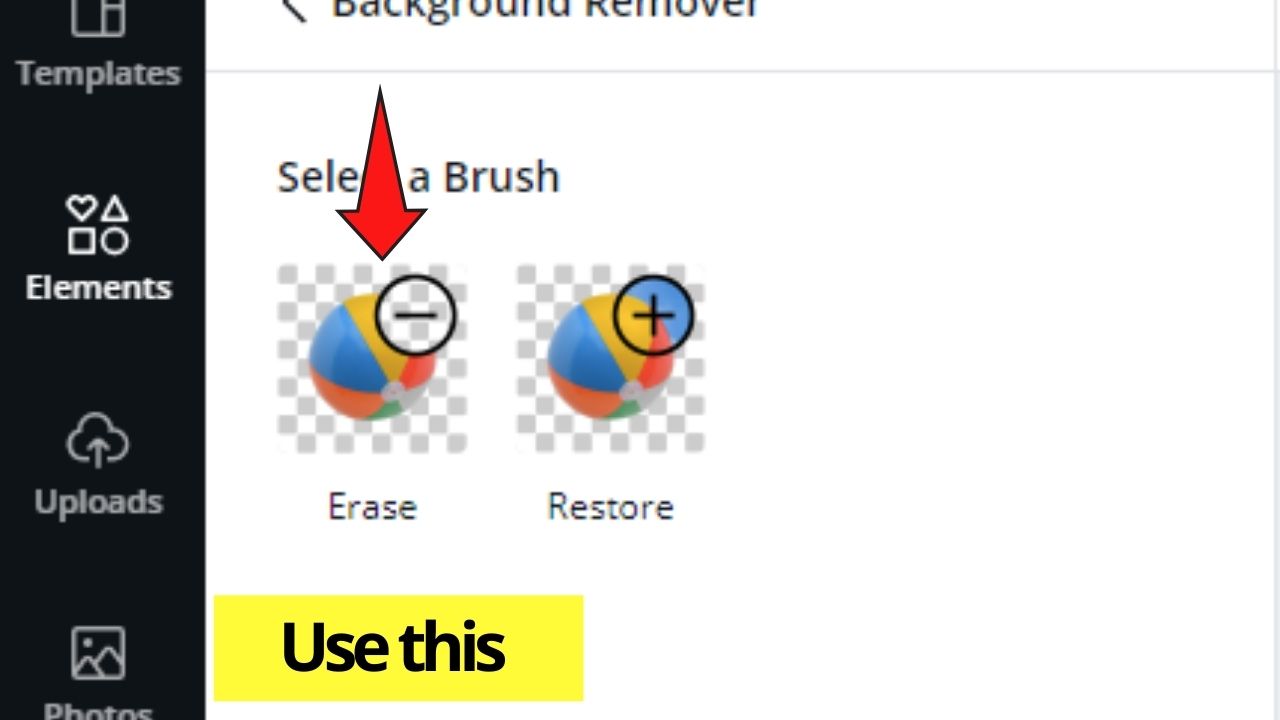
Step 6: After a few seconds, the background of the photo’s officially removed. For fine-tuning, zoom in on the image and use the “Erase” brush. You can even increase or decrease the brush size by dragging the brush size slider after clicking it.
Pretty simple, right?
You don’t need to be Albert Einstein to be able to erase the background image of the picture.
A few clicks and some creativity will do the trick for you. But, as I’ve mentioned earlier, you’ll have to be a Pro account user to fully enjoy this eraser feature.
If not, or if Canva’s background remover isn’t working, don’t feel disheartened. There’s still remove.bg to do the trick for you.
Assuming that you’re using a free photo or you have an existing picture from your design, you can simply head over to the site and upload the image there.
As soon as you upload the image, the website will remove the picture’s background, much like Canva’s background remover does the feat.
Once the process’s done, download the background-less image and re-upload it in Canva through the “Uploads” tab.
How to erase part of an image in Canva
Erasing part of an image in Canva is possible. However, if you are looking for a powerful tool comparable to the eraser tool or spot healing brush tool of popular software such as Adobe Photoshop and Illustrator, chances are that you won’t find what you are looking for.
In fact, for proper erasing of elements in Canva, you need to have Canva Pro.
To erase part of an image in Canva Pro, follow these steps:
- Left-click on the image
- Click on “Edit Photo”
- Click on “Magic Eraser”
- Brush over the part of the image that you would like to erase
- Wait for a few seconds until the process is finished
In this fashion, you can easily remove all sorts of elements from any picture, either uploaded to Canva or pictures that are part of Canva’s vast stock image library.
Now, if you don’t have Canva Pro, erasing part of an image in the very same way does not work.
Erasing parts of an image on Canva Free is, therefore, heavily restricted.
One thing that you can try is to use Canva’s crop tool to help you erase part of an image in Canva.
But the crop tool is very limited in its functionality, as it only crops images and pictures in Canva either horizontally or vertically.
So, one way to erase a certain element out of a picture would be to crop the image either horizontally or vertically but this is obviously not ideal because this will reduce the overall size of the image and will also erase other things out of the picture. This is usually not satisfactory, of course.
Another little workaround that can be useful at times is to place your image or picture in a frame/placeholder in Canva. For instance, have a look at the video preview above.
As you can see there, I have successfully erased part of the guy’s face. The way I achieved that was by placing the guy’s face into a circular frame. And then, I just repositioned the image so that only part of it is visible in the frame.
This is by no means a perfect solution but it’s better than nothing, I would suppose.
If you are interested in knowing how to do that, check out the following article: “How to fill a shape with an image in Canva.”
Also, if you would like to place your images into basically ANY shape, watch our video: How to fill any shape in Canva with an image.
In case you need to get some more sophisticated photo editing done, you would need to import your picture into some software such as Photoshop to get the job done.
If you are looking for free software that can help you erasing certain elements from a picture, you might want to give the free software GIMP a go.
The image manipulating software GIMP is available on Mac and PC and is completely free.
If you have Adobe Illustrator, you have another great tool at your disposal to solve this kind of issue.
Here’s how you would do just that in Illustrator: How to Erase Part of an Image in Illustrator
Frequently Asked Questions about How to Erase in Canva
Can you remove background images if you’re not a Canva Pro user?
Unfortunately, you cannot erase or remove background images if you’re only on a free account in Canva. You’ll need to upgrade your subscription to Pro, Enterprise, Education, or Nonprofits to enjoy such a feature.
Is it possible for you to undo erasing or removing an element in Canva?
Though erasing elements in Canva can seem permanent, you can undo the said action. Simply tap on the “Undo” button in Canva’s toolbar for you to bring back whatever element you’ve accidentally removed from your design.
Can you use Canva’s background remover unlimitedly?
If you’re a heavy Canva user, you’ll find that the graphic design tool has a daily limit of 500 background image removals. But, if you’re a casual Canva user, it’s highly unlikely that you’ll reach this daily limit. Hence, it may seem unlimited use still. The Canva Background Remover is a Canva Pro only feature, though, please keep that in mind.
What’s the difference between the “Erase” and Restore” brushes in Canva’s background remover?
The erase brush allows you to further remove some elements in the image if you don’t need them in your design. The restore brush, on the other hand, allows you to bring back the areas of the image you’d like to keep.
Can you erase elements in Canva without using the background remover tool first?
In Canva, you can only erase (or restore) elements after using the background remover first. That said, you can’t just simply erase any part of an element, picture or image in Canva.
Conclusion
No matter how minute a mistake you make in Canva, you can easily solve it by erasing elements, text, or backgrounds in your design.
Just follow the steps mentioned earlier, and you’ll never go astray with removing unwanted Canva elements on your design.
And, as always, you can just tap on the “Undo” button whenever you change your mind about removing such an element.