

How to Create a Drop Shadow in Illustrator
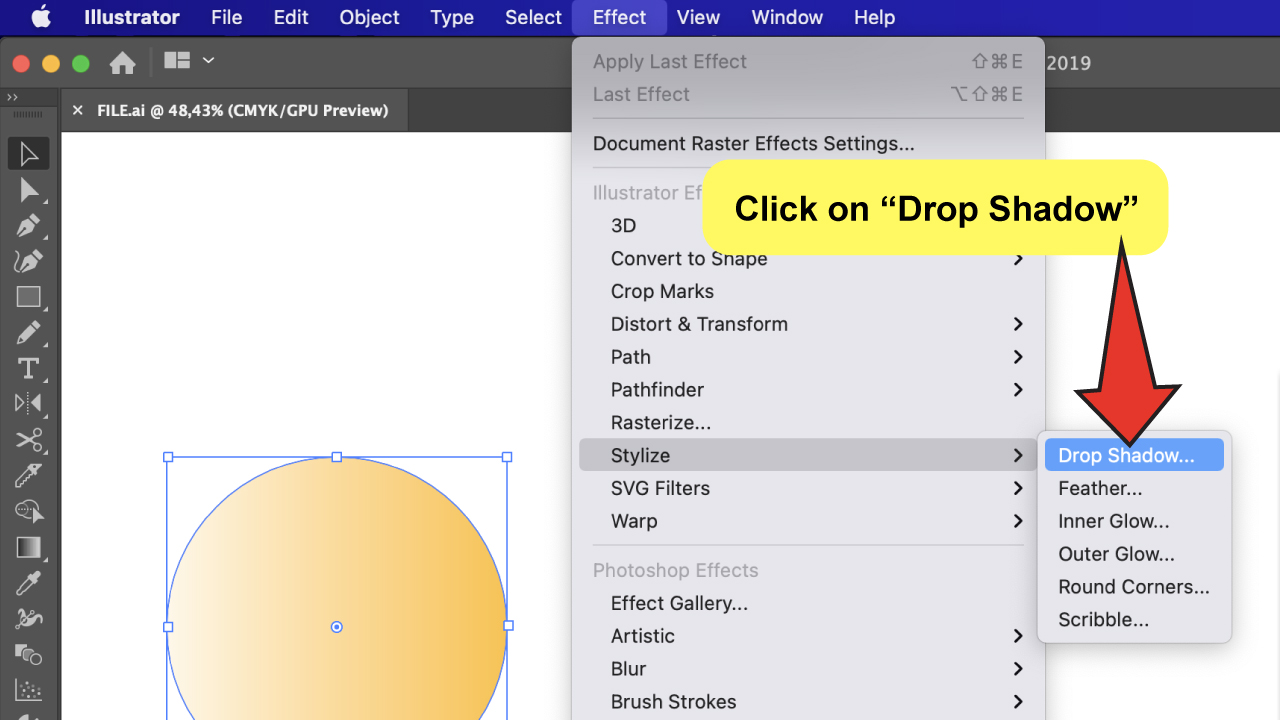
To create a drop shadow in Illustrator, select the object you want to work with. Then, at the top of the screen, go to the main menu bar and select “Effect.” Choose “Stylize” from the options, followed by “Drop Shadow.”
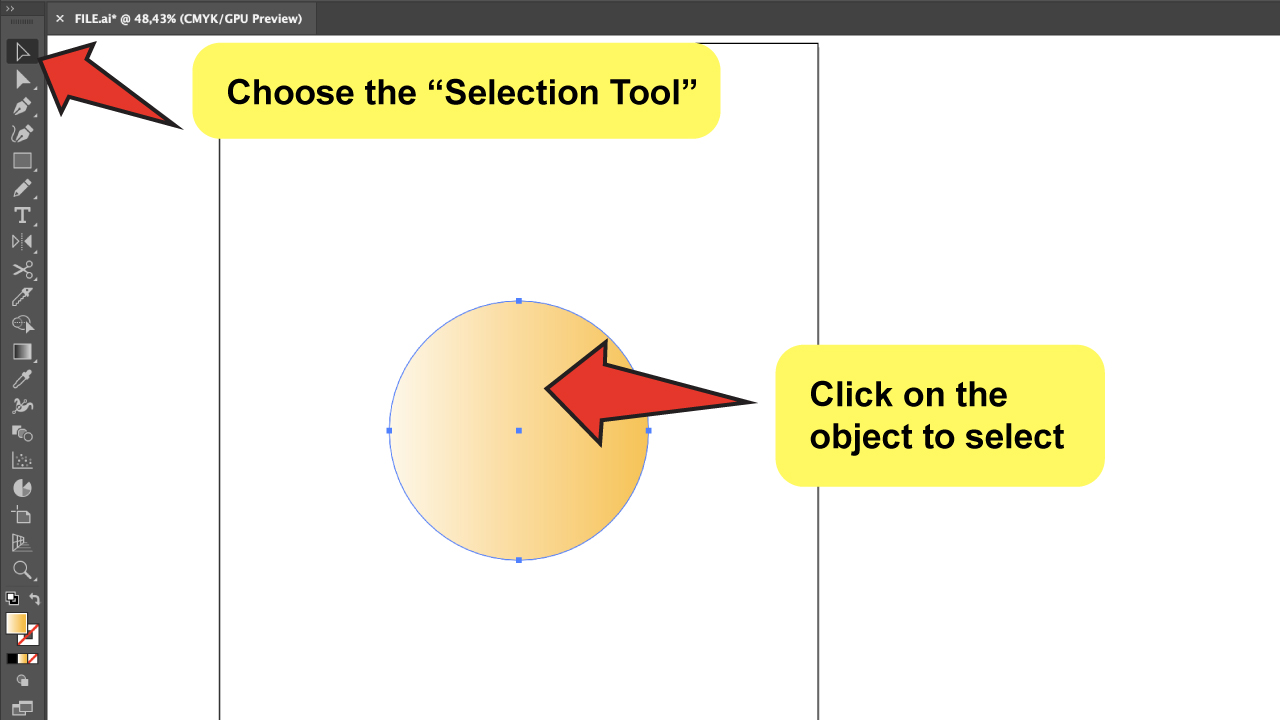
Step 1: Select an object or group (or target a layer in the Layers Panel).
Once you decide on the object you want to edit, go to “Selection Tool”, right on the top part of the toolbar (you could also get there by pressing the shortcut “V”), and select the object or group you are choosing for applying the shadow.

Step 2: Select “Drop Shadow” from the menu.
To start working with this effect, you need to click on “Effect” from the top menu bar, then click on “Stylize,” and select the “Drop Shadow” option.
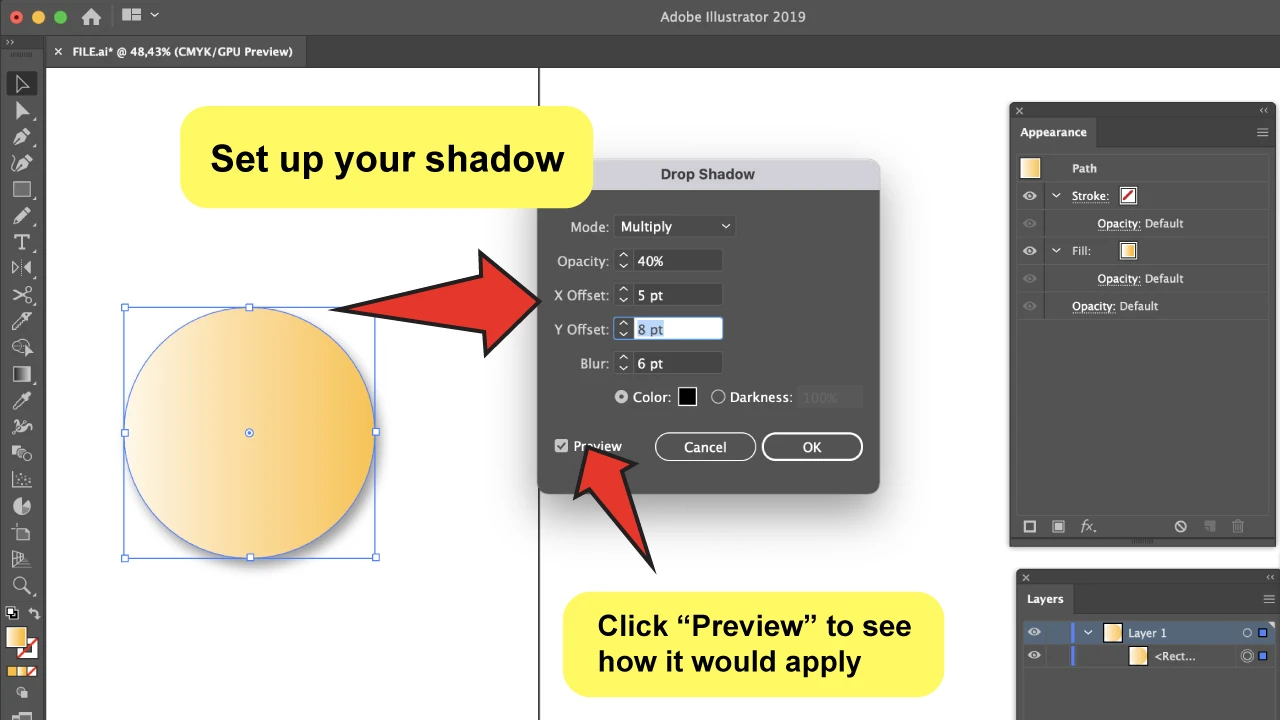
A pop-up menu box with options will show you everything you need to set up your effect.

Step 3: Define your “Drop Shadow” settings on the menu box.
You can configure the settings however you want.
Remember to click on “Preview” to be able to see all the settings you are applying on the go! And feel free to investigate by trying different combinations to adjust the appearance of the shadow.
Here’s a short description of each one of the settings available:
Mode. It´s the blending mode you want for the drop shadow. By default, you´ll see “Multiply.”
Opacity. Here, you can choose whether you want the shadow to be more or less transparent.
Position (X and Y Offset). Move your shadows along the axis to specify how near or far it will stand from the object. The X Offset moves it to the sides; the Y Offset does it up and down.
Blur. It´s literally what the name means. You can blur the shadow a lot to make it softer and bigger or keep it thick and heavy.
Color and Darkness. You can change your shadow color and choose any color you want! Move through the color spectrum to pick one. Apart from that, you can alternatively set the amount of black you want to include in the shadow.


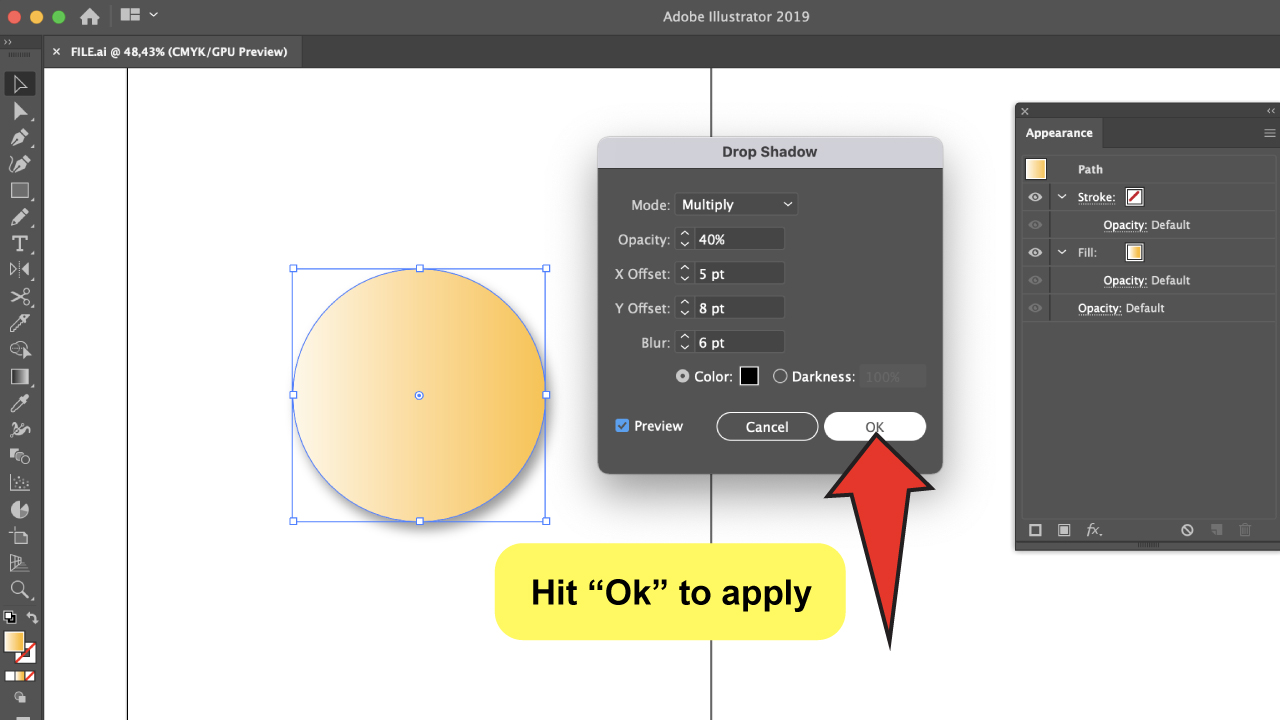
Step 4: Click on OK to confirm.
Does it look good to you already? Then click “OK” to apply the effect!
The final result should look exactly as it looked in the preview.
Now that you have finished your work and are happy with it, remember that you can always come back to the panel and keep editing by going to “Window” on the main menu and selecting “Appearance.”
You never know if your client, a colleague, or even yourself want to review some aspects and make one or two modifications. So, it’s good to know it’s possible to edit the drop shadows once they´re created.

Frequently Asked Questions About How To Use Drop Shadows In Illustrator
How to delete the drop shadow from an object in Illustrator?
If you want to get rid of the drop shadow, follow these steps: go to “Window” on the main top menu, click on “Appearance,” and select the “Drop Shadow showing on the panel. Do you see the menu? Well, say goodbye to the drop shadow as you press on the trash can icon in the right corner at the bottom of the box.
Can I hide a drop shadow and activate it later in Illustrator?
You can see your “Drop Shadow” effect or effects shown on the “Appearance” panel as like other effects as well. You need to hit the eye icon (as it works on the layer panel) to hide it, and you can do the same to re-activate it.
Can I use more than one shadow per object in Illustrator?
Yes, you can! While standing on your actual “Drop Shadow” showing on the “Appearance” panel, go to the icon that looks like a page called “Duplicate Selected Object”, and by clicking on it you will duplicate the effect.
Can I use drop shadows on text and pictures in Illustrator?
Absolutely! Just type a text on the artboard or insert an image and go back to step 1 of this tutorial to give this kind of object more dynamism.</span


Hey guys! It’s me, Marcel, aka Maschi. On MaschiTuts, it’s all about tutorials! No matter the topic of the article, the goal always remains the same: Providing you guys with the most in-depth and helpful tutorials!

