
Even the perfect artwork can be ruined by an ill-placed object or an unusual background object. So what do you do if your image has an eye sore you can’t just get rid of?
Adobe Illustrator has a wide range of tools you can use to do almost anything. When you know how to use these tools effectively, erasing part of any image takes minutes.
Here’s a detailed guide on how to erase part of any image in Illustrator in just 12 steps.
How To Erase Part Of An Image In Illustrator – Quick Guide
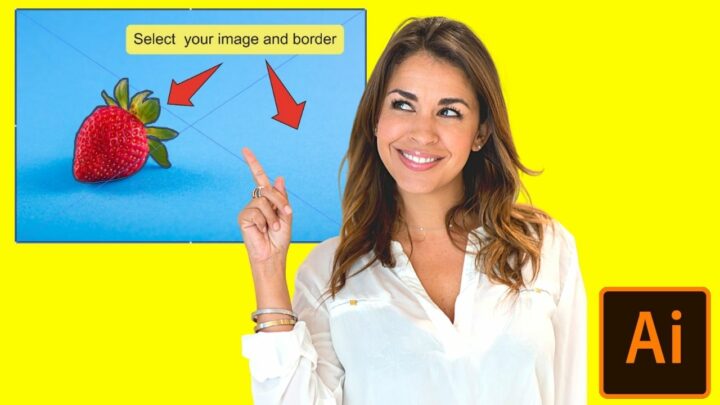
Press “P” to select the Pen tool. Use it to draw an outline around the target-object. Next, draw a second border around your whole image. Press “Shift+COMMAND+F9” (MAC) or “Shift+Ctrl+F9”, then click the “Exclude” icon. Finally, select your image and border and make a clipping mask.
How To Erase Part Of An Image In Illustrator – In-depth Guide
Step 1:
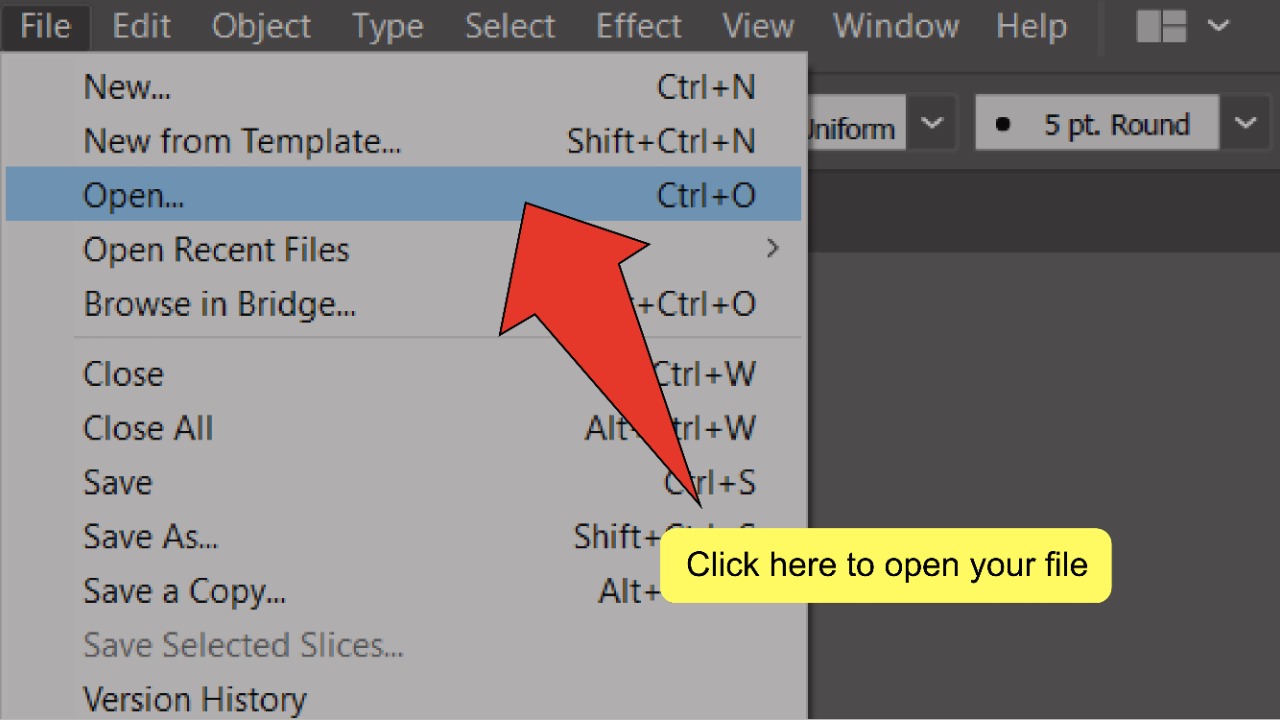
Open your Illustrator file. To start, open your document by double clicking on its corresponding Illustrator file, or if Illustrator is already open, you can go to “File” on the top menu, and then “Open” and choose the file you want to open. To speed things up, you can also use the keyboard shortcut “COMMAND+O” (MAC) or “Ctrl+O” (Windows).

Step 2:
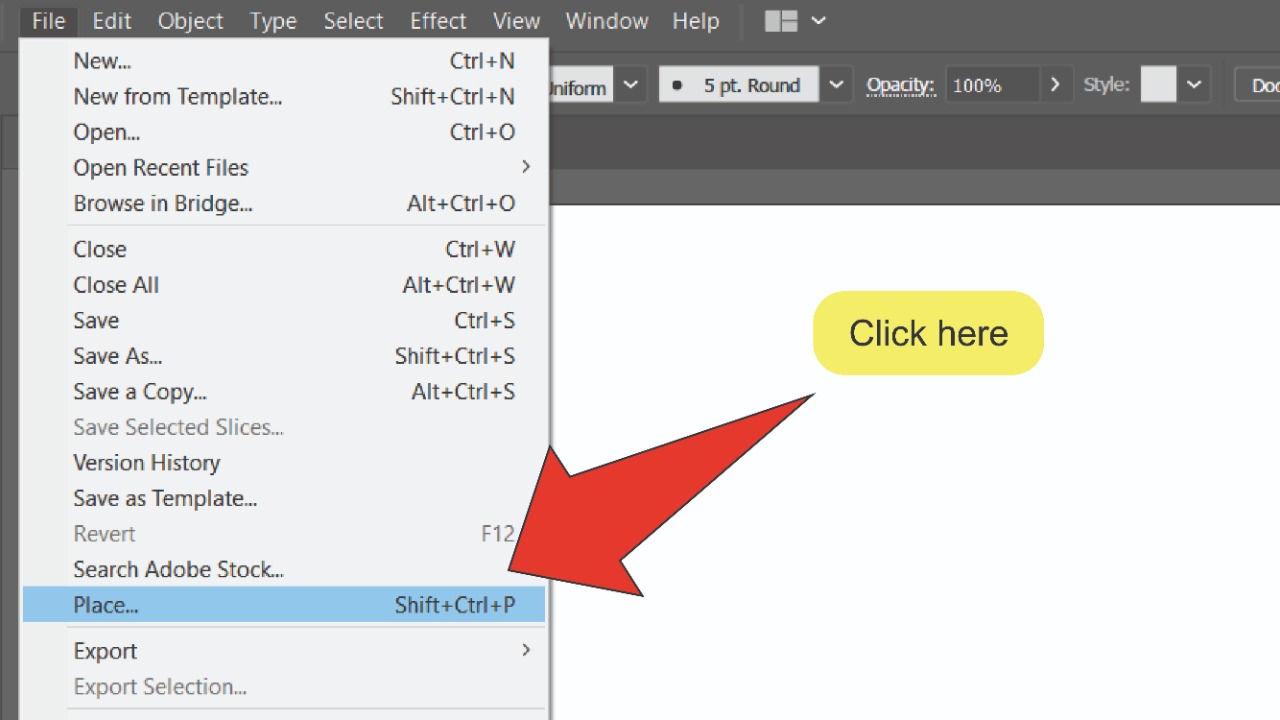
Place or create your image. Go to “File”, then click on “Place”, or use the keyboard shortcut “Shift+COMMAND+P” (MAC) or “Shift+Ctrl+P” (Windows). Next, select your image and click on “Place”.

Step 3:
Find and select the Pen tool. Look for the Pen tool, located on the toolbar on the left side of your screen. Alternatively, you can use the keyboard shortcut “P” to quick-select the tool.


Step 4:


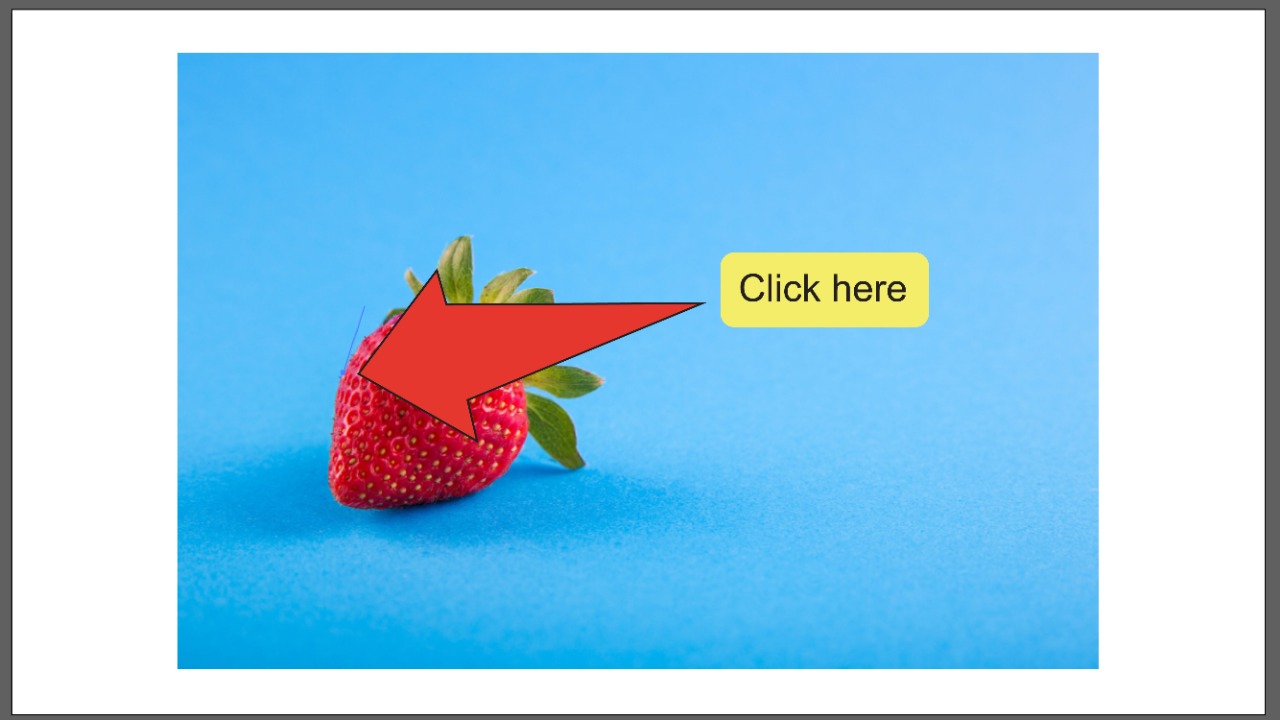
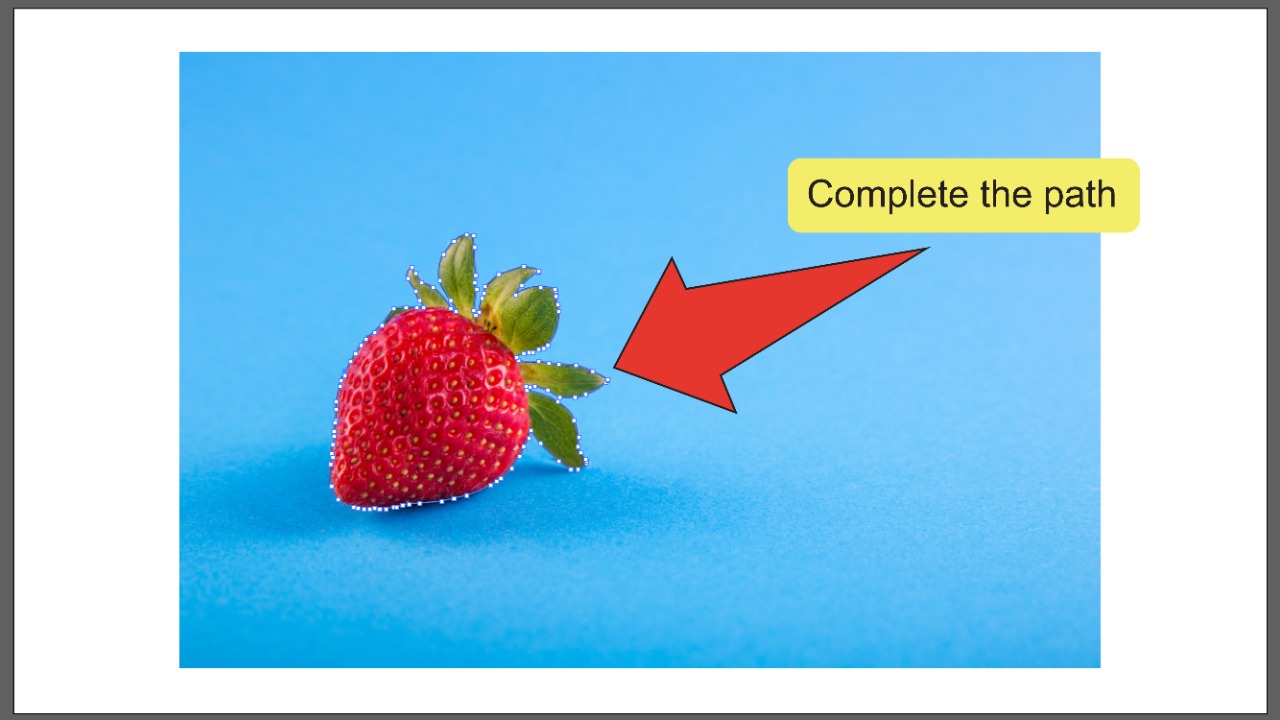
Place your first anchor point. Use the Pen tool to place your first anchor point by clicking anywhere along the edge of the part of the image you want to erase. You can connect anchor points using paths to create shapes.

Step 5:
Complete the outline. Keep clicking along the edge of the object in a clockwise direction until you reach the first anchor point you placed. Click on it to complete the path.

Step 6:
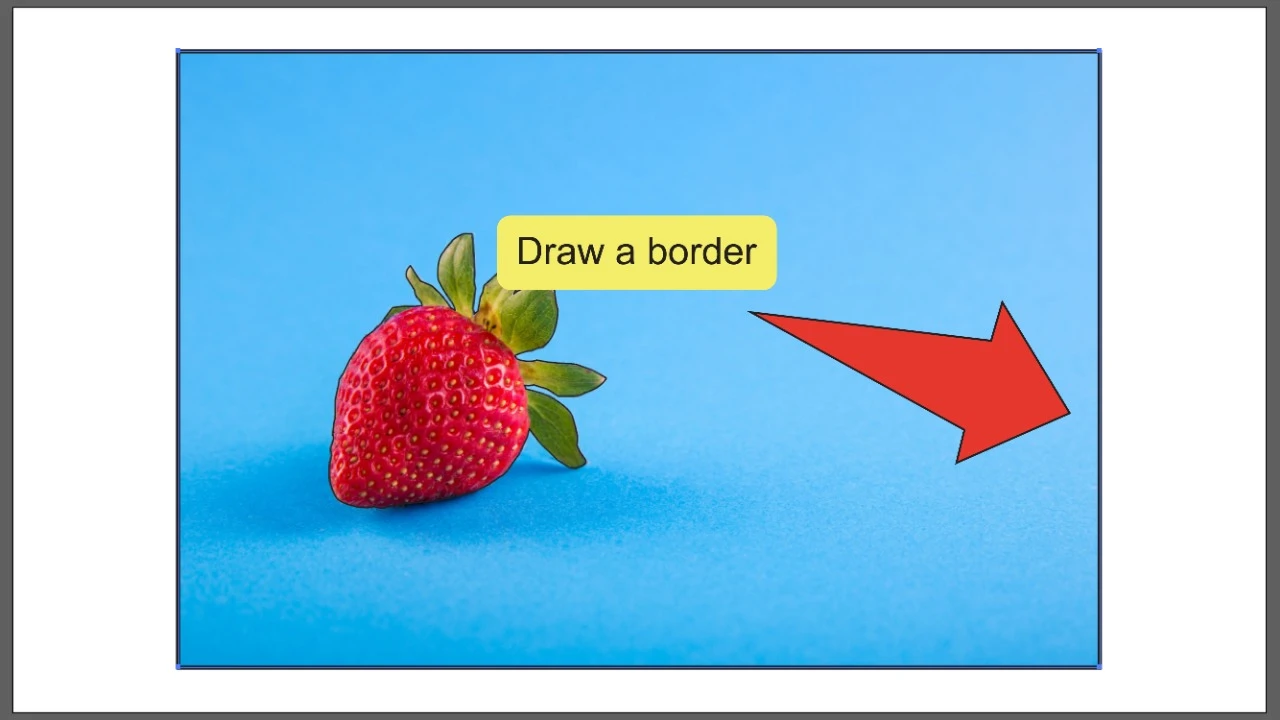
Draw a border around your entire image. Use the Pen tool to repeat the process and draw a second border around the part of the image you want to keep. If your larger image is a geometric shape like the example image, you can also use the Rectangle tool (keyboard shortcut “M”). With this tool equipped, you can just click and drag your cursor over your image to draw a border around it.

Step 7:
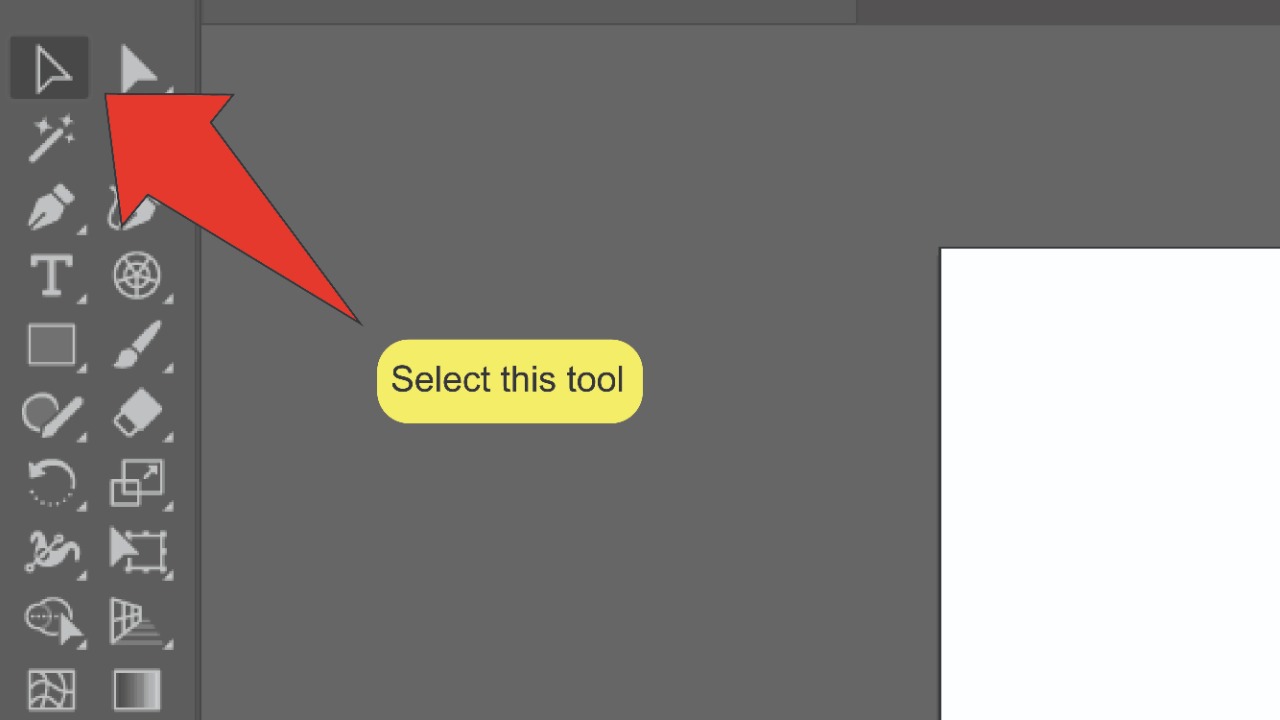
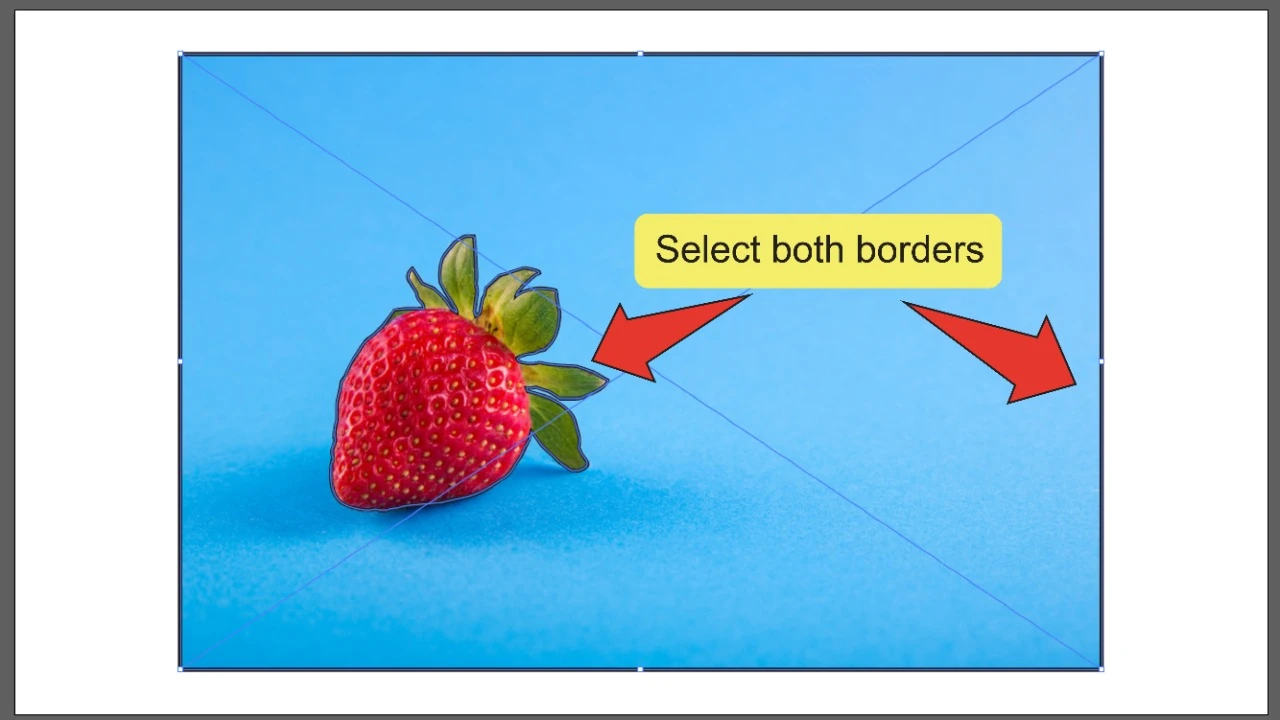
Find and select the Selection tool. Look for the Selection tool, located on the toolbar on the left side of your screen. Alternatively, you can use the keyboard shortcut “V” to quick-select the tool.

Step 8:
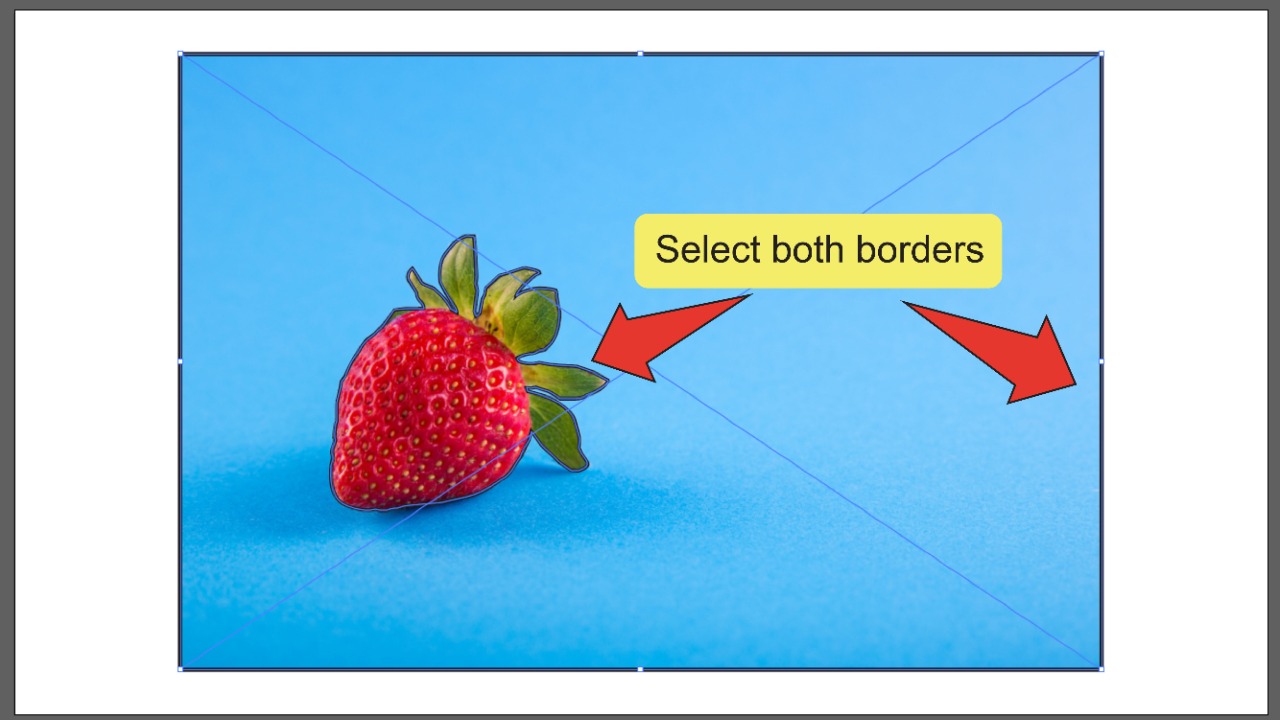
Select your borders. Press and hold the “Shift” key, then click on both of your borders to select them simultaneously. Both outlines should become highlighted. You can also click and drag your cursor over your entire image and both borders, then press and hold the “Shift” key and click on your image to deselect it.
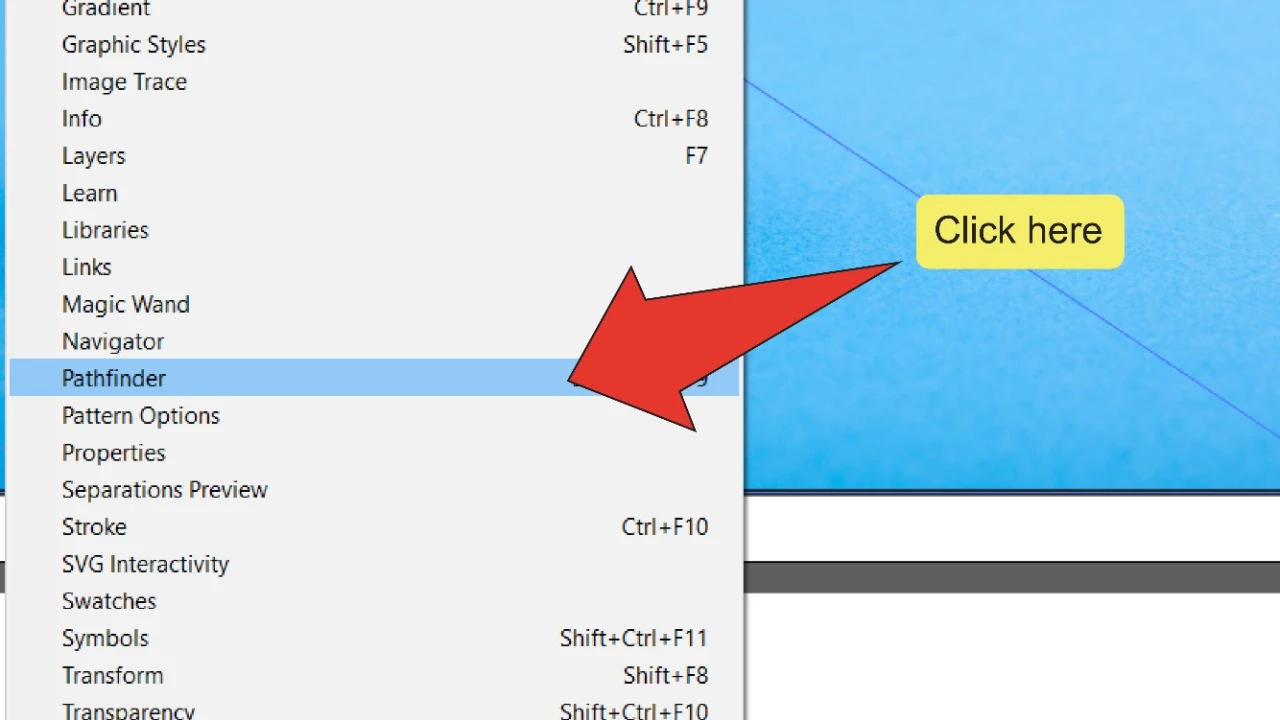
Step 9:
Open the Pathfinder panel. At the top of your screen, go to “Window”, then click on “Pathfinder”. The Pathfinder panel should pop up on the right side of your screen. To speed things up, you can also use the keyboard shortcut “Shift+COMMAND+F9” (MAC) or “Shift+Ctrl+F9” (Windows).

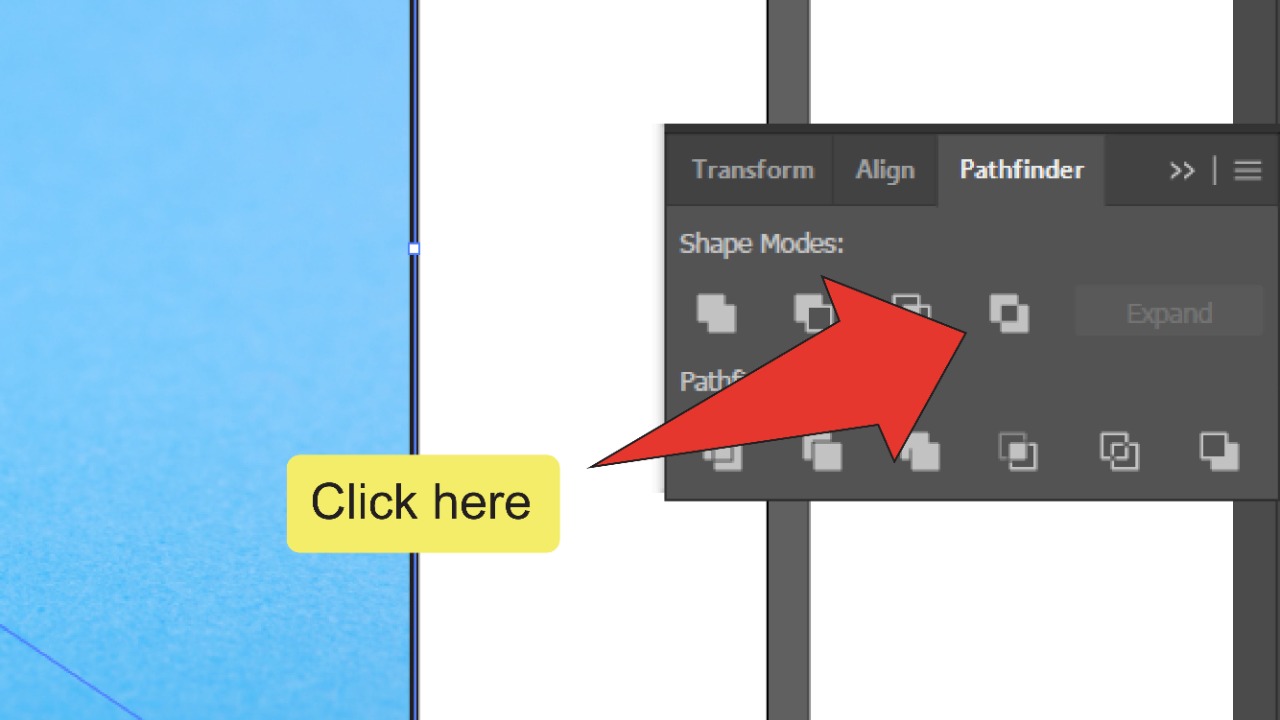
Step 10:
Click on “Exclude”. On the Pathfinder panel, find and click on the Exclude icon. This will convert your objects from two separate objects into a single one with a hole inside of it which matches the dimensions of your inner object.

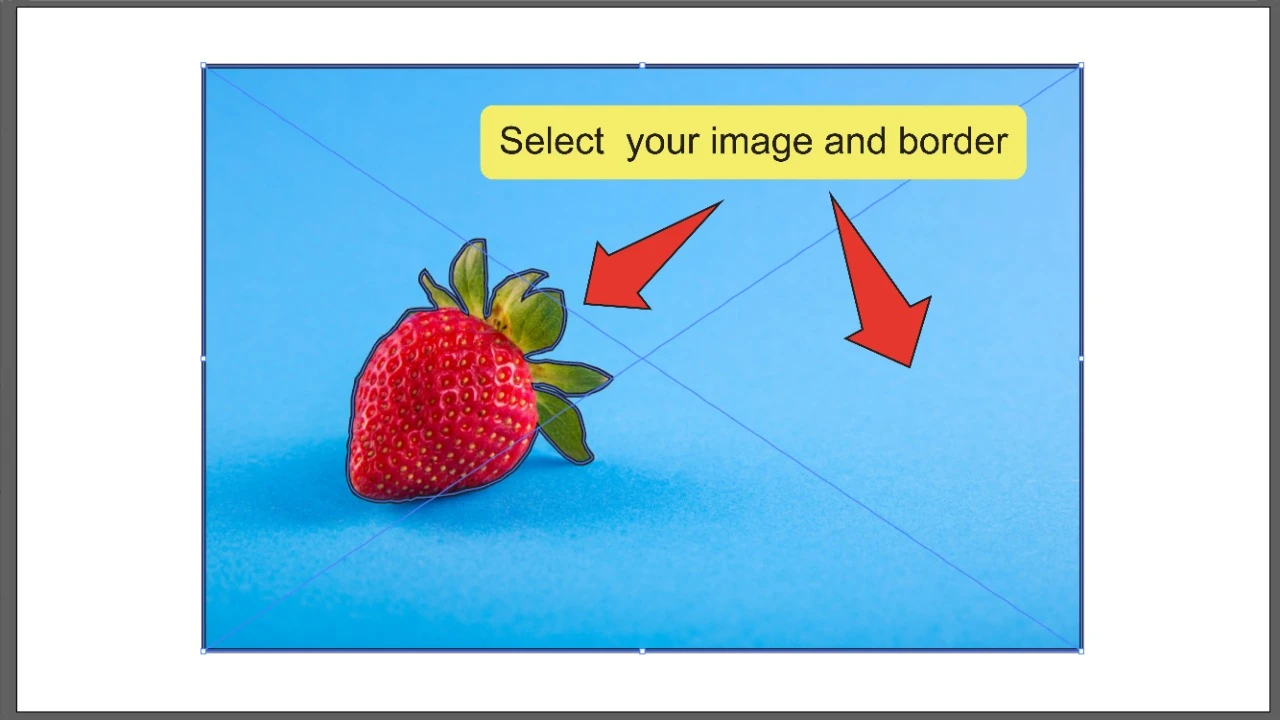
Step 11:
Select your border and image. Press and hold the “Shift” key, then click on both your newly created border and your image to select them together. You can also click and drag your cursor over both assets to select them at the same time.

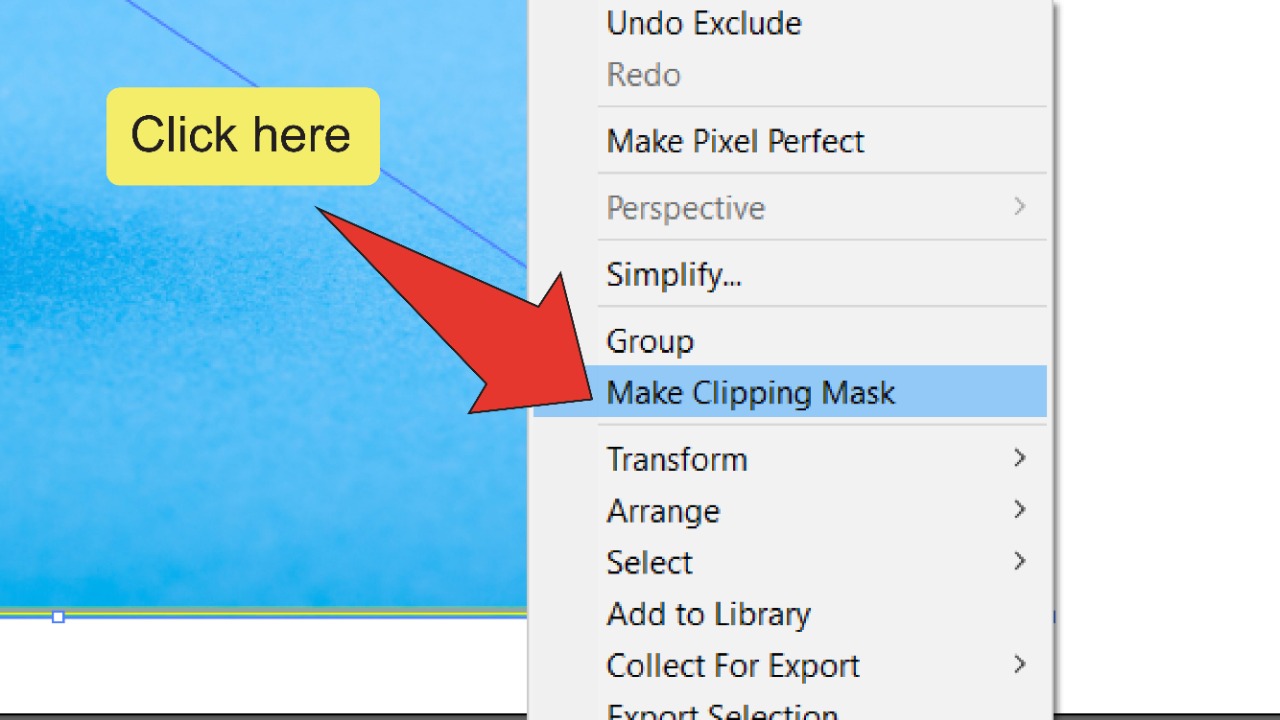
Step 12:
Make a clipping mask. Next, right-click anywhere on your image and click on “Make Clipping Mask”. This will remove the image you originally drew a border around.

Frequently asked questions about how to remove part of an image in Illustrator
Why does the wrong object get ‘cut out’ when I click the Exclude icon?
If you click on the exclude icon and the effect gets applied to the larger border instead of the one you want to remove, press “COMMAND+Z” (MAC) or “Ctrl+Z” (Windows) and make sure the larger border is positioned in front of the smaller one.
How do I erase part of an image made up of vector objects?
If your image is not rasterized and consists of a collection of vector objects, you can simply use the Selection tool (“V”) to select individual objects and press the “Delete” key to erase them.


Hey guys! It’s me, Marcel, aka Maschi. On MaschiTuts, it’s all about tutorials! No matter the topic of the article, the goal always remains the same: Providing you guys with the most in-depth and helpful tutorials!

