
We do love Canva and it quickly became our go-to software for all kinds of photo editing tasks and also for the creation of featured images for our blog posts and Youtube thumbnails.
But what about video editing in Canva? How do you actually edit videos in Canva and what are the available options at the moment?
Well, let’s find out right now.
How to edit videos in Canva
Video editing in Canva is limited to some core functions such as cropping videos and adding video animations & transitions. To edit a video in Canva, make sure the video is selected and then choose the available options from the top toolbar (click on the scissors symbol to edit the video length).
Resizing your Canva videos

Resizing footage is an essential part of video editing.
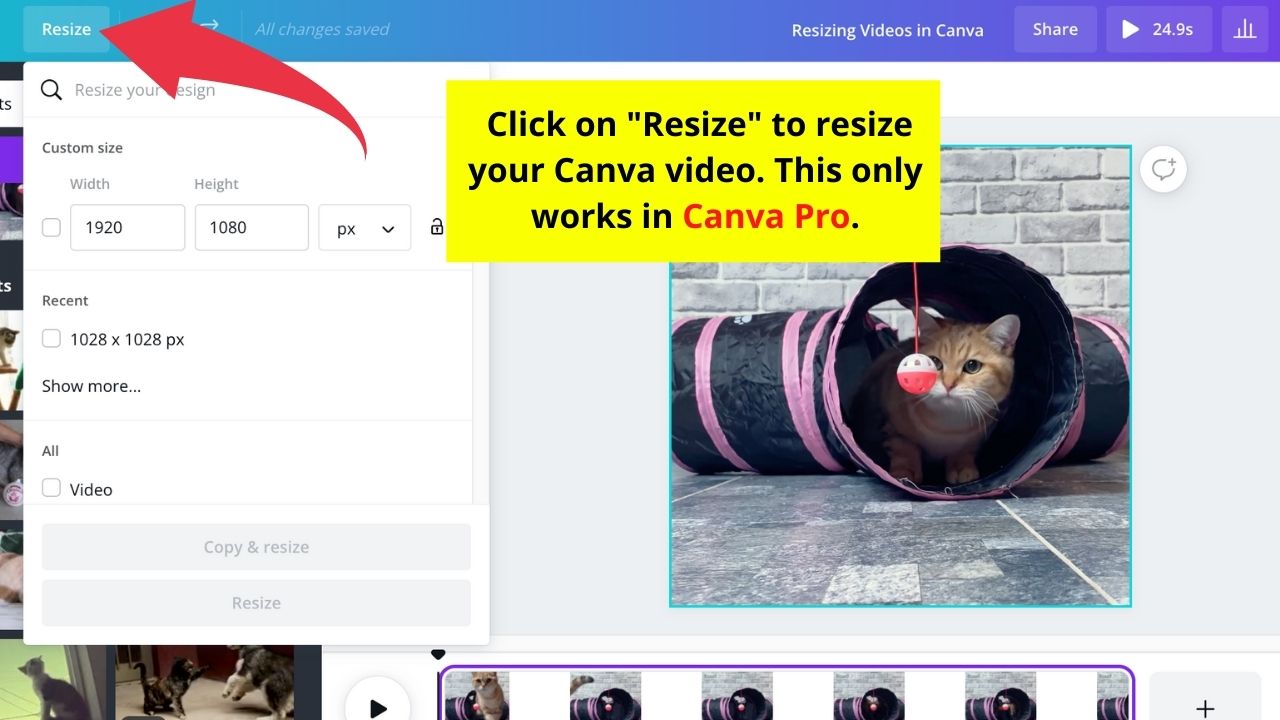
In Canva, resizing is done by clicking on “Resize” in the top toolbar (top-left corner).
If you are on a Canva Pro plan, you can use the “Resize” function at any given time.
If you are using Canva Free, though, you won’t be able to use the Resize function, as this feature is exclusive to Canva Pro.
Does that mean that as a Canva Free user you can’t adjust the dimensions of your Canva videos?
Well, sort of. Let me explain.
As a Canva free user, you can set the video dimensions when first initiating the video project. However, you won’t be able to adjust the video size later on once the project has been initiated.
That said, make sure you have a clear picture in mind when starting your project, so that resizing your video project later on won’t be necessary. Easier said than done, I know.
Video transitions in Canva
Video transitions are a fairly new thing in Canva. But I am really happy they decided to add this feature, as I do believe that video transitions should be part of ANY good video.
So, how do I spice up my video with some lovely Canva transitions?


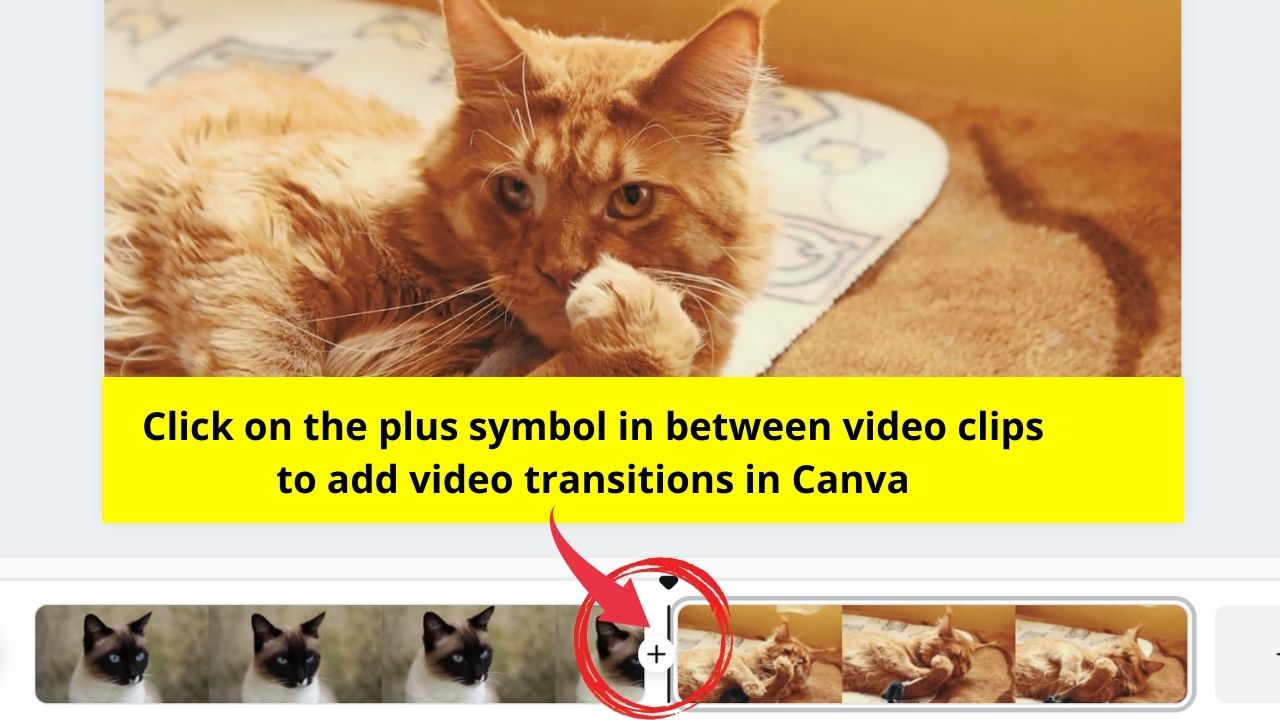
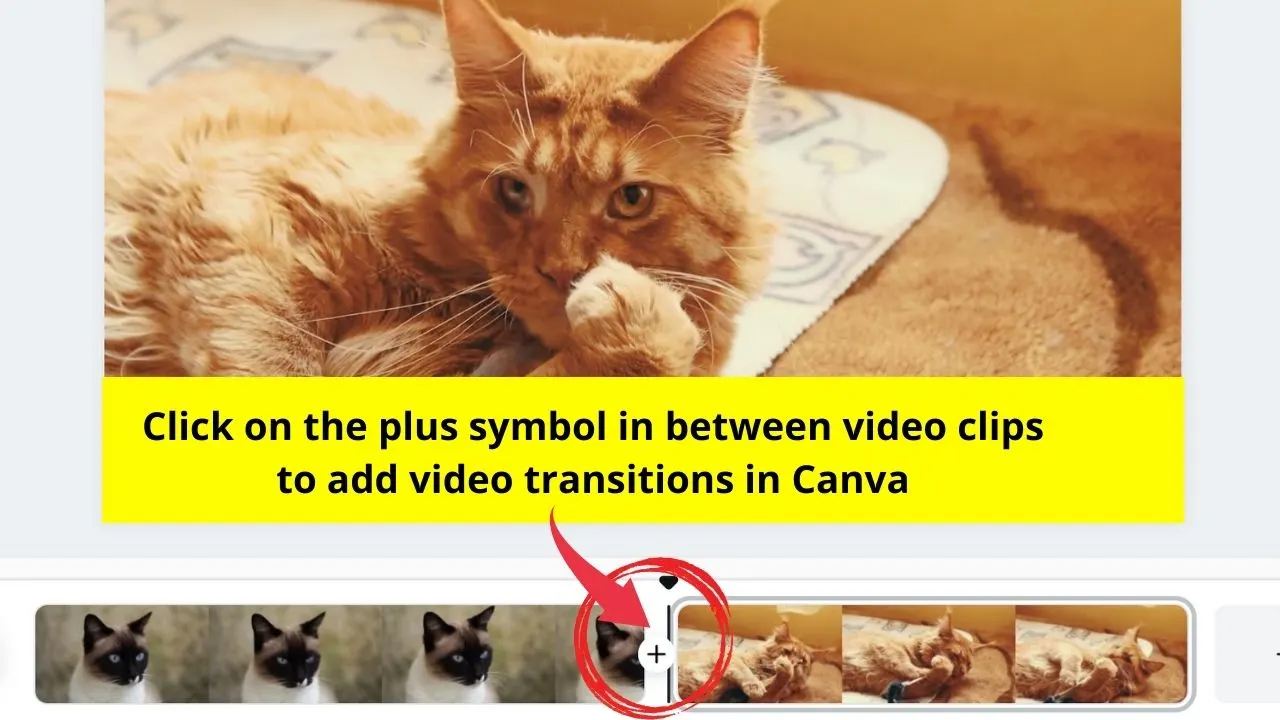
Easy! Just make sure that your video is selected, then have a look at the video timeline situated below your video and click on the Plus symbol and then choose “Add transition.”
Please note that video transitions are only available in case your project features at least two videos (the plus symbol will appear in between these two videos).
Adding music to your Canva videos
You can either add your own audio tracks by uploading your audio files to Canva or you can choose audio tracks from Canva’s very own music library.
If you would indeed like to upload your own music, please have a look at the following video tutorial:
Editing music
We have seen that Canva only offers very basic functionality as far as editing videos goes. This holds true for editing audio tracks as well.
In fact, the only sort of audio editing that you can do in Canva is to adjust the audio track to a certain length and to change the audio volume.
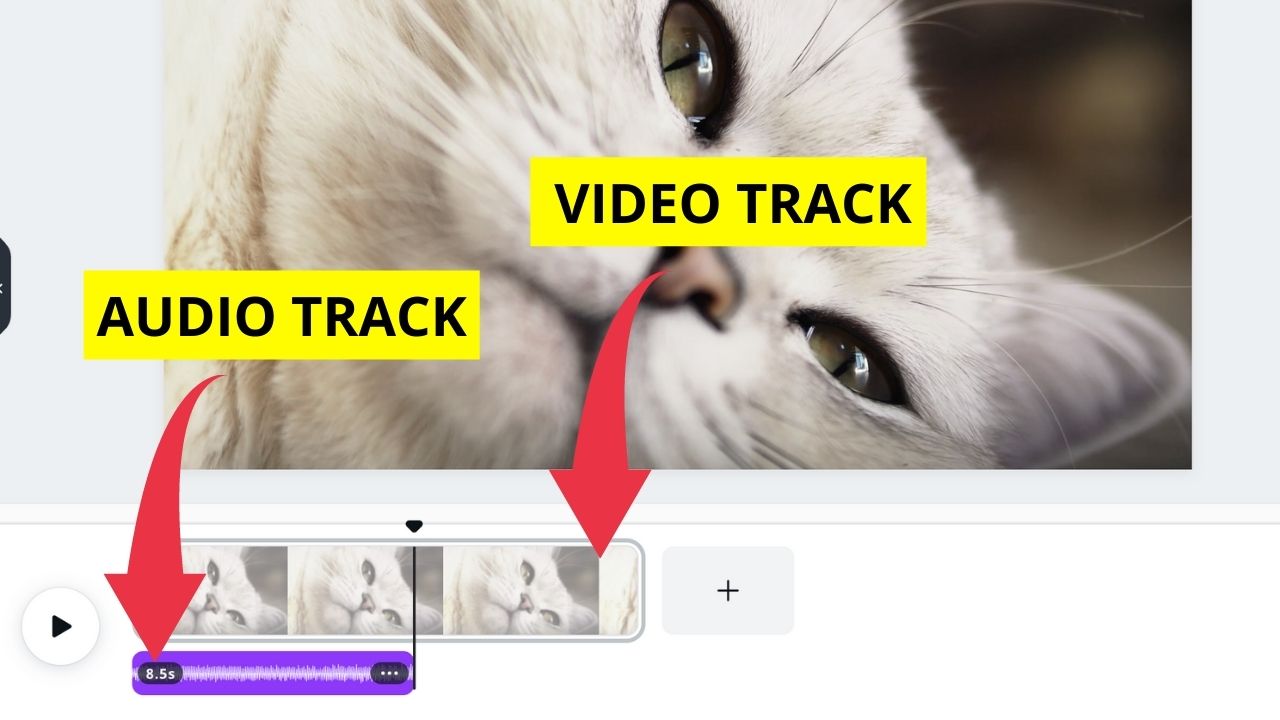
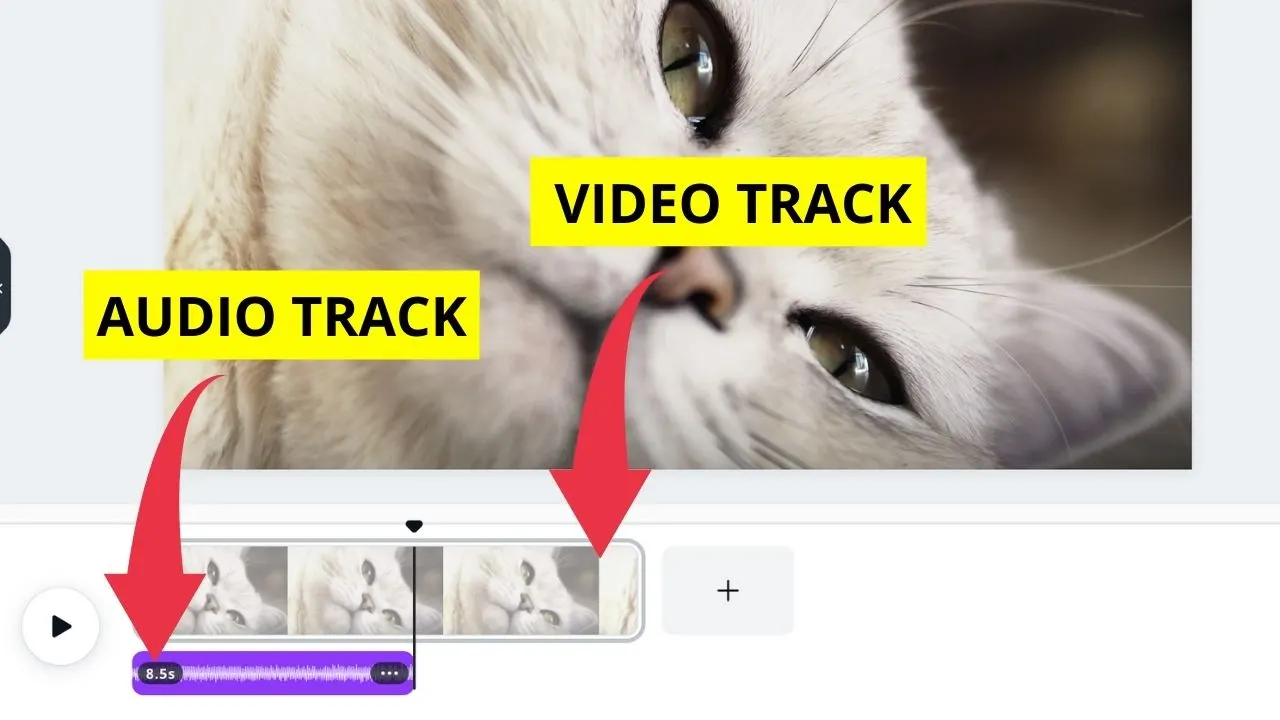
To do so, first head over to “Audio” in the left sidebar, then drag & drop the desired audio track into your project.
After that, to adjust the audio volume, click on the speaker symbol in the top right corner of the screen.
To adjust the audio length, click on the audio track and then select “Adjust”. Now you can adjust the starting and ending point of your audio file by simply dragging the audio file from either the left or right side.
What about fading in and fading out audio in Canva?
Short version: You can’t manually fade in/fade out audio in Canva.
Long version: Fading in/fading out audio in Canva is done automatically.
This hasn’t always been the case, though. In earlier versions of Canva, audio fades were simply non-existent.
The only way you could fix that problem was to post-edit your video in some other piece of software such as Premiere Pro or DaVinci Resolve.
Luckily, these days are now over and Canva simply does the basic audio fades for you. But there is simply no way to adjust the duration of the audio fades which is a pity.
Also, Canva just adds these fades at the very beginning and end of each audio track. If you need fades in between, the only way to get that done is to do it outside of Canva, be it in Audacity (free software), Premiere Pro or DaVinci Resolve (basic version is free).
Update:
Canva has now added a fade in/fade out feature. To use it, select the audio track in the timeline and then click on “Audio effects” above the video.
Slowing down/speeding up footage in Canva
This is a feature that you won’t find just yet in Canva.
That said, if you would like to either slow down your video (=create a slo-mo effect) or speed up your video (for instance to create a timelapse effect), you would need first need to export your Canva video, then do the editing on an external website and then reimport your video clip to Canva.
The good news is that there are websites out there that get this done for you for free. Please have a look at this video here for detailed instructions on how to get this done properly:
Subtitling in Canva
As far as videos go, Canva is clearly focusing on shorter video production such as videos for social media platforms such as Facebook (Meta), Instagram and TikTok.
That said, it doesn’t come as a surprise that Canva does not (yet) offer true subtitling functionality. Adding text to video clips in Canva is very easy but also very restricted with regards to what you can actually achieve with it.
Let’s say you have a short Tiktok video in Canva that lasts 10 seconds and is made up of two independent video clips.
In this case, you could easily have some text on the first video clip and some more text on the second video clip that becomes apparent as soon as the second video clip plays. No big deal.
However, you can’t truly time text on Canva, as text will just simply appear as soon as the (next) video clip starts.
There are indeed some workarounds that let you time text a bit better (mainly through manipulating the length of individual clips/slides) but, overall, subtitling (captioning) in Canva is not yet a thing.
So, in case you have longer videos and would like to get some decent subtitles that go with it, you should definitely do this in another software (Premiere Pro, DaVinci Resolve, etc.) after exporting your video from Canva.
Update:
Text timing has now been added by Canva as well. To time your texts, simply click on the text in your video and then click on the three dots (…) and choose “Show Timing.” In the timeline, you can then adjust the timing of your text (set a start and an ending point for your text). Like this, you can time any text element independently.
Color Grade videos in Canva
Is Canva your go-to tool for color-grading videos?
I highly doubt it, as Canva does not (yet) offer this kind of functionality.
To be more precise, there is absolutely nothing you can do to change/adjust the colors of your video in Canva.
That said, in case you would like to get some nice Hollywood LUT’s on your videos or maybe would just like to play a bit with the saturation levels, you would need to do this in another software (after exporting your Canva videos).
Update:
Canva has now added this functionality. In fact, you get the same “Adjust panel” that we also got for all Canva photo elements (or photos that you uploaded to Canva).
In the adjust panel, you can now easily set the white balance of your video (warmth, tint), make changes to the lighting (brightness, contrast, highlights, shadows, fade) and manipulate the colors (vibrance, saturation).
Video editing in Canva — Final words
Canva surely isn’t an advanced tool to edit videos. But it was never meant to be that in the first place.
However, Canva does understand the importance of videos and with recent updates we have seen some great updates with regards to video editing such as the addition of video transitions.
It’s pretty safe to say that Canva will offer more and more video editing functions as we get deeper into 2022.
As for right now, very basic video editing such as cutting videos and adding transitions can be done directly in Canva but everything else requires post-editing in dedicated video software programs such as Premiere Pro, DaVinci Resolve or any comparable software.
Frequently asked questions about video editing in Canva
Can Canva do video editing?
Canva is not primarily a video editing tool. However, they are constantly adding new video editing features. At the moment, you can trim videos in Canva, you can do basic color grading via the adjust panel, you can time text elements to go along with your videos and you can add animations and transitions to your videos.
What video formats does Canva support?
At the moment, Canva only supports the mp4-video format.
Is Canva a good choice for subtitling your footage?
Canva is not meant to be a subtitling tool and is, therefore not a good tool to use for subtitling your videos. Pro tools for subtitling include Premiere Pro (Adobe) and DaVinci Resolve.


Hey guys! It’s me, Marcel, aka Maschi. On MaschiTuts, it’s all about tutorials! No matter the topic of the article, the goal always remains the same: Providing you guys with the most in-depth and helpful tutorials!

