

Do you want to add some dramatic effect to your designs on Canva? If you do, then challenge yourself with blending photos with this graphic design tool.
Technically speaking, blending photos is like making the foreground meld or fade into the background.
So, for you to blend photos in Canva, read up on this article to find out more about it.
How to Blend Photos in Canva
First, remove the backgrounds of the photos you’ll use for blending later on using the background remover tool. Then, select the image by clicking it. After highlighting that picture, head to the Transparency tool and drag the slider to the left until you achieve the desired look of that image.
Blending Photos in Canva — Easy Peasy Steps!
Most of us would probably think blending photos together in Canva is a skill reserved for elite designers only. But, if you’re a master at using even the most basic tools in Canva, you’re all set.
So, here’s what you got to do to achieve that blended effect in Canva:
Step 1: On the editor page, head to the left-side panel menu and select photos you’ll use as the foreground of your design.

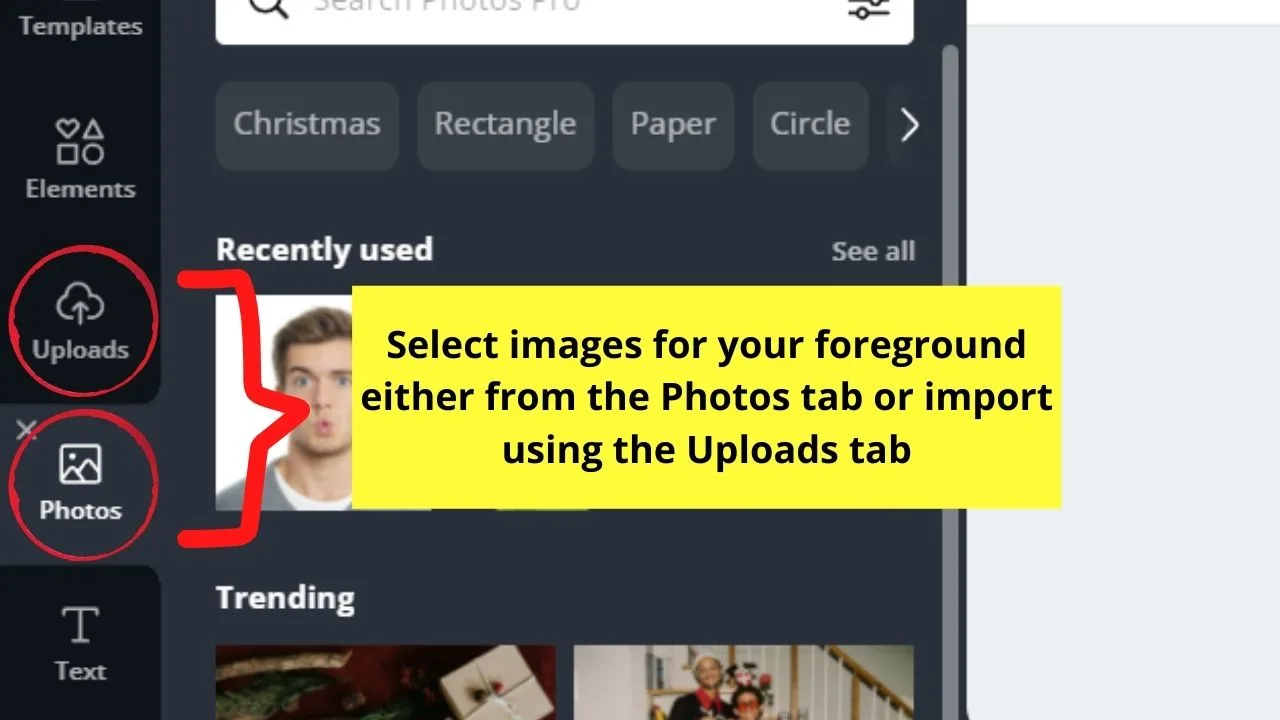
You can choose from the stock photos in the Photos tab or import from your device through the Uploads tab.
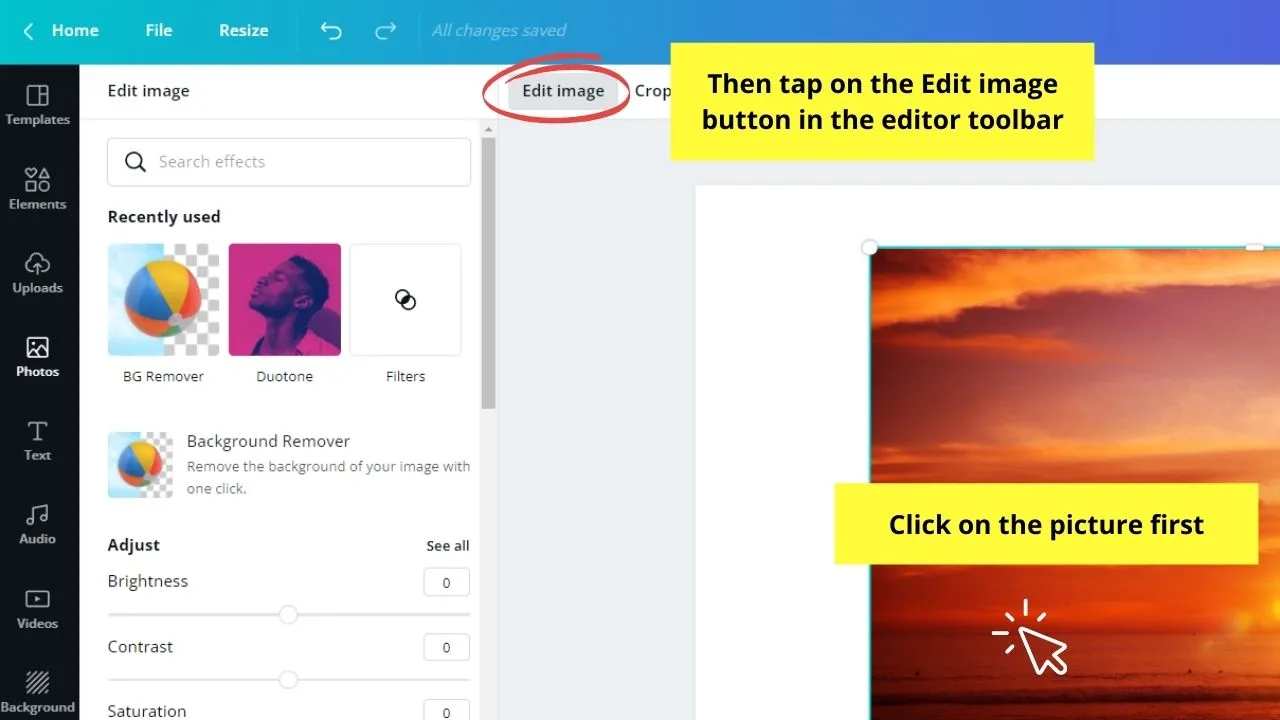
Step 2: After selecting images, it’s time to remove their backgrounds (if they don’t come with a transparent one).
To do this, select a photo by clicking on it. Then, on the editor toolbar, tap the Edit image button.

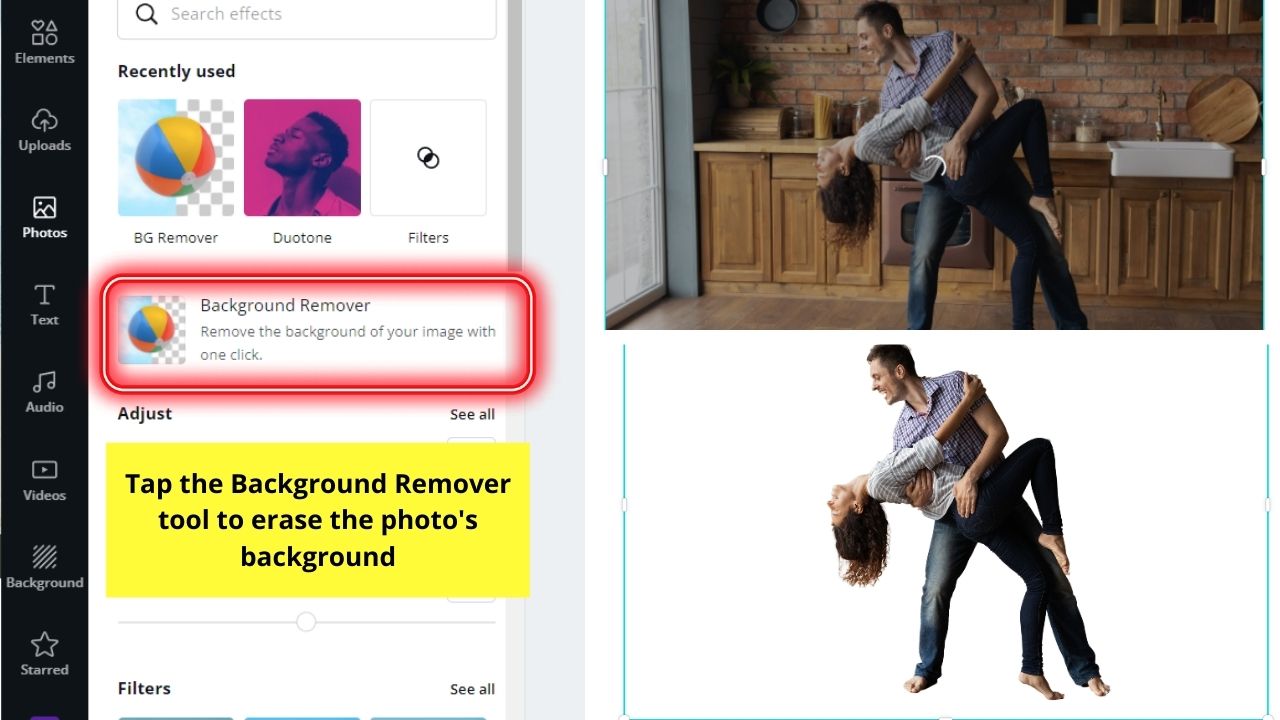
You will then see a gallery of photo effects to choose from. But, as our goal is to remove the background of the image you selected, tap the Background Remover tool.
After which, wait for Canva to finish processing the image. This step usually takes a few seconds.
Take note though that the Background Remover tool is a feature exclusive for Canva Pro users. So, if you’re using Canva Free at the moment, you’ll find this tool greyed out.
Repeat the same steps for all the photos you’d want to use later on for the blended effect.
Step 3: Once you’re done removing the backgrounds of those photos, it’s time you choose a background photo.


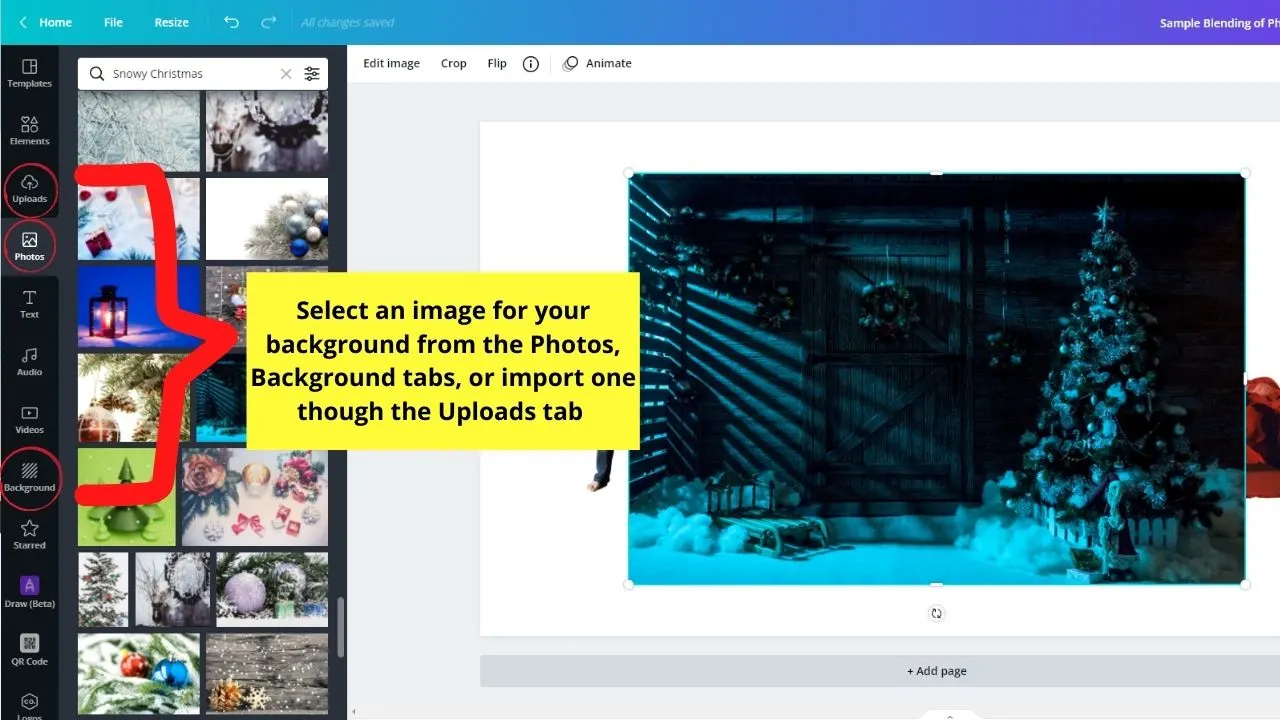
Like the previous step, you can find one through the Photos tab or the upload one from your device.
Yet, if you prefer using textured backgrounds, you can head to the Backgrounds tab instead.
Click and drag on the photo you selected and right-click on it. Select the Set image as background option in the dropdown menu that appears.
Step 4: Arrange the first set of photos you selected earlier across the canvas.

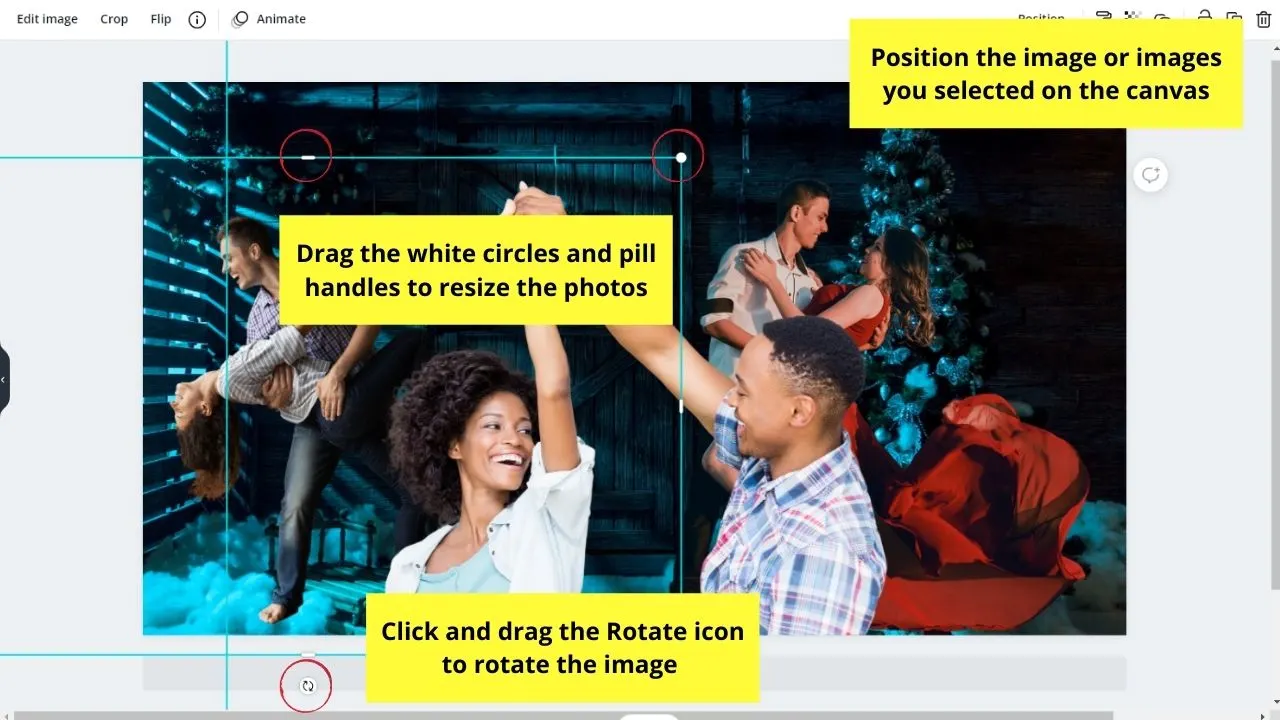
You can choose to mirror them, rotate, and even resize them.
It’s even possible to group some of the layers for easier arrangement.
Step 5: Once you’ve arranged your foreground images, tap one to select it.

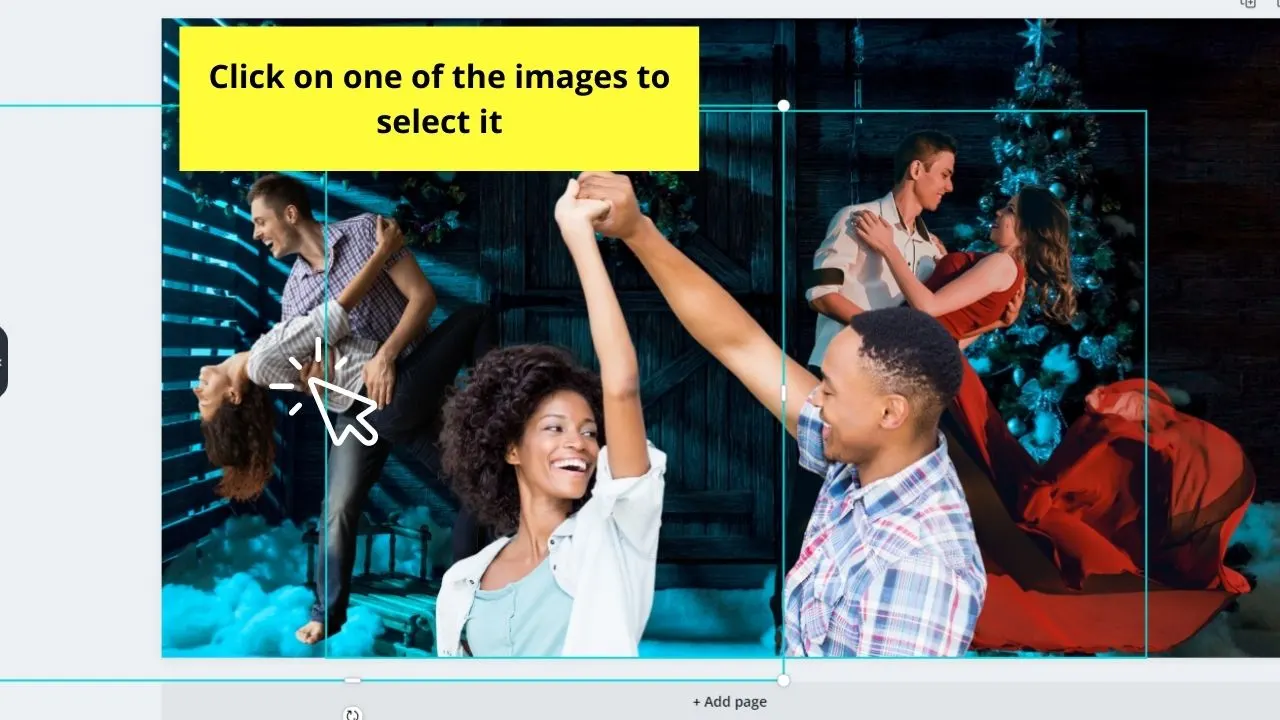
Once the photo’s highlighted, you can now head to the Transparency icon in the editor toolbar.

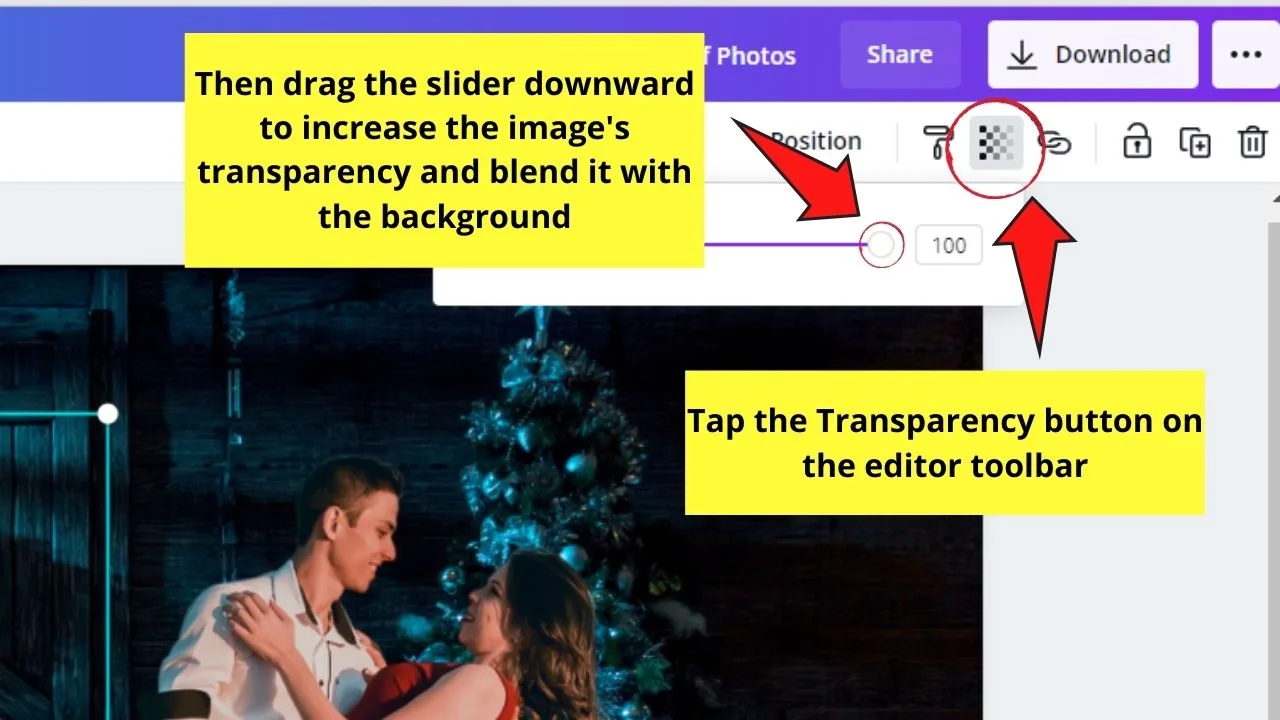
This tool looks like a fading checkered tool that sits between the Copy Style button and the hyperlink icon.
Click on the Transparency button, and you’ll then see a slider. Drag the slider leftwards until the photo slowly “blends” into the background.

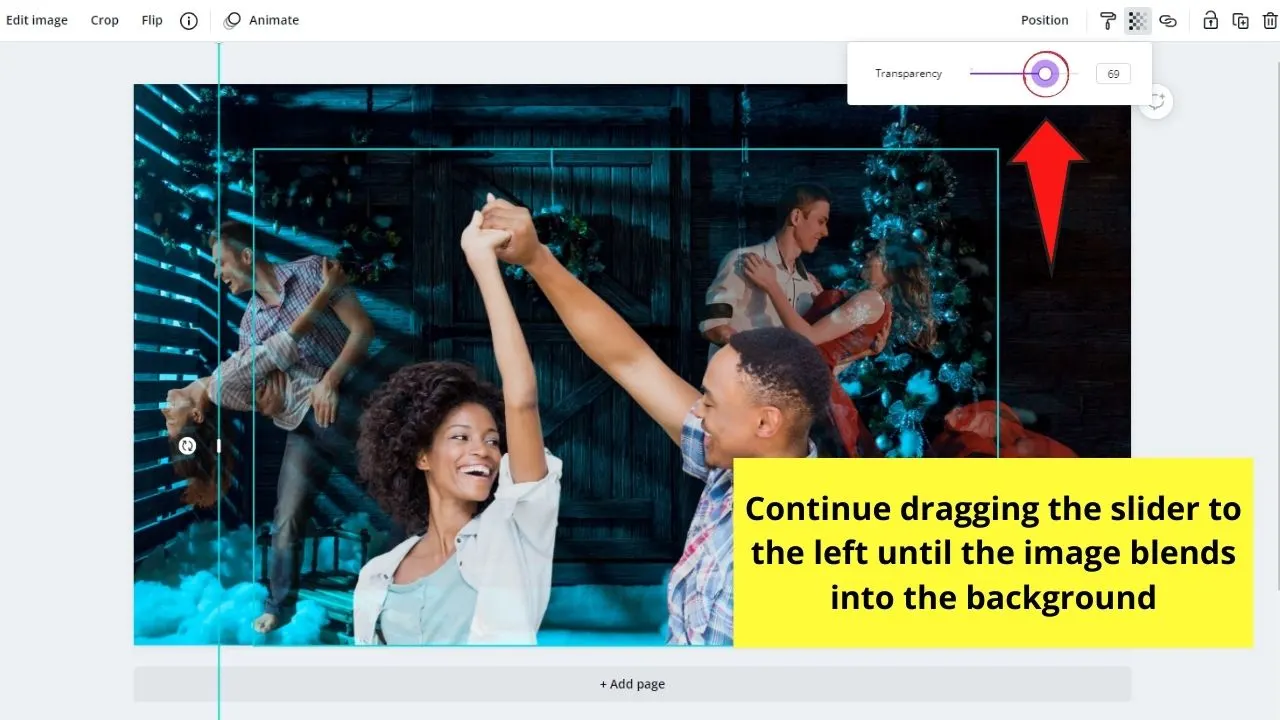
You can also encode the transparency percentage into the box if you know how transparent you want the image to be.
Repeat this step for all the images you’ll blend into the background.
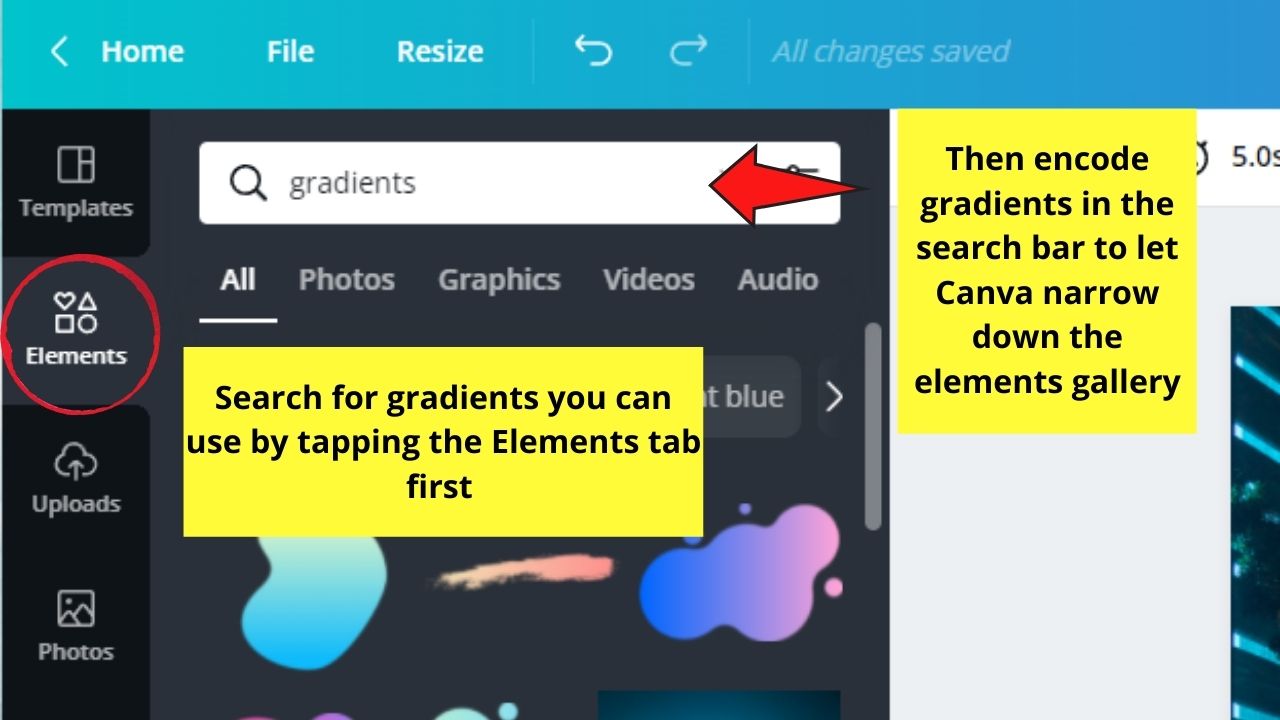
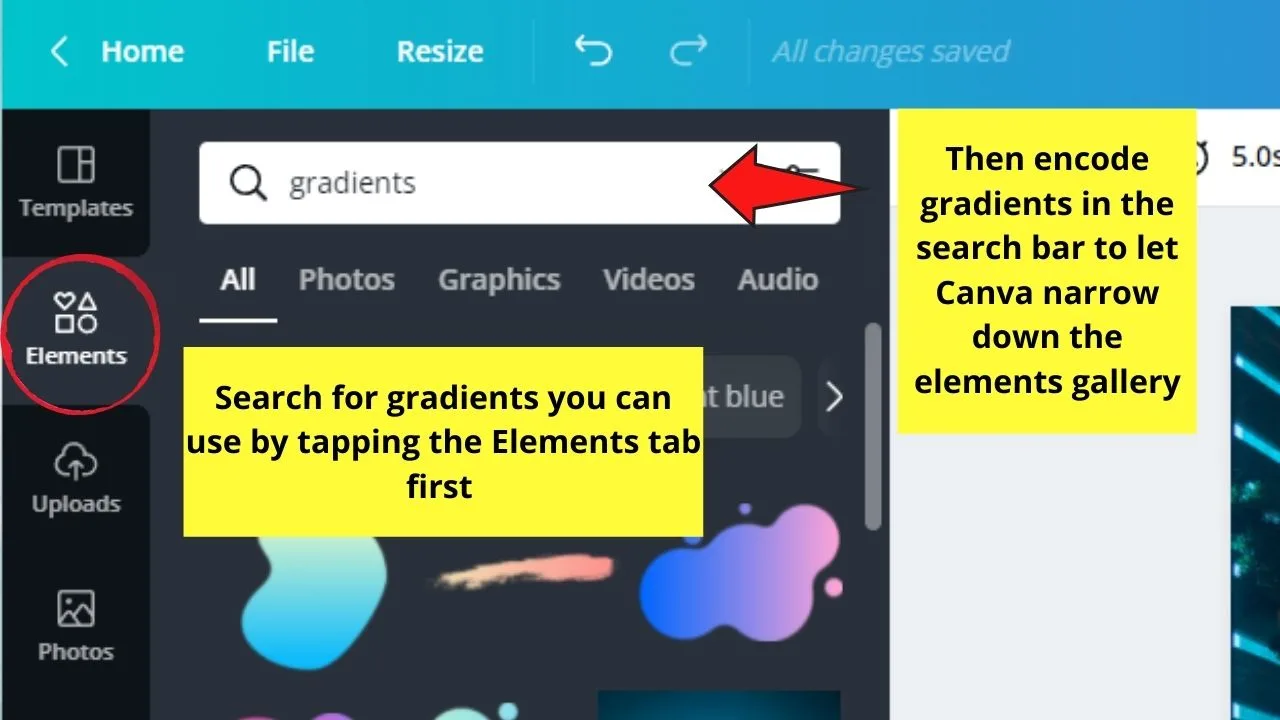
Step 6: If you to polish the blending of the photo edges with that of the background, you can opt to add Gradient elements.
Do note though that this step best works for a plain color background.
To do this step, head to the Elements tab and key in “gradients” in the search bar.
From there, select the gradient type you’d like to use and edit out the colors to make it match the background.
Step 7: Adjust the blur of the gradient element you added by first selecting it.
Then, head to the Edit Image button and select the See all option under the Adjust category.

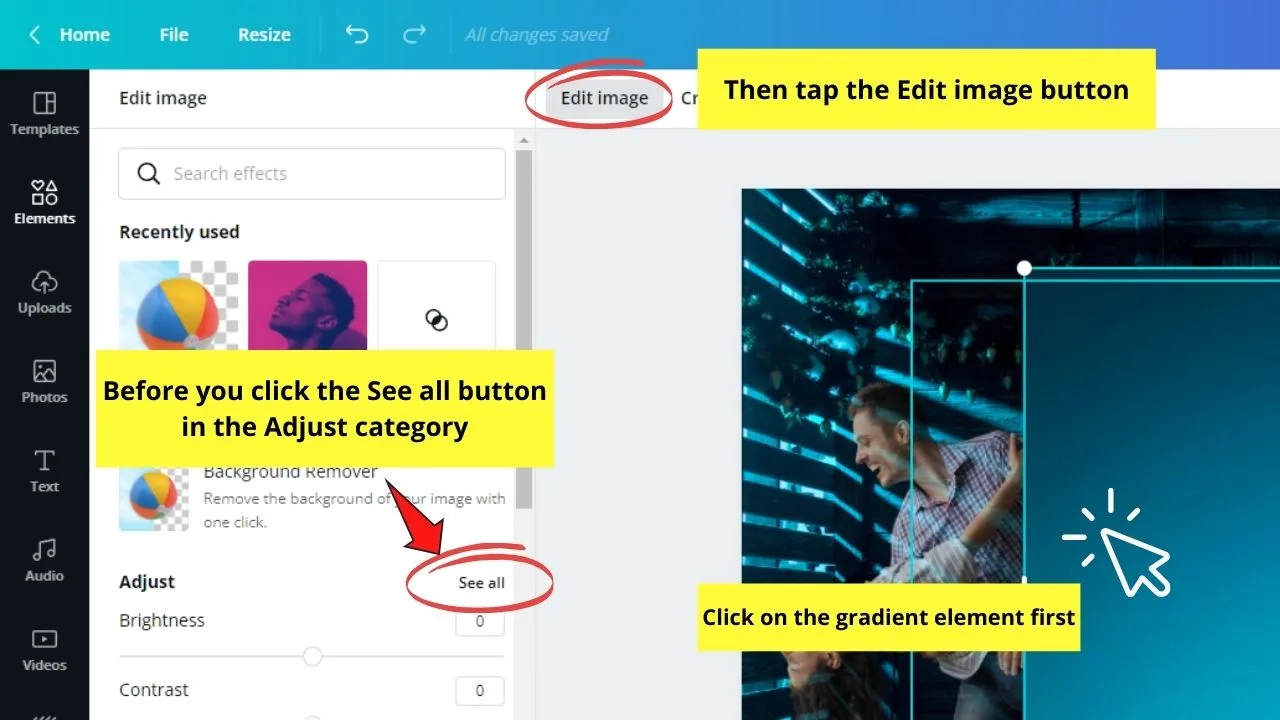
Keep scrolling until you see the Blur slider. Drag the slider sideways to increase or decrease the blurring of the image.
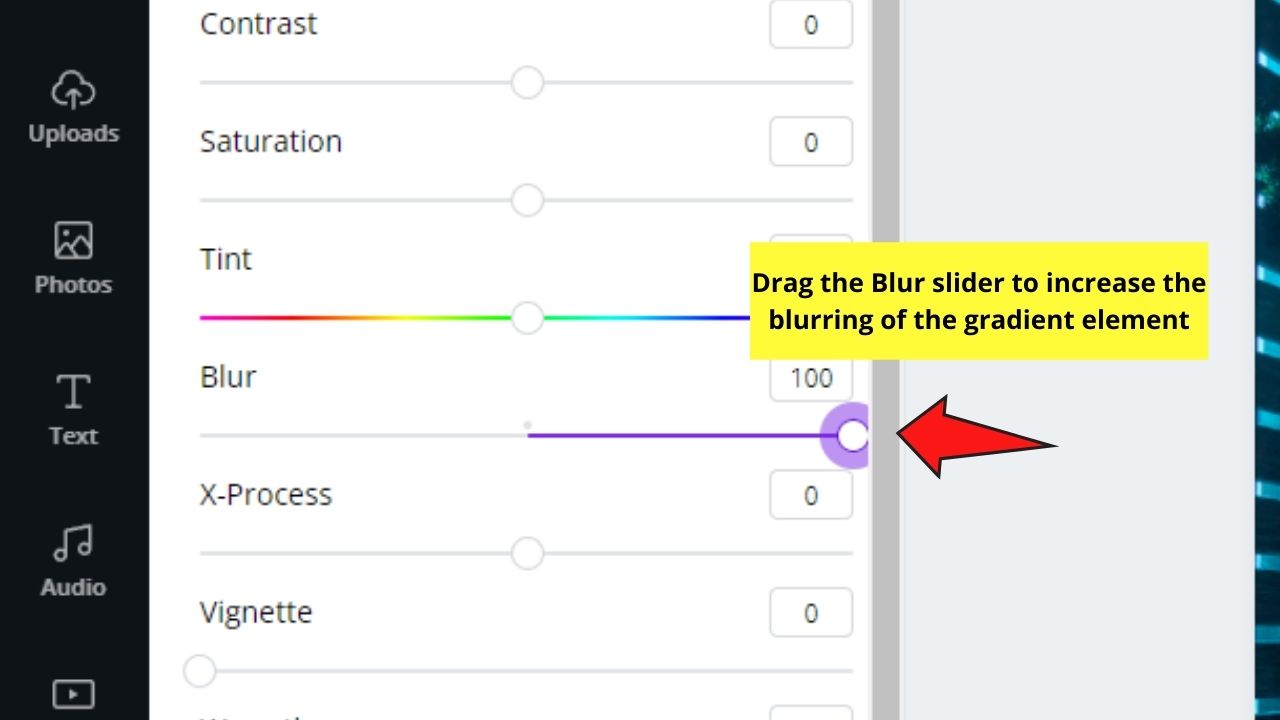

Once satisfied, just tap anywhere on the canvas to save the changes.
Step 8: If you don’t want to use a gradient element, you can hide the blended photo’s edges by adding graphic elements to the design.
Just tap on the Elements tab on the left-side menu and click and drag whatever graphic element you’d like to add.
Edit those elements accordingly.
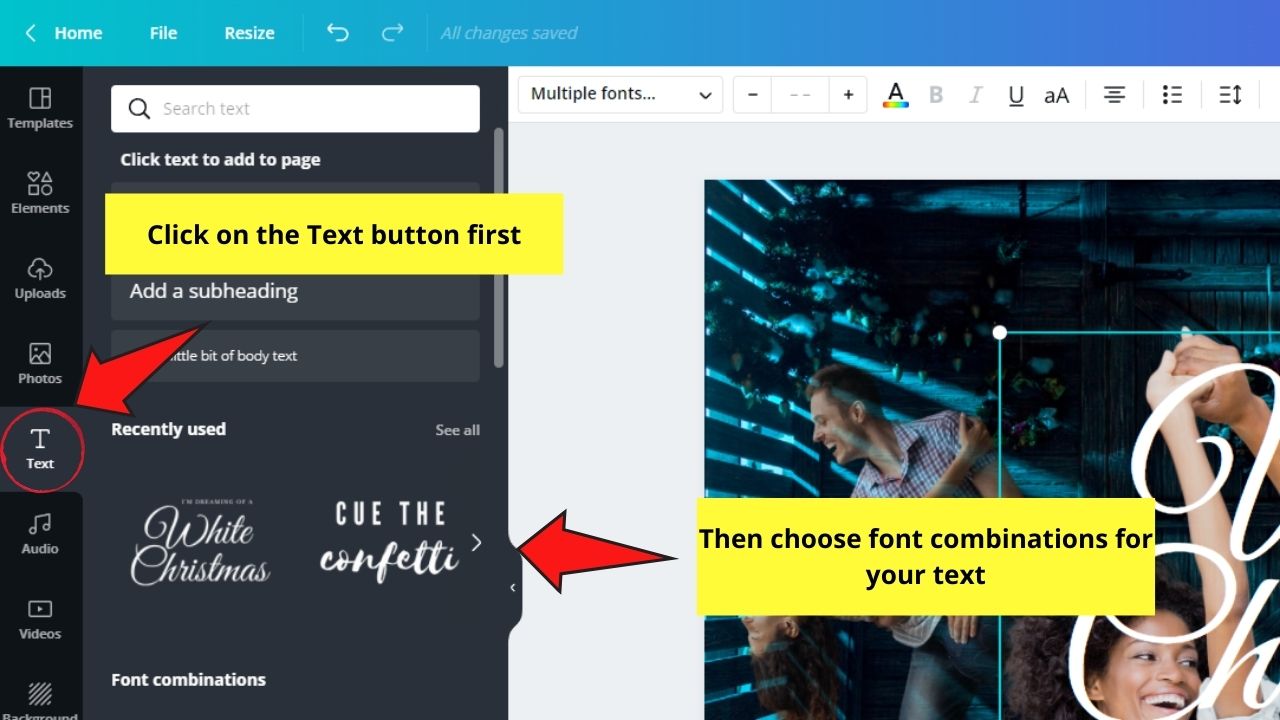
Step 9: If your design calls for some text, you can add text boxes to your design.
Either tap on the Text button on the left side menu or directly add a text box onto the canvas by pressing T on your keyboard.

And, with those 9 simple steps, you can now blend your photos in Canva. No need to use complicated photo editing tools for you to achieve that magical effect.
So, don’t waste time and apply those tips for you to perfectly blend your photos in Canva.
Frequently Asked Questions about How to Blend Photos in Canva
Can you group several layers in Canva?
You definitely can group several layers, or elements, in Canva. Tap the Shift key while clicking on the layers you’ll group. Then, either tap the Group button on the toolbar or press Ctrl/Cmd and G simultaneously to execute the command.
If I don’t have a Canva Pro account, how can I remove an image’s background?
For Canva Free users, you can use a third-party website called remove.bg to remove the background of a certain photo. But, download the photo from Canva first, then upload it to the site before downloading the image with a transparent background.


Hey guys! It’s me, Marcel, aka Maschi. On MaschiTuts, it’s all about tutorials! No matter the topic of the article, the goal always remains the same: Providing you guys with the most in-depth and helpful tutorials!

