What words do you associate with “team?” For one, cohesiveness and seamlessness are the two words that I associate with the word team.
And, by the looks of it, Canva incorporated these 2 important aspects in designing the app’s team feature.
But, how do the Teams feature in Canva work? Let’s find out in a bit.
How do Canva Teams Work?
Canva teams work by inviting people through a link or inputting their email addresses. Then, assign those people with their roles — Member, Template Designer, or Administrator. You can then begin assigning tasks, commenting on your team members’ work, or sharing files directly in Canva.
Canva Teams: The How-tos of Creating and Working With It
Working in a team is hard, especially if you don’t have the right tools to use for seamless collaboration with your members.
But, as mentioned earlier, Canva has you covered on that as you can now create a team account with at least 5 members in it.
Yet, how exactly can you create one? And what features can you find when you decide to form one?
Creating a Canva Team
Step 1: Head to the left side panel and click the “Create a Team” button

You’ll then see a dialog box that prompts you to type your team name before proceeding.

Once you’ve successfully encoded your team’s name, tap on the Continue button.
Step 2:Invite people to become your team’s members
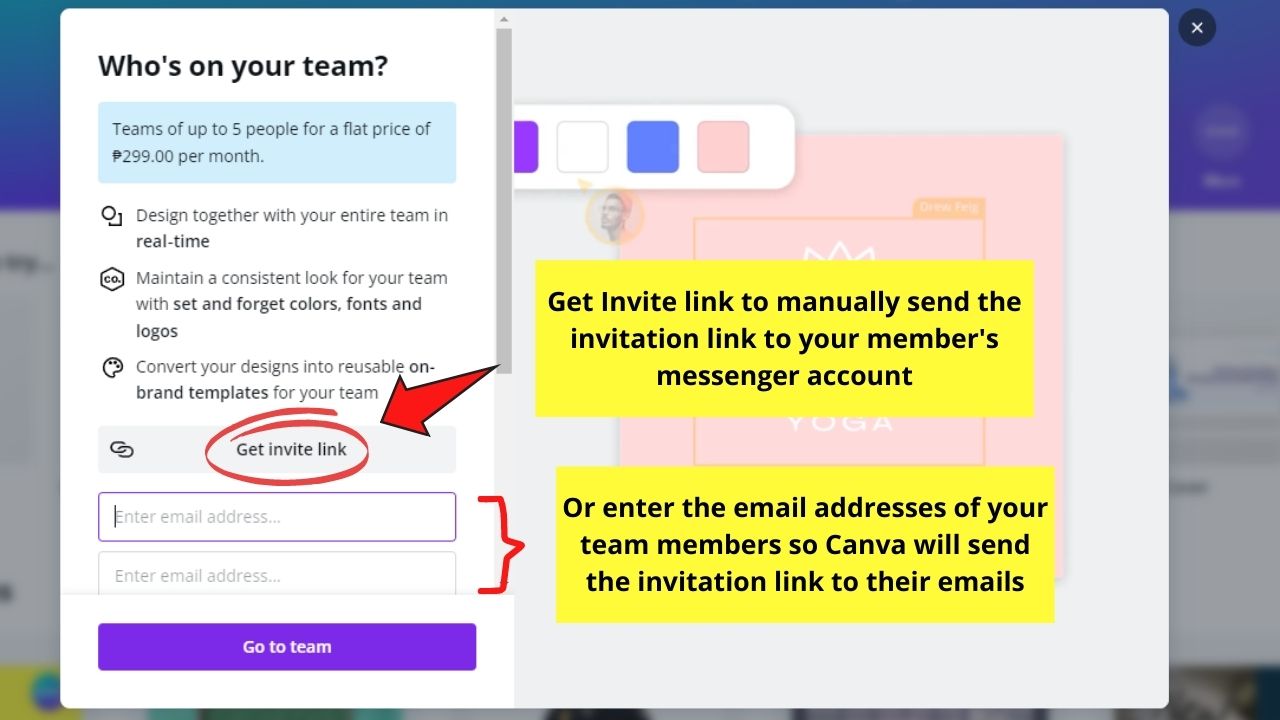
If you prefer the easy route, tap the “Get invite” link and copy and paste this link into the person’s messenger account.
You can also input their e-mail addresses instead to send the link.
Step 3: Assign your members’ roles in the team

Technically, you can assign 3 roles to your members:
- Administrator
- Template Designer
- Member
You can find each role’s function on the right side of the “Invite Team Members” page. Use this as a guide when assigning your members’ roles.
But, if there are any changes during the middle of your project, you can always change the person’s role at any time.
After this step, tap on the “Send invites” button so Canva will send an e-mail with the link to your recipients.

And, once your members click the link, you can now get started with working as a team in real-time inside Canva.
What You Can Do In A Canva Team
Now that you’ve successfully created a Canva team, it’s time to unbox what you can do with it.
The features you can use to your advantage include the following:
- Creation of a brand kit
- Use of collaboration tools, including the ability to create templates
- Unli creation of folders with 100 GB of storage for content organization
- Premium access to Canva’s content (videos, images, templates, elements, and fonts)
- Animations, Magic resize, and background remover
I won’t discuss each feature that you can do with Canva teams.
However, you can read about some of them in the differences between Canva Free and Pro text in this blog.
But, let’s focus more on the collaboration tools that you can use for a seamless workday with your team.
Collaboration Tools in Canva Teams
For you to work well as a team, you need to be able to communicate all your concerns alongside your teammates in Canva itself.
It’s such a hassle if you have to log in to another social media account just to communicate with your team members.
So, aside from the ability to invite and remove or leave a team in Canva, the tool features file sharing and commenting tools as well.
Sharing Files in Canva
Step 1: Go to the menu bar and tap the “Share” button
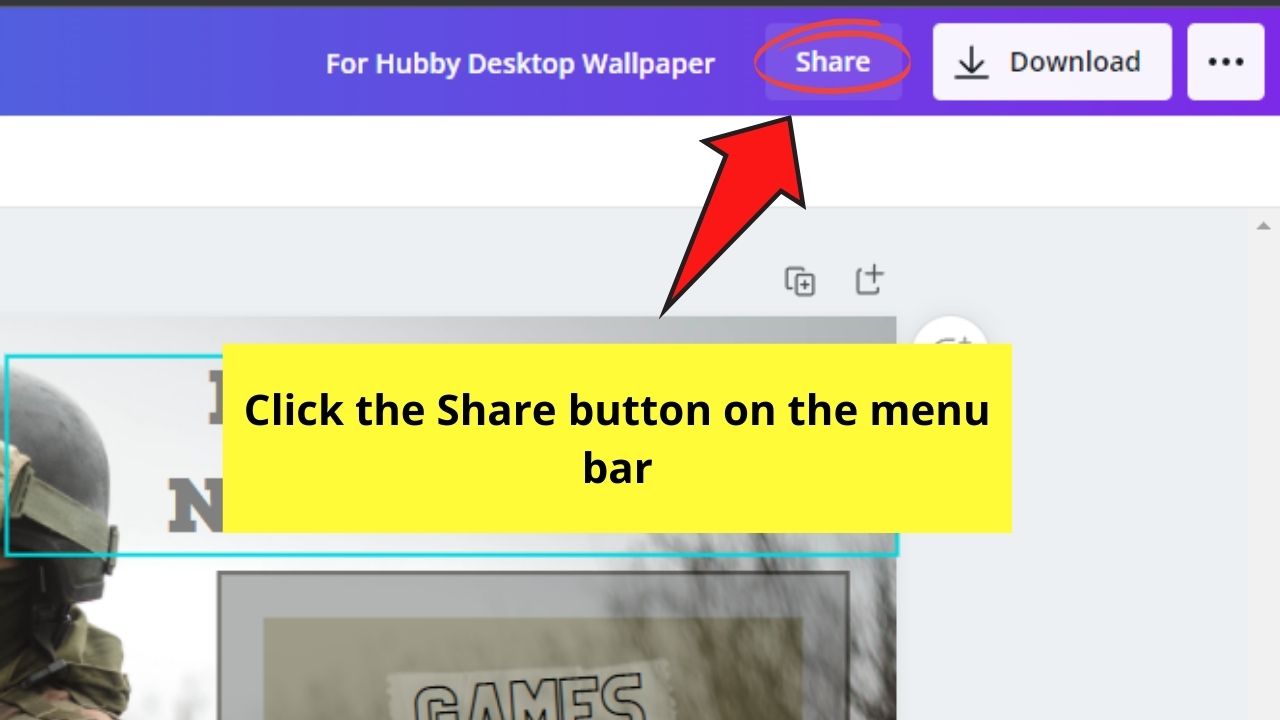
You’ll find this button after the File name/heading.
Step 2: Select the team or a particular team member you’d want to share the file with
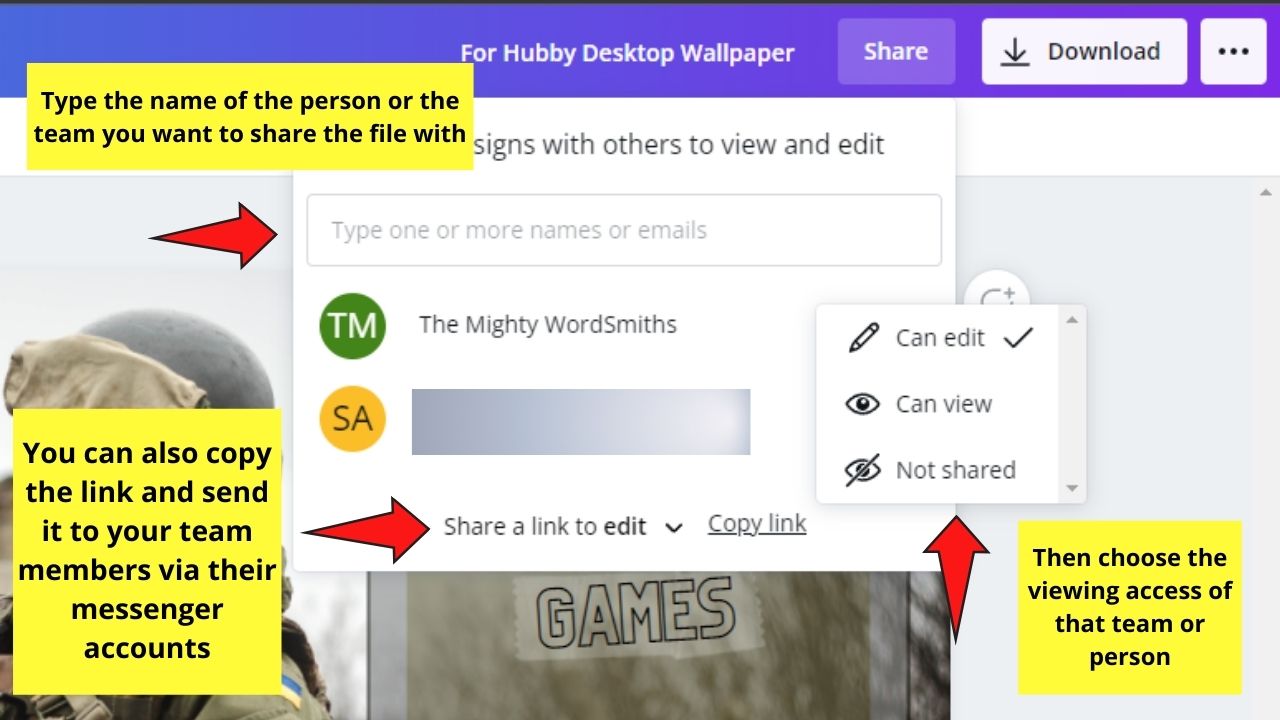
To do this, press the “@” button on your keyboard and input the team or member’s name after it. After locating the name, click on it.
Step 3: Edit the viewing access of a particular team or member
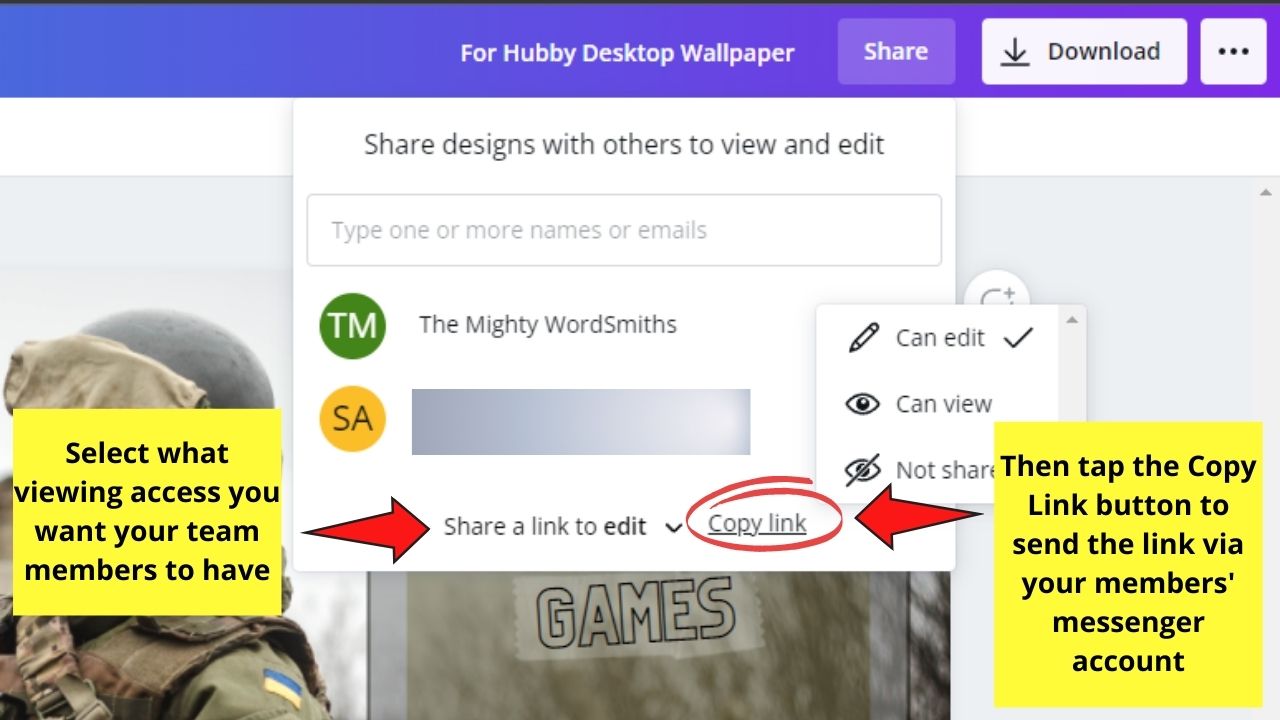
Tap on the Share a link to… button to activate the dropdown menu. You’ll then see 3 options:
- Can edit
- Can view
- Not shared
If you select the Can edit option, you allow that particular team or person to edit the design you’re creating.
The Can view option allows that person to see the design you created, but not make any changes in it unlike the previous option mentioned.
Not shared simply means that person or team member isn’t allowed to edit or even view that particular design. It’s like blocking in social media terms.
Step 4: Tap the “Copy” link button if you prefer to use another messaging option to distribute it
If not, then your members will simply receive a notification about the newest design you created and your tasks for them.
Creating Groups in a Team
Now, if want to organize people according to their departments, you definitely can create smaller teams, or groups, in Canva.
Think of them like the “Group Chats” feature you find in Facebook’s Messenger application.
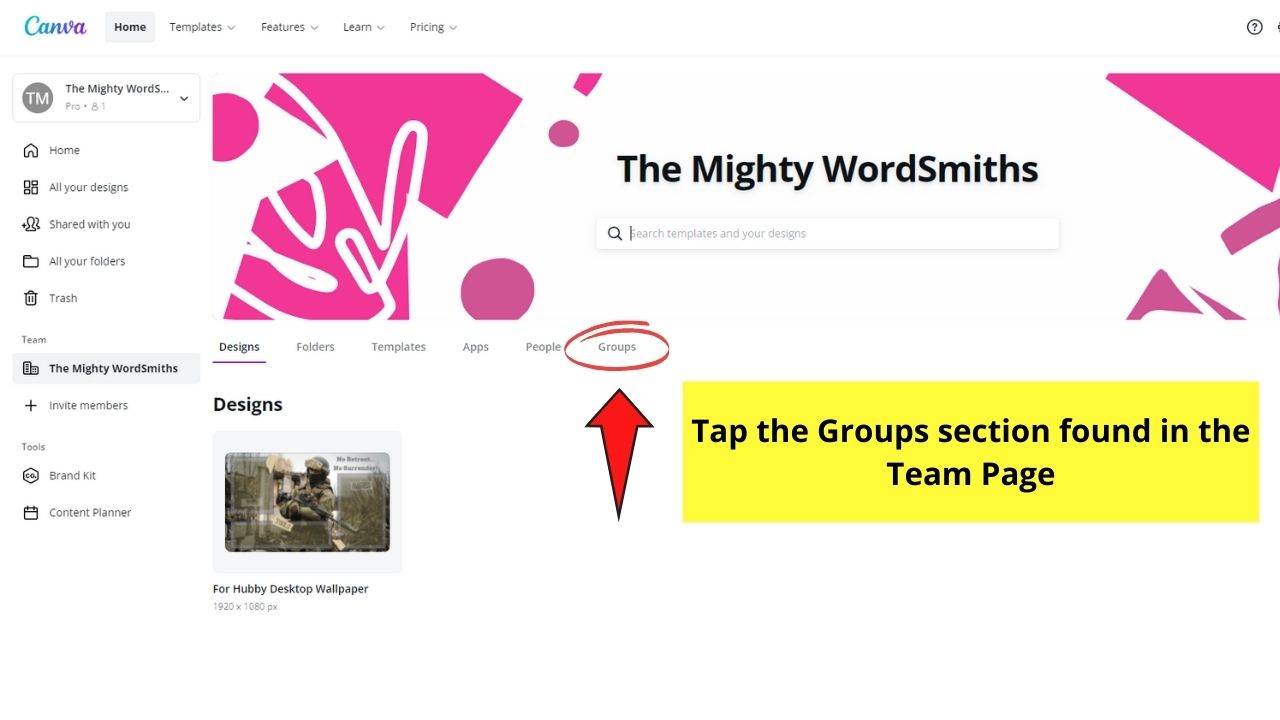
Step 1: Select the name of your team on the left-side panel
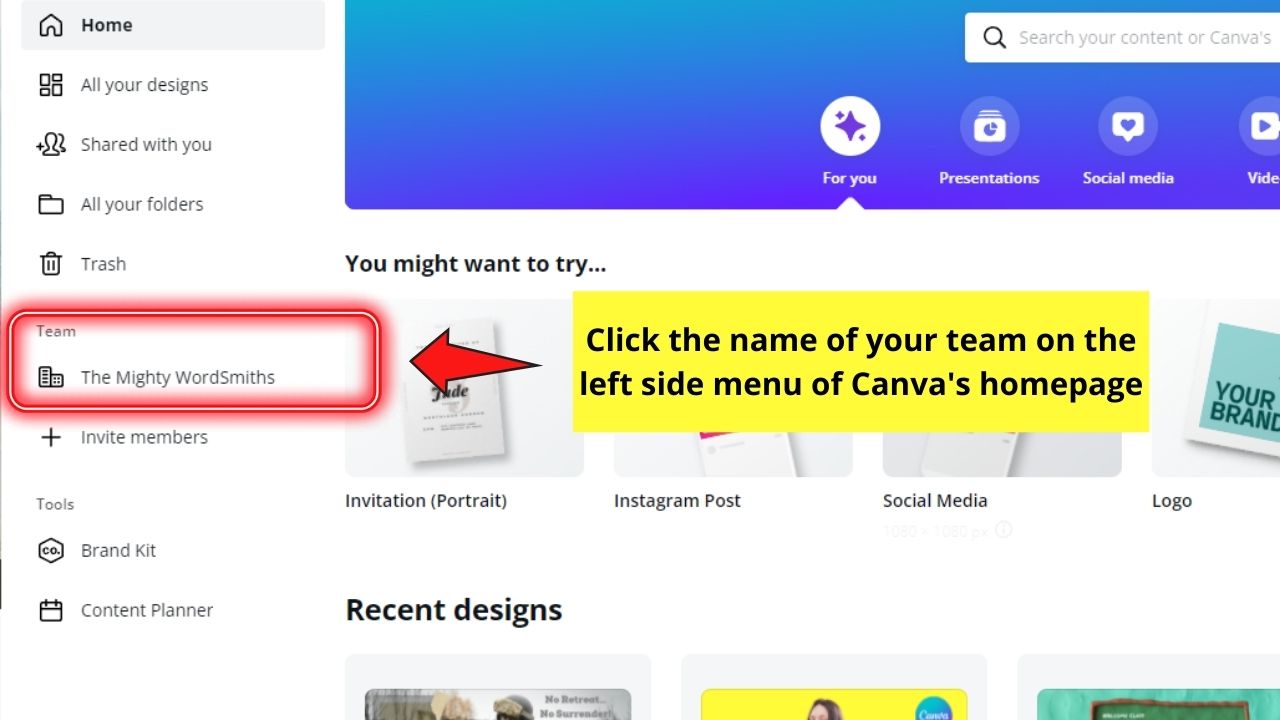
Step 2: Click the “Groups section”
Step 3: Click the “Create a group” button to start encoding your team members’ names or their Canva profile names
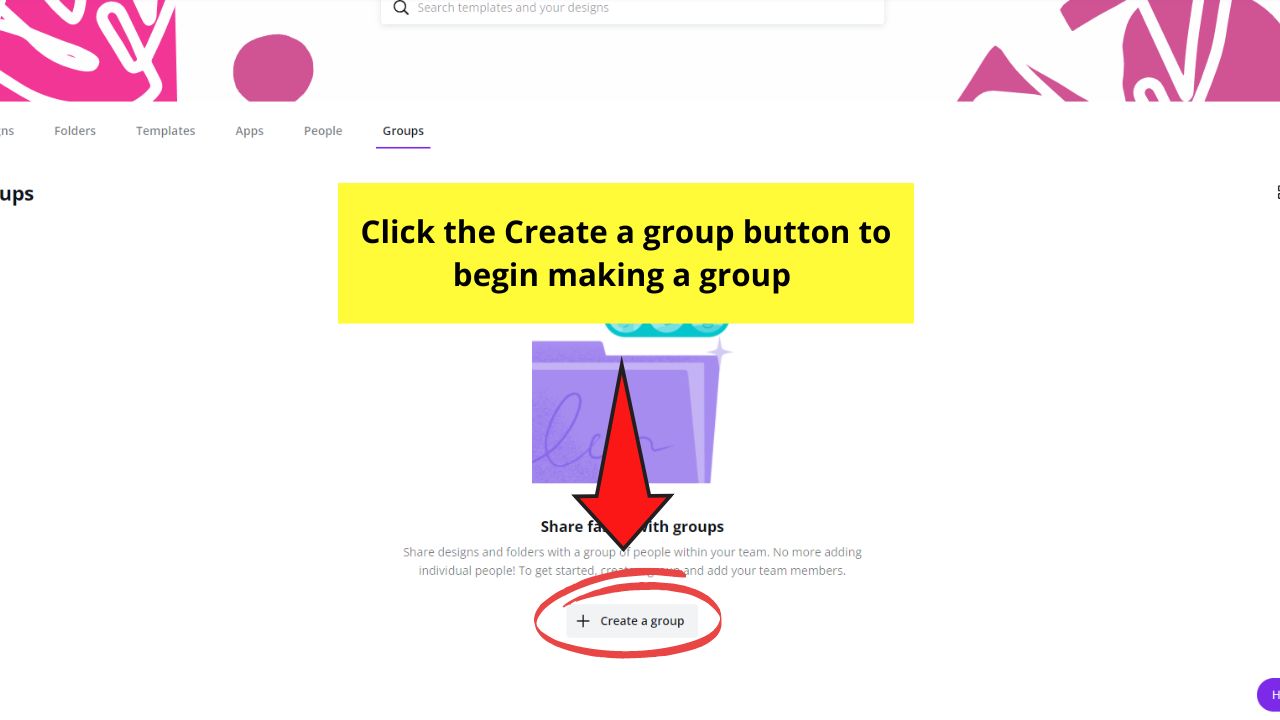
Continue typing the names until you’ve added all the people to the team.
Then, like in creating a team, you can assign which members will take the Administrator role and which ones will simply be a member of the group.
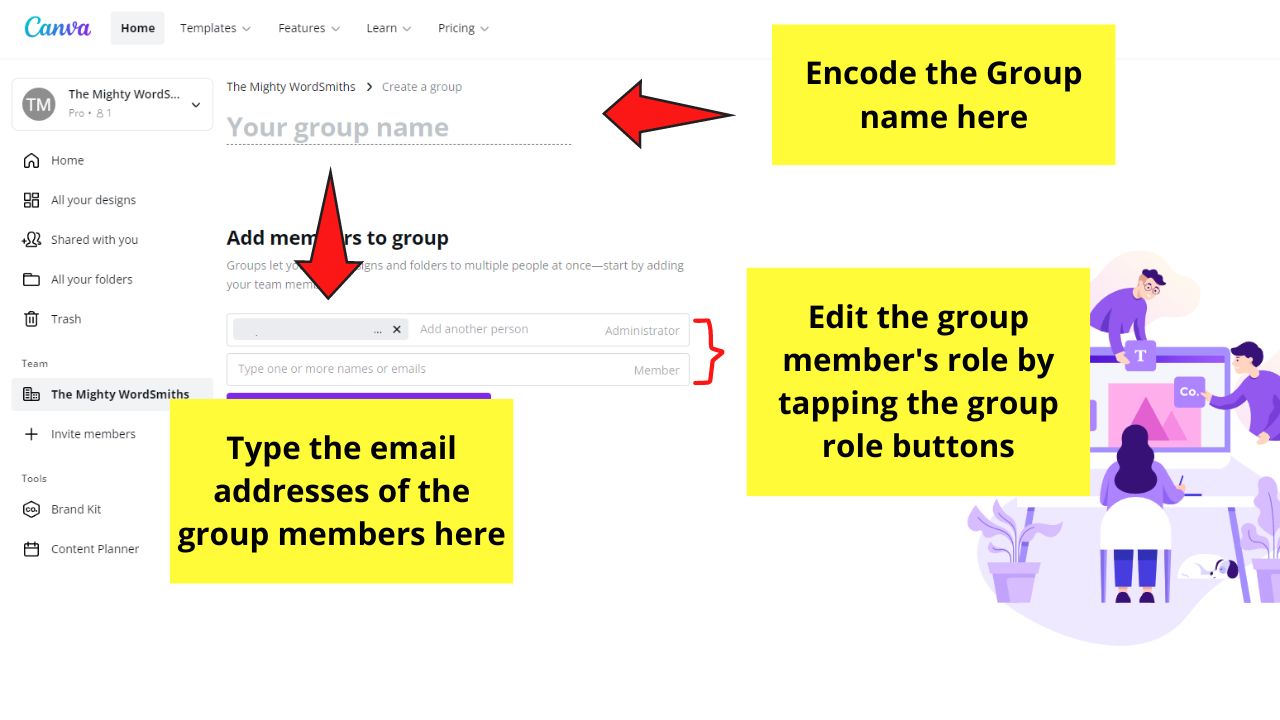
Step 4: Give your newly created group a name
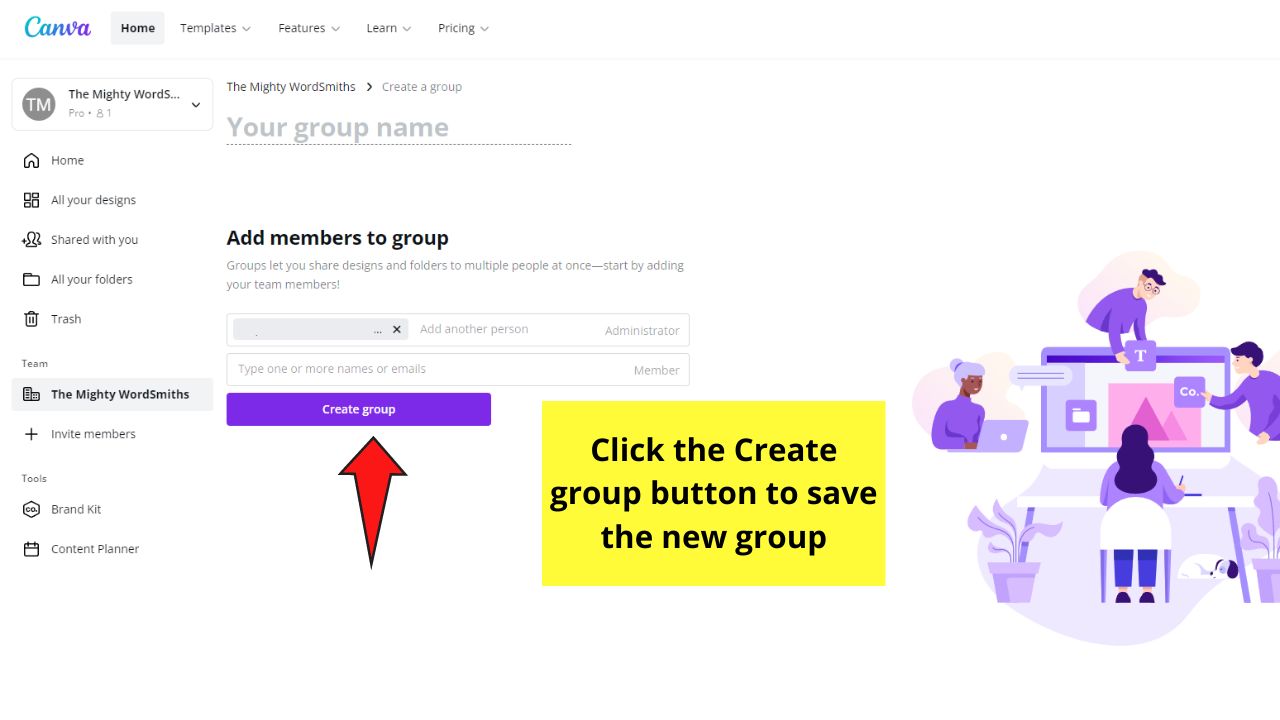
After this step, tap the “Create group” button to save it.
And, just like that, you’ve already created a group under a team.
Commenting on Team-created Designs
Last but not least on the list is the commenting feature. With commenting, you can directly input your feedback on a particular design so everyone on the team sees it.
To do this, you’ll need to follow these steps:
Step 1: If you’re in the “All Designs” tab, tap the ellipsis or 3-dot icon

A dropdown menu will then appear.
Step 2: In the dropdown menu, select the “Comment & Like” option
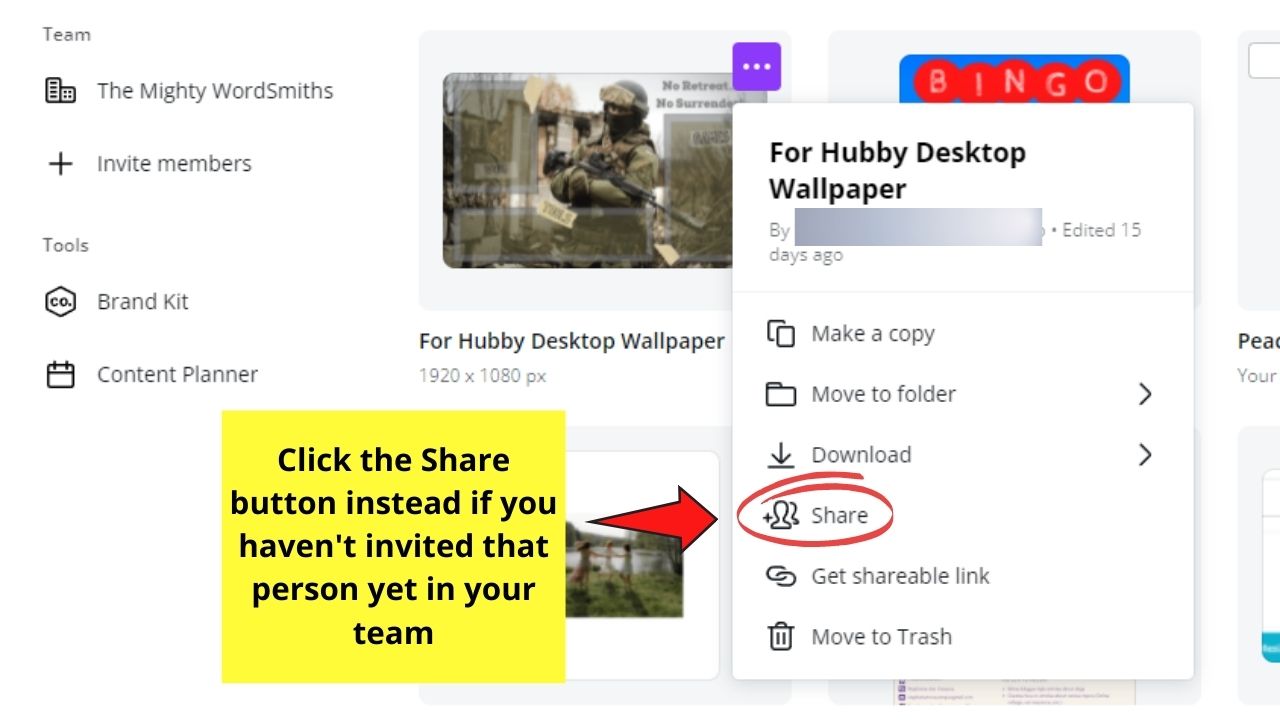
You’ll then see a box where you can input and even tag a member’s name so he or she will be notified of your comment.
But, if you haven’t invited the team or member yet, click the “Share” button instead.
Step 3: Click any design element you’ll comment on before selecting the “Comment” button

Then, type your comment and even mention a particular team member inside the comment box.

Step 4: Select the “Comment” button so everyone, including the person you mentioned, gets notified
You can also click the Assign task box to assign that particular task to that member.
Step 5: Once that team member makes the revisions according to your comment, he can type a reply before clicking the “Reply button
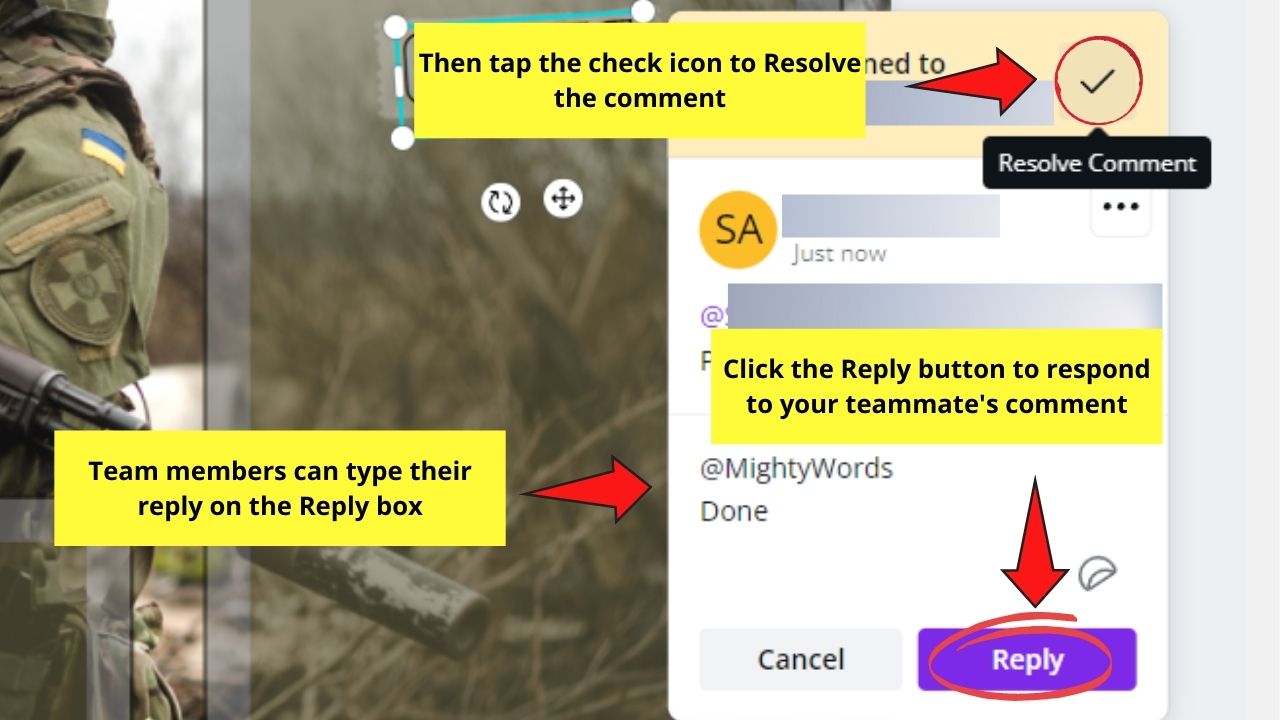
Also, don’t forget to click the checkmark icon on the upper right of that comment so that person gets notified that it’s resolved.
Step 6: Click the ellipsis icon to delete or edit out a comment
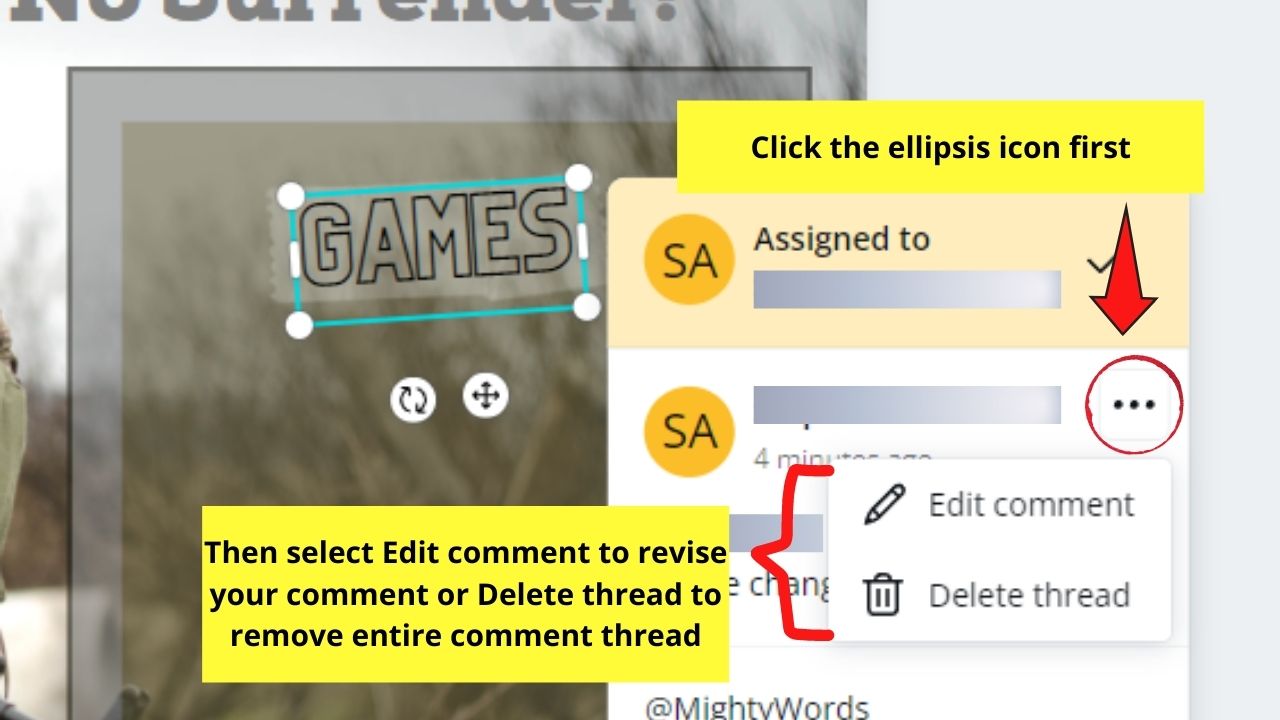
Then, choose between “Edit comment” or “Delete thread.” Click “Save” if you’re editing the comment (say you’re assigning the task to a different member).
How to Invite New Team Members to Existing Canva Teams
Now that you know how to create a Canva team from scratch, how will you add new members to it? Up to how many people can you add?
The “Canva Teams” feature was added to help teams create designs and collaborate seamlessly with other members. Hence, the minimum number of people who can join a team in Canva is two.
However, including yourself, only up to 500 people can be added per team. Plus, each person in the team can only be added up to 100 teams.
Regardless of your reason for adding new members to the team, here’s how you can achieve the feat.
Note: Make sure you’re logged into the correct Canva team account.
Step 1: Click the “Invite Members” button
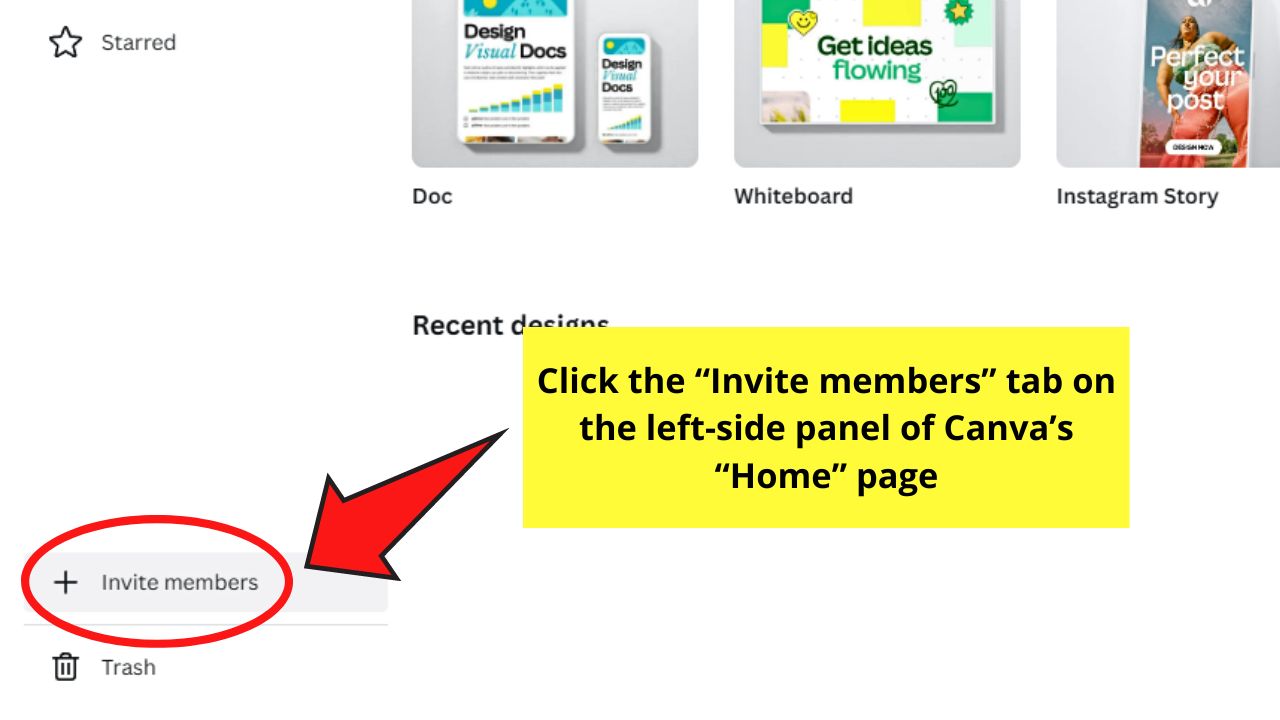
You’ll find this option on the left-side panel of Canva’s “Home” page. A pop-out window then appears in the middle of the screen.
Step 2: Invite people to your Canva team space
You can do this in two ways.
One way is to click the “Get invite link” button and paste the invite link on the messaging app you’re using.
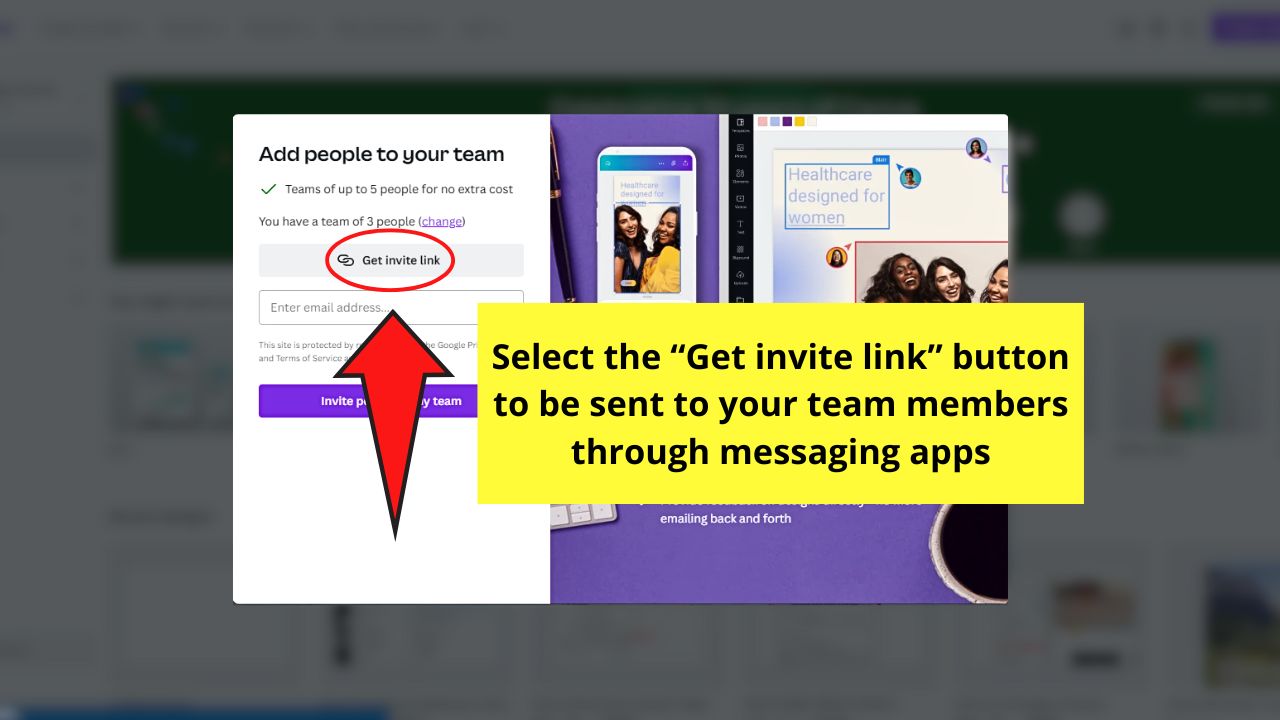
Send it to the intended recipient so he can click on it and become a part of your Canva team space.
Another way is to type the email addresses in “Enter email address…” New “Enter email address…” fields are added with each email you’re adding.

Step 3: Click “Invite people to my team
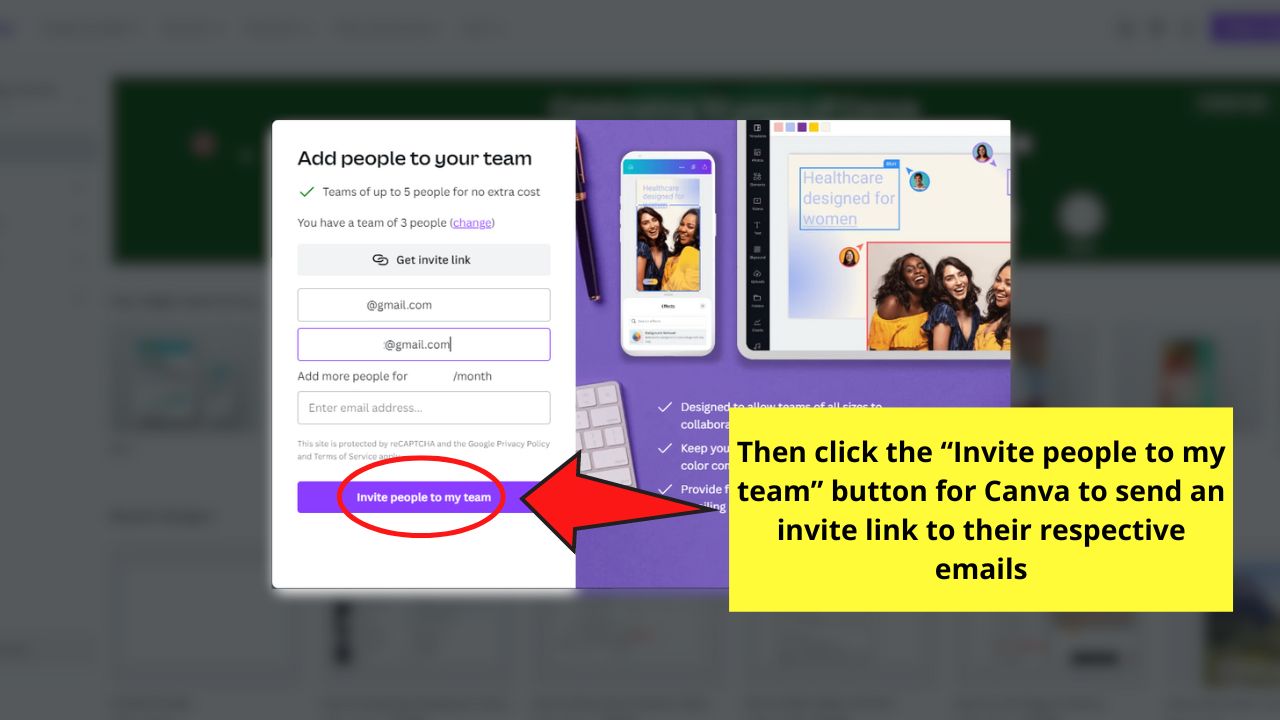
This will automatically send an email with the invite link to your Canva team to their emails.
The persons you invited can then open their emails and click on the link to gain access to your Canva team account.
Remember, though, that once your group has more than five members, each added person has an added cost to you.
This extra cost is added to your Canva subscription charge immediately. Then, the bill is adjusted on your succeeding subscriptions either monthly or quarterly.
But, as you add more people to the team, making you move to higher tiers, the cost per person decreases. You can check Canva’s new pricing for their “Teams” feature on their site.
Pretty cool, right?
What’s more, you can do all of these by commenting, assigning tasks, and working on the revisions as a team in real time.
So, while one team member swaps the colors of the template, you can also edit the fonts and their colors without interrupting each other’s progress.
You’ll just see the profile picture of all the active team members on the menu bar, as well as a differently-colored box with that member’s initials highlighting the part of the design they’re working on.
Frequently Asked Questions about Canva Teams
Do you need to upgrade to a Canva Pro account to use the Teams feature?
Creating a Canva team can be used both by Free and Pro users. But, if you’re on the Free account, you can’t use Magic resize, saving designs as templates, and downloading designs with a transparent background and as animations.
How much is the payment for creating a team in Canva?
For the basic team of 5 members, each member’s charged $12.95 monthly or $119.40 yearly. But, if you’ll exceed the five-person count, you’ll have to pay another prorated fee to cover the rest of the monthly or yearly plan.
Up to how many members can you add to a Canva team?
You can add to a maximum of 3000 members, yourself included in a Canva team.
If I create a team using a Free account, what kind of features can I use?
When creating a team on a Canva Free account, you and your members get to enjoy using the tool according to the limits of a free account. But, once you upgrade to a Pro account, each member of the team, including yourself, can use the Canva Pro features.
Will I be billed if I make a team during my Canva Pro trial period?
During the 14-day trial period for Canva Pro, you won’t be charged for creating a team. However, if you opt to continue with the use of the Pro account, billing starts on the day you made the upgrade.
Do all team members see the designs I create?
Not all team members can view your Canva designs unless you change their permission or view access to Can Edit or Can View.