One element to creating great designs in Canva is the addition of shapes.
Most people think shapes can only be used as decorations on their projects, but there are tons you can do with them.
But how do you use shapes in Canva like a pro? What are the secret techniques you should learn when working with shapes in Canva?
How to Use Canva Shapes
First, add a circle to your project by pressing “C” on the keyboard. To change the circle into another shape, click “Shape” on the toolbar. Then edit the shapes’ border thickness, style, and round its corners in the “Border Style” tab. Then, add and remove a shape’s fill color in the “Color” tab.
The steps above might sound like a lot at first, but with more practice, you’ll become a master at using them on any of your Canva designs.
Aside from using shapes to add more design aesthetics, you can use them when you’re brainstorming using Canva’s whiteboards. Also, you can fill text boxes with color in Canva by adding colored shapes behind them.
You can even use the same shapes for adding page numbers to an ebook you’re creating.
So, to start mastering the skill of using Canva shapes, refer to the more detailed steps below.
Adding Shapes to Canva Project
Step 1: The long way of adding shapes in Canva is to click the “Elements” tab on the left-side panel.

Then, go to the “Lines & Shapes” section and select a shape from there.
Step 2: If you’re strapped for time or simply want a faster hack to the process, just tap “C” on the keyboard first.

This will add a circle to your project’s canvas.
Step 3: Select the circle by clicking it if you want to change the circle to another shape.

Then, on the toolbar that appears, select the “Shape” button.
An object panel will then appear on the left, showing all the available shapes in the gallery. Simply click on one of the shapes to swap it with the circle.
Removing and Adding Fill Colors of Canva Shapes
Step 1:If you want to remove the shape’s fill color, select the shape and click the “Color” square on the toolbar.
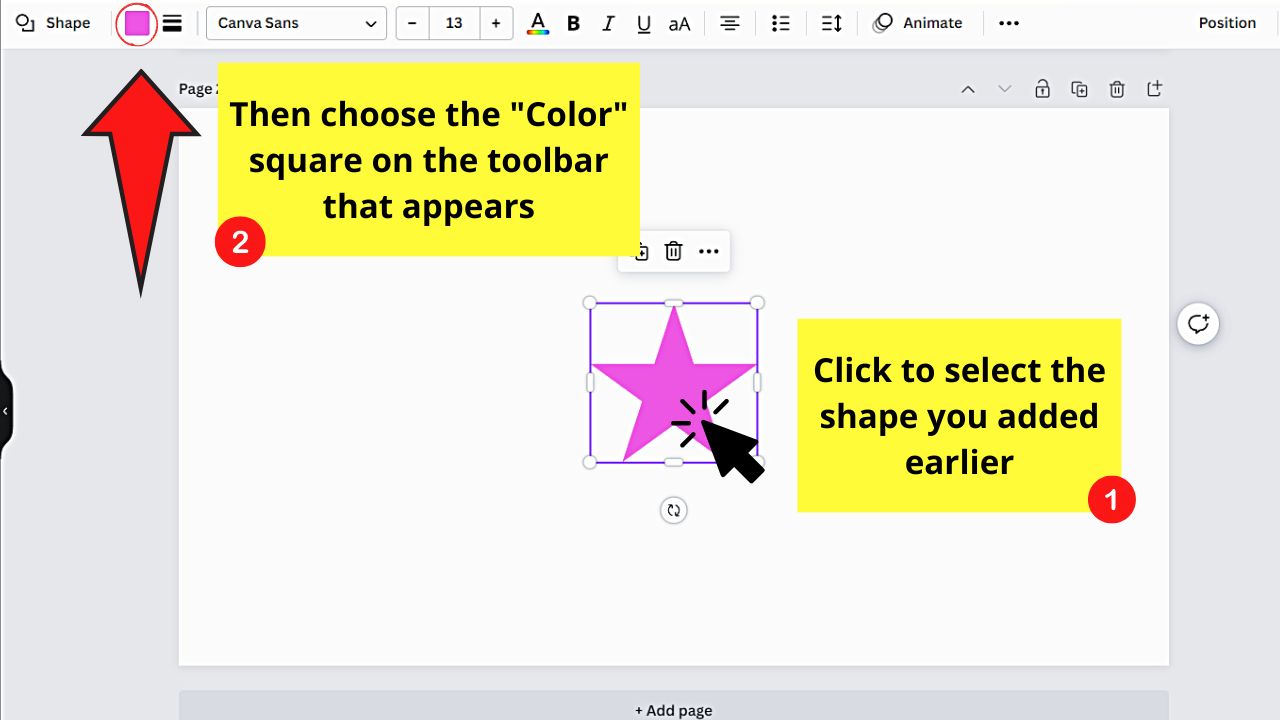
By default, the circle you added (or the new shape if you changed it earlier) has a preselected fill color.
Step 2: Click the “Transparency” square from the color gallery that appears.
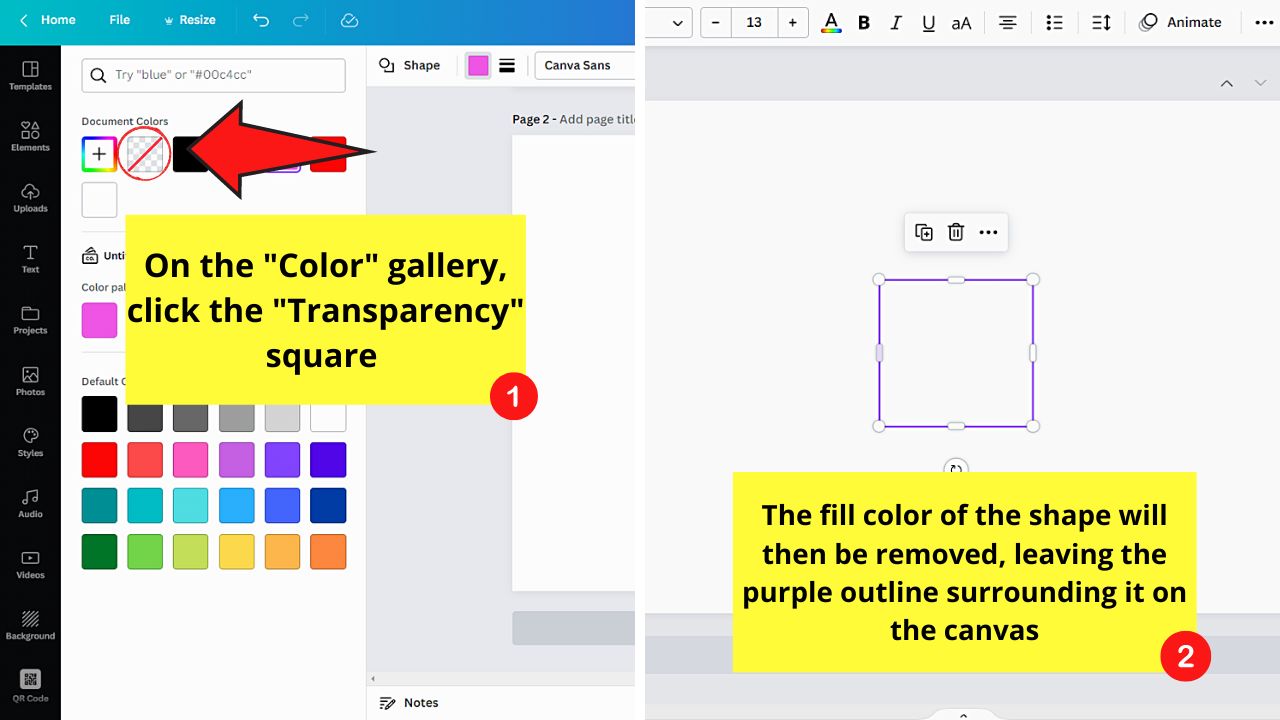
Its icon appears as a checkered tile with a red slash across it.
Step 3:If you change your mind and want your shape to have a fill color, go back to the toolbar and click the “Color” square.

It’s because the moment you remove the fill color, you’ll only be left with the purple outline square. This marks the area where the shape is on the canvas.
Step 4: On the “Color” gallery that appears, choose a hue from the “Color palette,” “Photo colors” or “Default colors” sections.

If, however, you want to use a color not found in the first 2 sections, select the rainbow-colored tile instead.
Then, choose whether you’ll select a hue from the color box, type the color hex code, or use the color picker tool to add that new color.
Adding and Removing Canva Shape Borders
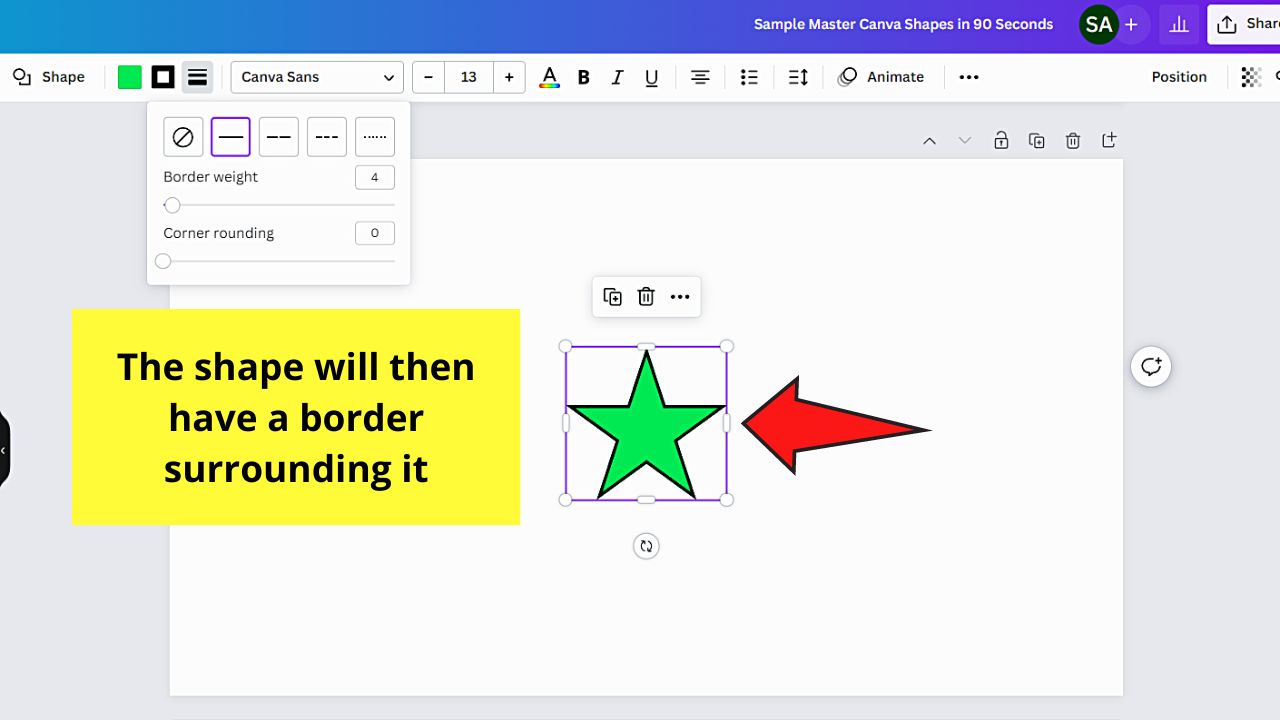
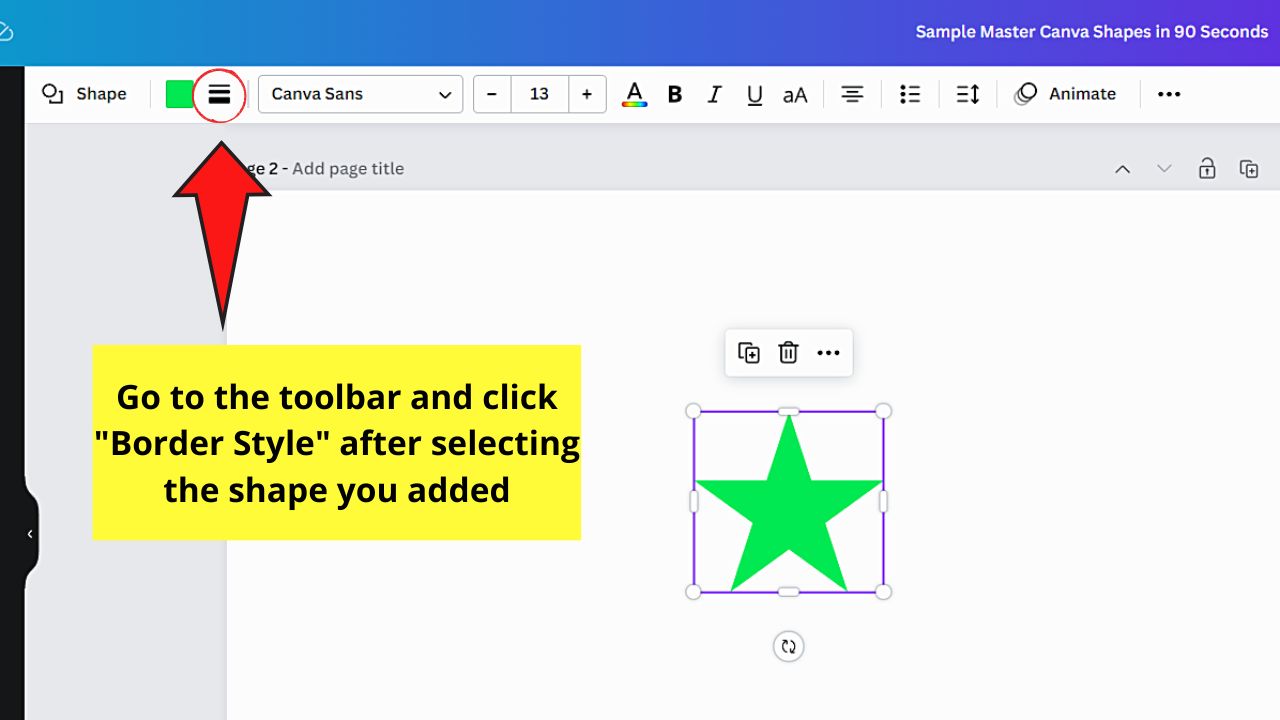
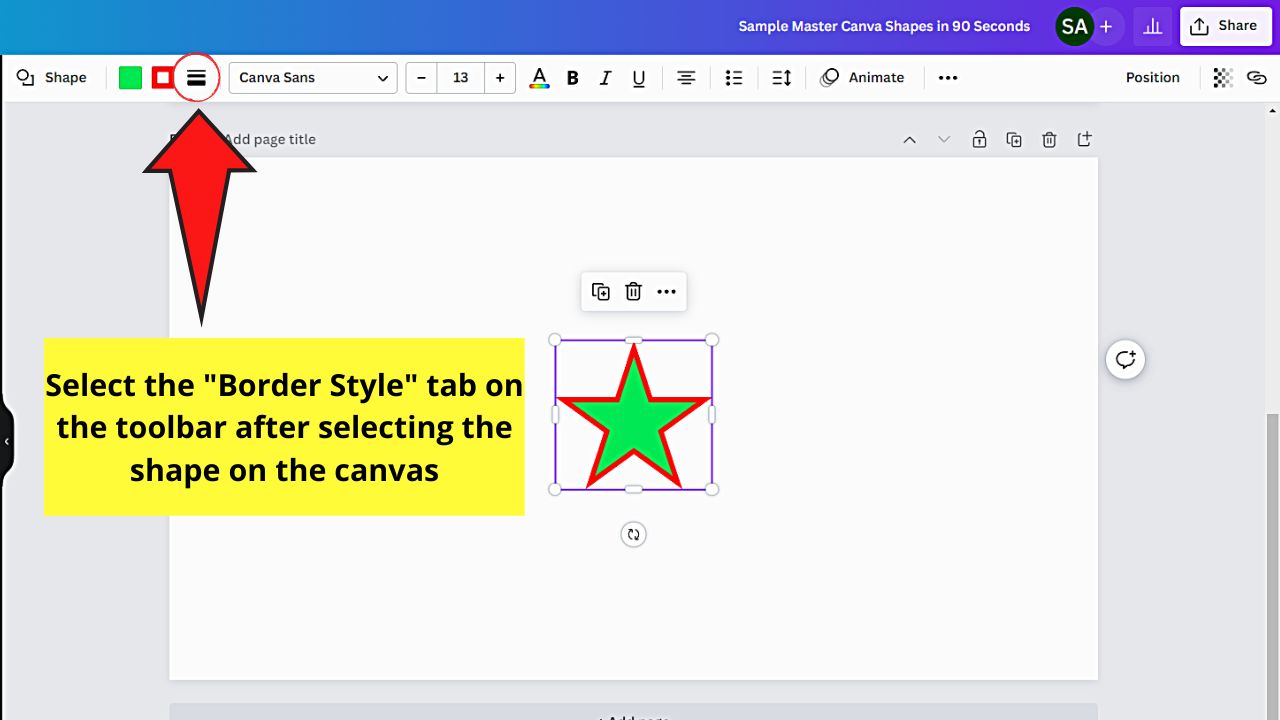
Step 1: After selecting the shape you added to the canvas, go to the toolbar and click the “Border Style” button.
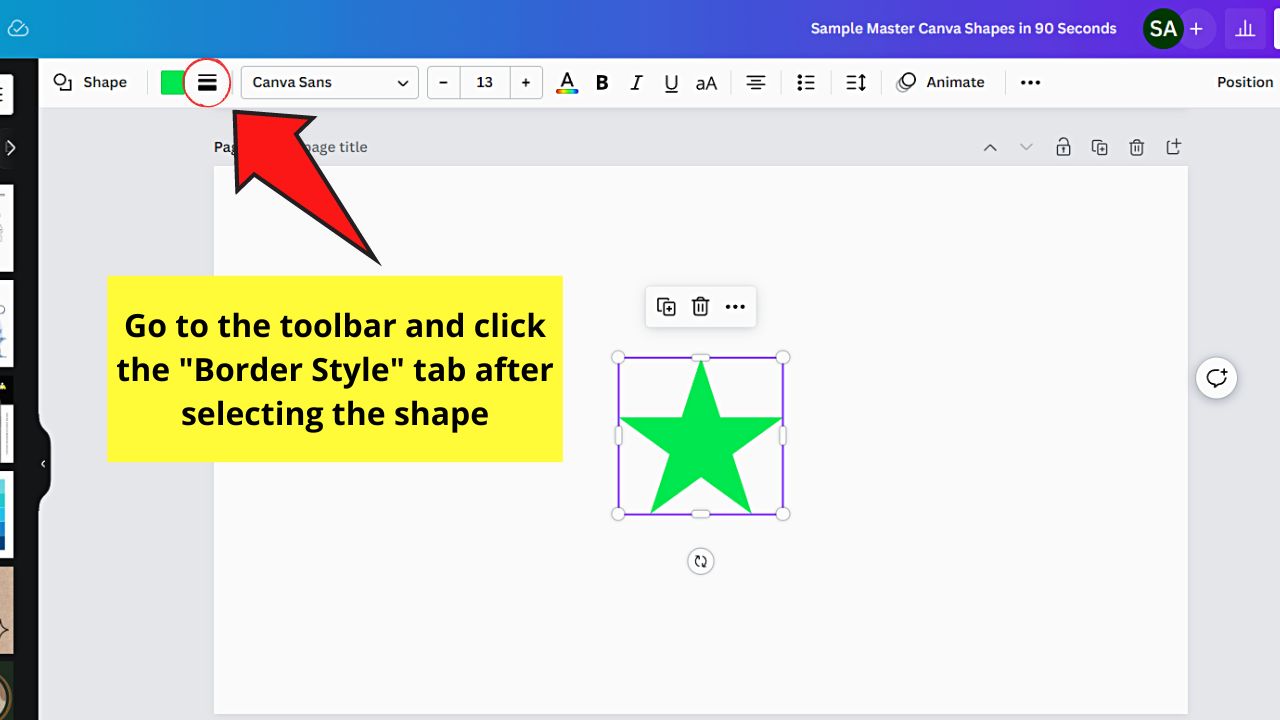
Step 2: On the dropdown menu, go to the “Border Style” section and choose what type of border you want your shape to have.
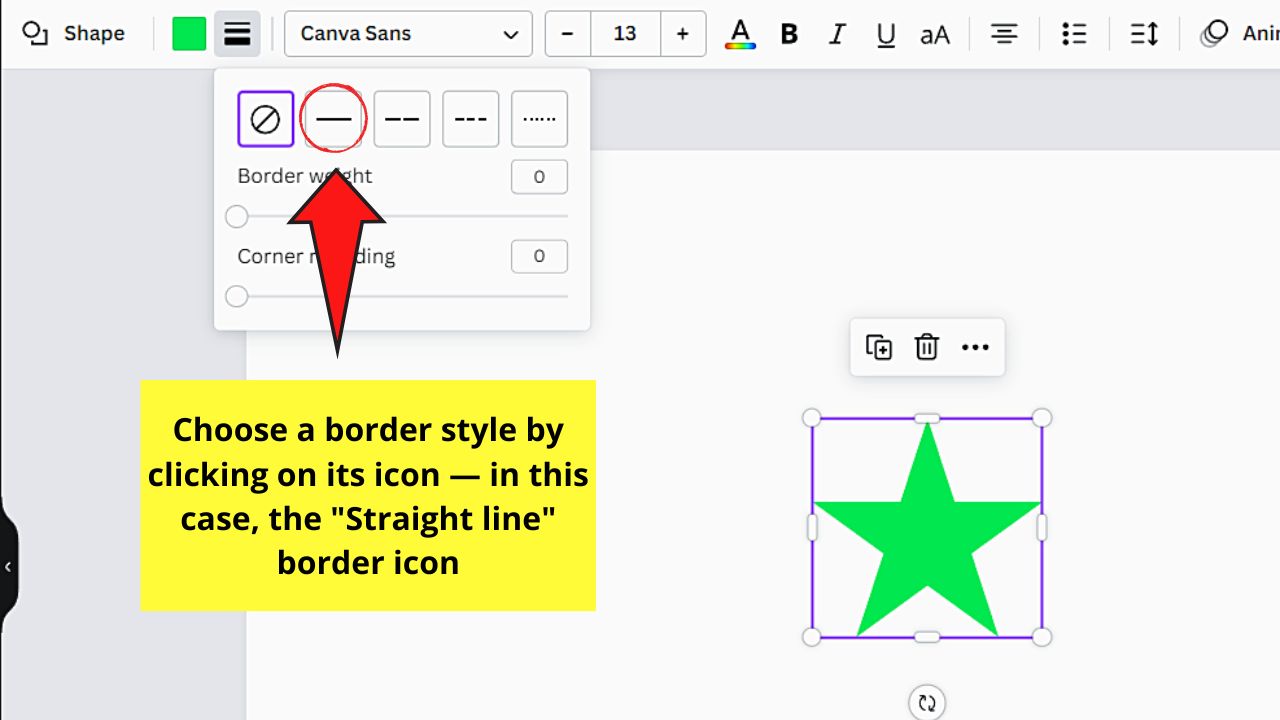
There are a total of 4 options”No border,” “Straight line, “Dashed Line,” and “Dotted Line.”
For sample purposes, I’ll go ahead and click the “Straight line” border icon.
Step 3: To remove the border from the Canva shape, select the “No border” icon.
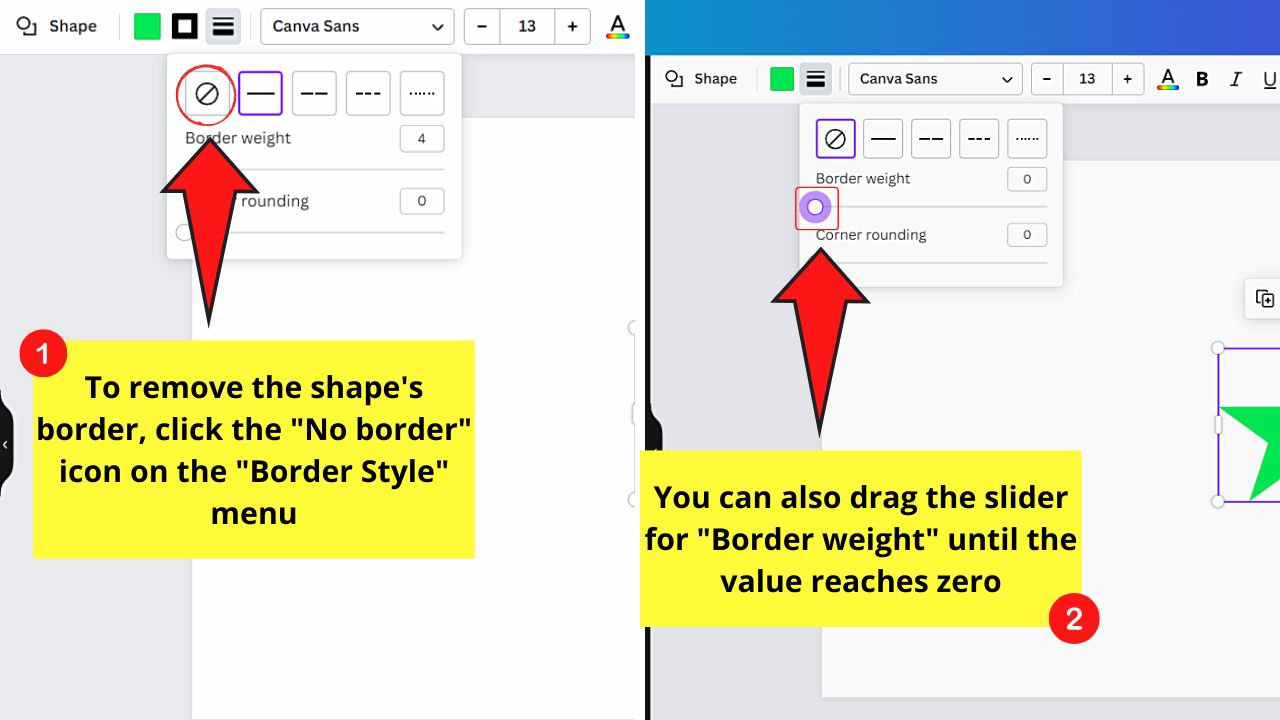
You can also go to the “Border Weight” slider and drag it until it reaches zero.
Automatically, the border you added will be removed.
How to Adjust the Border Thickness of a Canva Shape
Adjusting the thickness of a shape’s border helps make the Canva shape more visible.
To do some editing on your shape’s border thickness, follow these steps:
Step 1: After clicking the shape, go to the toolbar and select “Border Style.”
Step 2: On the dropdown menu, head to the “Border weight” section and drag its slider to the right.
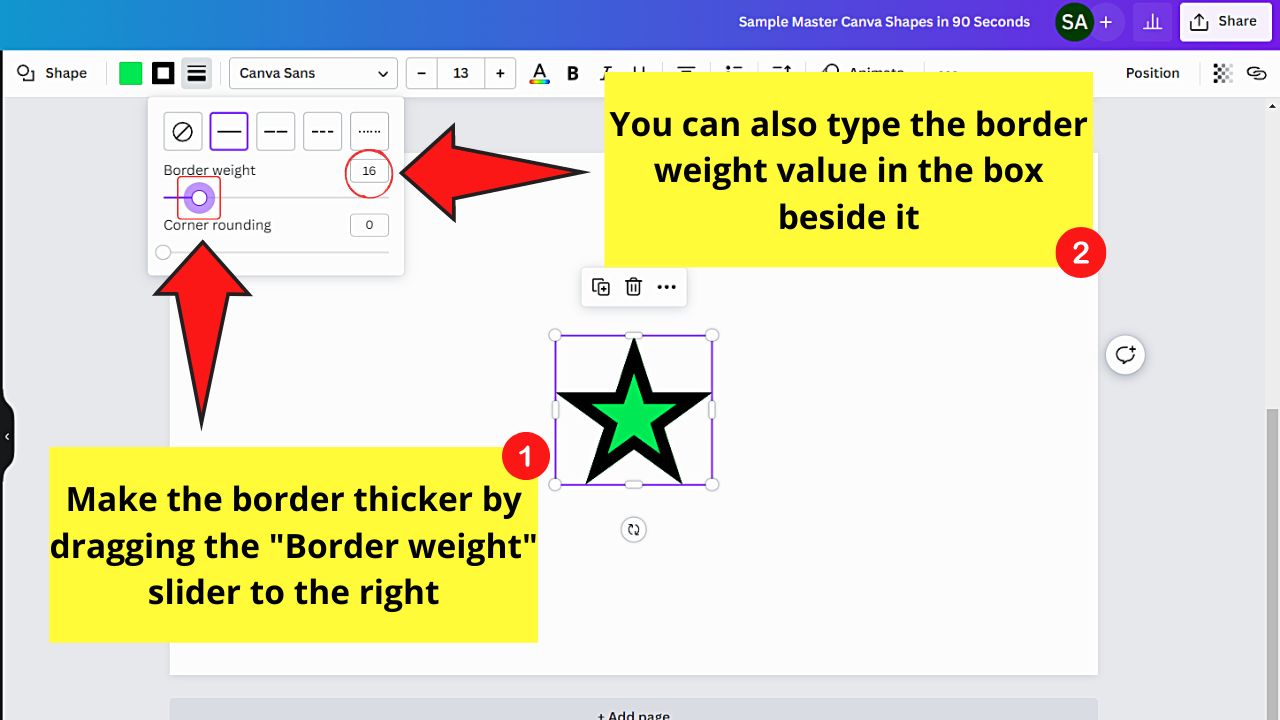
You can also directly type the number in the box provided.
Step 3: If you think the border weight you selected is too thick, just drag the slider to the left to lower it.
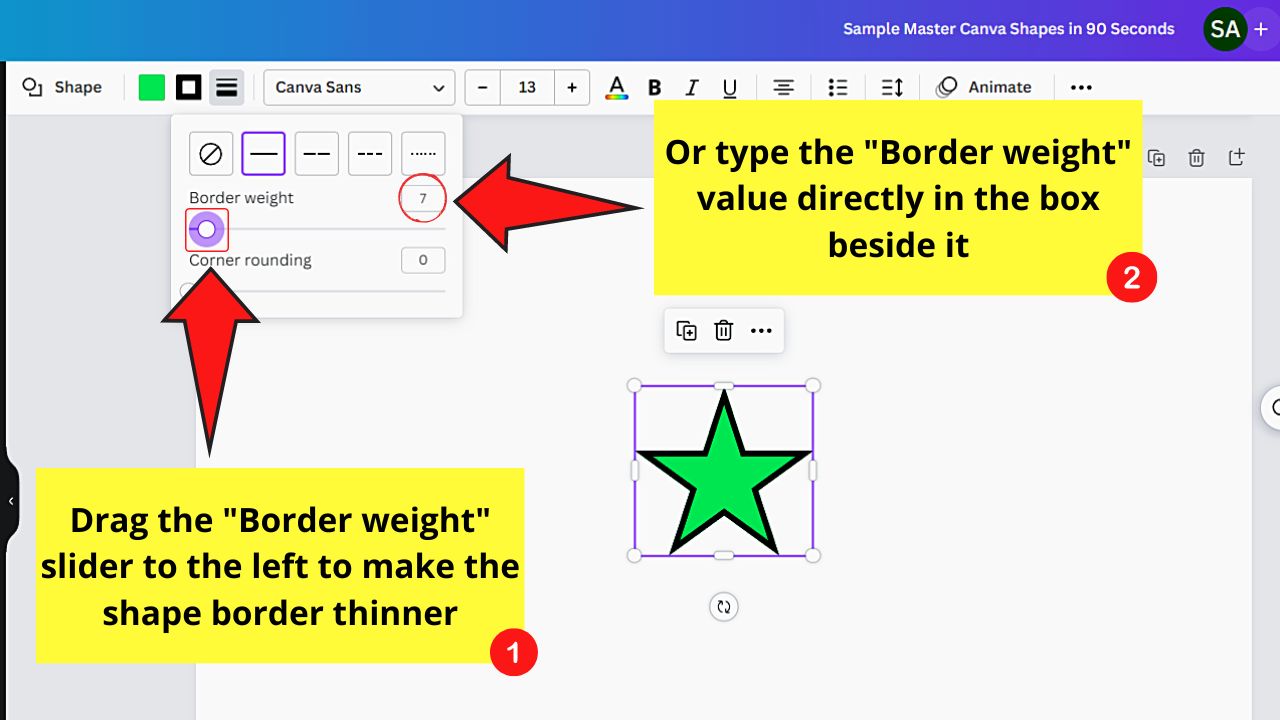
Again, you can also just directly type inside the box for easier adjustment of border weight.
Changing the Colors of Canva Shape Borders
Aside from editing the shape’s fill color, you can also change the color used on its border to make it in sync with the design you’re creating.
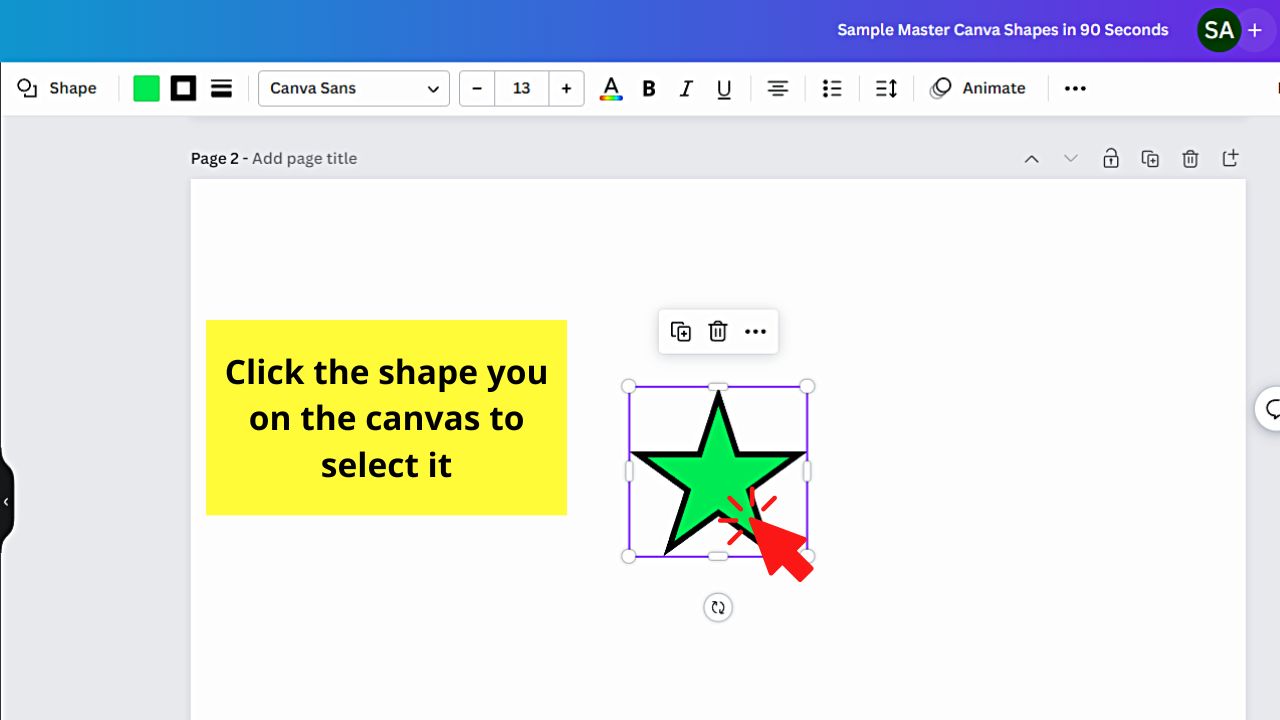
Step 1: Click to select the shape you added to your Canva project.
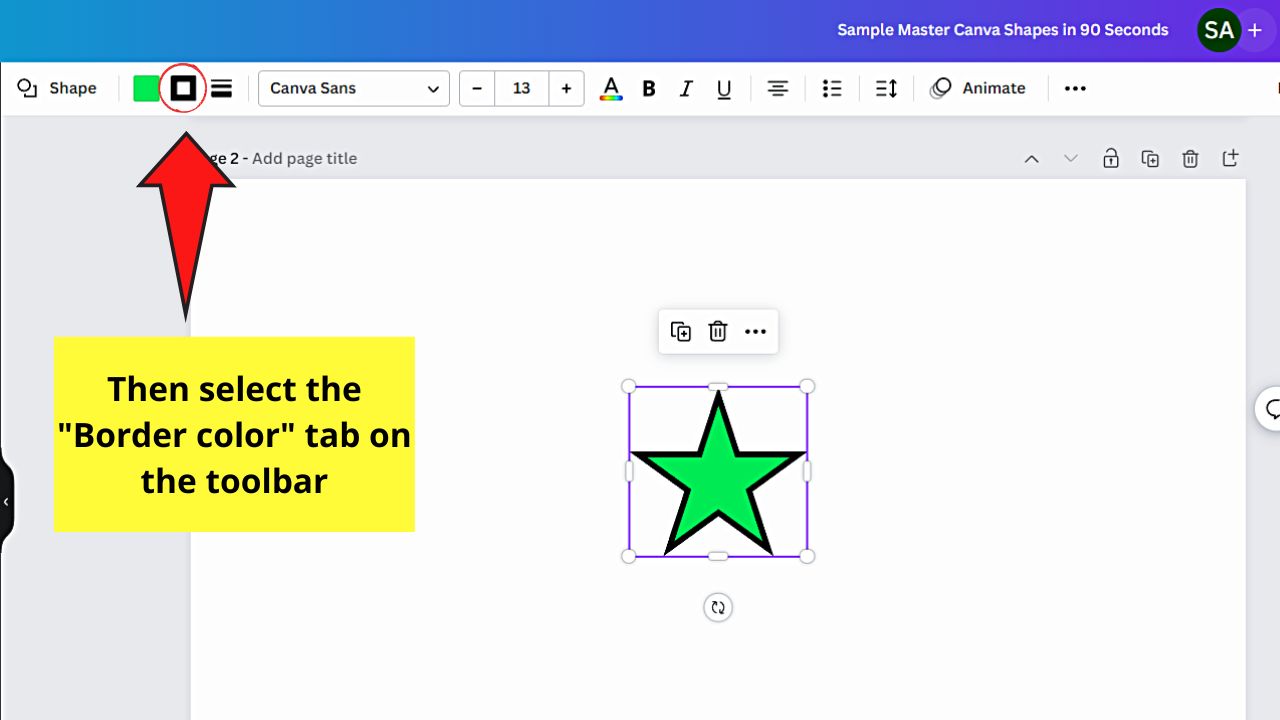
Step 2: Go to the toolbar that appears and select the “Border Color” tab.
Step 3: Click the color you want your shape’s border to have from the “Photo colors” or “Default colors” gallery.
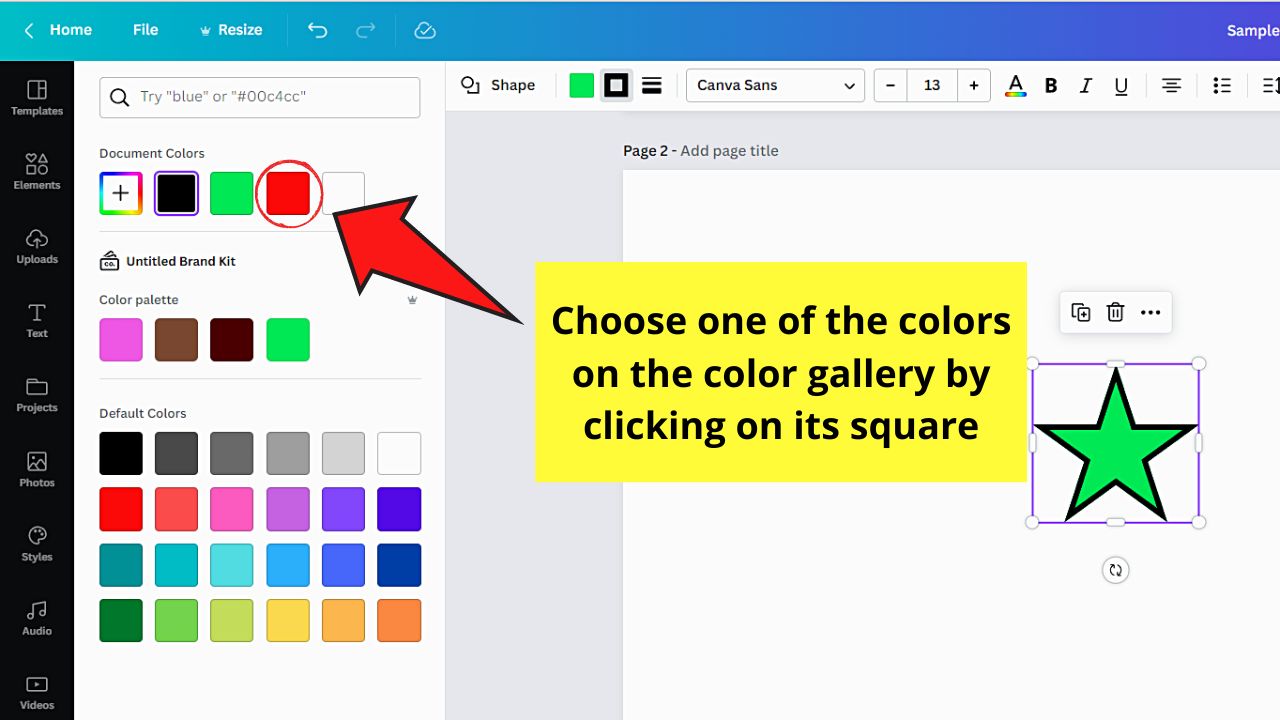
Step 4: If you prefer to add a new color for the shape’s border, select the rainbow-colored “+” button.
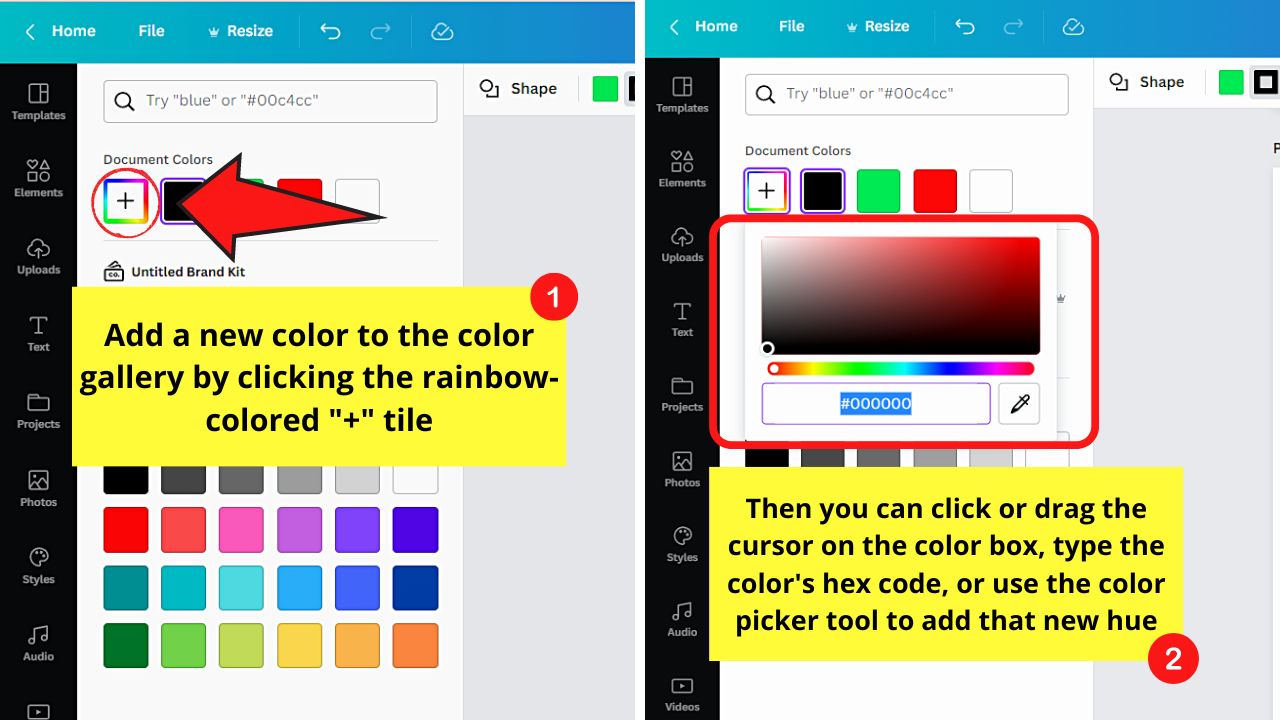
Then, click or drag the cursor across the color box, type the color hex code, or use the color picker tool to add the new color.
Rounding and Sharpening the Corners of Shapes in Canva
Rounding or softening the corners of any Canva shape is very simple to do with the following steps.
But, you can only use this rounding corners feature if the shape you added isn’t a circle.
Step 1: After clicking the shape, go to the toolbar and choose the “Border Style” button.
Step 2: Head to the “Corner Rounding” slider and drag it to the right to make the shape’s corners rounder.
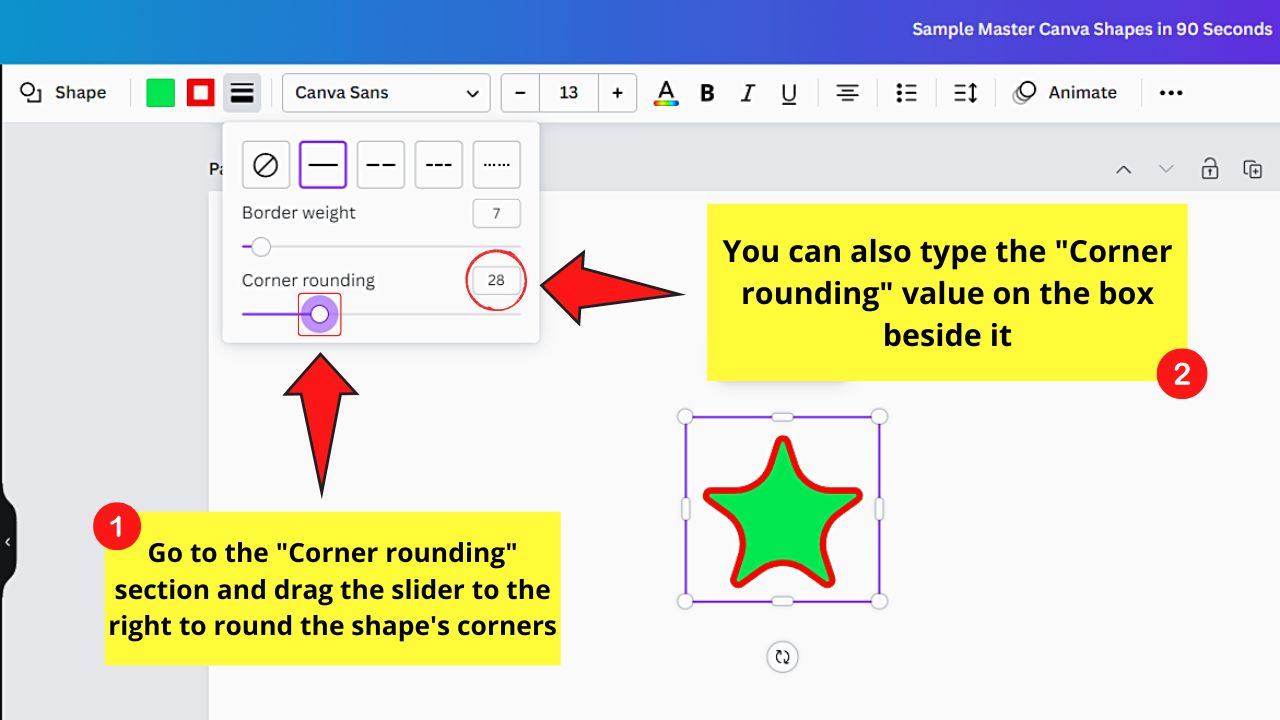
You can also type the number directly in the box.
Step 3: If you want to sharpen the corners of your Canva shape, drag the “Corner Rounding” slider to the left.
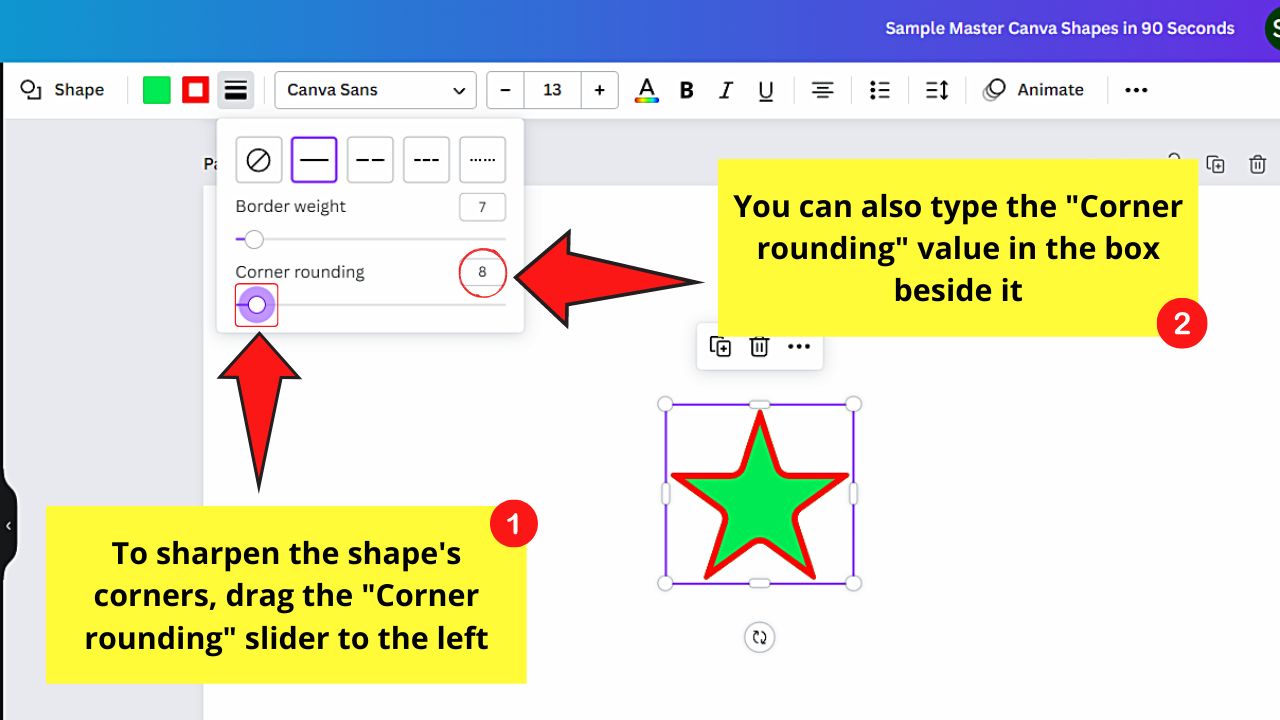
You can also just directly type the number in the box found above the slider.
There you have it! With those easy steps, you have become a master at using Canva shapes.
You can now apply what you have learned and add borders to the circles that you have turned into image holders or shapes filled with images in Canva.
Frequently Asked Questions about Shapes in Canva
Do I need to be on Canva Pro to be able to use the shapes from the “Shape” gallery?
Canva shapes is a free feature, so even if you’re not on Canva Pro, you can use any shape you fancy using. Just tap “C” on your keyboard to initially add a circle. Then, select the “Shapes” button on the toolbar to swap it out with another shape from the gallery.
What happens when I adjust the “Corner rounding” slider under “Border Styles?”
“Corner rounding” in Canva means that you soften or make the corners of any shape you added (excluding circles) less sharp. Dragging the “Corner rounding” slider to the right softens the shapes’ edges while dragging it to the left makes them sharper.
How can you edit a shape in Canva?
To edit a shape in Canva, click to select it first. On the toolbar, change the said shape with another by clicking the “Shapes” button. Change the shape’s border style and weight in the “Border Styles” tab. You can also add a fill color or remove it by selecting “Color” on the same toolbar.
How do you add text in a shape in Canva?
To add text on a Canva shape, double-click it first. This move will make a cursor appear inside the said shape. Type the text inside the shape and change its font color and style accordingly. Then, click outside the shape to save the new changes made.