
For a pretty long time, timing text was not something that Canva could take care of.
With the latest updates in 2023, however, you can now precisely time your text elements in Canva.
This is great because it allows for much more flexibility when working with texts in Canva be it when you create complex video projects in Canva or when creating subtitles in Canva.
How to Set the Duration of Text in Canva
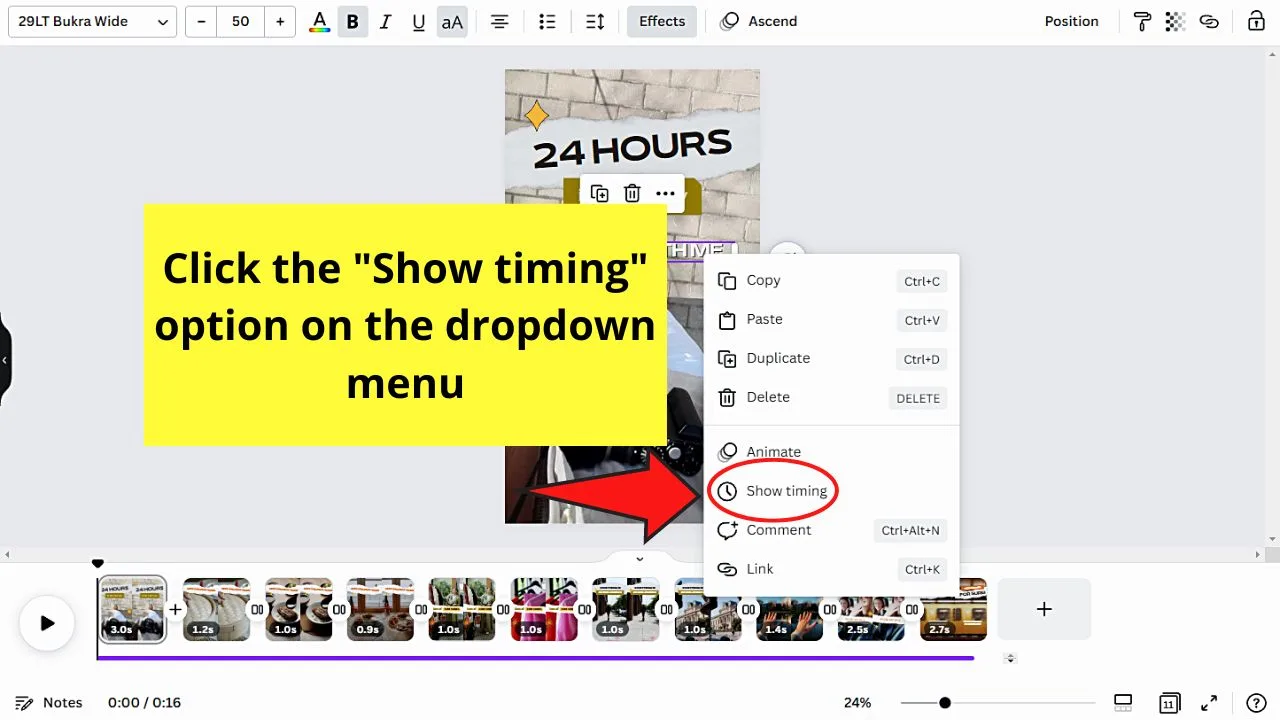
To set the duration of text in Canva, right-click on the text element on the video project. Select the “Show timing” option on the dropdown menu. Then, hover your cursor on one of the trim handles and drag to adjust the timing.
For a more detailed take on the steps, keep reading.
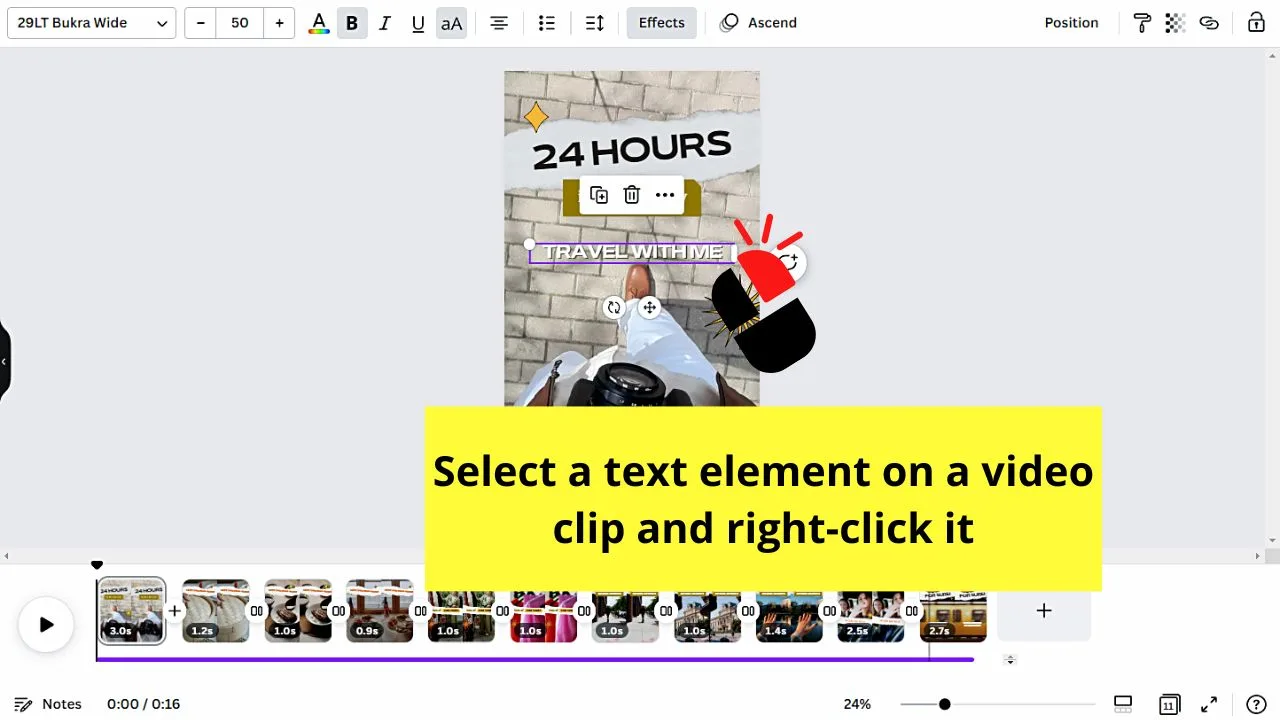
Step 1: Right-click on the text element in your project that you would like to set the duration for.

Step 2: Click on “Show Timing” (this is only available in Canva Video projects!)

Step 3: In the timeline, drag the text timing box to set the duration of the text.


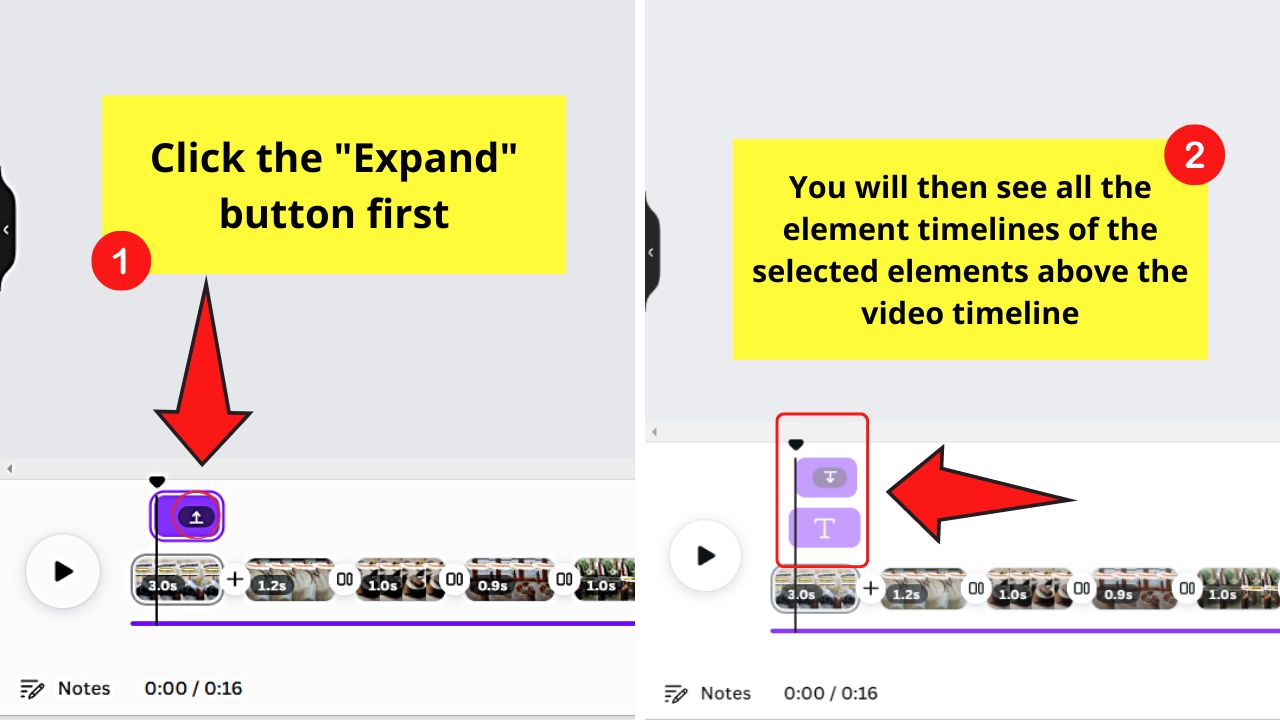
If you have selected other elements together with the text timing box, make sure to adjust the one you want to appear first on the video.
But, you can only do so after clicking the “Expand” button to show all the element timelines above the video timeline.

Text timing boxes as they appear on Canva’s timeline — Important Info
As soon as you click on “Show timing” after right-clicking a text element in your project, the text timing box will appear on the timeline. So far, so good.
What is a bit confusing here, however, is that you will only see the text timing box for the very element that you previously clicked on.
Why is it confusing?


It is confusing because in other software such as Premiere Pro, DaVinci Resolve and many other video editing tools, you will see all these elements at once in the timeline (but also on different “tracks”, which is something that Canva only partly supports).
So as far as Canva goes, when timing text, just be aware that you will only see the text timing box on the timeline for the text element that you selected (right-clicked and chose “Show timing” for).
Frequently asked questions about text timing in Canva
Can you time text in any kind of Canva project?
For now, you can only time text in Canva video projects. With that said, if you have created a custom size project or a simple project with only slides for a slideshow in Canva, then timing text won’t work.
Can you set the duration of text in Canva for each text element in your project?
The “Show Timing” feature is indeed available for each text element in your project. With that said, you can set the duration of each text element independently in Canva, as long as you are working on a Canva video project (text timing is not available for simple slideshow projects, etc.)
Is the Text timing feature useful for creating subtitles in Canva?
The “Text timing” feature in Canva is not a great feature for creating subtitles. I would recommend you to use the “Split page” feature instead to create subtitles. For longer videos, though, you should create your subtitles in professional video editing software such as Premiere Pro or DaVinci Resolve.


Hey guys! It’s me, Marcel, aka Maschi. On MaschiTuts, it’s all about tutorials! No matter the topic of the article, the goal always remains the same: Providing you guys with the most in-depth and helpful tutorials!

