

Not all is lost when you delete a WP post. There are a few ways in WordPress to recover a deleted post.
The same works for pages, too.
You can recover a deleted post within 30-days by restoring it from the trash. After that, the data needs to be retrieved from the WP database. Restores from trash will include a revision history. An alternative for published web pages is to capture the data from a search engine’s cache version.
Get the scoop on recovering (and restoring) deleted WordPress posts
Restore from the trash folder
Any posts or pages deleted from WordPress are sent to a folder named “trash”.
Files stay there for 30-days before being permanently deleted.
That is unless you go to your trash folder and delete the item permanently.
Log into your WP admin, go to the home page admin dashboard and select the “all posts” or “all pages” option depending on whether you want to recover a deleted post or a deleted page.
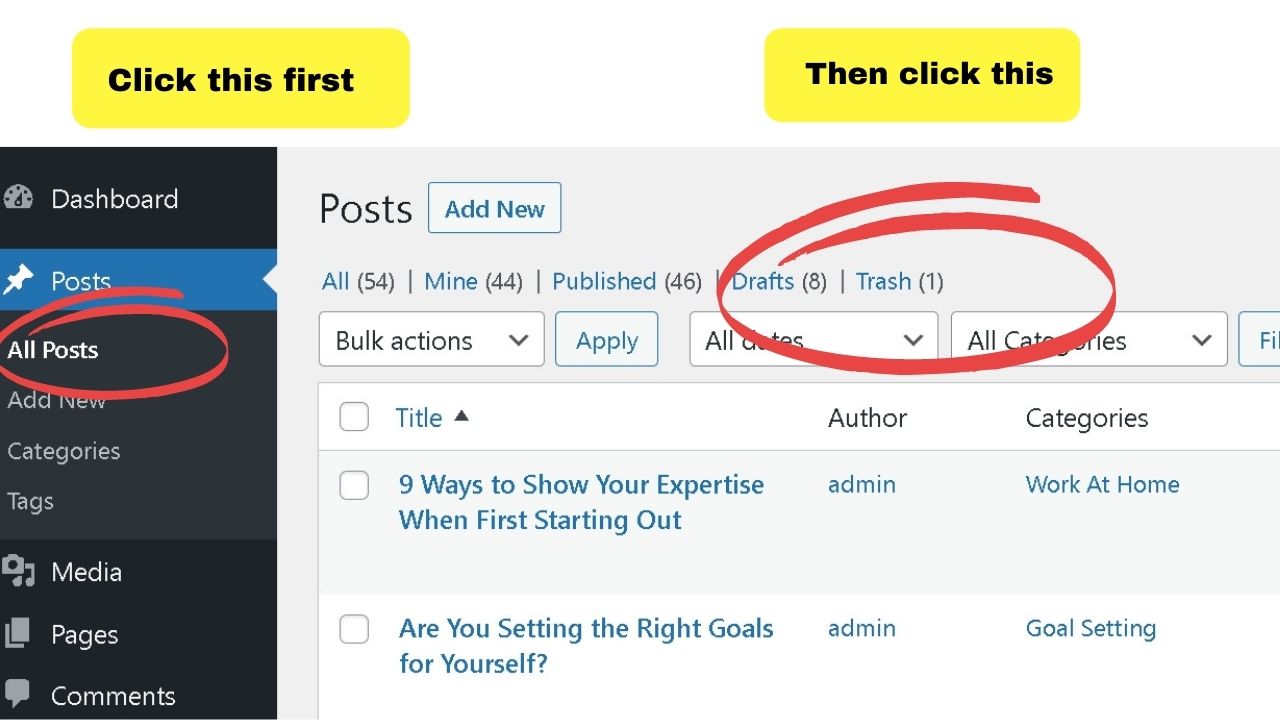

Click on the trash label, hover over the post or page you want to restore, and below each, you can select the appropriate options.
There are only two. Restore or permanently delete.
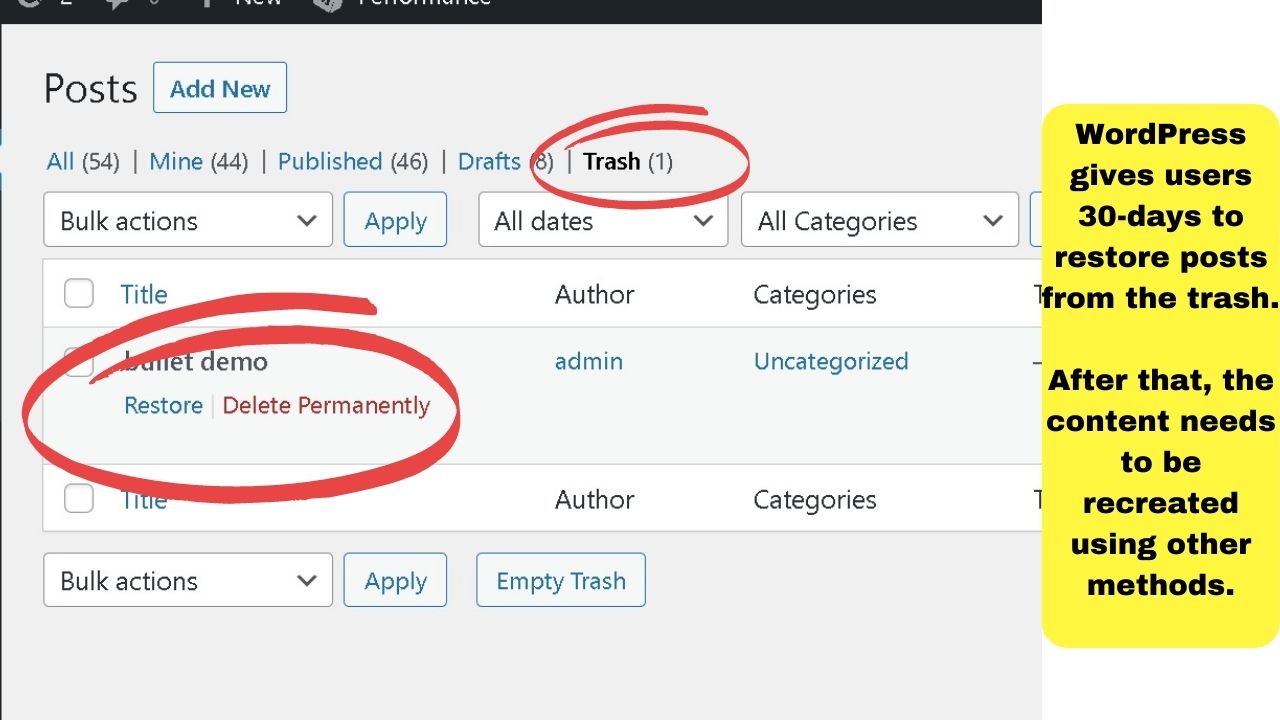

The restore from trash option is available for 30-days in WordPress.
After that, it automatically permanently deletes posts and pages from the trash folder
At that point, your recovery options are somewhat restricted, depending on your access and knowledge of working with the WordPress database. (More details on that in a bit)
For posts and pages that were published, you may not need to delve into the database. Check for cache versions first. (Covered later, too)
Restore previous versions of deleted posts
Provided you are within the 30-day window to restore a deleted post from the trash folder, you have an extra option to restore revisions of a restored post or page.
To find that, click on your restored post, then on the right-side menu, look for the “Revisions” label and click the “browse” link.


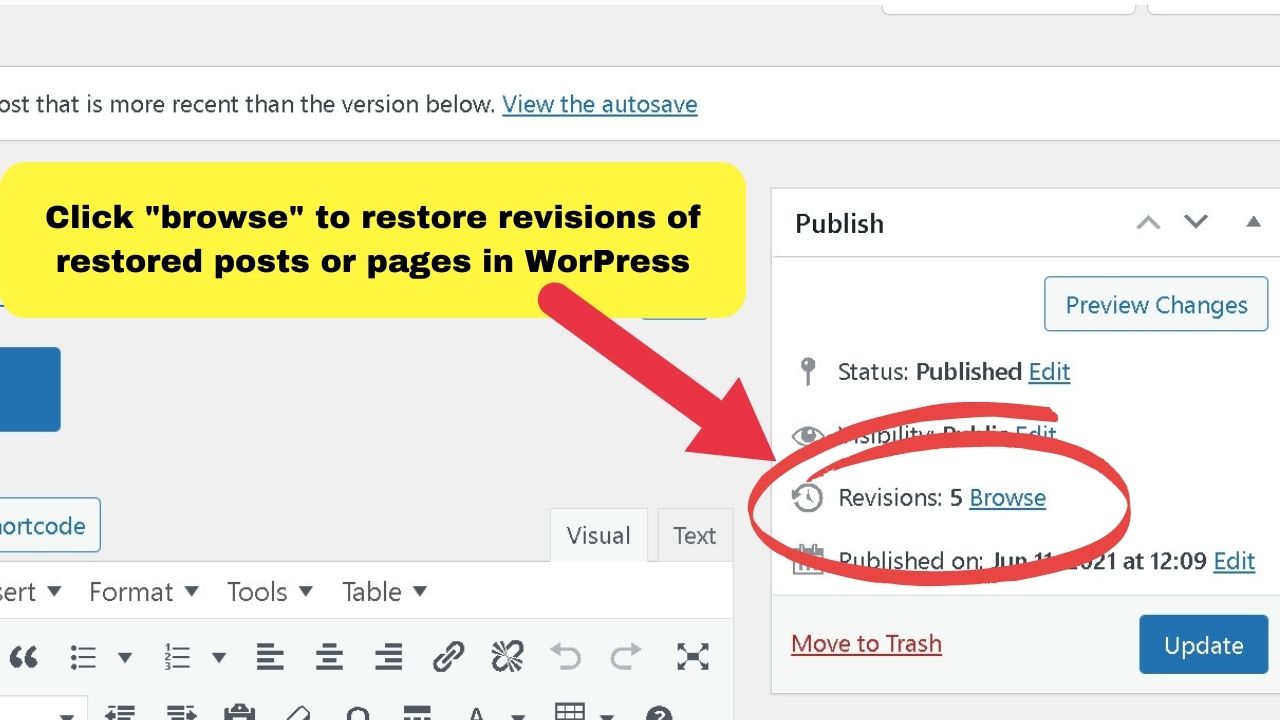

This will show you each autosave that WordPress has stored after each change has been made to the post.

If you find your WordPress revisions are missing, some troubleshooting will be required.
It is usually coding conflicts, or the feature is disabled by your web hosting provider to save on resources.
The number of revisions saved may also be limited. These are controlled in your WP-config.php file in your WP Cpanel.
If you have a multi-user site, admin and editors can view who made changes, and the date and time.
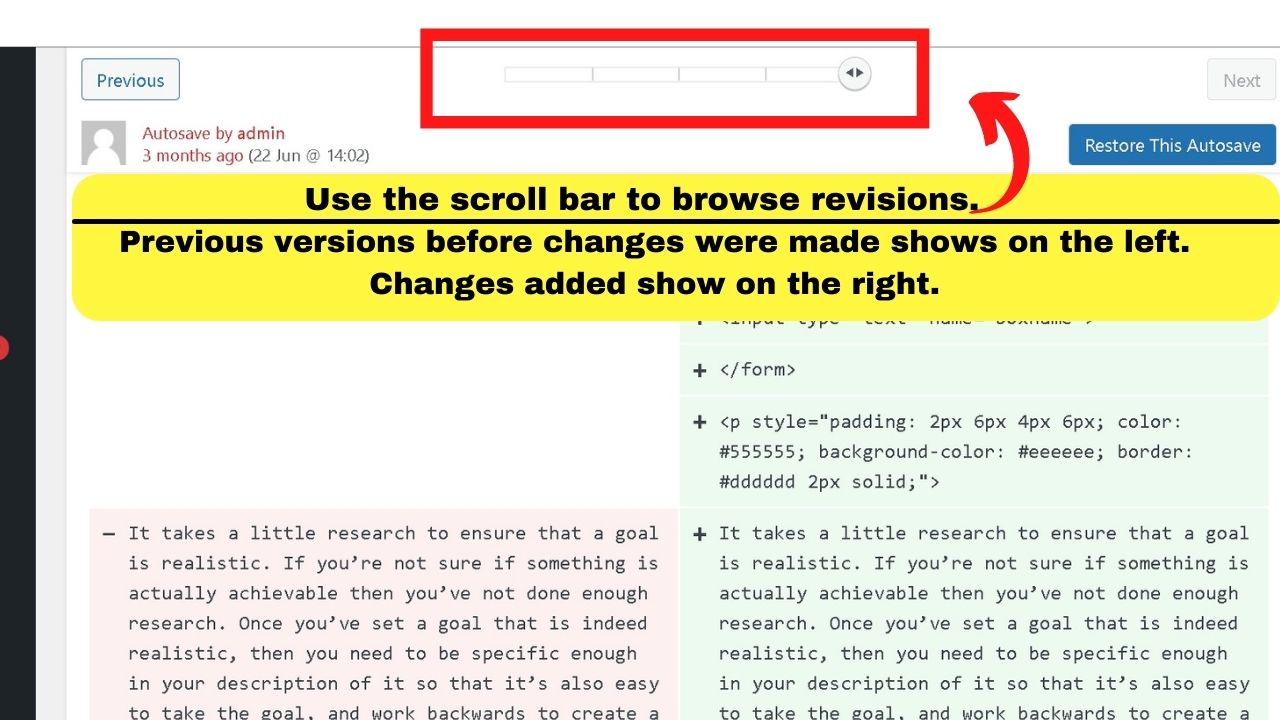
Otherwise, it will show the changes in green on the right-side column, and the previous version before changes were made on the left column.
Where this is handy is when an author or editor feels they have made such a mess of the content that they would be best deleting and starting over.
An admin can come in, restore the post, browse through the revisions and select the best draft suitable for rescuing instead of starting over.
Cache versions
Cache versions of pages can be a saving grace for pages previously published, then deleted.
The only way for them to work is for an indexing service to have included your previously published page.
The two largest search engines in the world usually do this. Your site needs to be indexable, which in the case of our test site, it isn’t. So, we’ll use an example of a published page to show the page cache option.
The search string is the same for Bing search and Google search.
Site, semi-colon, siteurl keyword phrase.
For this example, the string used is
site:maschituts.com wordpress database
You do not need to know the exact name of a post or page to find it. That helps, but search engines use keywords so they are good at working out what you’re trying to find.
Like, when you think “I had something about WP databases, but I can’t find it”.
Run a site search.
If it is deleted, but still indexed, clicking through to your site will show a 404 error.
Go back to the search engine, and this time, click on the cache version.
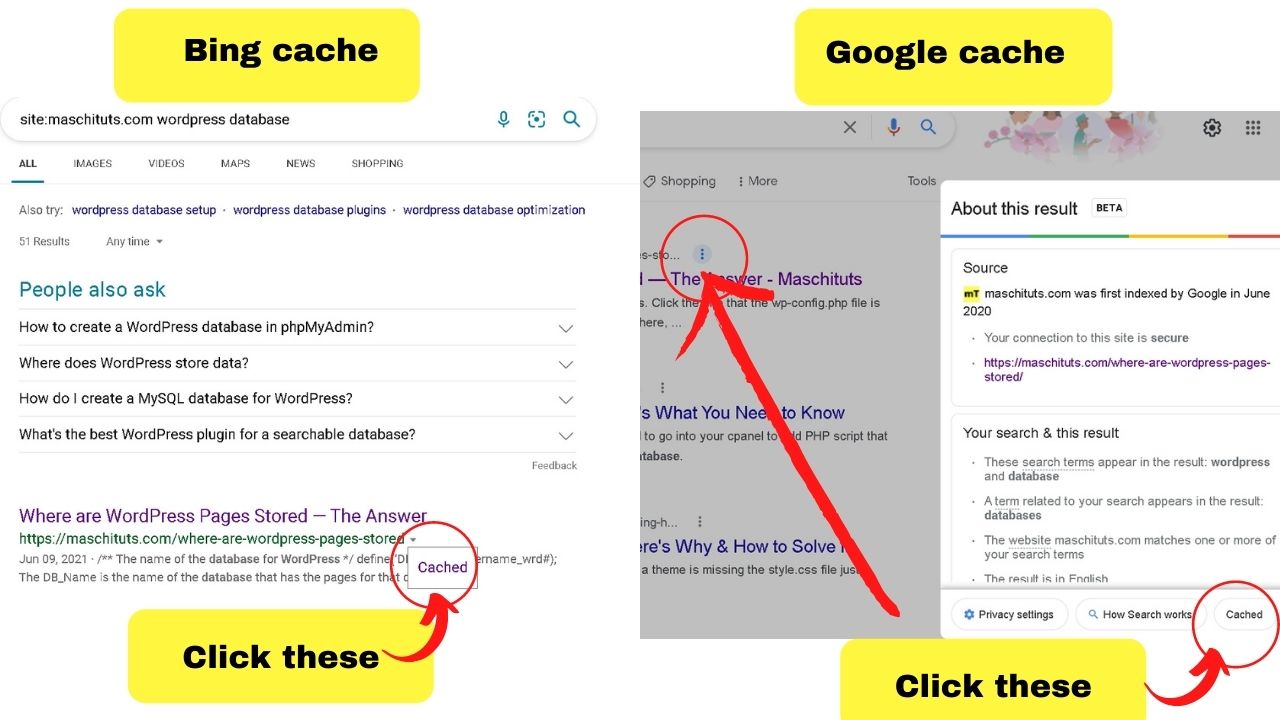

On Google search (currently, because they are always changing search up) the cache version is accessed by clicking the three dots beside the page title, then clicking the bottom right tab labeled “cached”.
On Bing search, the page title is shown in blue text, and the web address is in green text. Beside the green website URL is a dropdown arrow. Click on that and the “cache” tab pops up.
Clicking that loads the page.
Now, page caches in Google search are only raw HTML. They do not load images, and neither Google nor Bing can load dynamic content from a page cache.
That means when the page loads, it loads the version of the page that was stored at the time the page was saved.
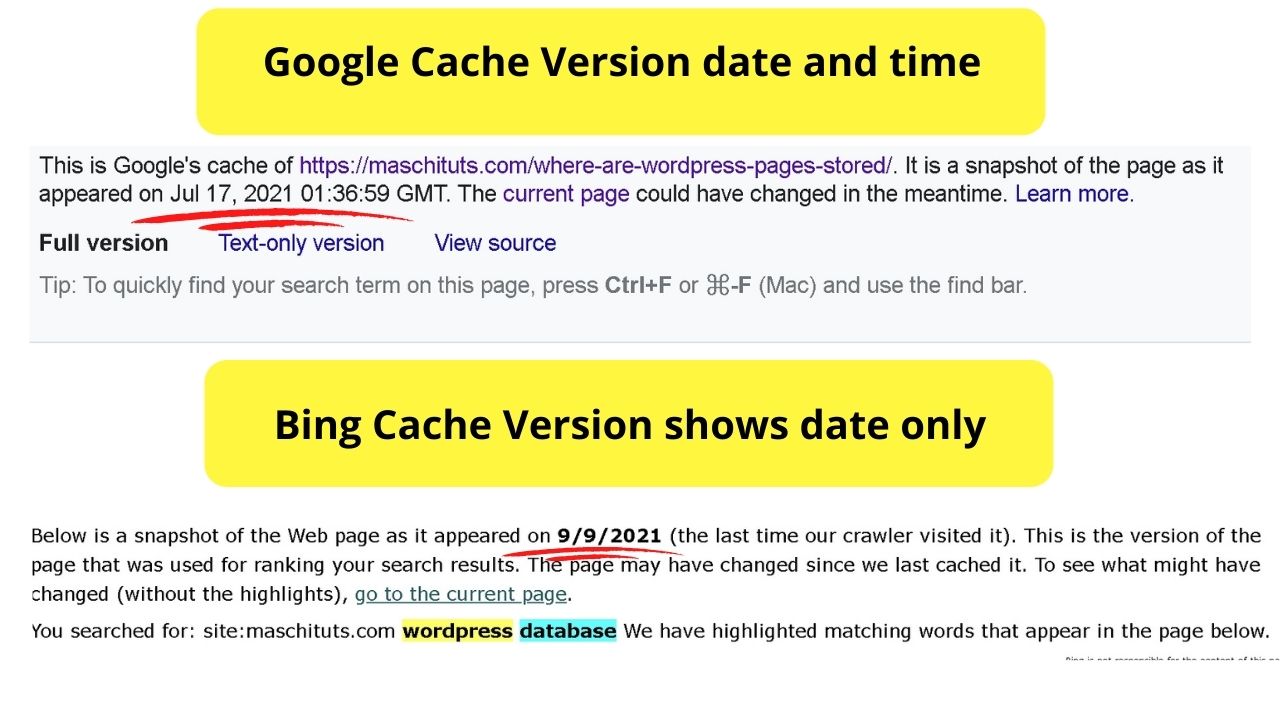
The top of each cache page tells you the date the page was last saved.
Bots crawl sites at different frequencies, so what you see on the Google cache can be different from what the Bing cache has stored.
 For pages indexed and cached years ago, changes (including blog comments) likely will not be accessible.
Currently, Bing cache versions load images. Google search does not.
Google have opted to save on resources by inserting databoxes, which are just blank grey blocks where images would be inserted.
Even the raw HTML does not include the web URL for the image so you will not be able to retrieve those with Google cache.
Another source to check for a page cache is archive.org, but do not rely on it.
It does have a bot like the search engines, scours the web, and saves snapshots of live pages.
It is only applicable to established sites though. Unless you add it manually.
To save your web pages on The Internet Archive Wayback Machine, you need to go to archive.org/web and save the website page URL.
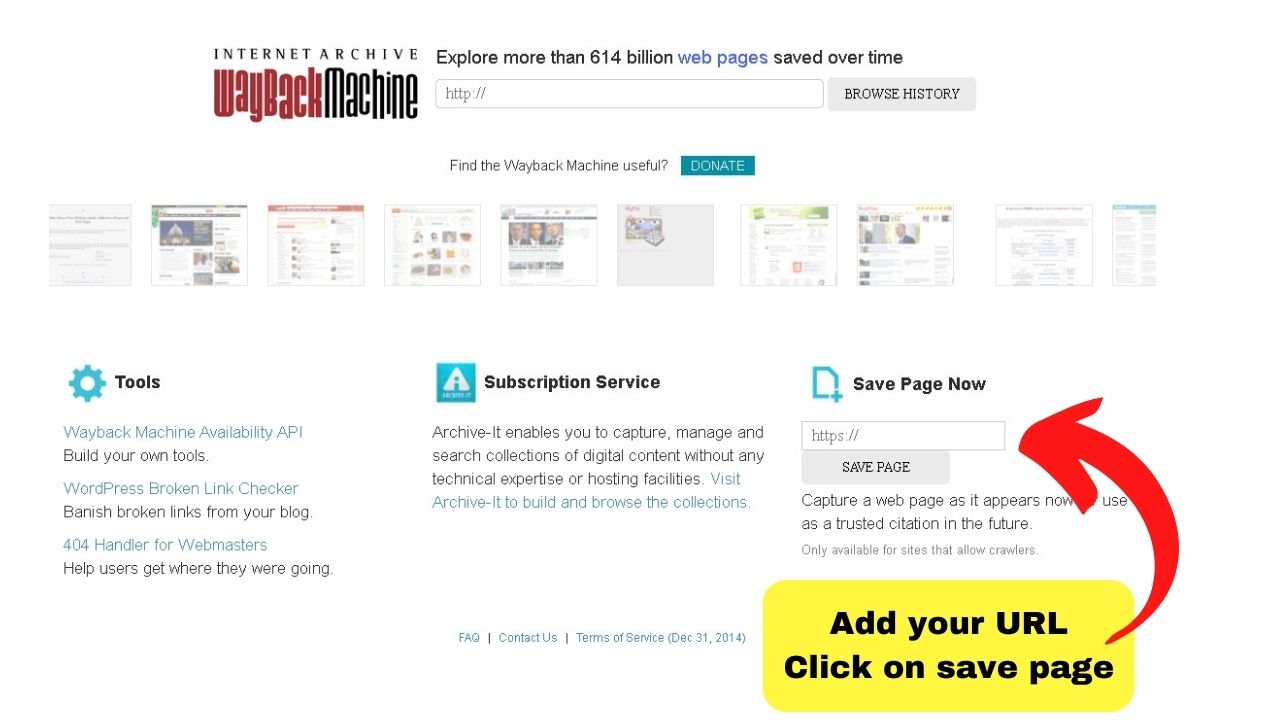

Only pages can be saved (not whole websites) and it only works if your robots.txt file permits access to their web crawler.
If you’re building a private site that disallows user agents to crawl your website, but would still like an archive version, you need to permit the “ia_archiver” user agent in the robots.txt file.
Yoursite.com/robots.txt. If you do not have one, you should!
Now, just because you can let the Internet Archive crawl your site, it does not mean they will! That’s why this cannot be relied on to recover deleted posts.
Restore from your WP database
Technically, WordPress posts are not permanently deleted until they are deleted from the database.
You cannot restore your content from the database directly, but you can pull all the information you need to recreate the post or page that was deleted.
Log into your web host Cpanel (yoursite.com:2083) and select the PHPMyAdmin option.
Pull up the database for your website, then select the WP_Posts option.
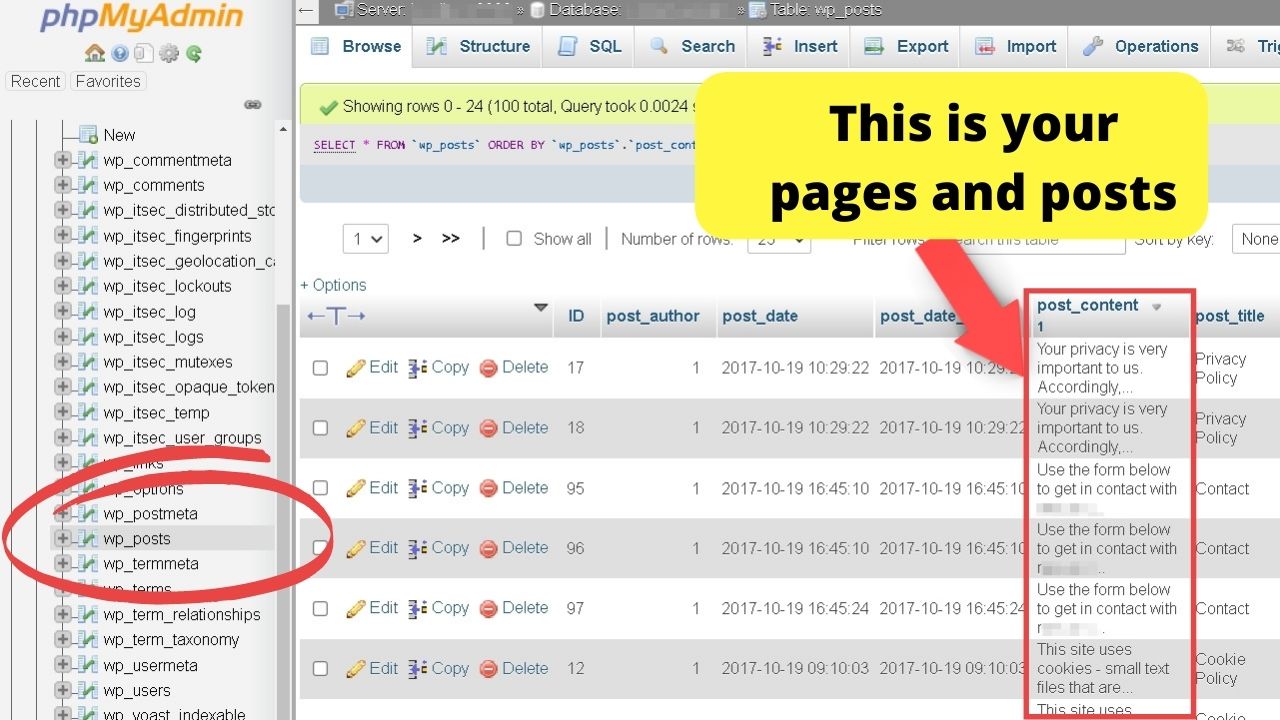
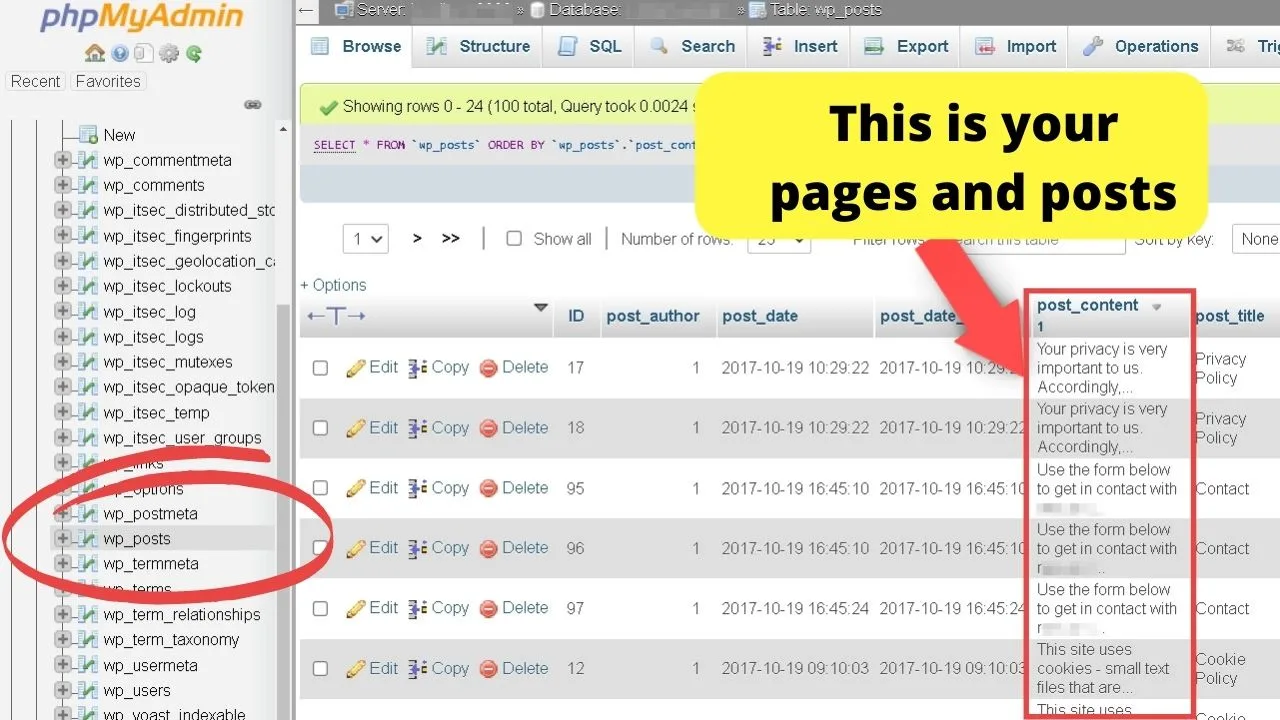
If you’ve ever asked the question about where are WordPress pages stored, it is in there, right on your database.
Now, for long-gone content, the posts may be deleted from the database.
To recover those, you will need to restore a previous version of your WP backups.
Some web hosts provide this as part of the package, others leave it to site owners to handle manually, or use plugins to automate database backups.


Hey guys! It’s me, Marcel, aka Maschi. On MaschiTuts, it’s all about tutorials! No matter the topic of the article, the goal always remains the same: Providing you guys with the most in-depth and helpful tutorials!

