

Tables are the perfect tool for organizing complicated information into an easily digestible format. If you are looking to create a table of your own but you aren’t sure where to start, look no further!
Here’s a guide to creating a table in Adobe Illustrator in just six steps.
How to Create a Table in Illustrator
How to Edit a Table in Illustrator
Frequently Asked Questions About Tables In Illustrator
How To Create A Table In Illustrator
To create a table in Illustrator, press “M” on your keyboard to select the Rectangle tool. Next, click on your artboard to open the Rectangle window. Now, enter your dimensions and click “OK”. Go to “Object,” then “Path,” and click on “Split Into Grid.” Enter your row and column settings and finally click on “OK.”
To create a table in Illustrator, follow these steps:
Step 1: Open your Illustrator file.

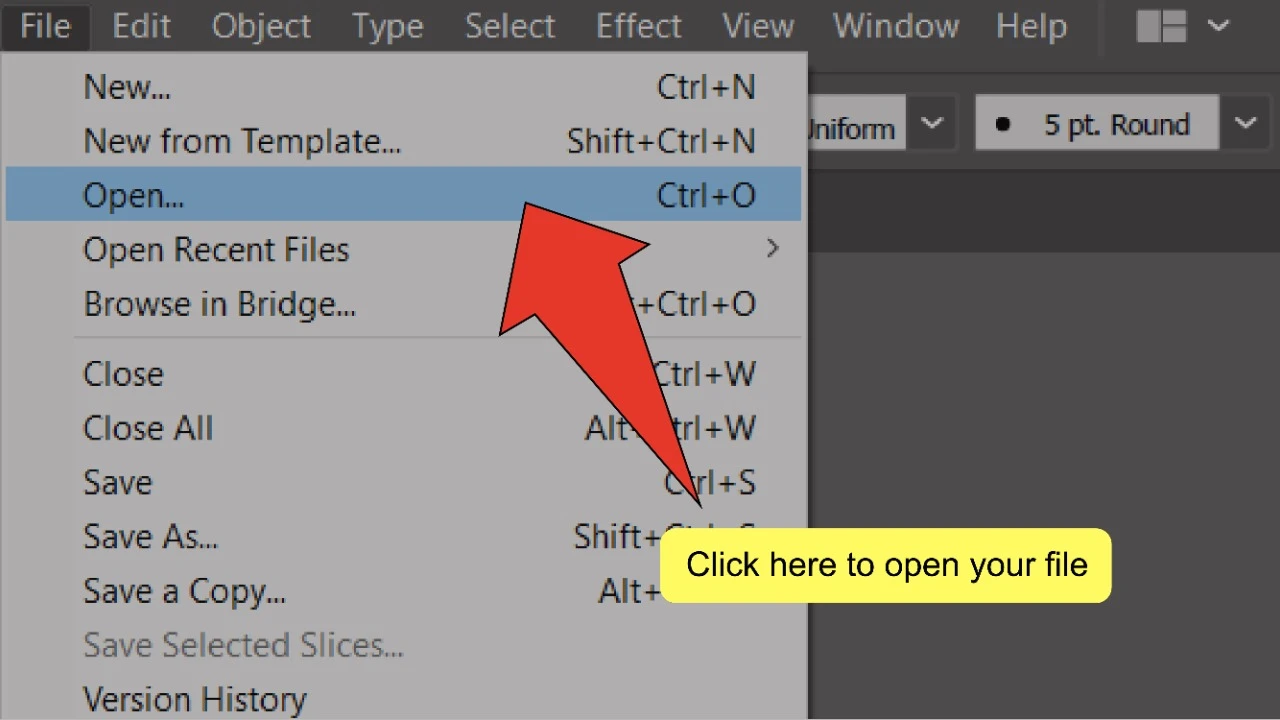 To start, open your document by double-clicking on its corresponding Illustrator file, or if Illustrator is already open, you can go to “File” on the top menu, and then “Open” and choose the file you want to open. To speed things up, you can also use the keyboard shortcut “COMMAND+O” (MAC) or “Ctrl+O” (Windows).
Step 2: Find and select the Rectangle tool.

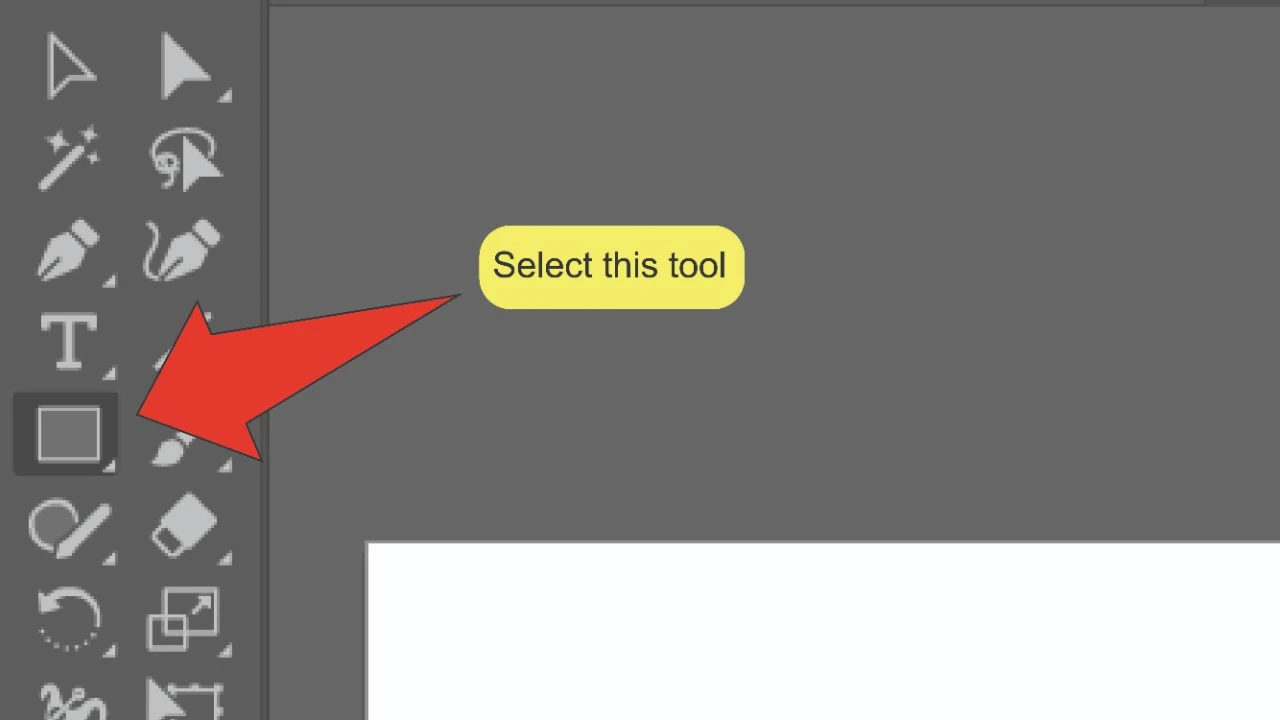
Look for and equip the Rectangle tool on the toolbar on the left side of your screen. Alternatively, you can use the keyboard shortcut “M” to quick-select the tool.
Step 3: Place your rectangle

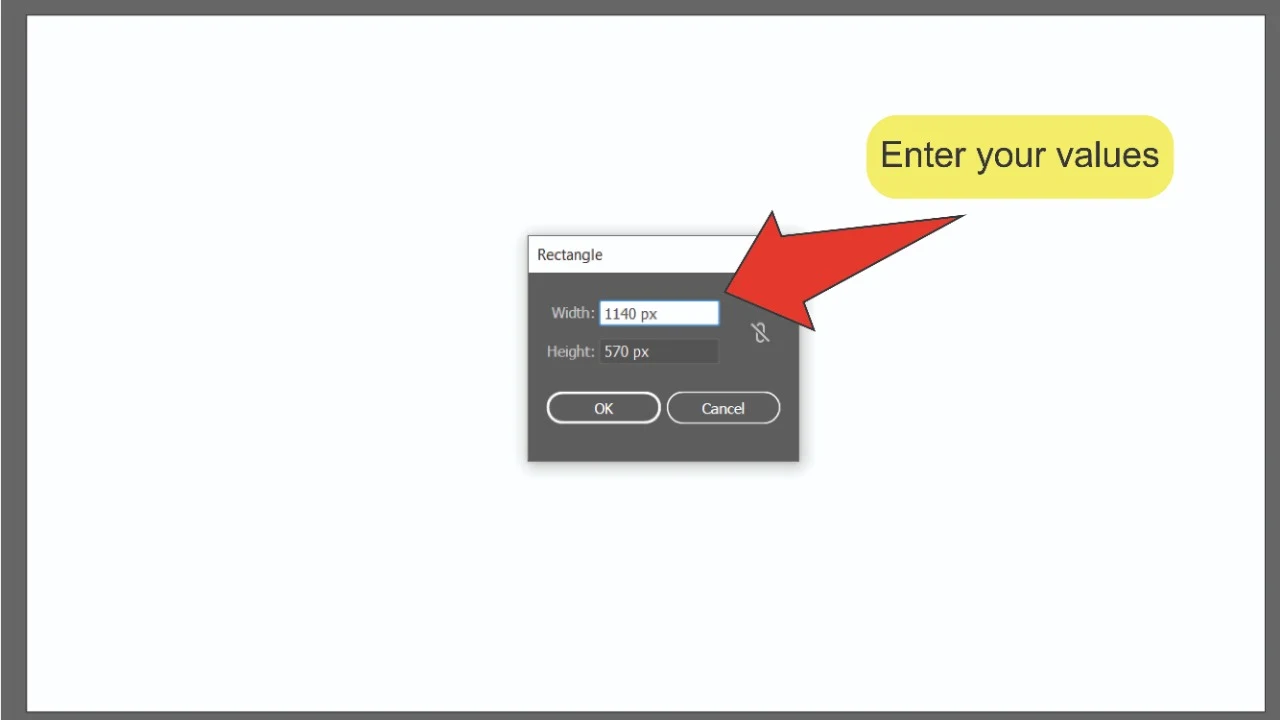
Click on your artboard and enter the height and width of your table into the window (labeled “Rectangle”) that pops up, then click “OK”. A rectangle fitting your specifications will appear on your artboard. You can also use this tool to click and drag a rectangle matching the size you want on your artboard.
Step 4: Open the Split Into Grid window
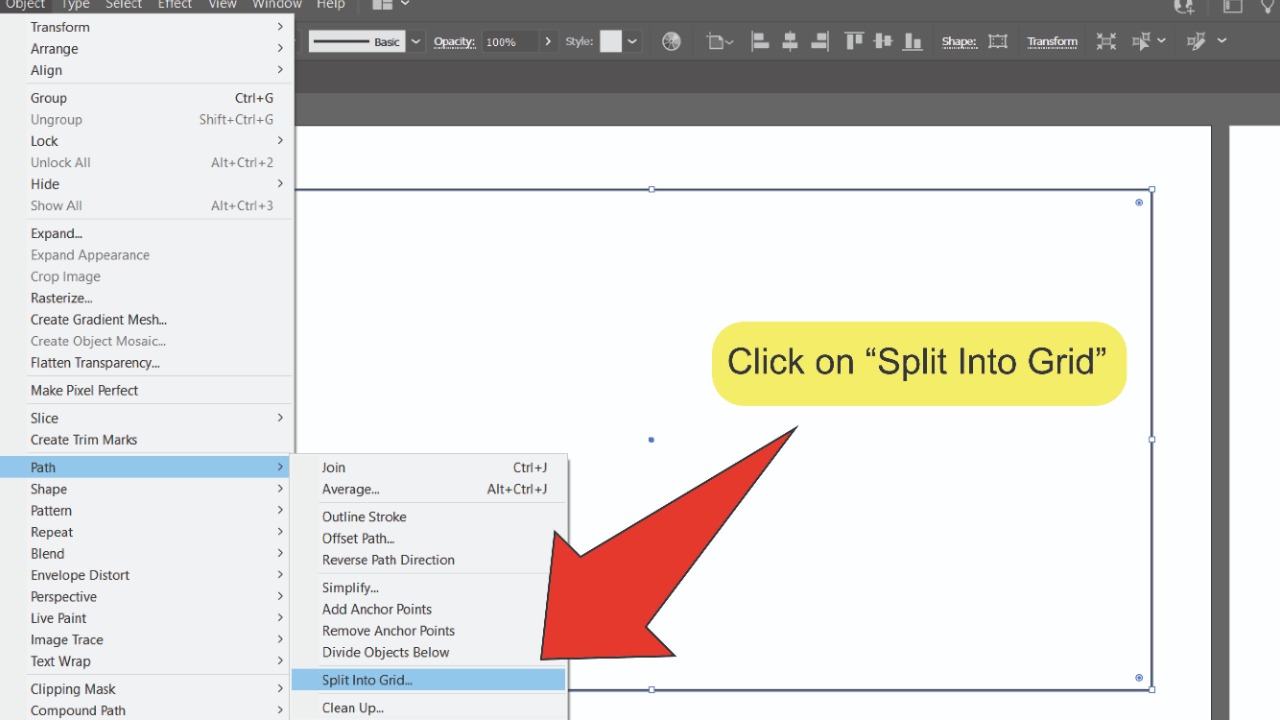

On the bar at the top of your screen, go to “Object”, followed by “Path”, then click on “Split Into Grid…”.
Step 5: Set up your table
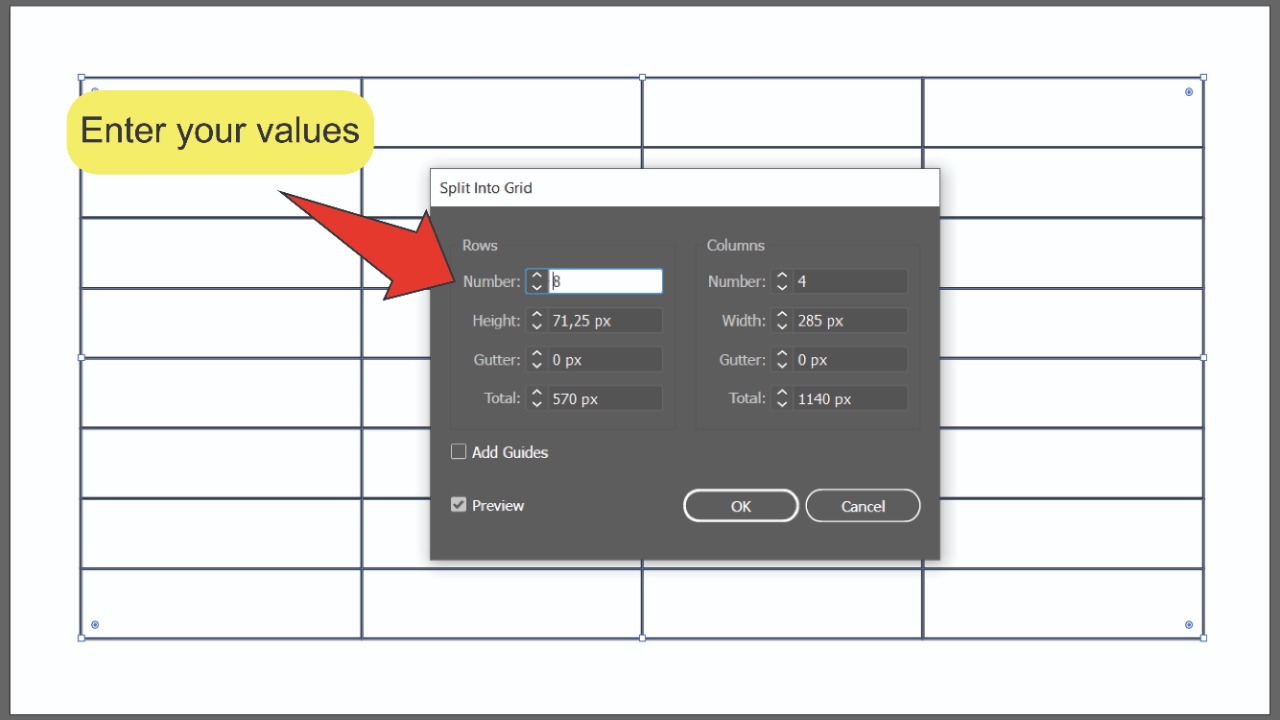

Make sure you have “Preview” selected on the Split Into Grid window so you can see the effect of your adjustments as you make them. Next, enter the specifications of your grid. You can adjust the amount of rows and columns in your grid, their height and width, and the size of the gutter between them.
Step 6: Finalize your changes

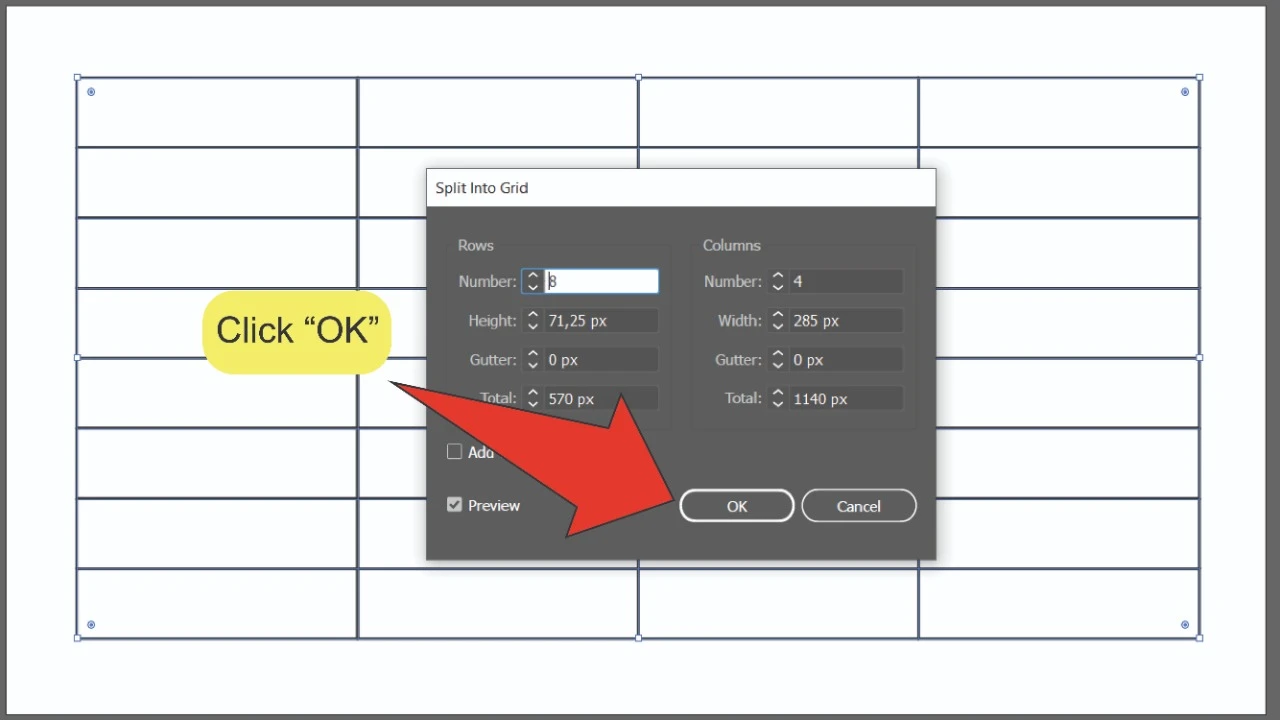
Once all your specifications have been entered, click the “OK” button at the bottom of the Split Into Grid window.
How to Edit a Table in Illustrator
Next, we’ll cover some edits you can make to customize your tables in Illustrator, including adding color to the cells and adjusting the line thickness.
Adding Color to the Cells in a Table in Illustrator

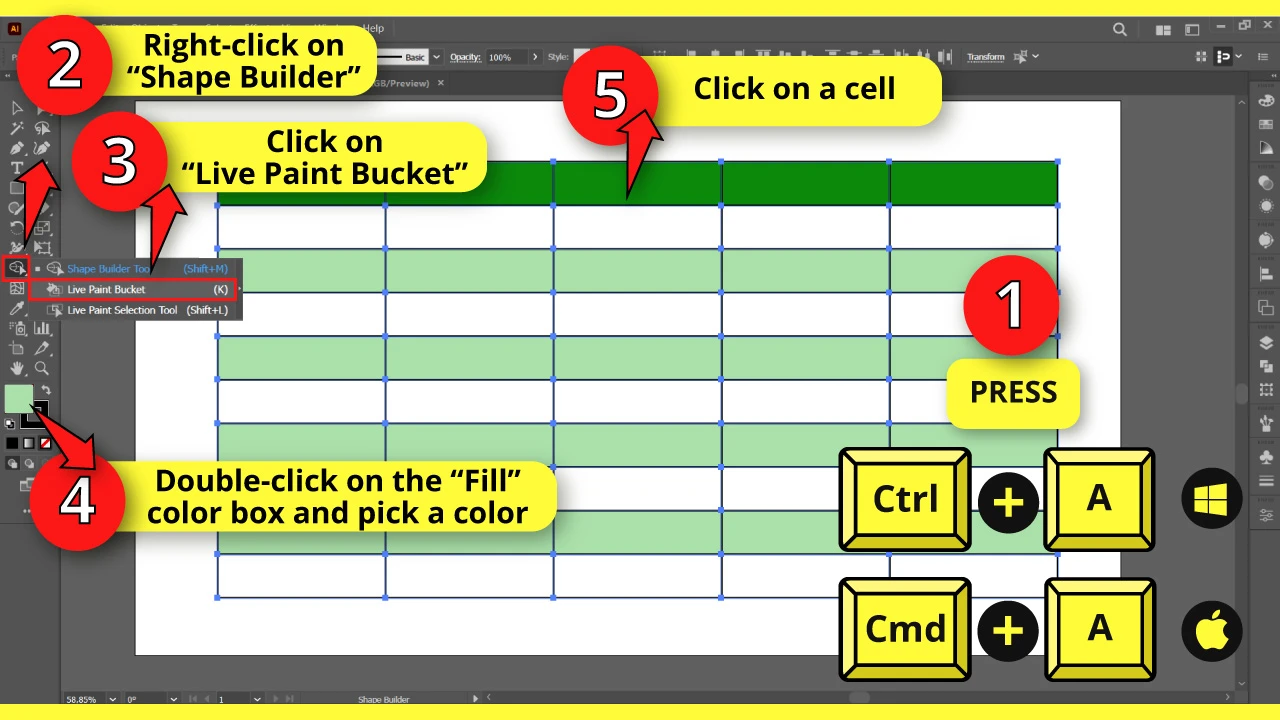
To edit the table colors, first select it using the “Selection” (V) tool located on the left side toolbar or hit the “Ctrl + A” or “Cmd + A” command to select all.
We can use different methods to color the cells, but this time, we’ll use the Live Paint Bucket tool in Illustrator.
To do so, right-click on the “Shape Builder” (Shift + M) tool, also located on the left side toolbar.
Once the hidden tools menu unfolds, click on the “Live Paint Bucket” (K) tool.
Alternatively, press the “K” key on your keyboard for the shortcut.
Next, double-click on the “Fill” color box located on the left side toolbar and choose your desired color.
Now, click on the table cells to paint them.
If you want to paint several cells simultaneously, click and hold on a cell and then drag the mouse to paint multiple cells.
Adjusting the Line Thickness in a Table in Illustrator

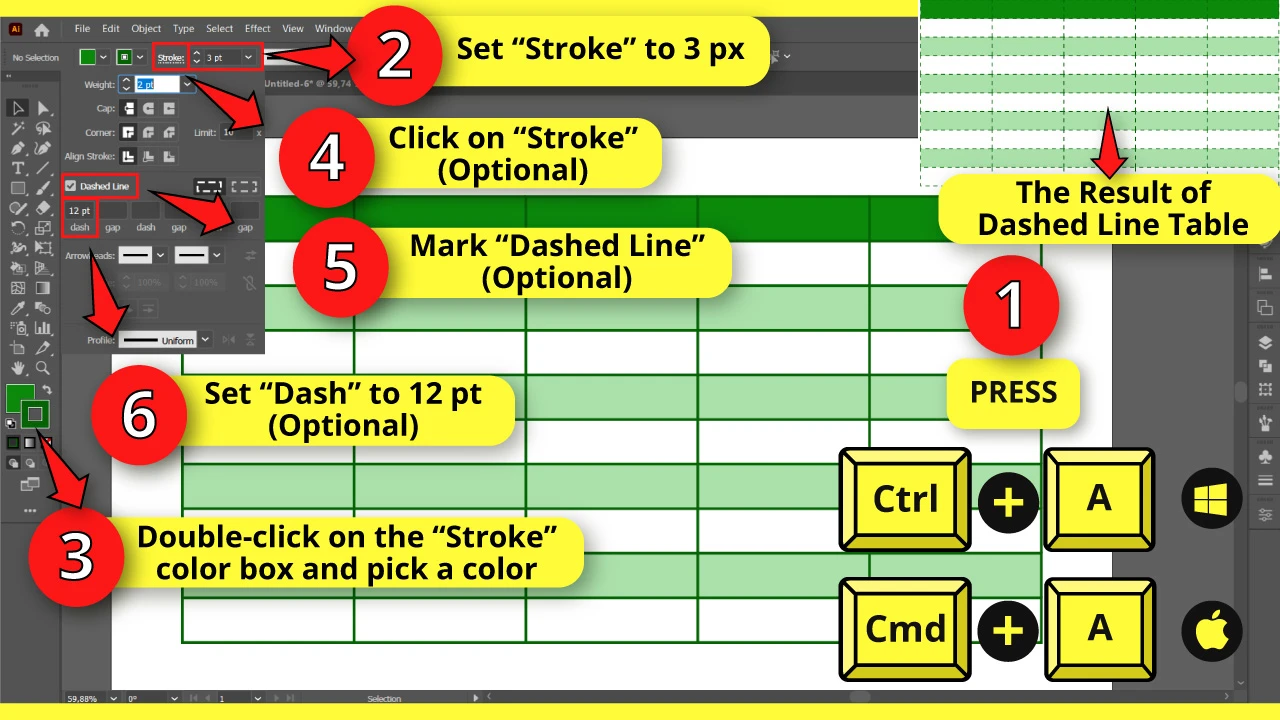
To adjust the line thickness, first select the table using the “Selection” (V) tool or by pressing the “Ctrl + A” or “Cmd + A” command for Windows or Mac respectively.
Then adjust the value in the “Stroke” panel located on the toolbar at the top of the screen. For example, I’ll go with 3px, but you can enter any value you prefer.
Unfortunately, Illustrator does not have the option to choose a single line to change its thickness. You have to change all of them.
If you want to change the line’s color, make sure that the table is still selected and then double-click on the “Stroke” color box located on the left-side toolbar and select a color.
If you also want to create dashed or dotted lines in Illustrator, click on the “Stroke” panel, and on the pop-up window, select the “Dashed Line” checkbox.
Next, in the first “Dash” field, enter the dash length value. I’ll go with 12 px, but you can enter the value that suits you better.
Frequently Asked Questions About Tables In Illustrator
Can I import an existing table to Adobe Illustrator?
Yes! First, open your table in Adobe Indesign or Microsoft Word. Next, select the entire table and press “COMMAND+C” (MAC) or “Ctrl+C” (Windows) to copy it. Finally, in your Illustrator file, click on your artboard and type “COMMAND+V” (MAC) or “Ctrl+V” (Windows) to paste your table.
How do I add more rows or columns to an existing table in Adobe Illustrator?
To add more rows or columns to your table, press “V” on your keyboard to equip the selection tool, then click and drag your cursor over all the cells in the last column or row of your table. Next, copy and paste your selection or press and hold “Alt+shift” while dragging it into position.
How do I customize my table in Illustrator once I’ve made it?
Once your table is complete, you can edit the individual cells as you would a regular vector shape in Illustrator. To add type, press “T” to equip the Type tool and draw a textbox over your desired cell or select the cell using the Selection tool and use the Type tool to convert the cell into a text box.


Hey guys! It’s me, Marcel, aka Maschi. On MaschiTuts, it’s all about tutorials! No matter the topic of the article, the goal always remains the same: Providing you guys with the most in-depth and helpful tutorials!

