
Facebook gets it. Businesses are busy. Social media never sleeps. To reach the widest audience, you need to be posting at various times.
The only way to do that consistently (and keep your sanity) is to schedule your Facebook posts.
You do need to have a business page set up. It is logical. If you do not have a business page, (or be assigned as an admin of one) you probably do not need a post scheduler.
You need a personal profile to create a business page, but you cannot schedule posts to publish to your personal profile. Your profile is really just to prove you are real. Not a bot.
With a business page set up, Facebook marketing can be done so much more efficiently when you schedule your posts in advance.
How to schedule a post on Facebook with Meta Business Suite Desktop
- Go to business.facebook.com
- Select the page you want to manage
- Select planner
This gives you a calendar view to schedule posts. Alternatively, create a post the usual way, then click the arrow beside the publish button and select “schedule post”. You can also use the Meta Business Suite app.
Above is the narrowed-down process to schedule posts on Facebook. In between, there are buttons to press, and different pop-out windows with quite a few text input fields.
To leave you in no doubt about how to schedule posts on Facebook and get the most of its time-saving benefits, the tutorial to follow guides you through the process (visually with screenshots) through each step.
How to get started with scheduling posts on Facebook
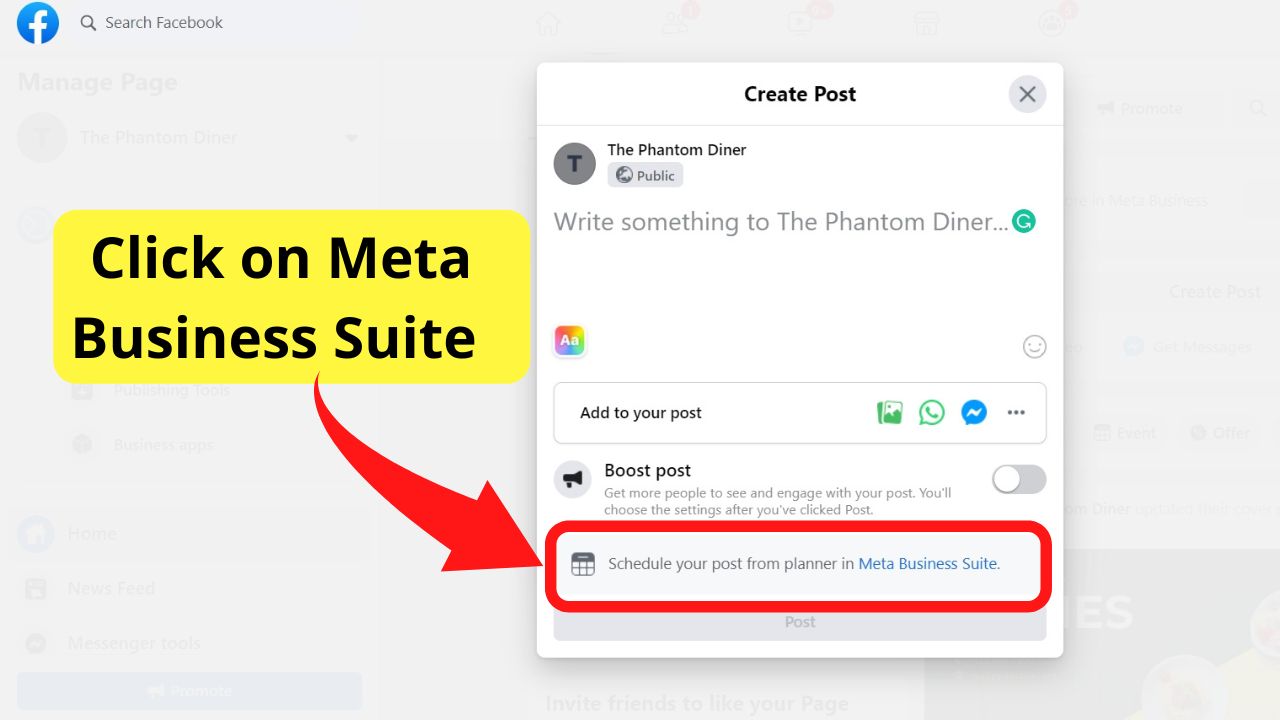
When you click on “create a post” on Facebook, you should be seeing a message just above the “post” button giving you the option to “Schedule your post from the planner in Meta Business Suite”.
Click to open “Meta Business Suite”
This takes you to the business.facebook.com URL.
If you only see the post button with nothing hinting towards a scheduling option, it is probably because you are posting on your personal profile.
Only Facebook pages can use post scheduling. It is a function to help businesses. Personal profiles have no need for scheduling.
To find your Facebook page, go to your personal profile, then on the left sidebar, click on “pages”.
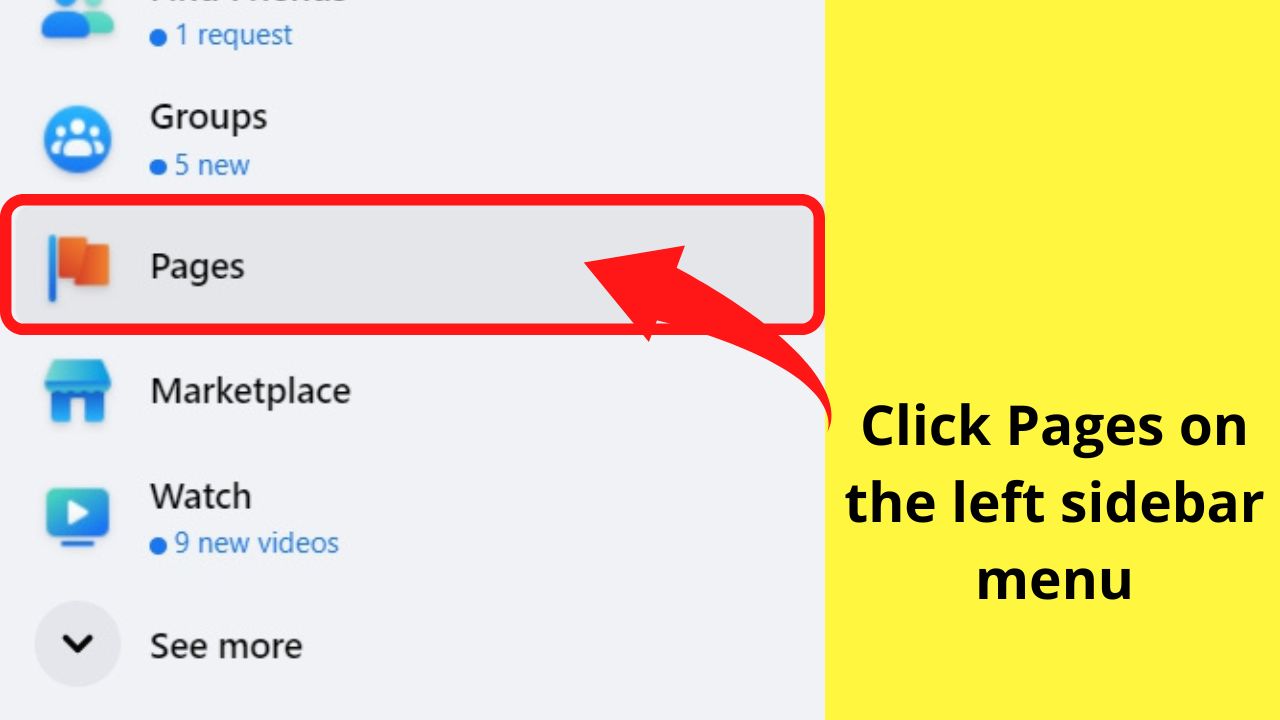
If you have (or manage) more than one page, select the page you want to schedule posts to post to.
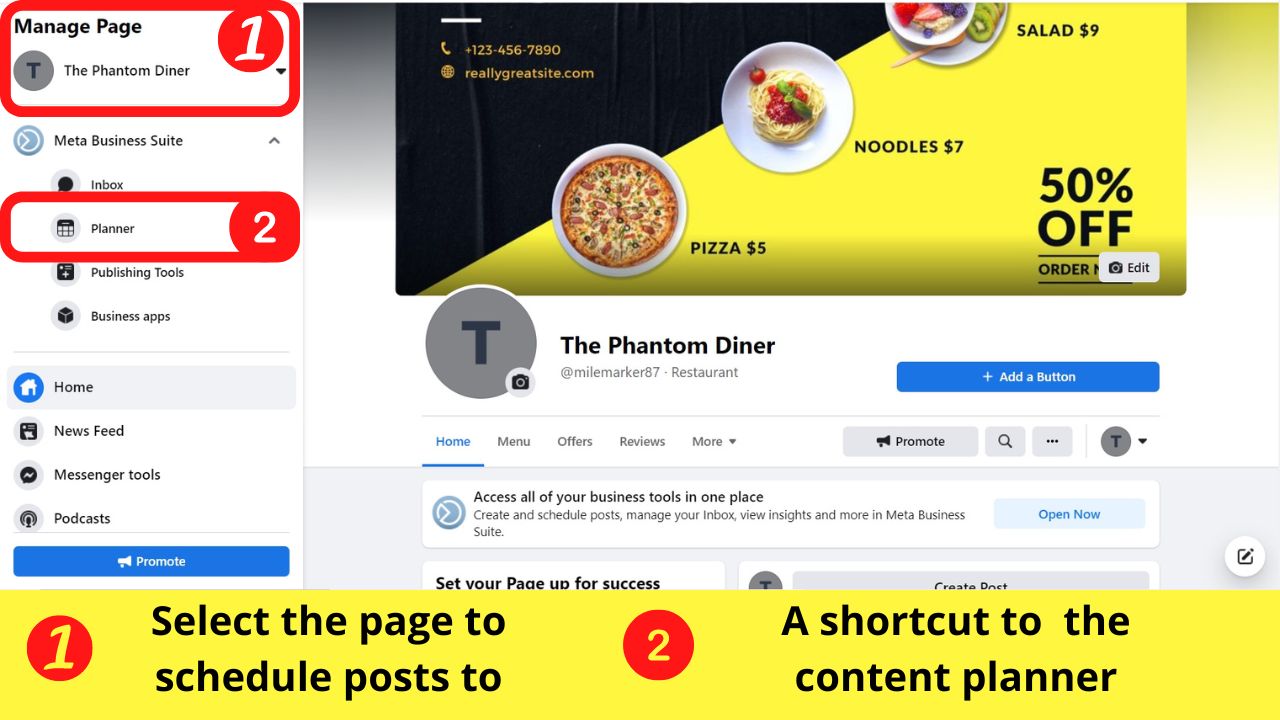
On the left side menu, click on “Planner”.
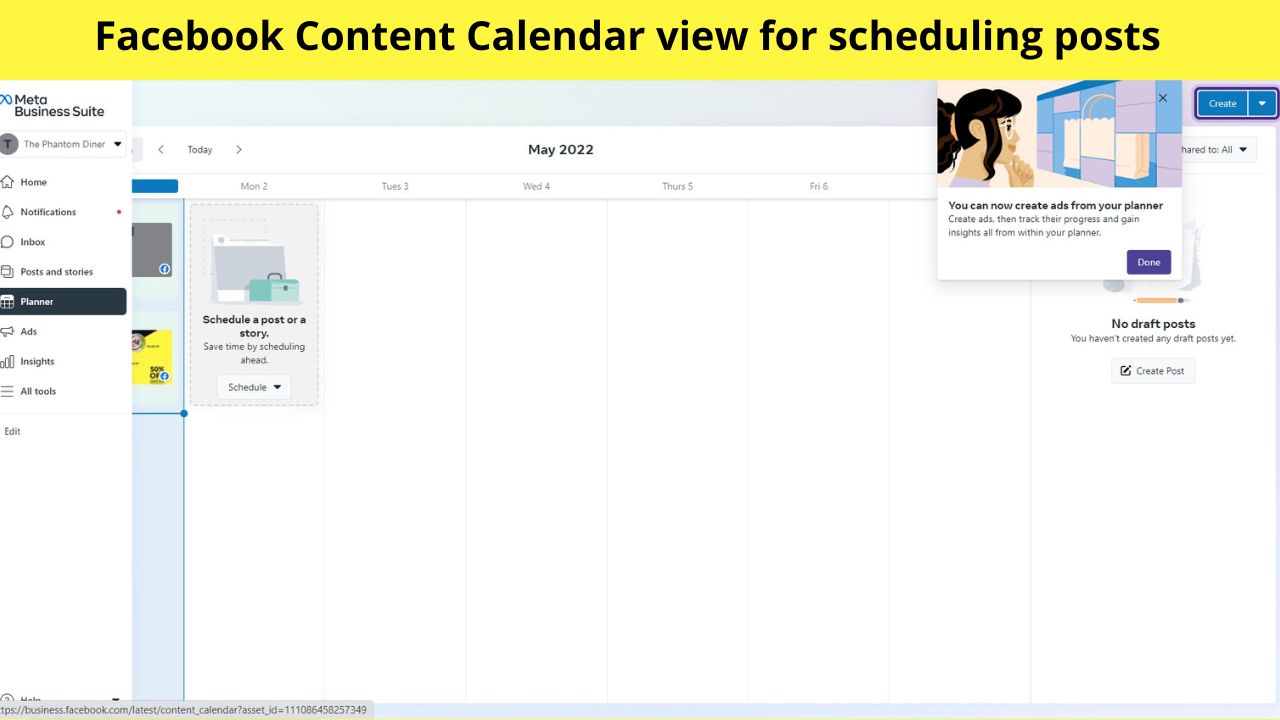
You can set the view to week or month by clicking the relevant tab on the top left.
You can use this to schedule Facebook posts, stories, and Facebook Ads if you like.
In the calendar view, for the current day, click on the “create” button. A new menu opens to select from
- Create Post
- Create Story
- Create Ad

You can start on today’s calendar slot, or select “Schedule Post” for any other future date. There is still the option later to change the date before you schedule the post to go live.
To schedule a Facebook post, click the “Create post” button.
The post editor displays it in a pop-out window.
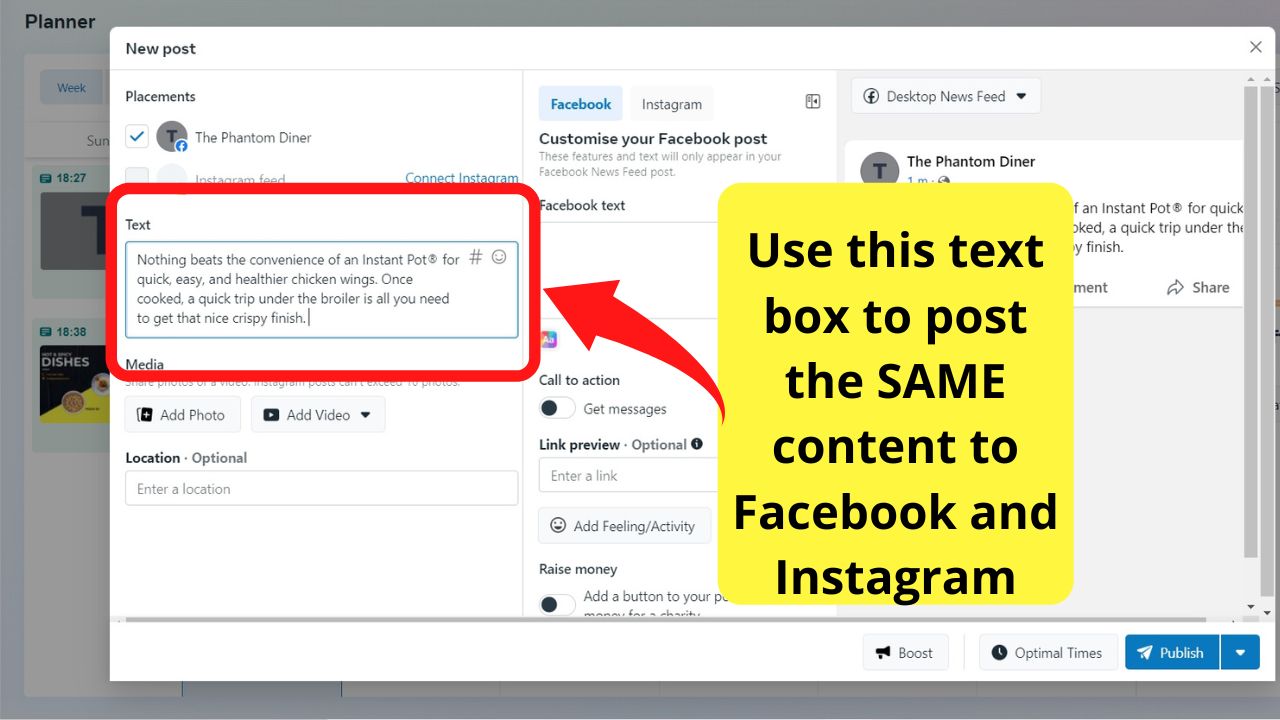
Type (or copy and paste) your text in the box on the center column if you are only posting to Facebook.
You can use the Meta Business Suite Planner to create variations to be posted to Instagram and Facebook.
In the first column labeled “placements”, use that if you want to schedule the same content to post to Facebook and Instagram.
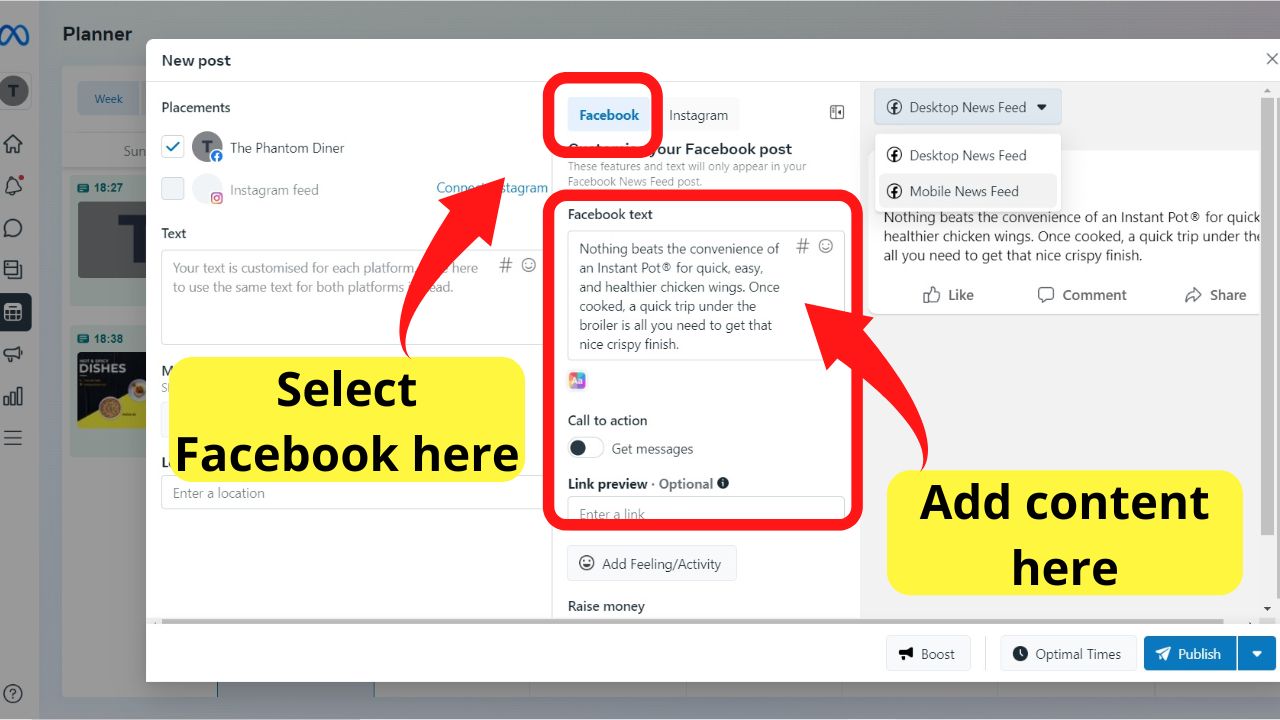
The center column has two tabs.
One for Facebook, the other for Instagram.
The Instagram tab will only become active once you connect your Instagram account.
If you have done that, make sure you have selected the “Facebook” tab to schedule a post to publish on your Facebook page.
Otherwise, you will be scheduling the content to post on Instagram instead.
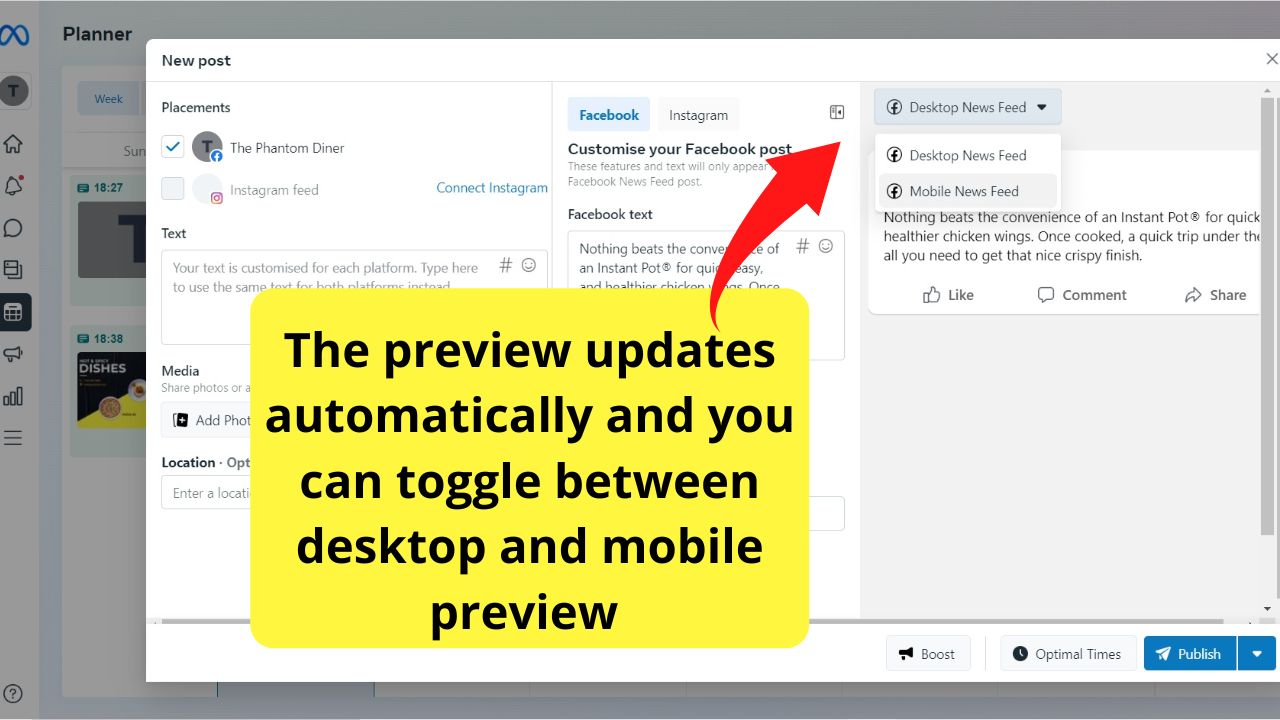
On the right is the preview pane
You can toggle the preview between “Desktop News Feed” and “Mobile News Feed” to see how your post will look once it goes live.
The preview updates in real-time so you can continue editing your post with hashtags, and add your images.
To add hashtags to your post, click on the # (hashtag) icon in the Facebook editor
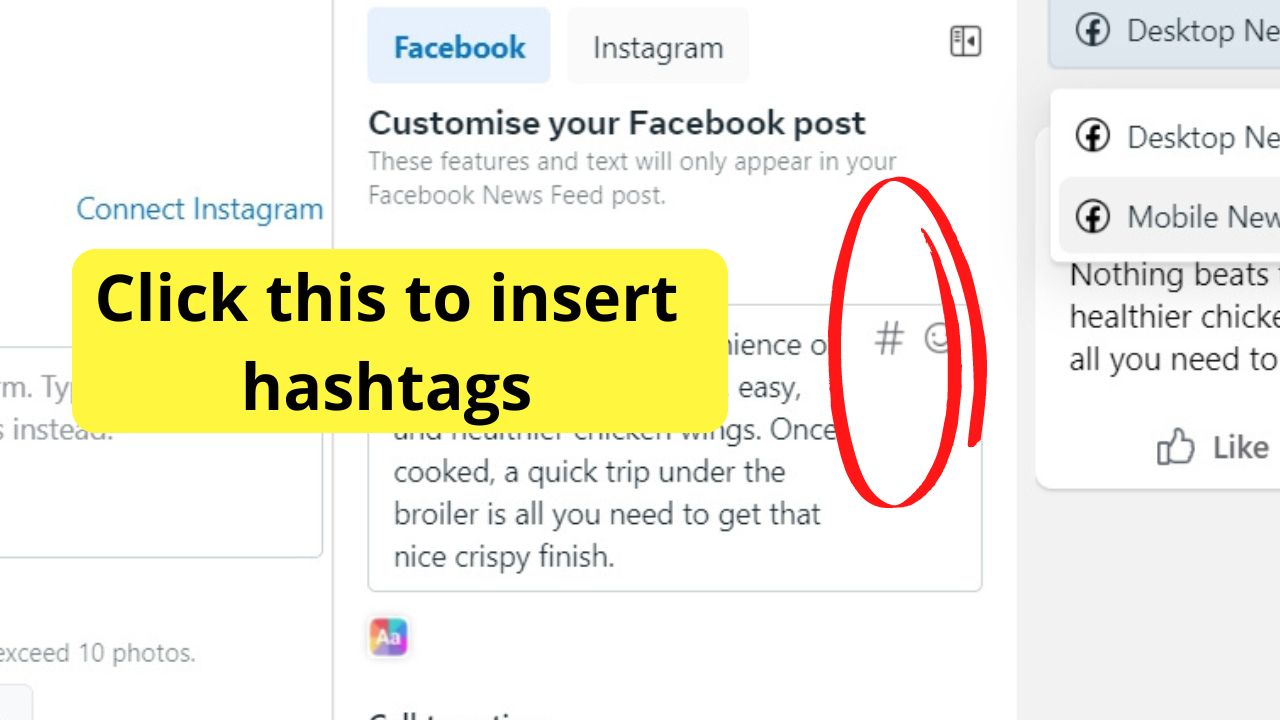
You can use the search bar to search for trending and popular hashtags.
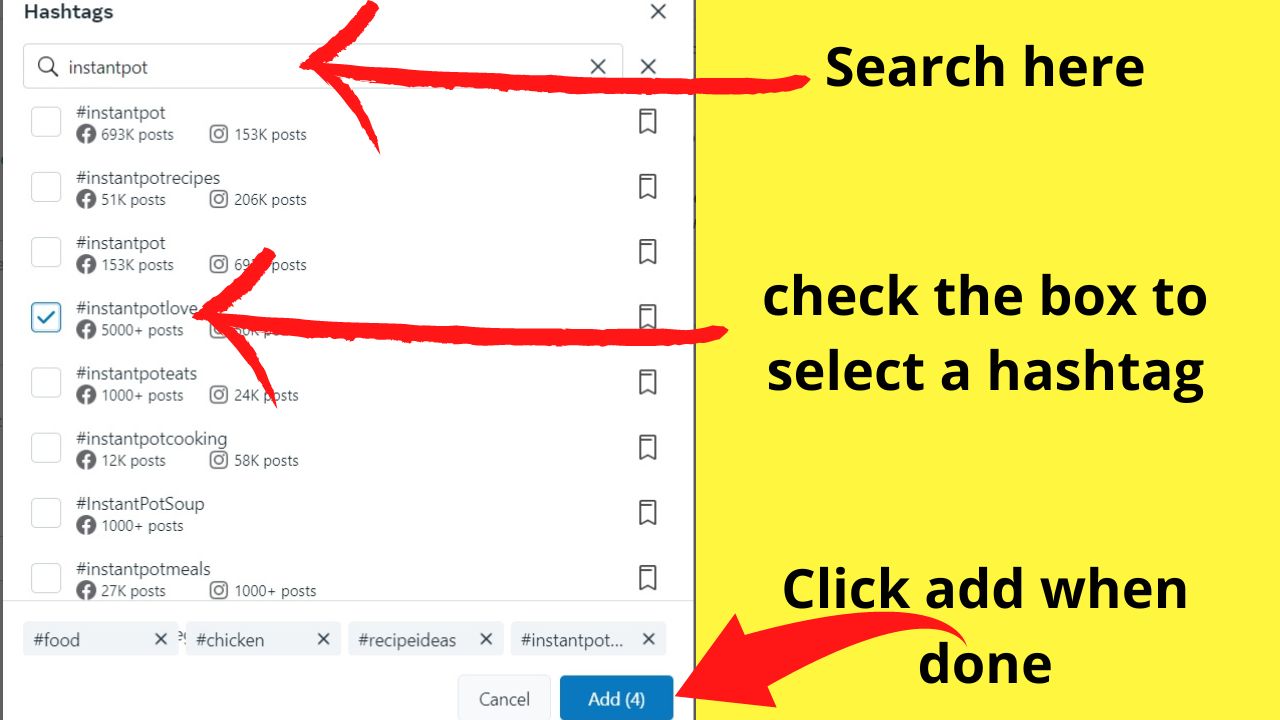
Instead of adding them by clicking the “Add” button, click the box beside the hashtag you want to include, then search for any other relevant hashtags.
Each tag you select is shown at the bottom of the screen.
For Facebook posts, two to three hashtags are sufficient. Otherwise, your wall will become littered with them.
To add a photo, click “Add photo” on the left in the “Media” section
The preview will update once your image is uploaded.
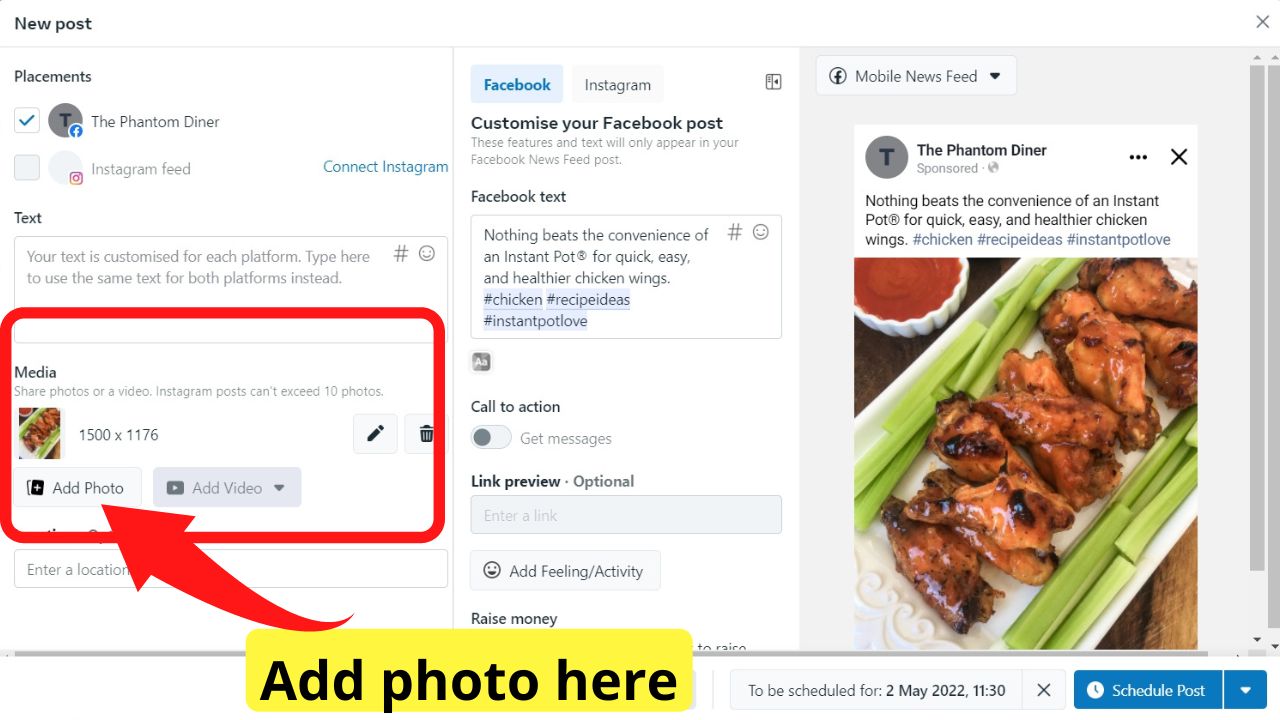
There is a limit of 10 images if you are posting to Instagram. For Facebook posts, the limit is 30 MB.
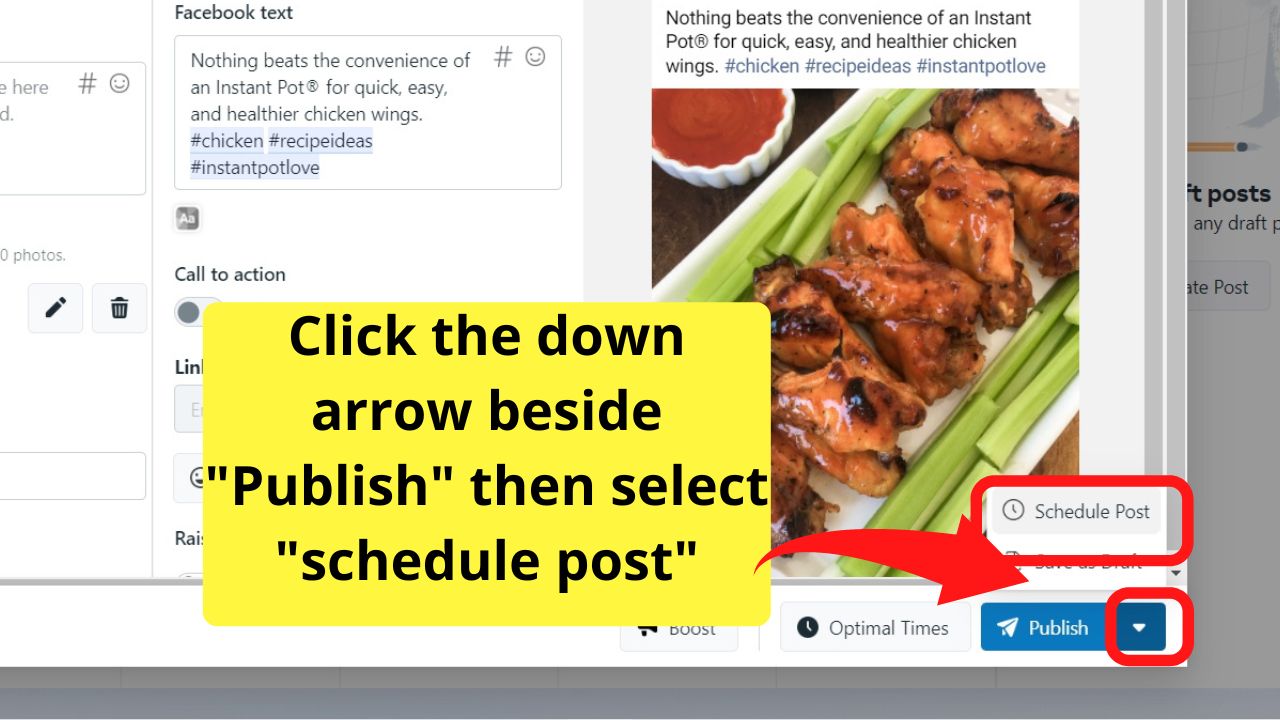
Once you have your post ready, click the down arrow beside the “publish” button, then select “schedule post”.
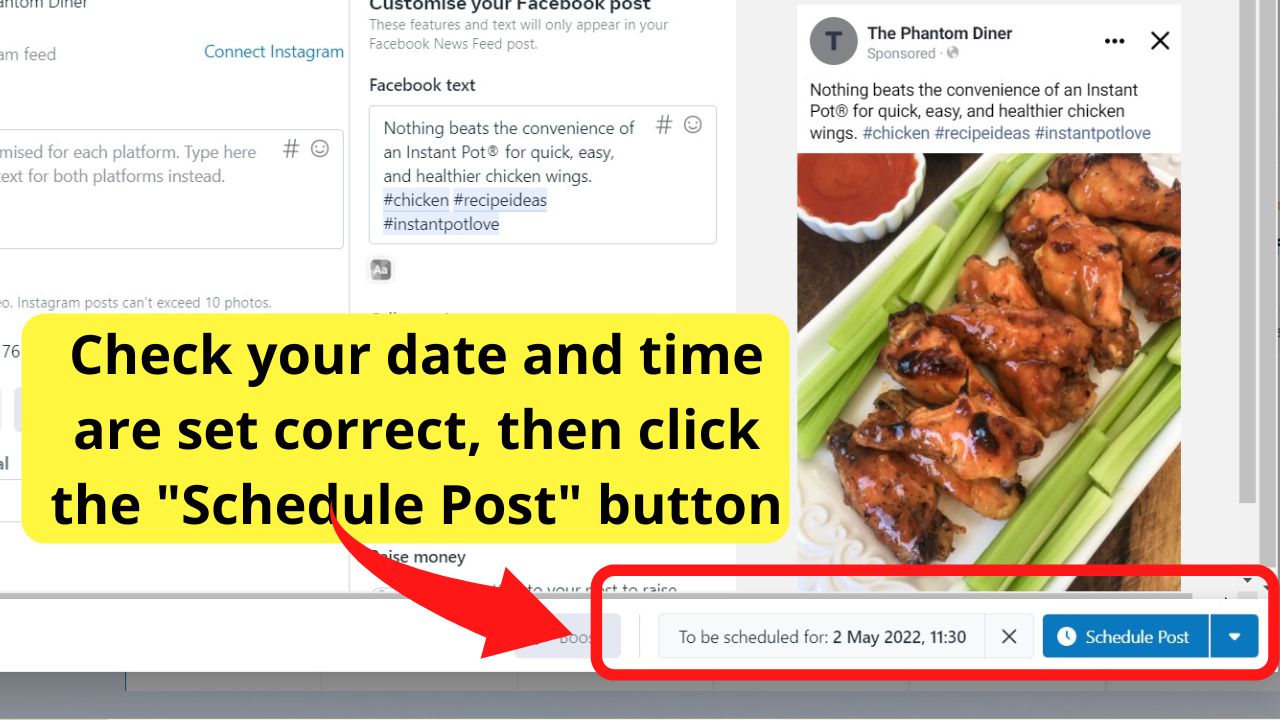
Pick a date and time to post, then press save.

How optimal times work for Facebook scheduled posts
The optimal time option is based on Facebook’s “Audience Insights”.
This lets you post at times that your followers have been the most active on Facebook within the past 7 days.
Naturally, you need to have followers first.
Once you have some followers, this feature will become available when you schedule future posts. Until then, make your best guess at when your target audience is going to be most active.
Once you have your date and time selected, select save, double-check the scheduled date and time are correct (like it is AM and not PM or vice versa), then click “Schedule post”.
After scheduling your first Facebook post, a (kind of) success message shows.
You scheduled a post through Meta Business Suite
Get the Meta Business Suite Mobile App
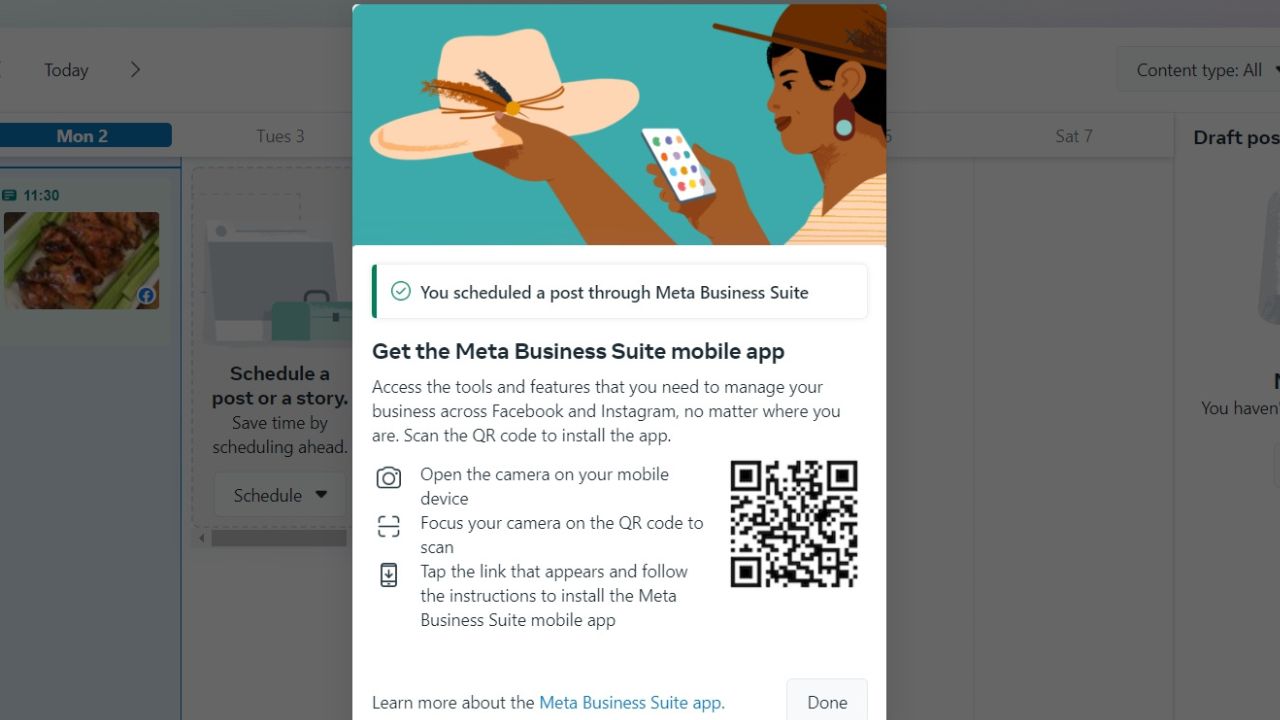
A quick and easy way to start using the Meta Business Suite App
For quickness, you can just scan the QR code image on a phone, tap the “open browser” link and follow the prompts to install the app.
Once installed, sign in to the app with your Facebook login details.
It launches the Facebook page you were last managing using Meta Business Suite Desktop.
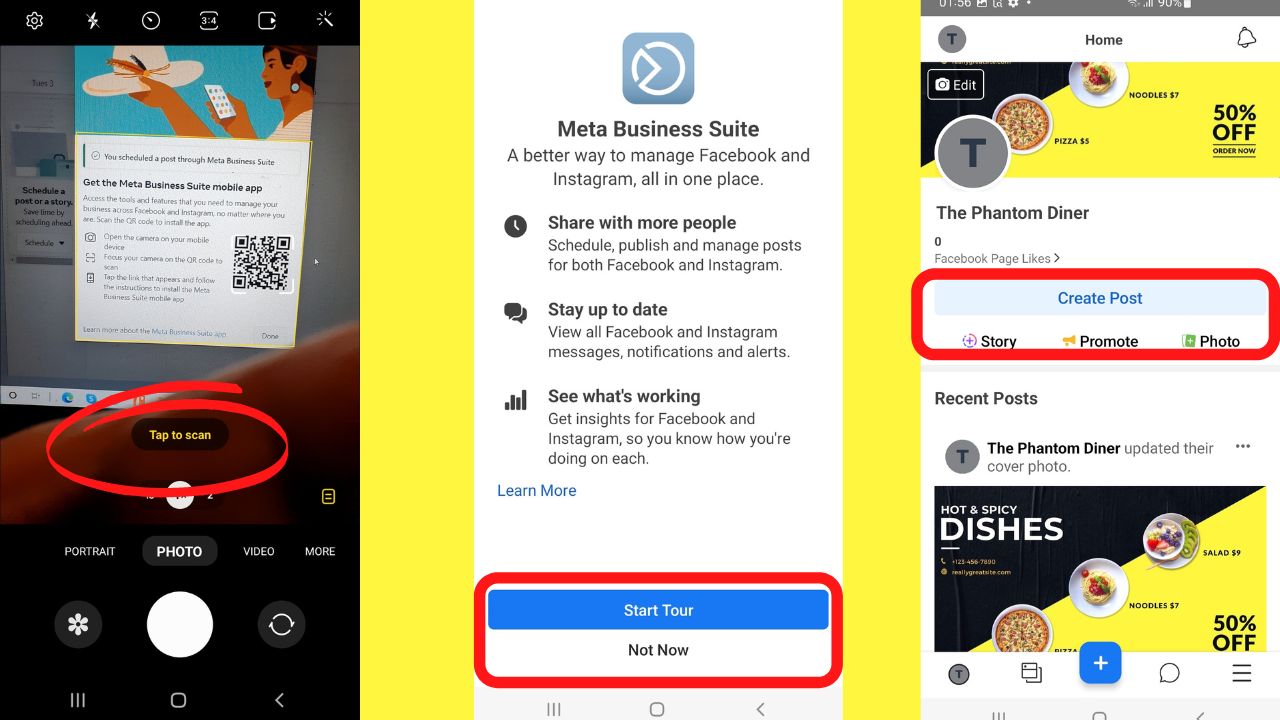
How to schedule a post on Facebook using the Meta Business Suite app
The app does not have a planner with the calendar view like the Meta Business Suite desktop version has. You can still use it to schedule future posts.
Step 1: Tap on “Create post”
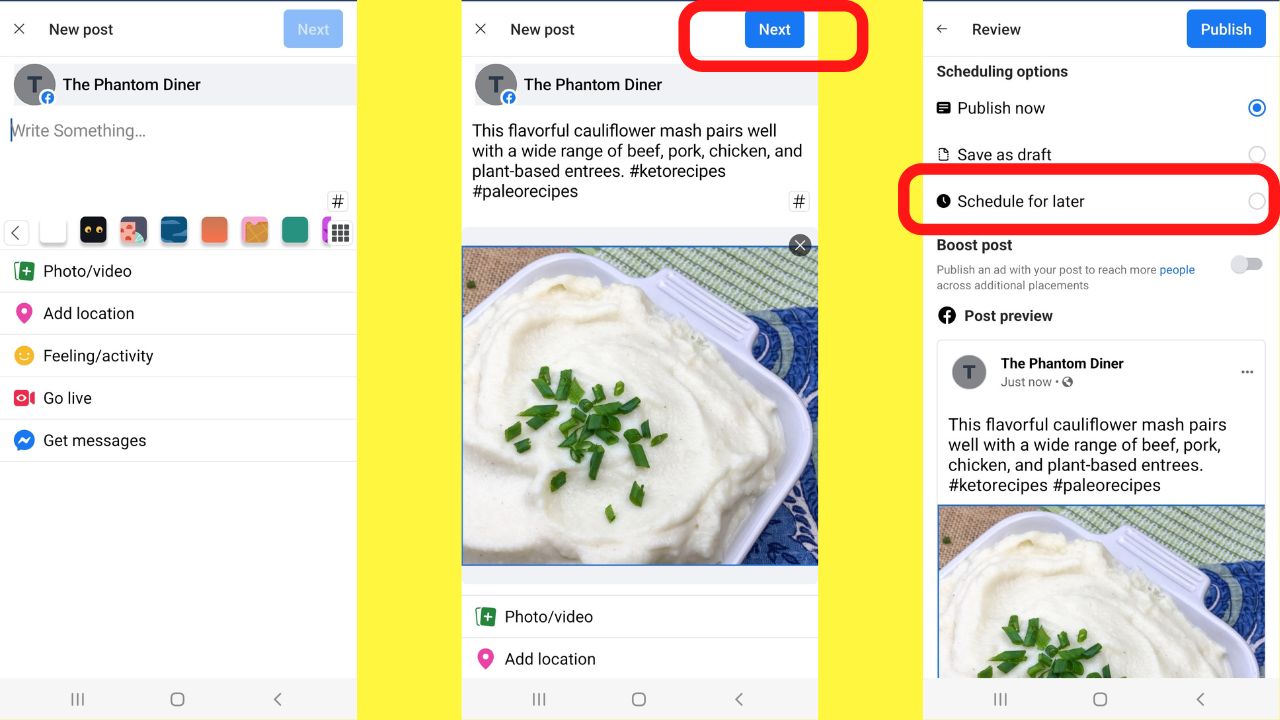
Add your content, and any relevant hashtags, and also upload any photos or videos to accompany your post.
Step 2: Tap on “next” (top right)
Step 3: Tap on “Schedule for later”
Select a time, then tap OK
Step 4: On the next screen, select the date you want the post to go live then tap OK.
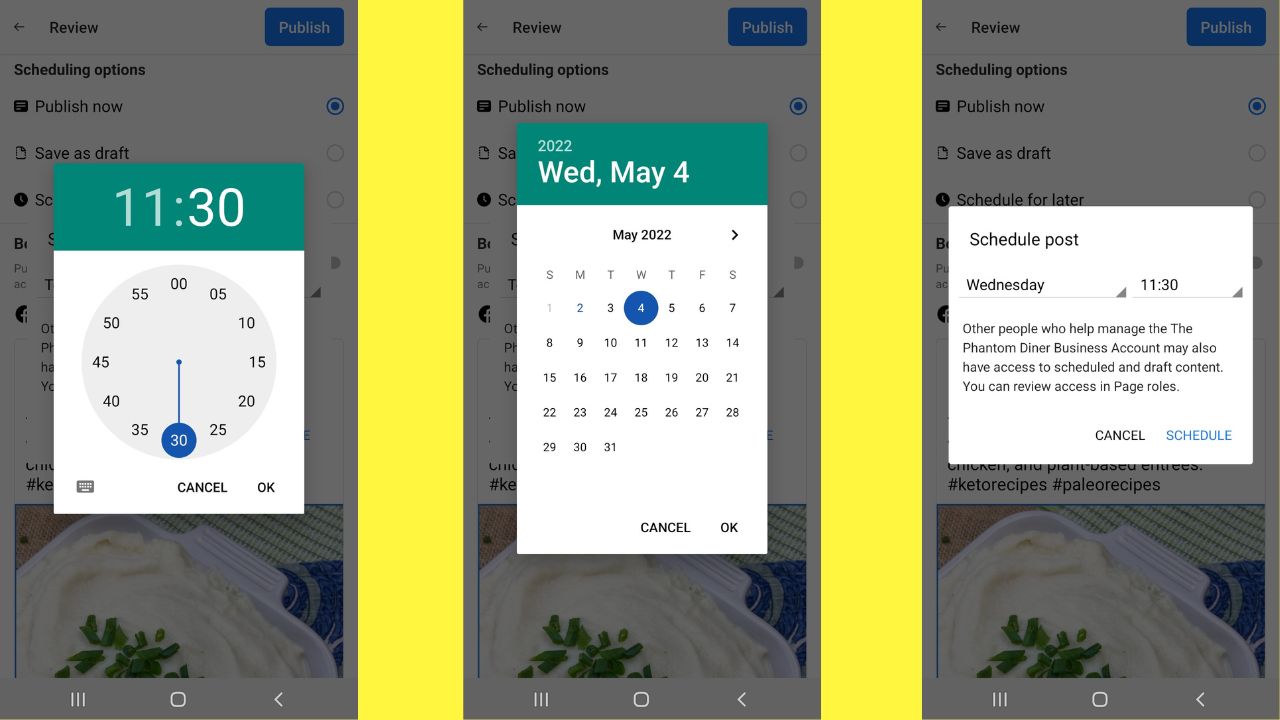
Confirm the date and time by tapping “Schedule” on the next screen.
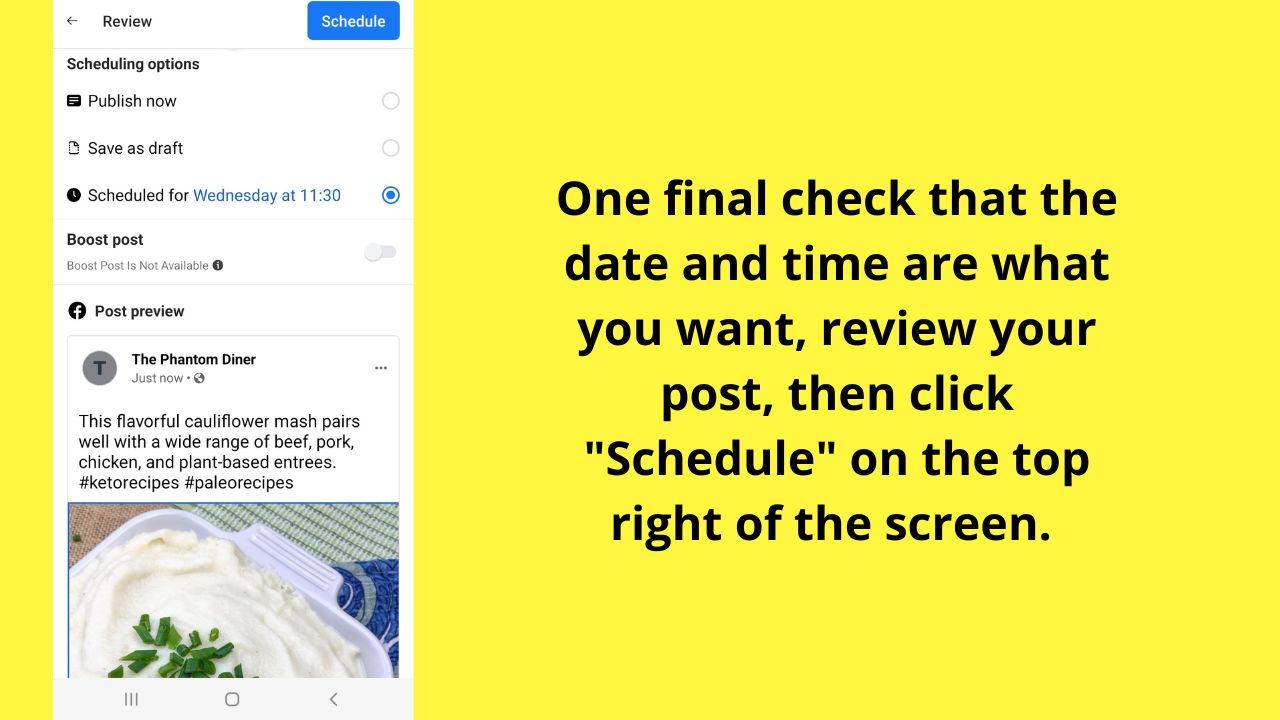
Step 5: Review the post then confirm the “scheduled for [date and time]” are correct by tapping the blue “Schedule” button on the top right of your screen.
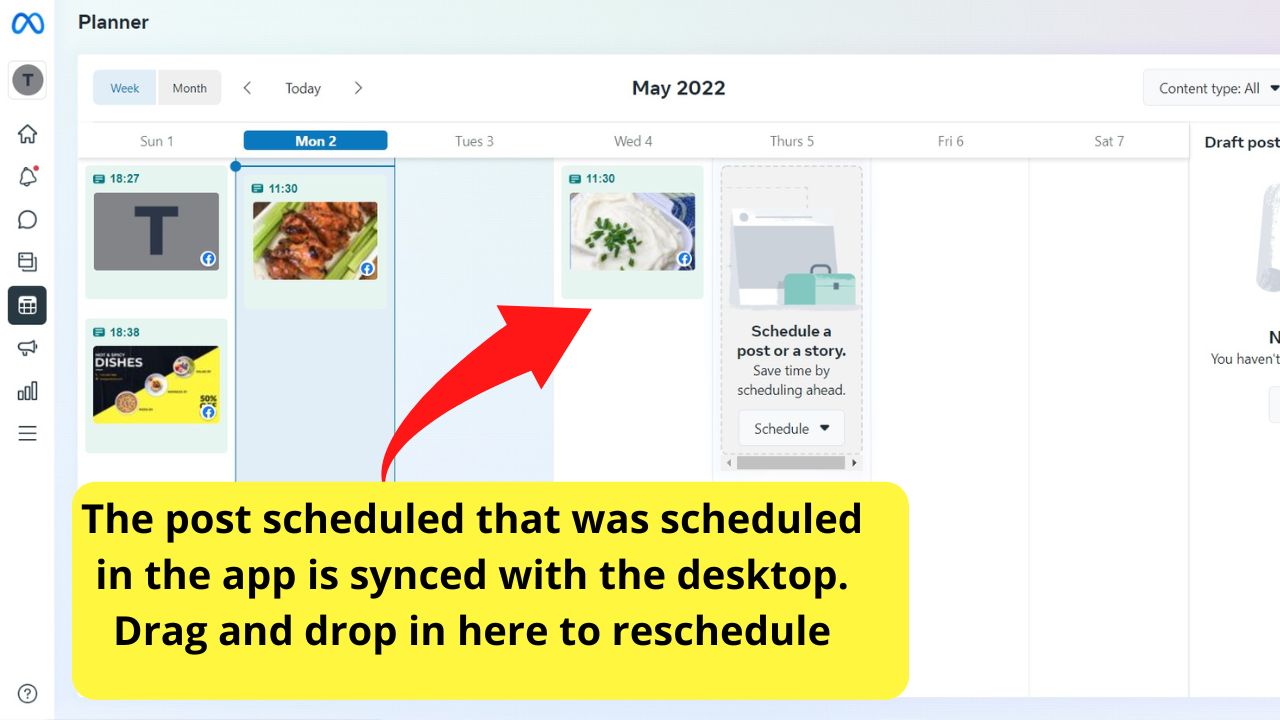
As soon as the content is scheduled in the app, it updates on the desktop Meta Business Suite too.
Repeat the process for as many posts, or as many months as you have the time for.
By using the Meta Business Suite on the desktop, the content calendar view makes it easier to see what you have scheduled for later.
For managing responses, comments, reviews, messages in messenger, et al, the Meta Business Suite app can help you stay on top of the cumbersome tasks that come with managing a Facebook page.
Another common problem that many FB users often come across is that they don’t know how to find their drafts on Facebook. If you are struggling with this sort of thing, make sure to have a look at our article “How to find drafts on Facebook in 2023.”