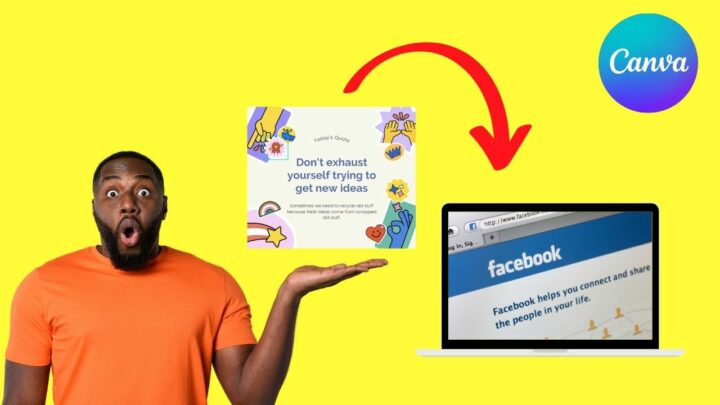

Wow! How did you manage to create such an engaging post on Facebook? Did you use advanced graphic design tools to be able to achieve such an effect?
Yes, I indeed used a graphic design tool for creating my stunning Facebook post. If you’ve ever heard about using Canva for creating designs, you’re in for a treat!
Not only can you create a ton of Facebook posts, but you can also directly publish them from Canva without ever switching tabs!
So, if you’re up for some reading, let’s take a look at how you can use Canva for Facebook.
How to Use Canva for Facebook
After creating your design, tap the ellipsis icon and select either the Facebook group or Facebook Page button. Choose what account you’ll publish your design into before tapping the Publish now button. If you want to schedule the post instead, tap the calendar icon and set the time and date.
Using Canva for Facebook — What Budding SMMs should Discover
Staying engaged with your audience on Facebook is one of the keys to making your page lively.
But, with Canva, you don’t need to be online 24/7 just to share posts on your Facebook page. Thanks to its Content Planner feature, you now have the option of scheduling your posts.
Yet, you need to get started with the creative process first.
Creating Facebook Posts with Canva
First things first, log in to your Canva account. You’ll then see the home page.
On the upper left of the home page, head over to the Templates section and select Social Media.
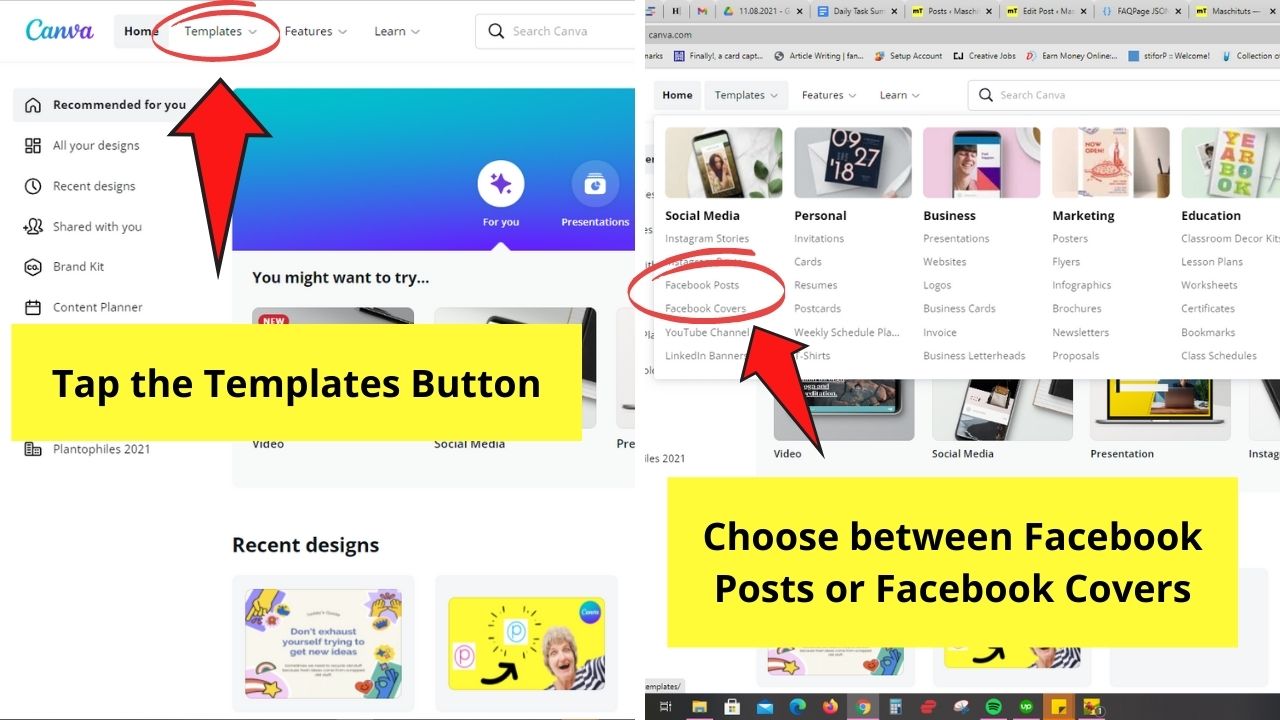
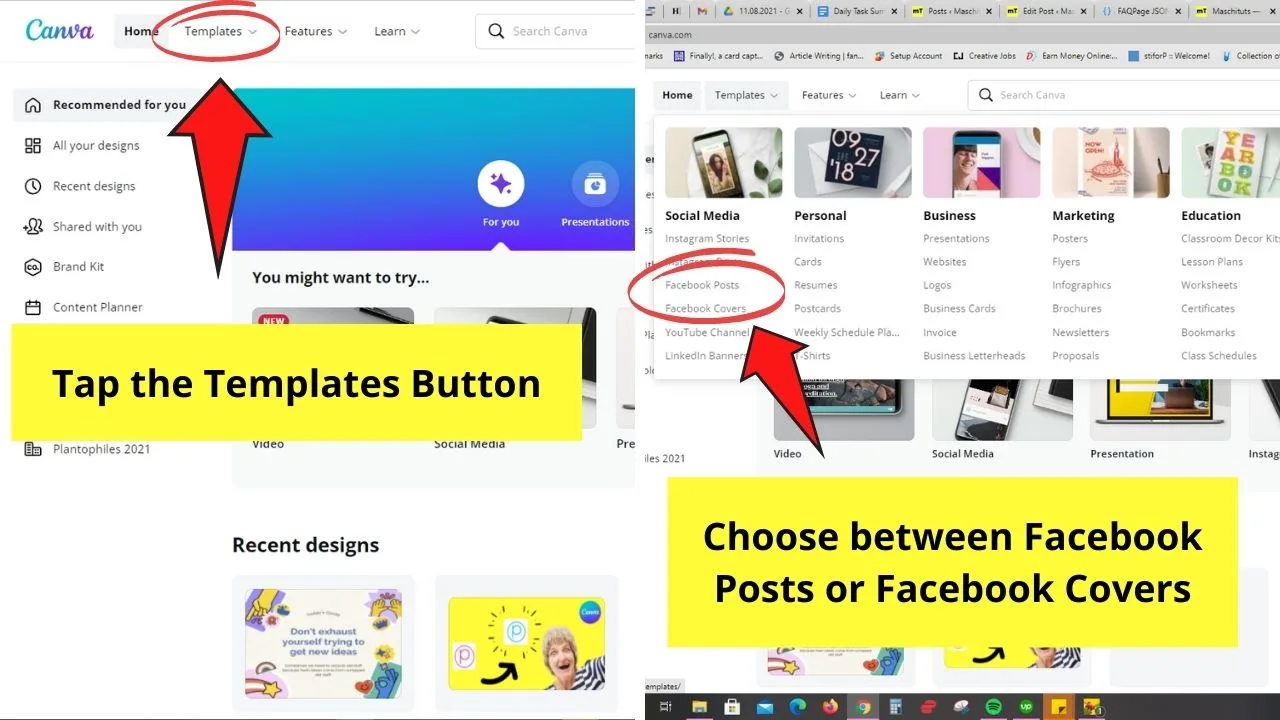
From there, you’ll see what Facebook templates you can create:
- Facebook Posts
- Facebook Covers
But, for sample purposes, let’s focus more on creating Facebook posts.
Click on the template you’d like to use and tap the Customize this template button to begin customizing it.

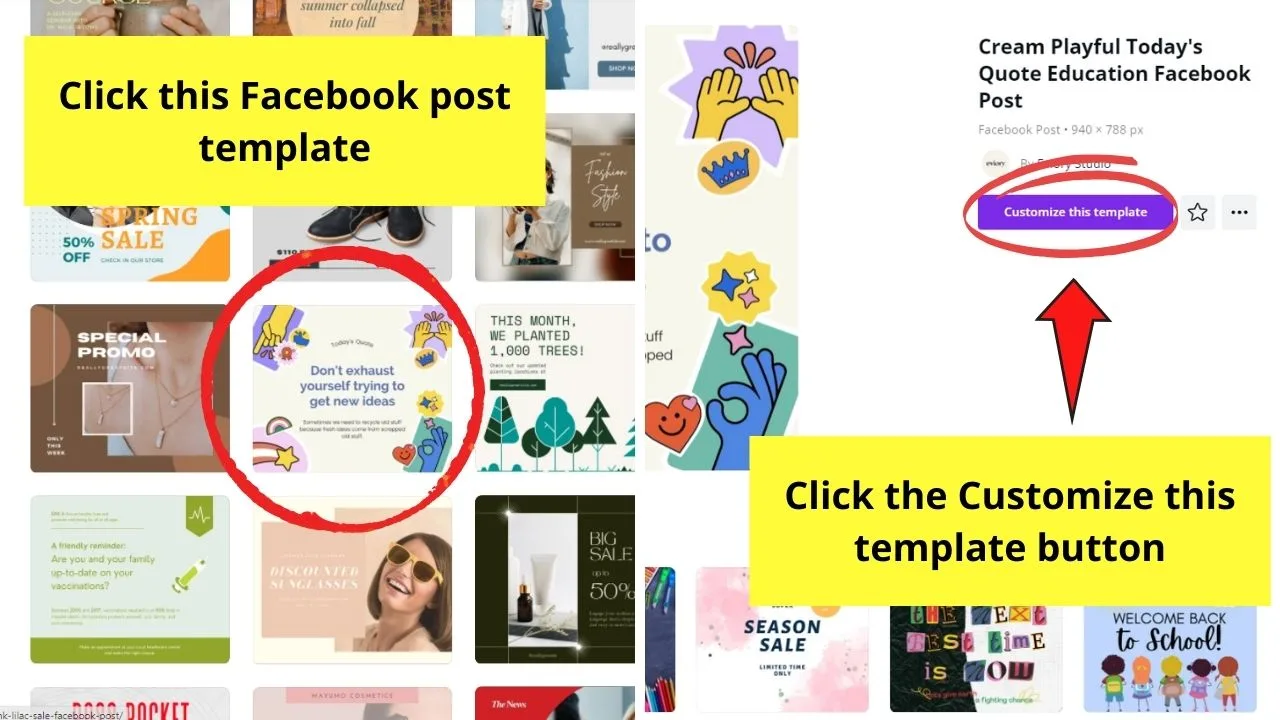
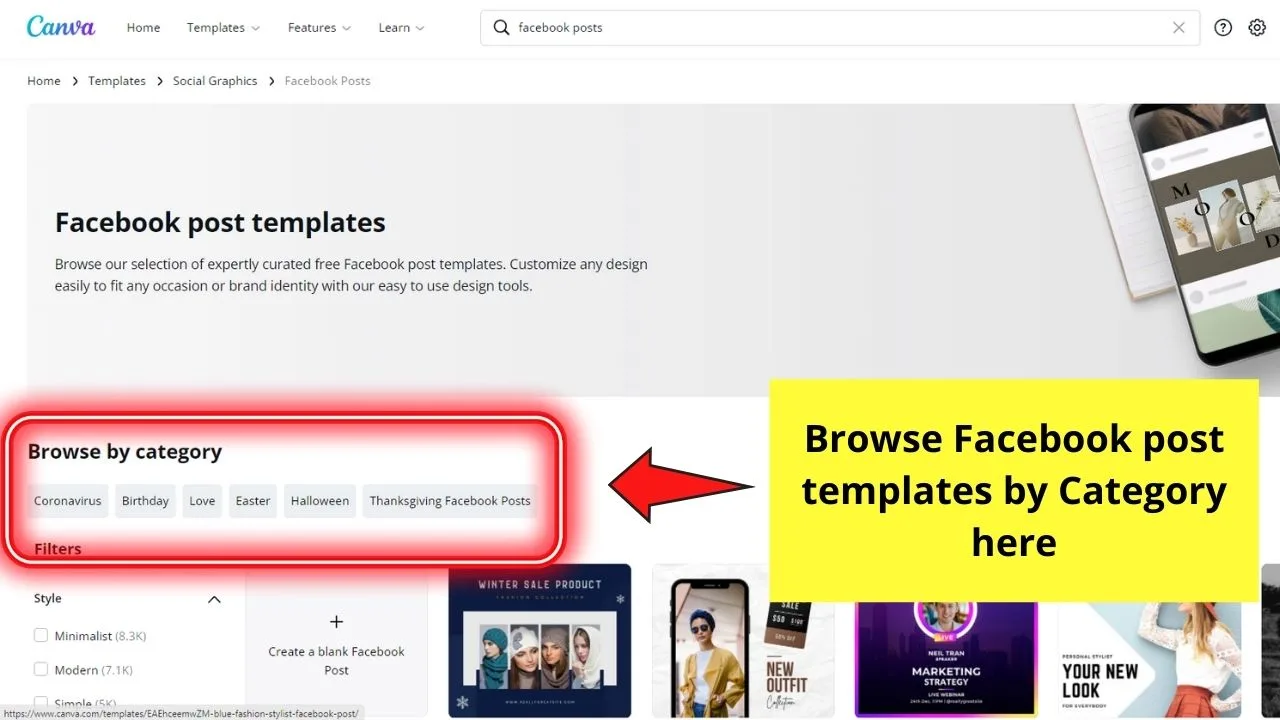
However, if you want to create something from scratch, you can narrow your choices by browsing per category.


From there, you’ll find yourself inside the editor page. You can then begin customizing it by adding more elements, editing the text, or even changing the colors of the template using your Canva brand kit.
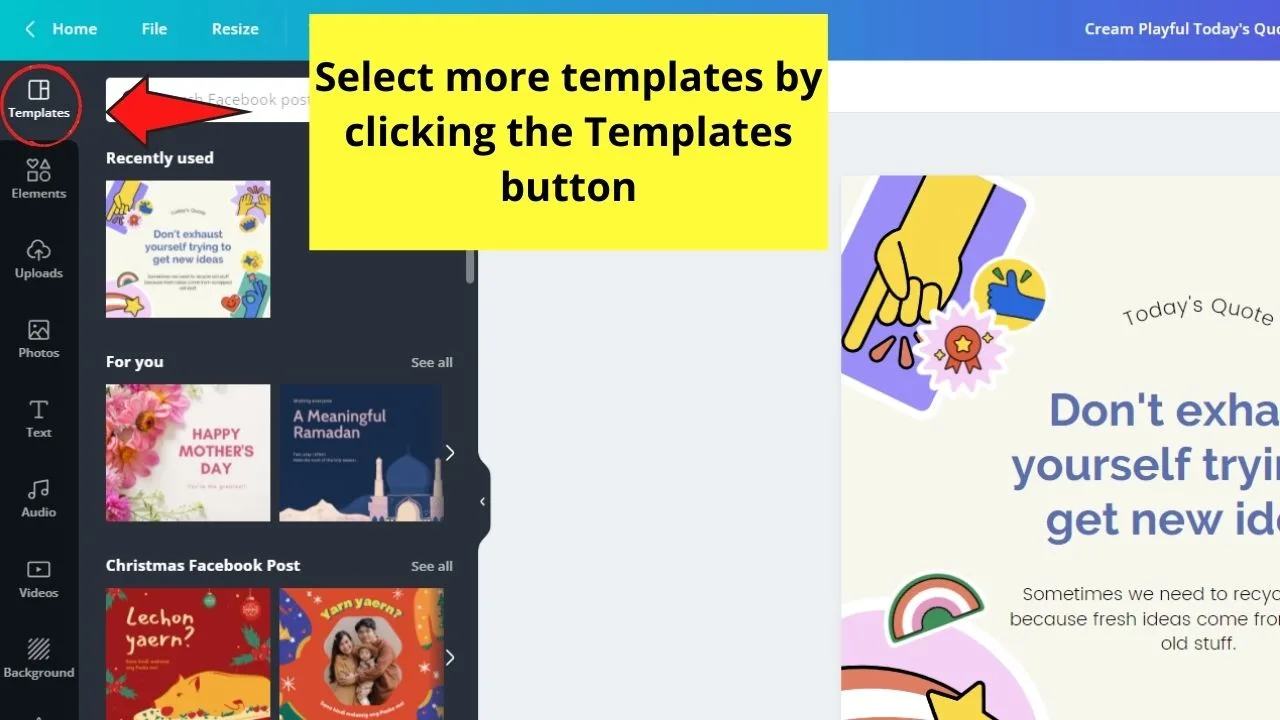
Now, if you want to add more templates (in case you’re creating posts for a week or more), tap on the Add page button before heading over to the Templates gallery.
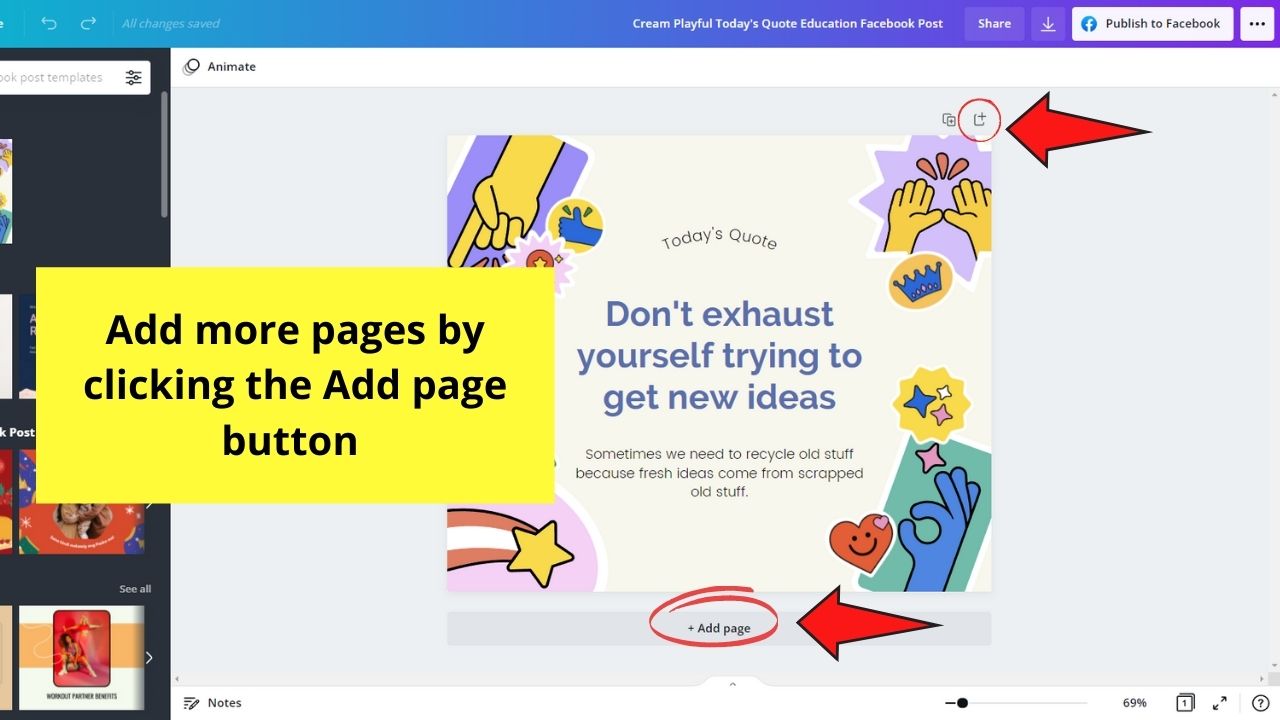
You’ll find the Templates gallery on the left side of the editor page. Then, simply tap on the templates you’d like to add to your project.

Once you reached the desired number of pages, hit the Page manager button on the lower right of the editor page.
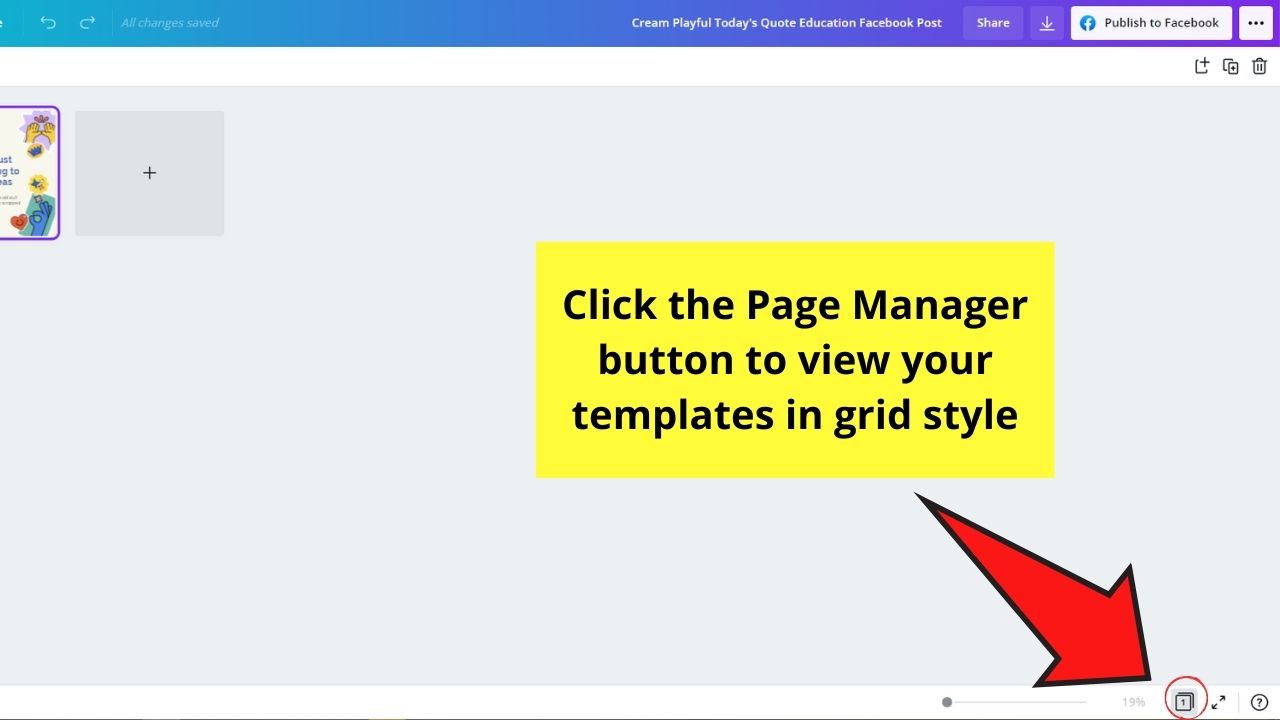
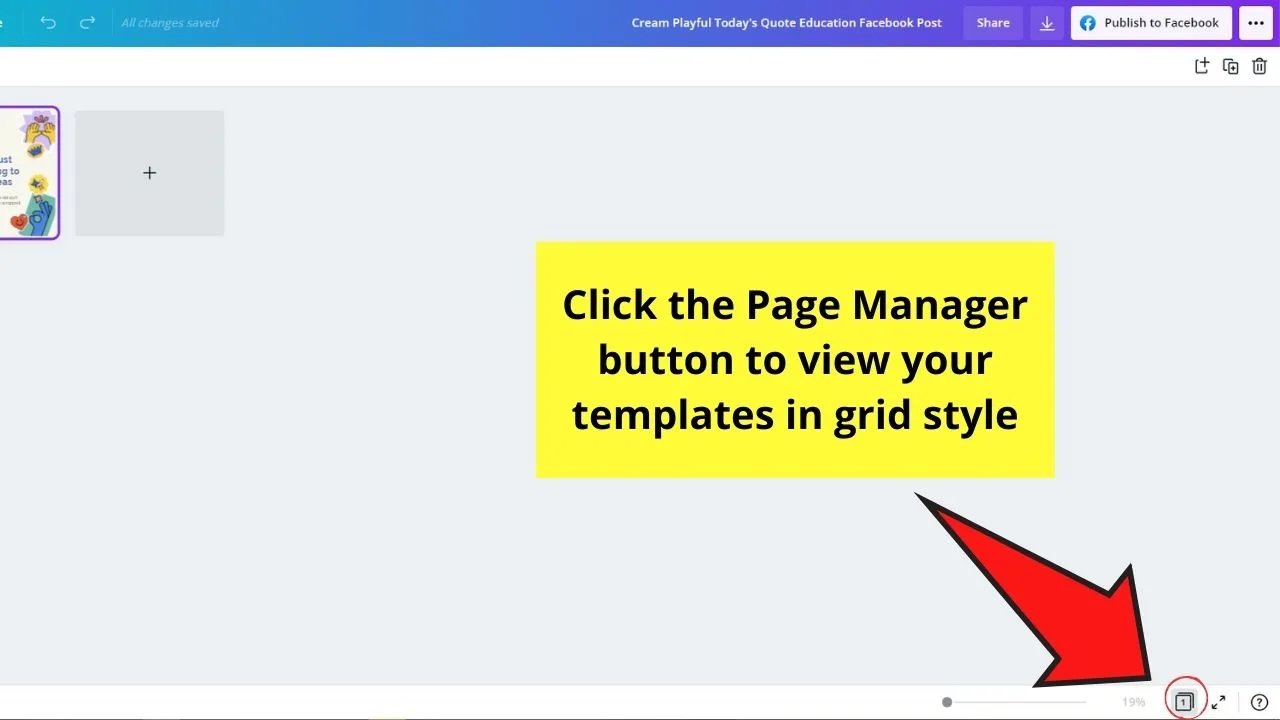
If you’re satisfied with how your graphics are arranged, exit the Page manager view. But, if you want to make revisions, add or delete pages as needed.
Then, head back to editing the elements and text on your graphics until you achieve the desired effect.
You can even design a logo if you want for a stronger brand presence on your post.
And, once everything’s to your liking, it’s time to post them on your Facebook page.
Posting Facebook Posts from Canva through the Publish Now Button
Now, if you need to publish the designs on your Facebook page, there’s no need to download them to your computer and upload them on Facebook.
You simply need to follow these steps for a hassle-free Facebook posting experience:
Note: Posting on Facebook from Canva is only available for Facebook pages and groups. This feature isn’t available for posting content directly on your Facebook profile.
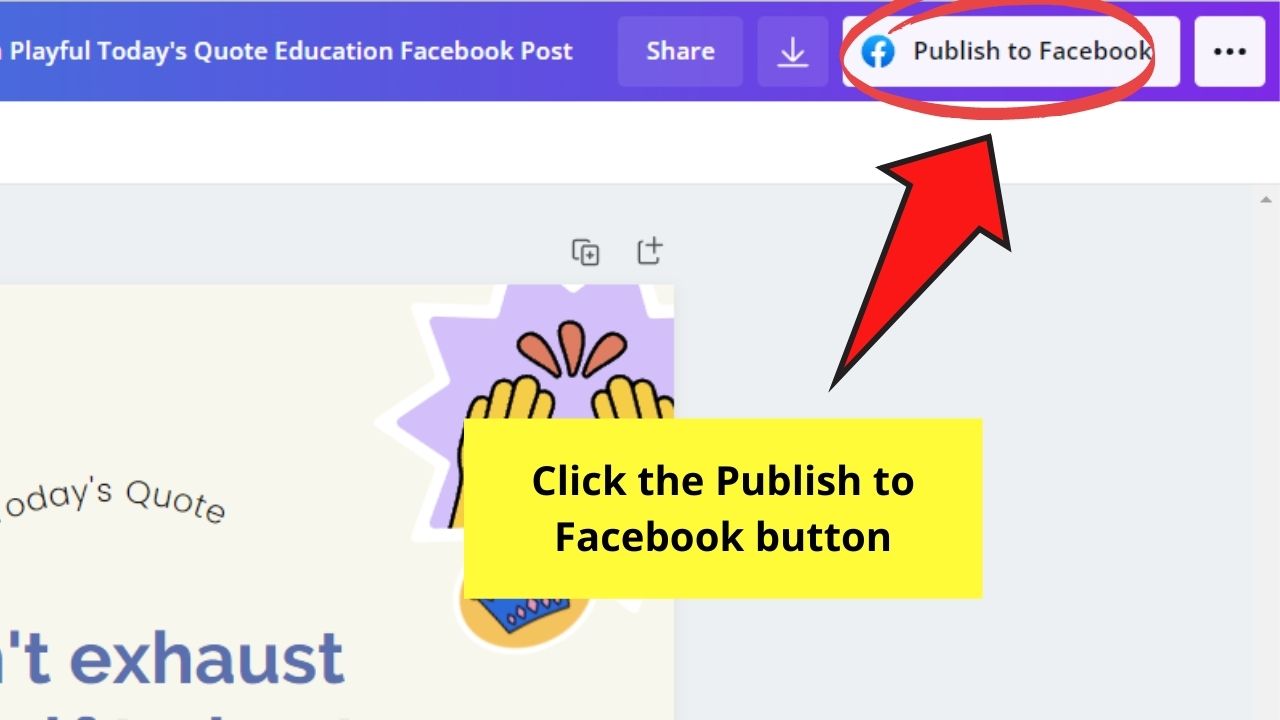
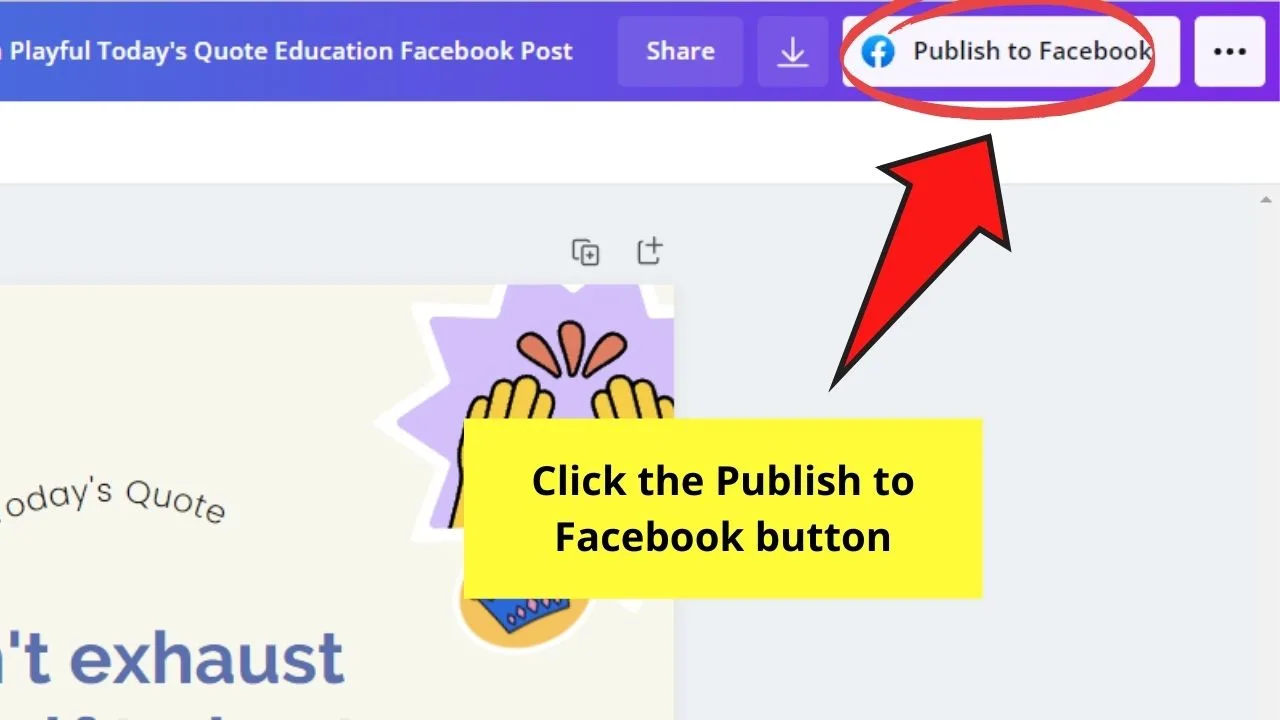
Step 1: On the upper right of the menu bar, tap the Publish to Facebook button.
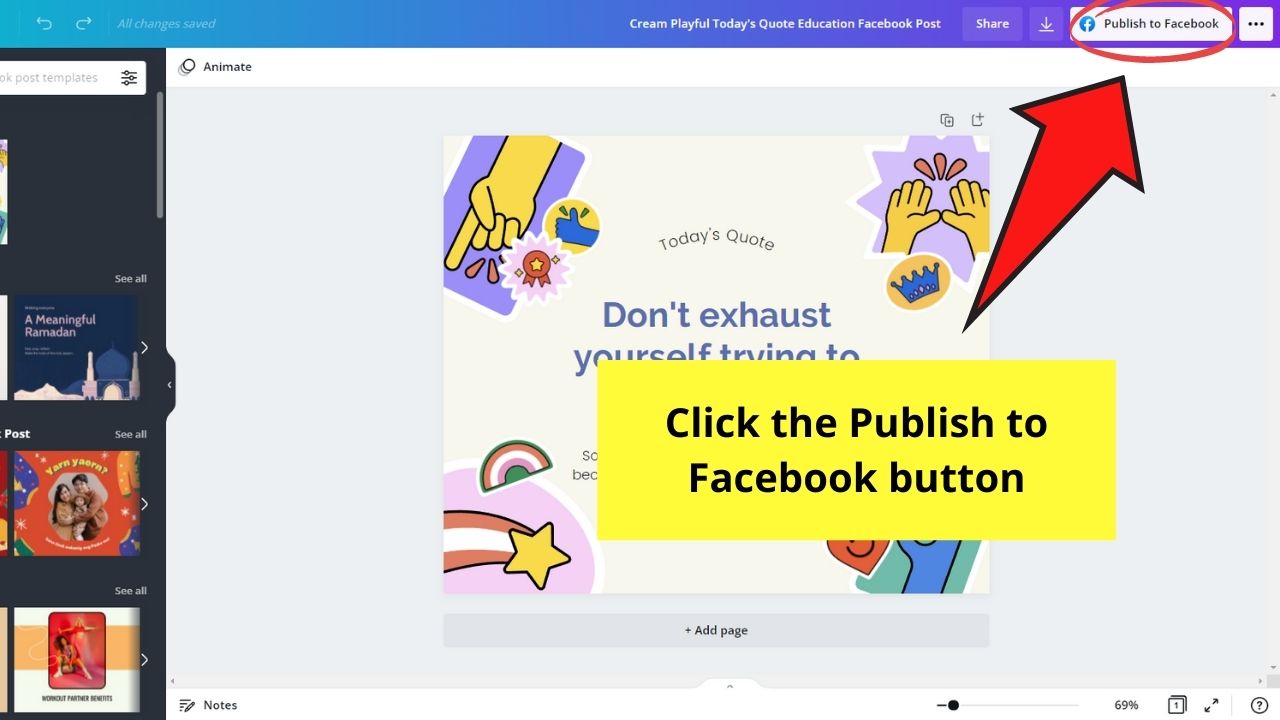
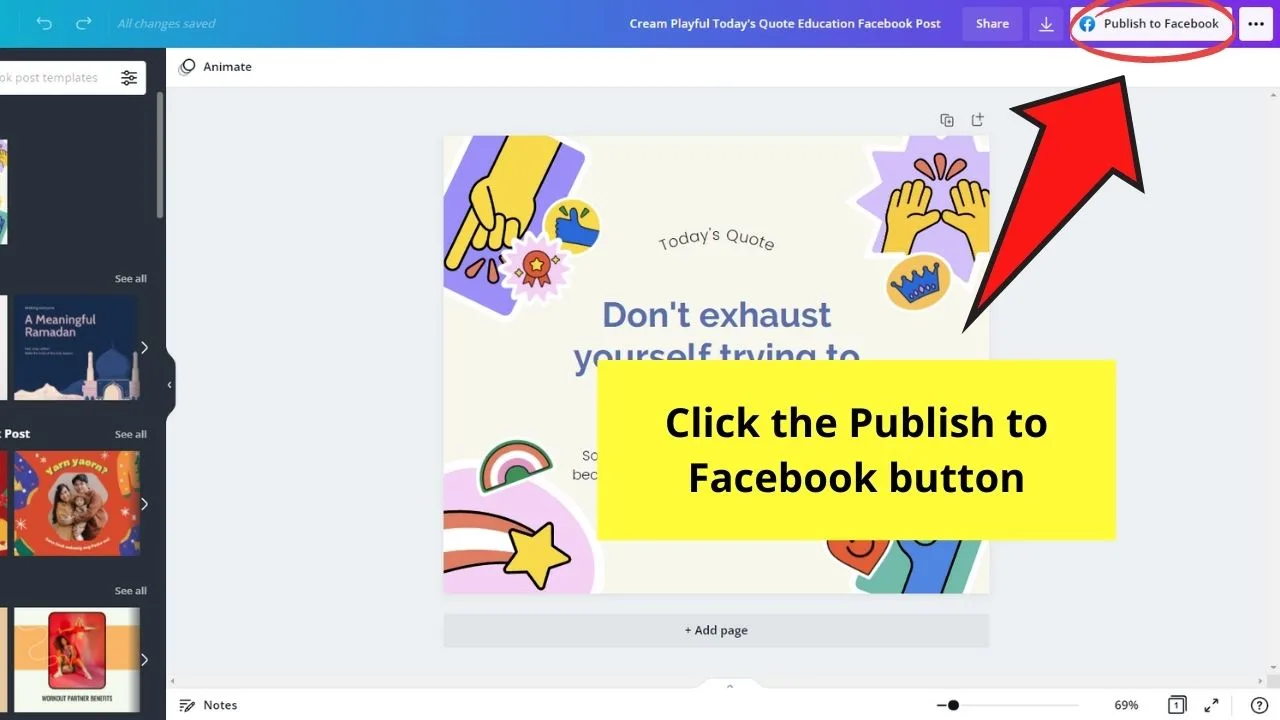
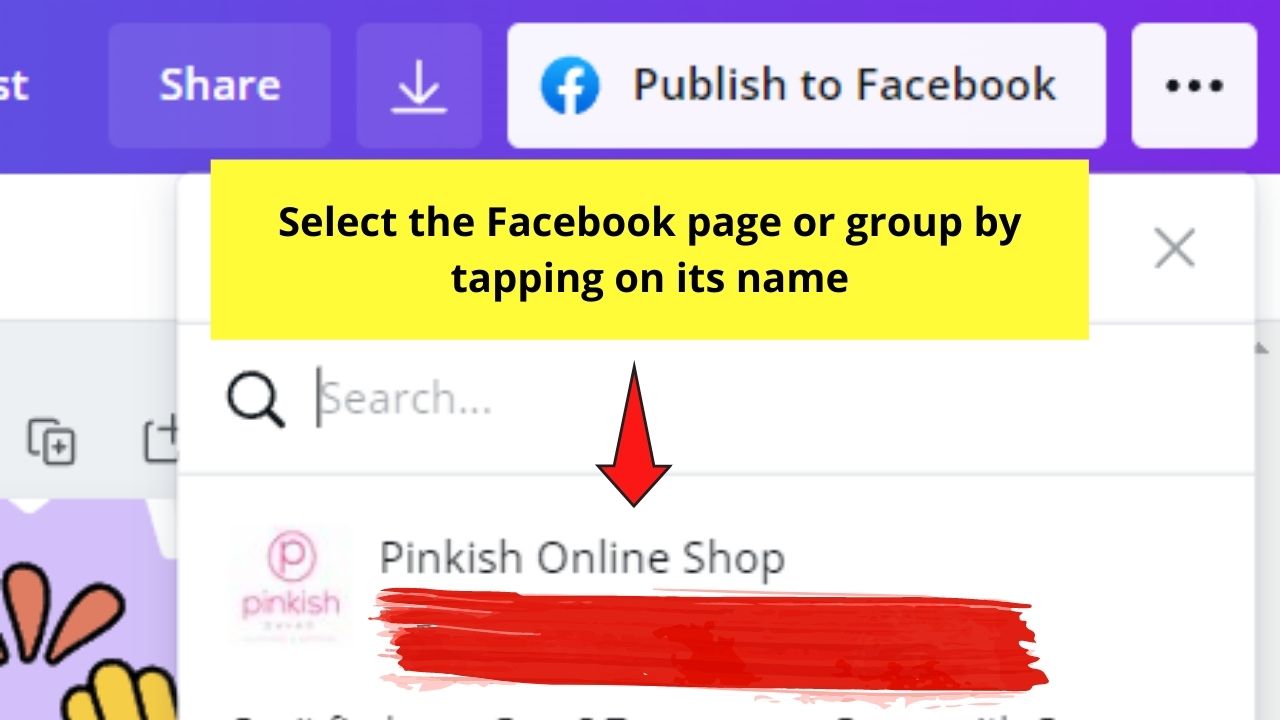
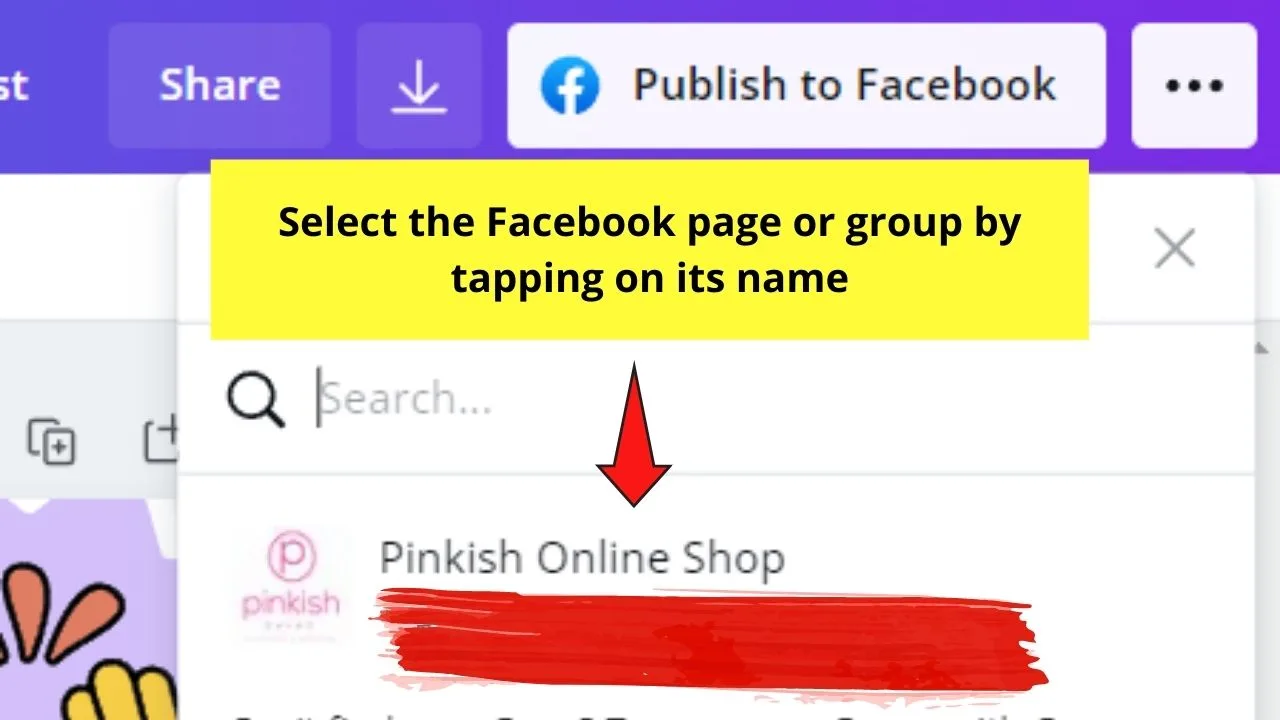
Step 2: In the dropdown menu, select the Facebook page you’d publish your post into and click it.
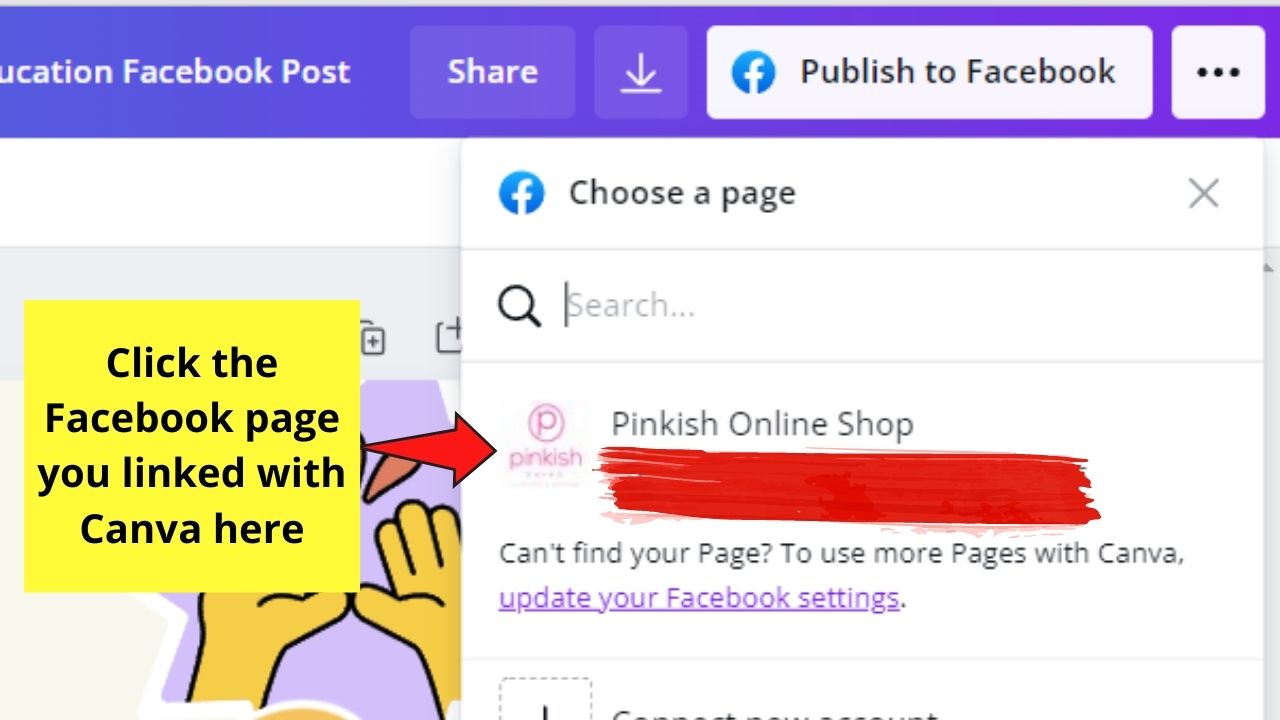

If you haven’t connected your Facebook account with Canva, you will see a purple Connect button below the dropdown menu.
Now, if you’re done linking Facebook and Canva, you can head back to selecting what Facebook page or group you’d like to publish your designs into.
Step 3: Once you’ve chosen the page you’ll publish your post into, select the page or pages of the design you’d like to publish.
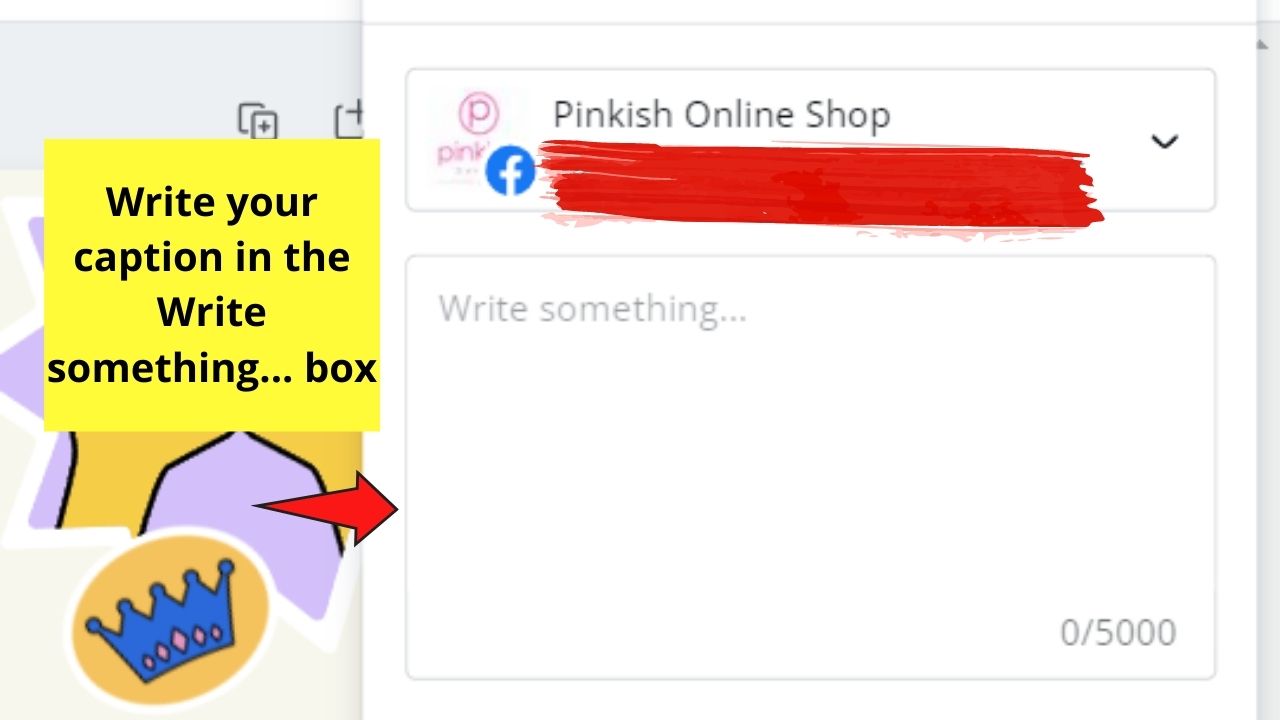
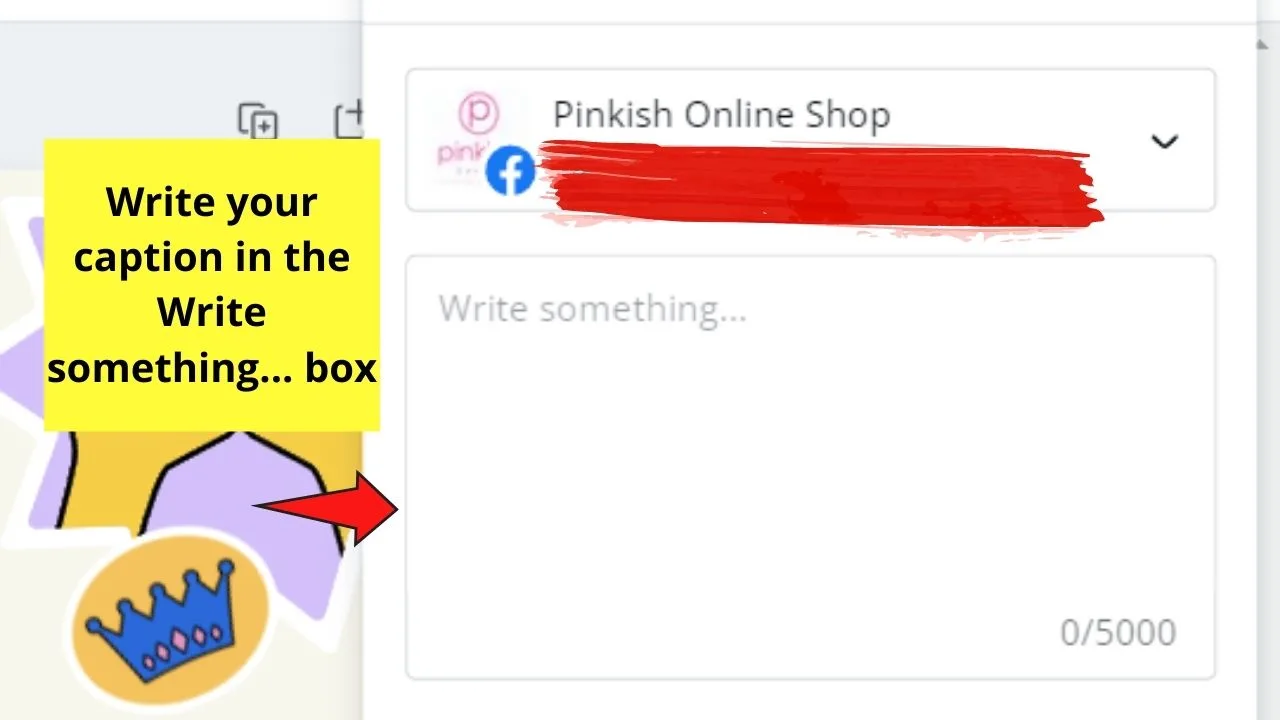
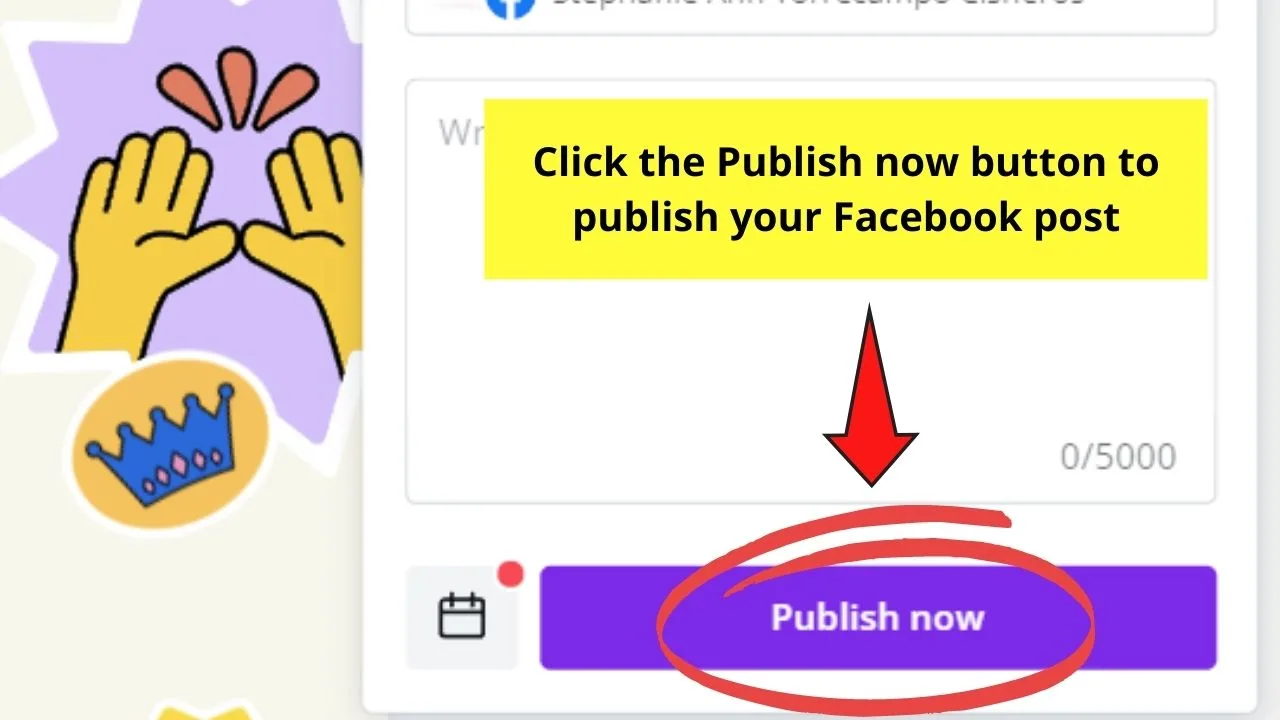
You can add a caption on the Type a caption box.
If not, hit the Publish now button.
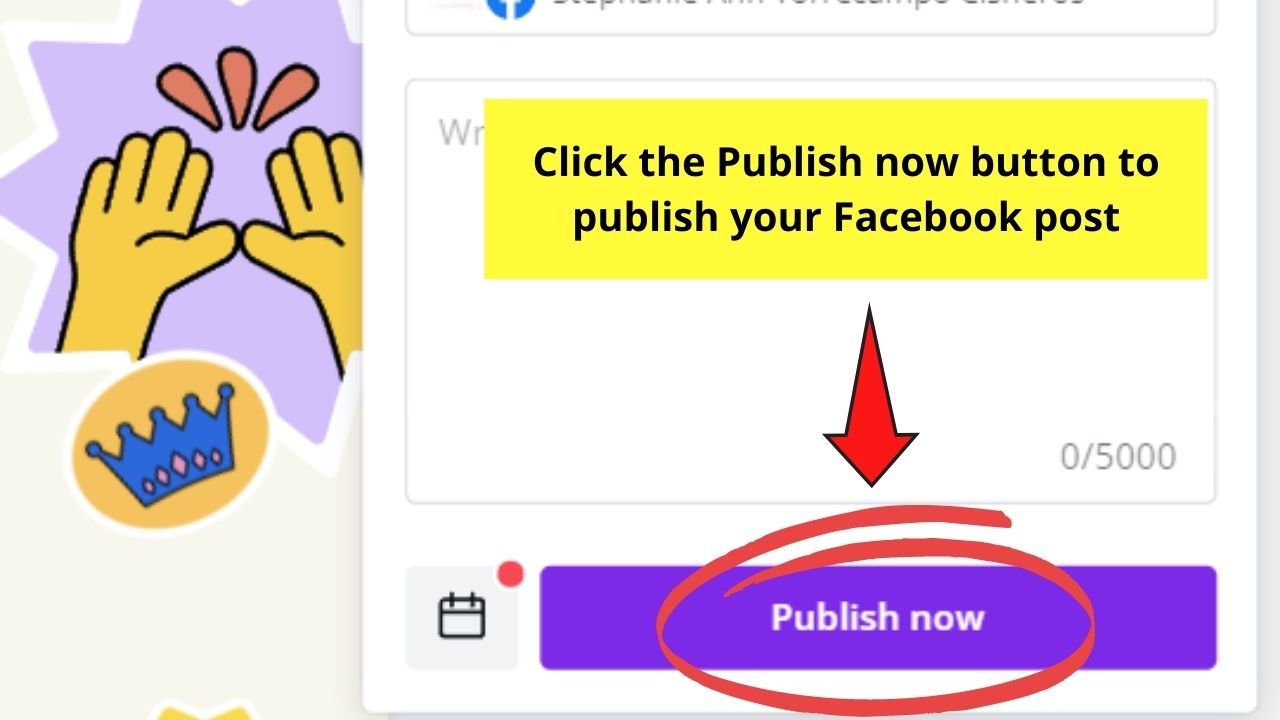
From there, allow Canva to finish the process of publishing your post on your Facebook group or page.
And, if it’s successful, you will see a prompt with a link to the post that Canva made on Facebook.
Nifty, right? Now, wait until you learn how to schedule those posts.
Scheduling Facebook Posts from Canva
Step 1: Tap the Publish to Facebook button on the menu bar.
Step 2: Select the Facebook group or page you’d like to publish your post into.
Step 3: Choose what page or pages of the design you’ll post. You can opt to write a caption first.
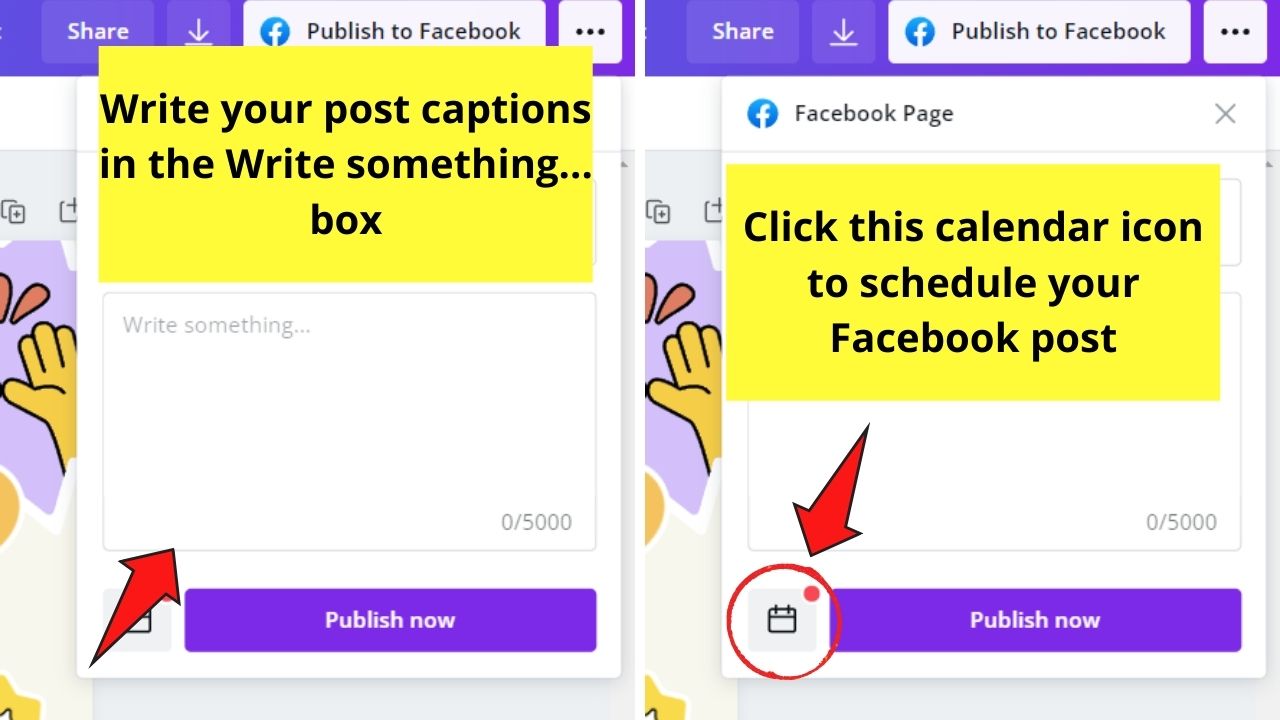
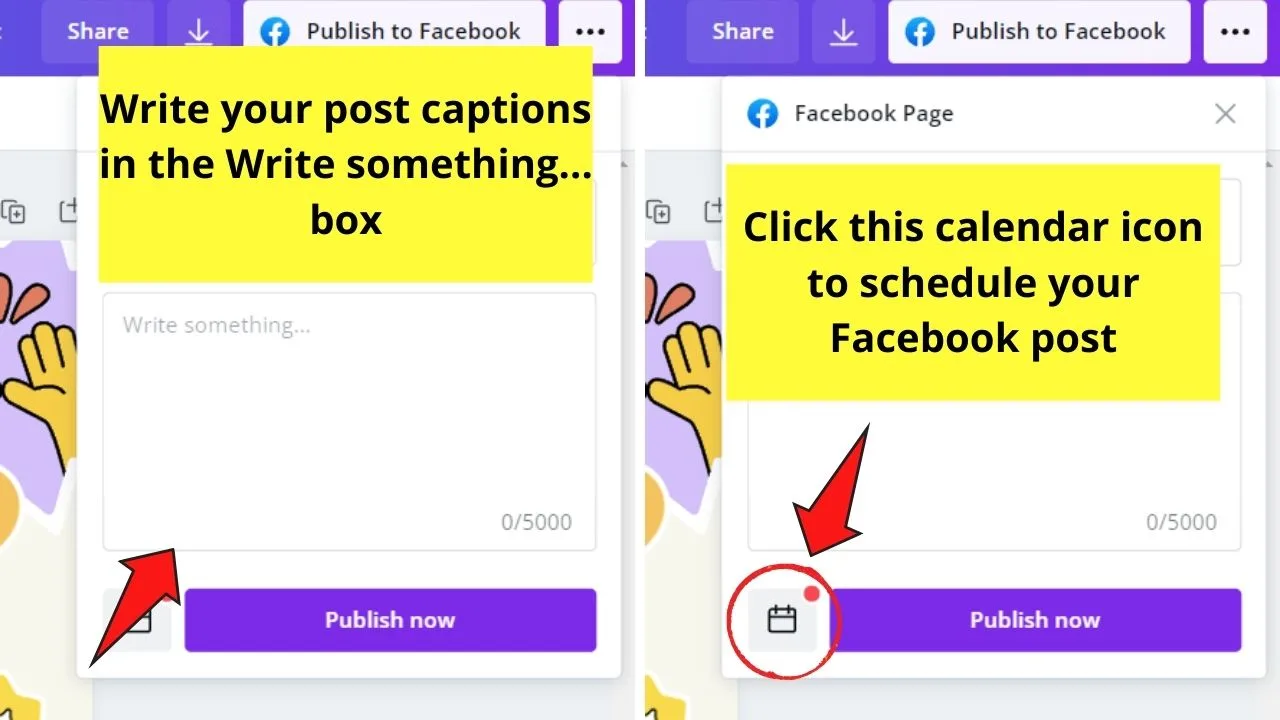
But, if not, tap the calendar icon found at the left side of the Publish now button.
Step 4: Select the publishing time and date and tap the Done button.

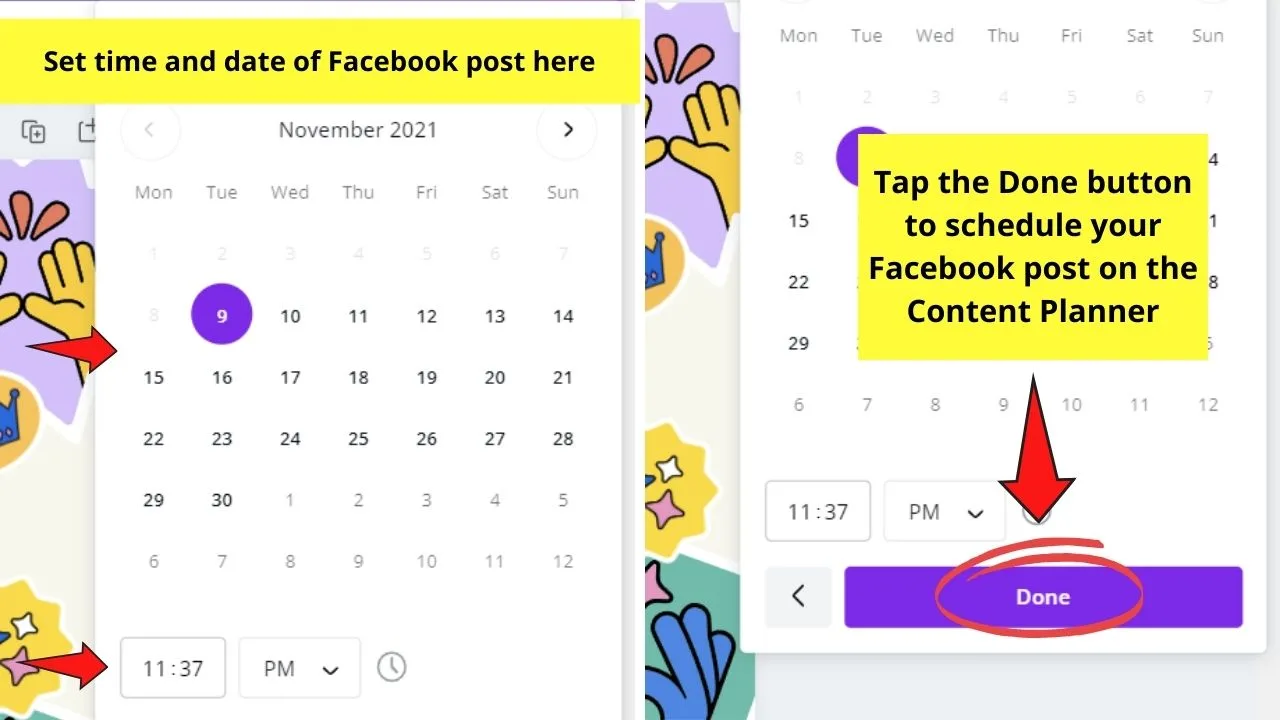
This will then schedule your post on the date and time you specified on the Content planner.
Step 5: However, if you’re on Canva’s home page, you can access the Content planner from the left side menu.
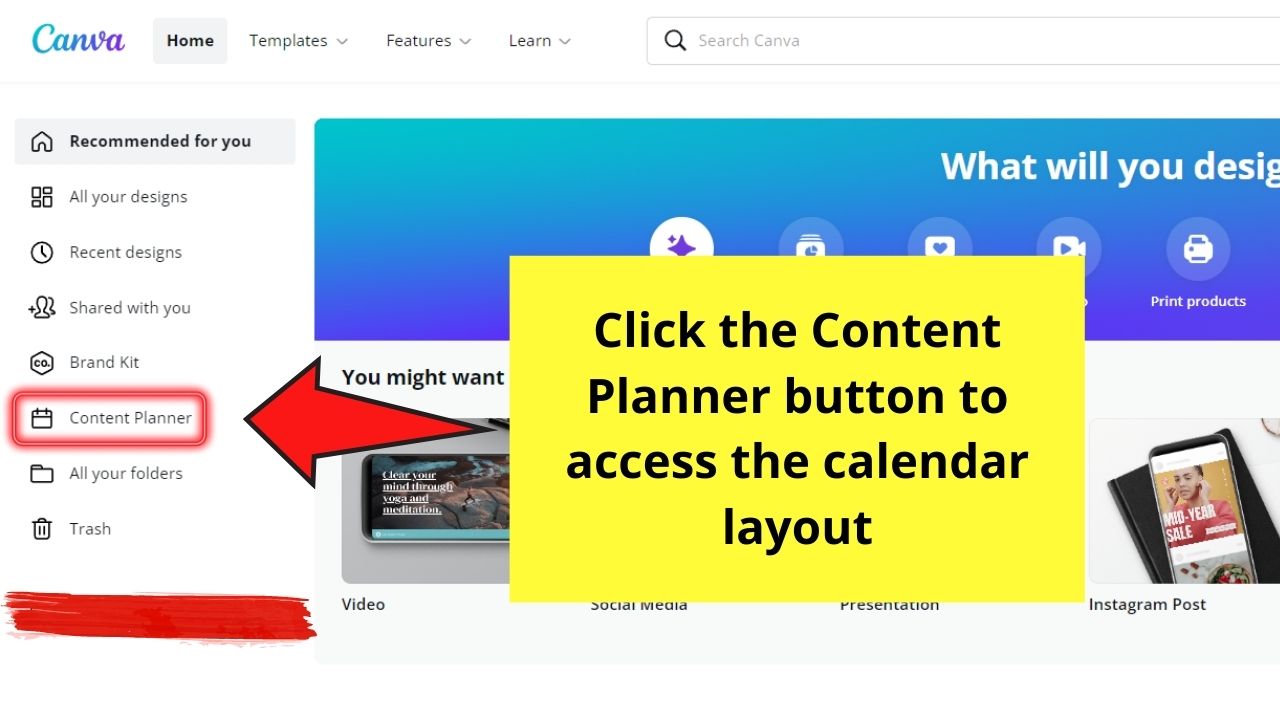
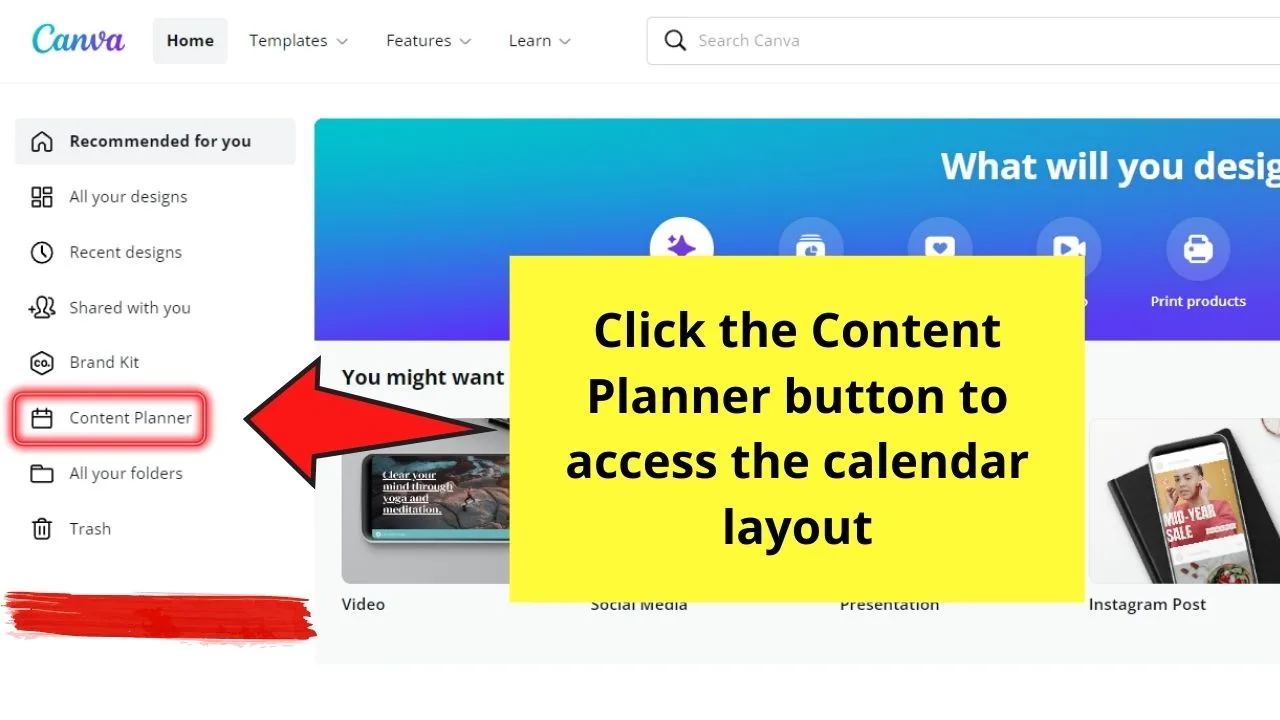
After clicking on it, you will then see a calendar layout of the social media posts you’ve scheduled.
You can also opt to schedule a design directly from this content planner by tapping on the “+” icon beside the date.
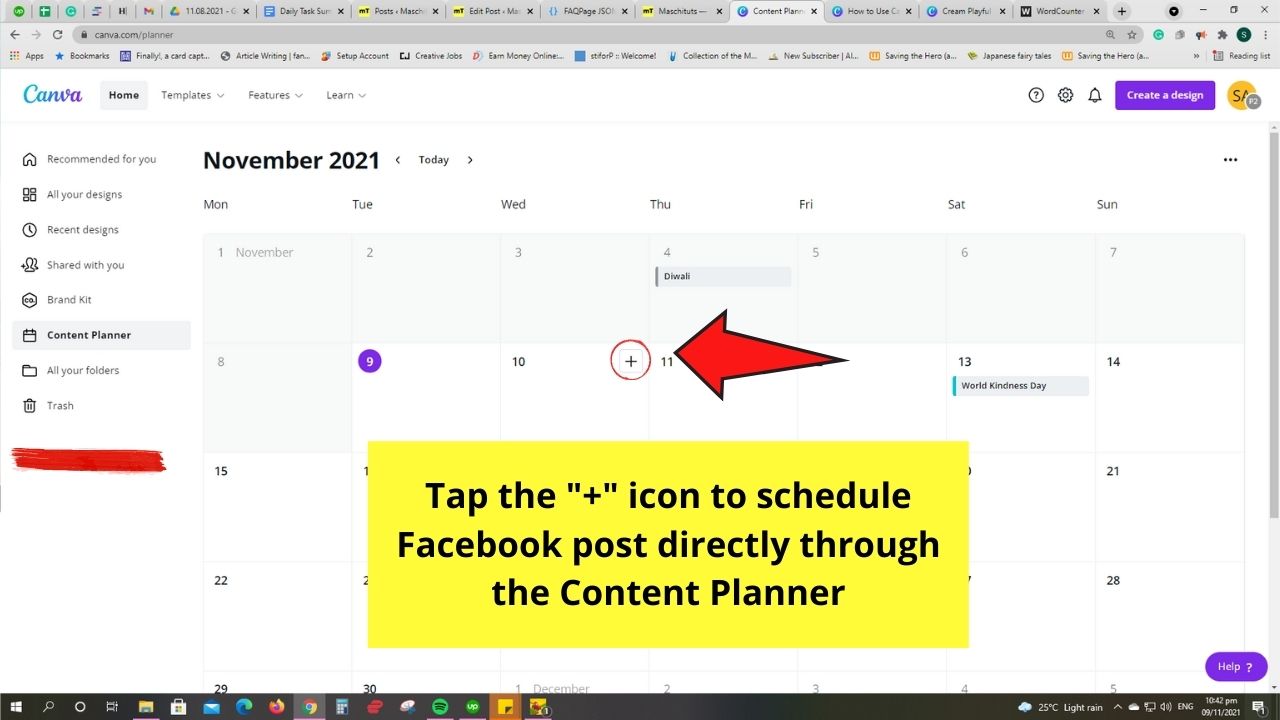

Then, select the file and set the time you’d want to publish the design.
And, there you have it! You’ve successfully scheduled your Facebook posts straight from Canva.
You can obviously also schedule Facebook posts using the Meta business suite but depending on your workflow, scheduling your Facebook posts directly from within Canva can make a whole lot of sense and can save you tons of time.
Frequently Asked Questions about How to Use Canva for Facebook
Can you post your Canva designs directly to your Facebook personal page?
Publishing your Canva designs directly to Facebook is only available for Facebook business pages or groups. You can’t directly post your designs on your personal Facebook page.
How many Facebook accounts can you link to Canva?
Though you have a lot of Facebook Pages or Groups added to your Canva, you can only link one Facebook account with Canva.


Hey guys! It’s me, Marcel, aka Maschi. On MaschiTuts, it’s all about tutorials! No matter the topic of the article, the goal always remains the same: Providing you guys with the most in-depth and helpful tutorials!

