When you are working with Illustrator it is a very common need to outline texts and here is when the doubts begin. Luckily, there is a tool that allows us to set it very accurately and professionally. It also allows us to make as many outlines as we need.
And of course, you can apply this method to any kind of artwork. This is not constrained to texts.
Let’s move forward to find out how we can apply this.
Outlining Text in Illustrator
Type a text using the “Type” (T) tool and pick a color. Press “Shift + Ctrl + O” to create outlines. Go to “Object > Path > Offset Path” and set your desired “Offset” value. With the new brand outlines selected, pick another color. Repeat this process as many times as you need.
Step 1: Type a Text
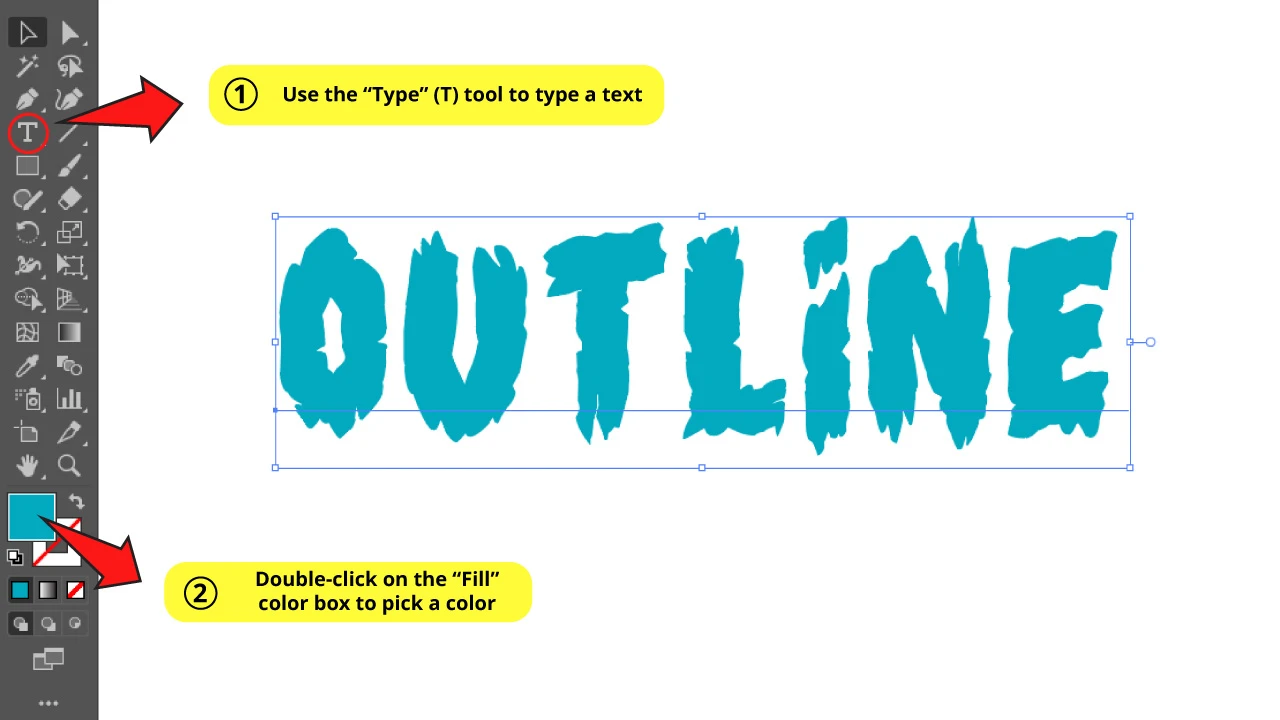
Type a text using the “Type” (T) tool on the left toolbar.
I’ll be using the “Shadow of The Deads” font for this example.
In case you missed it, you can download and import fonts into Illustrator if you wish to use fonts besides the default ones. Or you can download and activate fonts in Illustrator if you want to use the Adobe Fonts instantly.
When your text is ready, double-click on the “Fill” color box on the left side toolbar to pick a color. Or you can use a gradient text if you prefer. The outline also works in gradient fills.
Step 2: Create Outlines
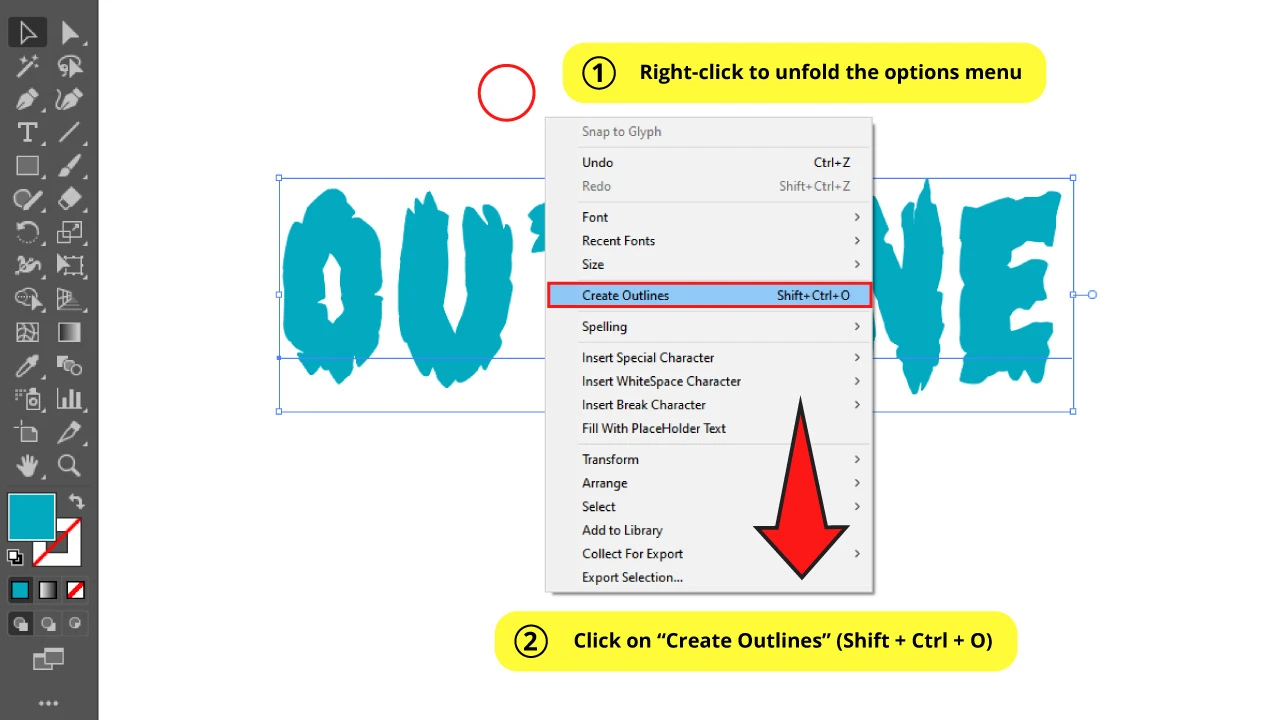
With the text selected, right-click to unfold the options menu.
Click on “Create Outlines” or press the “Shift + Ctrl + O” command to shortcut it.
You can also get this done by going to “Object > Expand” on the menu at the top of the screen.
In the “Expand” settings window, make sure to check the “Fill” and the “Stroke” boxes. Then click “OK” to save.
Your text is now an object.
Step 3: Offset Path
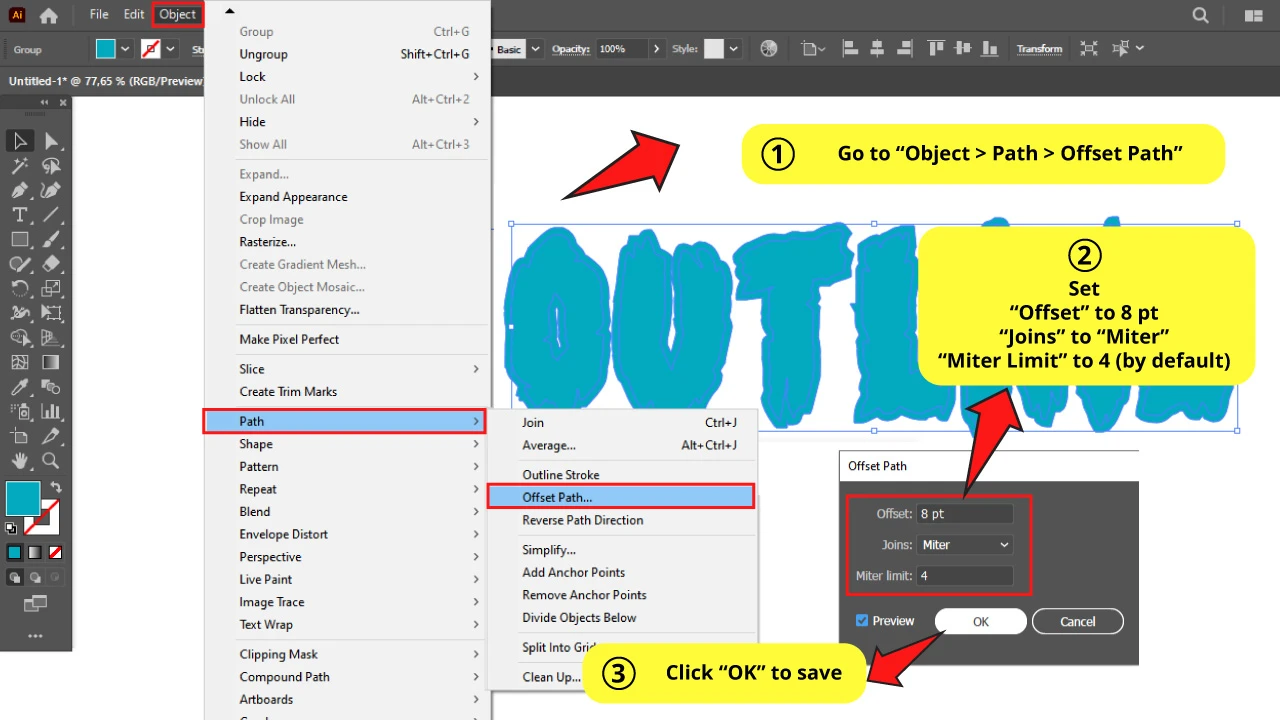
Go to “Object > Path > Offset Path” on the menu at the top of the screen.
On the “Offset Path” window, set the “Offset” value.
I’ll set mine to “8 pt”. This value will depend on the size of your text.
In the “Joins” field you can choose between “Miter”, “Round” and “Bevel”. The most commonly used are the first two. Try these options with the “Preview” box checked in until you get the desired result.
Leave the last field, “Miter Limit”, by default.
Then click “OK” to save.
Step 4: Change the Color
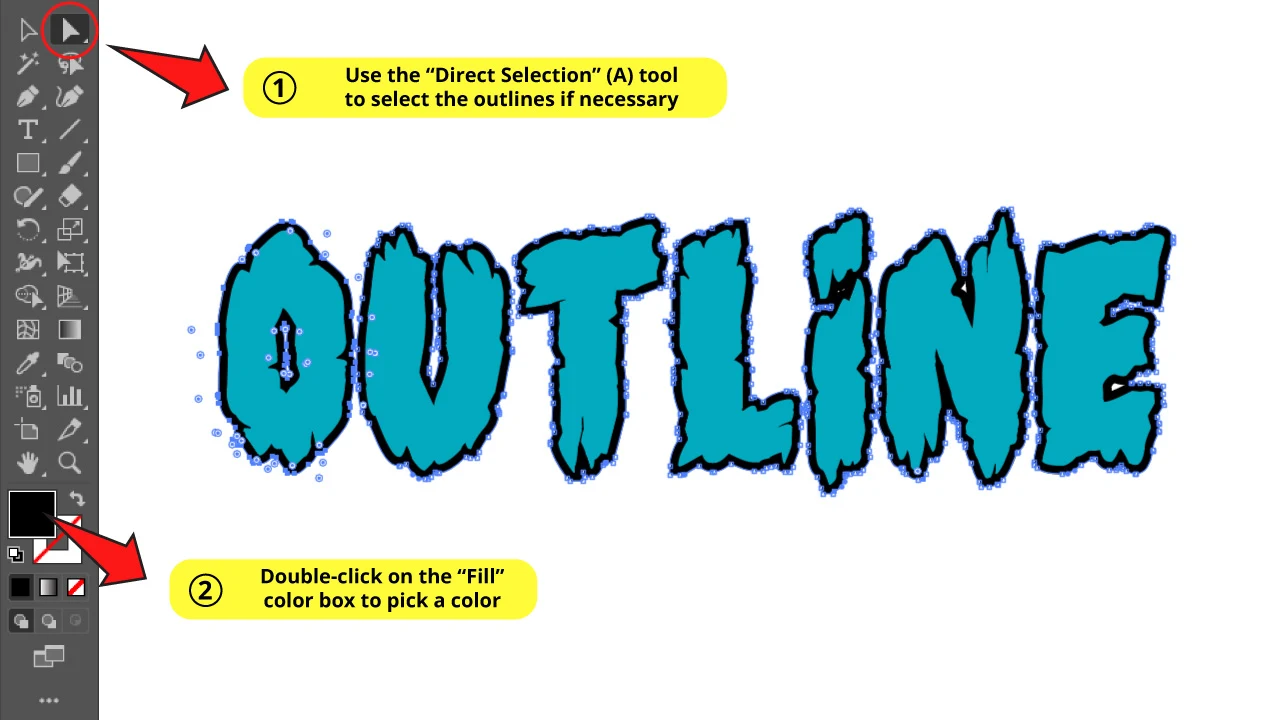
You have now outlined your text, but these outlines have the same color of your original text.
So, with the brand new outlines selected (the outlines will appear selected by default after clicking “OK” to save the “Outline Path” settings) double-click on the “Fill” box color and pick a color.
If you accidentally have deselected the outlines, you can select them again using the “Direct Selection” (A) tool on the left side toolbar.
Make sure to hold the “Shift” key as you select each outline. Holding the “Shift” key allows you to select several objects at the same time.
This is it. This is all you need to do to outline your text.
Now, if you want to know how to add multiple outlines, continue to the following step.
Step 5: Select the Outline
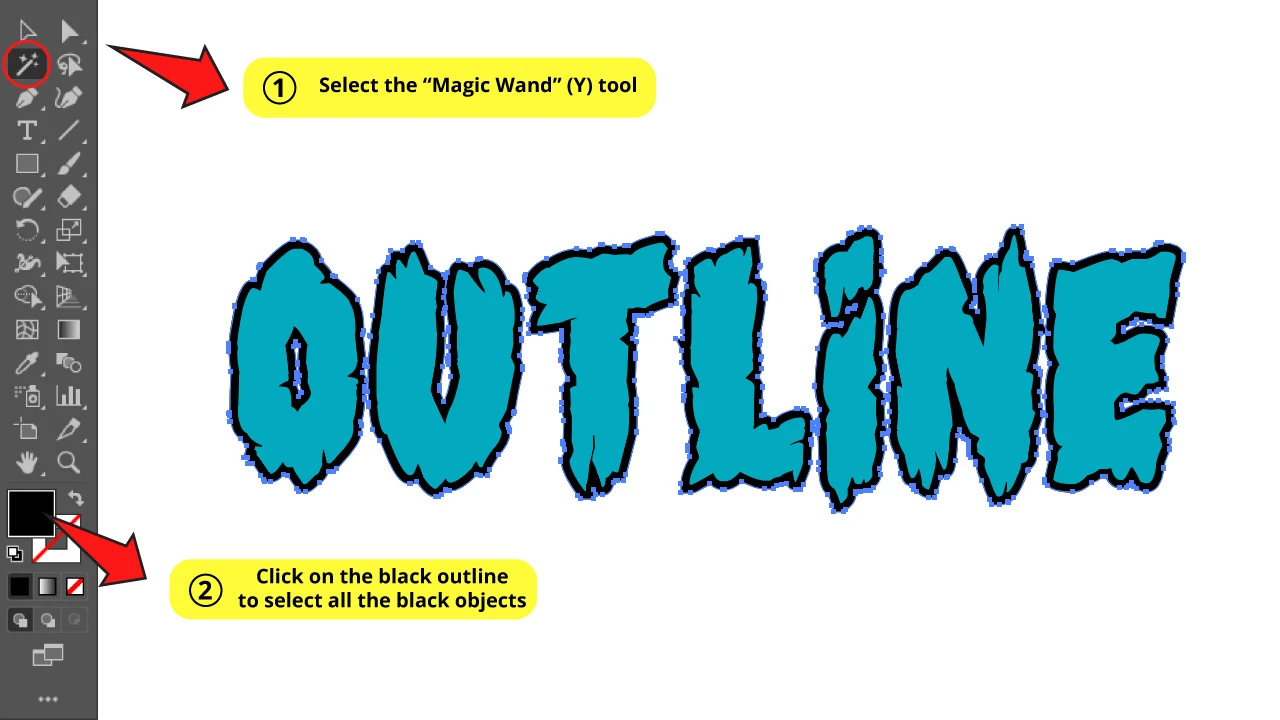
Select the “Magic Wand” (Y) tool on the left toolbar.
Then click on the black outline to select all the black objects at the same time.
This tool saves us from having to select each outlined object one by one.
Step 6: Make Another Outline
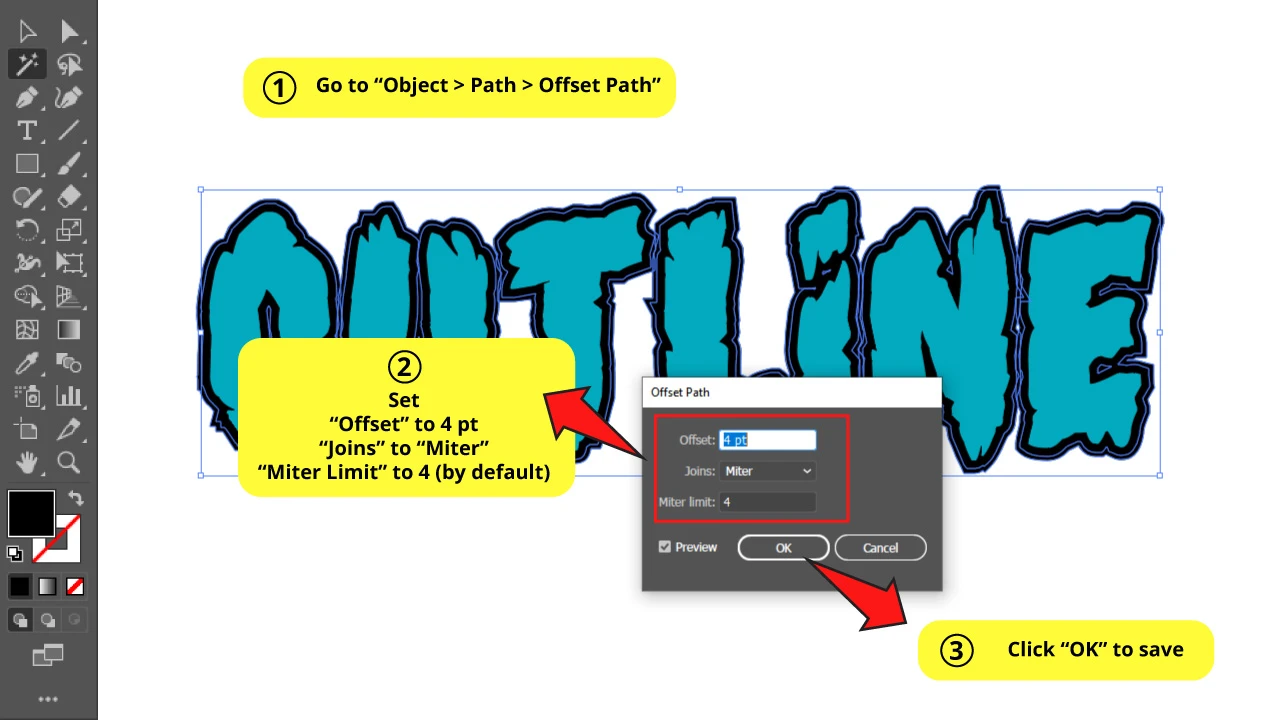
Go to “Object > Path > Offset Path” once again, and adjust the “Offset Path” settings.
I’ll set the ”Offset” value to “4 pt” this time. And the “Joins” to “Miter”.
Then click “OK” to save.
Step 7: Pick a Color for the New Outlines
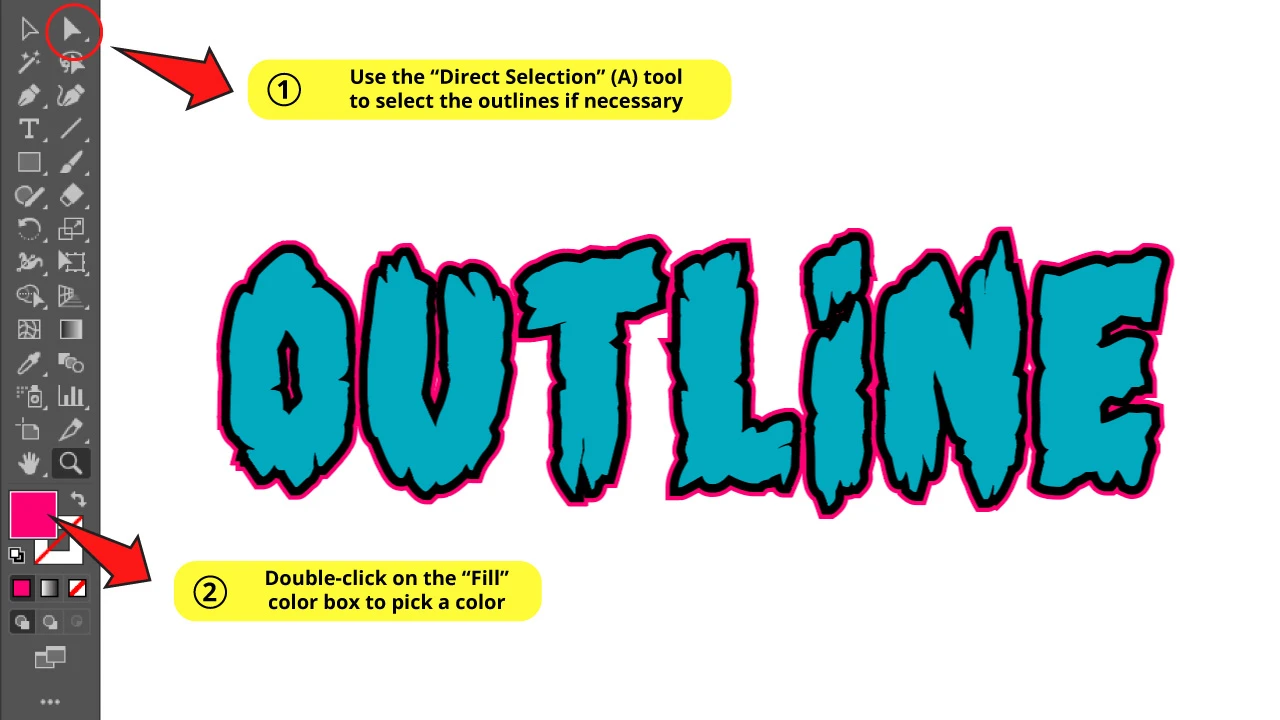
Finally, with the new outlines selected, double-click on the “Fill” color box to select another color for them.
And that’s it.
Repeat this process as many times as you need.
And a final tip! Before saving your work, you can center your object to keep your work tidy and neat.
Frequently Asked Questions on “How to Outline Text in Illustrator”
What’s the difference between the different types of “Joins” in the “Offset Path” Illustrator settings: “Miter”, “Round” and “Bevel”?
“Miter” makes the edges sharper, “Round” makes them rounder, and “Bevel” cuts the edges in an oblique angle.
Is there any other way to outline texts in Illustrator?
You could also use the “Stroke” tool. Once your text was converted to object by the “Create Outline” function, set the “Stroke” width on the toolbar at the top of the screen. Then set “Align Strokes” to “Outside” on adjustments. Finally go to “Object > Expand Appearance”.

Hey guys! It’s me, Marcel, aka Maschi. On MaschiTuts, it’s all about tutorials! No matter the topic of the article, the goal always remains the same: Providing you guys with the most in-depth and helpful tutorials!
