
There are two good methods to Bevel & Emboss in Illustrator. The first can be done with the “Extrude & Bevel” feature, and the second by combining the “Offset Path” and the “Knife” tools. I mostly recommend the first method because it is the easiest to apply.
Do you know how sometimes you want to try something different? Have you ever found yourself scrolling through all of Photoshop’s effects looking for the right one?
If you have, I’m sure you’ve come across the most well-known effect “Bevel & Emboss,” and you’re probably aware that it doesn’t exist in Illustrator.
But the good news is that you can still recreate the effect by combining or using other tools. So, how do we proceed?
I’ll demonstrate two methods: automatic and manual. But don’t worry! We’ll go over each step to make sure we get the desired outcome.
How to Bevel & Emboss in Illustrator Using “Extrude & Bevel”
To Bevel & Emboss in Illustrator, create a rectangle with the “Rectangle Tool”(M), go to “Effect”>”3D”>”Extrude & Bevel”. Set the view on “Front” and choose a “Bevel” from the list. Define its “Height” and adjust the other settings to your preference. Expand Appearance to keep editing afterward.
Step 1:
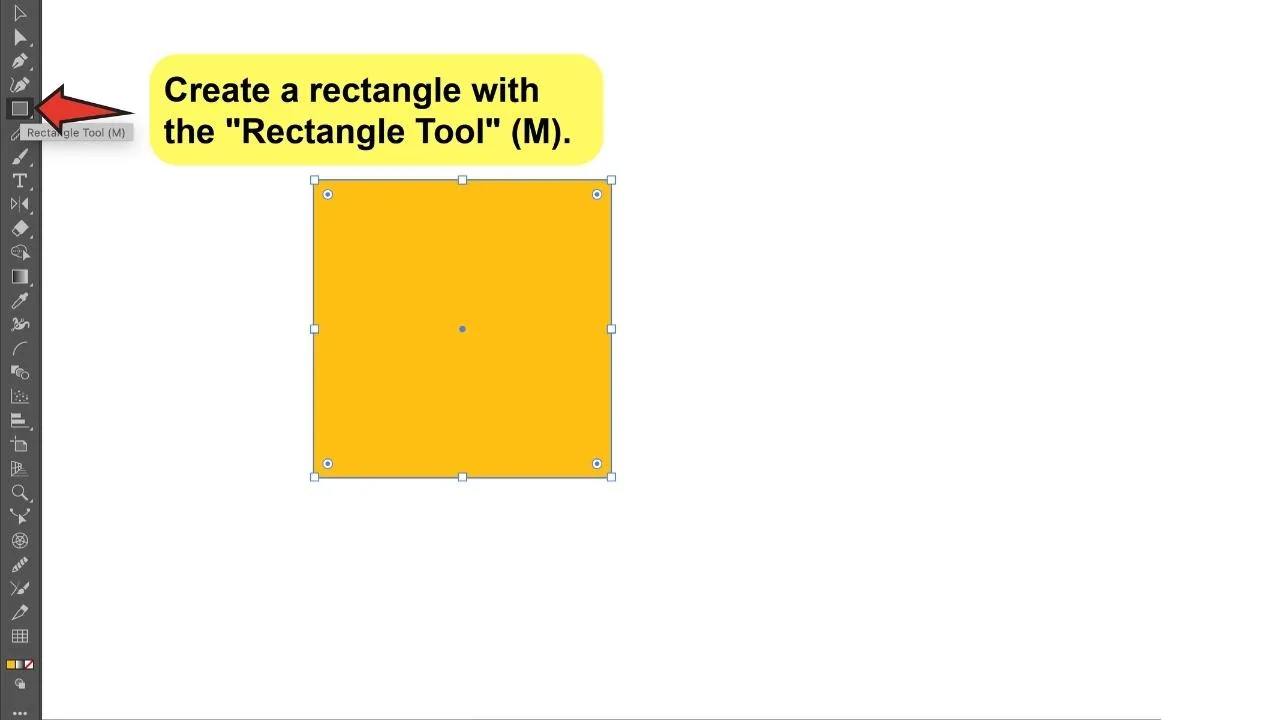
Create a rectangle.

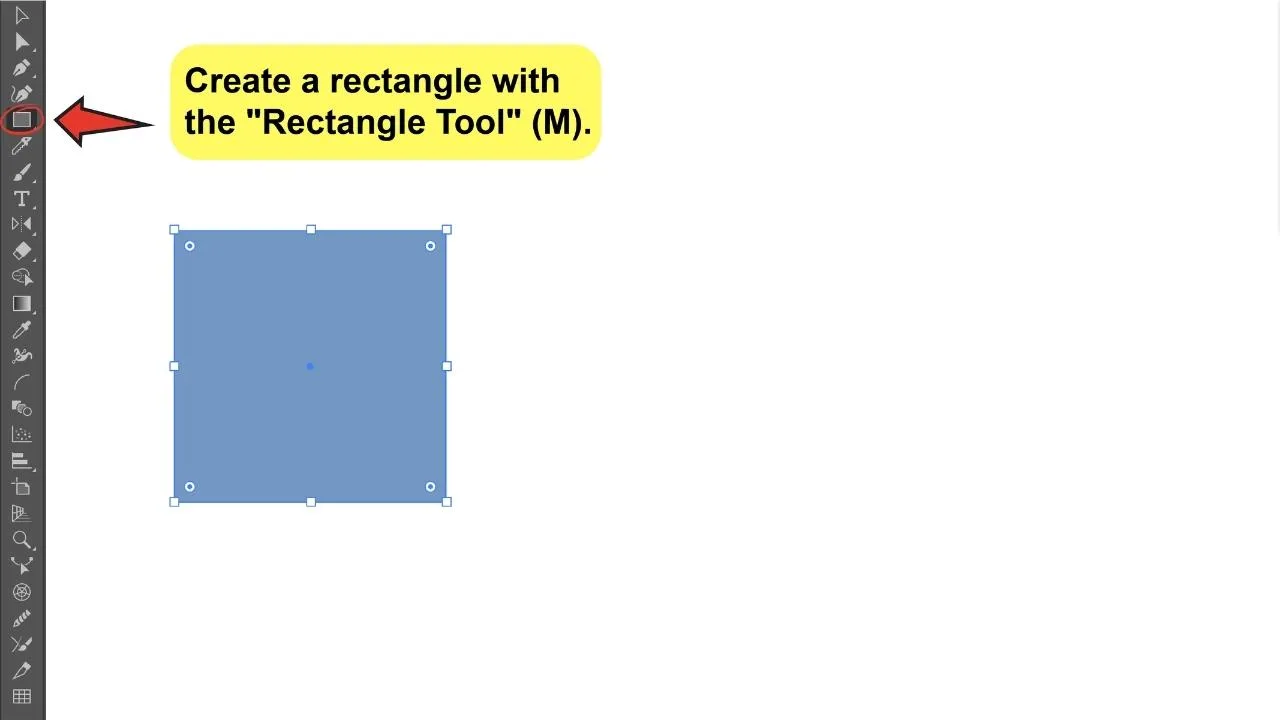
We will use a simple rectangle shape to teach you how to apply this effect, but once you are familiar with the process, you’ll be able to use this on any other shape you want.
Go to the toolbar and choose the “Rectangle Tool” (M) to create a rectangle. Make sure it has a fill color.
Step 2:
Select the “Extrude & Bevel” option from the menu.

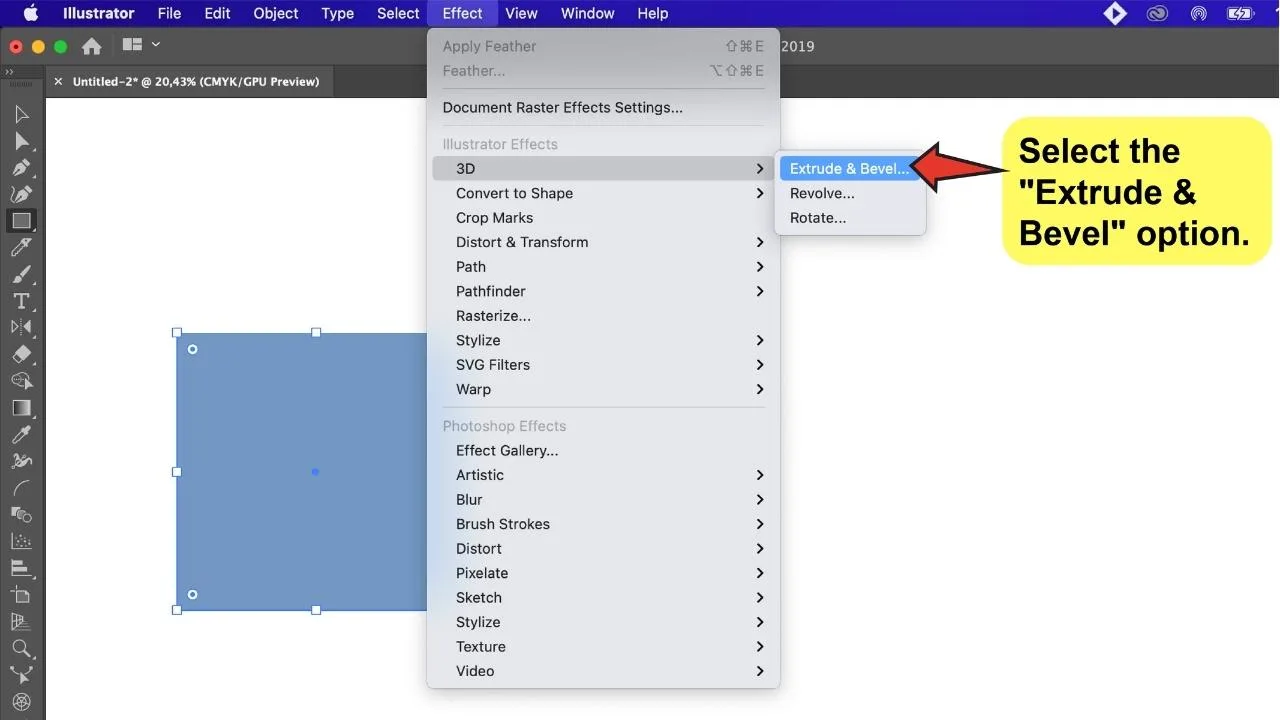
Go to the top menu and choose “Effect”>”3D”>”Extrude & Bevel.” A menu box with options will appear. To display the full list of options, click on the “More Options” button at the bottom of the box.


At this point, it’s also a good idea to check the “Preview” box to see how each adjustment impacts your rectangle directly.

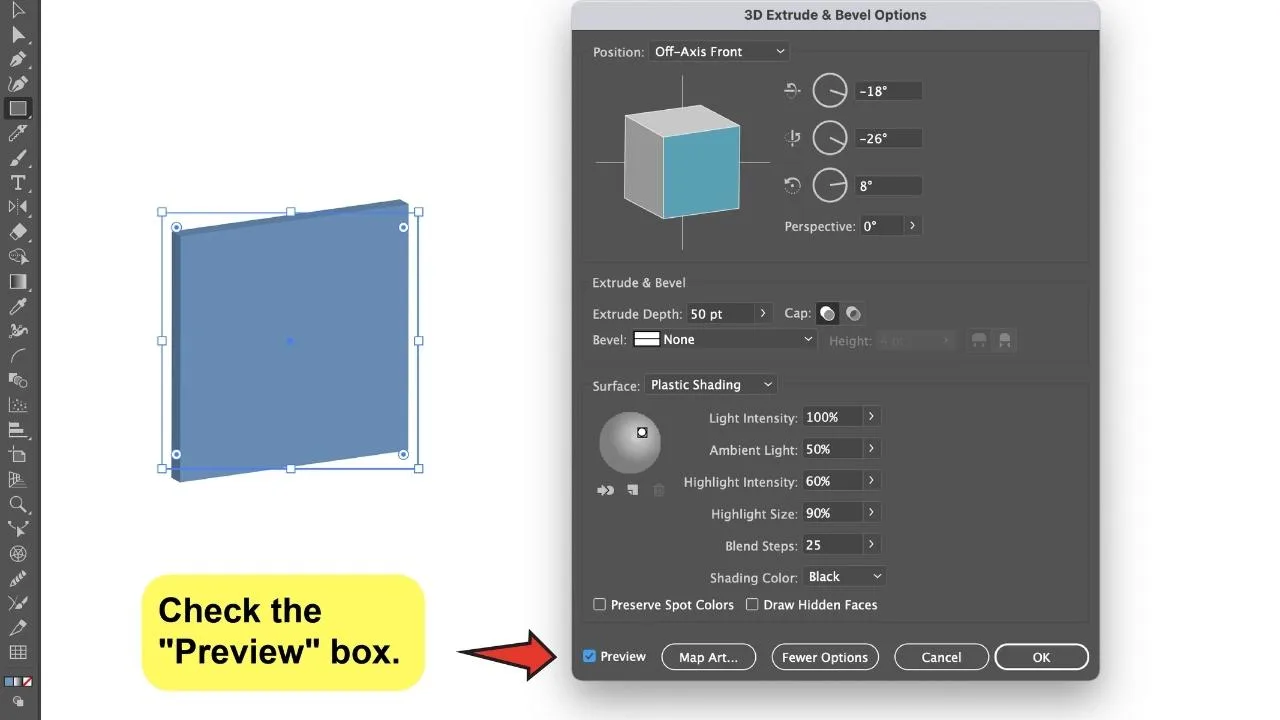
We’ll go over the various options available in these settings and explain them. So don’t be afraid! It’s not as hard as it appears.
Step 3:
Adjust the “Position” to “Front”.
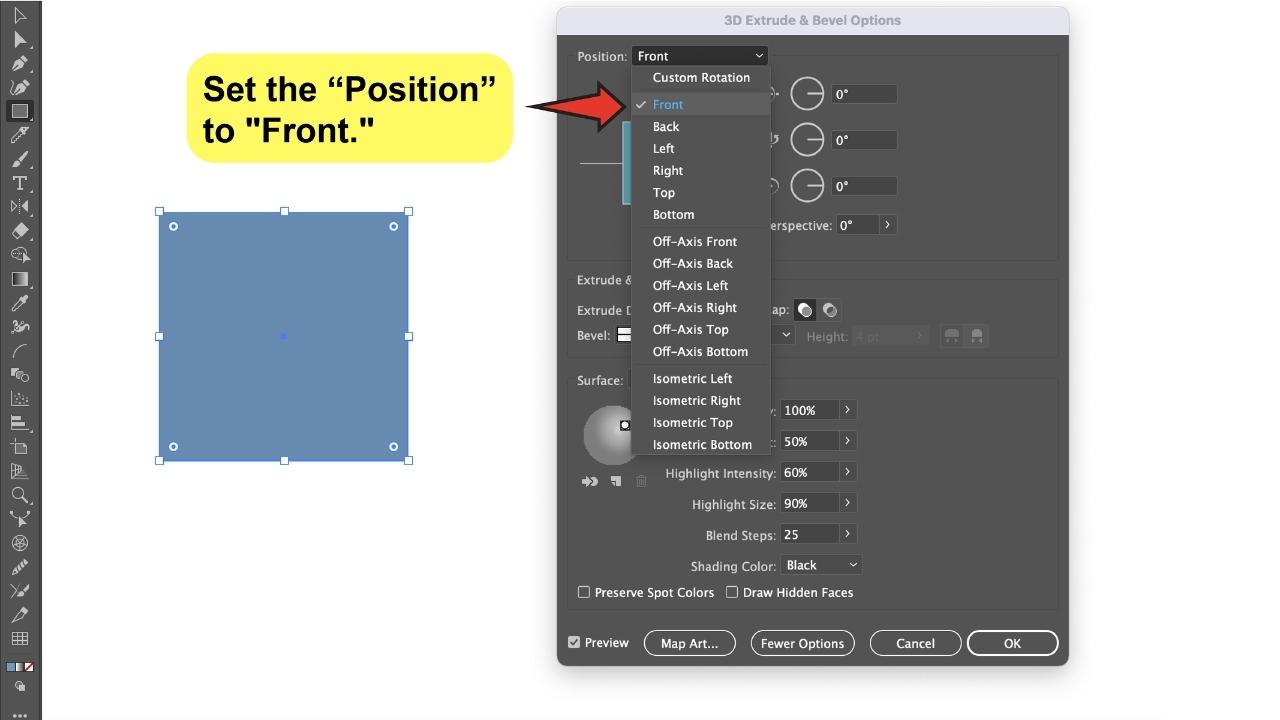
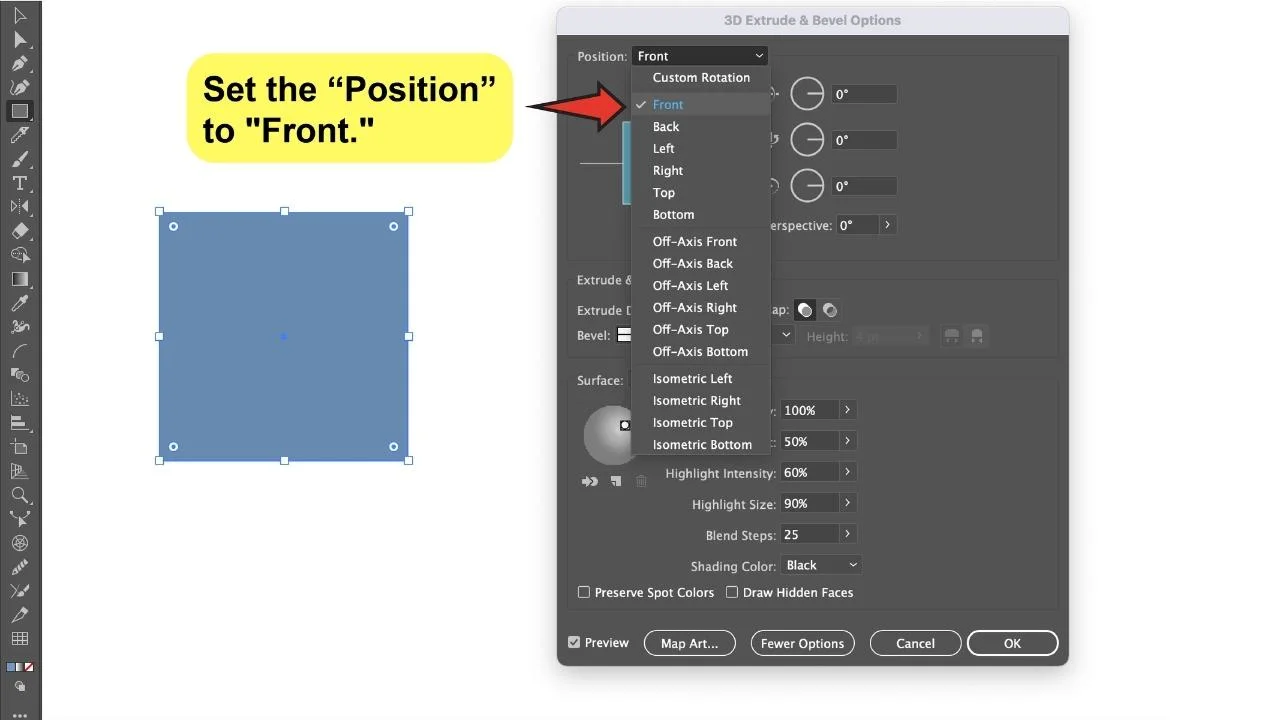
The “Position” specifies how the object is rotated and from what perspective it is viewed. We’ll use the “Front” view because we want to change the average appearance of the rectangle by adding some depth and volume to it, but we don’t have to use a 3d rotation in this tutorial.
Step 4:
Adjust the “Extrude & Bevel” settings.

This section is essential because it defines the object’s depth as well as the magnitude of any bevel applied to it or removed from it.
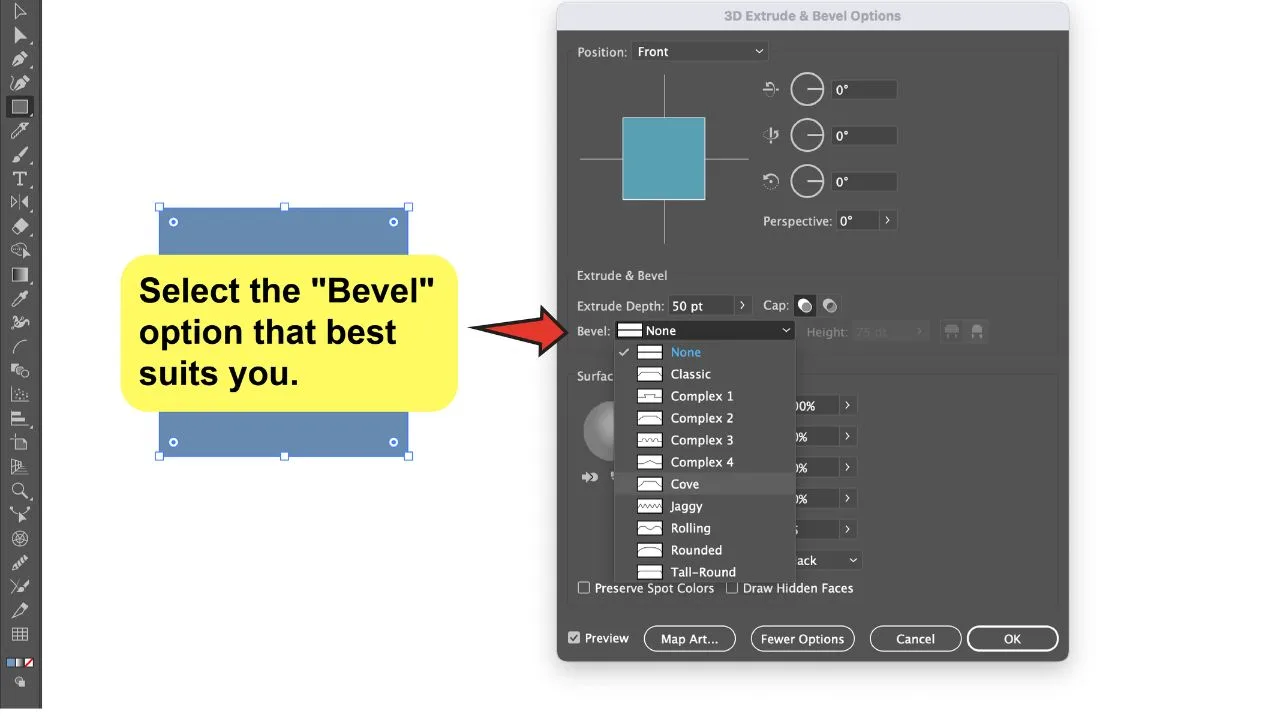
First, we will explore the “Bevel” option, which will give you the chance to define the style of the beveled edge that you want. This is crucial for the final appearance that we are looking for.
Explore the options in the drop-down menu to find one that suits you. Feel free to play around with them as much as you’d like before deciding.
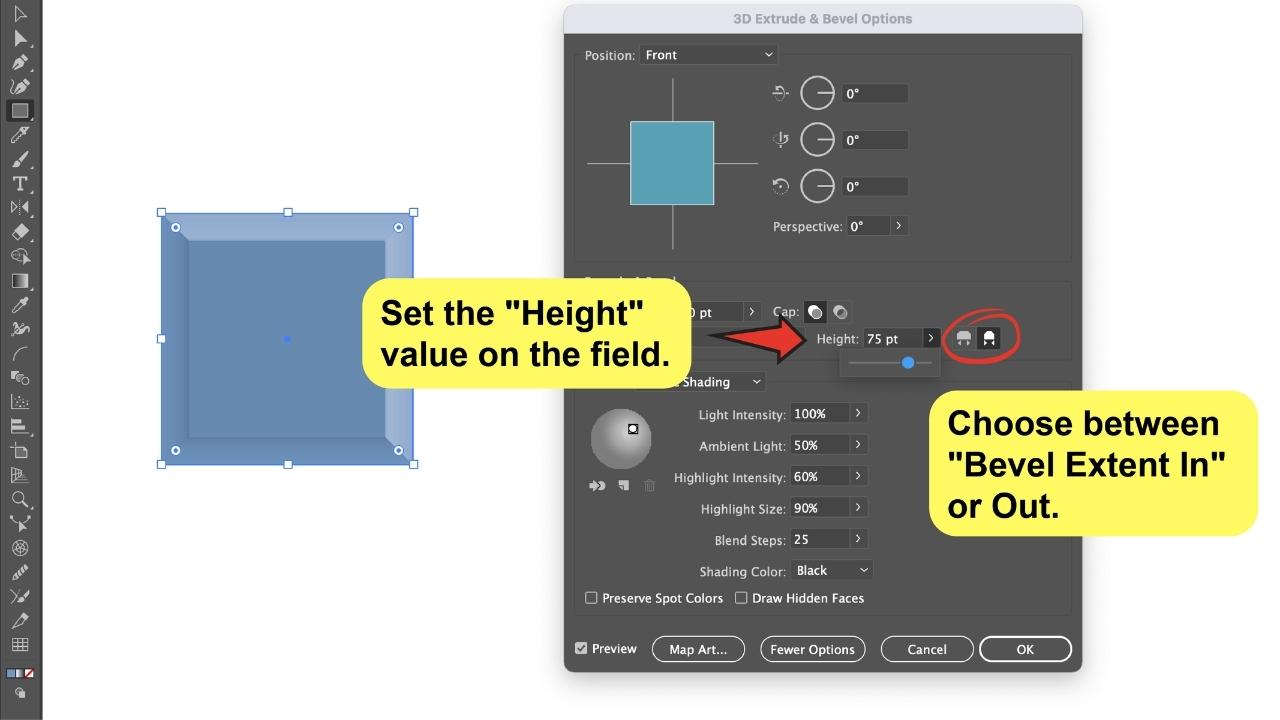
Second, we’ll go to the “Height” box, where you can set the bevel height between 1 and 100. This will enlarge or reduce its size. The bevel will appear on your rectangle as soon as you increase the value.
It is important to note that the “Height” does not correspond to the object’s depth or height, but only to the bevel.
The “Extrude Depth” option can be used to define the depth of an object. However, you’ll notice that this has only a minor effect on the appearance, and this is mostly due to the fact that we’re working with a frontal view.
You’ll notice two small buttons right next to the “Height” value field. The one on the left, “Bevel Extent Out,” will add the bevel to the object’s original shape, while the one on the right, “Bevel Extent In,” will sculpt the bevel out from the original shape.

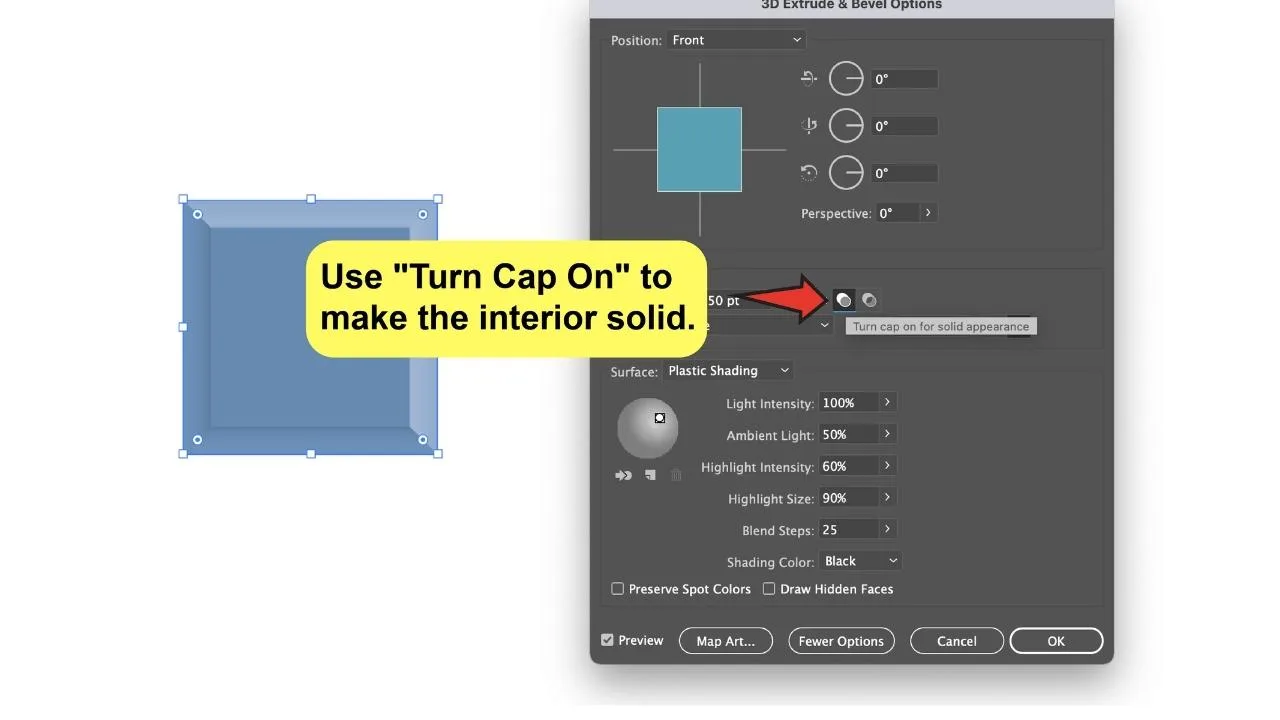
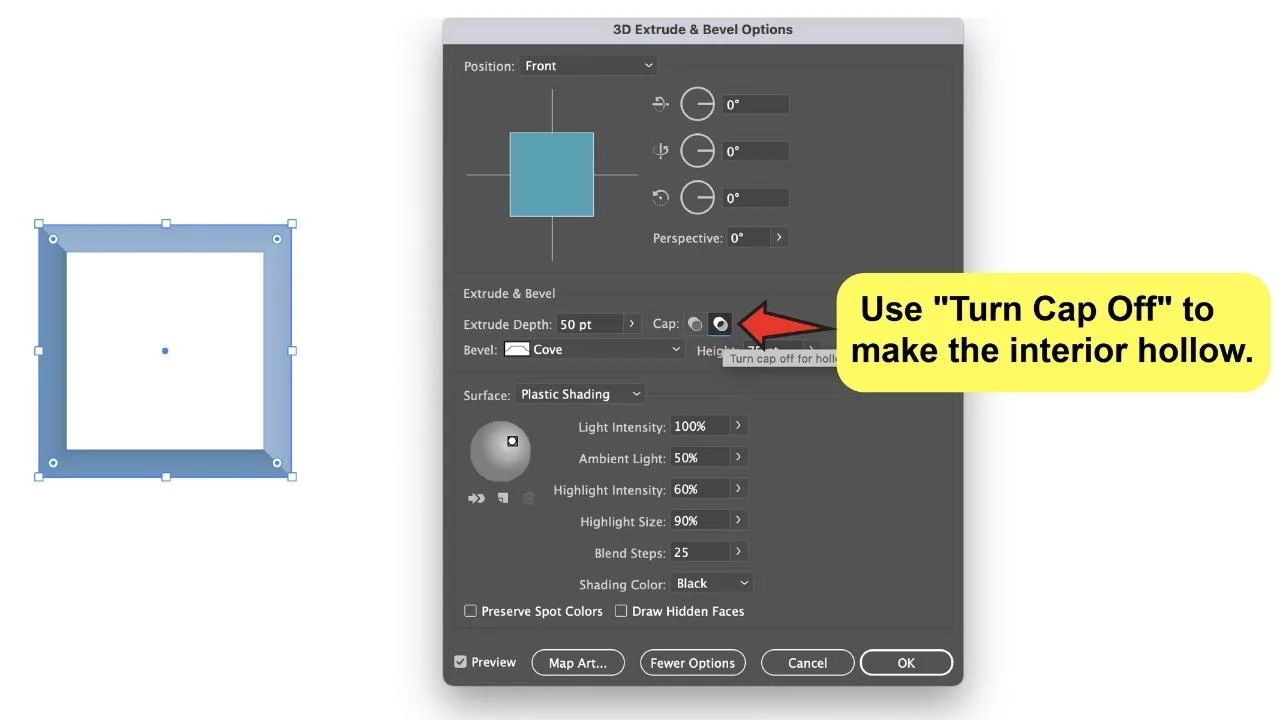
Lastly, you could also explore the “Cap” options. These buttons can basically be used to specify if the object will be solid inside (“Turn Cap On”) or hollow (“Turn Cap Off”). By making it hollow, you will only visualize the bevel.


Step 5:
Adjust the light in the “Surface” section.

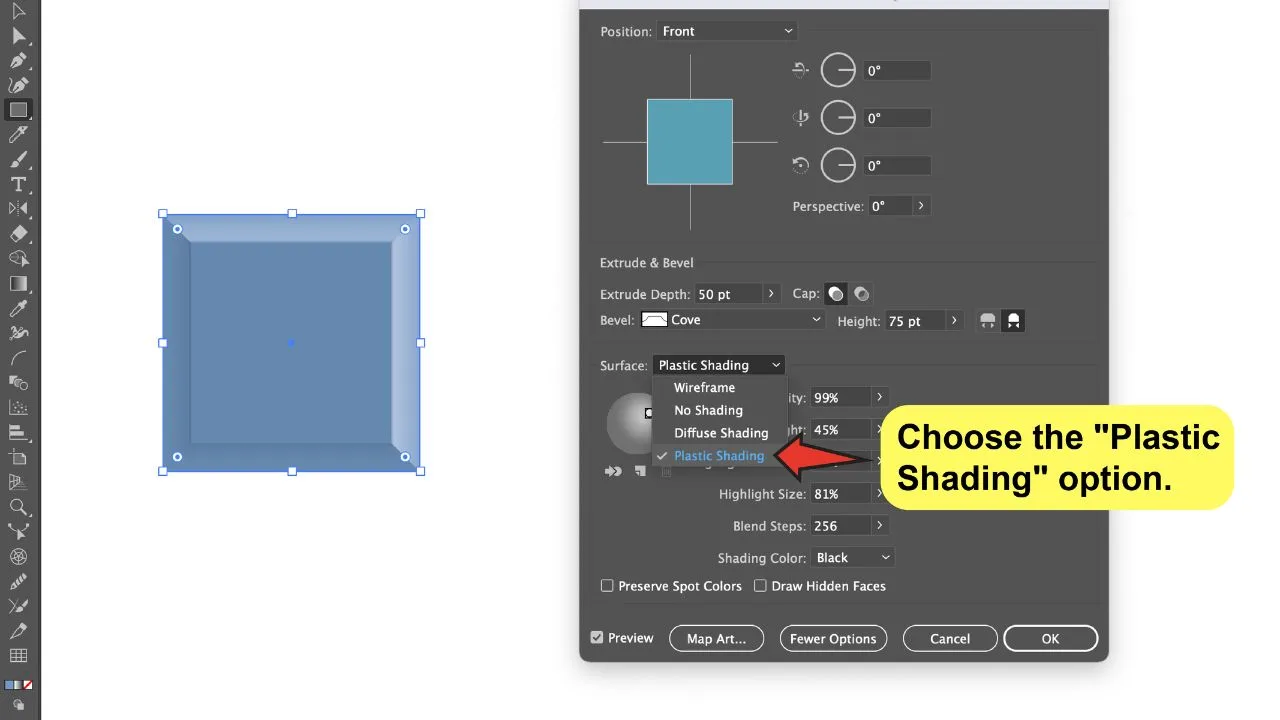
This section allows you to modify the lighting, and it will help you create a more realistic aspect.
Go to the “Surface” option and select “Plastic Shading” from the drop-down menu.
The “Lighting Sphere” below allows you to control where the light shines, and even add more lights to the sphere if you want to.
Set a number between 0% and 100% in the “Light Intensity” field to adjust the intensity of the spotlight that appears on the sphere.
“Ambient Light” regulates global lighting, allowing it to change the brightness of all object surfaces uniformly.
The Highlight values can be controlled by altering the “Highlight Size” and “Highlight Intensity” parameters.

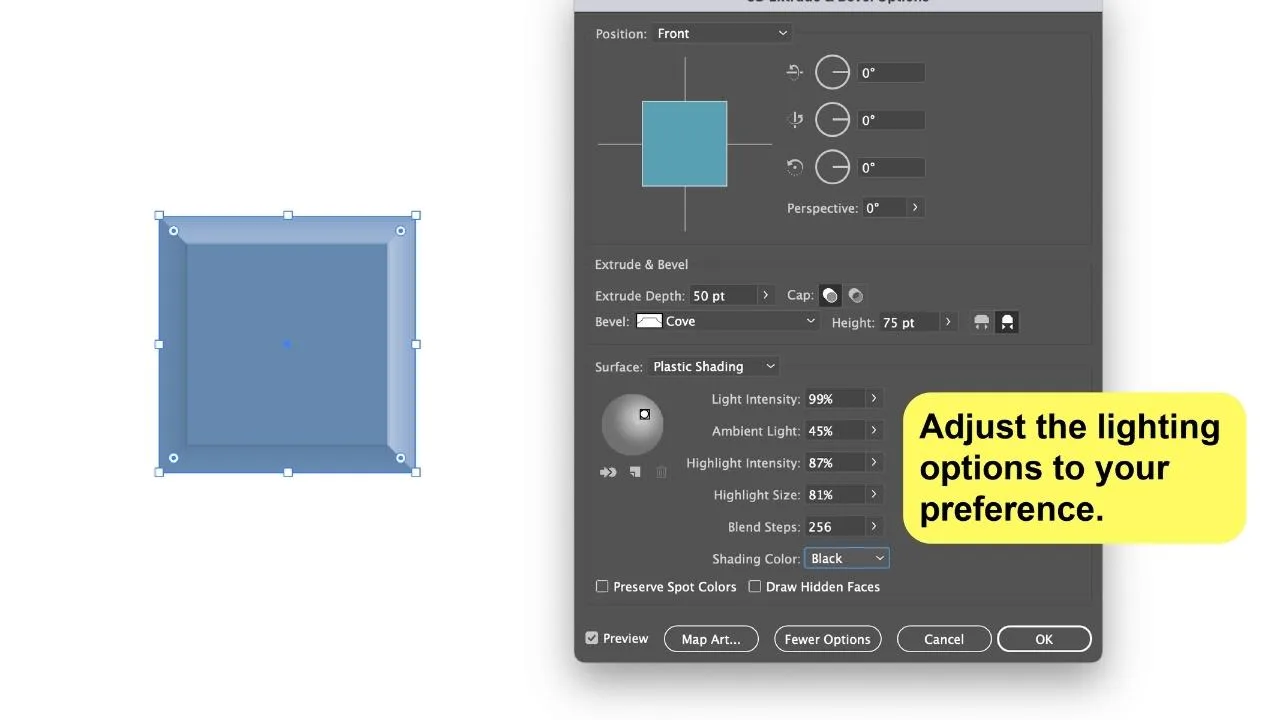
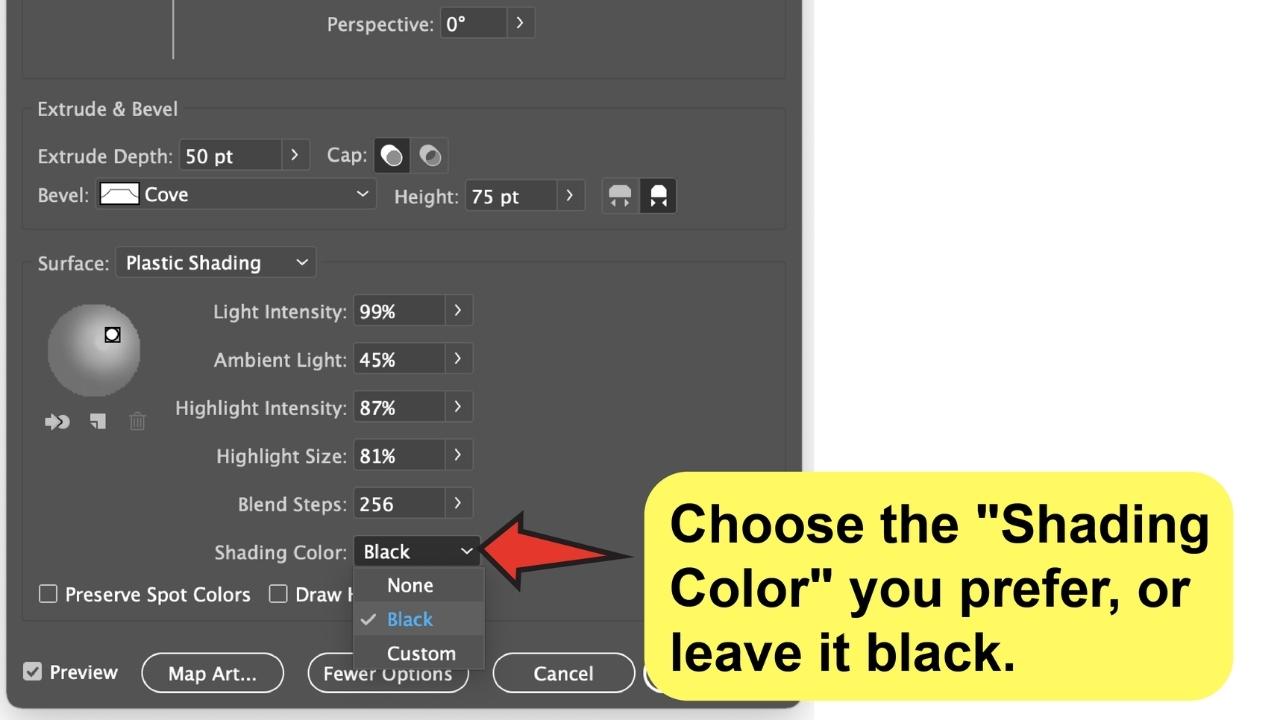
Lastly, on the “Shading Color” option, you can adjust the shading color. You can choose between Black, White, or Custom if you want to use a specific color.

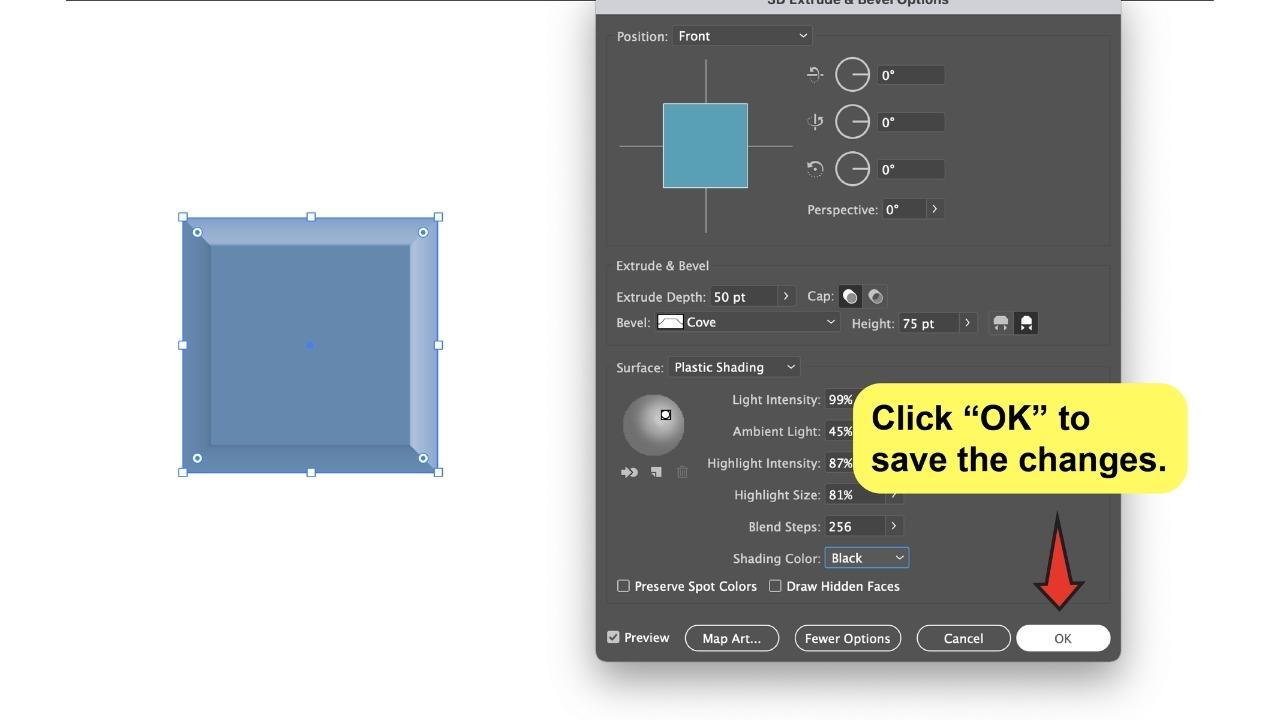
At this point, we’re done adjusting the settings we need from the whole menu-box, so simply click “Ok” to apply.

Step 6:
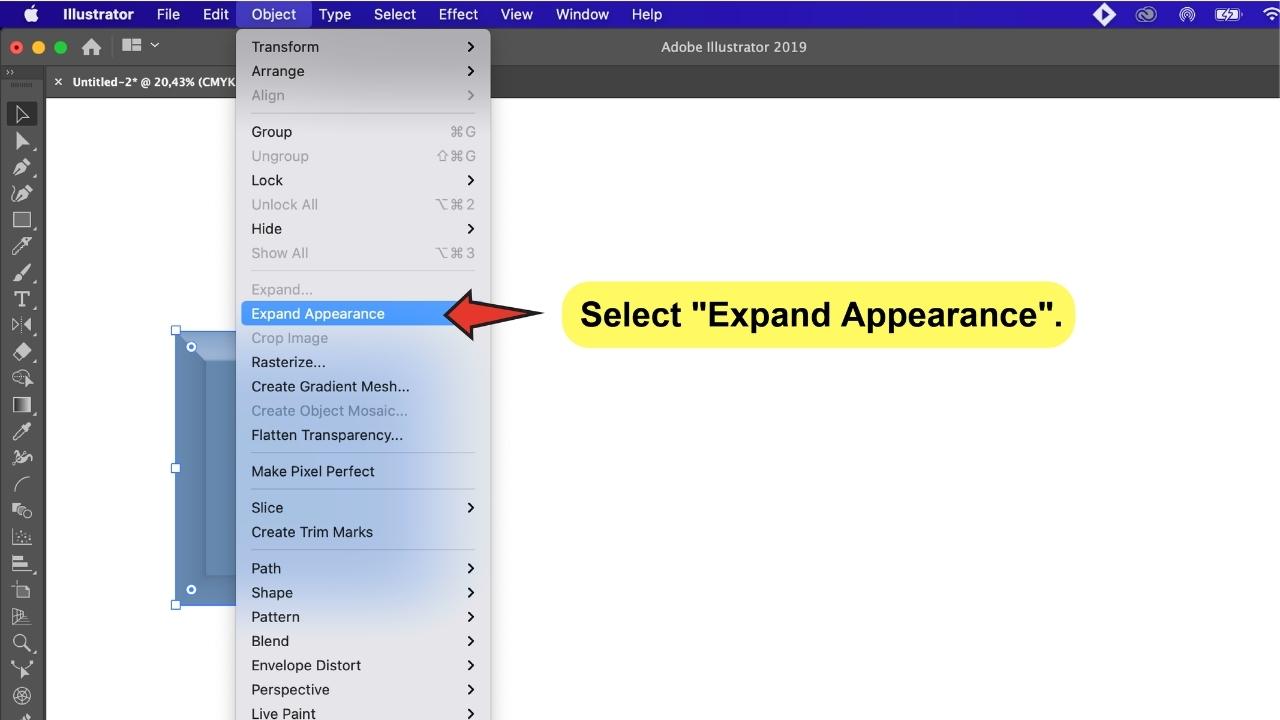
Apply “Expand Appearance”.

Now that you’re finally done with these settings, you might want to be able to customize the colors and any other details you consider important for your rectangle’s appearance.
To do this, you need to expand the appearance so that you can freely edit it.
Go to the top-menu and select “Object”>”Expand Appearance”. You are free to make any changes you want!
Think about how you can customize the artwork using other Illustrator tools and your creativity.
I personally recommend that you work on the colors and add some blending effects, gradients, or shadows to increase the sense of depth and volume. That will definitely make the outcome more realistic.
How to Bevel & Emboss in Illustrator Using the “Offset Path“ and the “Knife” tools
To Bevel & Emboss in Illustrator, make a rectangle with the “Rectangle Tool”(M) and use the “Offset Path” to add an offset around it. Separate it from the rectangle with the “Shape-Builder Tool” or the “Pathfinder” and cut the offset corners to create the bevel. Edit colors to create a deep effect.
Step 1:
Create a rectangle.

Go to the toolbar and choose the “Rectangle Tool” (“M”). Make a rectangle with it. Make sure the rectangle has a fill color.
Step 2:
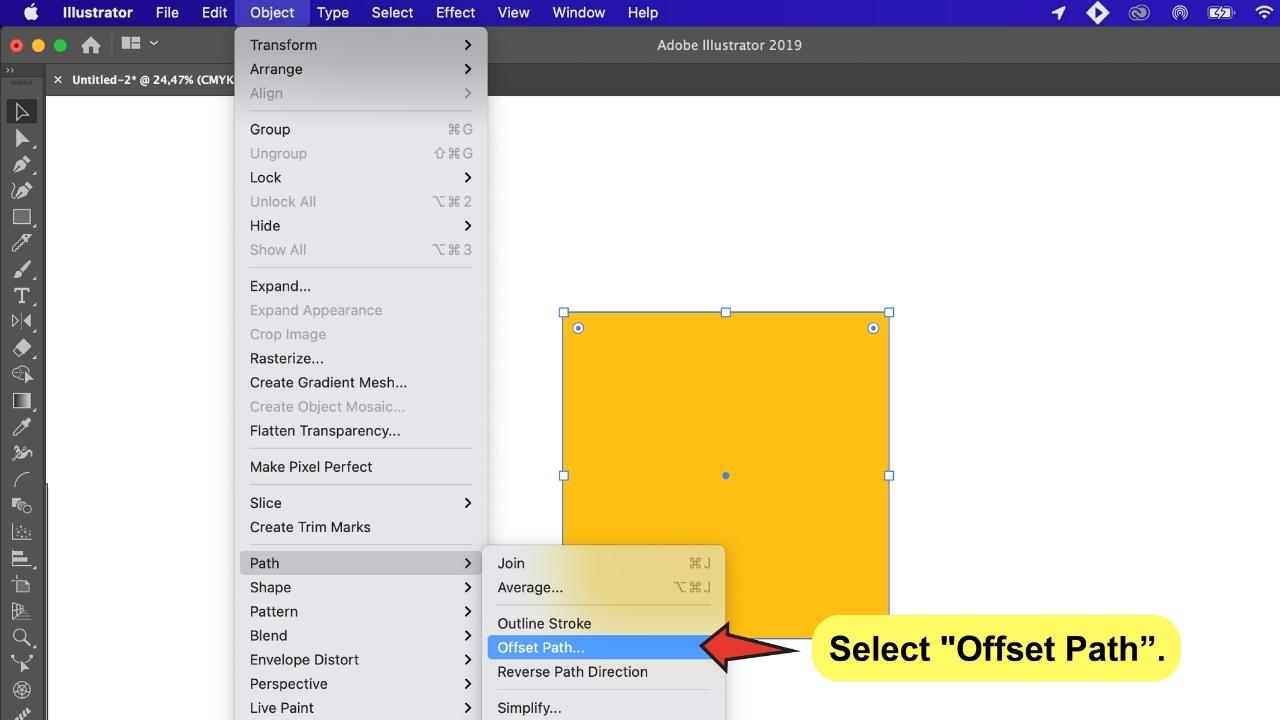

Use the “Offset Path” feature to add extra space on the rectangle’s edges.
Go to “Object”>”Path”>”Offset Path” on the top-menu to open the ”Offset Path” menu-box. You can enter a value here to define the offset that you want to add.
Enter the value in the field and select “Preview” to see how it will look. When you’re done, press “Enter” or click “Ok.”


You should now notice a new rectangle behind yours that is the same size as the offset you just added.
Step 3:
Use the “Shape Builder Tool” or the “Pathfinder” to separate the rectangle from the offset.
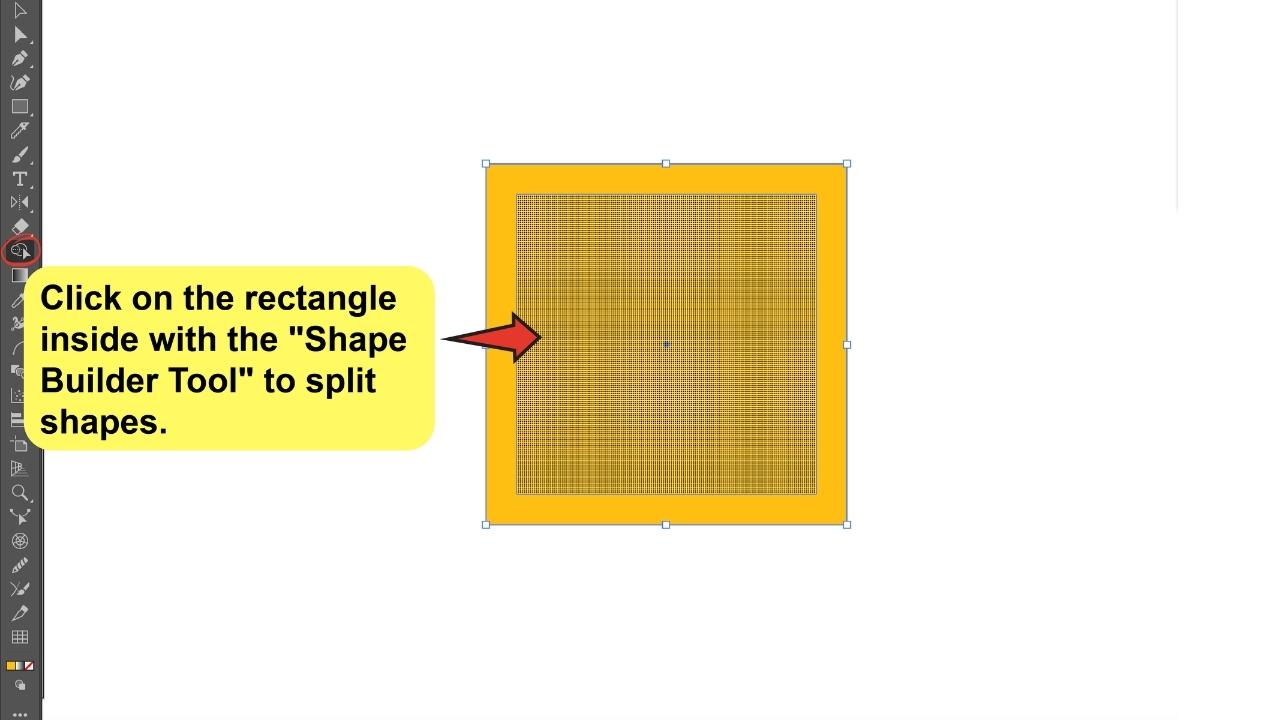
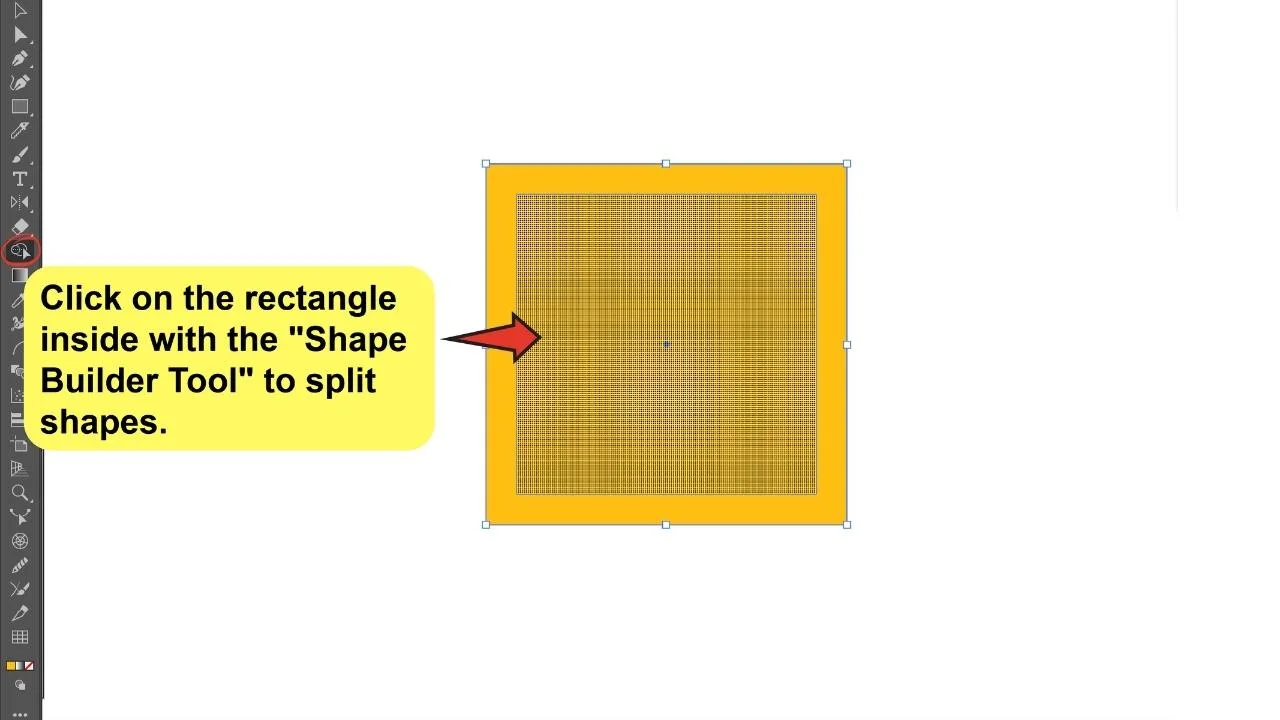
Locate the “Shape Builder Tool” on the left-toolbar or use the “Shift+M” keyboard shortcut to access it, and then click once on the rectangle inside. Both areas are now split.
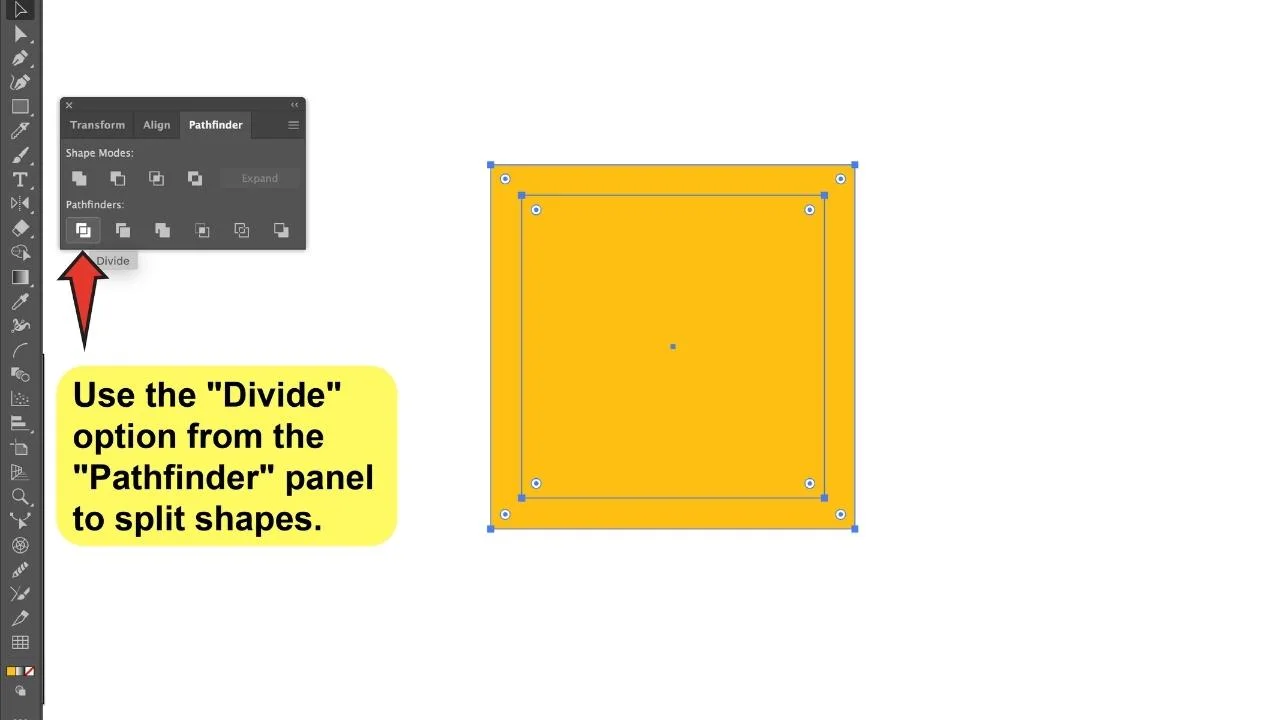
You can do the same thing with the “Pathfinder.” To open the “Pathfinder” panel, go to “Window”>”Pathfinder,” or use the “Shift+F7” keyboard shortcut. Select both objects and then click the first option on the panel’s left-bottom.
The rectangle and offset have also been split, but they are now grouped, so right-click on them and select “Ungroup,” or use the “Control+Shift+G” keyboard shortcut to do the same.

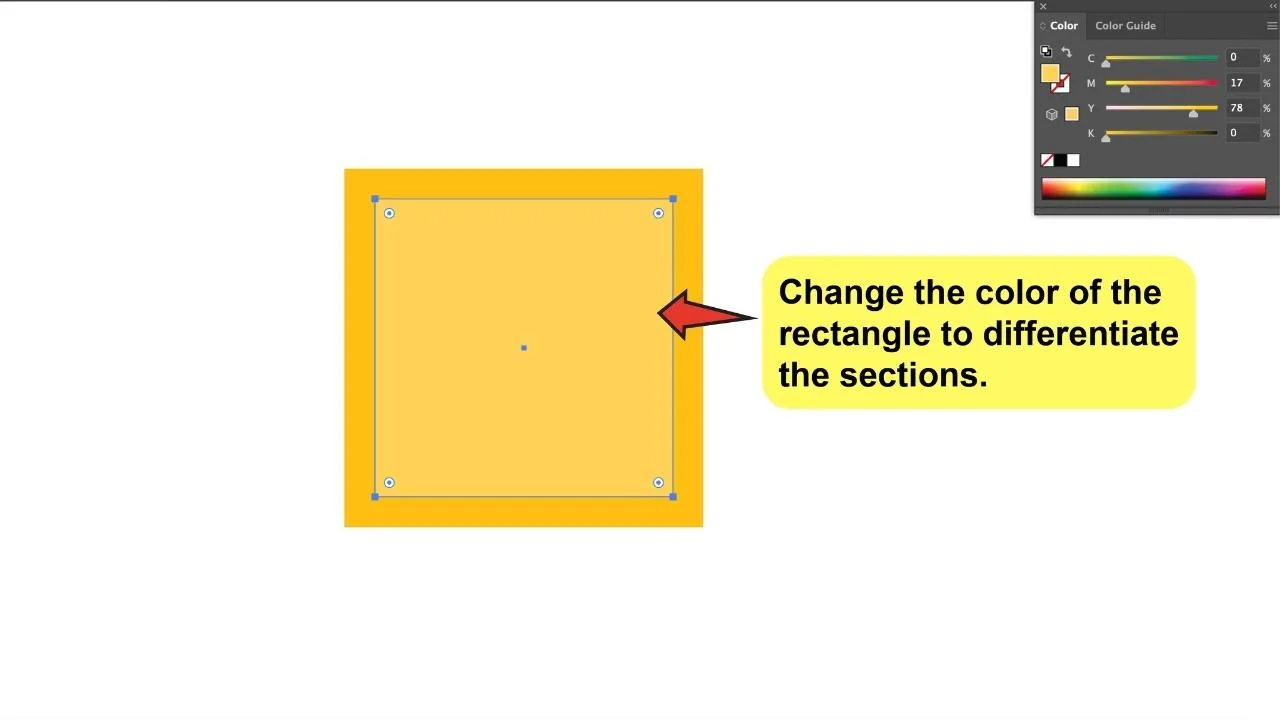
At this point, I recommend that you change the color of the rectangle or the offset. This will help you in quickly identify the areas while you are still working on the structure.

Step 4:
Make diagonal cuts on the offset corners with the “Knife Tool” to create the bevel.

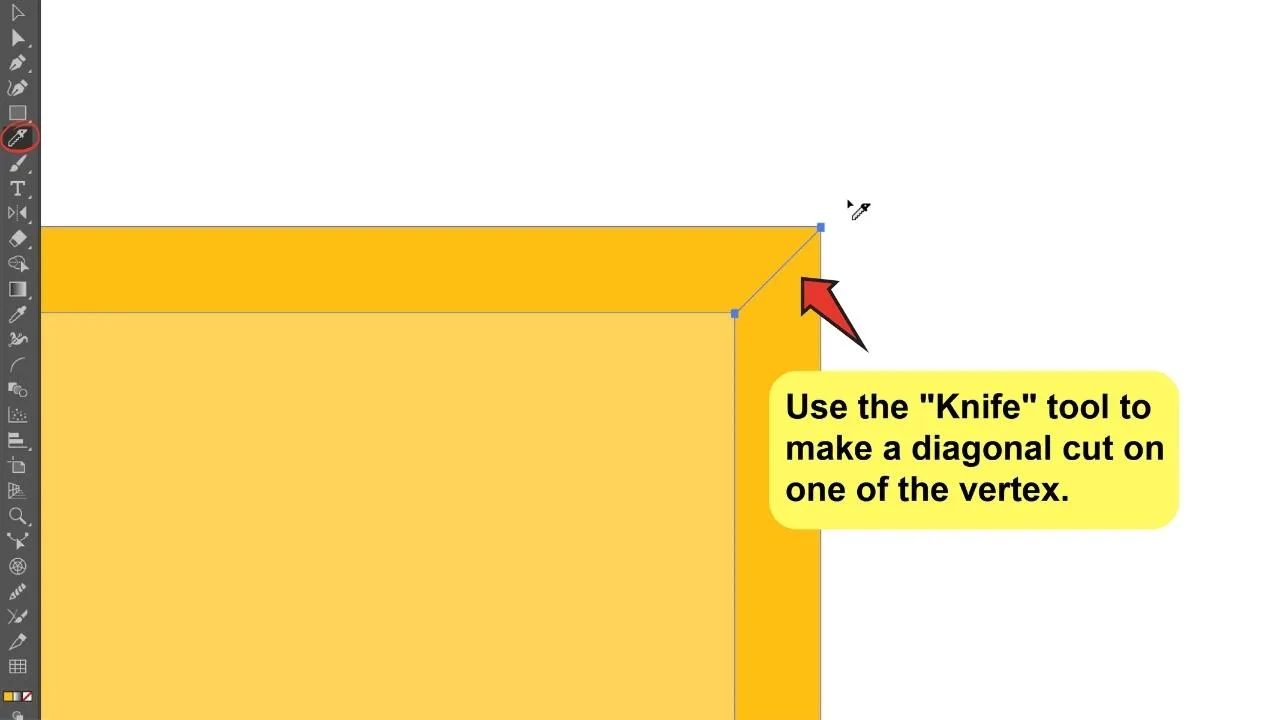

Locate the “Knife Tool” on the toolbar. To add depth to the rectangle, you’ll need to make a diagonal cut on each corner of the offset.
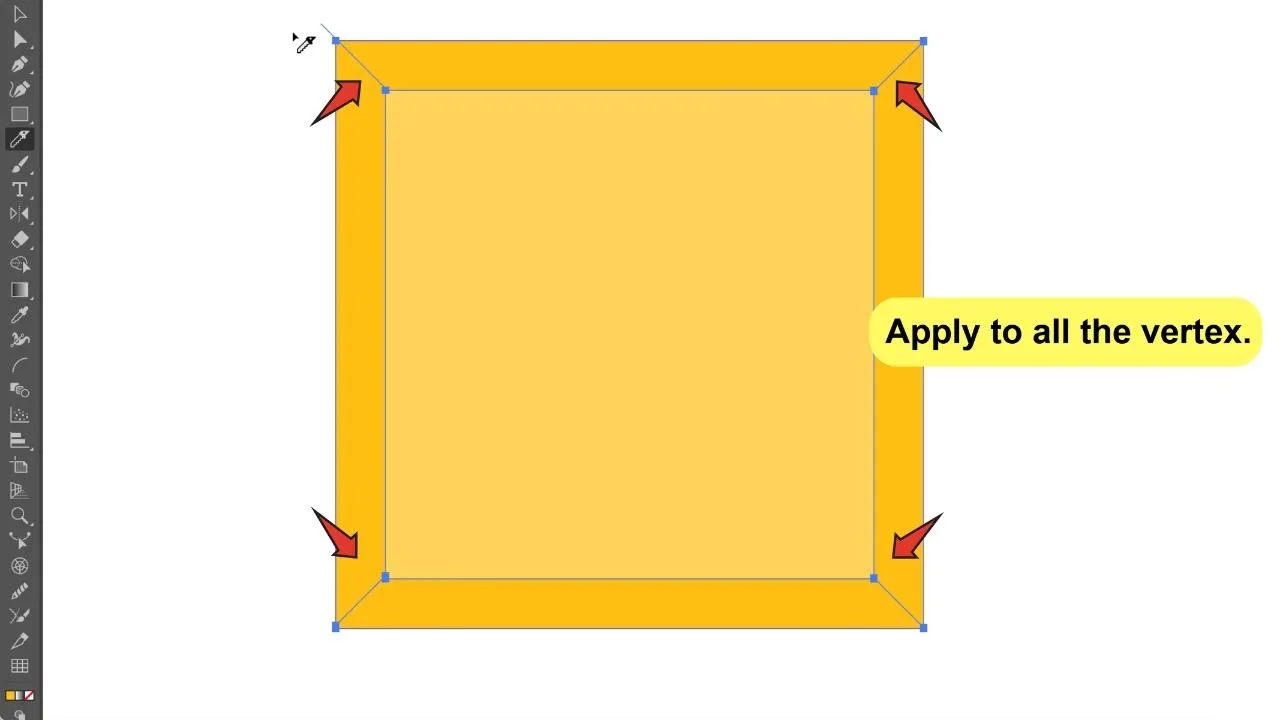
So, move to one of the offset’s corners. Make a diagonal cut from one anchor point to the other while holding the “Shift” and the “Alt” keys, these keys will help you maintain the cutline straight. Do the same with the rest three corners.
By making these cuts, the offset shape will be divided into four different sections, and you will now be able to edit the colors on each of them to enhance the sense of volume and depth.
Step 5:
Edit the colors on each segment, so that you can create a sense of volume.
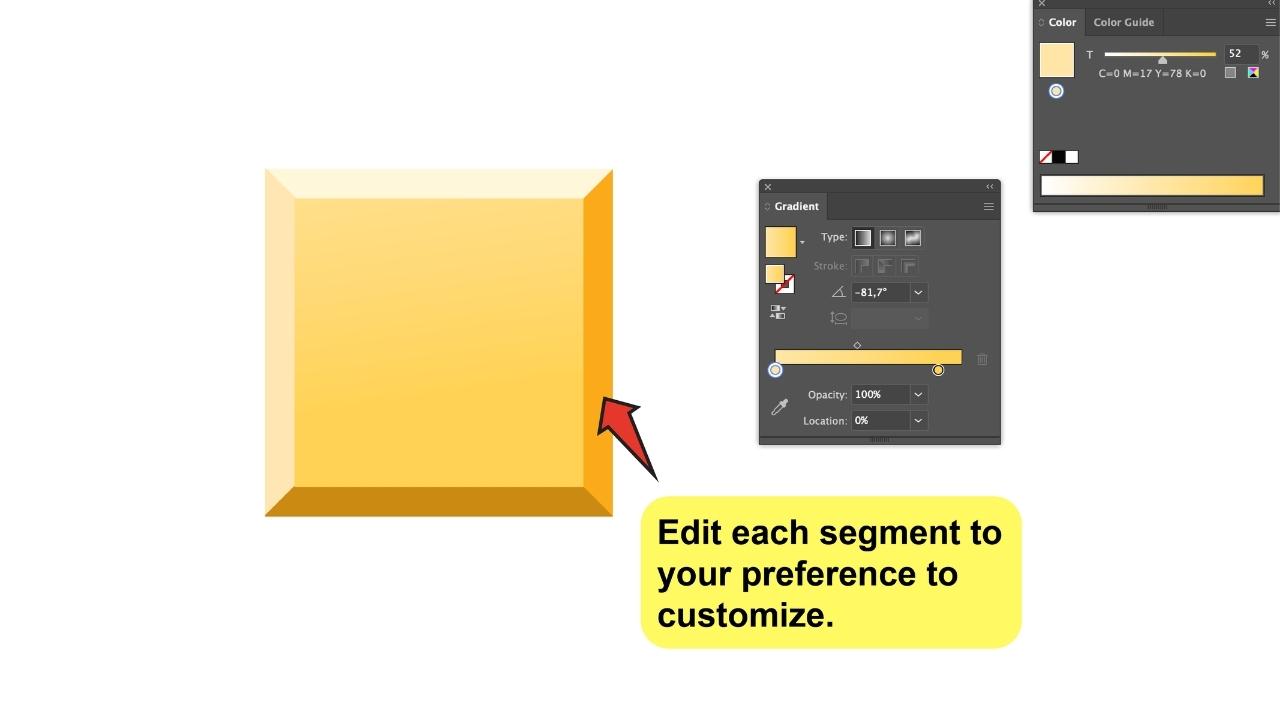

This step is easy to do but crucial for the final appearance. Through color and gradients, we will generate the sense of depth and volume that we need.
All you have to do is choose a main color or gradient to use as a base, then add shadows and lights in different shades of that color to create a sense of volume.
I strongly recommend the use of gradients, especially on the main rectangle, as it could bring a 3D vibe that would look great!
Remember that you can also implement any of the other tools available in Illustrator to help you create the result that you want.
For example, a “Drop-Shadow” effect or a pattern could work. Maybe even a blending mode, the options are endless! And it’s really a matter of trying and playing around with the options that this software has to offer to create something beautiful


Hey guys! It’s me, Marcel, aka Maschi. On MaschiTuts, it’s all about tutorials! No matter the topic of the article, the goal always remains the same: Providing you guys with the most in-depth and helpful tutorials!

