

Let’s have a look at how you can add fonts to Illustrator.
In the step-by-step tutorial below, we will also have a quick look on how to first download a suitable font.
In case you already have the font ready that you wish to add to Illustrator, you can skip the first 4 steps and simply start with Step 5.
How to Add Fonts to Illustrator (Windows)
- Double click on your browser icon.
- Search for a downloadable version of your font on Google
- Select a font website (one of the most popular sources is dafont.com)
- Download your font from its source.
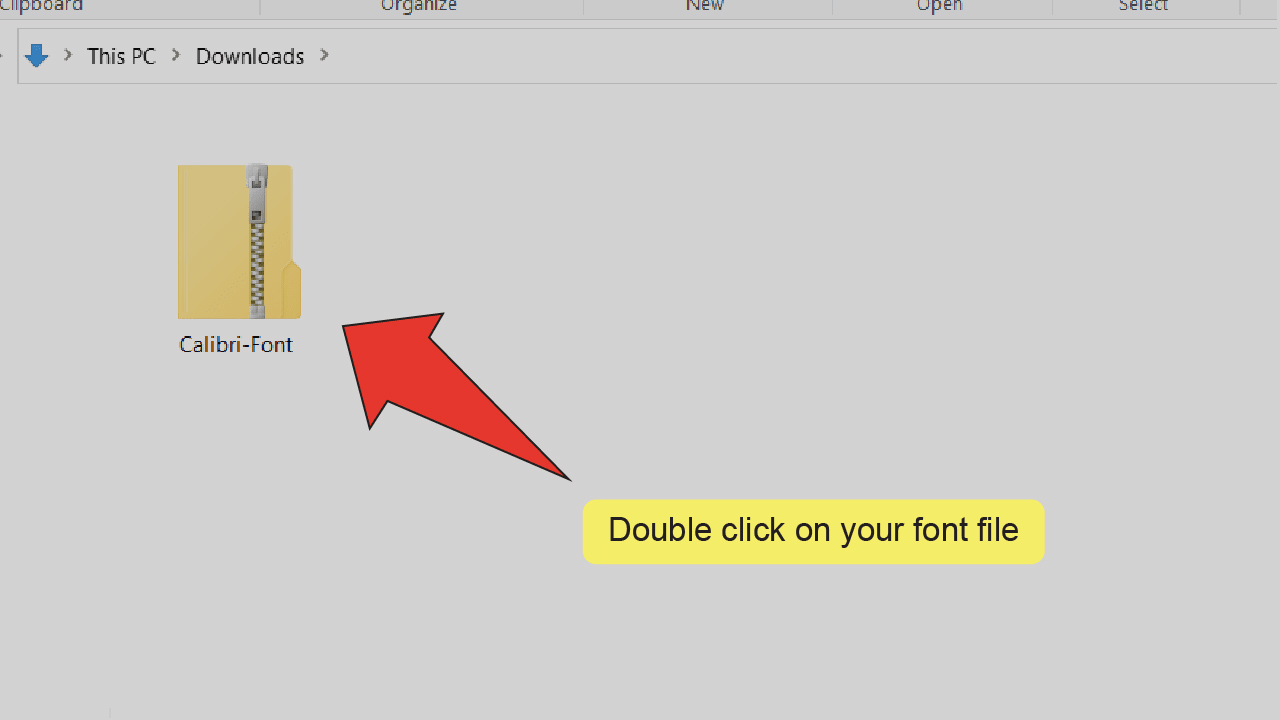
- Double click on your .zip file to open it.
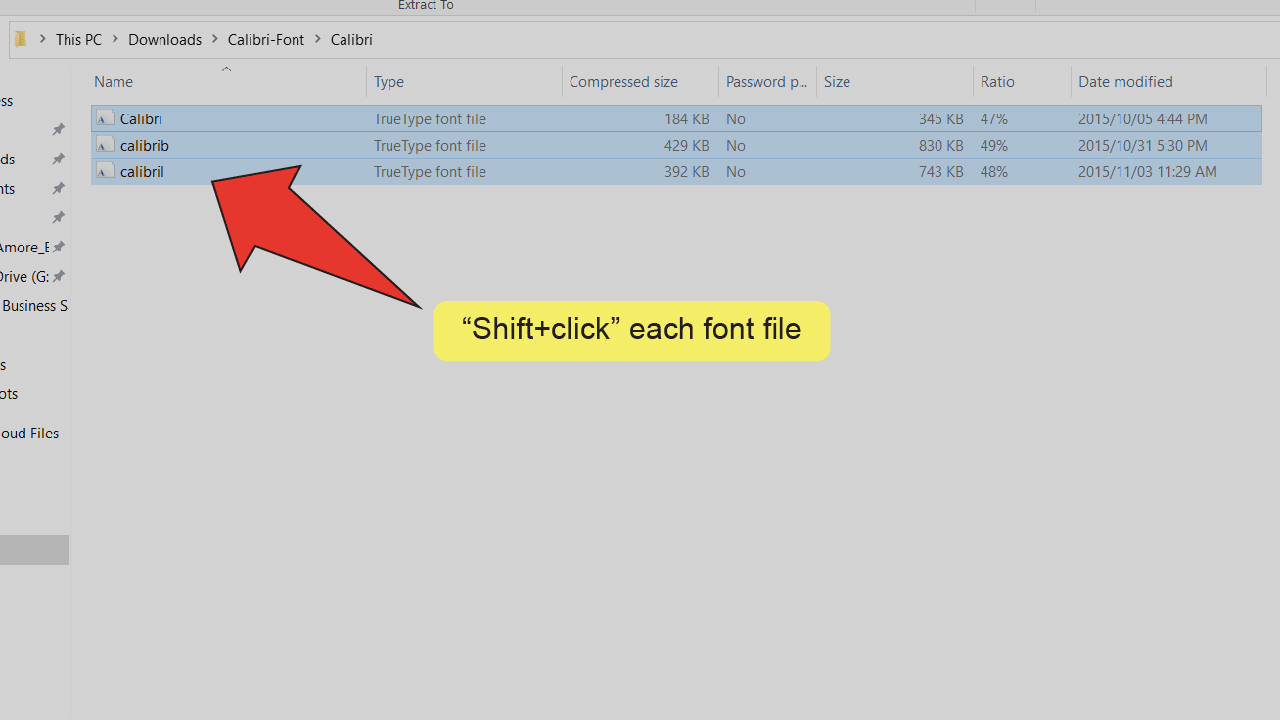
- “Shift+click” each of your font files.
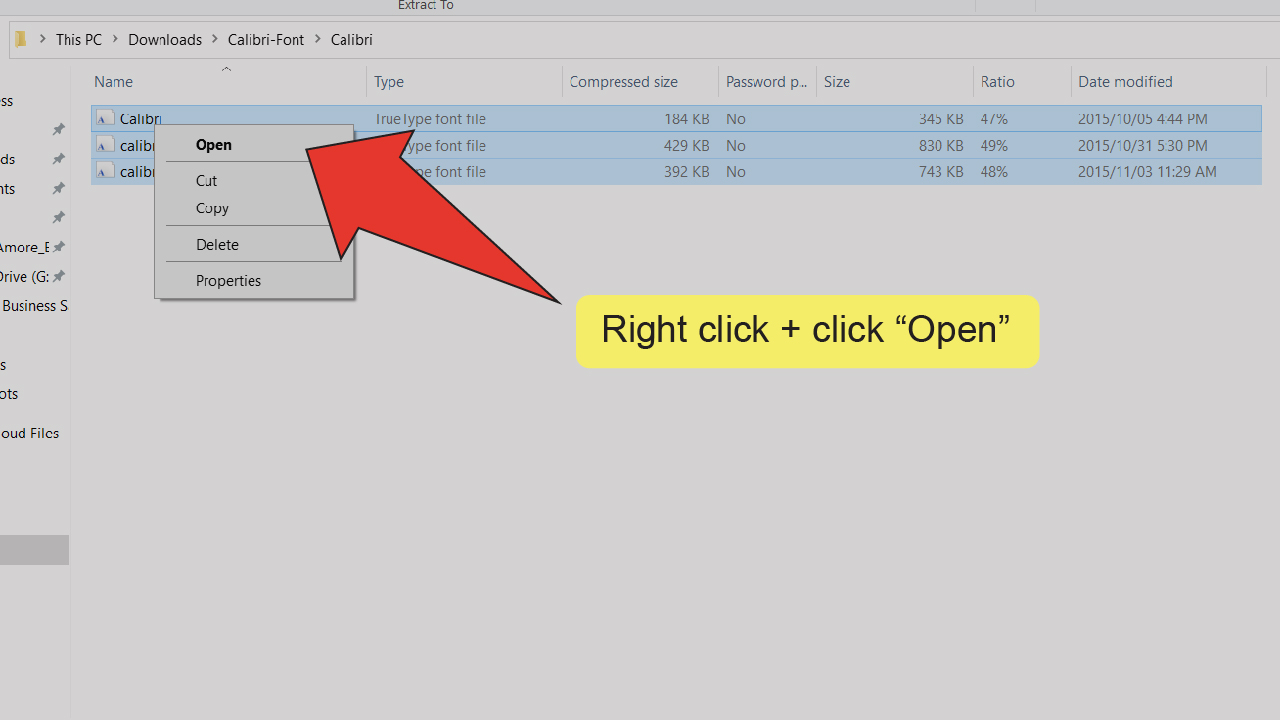
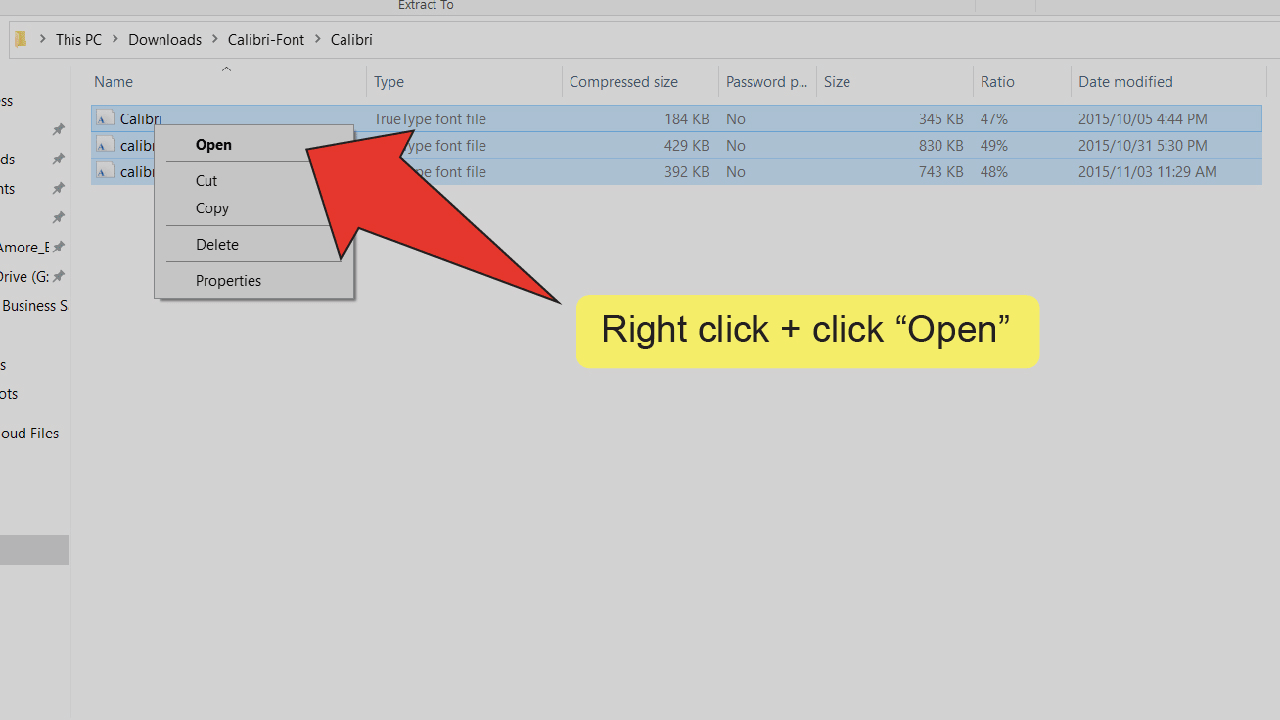
- Right click your files and select “Open”.
- Click “Install” for each file.
- Open your Adobe Illlustrator project.
- Find and equip the Type tool.
- “Click+drag” to create a textbox.
- Search for your font in the Character textbox.
- Select your font.
How to Add Fonts to Illustrator
Step 1:
Open your browser. To open your browser, double click on the browser icon on your desktop.


Step 2:
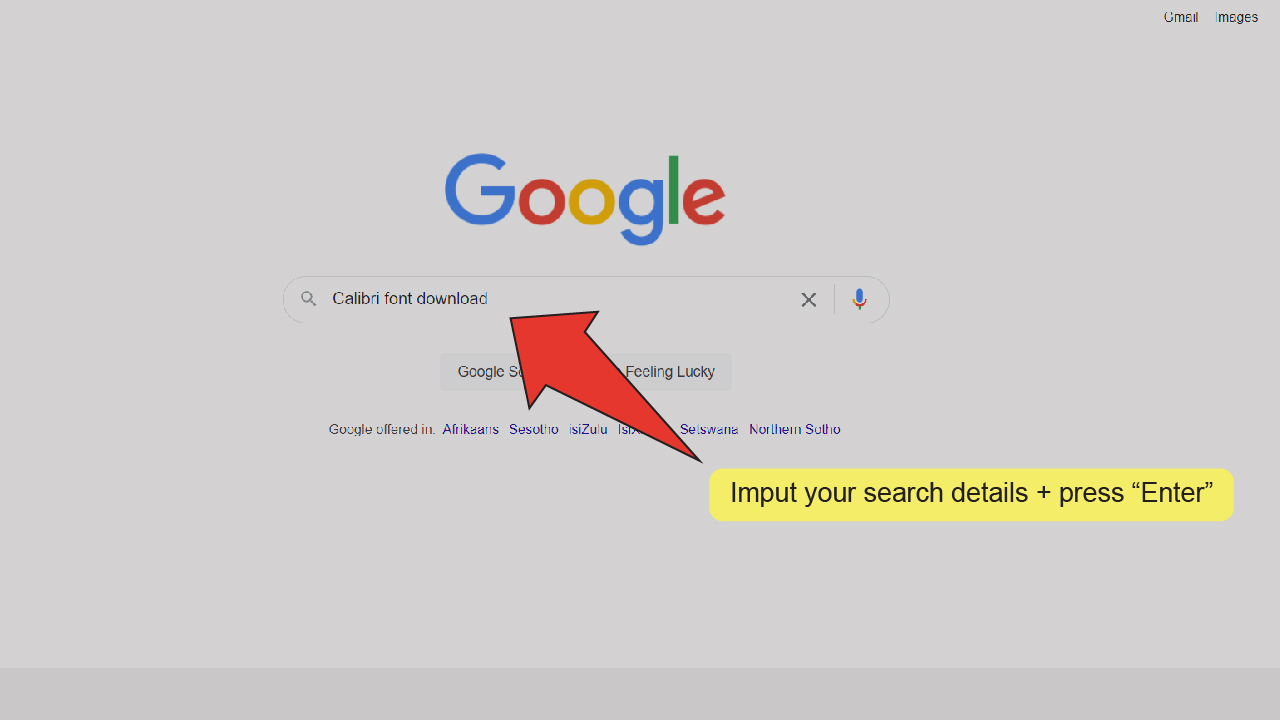
Search for a font. Type the name of the font you are looking for into your browser’s search bar followed by “font download”, then press “Enter” on your keyboard.

Step 3:
Select a website. Your browser will bring up links to multiple websites where you can download your chosen font. Click on any one. Remember, some websites only let you download fonts that you pay for and some free sources require attribution when you use their fonts, so it’s best to look at a few websites to determine which one best suits your needs.


Step 4:


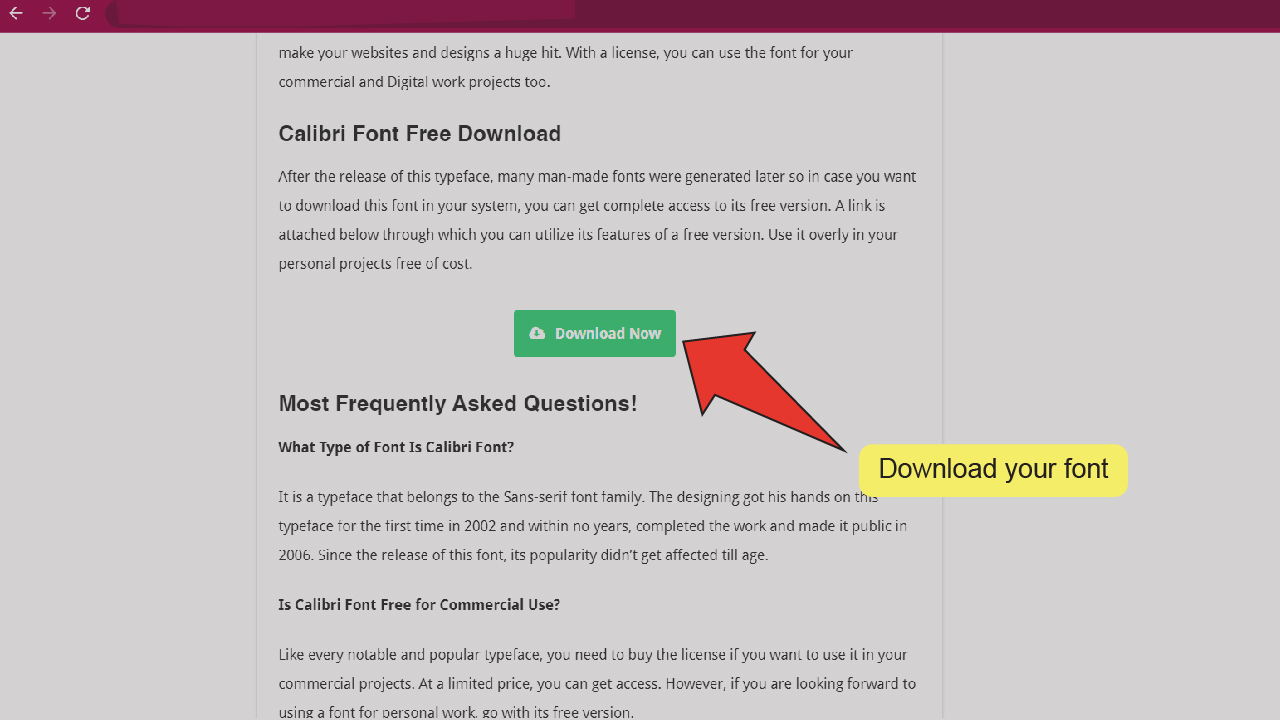
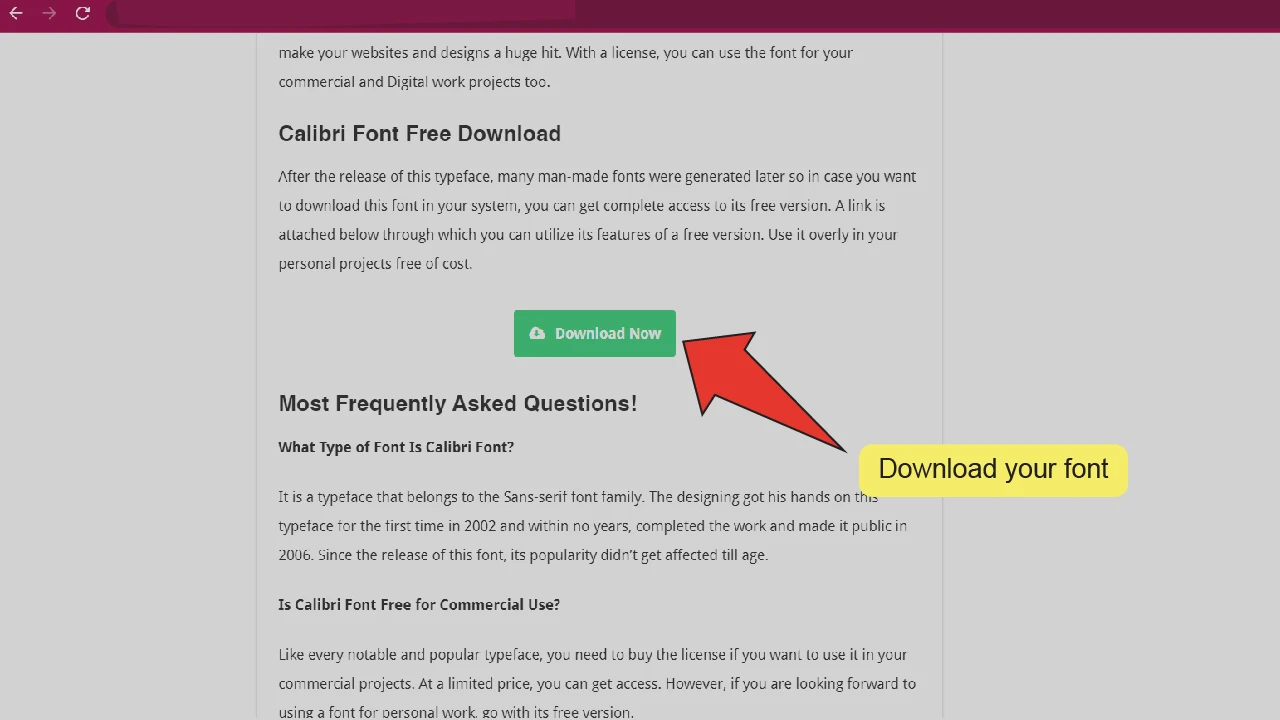
Download your font. Once you’ve found the right source for you, follow the instructions on the website to download your font.
Step 5:
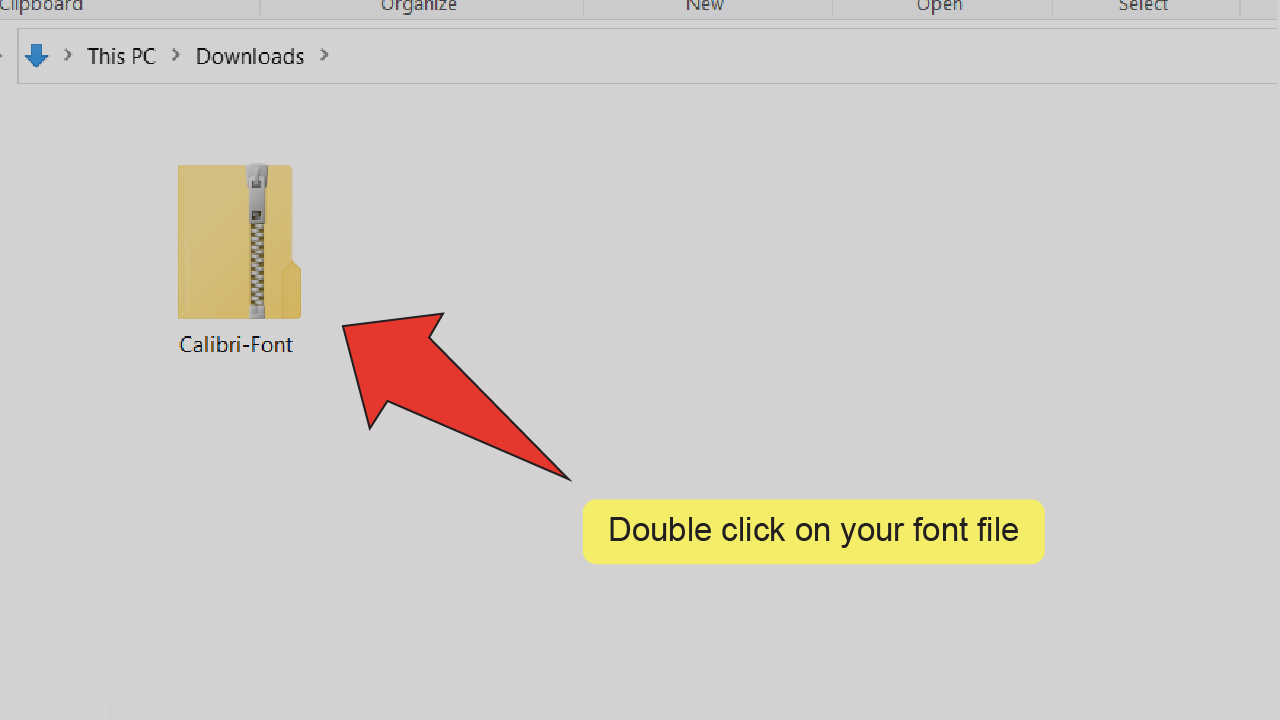
Open your .zip file. Fonts usually get downloaded in .zip files. Go to your computer’s Downloads folder and double click on your font’s .zip file to open it.
Step 6:
Select your font files. Press and hold the “Shift” key and click on each font file inside the .zip file. It is important that you install all these files, otherwise your font won’t work properly.

Step 7:
Open your font files. Right-click on any of the selected files and click on “Open”.
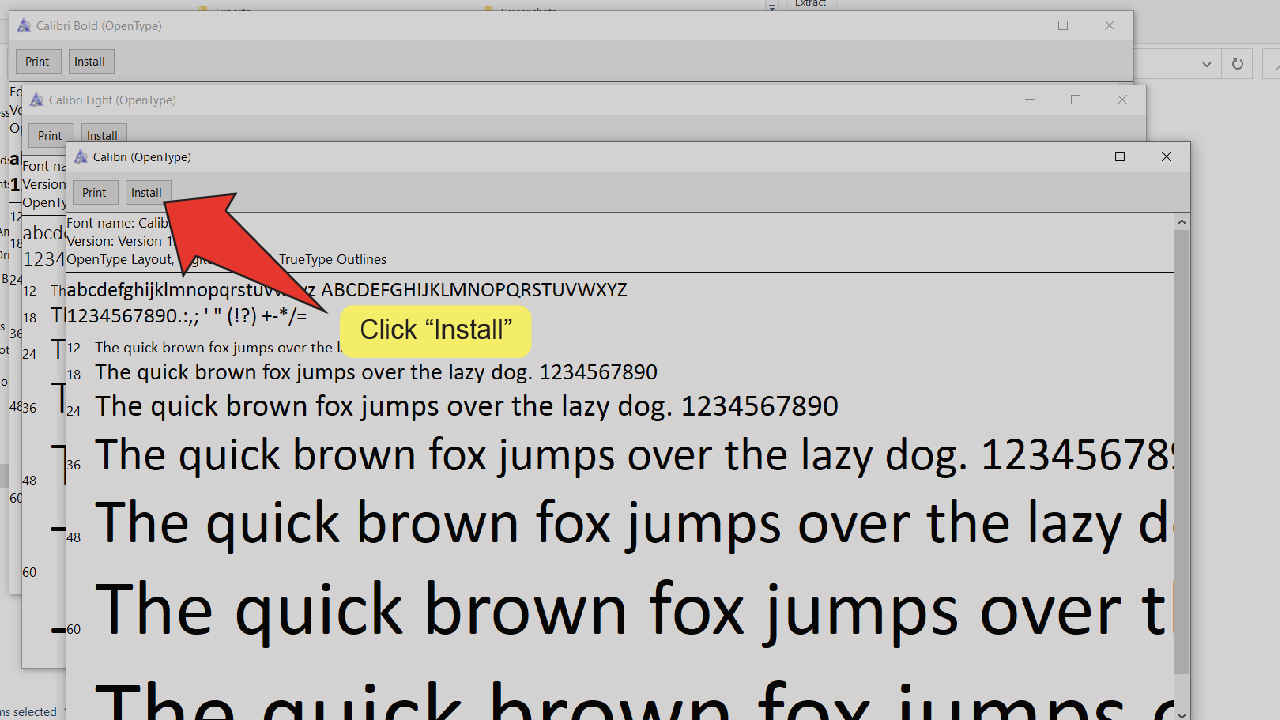
Step 8:
Install fonts. Click the “Install” button at the top left of each file’s installation window. When this button turns gray, you can close the window.

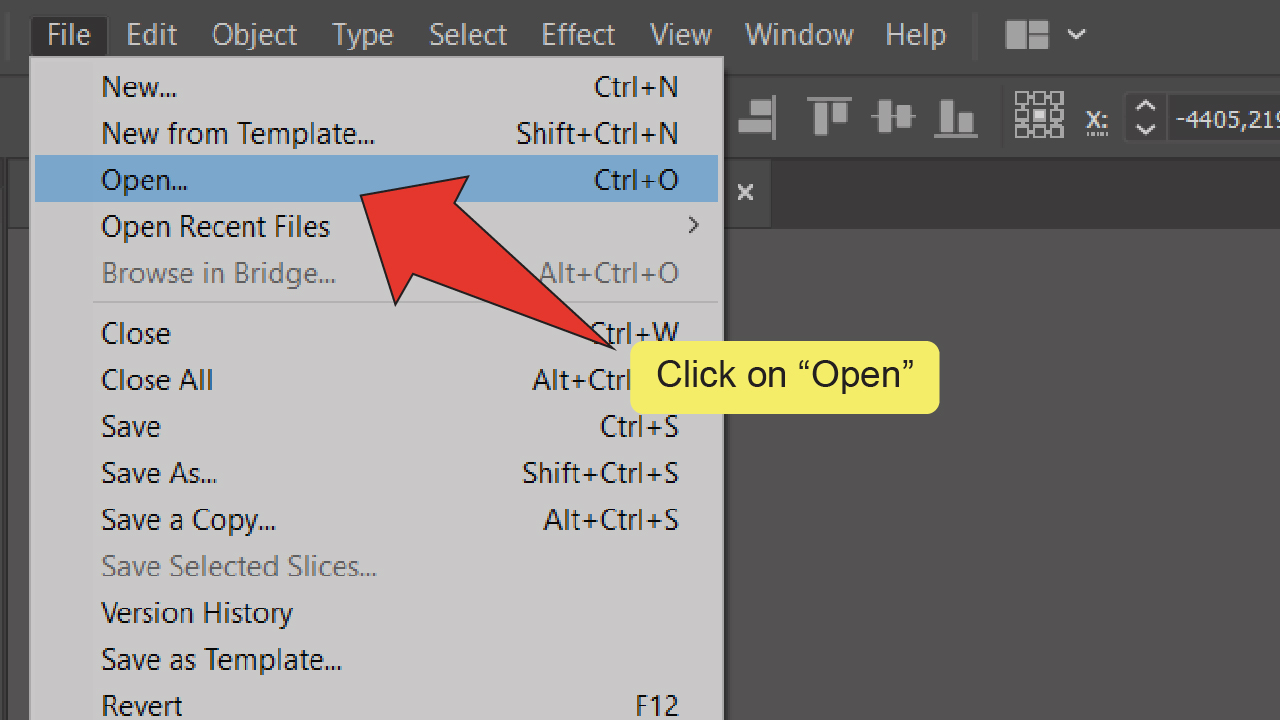
Step 9:
Open your Illustrator file. Open your document by double clicking on its corresponding Illustrator file, or if Illustrator is already open, you can go to “File” on the top menu, and then “Open” and choose the file you want to open. To speed things up, you can also use the keyboard shortcut COMMAND+O (MAC) “Ctrl+O” (Windows).

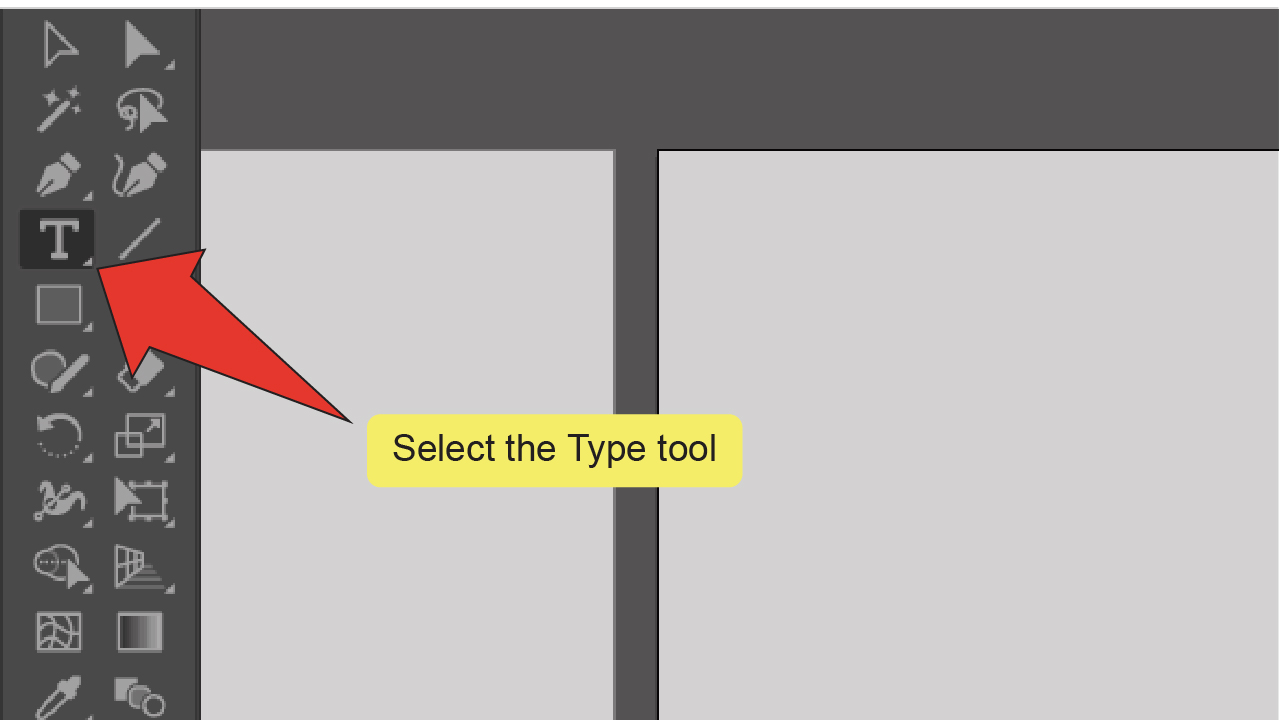
Step 10:
Find and equip the Type tool. Look for and select the Type tool, located on the toolbar on the left side of your screen. Alternatively, you can use the keyboard shortcut “T” to quick-select the tool.

Step 11:
Draw a textbox. Click and drag your cursor on your artboard to draw a text box. The text box will automatically fill with random text and you can type something of your own from here.


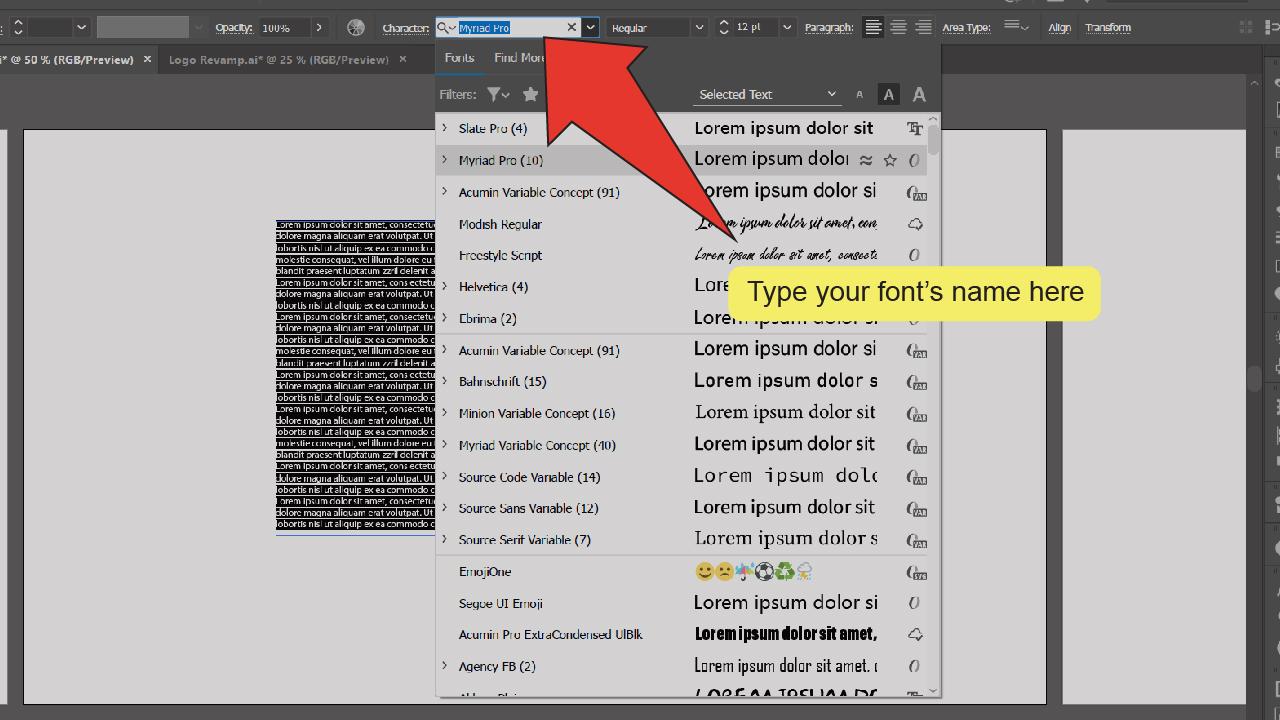
Step 12:
Search for your font. Type the name of your font into the text box next to the word “Character” at the top of your screen. A list of fonts with different attributes will pop up on a dropdown menu below this area.If you aren’t sure what the font you want is named, you can click on the arrow icon to the right of the text box to open and scroll through the full list of fonts saved on your computer.

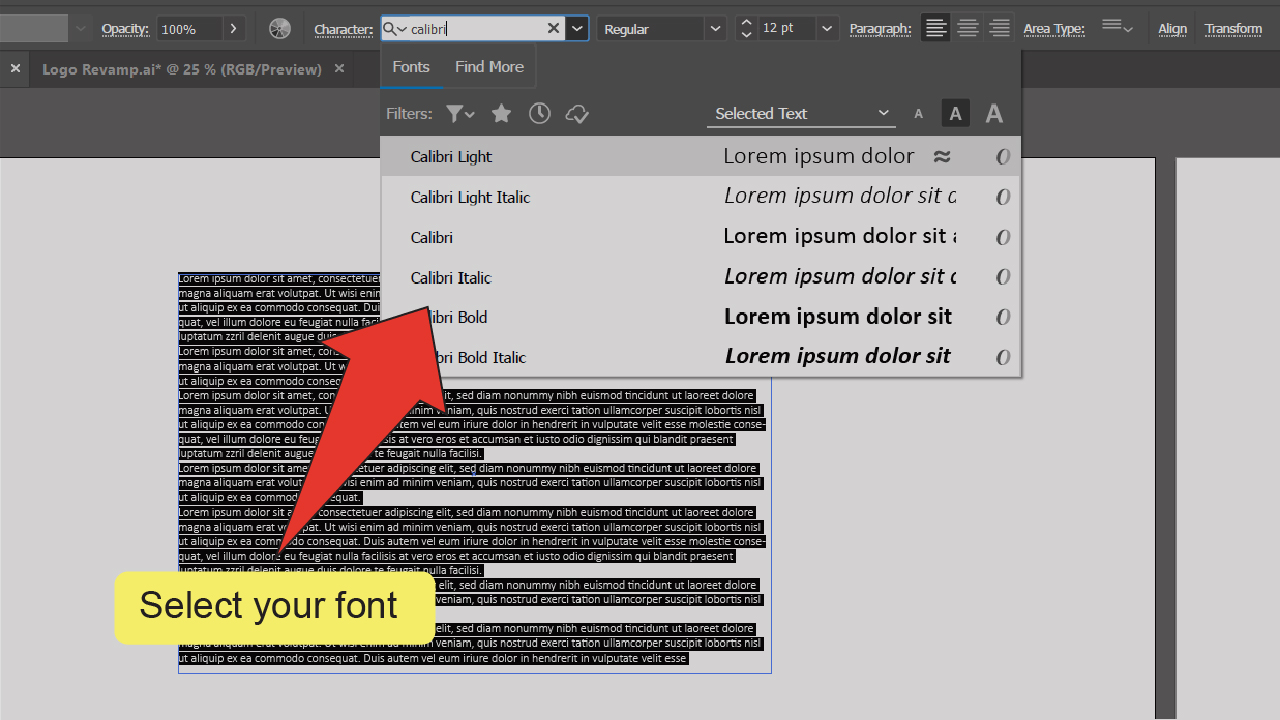
Step 13:
Select your new font. Look through the list of fonts on the dropdown menu and select your new font.

How to Add Fonts to Illustrator on a Mac
- Open up the .zip file that contains your font
- Double-click on the font file (.ttf file)
- In the popup-menu, click on “Install font.”
- Open up Adobe Illustrator
- Find and equip the Type tool.
- “Click+drag” to create a textbox.
- Search for your newly installed font in the Character textbox.
- Start typing and using your new font
How to Use Downloaded Fonts in Illustrator (PC & Mac)
To use a downloaded font in Illustrator, after download, simply make sure to install that font on your computer first.
On a Windows PC, you will have to open up the zip file and then make sure to select all the font files, then right-click on it and choose “Open.” Then, click on “Install” for each file. Your new font is now installed on your computer.
On a MAC, after downloading your font, open up the zip file (if any) and then make sure to double-click on your font file (usually a .ttf file). Then click on “Install font” to install your font.
The good thing now is that Adobe Illustrator will automatically detect this new font. You won’t need to really upload your font to the Illustrator software itself! This is the case both on Mac and on PC.
This means that at this stage, all you will need to do is to start up Adobe Illustrator and then create a new text field with the “Type tool” and you can then simply choose the new font from the font dropdown-menu. If you did install it correctly, the font should appear in the list.
Now, if you don’t see your newly installed font in Adobe Illustrator, chances are that when you installed the new font, you already had Illustrator running.
To fix this type of problem, it is usually enough to just restart Illustrator and your new font should then be part of the font dropdown list (you can either scroll through all fonts to find it in the list or you can also type in the name of the font you downloaded to find it faster).
Uploading fonts to Illustrator is as simple as that!
Now go and enjoy your new font(s)!
Frequently asked questions on “How to add fonts to Illustrator”
How to install fonts in Illustrator?
Fonts are not directly installed in Illustrator itself. In fact, you just have to download and install a font on your computer. To install it on your computer, just extract the .zip file and then install all the font files on your computer. After that, simply open up Illustrator and you will then find your newly installed font in the font dropdown list.
How to import fonts to Illustrator?
Fonts don’t need to be directly imported to Illustrator. In fact, after you have downloaded and installed the font on your computer, it will automatically be installed on Illustrator. If you can’t see the font in the font list of Illustrator yet, make sure to restart Illustrator and check again.
Where can I find free fonts that I can use in Illustrator?
You can find free fonts on “Dafont.” On this website, you can find many fonts that are free for personal use and also many that are even free for commercial use. Also, if you do have an Adobe Creative Cloud subscription, you can download thousands of fonts for free from the official Adobe website that you can use in Illustrator.


Hey guys! It’s me, Marcel, aka Maschi. On MaschiTuts, it’s all about tutorials! No matter the topic of the article, the goal always remains the same: Providing you guys with the most in-depth and helpful tutorials!

