

A well-placed gradient can add a unique element to any design, and combining a gradient with any other design resource can lead to eye-popping visuals.
One great resource to combine a gradient with is typography, but it’s important to be weary of which method you use to do it!
There are two ways to gradient type in Illustrator; by using either destructive or non-destructive fill. Here’s a full guide to doing both.
How To Gradient Text in Adobe Illustrator Using Non-Destructive Fill – Quick Guide
Equip the Type tool by pressing “T” on your keyboard. Click+drag over your text to select it. ”Shift+F6” to open the Appearance window, then click the “Add New Fill” button. Press “Ctrl (Command)+F9” to open the Gradient window. Finally, click the Gradient thumbnail to apply it to your type.
“Non-destructive fill” means that after you’ve applied your gradient to your type, it will still be editable. This method is best to use if you are working with longer forms of text and/or text that may still need to be edited later.
How To Gradient Text in Adobe Illustrator Using Non-Destructive Fill – Step-by-step Guide
Step 1:
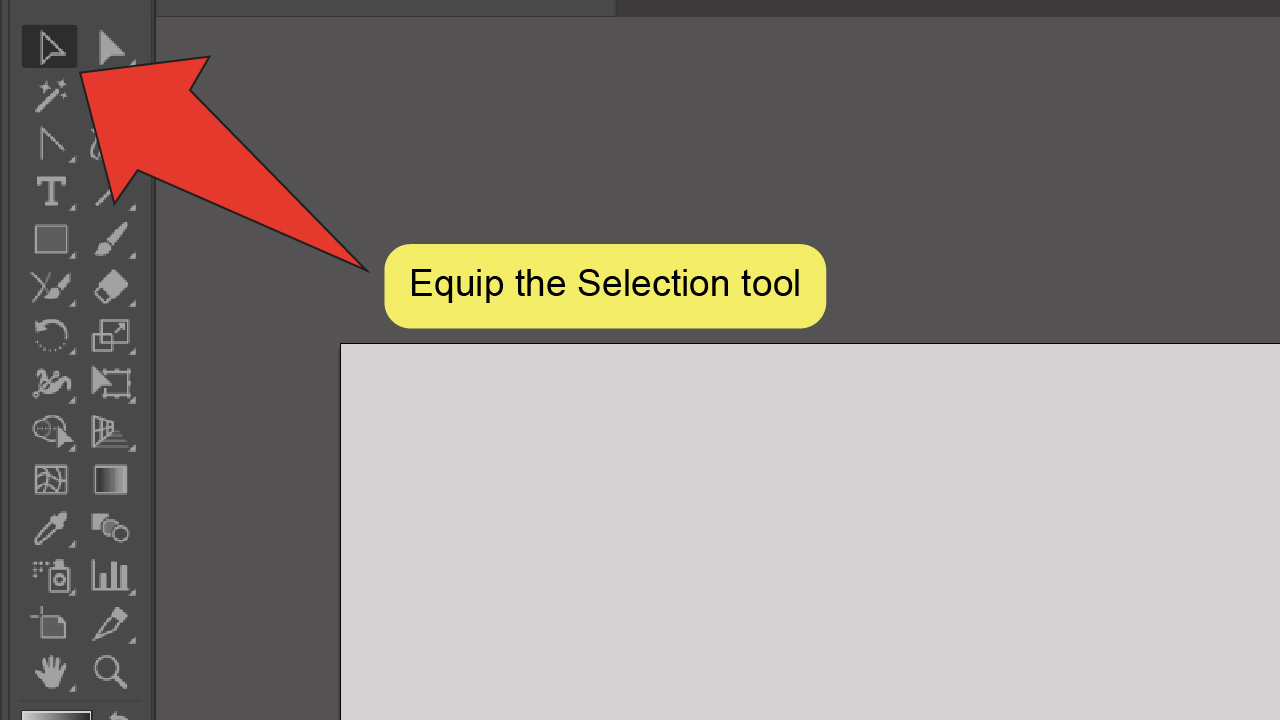
Equip the Selection tool. When working in Illustrator, the tool you will find yourself working with the most is going to be the Selection tool. You’ll need to use the Selection tool to select your text before applying your gradient. To equip the tool, look for and select it from the toolbar at the left of your screen or press the “V” key.

Step 2:
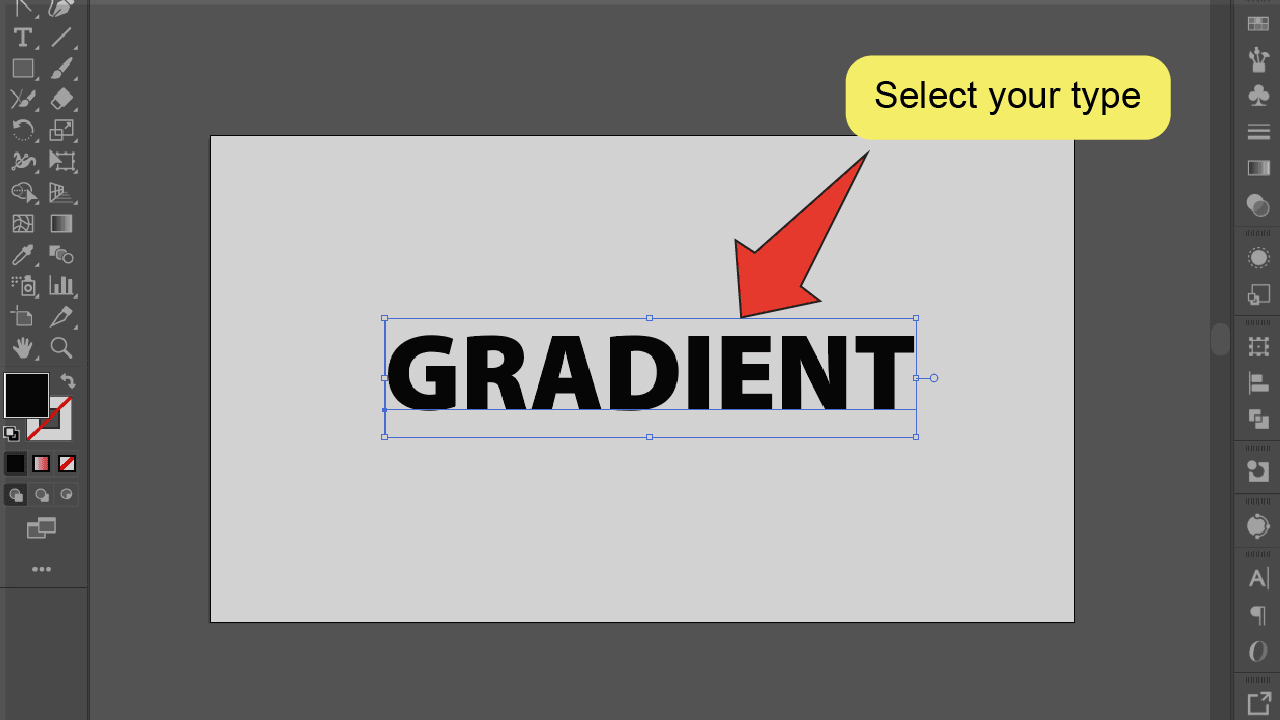
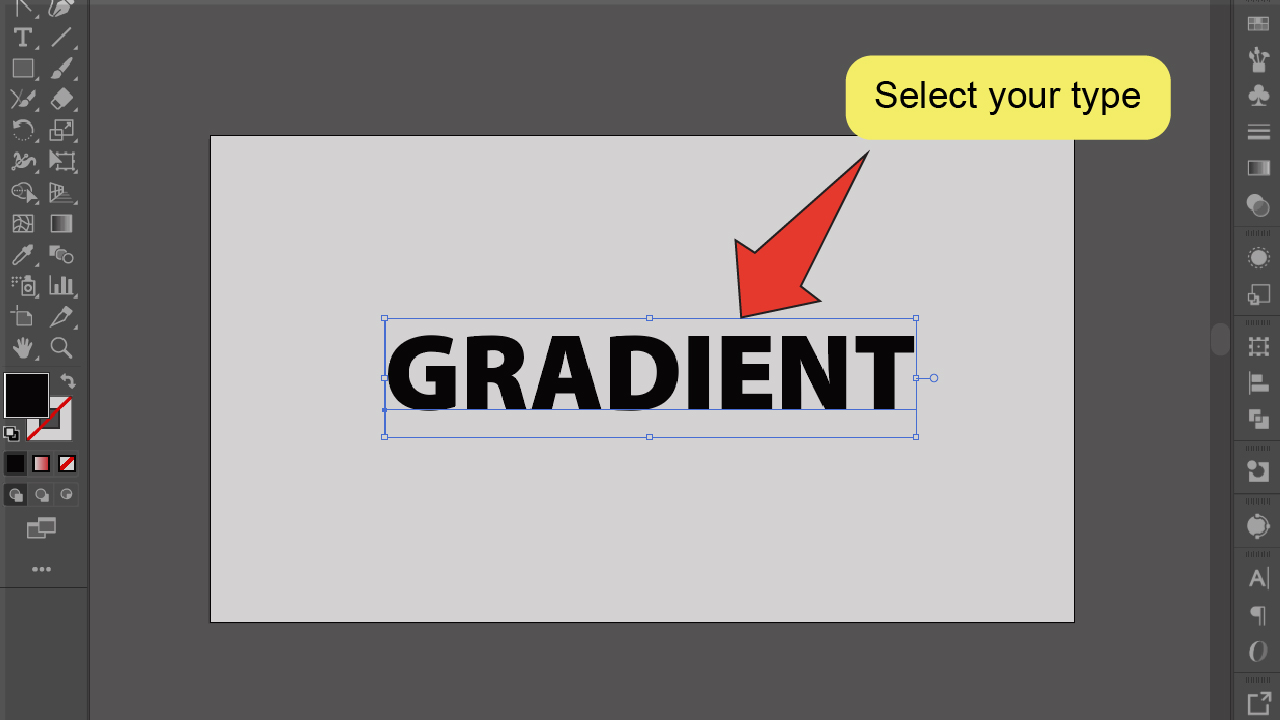
Select your text. Click on your text box to select your text. A highlighted border should appear around your type.

Step 3:
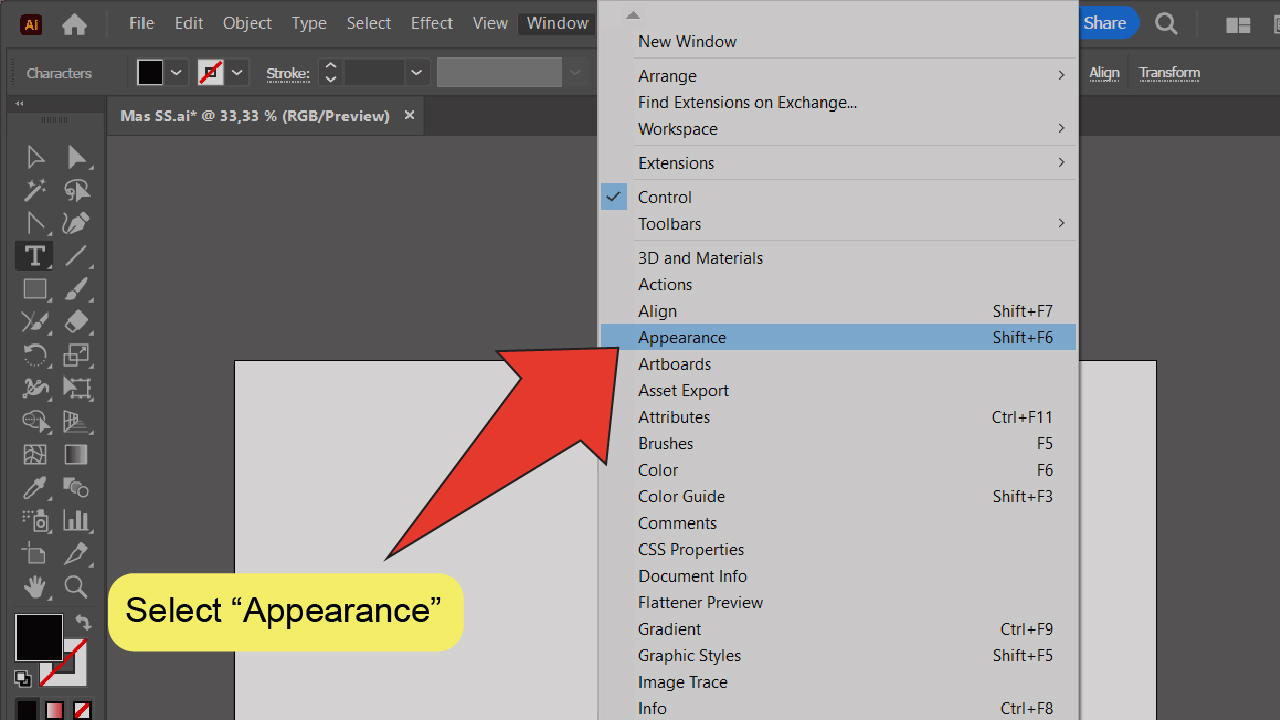
Open the Appearance window. Go to “Window” then click on “Appearance” or use the keyboard shortcut “Shift+F6” to open the Appearance window.


Step 4:
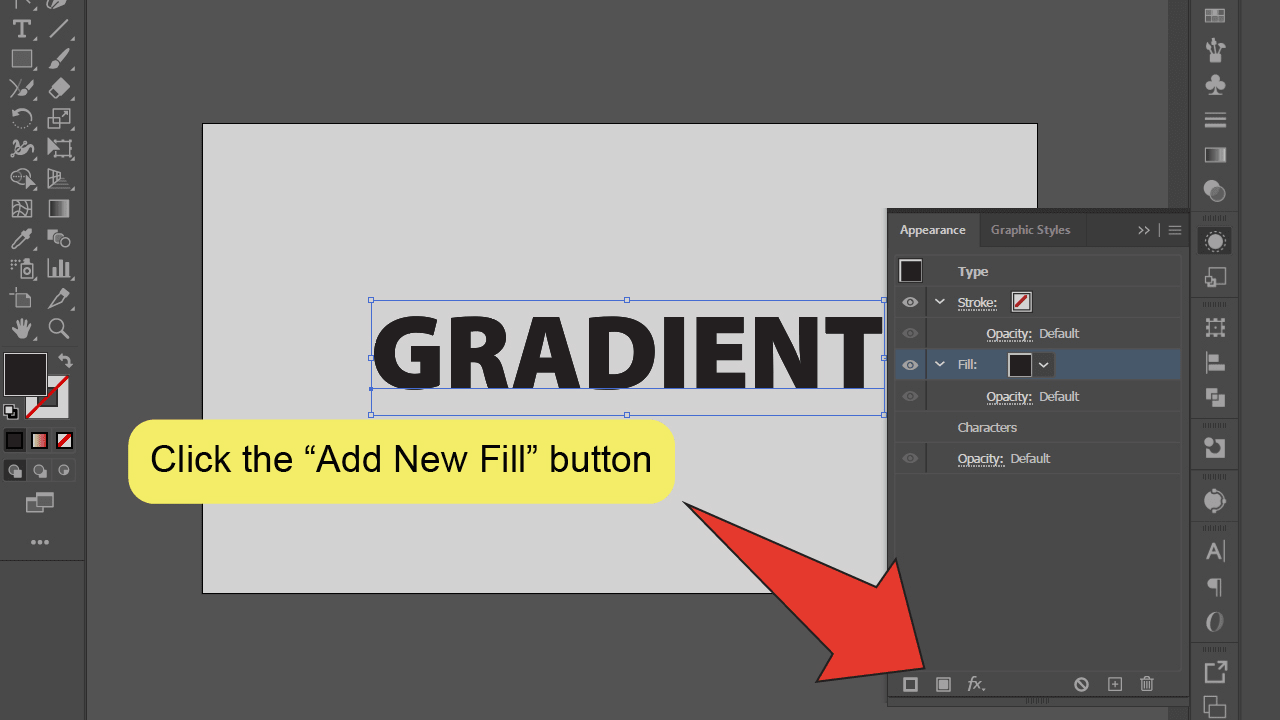
Add a new fill. Find and click on the “Add New Fill” button on the Appearance window, making sure to keep the new “Fill” panel selected once it opens.

Step 5:
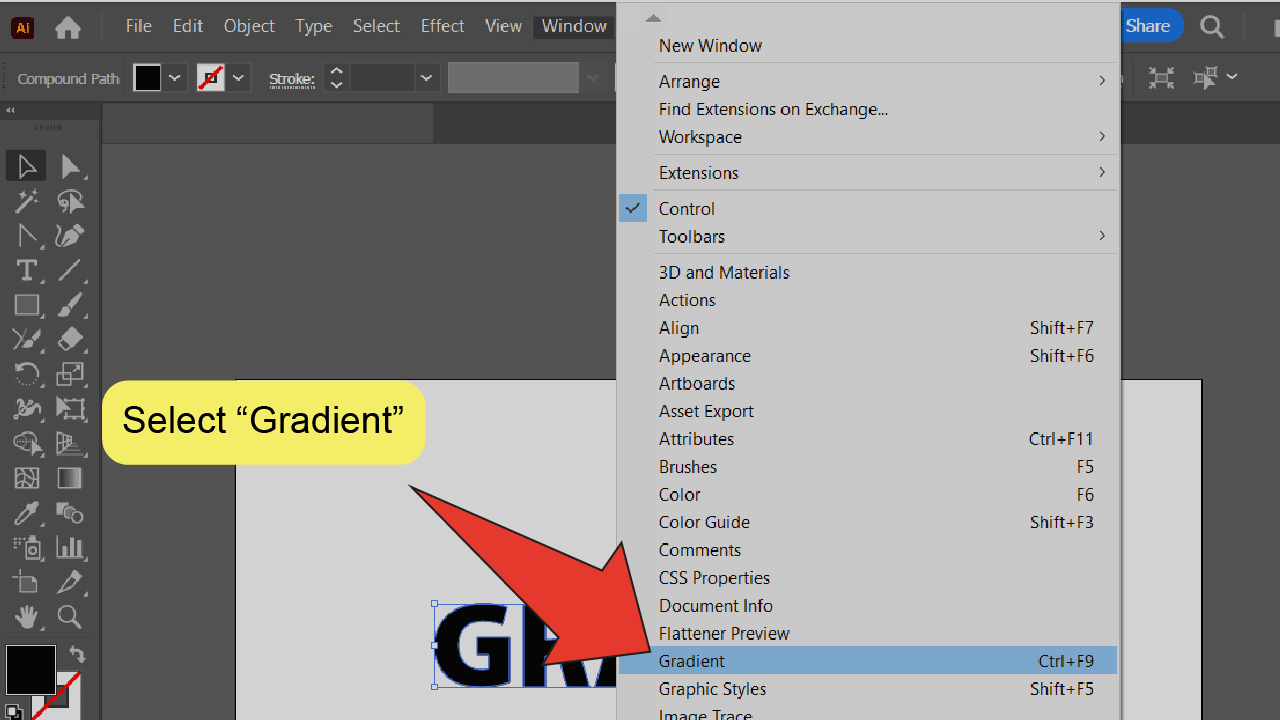
Open the Gradient window. Open the Gradient window by going to “Window” and clicking on “Gradient”. You can also use the keyboard shortcut “Ctrl (Command)+F9”.

Step 6:
Apply a gradient to your text. Click on the Gradient thumbnail or slider to apply a gradient to your text.


Step 7:
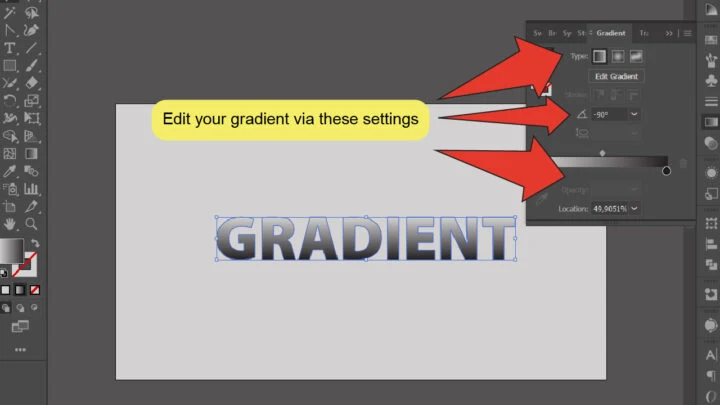
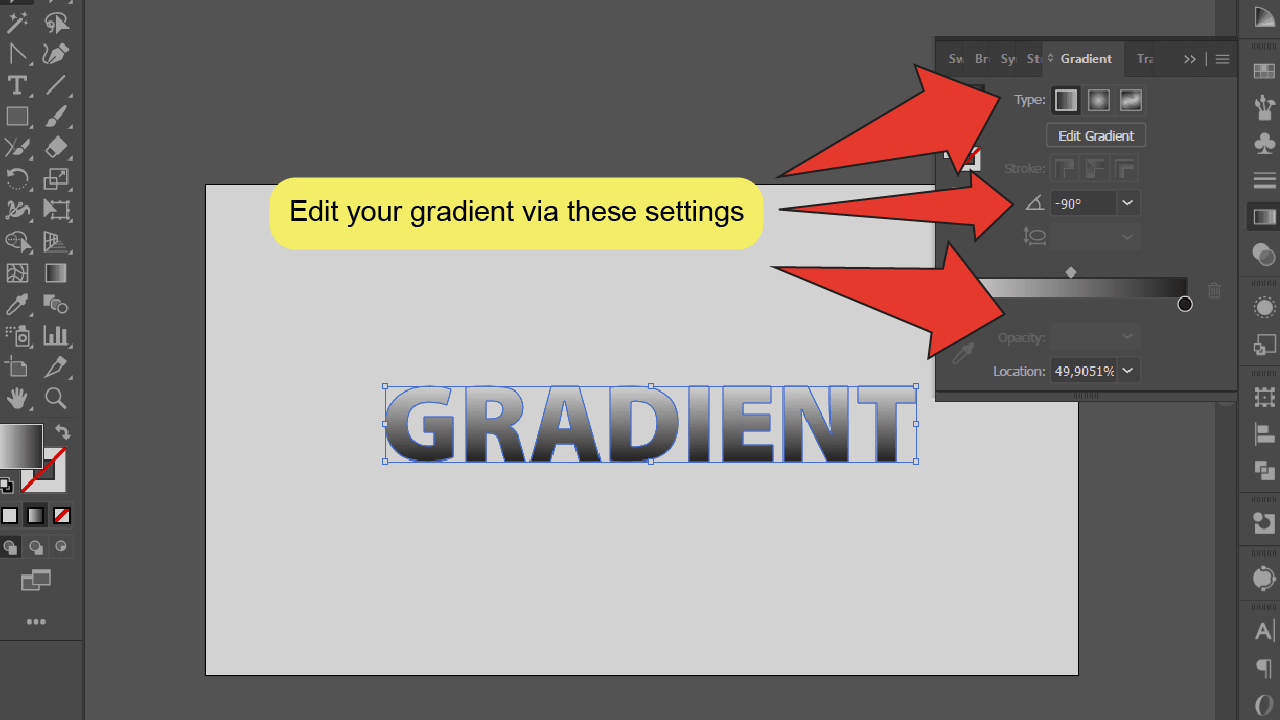
Edit your gradient or text. Once you’ve applied a gradient to your text, you can edit your gradient via the Gradient window (“Ctrl (Cmd)+F9”) or edit your type via the Character or Paragraph menus (accessible via the toolbar at the right of your screen).

How To Gradient Type in Adobe Illustrator Using Destructive Fill
Press “T” to equip the Type tool. Click+drag to select your type. Press “Shift+Ctrl (Cmd)+O” to create outlines”. Press “Shift+Ctrl (Cmd)+F9” to open the Pathfinder window and click the “Unite” button. Press “Ctrl (Cmd)+8” for a compound path, then “Ctrl (Cmd)+F9” to open the Gradient window. Click the Gradient thumbnail to apply it.
“Destructive fill” means that after you’ve applied your gradient to your type, it will no longer be editable. This method is best to use if you are working with shorter forms of text like titles or single words.
How To Gradient Type in Adobe Illustrator Using Destructive Fill – Step-by-step Guide
Step 1:
Equip the Selection tool. To equip the Selection tool, look for and select it from the toolbar at the left of your screen or use the keyboard shortcut “V”.


Step 2:
Select your text. Select your text by clicking on your text box. A highlighted border should appear around it.

Step 3:
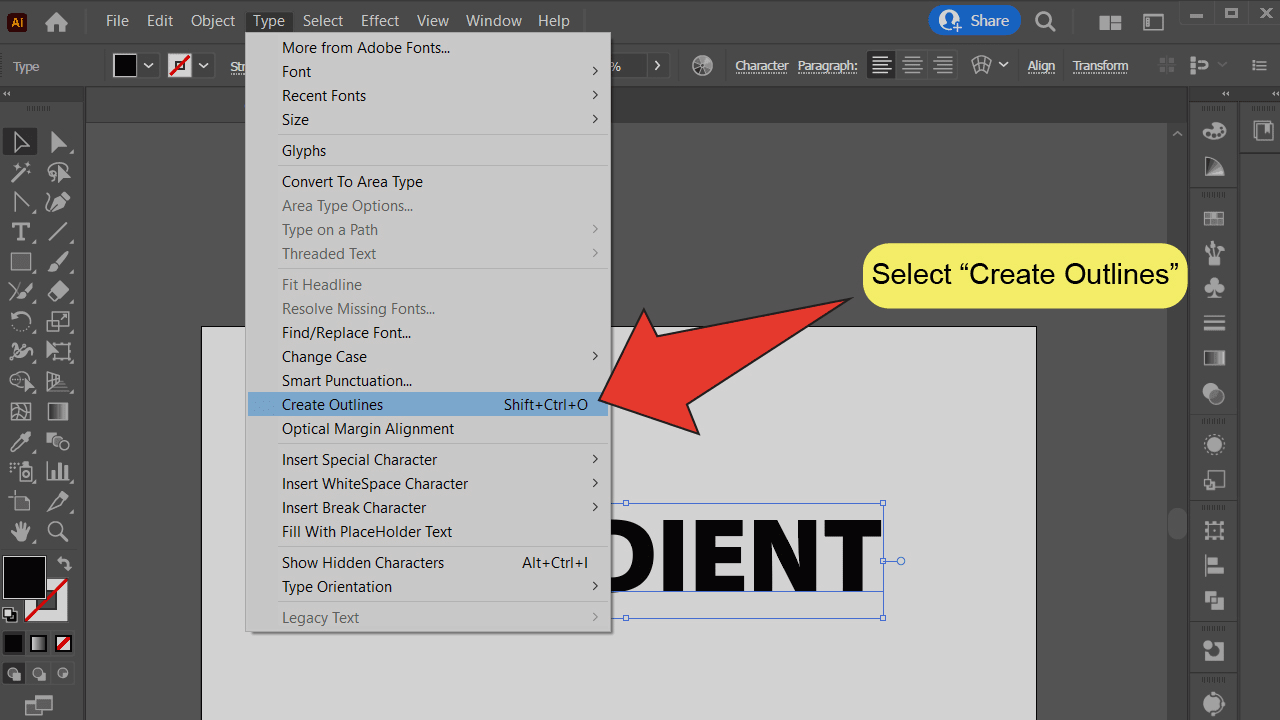
Outline your text. On the toolbar at the top of your screen, go to “Type”, then click on “Create Outlines”. This will convert your editable text into a series of individual objects. You can also press “Shift+Ctrl (Cmd)+O”.

Step 4:
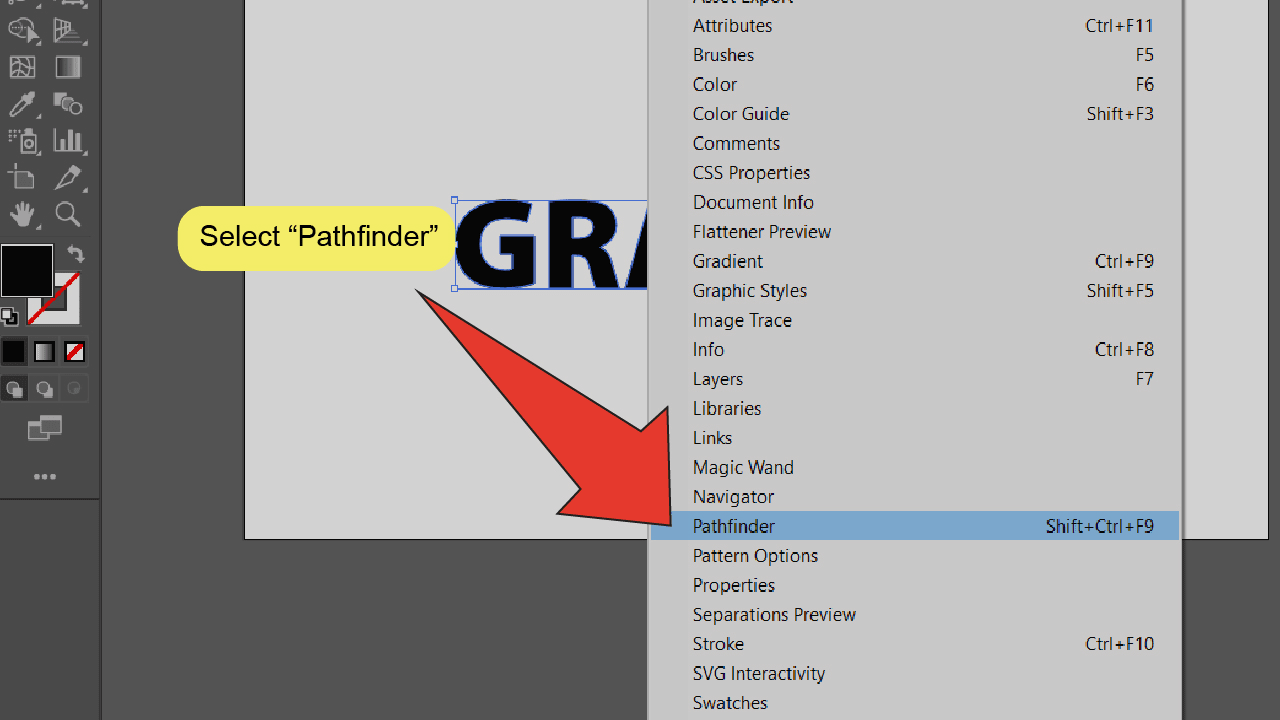
Open the Pathfinder window. You’ll need to use the Pathfinder window to group your type together. To open the Pathfinder window, simply go to “Window” on the toolbar at the top of your screen, then select “Pathfinder”. As a shortcut, you can also press “Shift+Ctrl (Cmd)+F9” to open this window.

Step 5:
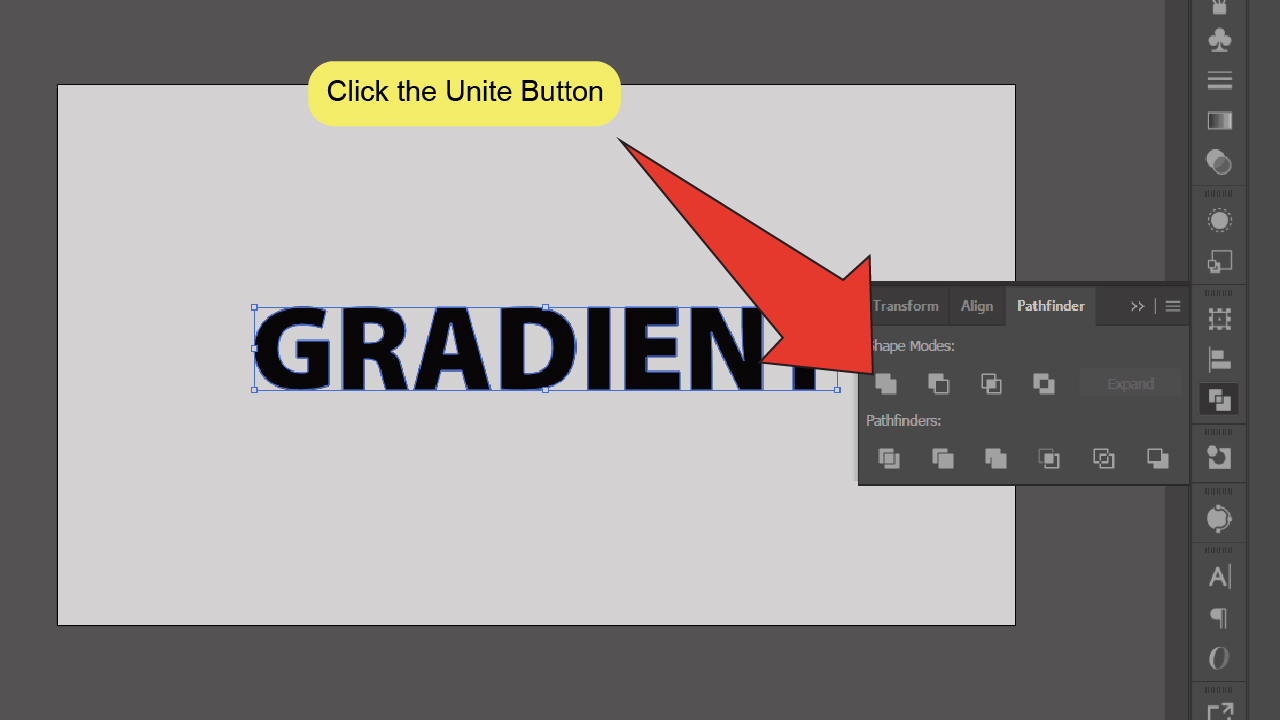
Click the Unite button. Find and click the “Unite” button under “Shape Modes” on the Pathfinder window. Your objects will be grouped together.

Step 6:
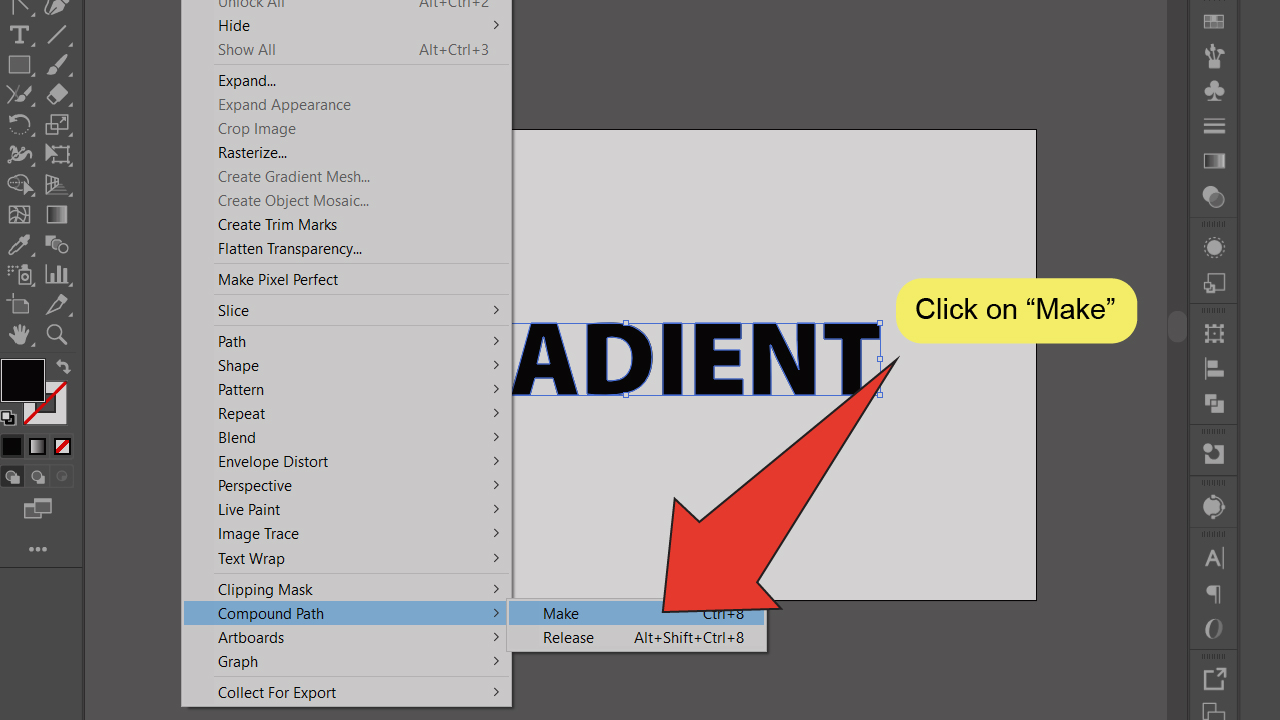
Make a compound path. On the top toolbar, go to “Object” followed by “Compound Path”, then “Make” or press “Ctrl (Cmd)+8”. This will make your individual objects into one singular object.

Step 7:
Open the Gradient window. Open the Gradient window by going to “Window” and clicking on “Gradient”. You can also use the keyboard shortcut “Ctrl (Cmd)+F9”.


Step 8:
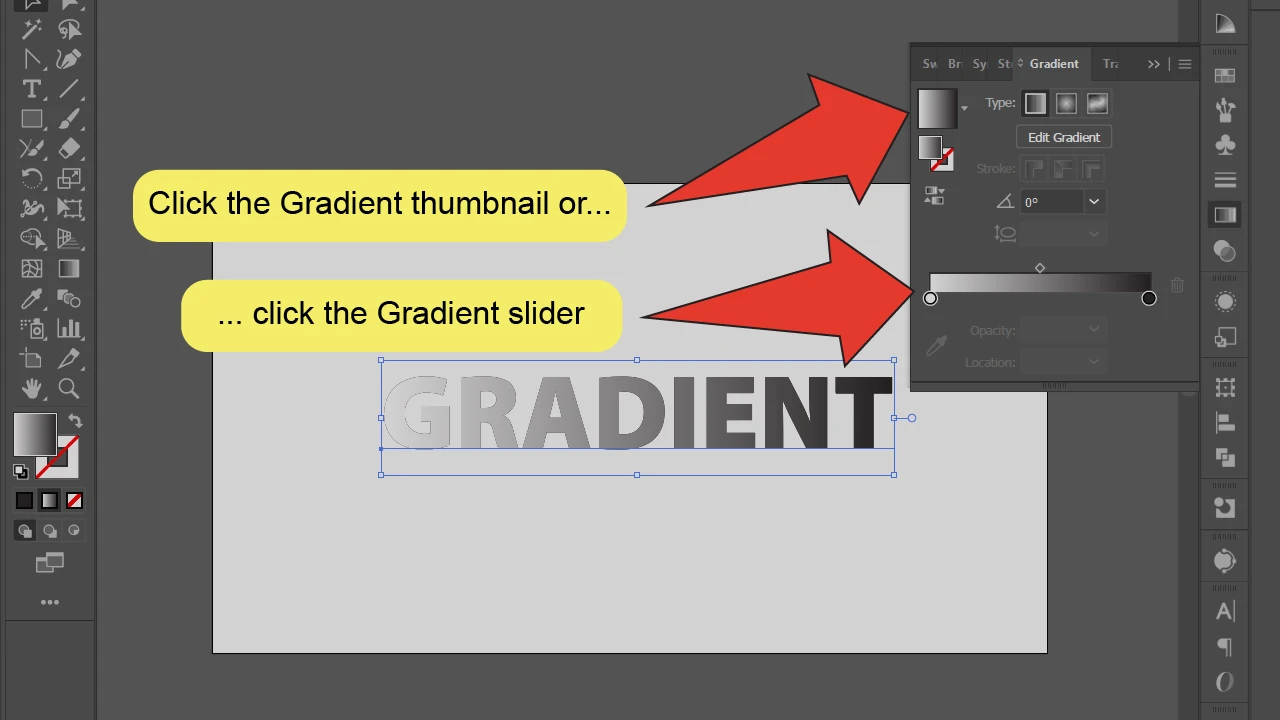
Apply your gradient. Click on the Gradient slider or thumbnail to apply a gradient to your text.

Step 9:
Edit your gradient. Finally, use the settings available on the Gradient window to alter your gradient to your liking.

Frequently Asked Questions About How To Use The Polygon Tool In Illustrator
How do I apply a non-destructive gradient outline around my text?
Simply click+drag to select your type using the Type tool (T). Press “Shift+F6” to open the Appearance window, then click the “Add New Stroke” button. Press “Ctrl (Cmd)+F9” to open the Gradient window. Finally, click the Gradient thumbnail to apply it to your border.
How do I apply a destructive gradient outline around my text?
Once you’ve successfully applied a gradient to your type, you can simply press “Ctrl (Cmd)+X” to swap your fill and stroke colors.


Hey guys! It’s me, Marcel, aka Maschi. On MaschiTuts, it’s all about tutorials! No matter the topic of the article, the goal always remains the same: Providing you guys with the most in-depth and helpful tutorials!

