Creating shapes and paths in Adobe Illustrator is a whole universe, and in many scenarios, we’ll need to alter these objects to make them look the way we want.
One of the resources I’ve used the most over the years is to create rounded corners.
And, when I first started using Illustrator, I had to manually build the curve with the “Pen Tool” to round the corners of my object.
Now, however, I’m going to show you how the “Live Corner Widgets” feature can do the same thing but in a matter of seconds!
Let’s dive right into it.
How to Make Rounded Corners in Illustrator
To make rounded corners in Illustrator, select your object using the “Direct Selection Tool,” then look for the “Live Corner Widgets” and drag the corners you wish to round inwards toward the center of the shape.
Knowing how to round corners in Adobe Illustrator is priceless, and you should have it as one of your go-to skills because, believe me, you can improve not just the quality of your work, but also the amount of time you spend refining details on your designs.
It’s important to incorporate the daily use of features and tools as essential as this one because it gives you more independence in your everyday work and allows you to obtain a more detailed result.
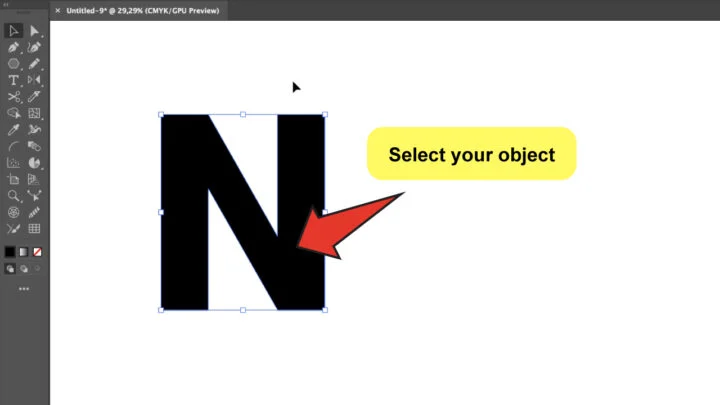
Step 1: Select your object
Go to “Selection Tool” (V) and tap on the object that you want to transform.
If you don’t have any, you can simply grab any of the shape presets found on the left toolbar and try the feature with it. Please note that if the object that you are working with is text, then you first need to use the “Create outlines” function in order to apply rounded corners later on (the Live Corner Widgets won’t appear if you don’t do this first on your text!)
You can simply do so buy selecting your text and then choose “Type” in the main menu and then select “Create outlines.”
If your object is not text, then this “Create outlines” step is NOT necessary.
Step 2: Visualize the “Live Corner Widgets”
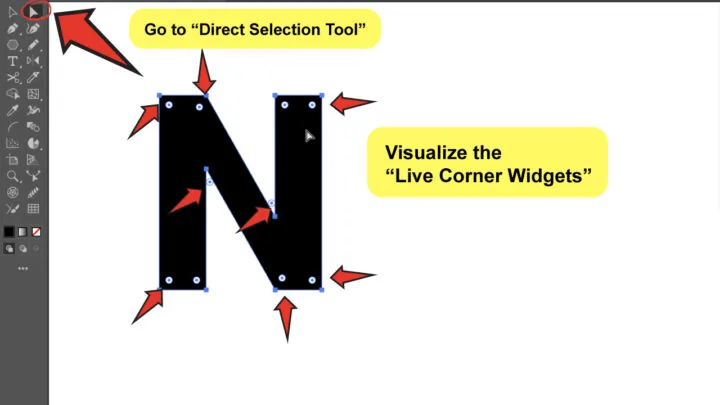
While your object is already selected, go to the “Direct Selection Tool” (A) and look for the little circular handles on the inside of your design.
Those are the “Live Corner Widgets”, and they are the feature that will help you round the corners of any shape in Illustrator in a matter of seconds!
Live Corners Widgets look like little white circles with a little blue dot inside of them, and are usually found close to the inner and outer edges of the corners.
Step 3: Select the corners you want to make rounded
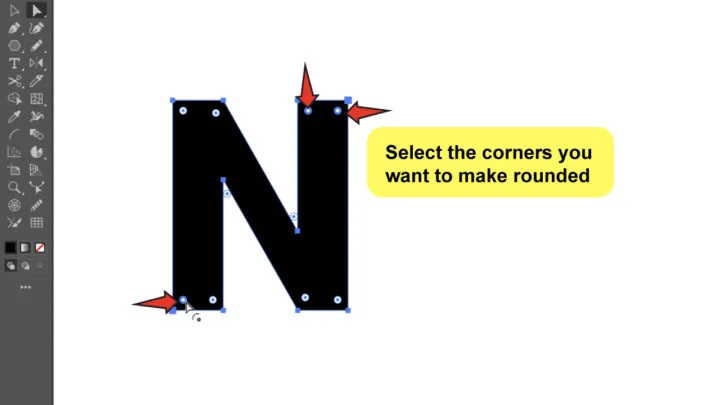
If you click the whole object (without touching any anchor point), all the corners will be selected, and so, all of them will be transformed.
To choose a single corner, just click on any of the widgets, and make sure to click on it only once.
You will notice that the selected widget has a blue outline around it now. That means it’s selected.
The difference is really subtle, widgets that aren’t selected will look almost the same, but without the blue outline.
To round multiple corners at once, hold the “Shift” key as you add the other corners or widgets to the selection.
You can also select them by just dragging the cursor around the whole area involving those corners, both ways are acceptable.
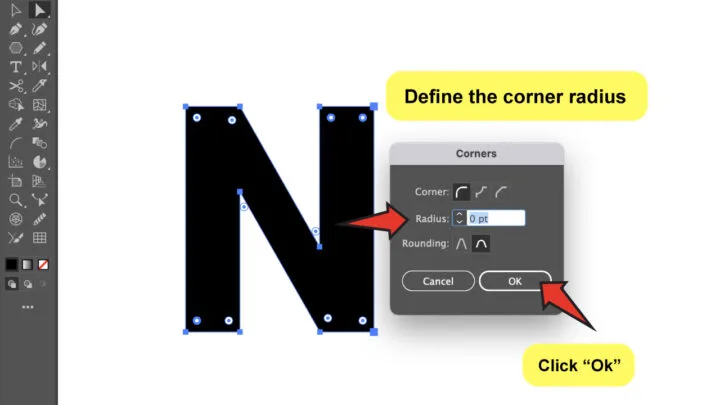
Step 4: Define the corner radius
This step isn´t necessary unless you need to set a specific radius for your object.
If you wish to set a specific radius for your object corners, just double-click on any of the widgets selected. A “Corners” menu box will appear with a few options available.
You can make some additional adjustments there, including adjusting the radius. Just keep in mind that these changes will only apply to the corners you’ve selected, so make sure you’ve covered that section.
First, you can choose the type of Corner that you want, which you can also change by holding down the “Alt” key (or “Command” if you’re a Mac user) while pressing on a widget. This would make the corner to cycle between the different styles.
Secondly, you’ll see a Radius field where you can enter whatever value you need. You can type the value yourself, or you can just scroll up or down to increase or decrease the value.
Lastly, there’s the Rounding, which determines whether the curve will keep its current angle or be based on a circle.
When you are done setting up all the adjustments you need click the “Ok” to apply.
Step 5: Round the corners!
Drag the object’s corners to the center while they are still selected.
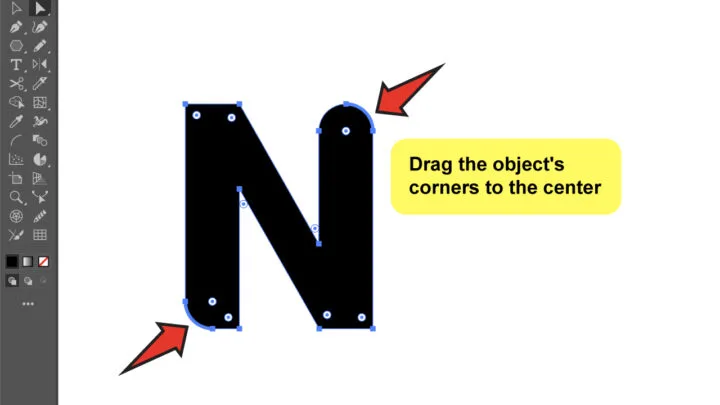
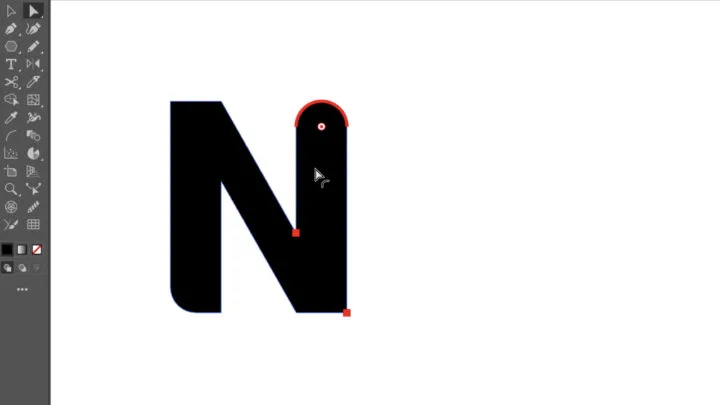
If you drag the widgets far enough (toward the center of the shape), a red path will appear around the corner, indicating that the maximum point has been achieved.
To increase the radius, drag toward the center, and to decrease the radius, drag out to the corners. If you drag all the way out, it will become a straight corner regular rectangle.
How to make rounded corners on an image in Illustrator
Now that you’ve learned everything there is to know about rounding corners, I think it’s essential that you know how to use it in one of the most common scenarios.
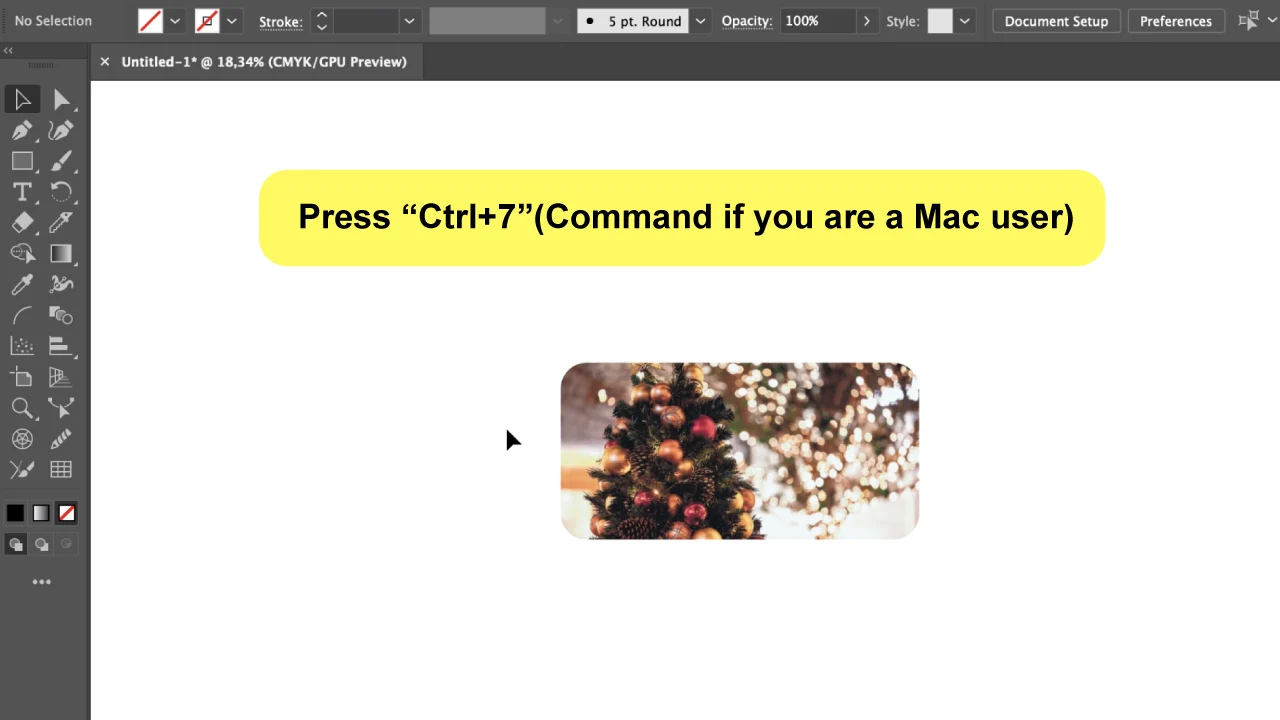
By combining the “Live Corner Widgets” and “Clipping Mask” features, you can easily create rounded corners on any picture.
Step 1:
To start, select “File” and then “Place” to open the image you wish to edit. 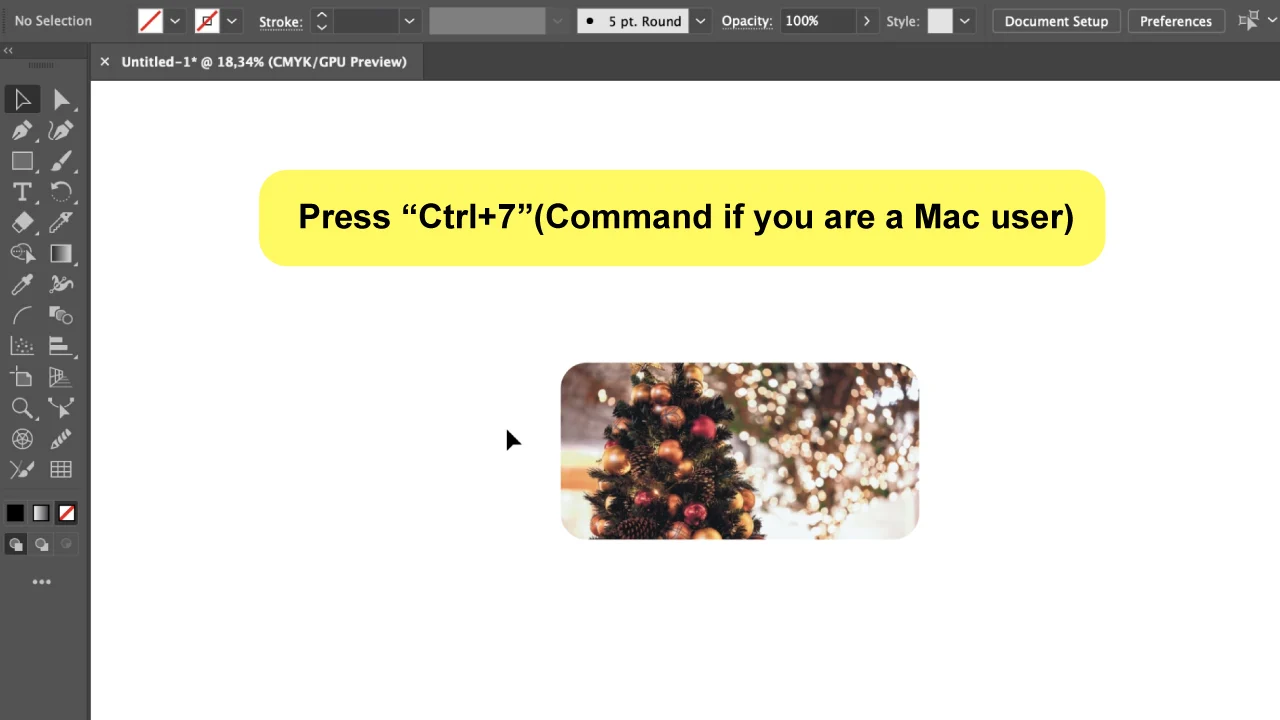
Step 2:
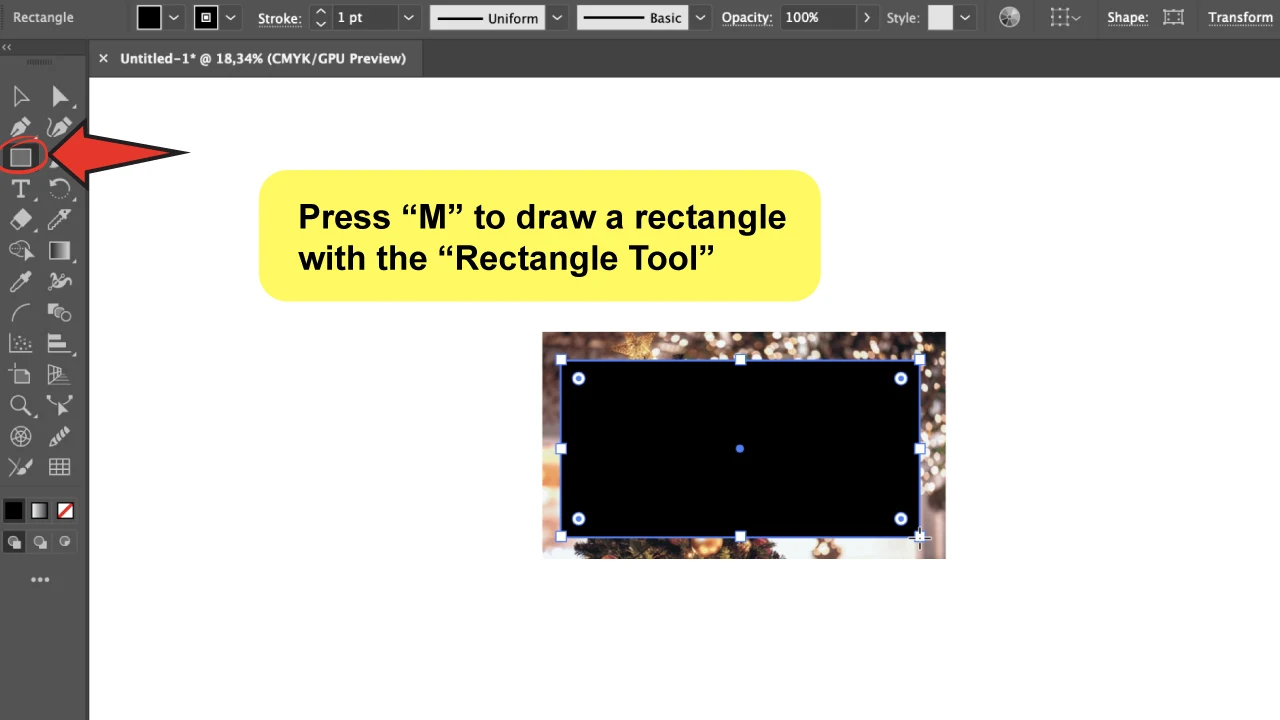
Then, depending on the photo size, draw a square or rectangle over the image to make a mask for it. You may do this by using the “Rectangle Tool,” which you can access by using the “M” key on your keyboard.
Step 3:
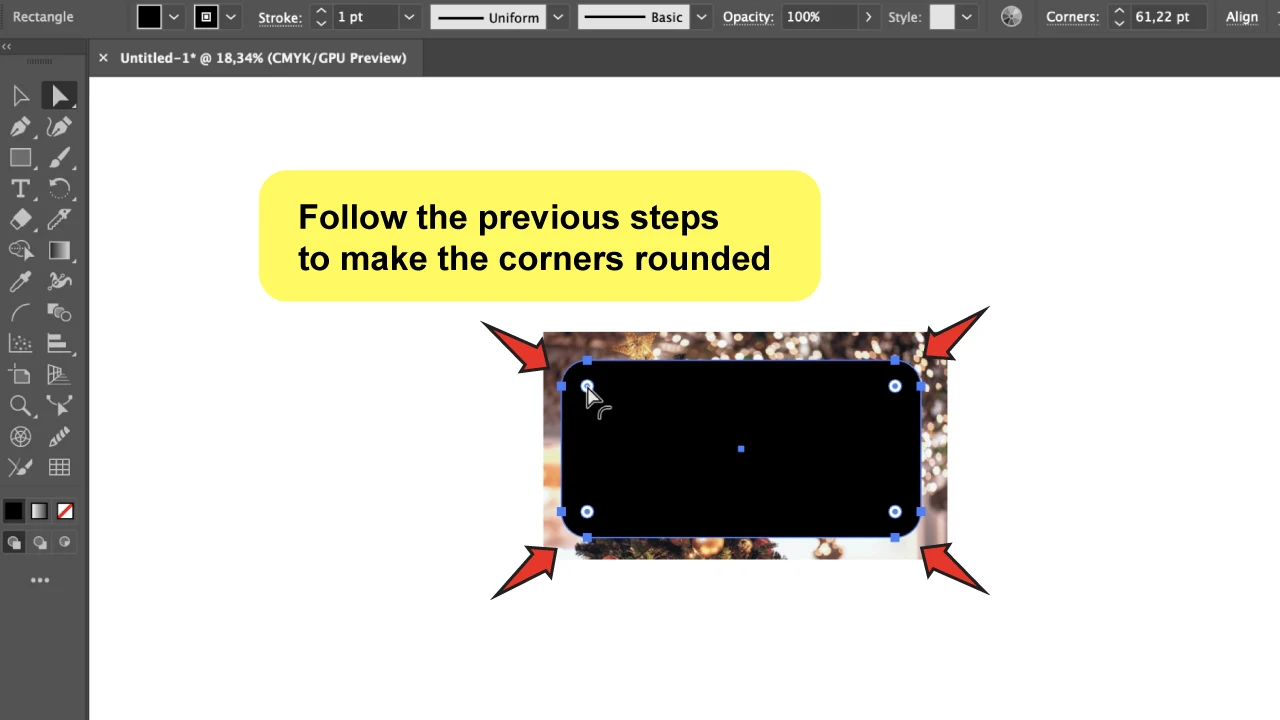
Now, use the “Direct Selection Tool” to select the shape, then find the “Live Corner Widgets” and drag them inwards to round the corners.
Step 4:
Lastly, select both the image and the rectangle, and then press the “Ctrl+7” keyboard shortcut (Command if you are a Mac user).
Frequently Asked Questions About How to Draw in Adobe Illustrator
Why I can’t see the “Live Corner Widgets” on my shape?
This sometimes happens when the image is too small (zoom level too high). Try to enlarge your image as much as possible to see if the widgets appear.
Which objects can I use the rounded corners on?
Basically, you can round corners of any shape! Whether It’s a preset shape or one you just built.
How can I undo rounded corners?
Undoing rounded corners is very simple. While the corner widgets are selected, drag out in the corners direction, and it will be back to the original shape. You can do an undo as much as you want!

Hey guys! It’s me, Marcel, aka Maschi. On MaschiTuts, it’s all about tutorials! No matter the topic of the article, the goal always remains the same: Providing you guys with the most in-depth and helpful tutorials!


