
Did it ever happen that you were ready to send your design to the printer and, at the last minute, you realized your image wasn’t at the right resolution?
Well, don’t worry! One of Illustrator’s greatest features is here to save the day for you.
This wonderful feature is called “Image Trace.”
It’s basically the easiest way to convert any raster image into a vector tracing.
Here’s how you use it:
How to Use Image Trace in Illustrator
To use “Image Trace” in Illustrator, go to “Window” and then “Image Trace”. Place the image you wish to trace and select it. Adjust the panel settings or pick one of the presets from the list, enable “Preview” to preview the result, and then press “Expand” once you are happy with the result.
You will have to keep in mind that, for every single image, you will need a different setting, and of course, the whole process also depends on the results that you are expecting at the end. So, there isn’t really a right or wrong here.
I suggest you play with the settings and see how it looks until you finally get what you want.
Before we get started, it’s important to note that this resource comes with a set of default presets that are ready to use right away.
So, if you don’t feel like experimenting with the tool or you just don’t have the time, you can go through these presets and see if any of them match your needs.
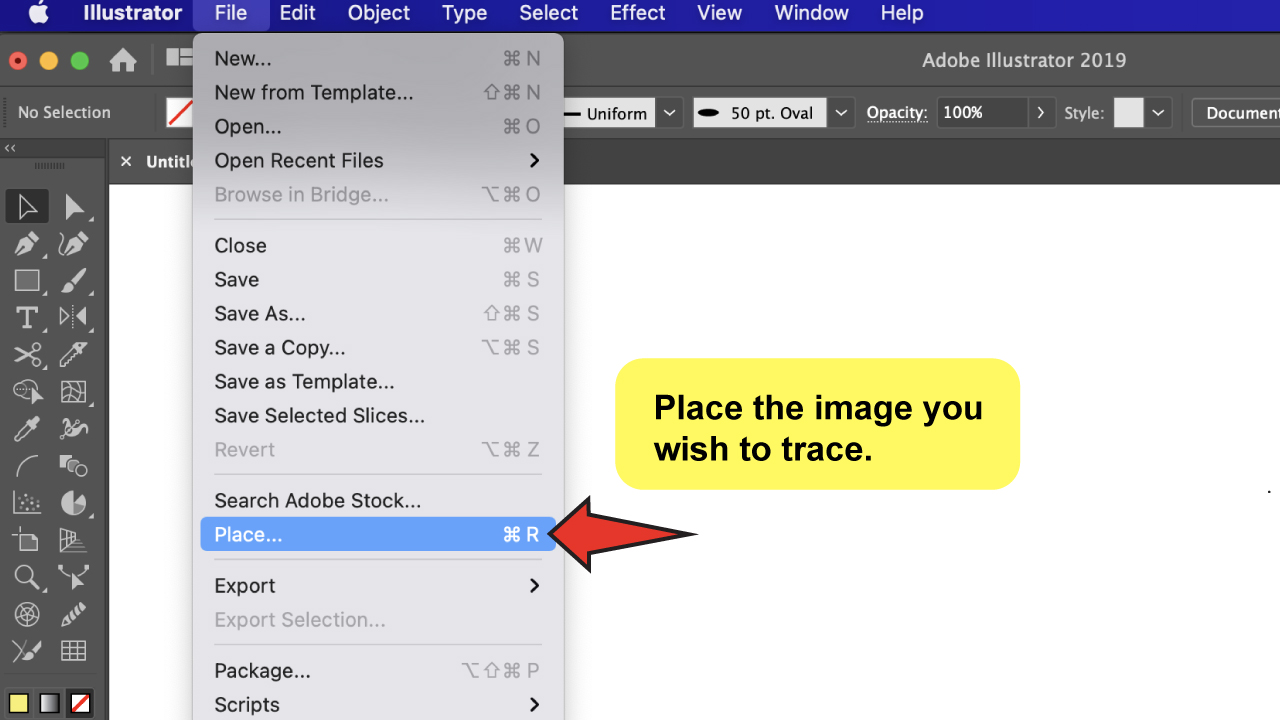
Step 1: Place the image you wish to trace.
First things come first, so you need to open the image to do the tracing.
Go to the top menu “File” option, and click on “Open” (Ctrl+O),
If you are already working on a file, select the “Place” option (also under “File”). This option will import the image you want on the file that you are already working on.

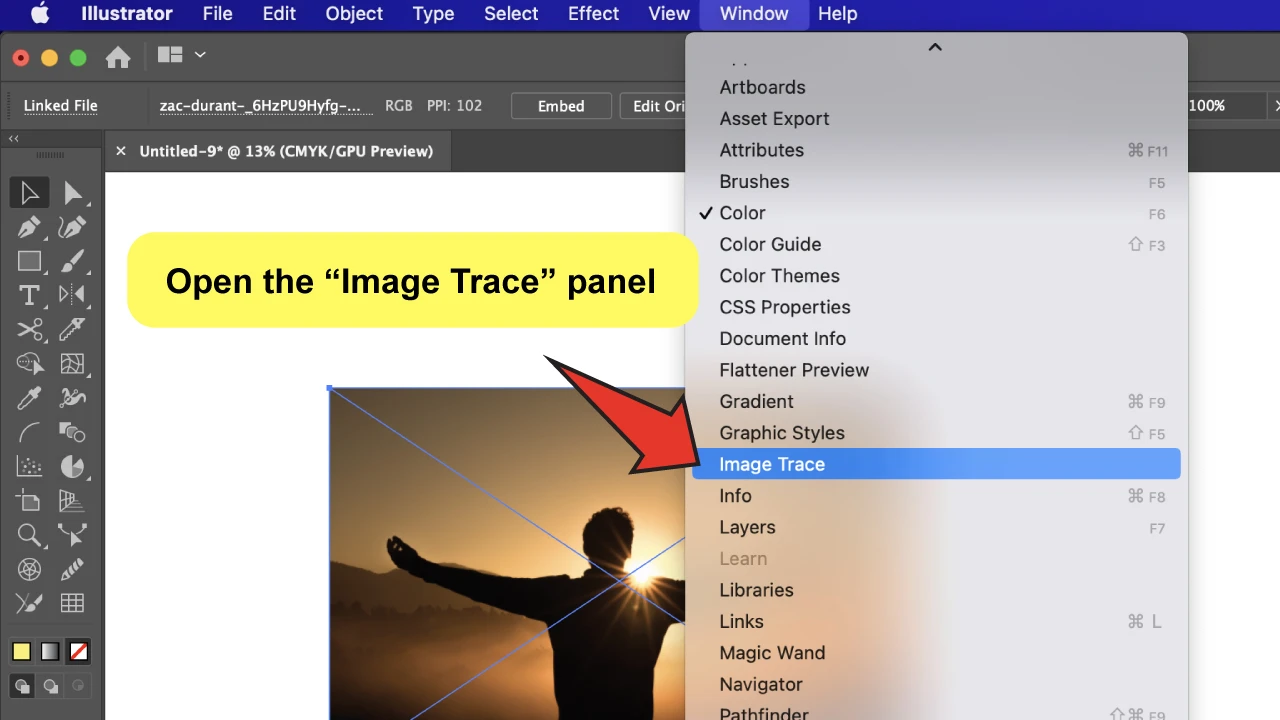
Step 2: Open the “Image Trace” panel


Go to “Window” on the top menu, and choose “Image Trace”.
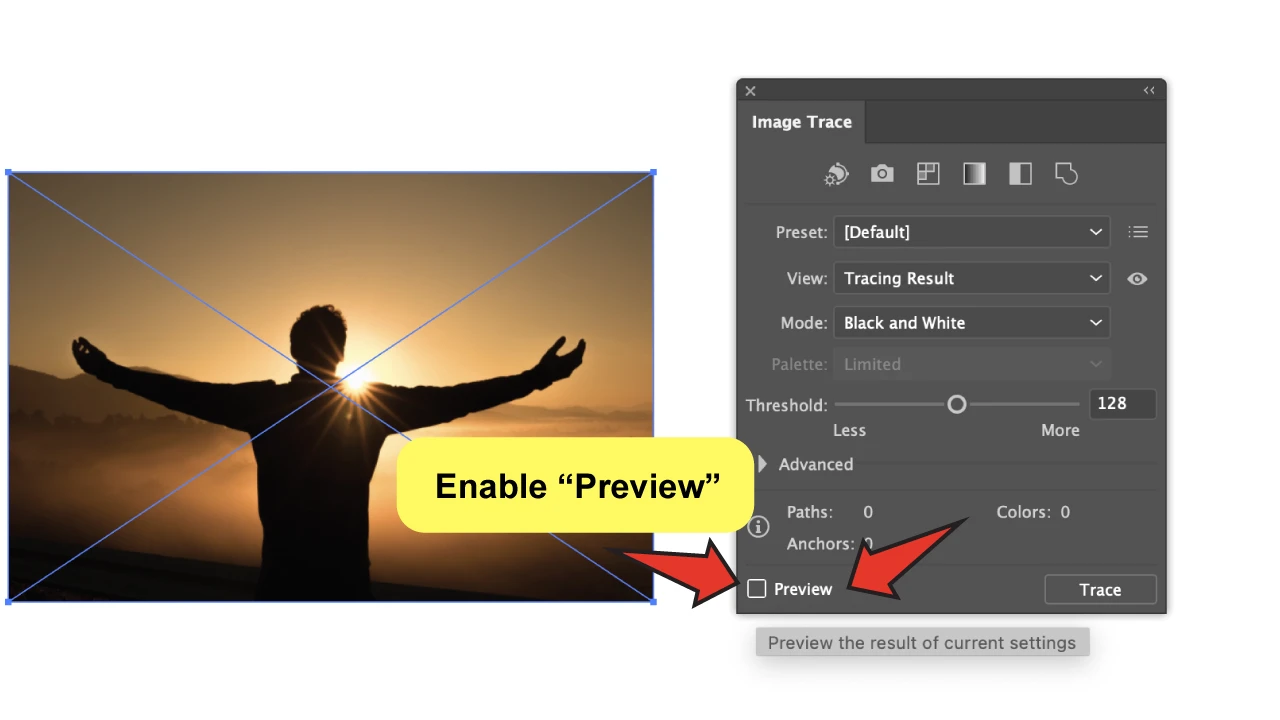
Once you open the panel, click to select the image you just opened and go back to the panel to enable the “Preview” option while your image is still selected.
This will give you a live look at the results while you’re setting up your tracing preferences.
Don’t worry if it doesn’t look good straight away; there are plenty of options to go with, and you need to play around a bit before you decide!


Step 3: Set up the options or choose a preset from the list
Don’t worry! This may look slightly overwhelming, but I promise you that if you simply follow these steps wisely, you will realize it’s a piece of cake!
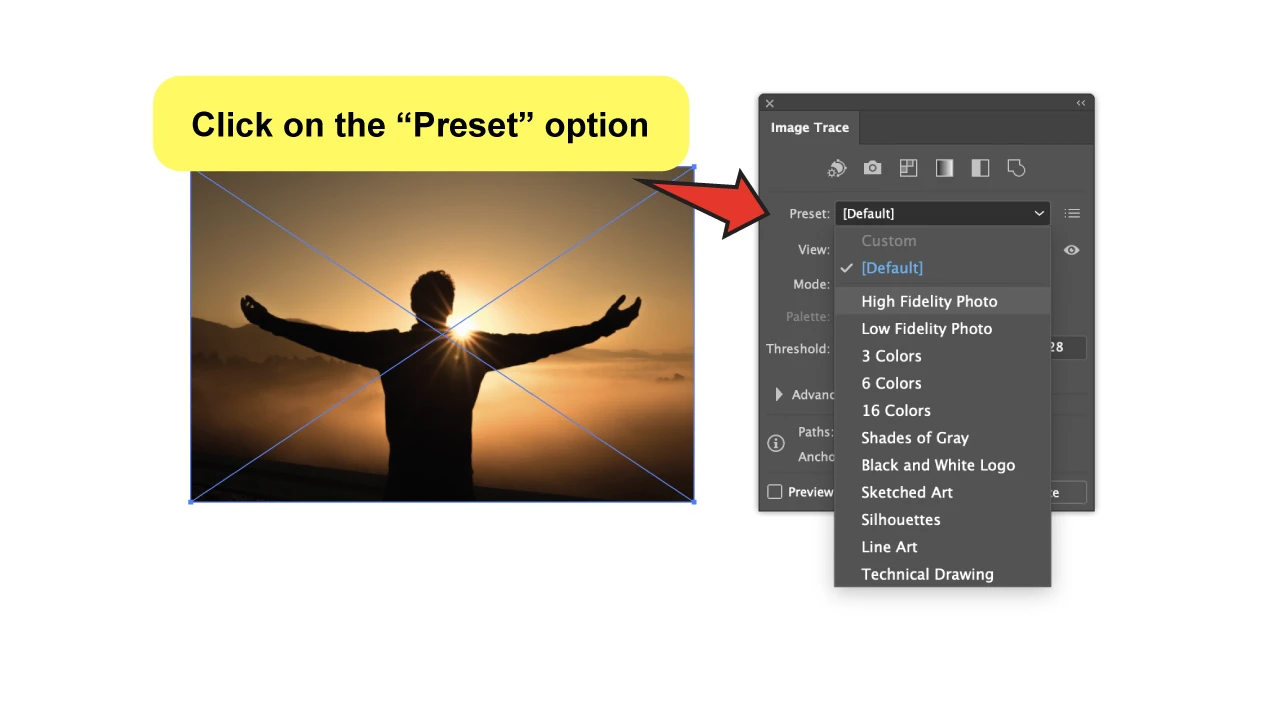
If you’ve chosen to use a preset to resolve quickly, click on the “Preset” option, and you’ll see a drop-down menu with a list of available presets. Don’t be afraid to test them all before making a decision!
If you can’t find what you’re looking for in the preset list, go to the next options.
The most essential thing to consider here is to specify the color mode and the amount of colors. The lower the number of colors, the smaller the file size and definition.
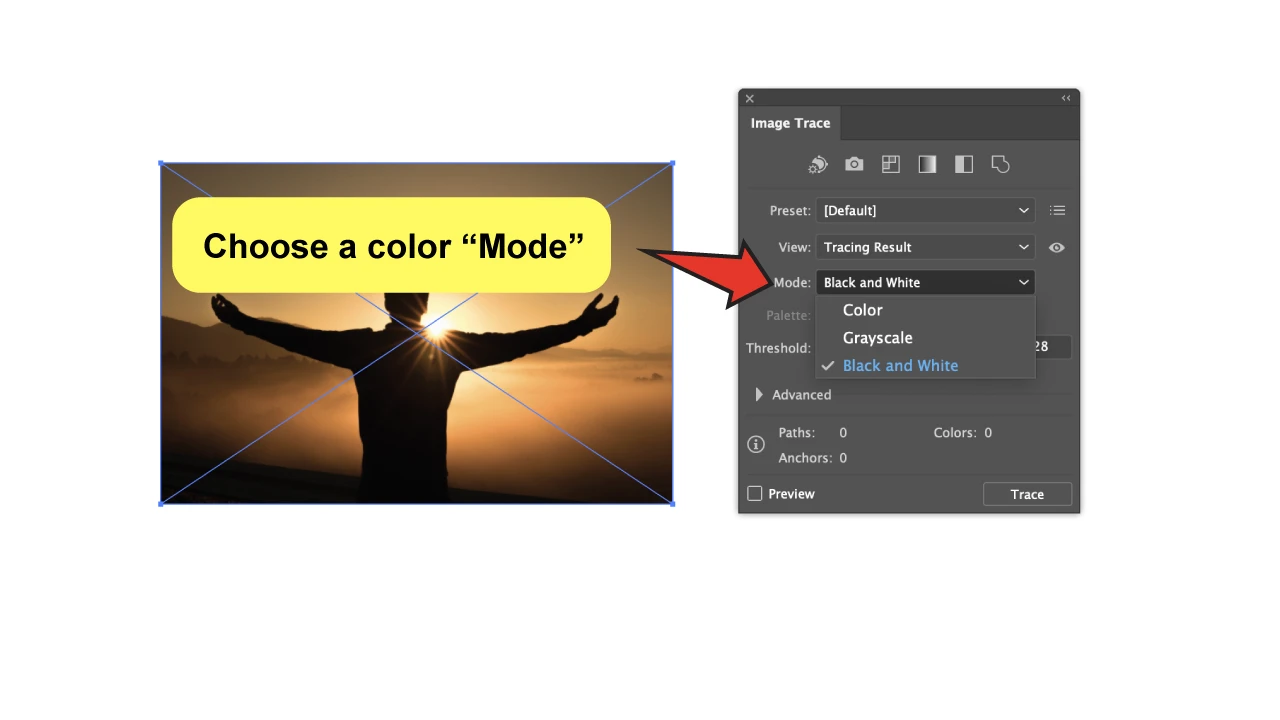
To adjust the color mode, tap on Mode and select one of the options listed below. You can choose “Color,” “Grayscale,” or “Black and White.”
To define the number of colors, go to Palette and first specify the type of palette you wish to use.


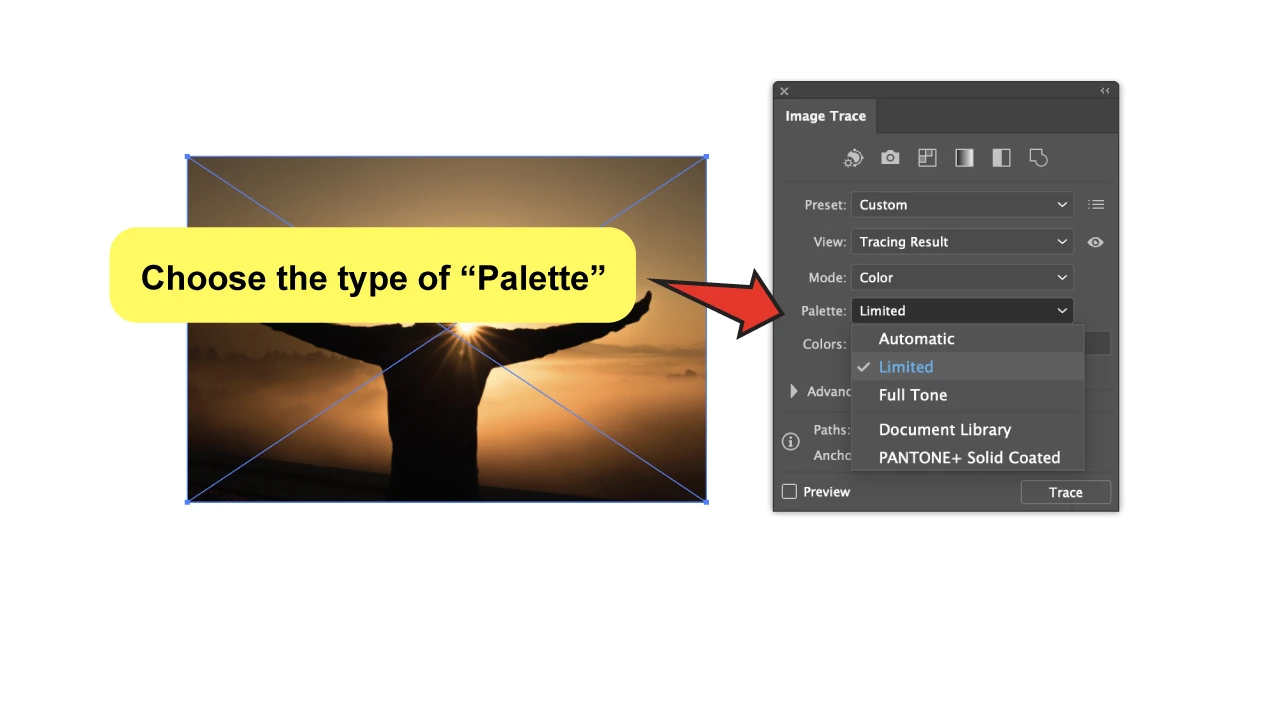
This will have a direct impact on the number of colors accessible on Colors (Color Accuracy in Percentage).
So, depending on your chosen palette, you’ll have a smaller or wider range of colors accessible. After that, you may manually adjust the amount.
At the bottom, you’ll find the “Advanced” sub-menu, which allows you to adjust the number of paths and refine the trace even more.
I suggest that you experiment with the values to see what possibilities and outcomes you can obtain. This may not be essential, but it can occasionally significantly improve the outcome.
Step 4: Expand
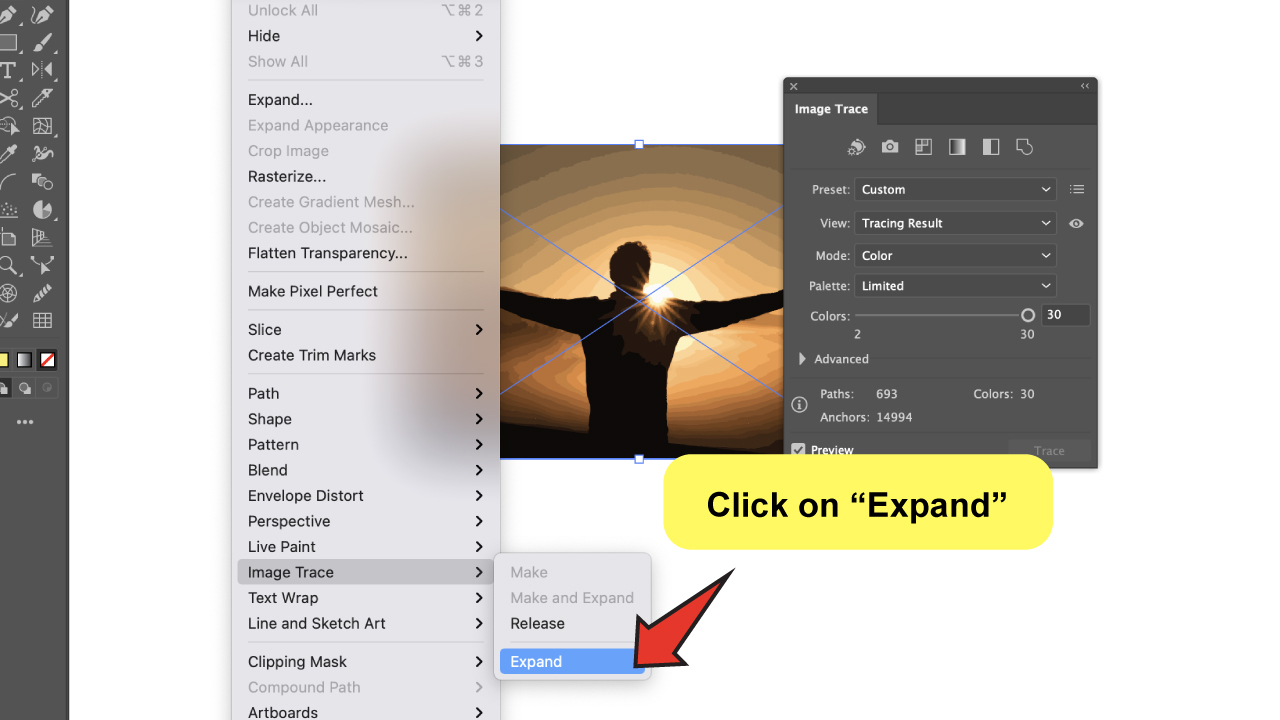
Once you’ve completed the settings, you must expand the appearance so the tracing can finally vectorize.
Go to “Object” on the top menu, select “Image Trace,” and click on “Expand” from the sub-menu that appears.
And you made it! The best thing is that you will not only be able to create some fantastic new editions of your images, but you will also benefit from the vector format’s versatility.

Frequently Asked Questions About How to Use Image Trace in Illustrator
How do I manually trace an image in Illustrator?
If you want to trace an image the old-fashioned way, you can just draw over an image. Simply bring the image into Illustrator, lock it in a layer, and start drawing over it on a new layer with any of the freehand tools such as “The Paintbrush,” or “The Pencil”.
Can I change the colors once I applied “Image Trace”?
Absolutely! You can now change and adjust anything you want because this is a vector image. This means you can use any of the tools available for colors and just create!
How can I get the trace results to look exactly the same as the picture?
Mostly you can’t, but you can make a quite accurate version if you use the “High Fidelity Photo” preset. It will always depend on the quality your image originally has, and the type of setting you choose.


Hey guys! It’s me, Marcel, aka Maschi. On MaschiTuts, it’s all about tutorials! No matter the topic of the article, the goal always remains the same: Providing you guys with the most in-depth and helpful tutorials!

