Hey! I’ve got to rush a report I’m writing on Google Docs.
I’ve already indented the citations and even made 2 columns in Google Docs to make my report presentable.
Yet, I don’t know how to sub bullet in Google Docs. How do you do so in this word processing tool?
Better continue reading the text below and see how sub-bullets are created in Google Docs.
How to Make a Sub Bullet in Google Docs
The fastest way to create a sub bullet in Google Docs is to place the blinking cursor after the text you want to add a sub-bullet into. Then, press “Enter” and then “Tab” on your keyboard to add a sub bullet. Or, you can create a multilevel list to add sub bullets in Google Docs.
Sub Bulleting in Google Docs — Possible or Not?
Most people think you’ll need to manually adjust the sub bullet indentation by dragging the pointer on the ruler to create sub bullets.
But, you don’t need to go through that long method of adding sub bullets in Google Docs if you continue to read below.
Now, there are two ways to sub bullet in Google Docs:
Method 1: Adding Sub Bullets by pressing “Enter” and “Tab Keys
Step 1: Open a Google Docs document from your Google Drive or create a new one by selecting the “Blank” page template.
Step 2: Once you’re in the Google Docs document, encode the text.
After typing, highlight the part of the text you want to become bulleted by dragging the cursor over them.
You’ll then see the selected text highlighted in blue.
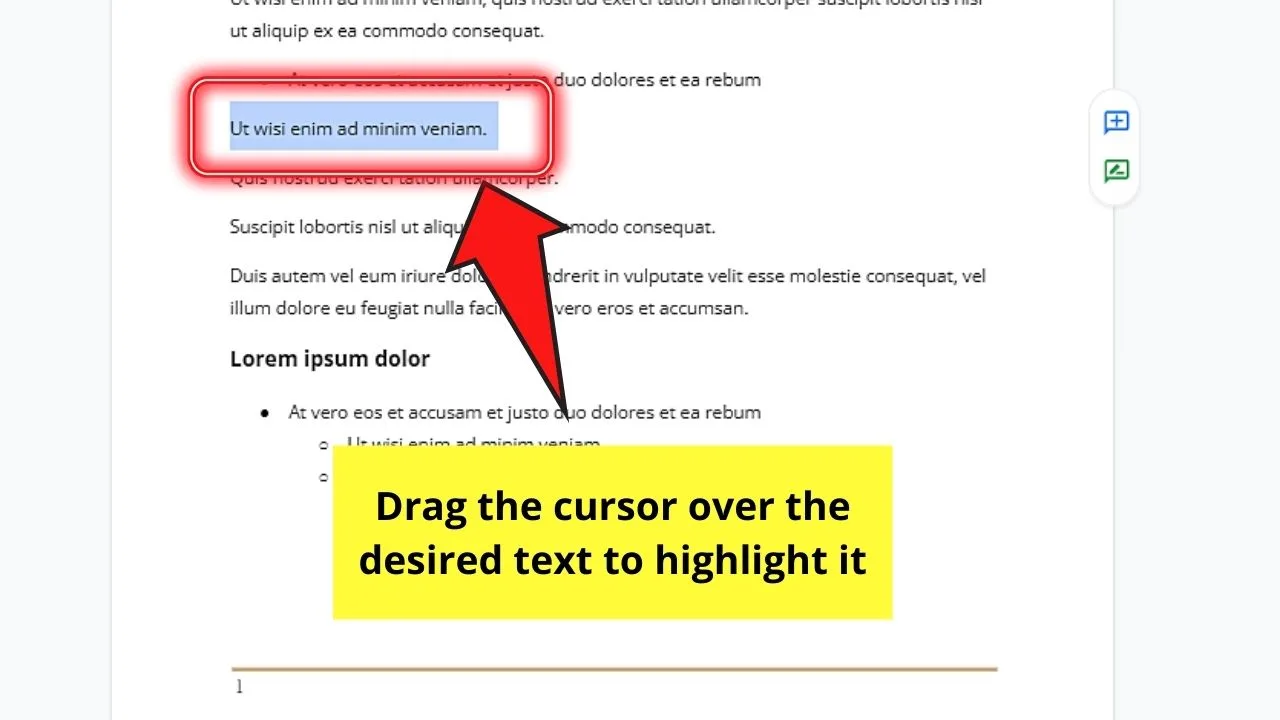
Step 3: After highlighting the desired text, head to the toolbar and select the “Bullet” icon in the toolbar.
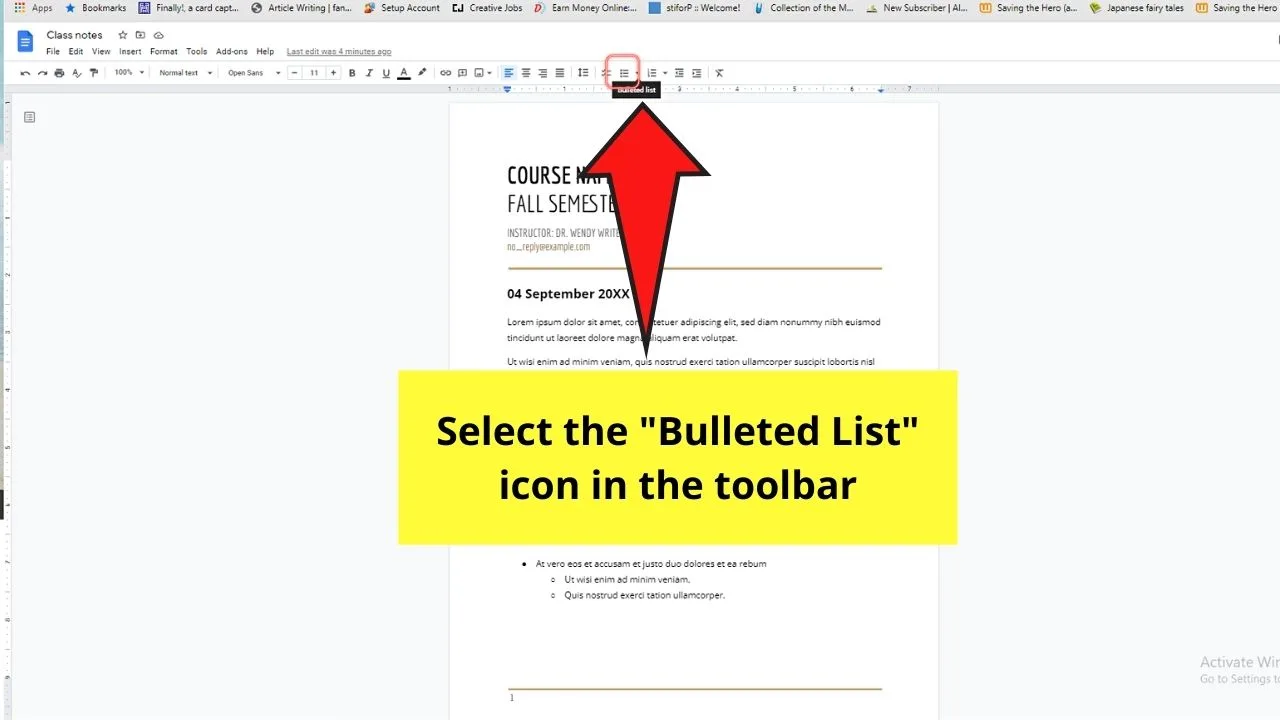
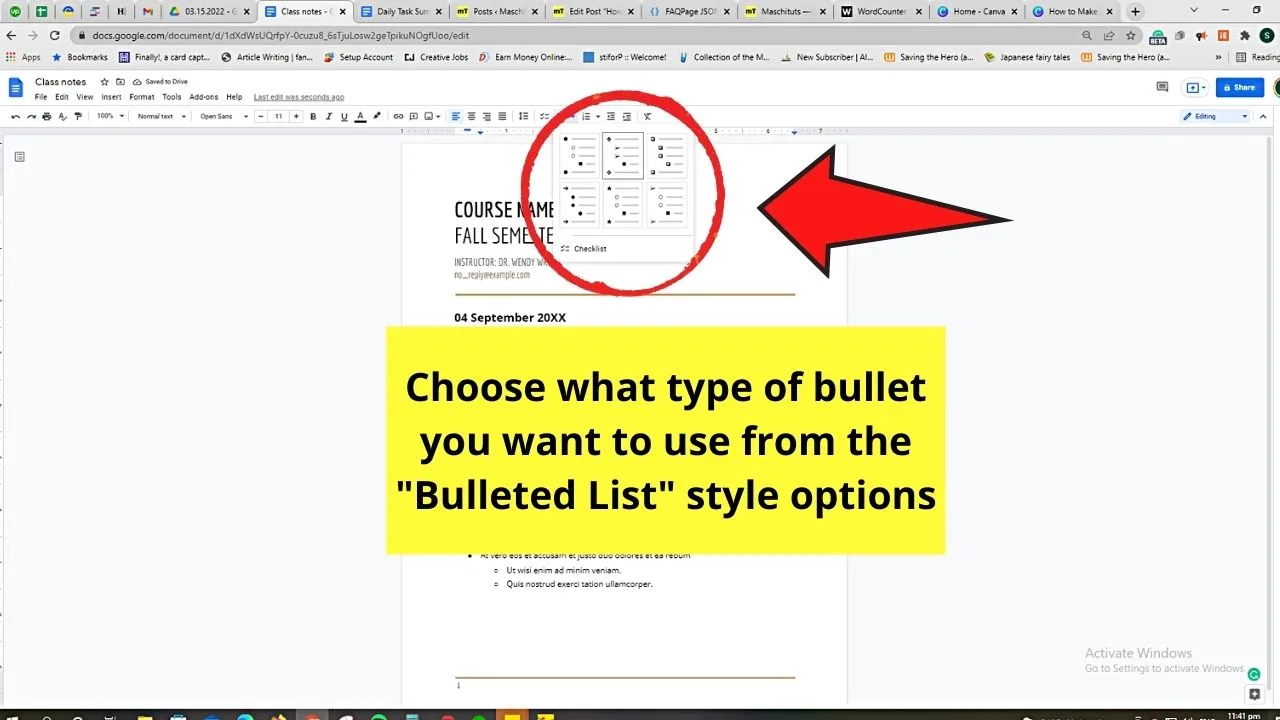
This move automatically turns the simple text lines into bulleted points.
Choose what bullet style you’ll use and click on it.
Step 4: After creating your main bullet points, place the blinking cursor at the end part of the text you want to add a sub bullet into.
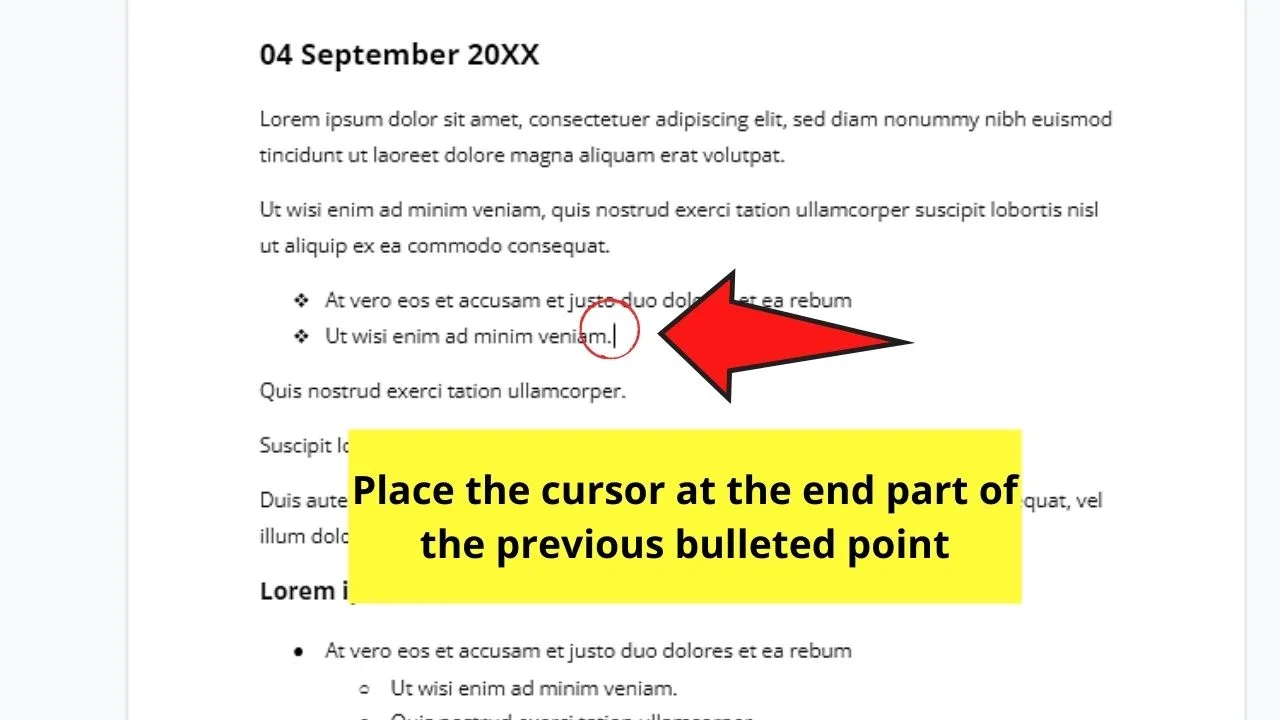
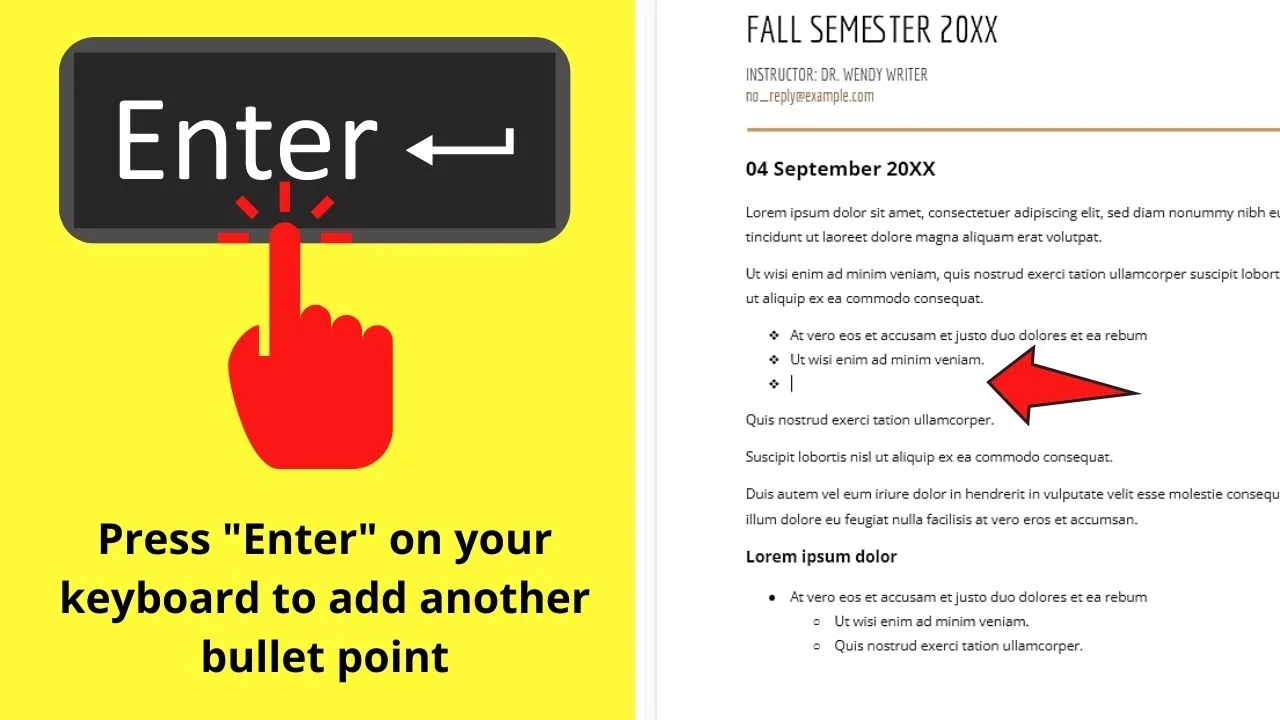
Step 5: On your keyboard, press “Enter.”
Step 6: Then, to create the sub bullet under that bullet point, press “Tab” on your keyboard.
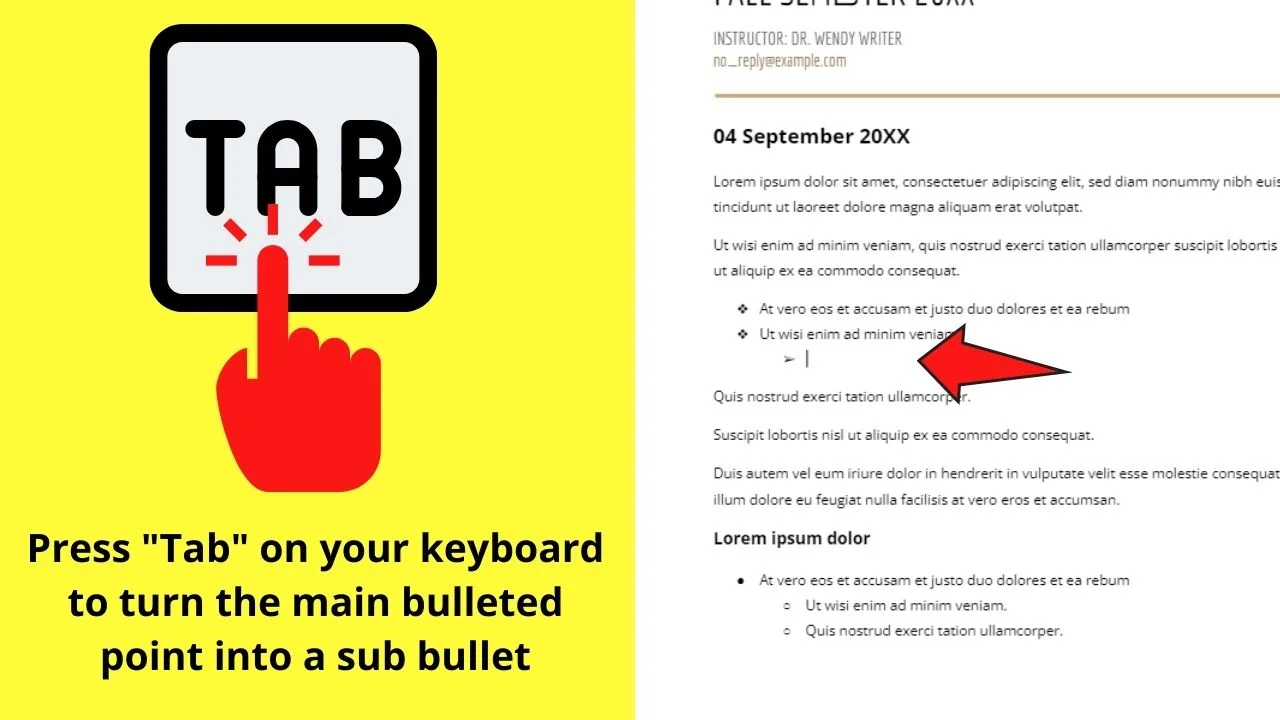
After which, the bullet point you created earlier will then be indented from the left margin, as well as assume another bullet style.
And, just like that, you’ve made a sub bullet in Google Docs.
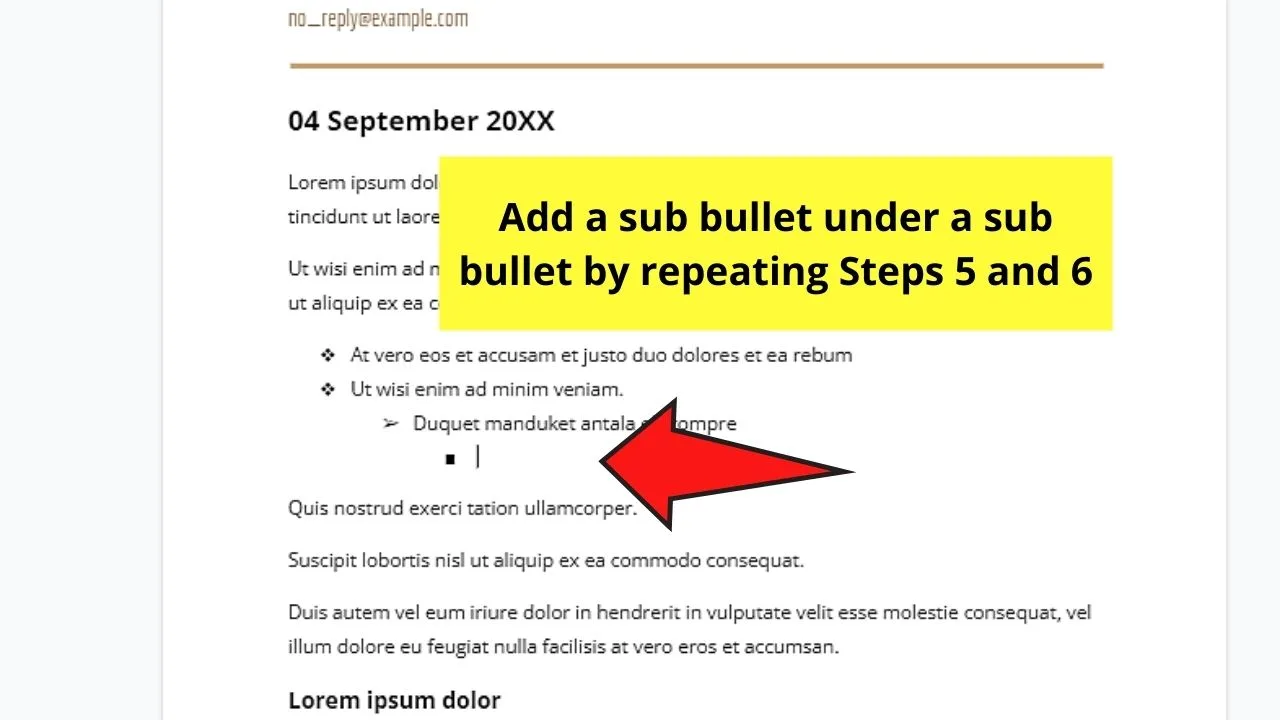
If you want to add more sub bullets, specifically, a sub bullet under another sub bullet, just repeat Steps 5 and 6.
However, if you’re done typing your report and you simply want to create sub-bullets in certain areas of the text, the second method will work better for you.
Method 2: Creating a Multilevel List in Google Docs
From the name itself, multilevel lists are lists that feature more than one level.
Aside from the main bulleted points, you’ll also see sub bullet points.
And, multilevel lists aren’t just bulleted lists; they can feature numbered lists as well.
So, if you want to try creating a multilevel list to create sub bullets in Google Docs, here’s what you should do:
Step 1: Open a new document by selecting “Blank page” in Google Docs.
You can also opt to open an existing Google Docs file by opening the file from your Google Drive.
Step 2: Once you’re in the Google Docs document, select everything in that file that you want to include in the multilevel list.
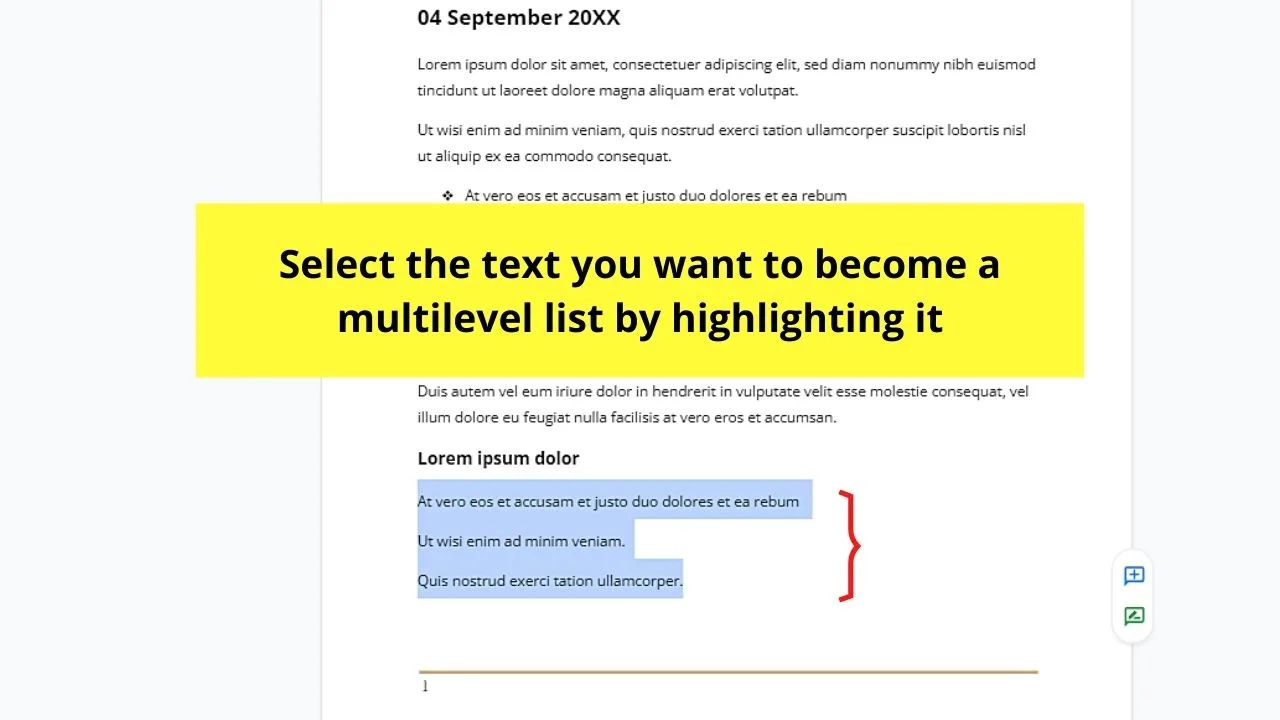
If you don’t want to drag the cursor across the text manually, you can select everything in that file by pressing “Ctrl/Cmd + A.”
Step 3: Once you’ve selected the text you want to include in the multilevel list, head to the menu bar and click “Format.”
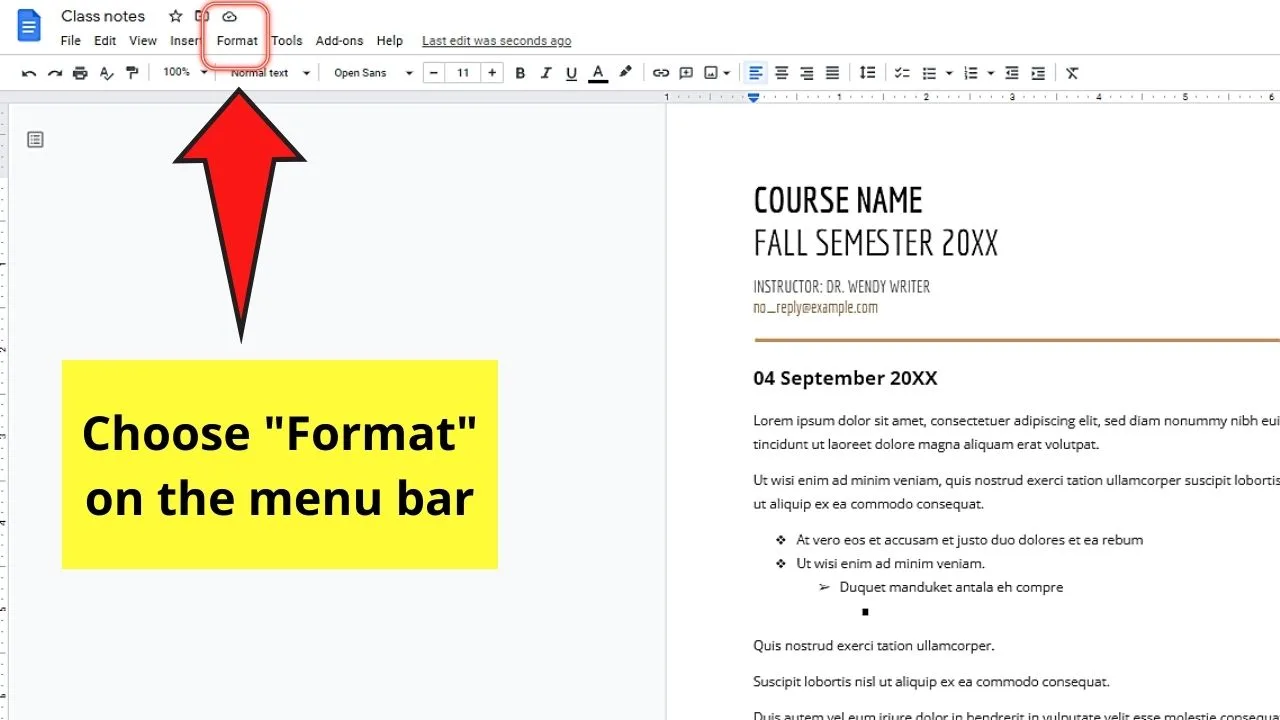
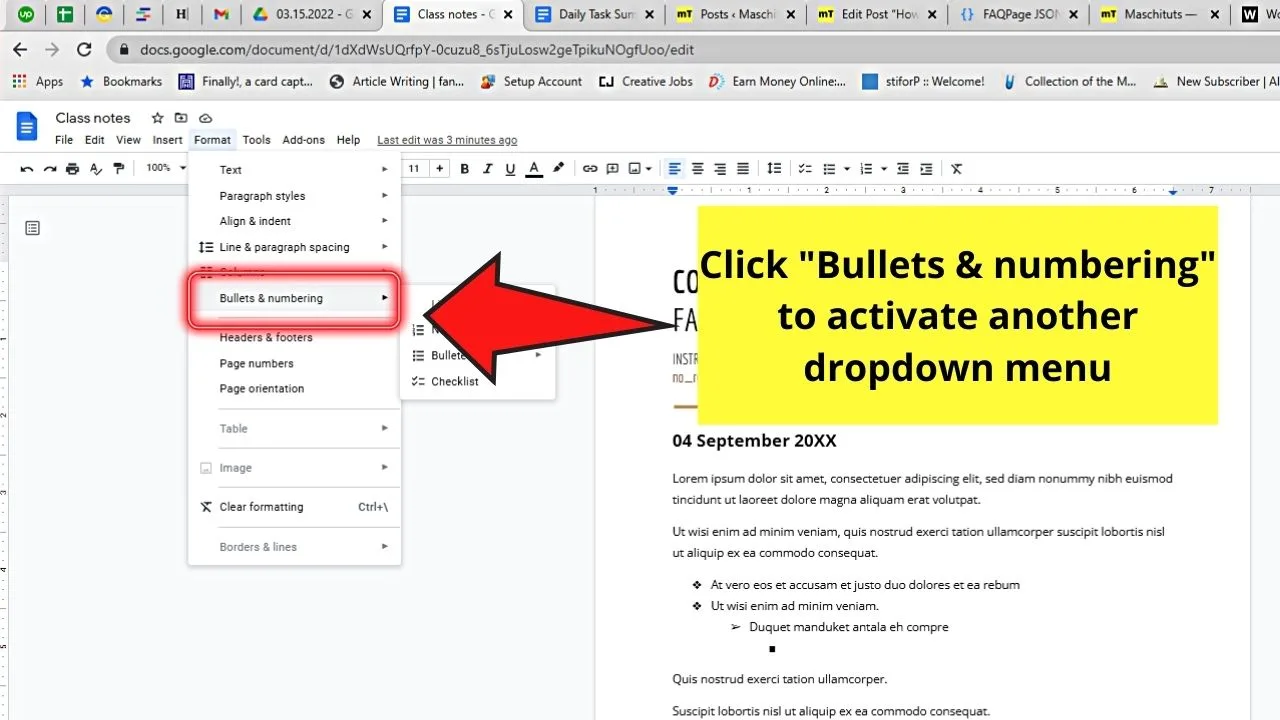
Step 4: In the “Format” dropdown menu, head to the “Bullets & numbering” option and click it. This will then trigger another dropdown menu to appear.
Step 5: In the second dropdown menu, you’ll find 3 list options: Bulleted List, Numbered List, and Checklist.
Since we’re aiming to make sub bullets, choose the “Bulleted List” option.
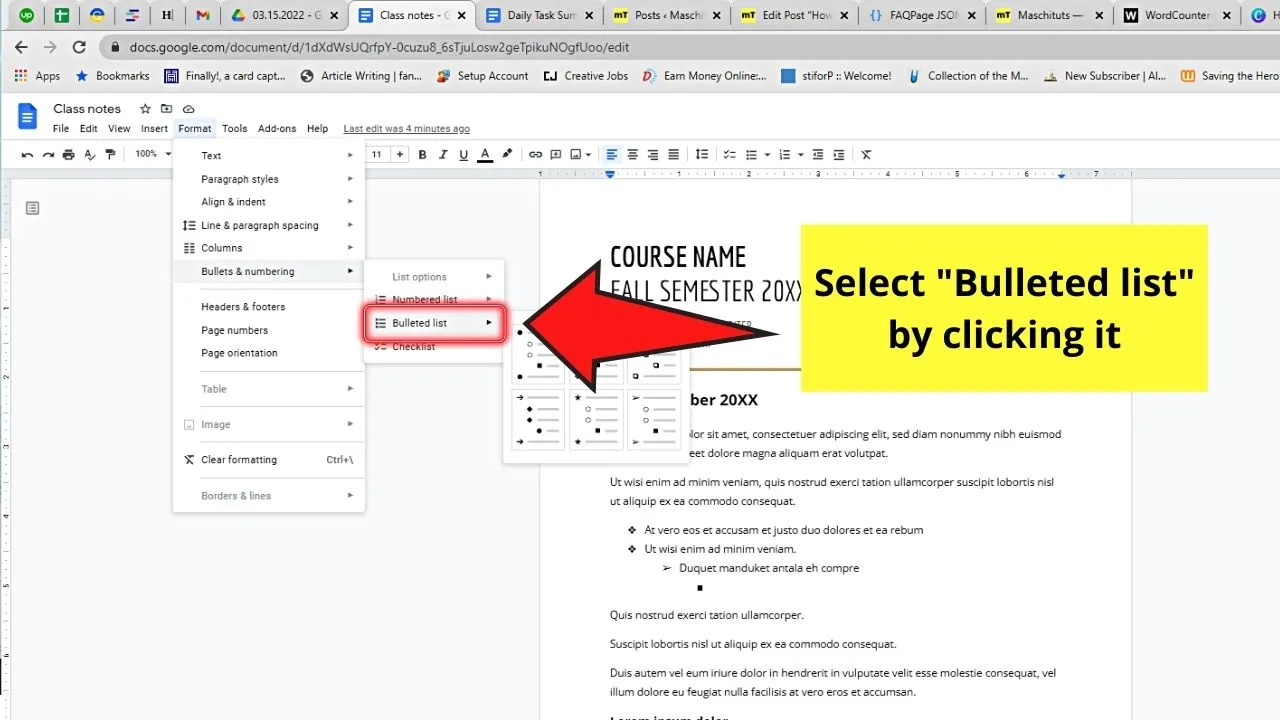
You’ll then see the selected text formatted in the list style you chose earlier.
Step 6: Place the cursor at the start of the text you want to demote its line indent.
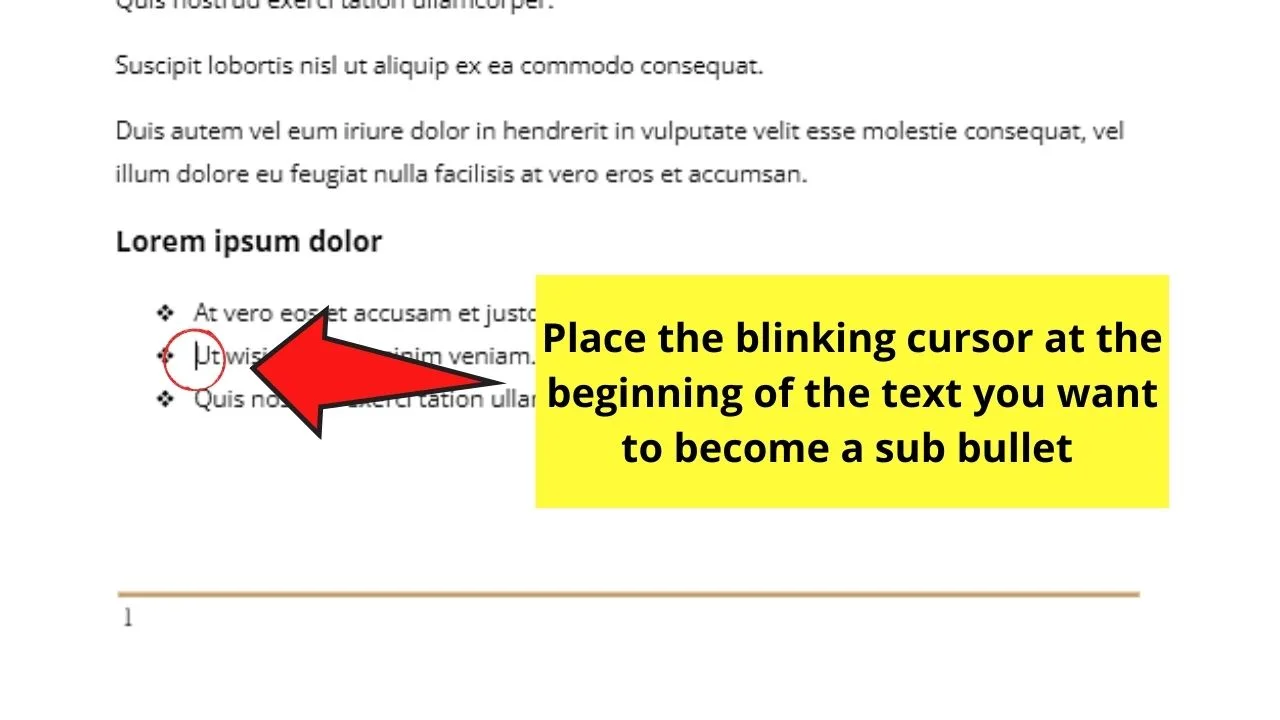
Step 7: Press “Tab” on your keyboard to move the desired text one level lower.

If you want to move the said text to another level, press “Tab” again.
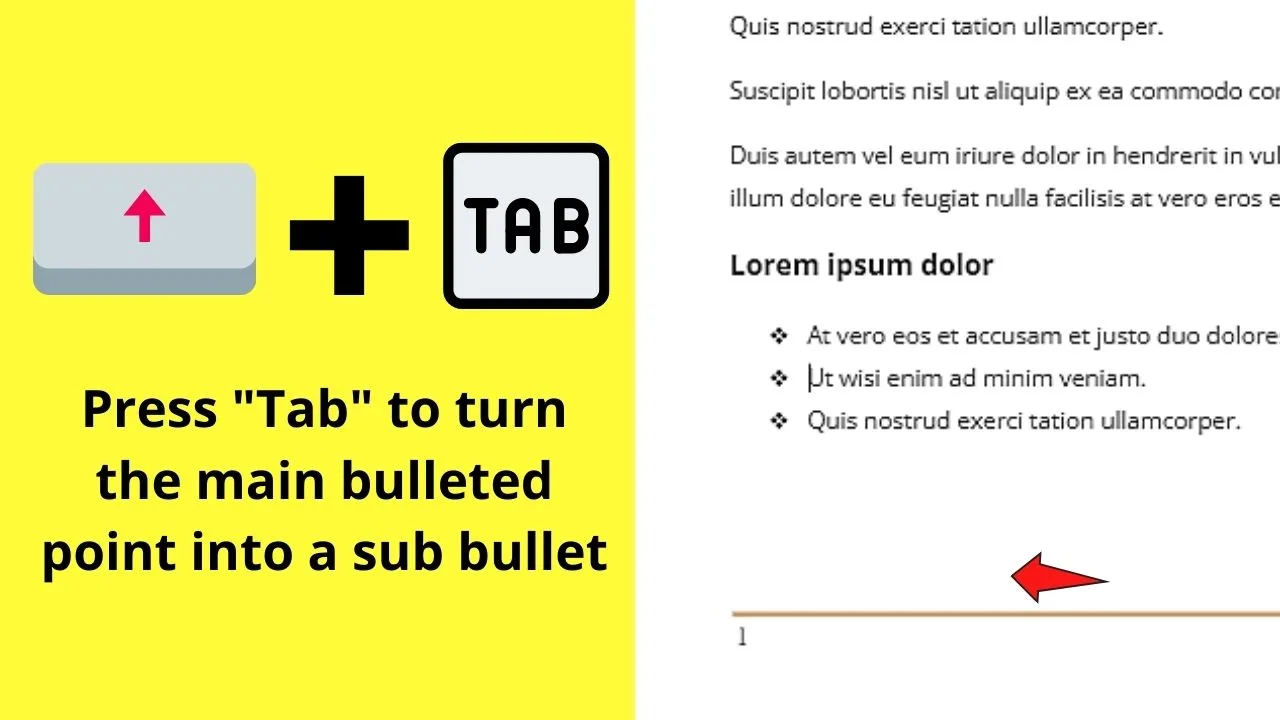
Step 8: Now, if you want to promote the desired text one level up, place the blinking cursor again at the beginning of the said text and hit “Shift + Tab.”
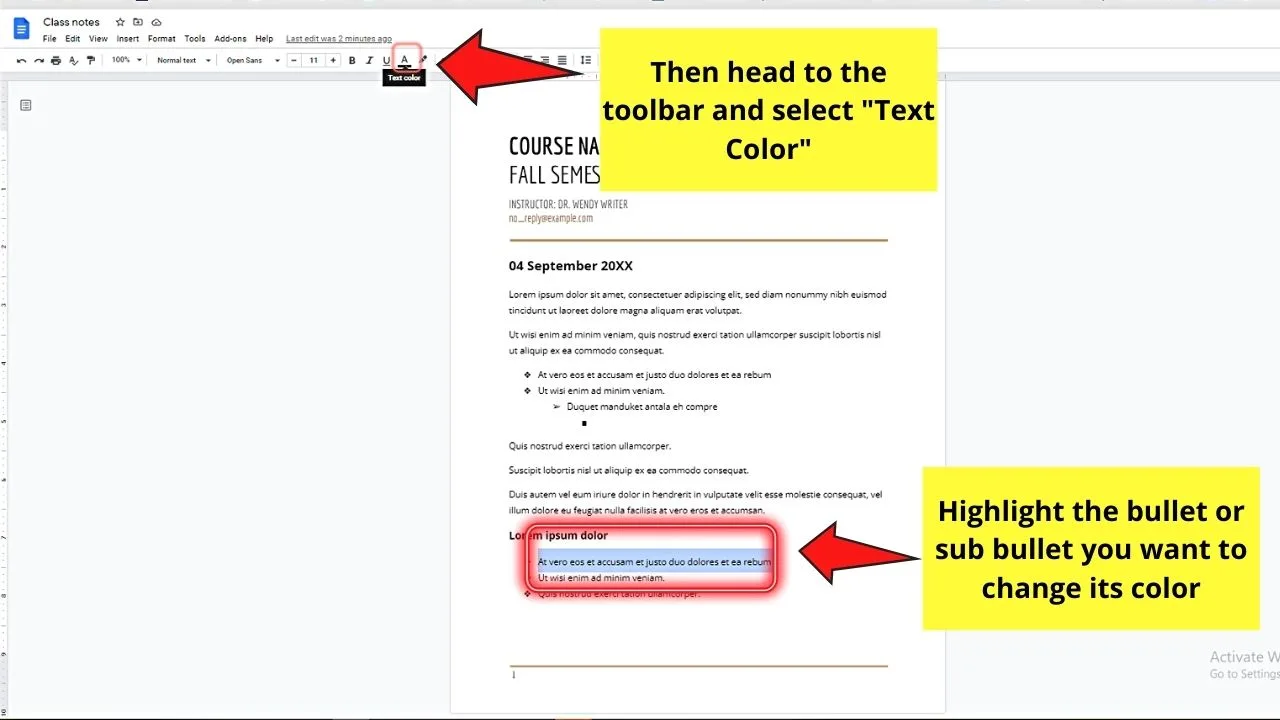
Step 9: If you want to change the text color for both the bullets and sub bullets, highlight the desired text and click “Text color.”
Enlightened on how you can sub bullet in Google Docs?
Just review the steps mentioned above, and you won’t have a hard time creating multilevel lists involving sub bulleted points.
Frequently Asked Questions about How to Make a Sub Bullet in Google Docs
Can I customize the look of my multilevel list without manually changing the bullet styles?
You can customize the bulleting style of the multilevel list you’re creating. To do so, select the desired text, then click the meatball icon (horizontal ellipsis) before selecting “Bulleted List.” Click the “v” icon before choosing the bulleting style you want.
How do you move a bulleted point in Google Docs?
To move a bullet point in Google Docs, place the cursor at the beginning of the bullet point and press “Tab.” This will indent the bullet point one cell to the right. To undo the indentation of the bullet point, place the cursor at the beginning of the text, then press “Shift + Tab.”
How do you change the character used for the sub bullets in Google Docs?
To change the sub bullet characters used in Google Docs, head to “Format” > “Bullets & numbering” > “List options” > “More bullets.” Then, in the special characters chart that appears, choose the character you want to use. This will then apply the character on the sub bullets you highlighted.

Hey guys! It’s me, Marcel, aka Maschi. On MaschiTuts, it’s all about tutorials! No matter the topic of the article, the goal always remains the same: Providing you guys with the most in-depth and helpful tutorials!


