

Wow! I love looking at your resume, as it’s neat and organized!
Plus, the horizontal lines you added help organize your resume’s content.
How did you add those horizontal lines in Google Docs?
If you’re a newbie unfamiliar with how to add a horizontal line in Google Docs, keep reading!
How to Add a Horizontal Line in Google Docs
To add a horizontal line in Google Docs, follow these steps:
Step 1: Place the cursor where you want to insert the horizontal line

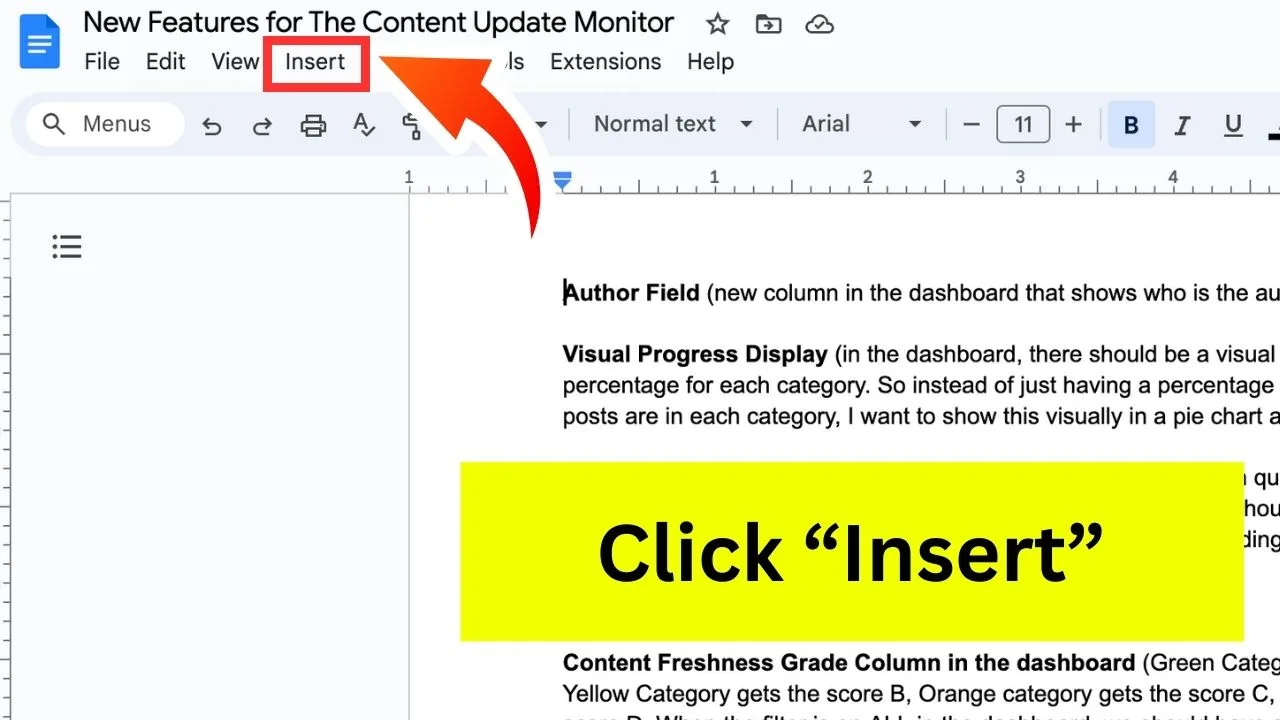
Step 2: Click on “Insert” in the top menu

Step 3: Select “Horizontal line”


Now, if you prefer a much more flexible method of adding horizontal lines, then the second method is your best option.
Method 2: Use the “Drawing” Tool to Add a Horizontal Line
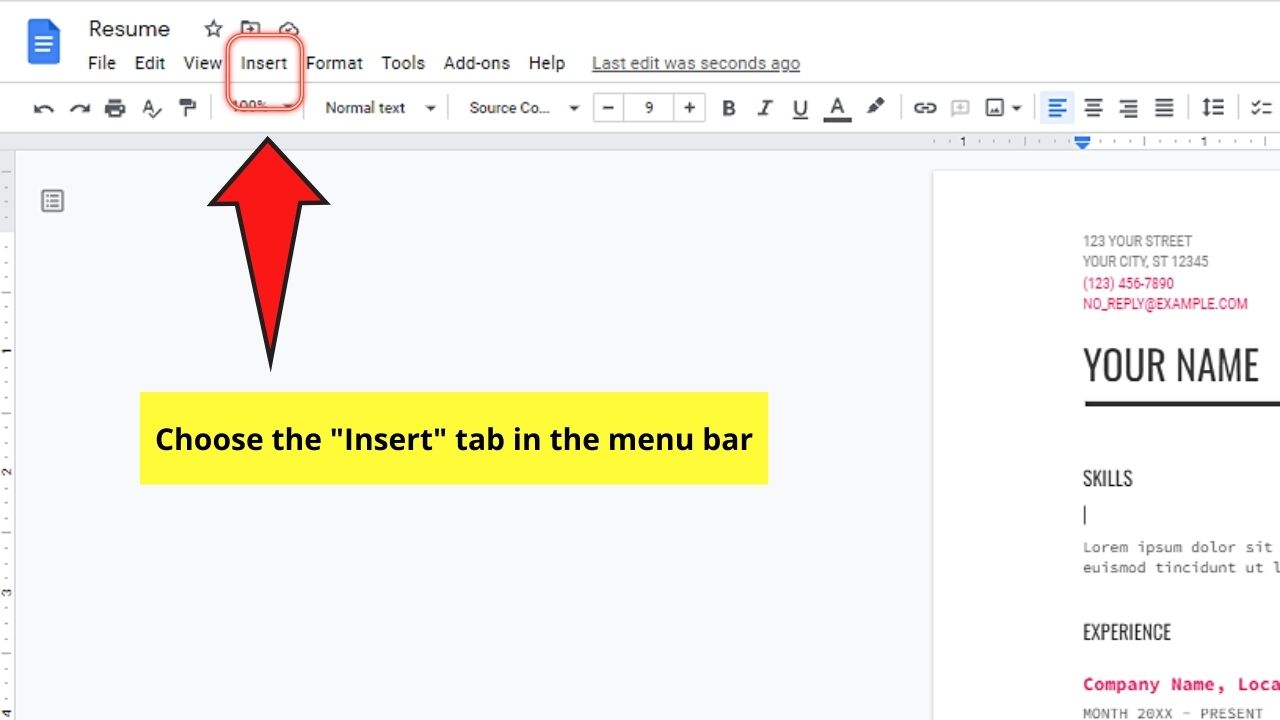
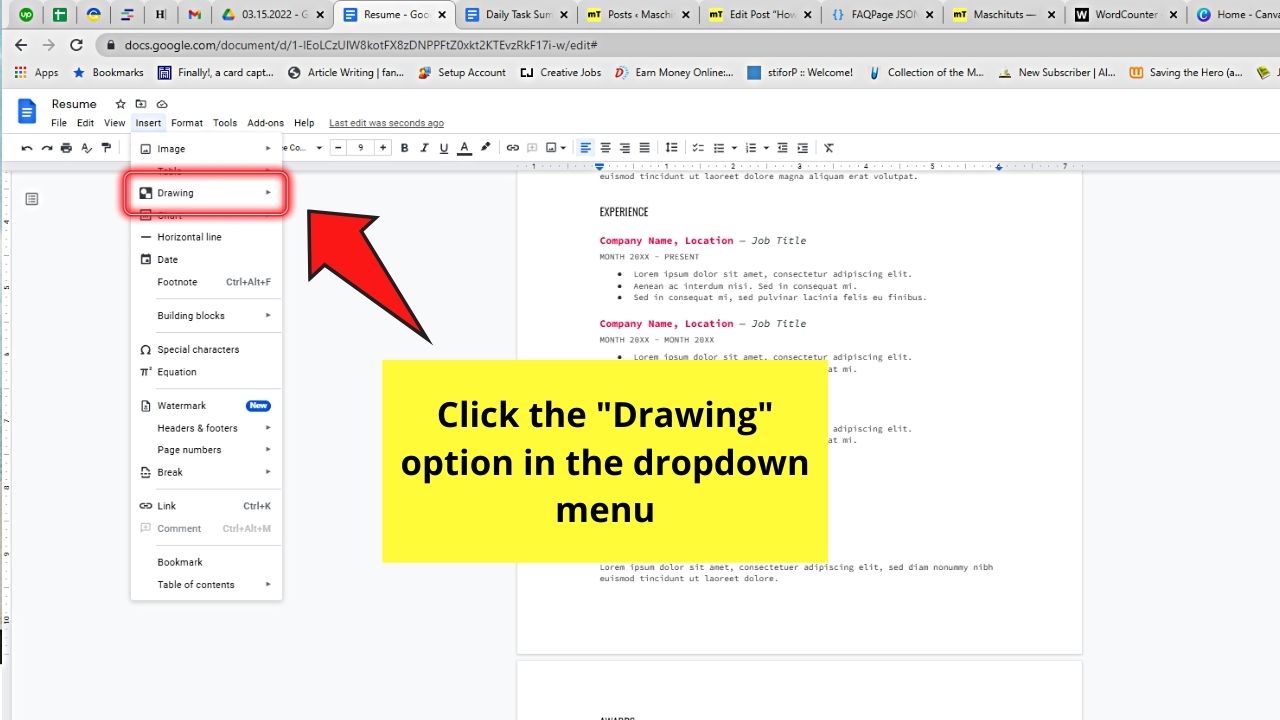
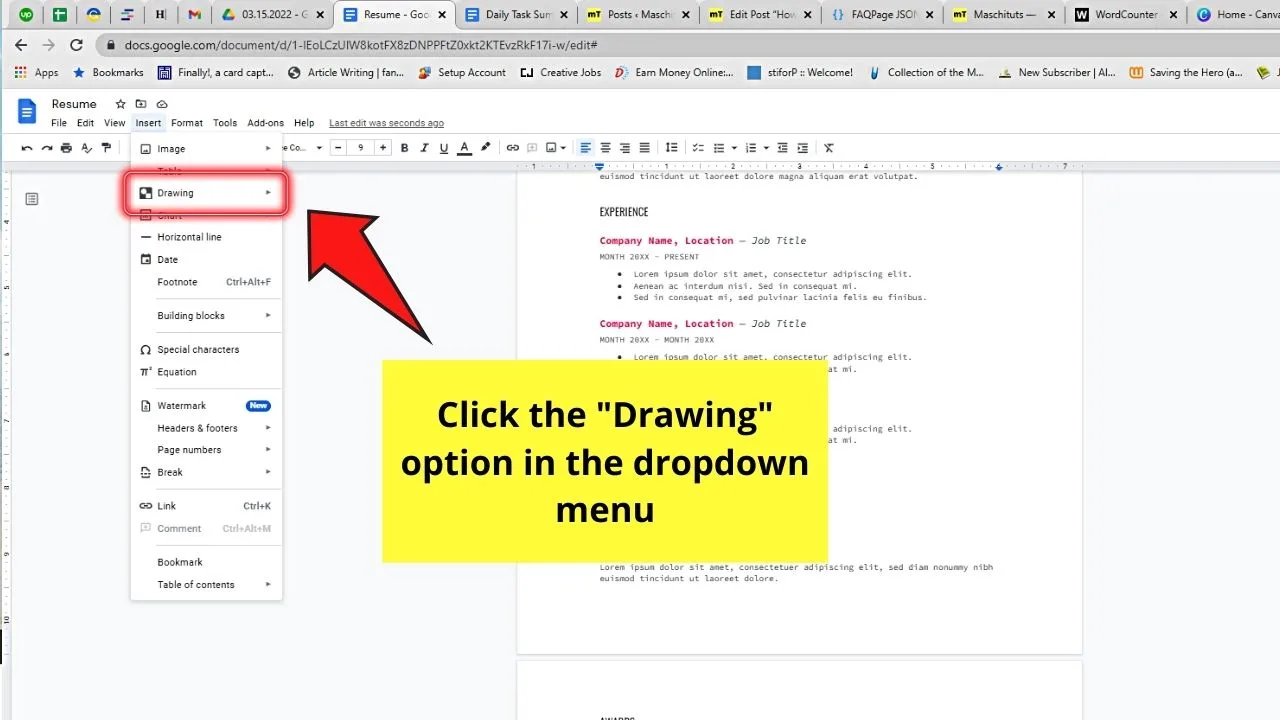
Step 1: After opening a Google Docs file, head to the “Insert” tab on the menu bar and click it.
Step 2: In the dropdown menu that appears, scroll down to the “Drawing” button and click it.


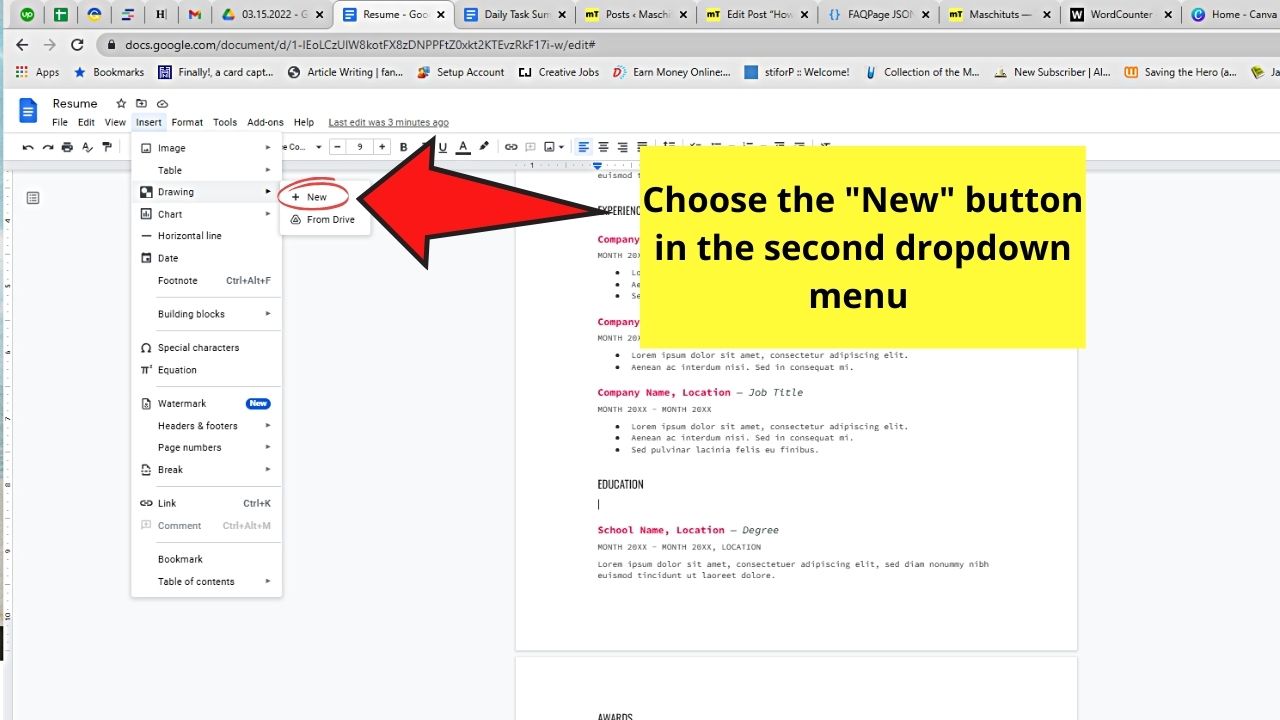
A second dropdown menu will appear beside “Drawing.”
Step 3: After selecting “Drawing,” you’ll then see two options available: New and From Drive.
Choose the “New” option to make the “Drawing” pop-out window appear.

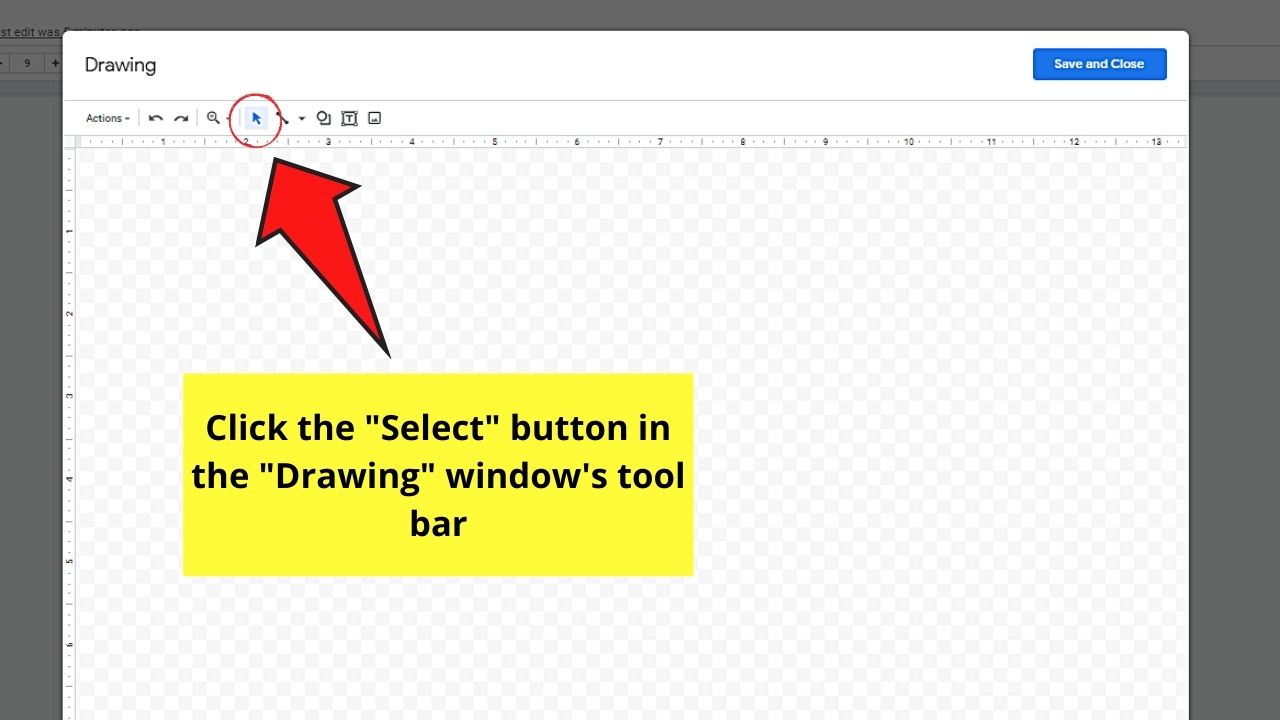
Step 4: Once you’re in the “Drawing” tool, click the “Select” button (the small arrow icon beside the “Line” button) to view the entire options available.

Step 5: Then, choose “Line” from the “Line” button. Just click the “v” icon to select from the line styles available.
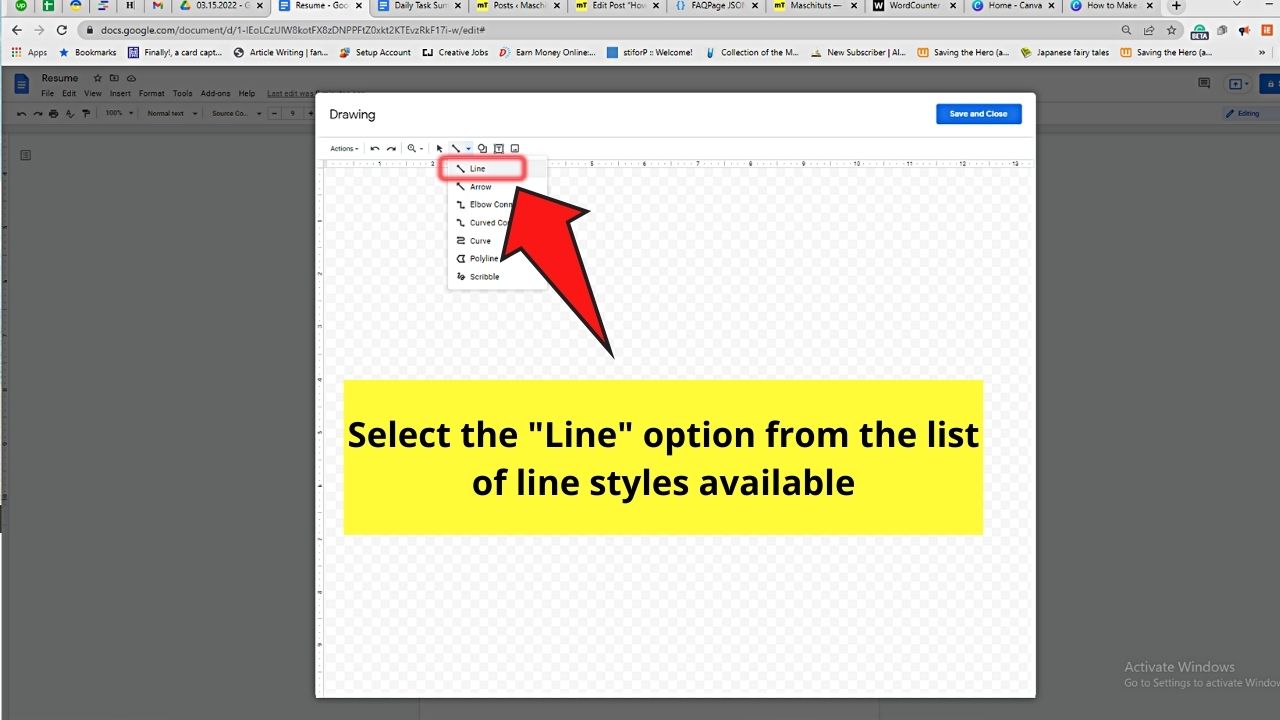
Since we want a horizontal line, choose “Line” in the line styles available.
Step 6: Now, click and drag the arrow across on the drawing tool to form a horizontal line.

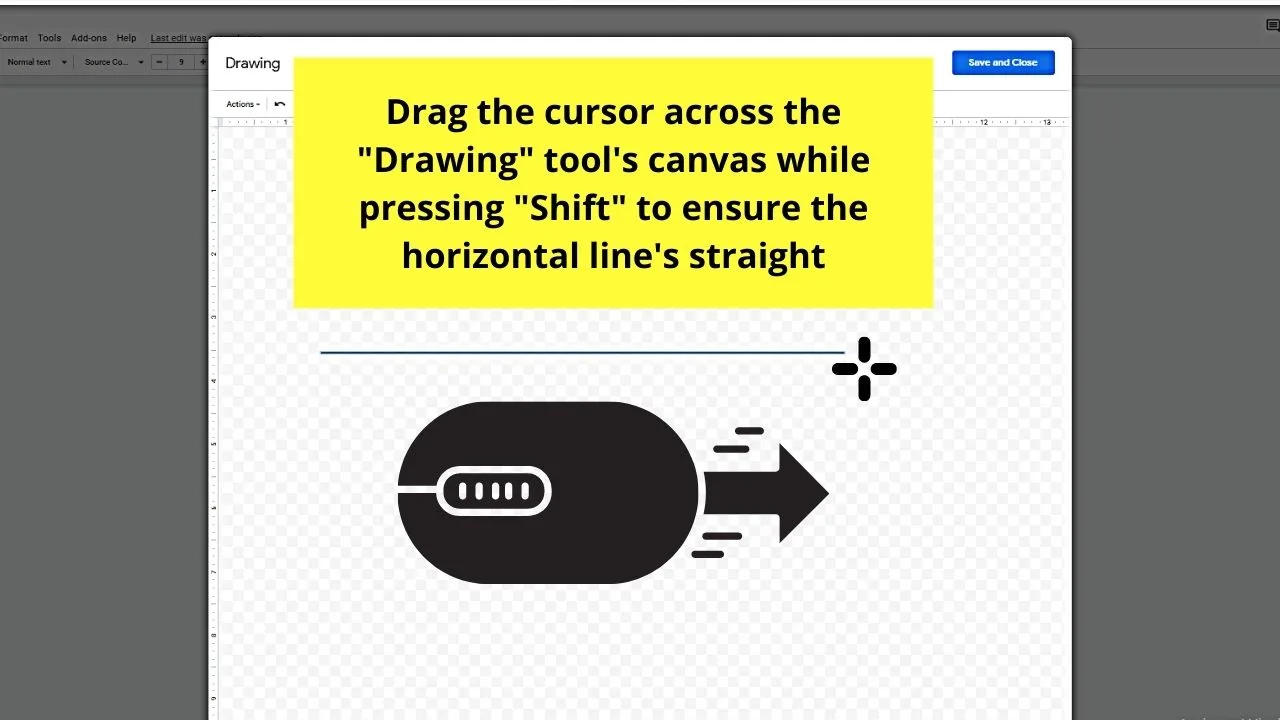
If you want to ensure you’re making a perfectly straight horizontal line, press “Shift” while dragging the cursor.
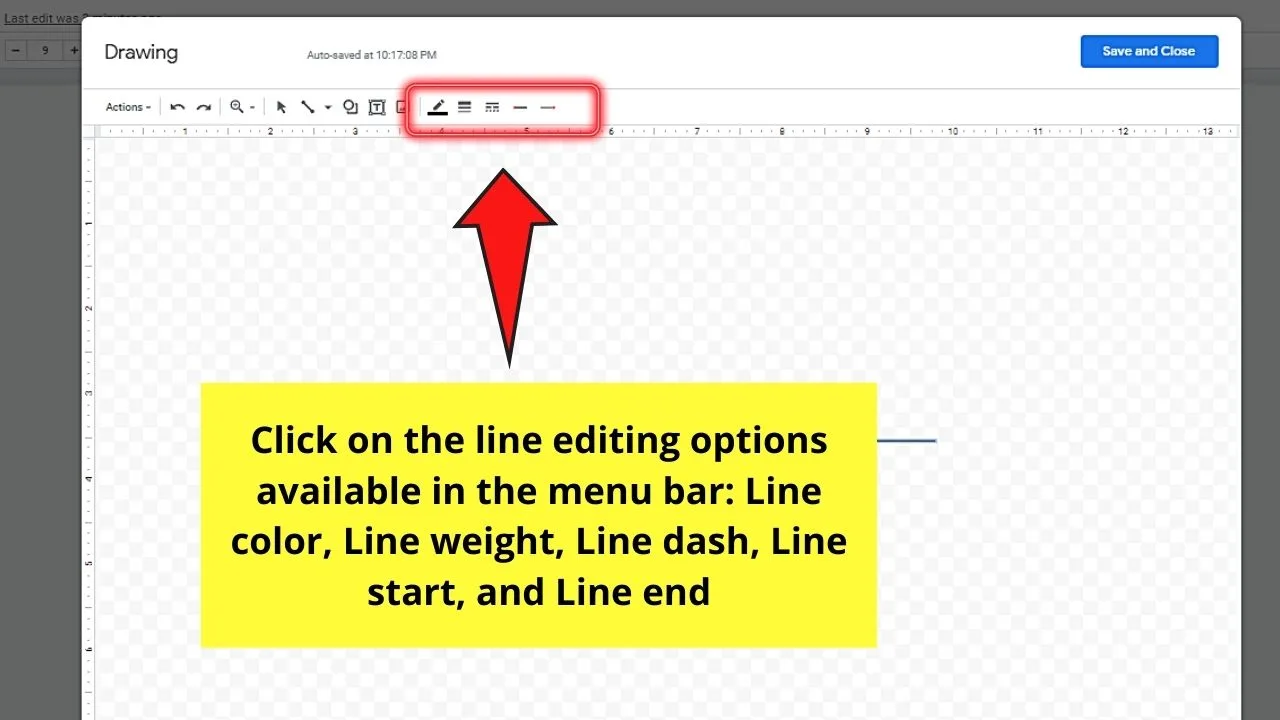
Step 7: If you want to adjust the horizontal line’s appearance, you can do so by selecting from the “Line Editing” options available.
- Line Weight (adjusts the horizontal line’s thickness)
- Line Color
- Line Dash (otherwise known as the Line Style button; allows your line to have dashed, dotted, or other forms of styles)
- Line End and Line Start (gives you options to add squares, arrows, circles, etc. at the corner of the line you created)

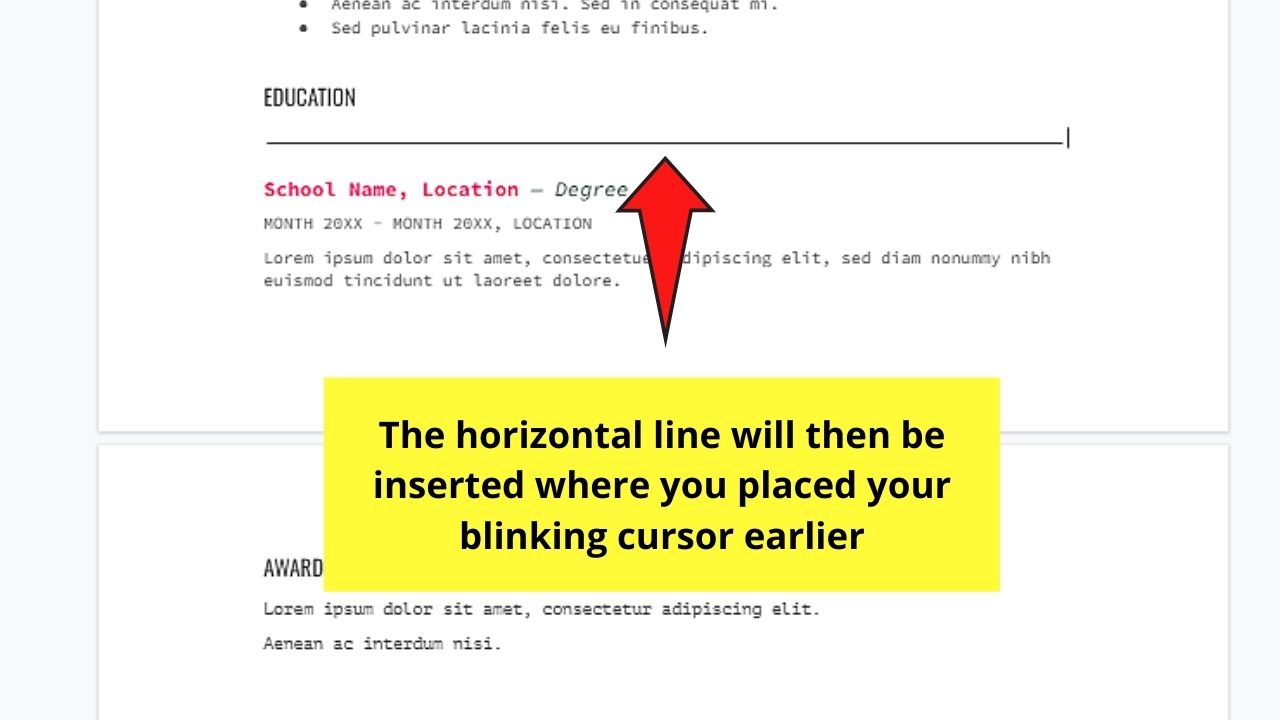
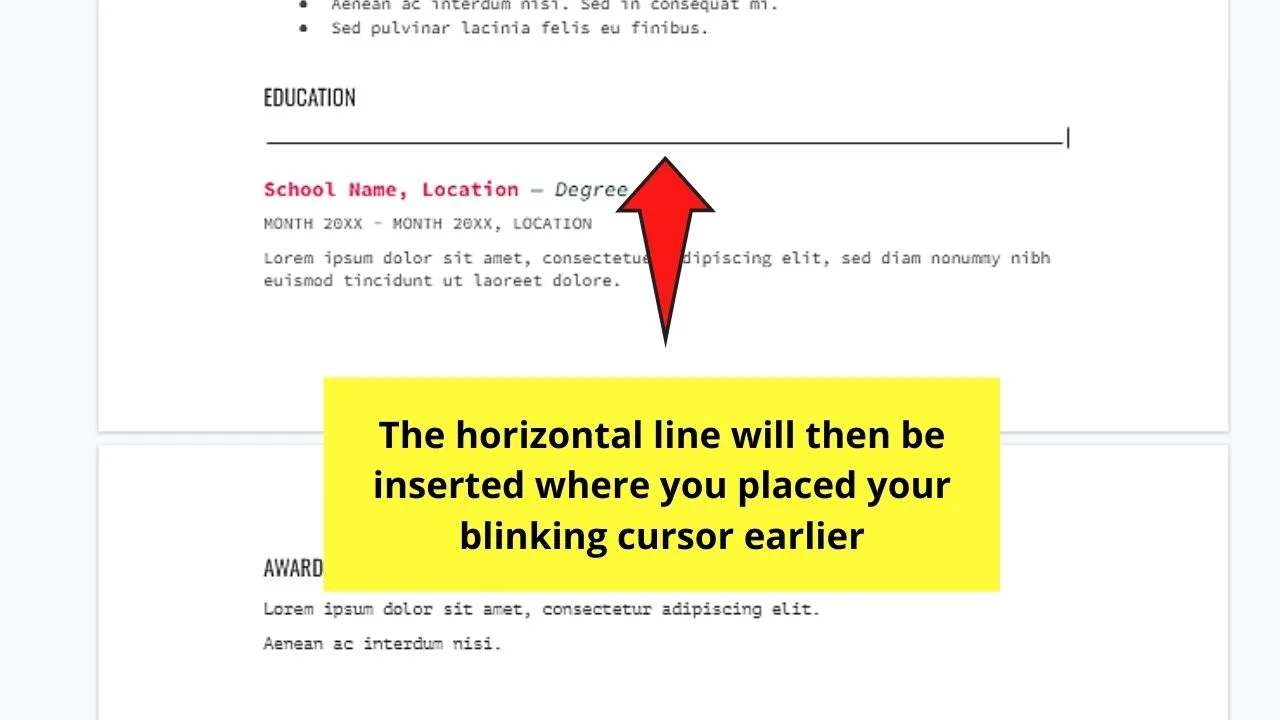
Step 8: If you’re satisfied with how your horizontal line looks, click “Save and Close” to insert the new line into the document.
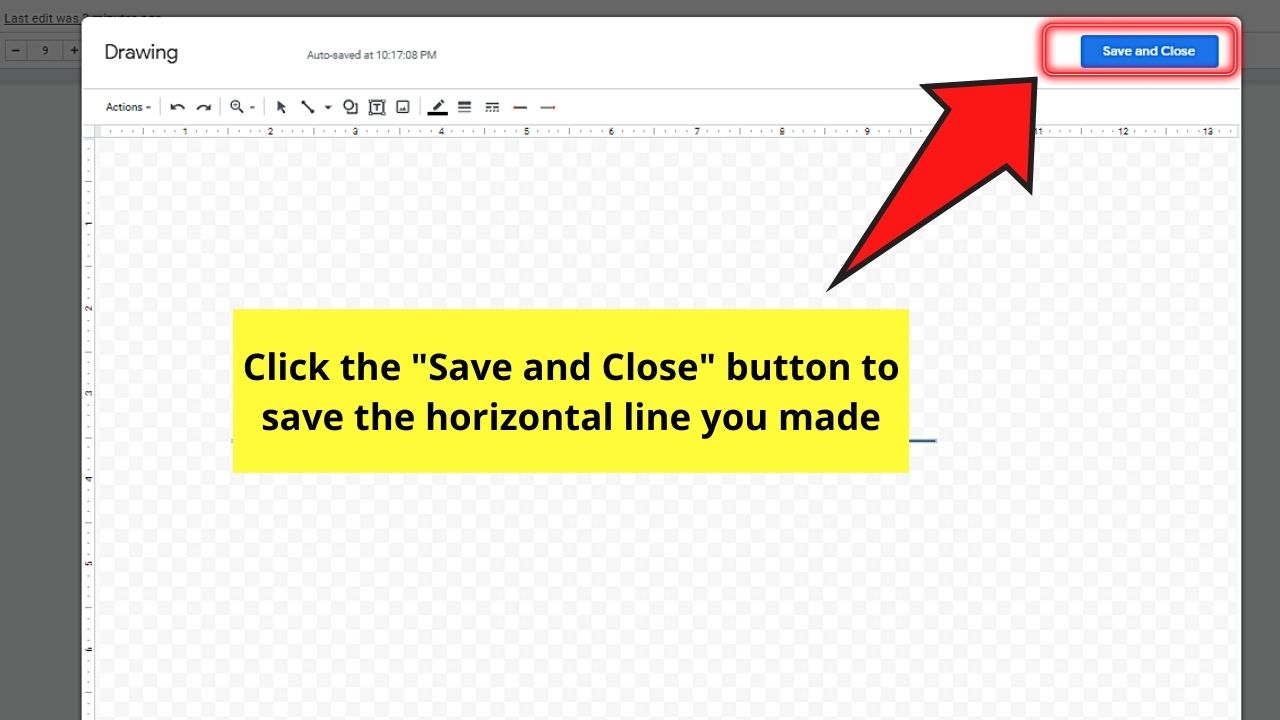

Just make sure that the cursor’s placed in the correct area as Google Docs will place the line in the same area where that cursor is.
Simple, right? Wait until you read the next method below.
Method 3: Adding Horizontal Paragraph Borders
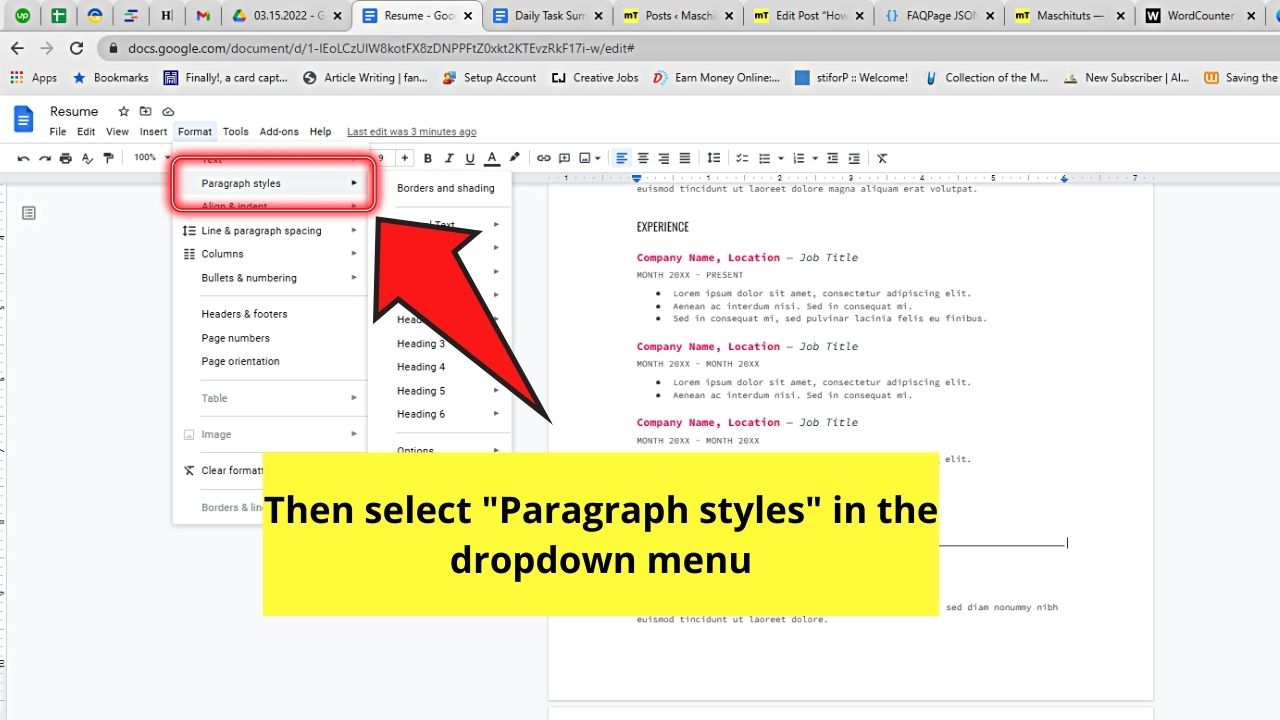
Step 1: After opening a Google Docs document, head to the menu bar and select “Format.”
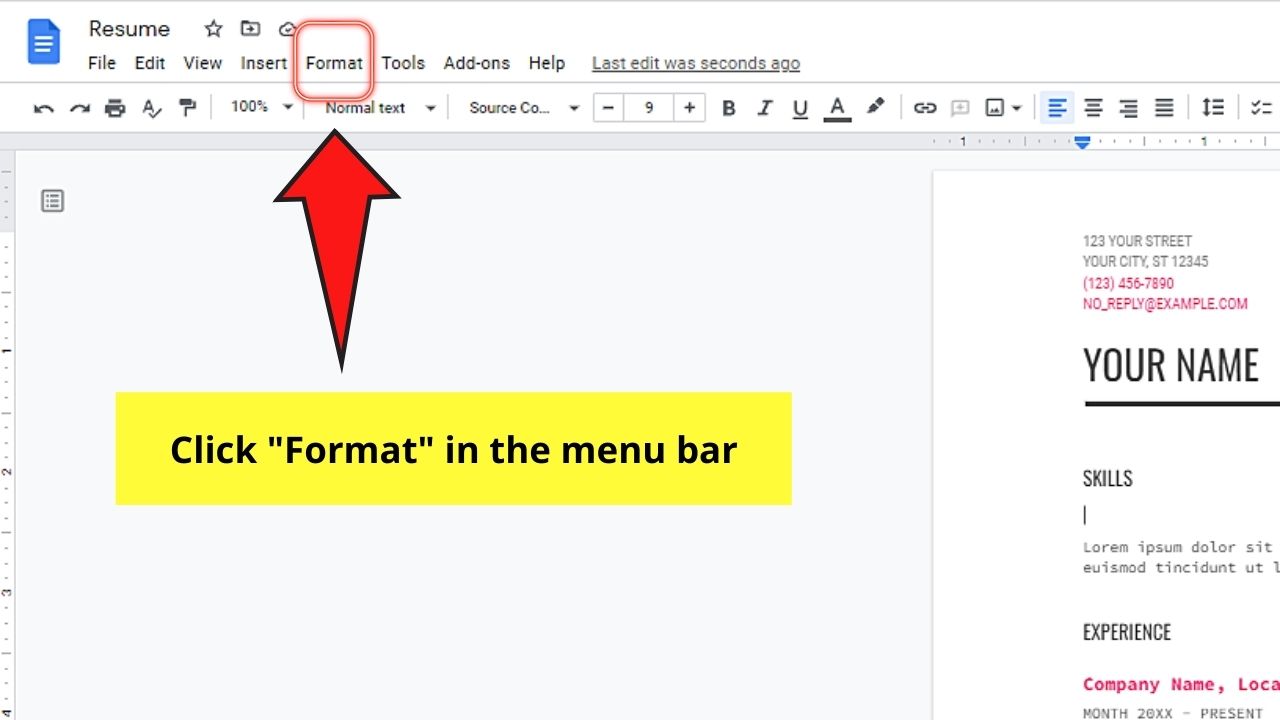

You’ll then see a dropdown menu appear after clicking “Format.”
Step 2: Keep scrolling the “Format” dropdown menu until you see “Paragraph Styles.” Select the “>” icon to make the next dropdown menu appear beside it.

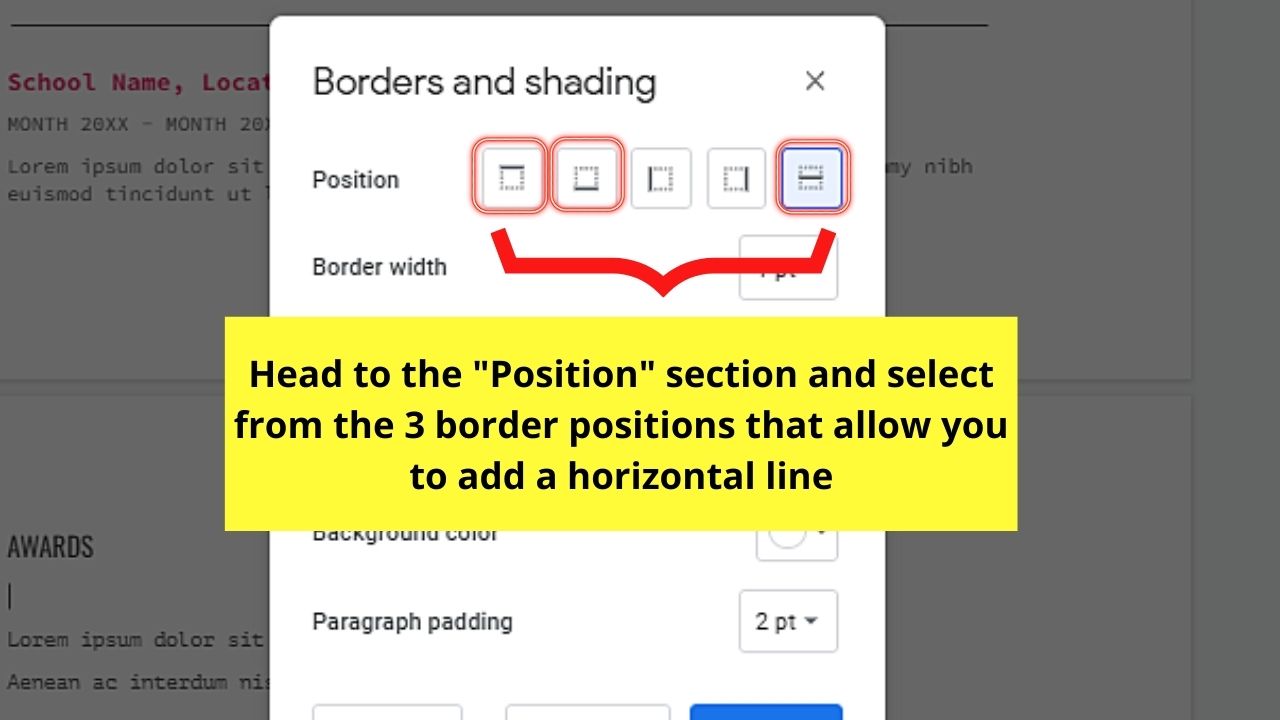
Step 3: In the second dropdown menu, click “Borders and shading.”


Step 4: In the “Borders and shading” dialog box, choose where you want to position your border on the page.
Among the five border position options available, only 3 allow you to add a horizontal line: between, bottom, or top.
Select from these 3 by clicking one of them.

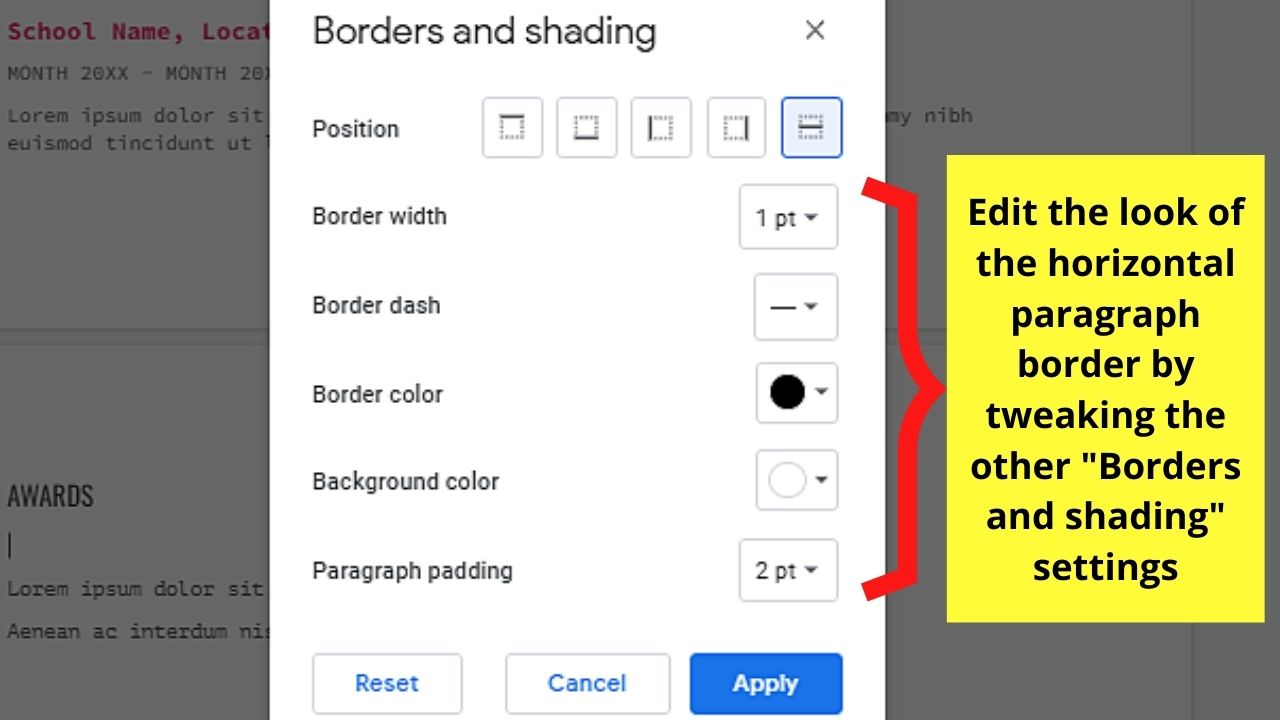
Step 5: Then, head to the other border features in the pop-out window to edit the look of your horizontal paragraph borders.
These border features that you can edit include the following:
- Background color
- Border dash
- Border width
- Paragraph padding (changes the spacing around the paragraph)
- Border color

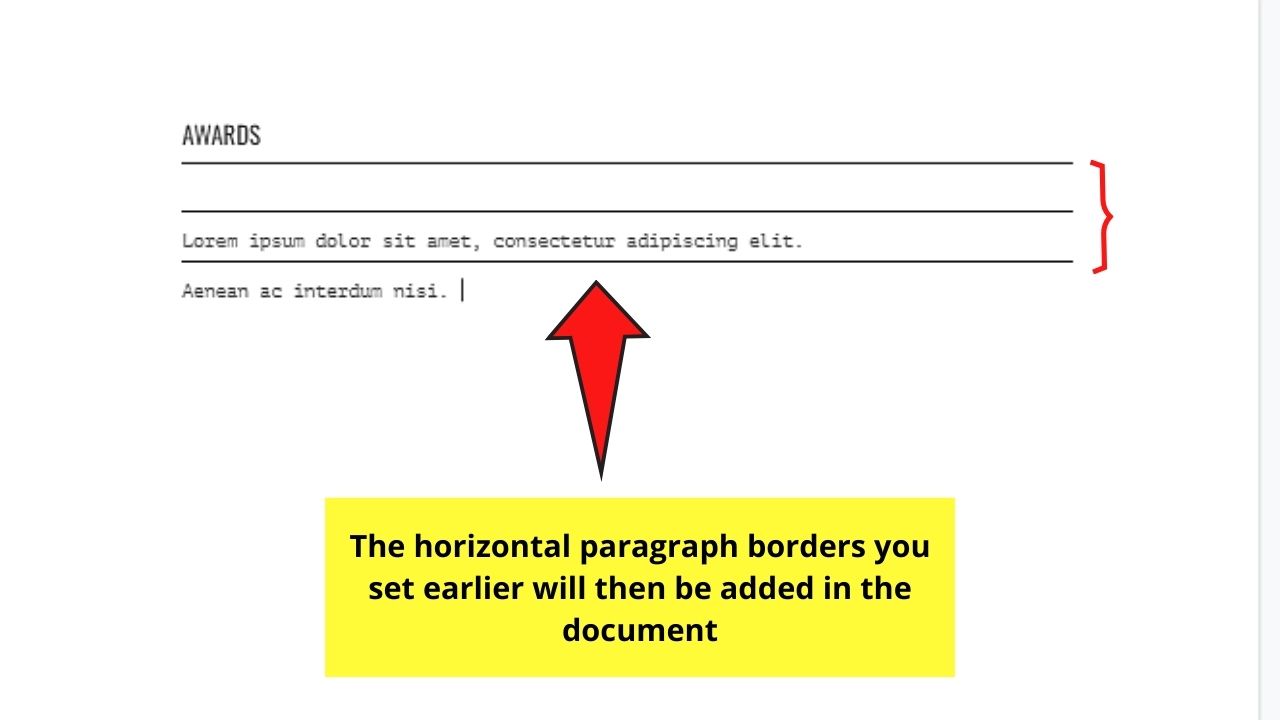
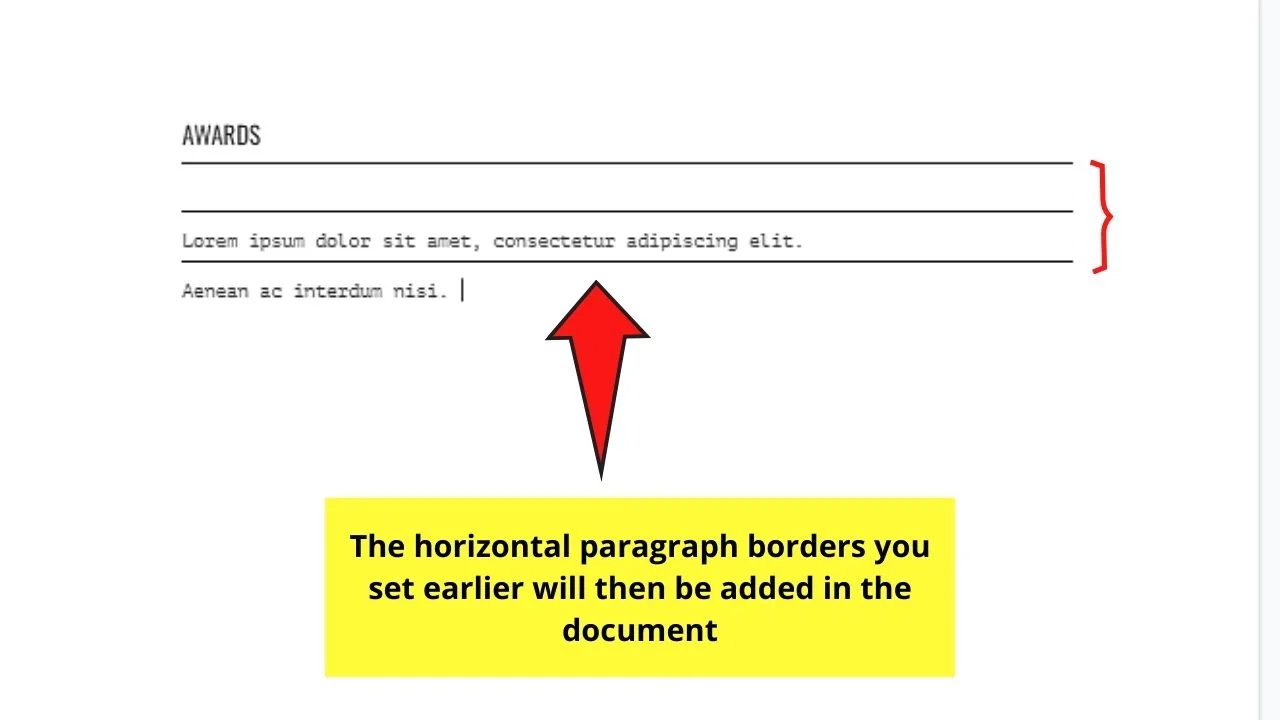
Step 6: Once you’re all set with your border features, click the blue “Apply” button.
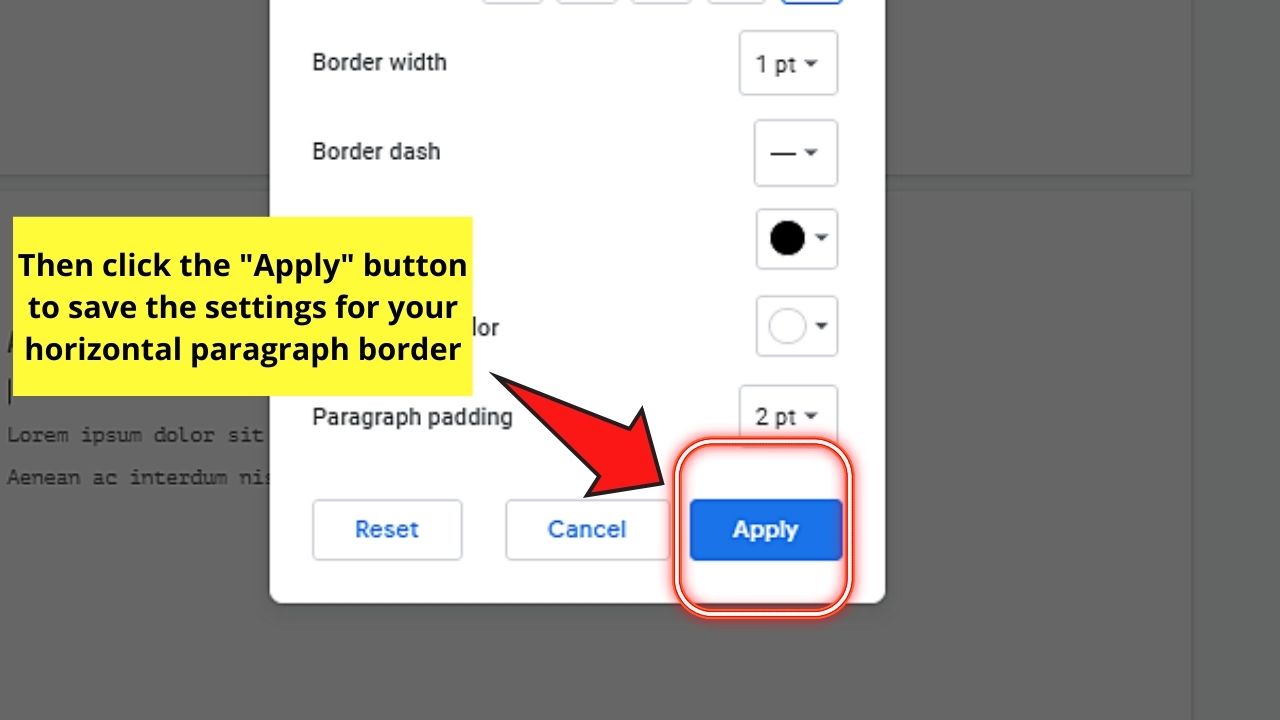

This move will then insert the horizontal paragraph border you created based on the border position you selected.
But, if you don’t want to go through any of those dropdown menus and pop-out windows to add a horizontal line, try the last method below.
How to Add a Horizontal Line in Google Docs with a keyboard shortcut
To add a horizontal line in Google Docs with a keyboard shortcut, follow these steps:
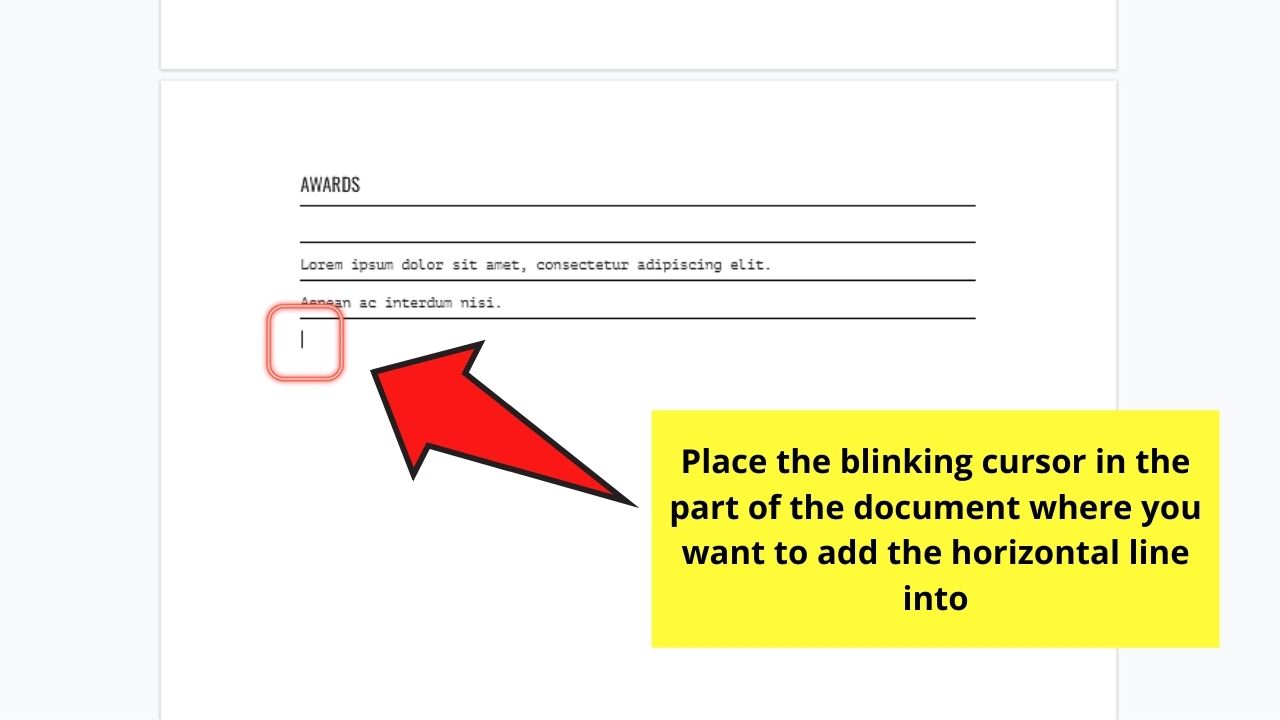
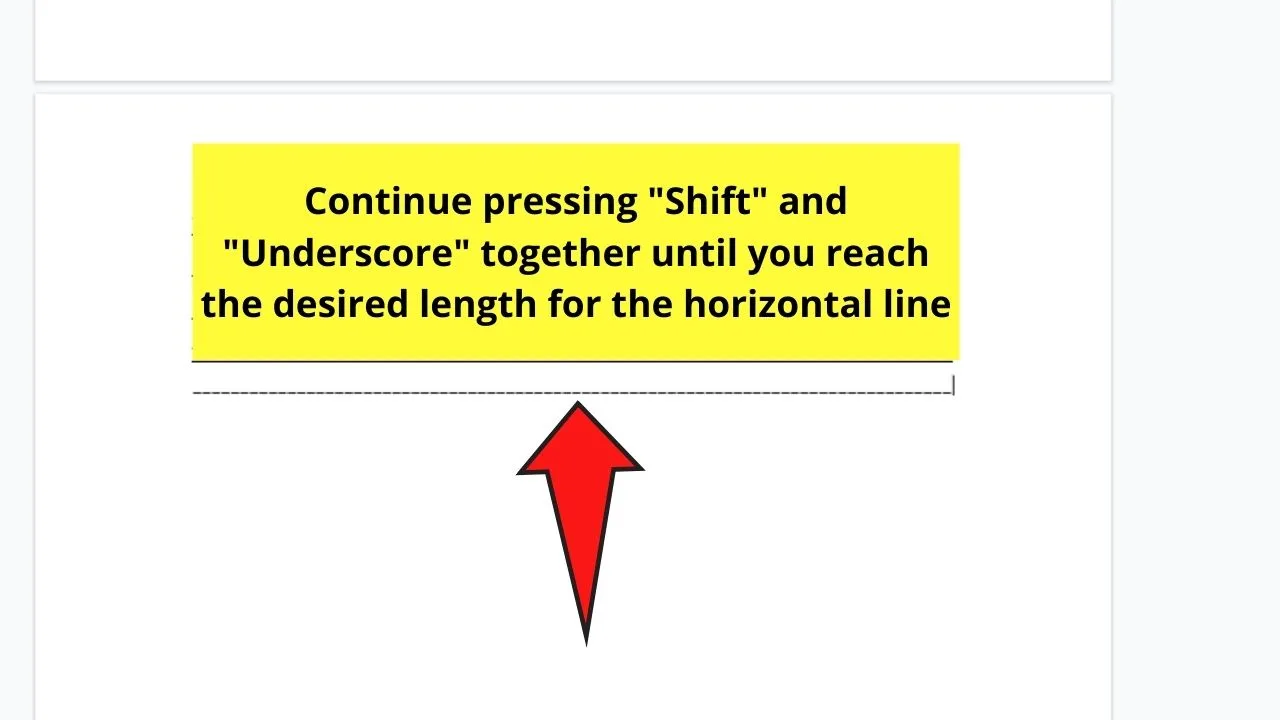
Step 1: Place the blinking cursor where you want to add a horizontal line

Step 2: On your keyboard, press “Shift + _”
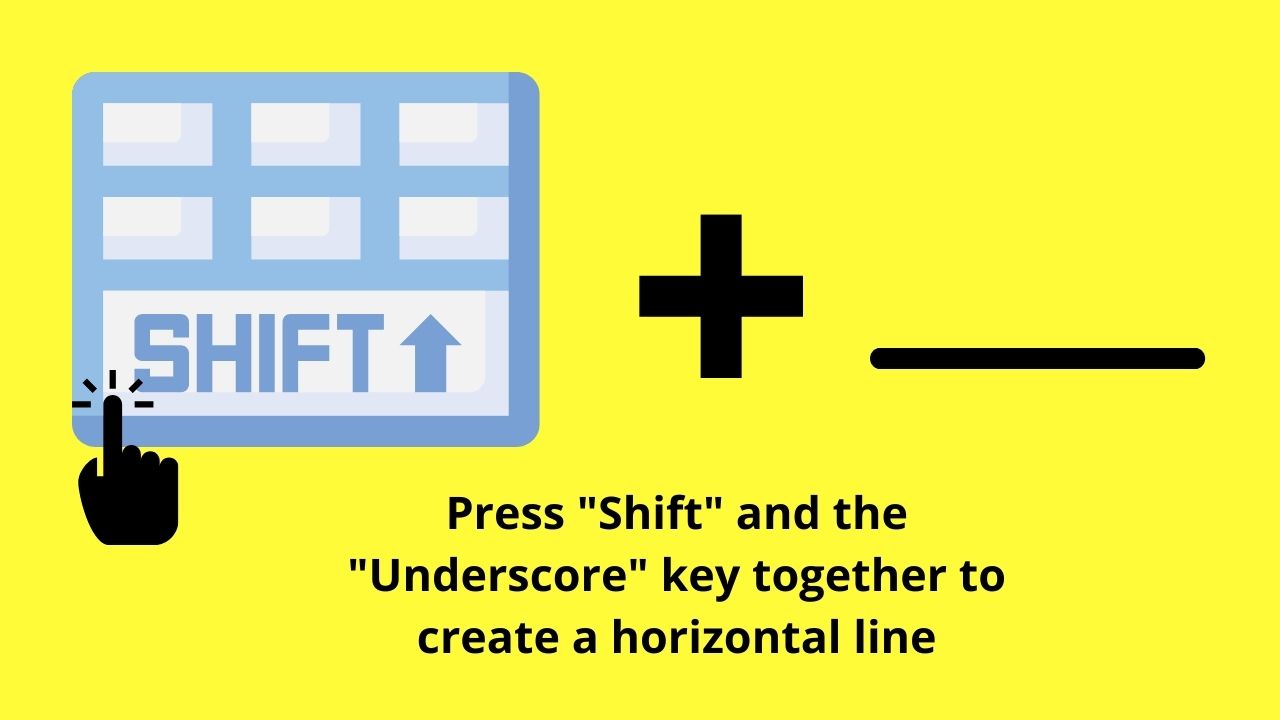

Continue pressing these keys together until you have the size of horizontal line you want.

Pretty cool and simple, right?
So, which of these four methods of making horizontal lines in Google Docs do you prefer using?
Frequently Asked Questions about How to Make a Horizontal Line in Google Docs
Can you remove the horizontal line you made in Google Docs?
You definitely can remove a horizontal line you created in Google Docs. Drag the cursor over the line to highlight it, then press either “Delete” or “Backspace” to remove it. Another way is to highlight on the horizontal line and right-click it before choosing “Delete.”
How do you adjust the spacing between the text and the horizontal line you added in Google Docs?
To adjust the distance or spacing between the horizontal line and the text, double-click the line to highlight it. Then, head to the “Font Size” box and encode “1” in it before pressing “Enter.” This move will automatically bring the horizontal line closer to the text.


Hey guys! It’s me, Marcel, aka Maschi. On MaschiTuts, it’s all about tutorials! No matter the topic of the article, the goal always remains the same: Providing you guys with the most in-depth and helpful tutorials!

