

Ever wondered how one can write notes in the footer of a specific page in Google Docs without affecting the other pages’ footers?
If the answer to this question is a resounding “Yes,” we strongly advise you to read on.
How to Have Different Footers in Google Docs
To have different footers in Google Docs, follow these steps:
- Scroll down to the page where you want to create a different footer
- Place the cursor after the last word or sentence of the previous page
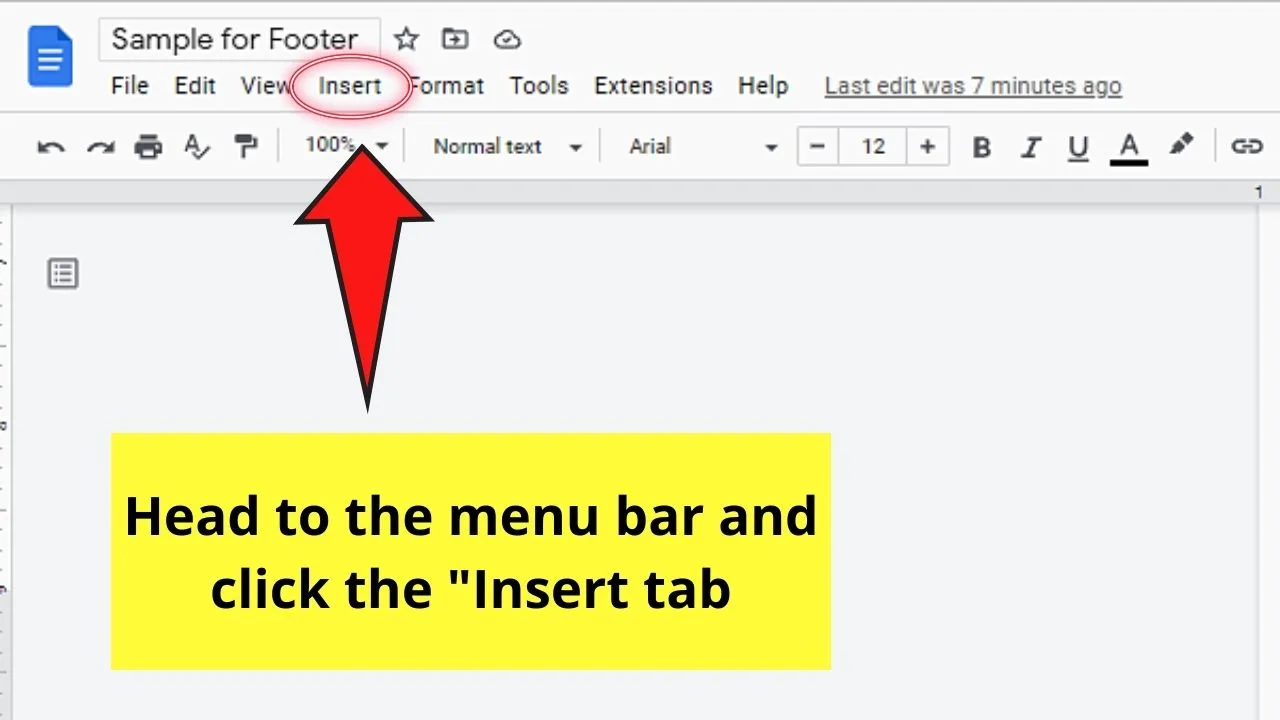
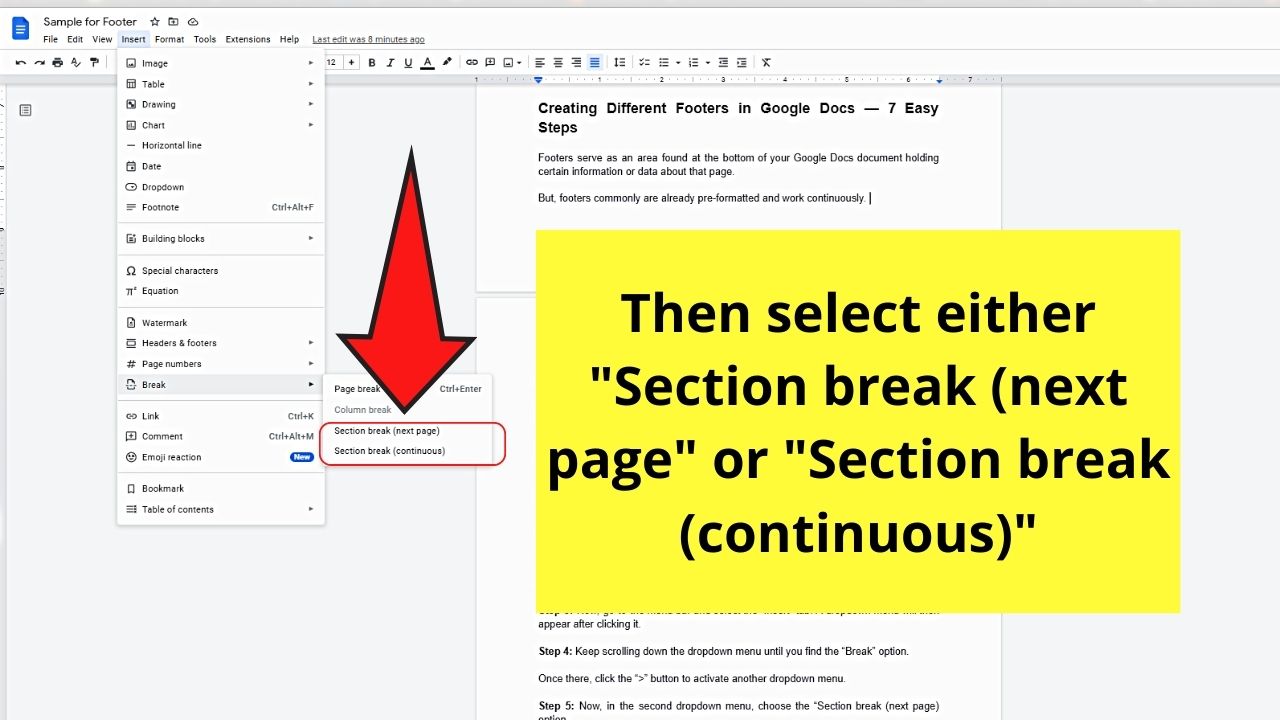
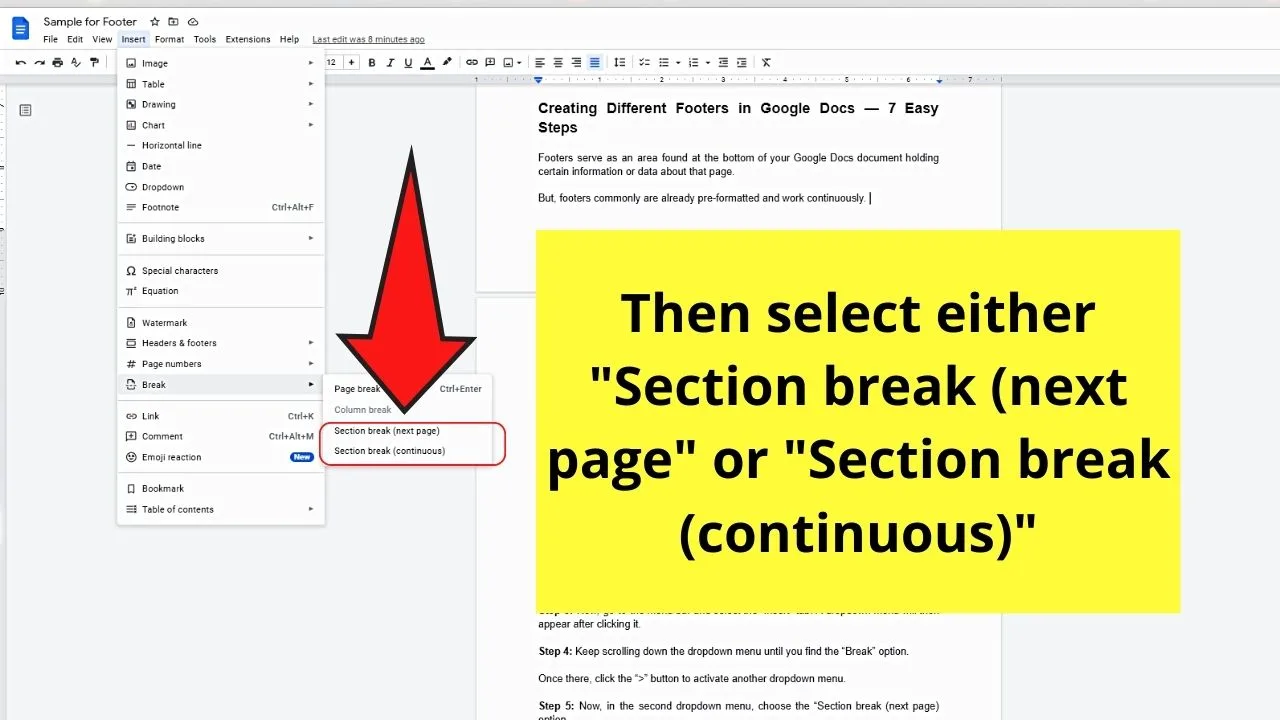
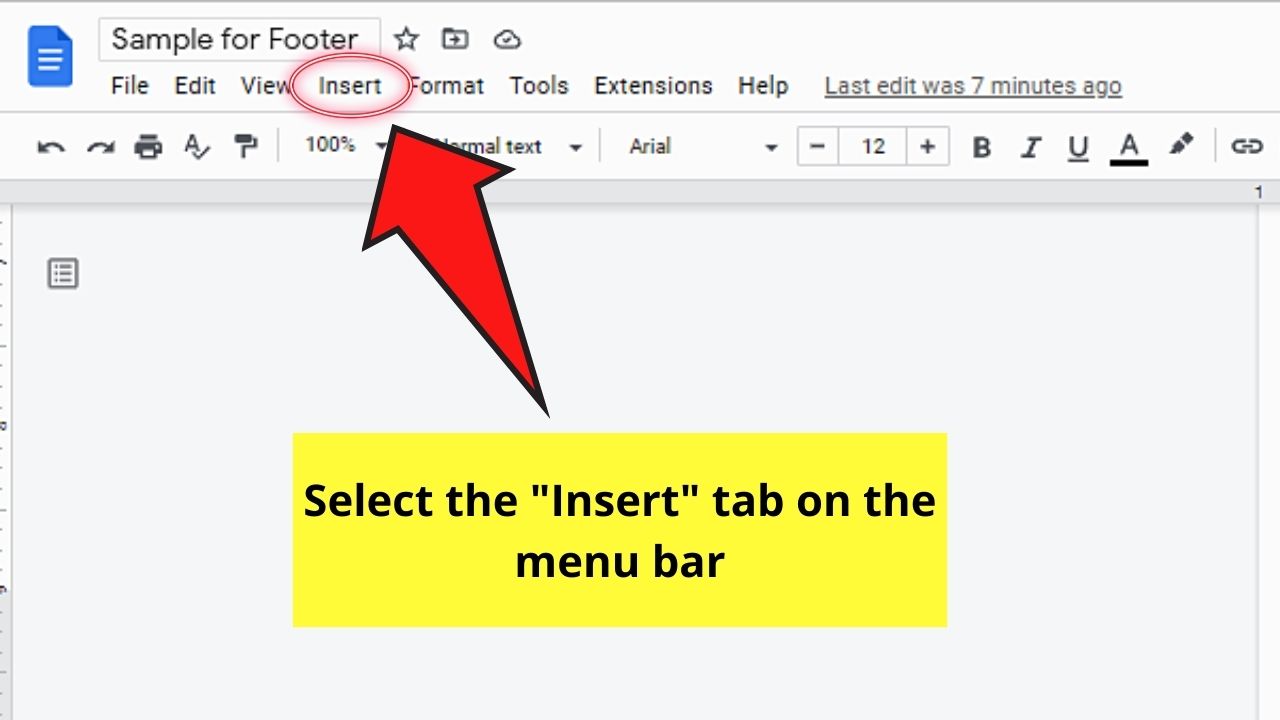
- Head to the menu bar and select the “Insert” tab.
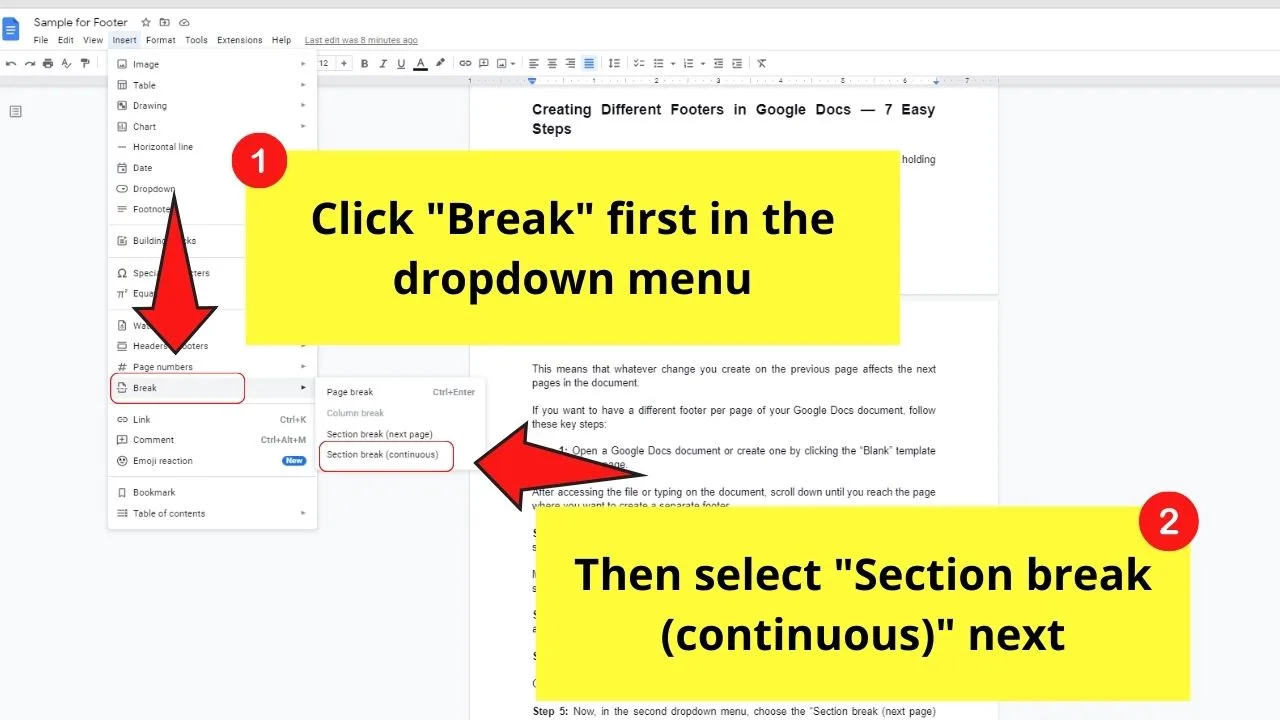
- Keep scrolling until the “Break” option in the dropdown menu appears, and click the “>” button.
- On the second dropdown menu that appears, click “Section break (next page).”
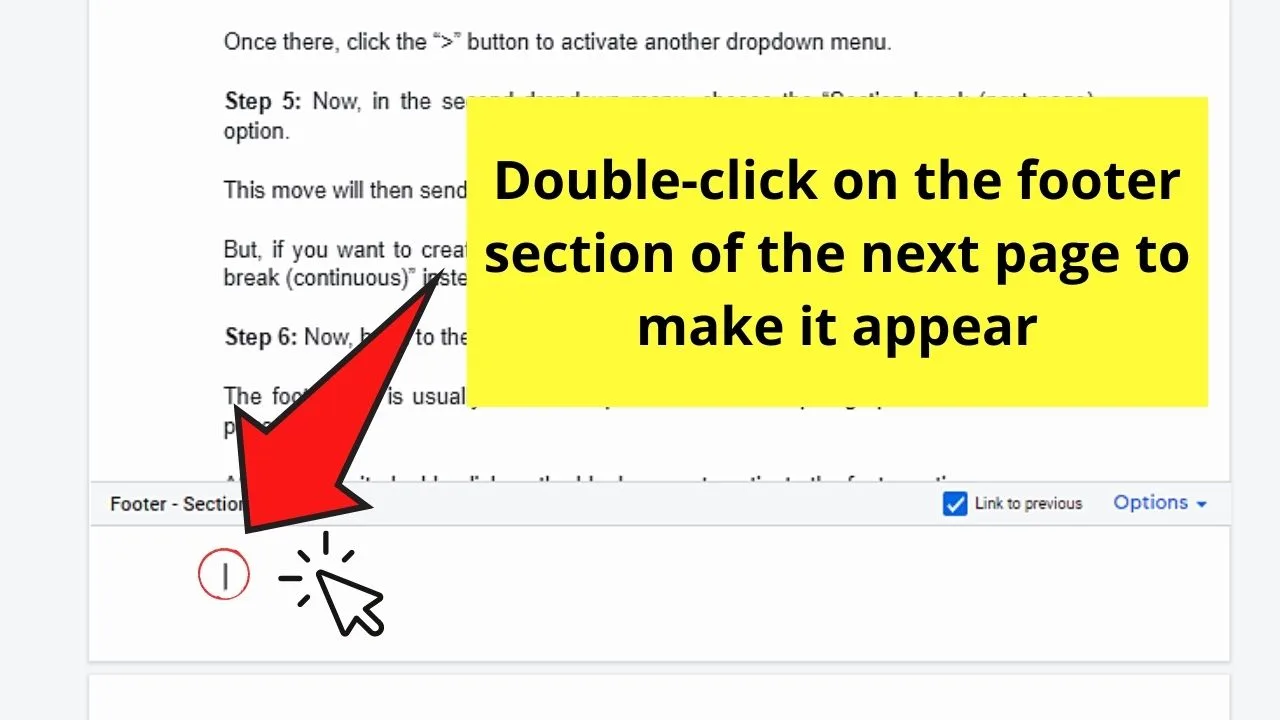
- Once the cursor appears on the next page, scroll down and double-click on the footer section.
- Uncheck the “Link to previous” box from the footer options that appear to make the footer behave separately from the other pages.
Footers are found at the bottom of your Google Docs document holding certain information or data about that page.
But, footers commonly are already pre-formatted and work continuously.
This means that whatever change you create on the previous page affects the next pages in the document.
However, with a bit of customization, you can also have unique footers in Google Docs. Let us have a look at the exact steps to make different footers in a Google Docs document:
Step 1: Open a Google Docs document or create one by clicking the “Blank” template from docs.new page.
After accessing the file or typing on the document, scroll down until you reach the page where you want to create a separate footer.
Step 2: Once you find that page, place the blinking cursor after the last word or sentence of the previous page (not the current one).
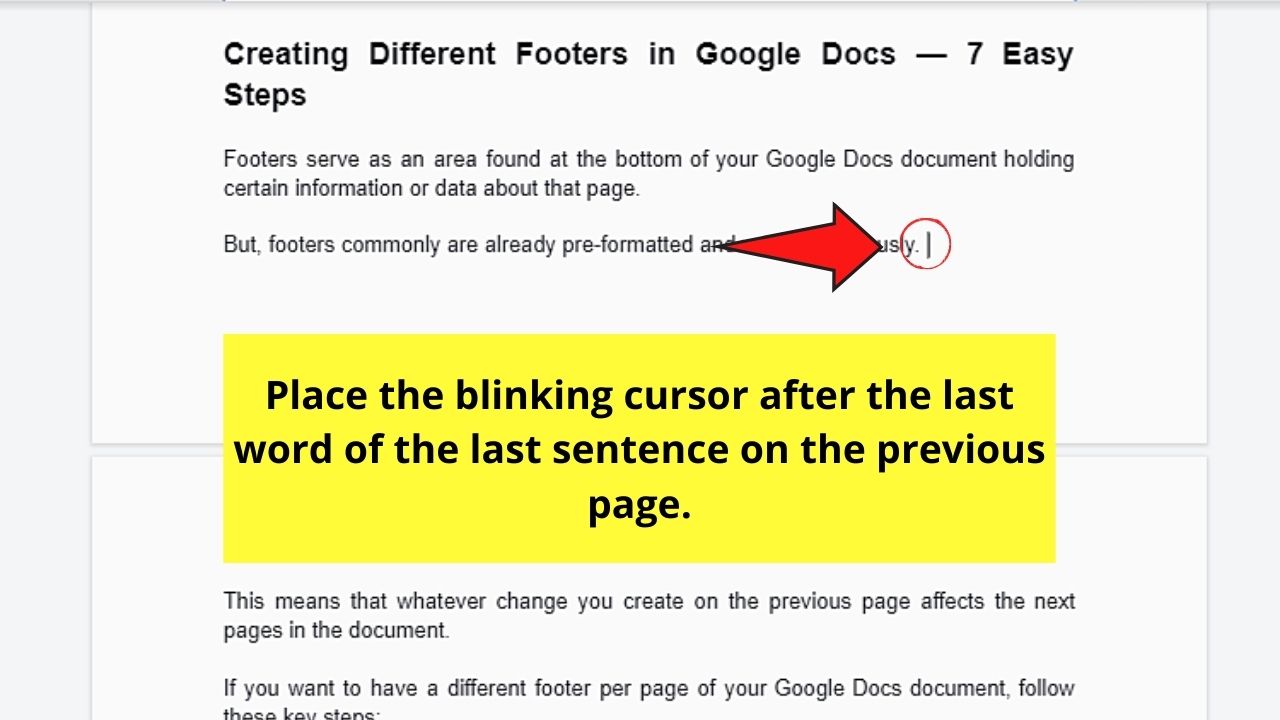
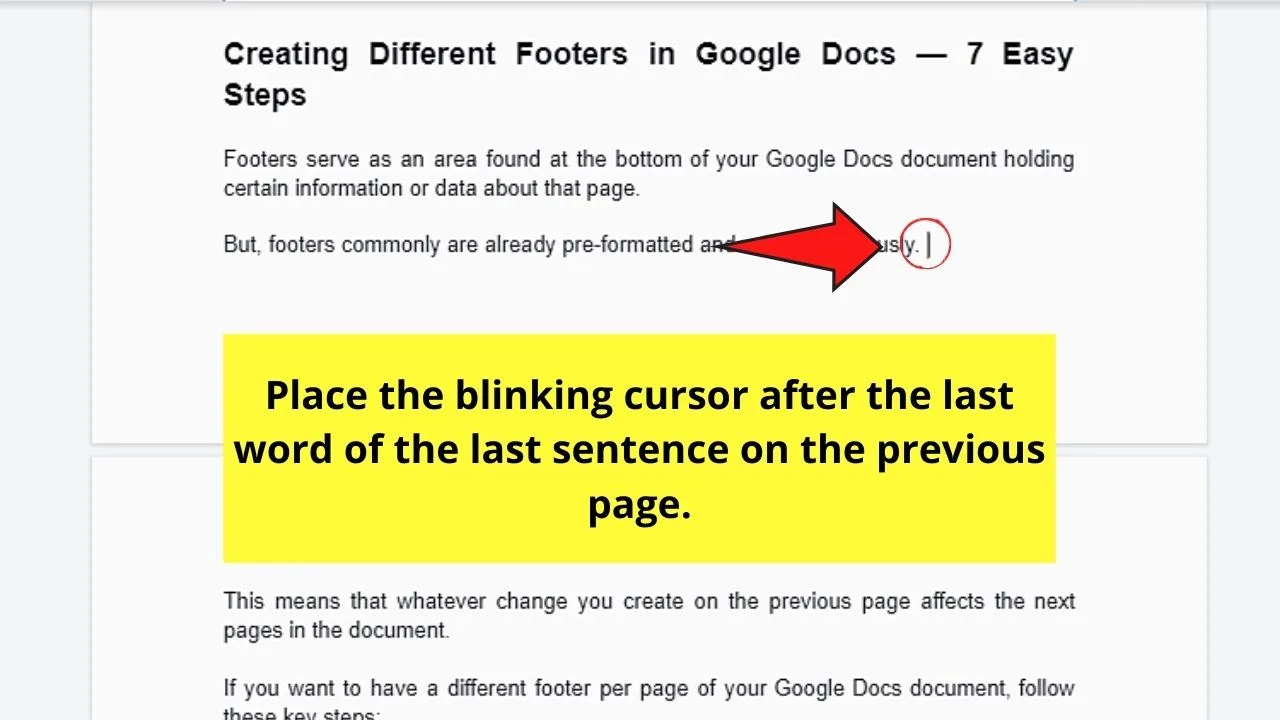
Make sure to remember this step very well as it’s crucial for the next step to be successful.
Step 3: Go to the menu bar and select the “Insert” tab. A dropdown menu will then appear after clicking it.

Step 4: Keep scrolling down the dropdown menu until you find the “Break” option.
Once there, click the “>” button to activate another dropdown menu.
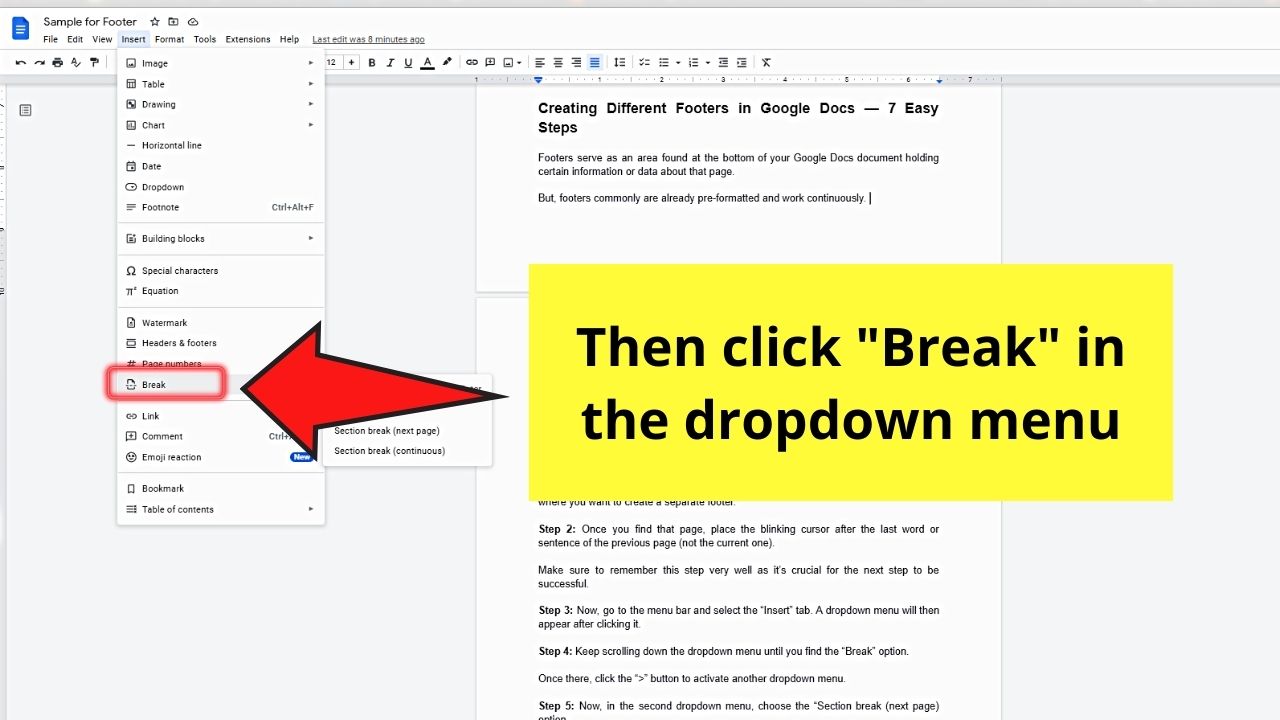


Step 5: In the second dropdown menu, choose the “Section break (next page) option.
This move will then send the cursor to the next page.
But, if you want to create a section break for the entire document, select the “Section break (continuous)” instead.
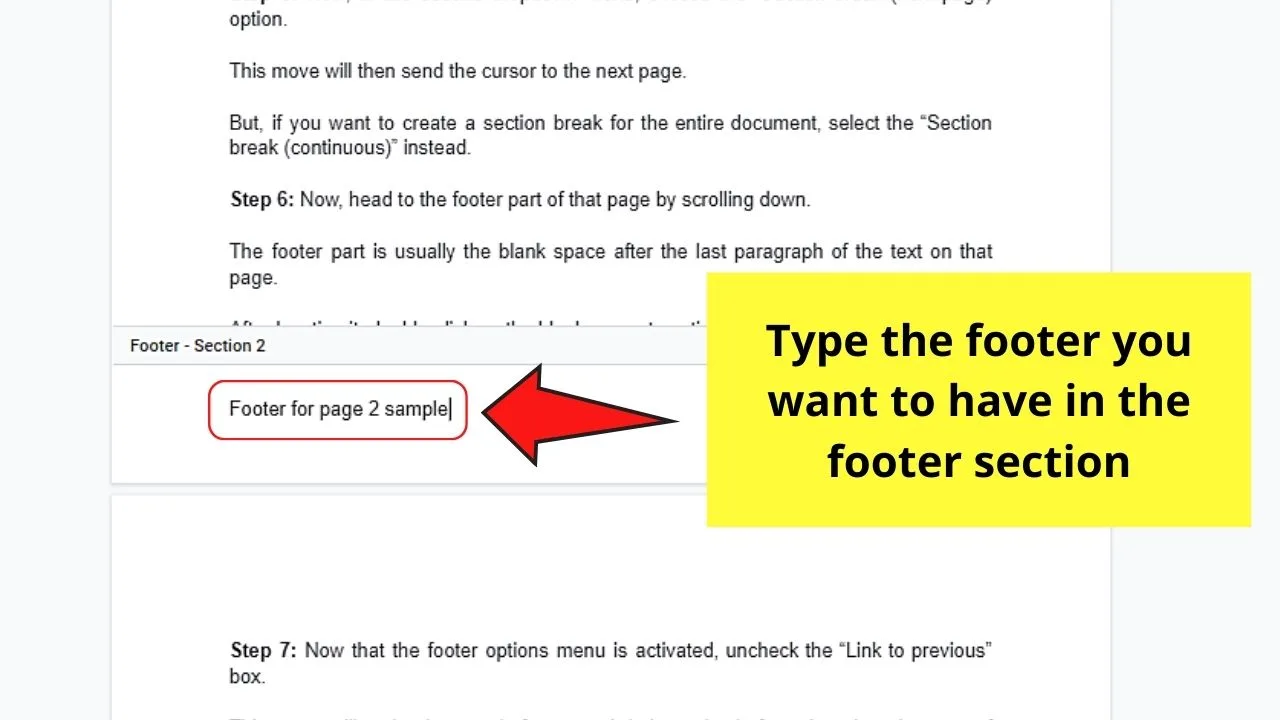
Step 6: Now, scroll down to the footer part of that page.
The footer part is usually the blank space after the last paragraph of the text on that page.
After locating it, double-click on the blank space to activate the footer options.

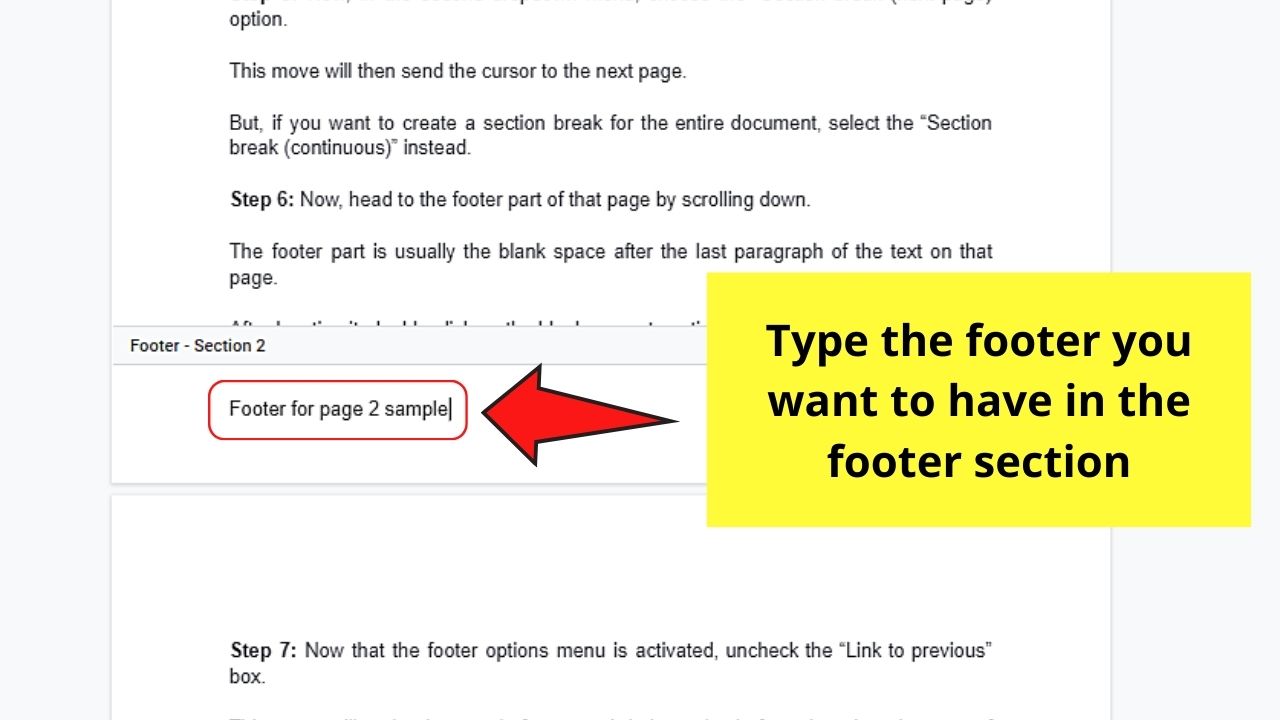
Step 7: After activating the footer options menu, uncheck the “Link to previous” box.


This move will make the page’s footer work independently from the others in terms of formatting.
From there, carry on with adding your footer content.
Then, close the footer section by clicking outside the footer area or hitting “Escape” on your keyboard.
Very simple, right?
Now that you know how to create different footers in Google Docs, you must learn how to customize them.
How to Customize Footers in Google Docs
When you say you want to customize your footers in Google Docs, it simply means that you don’t want to use the formats readily available for it.
Be it turning your page numerals into Roman numerals or using a different font type from the pre-formatted one, the process is the same.
To customize footers in Google Docs, follow these steps:
Step 1: Make sure you’ve already inserted section breaks for each page
To do so, click “Insert” on the menu bar.

Then, select “Break” and “Section break (continuous)” to make each page an individually functioning section.

Read the previous section for you to review how to create these section breaks in detail.
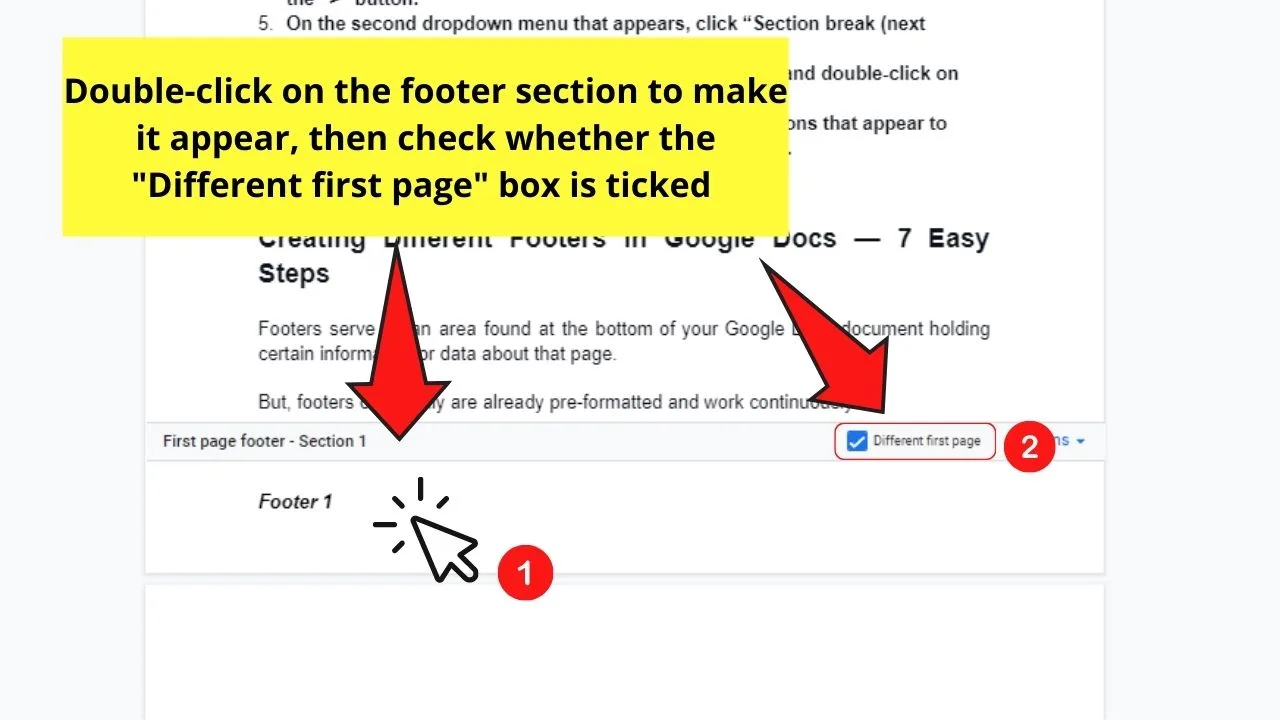
Step 2: Double-click on the footer section of the first page of your Google Docs document
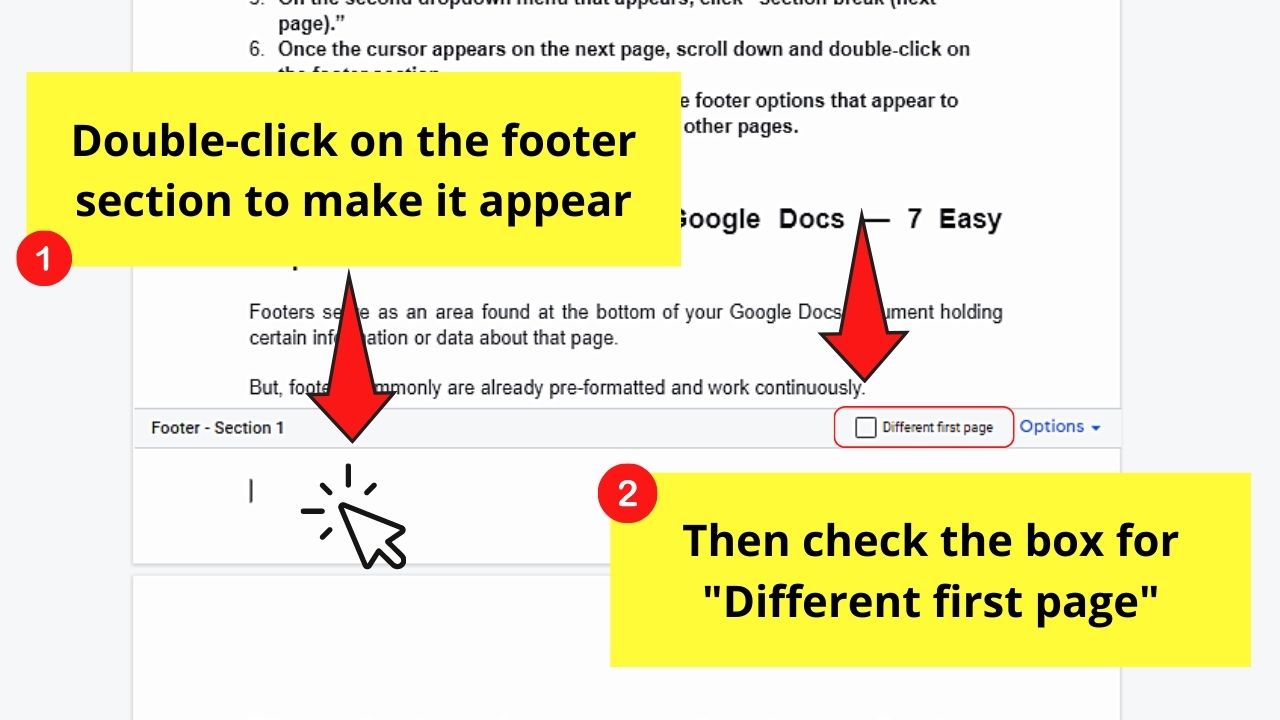
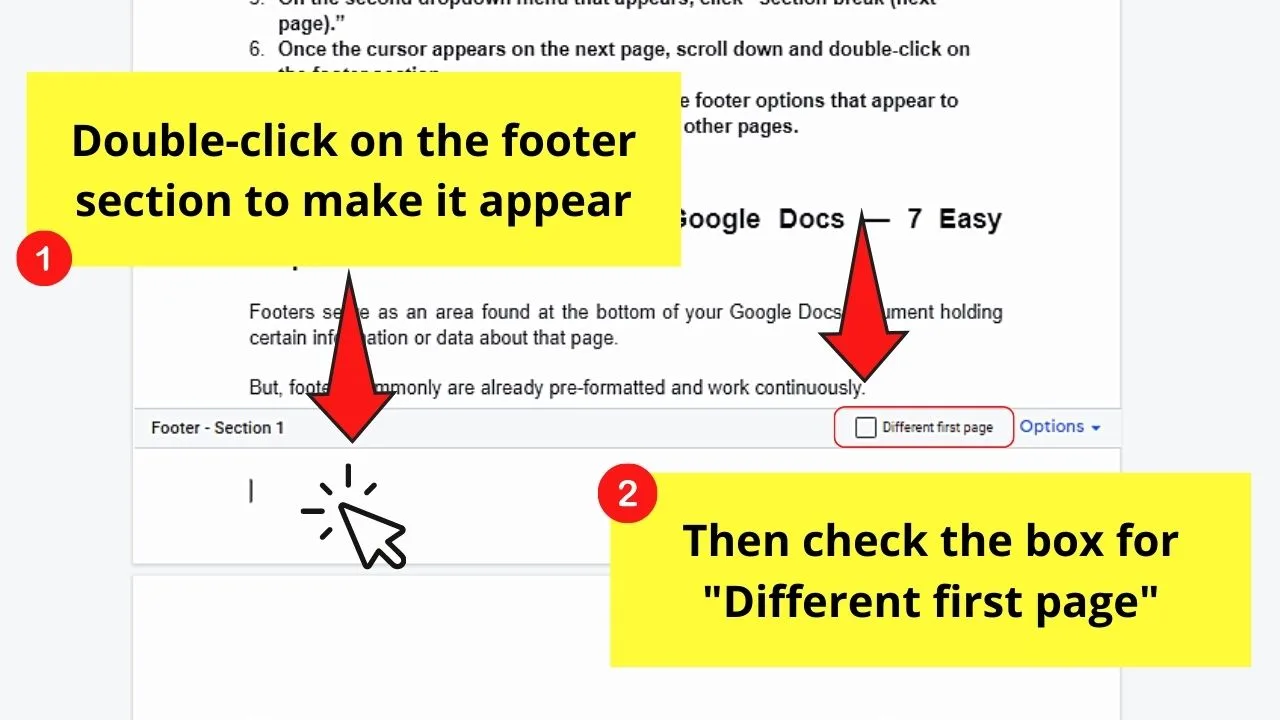
This move will then open the footer options. With this, make sure to tick the “Different first page” box.
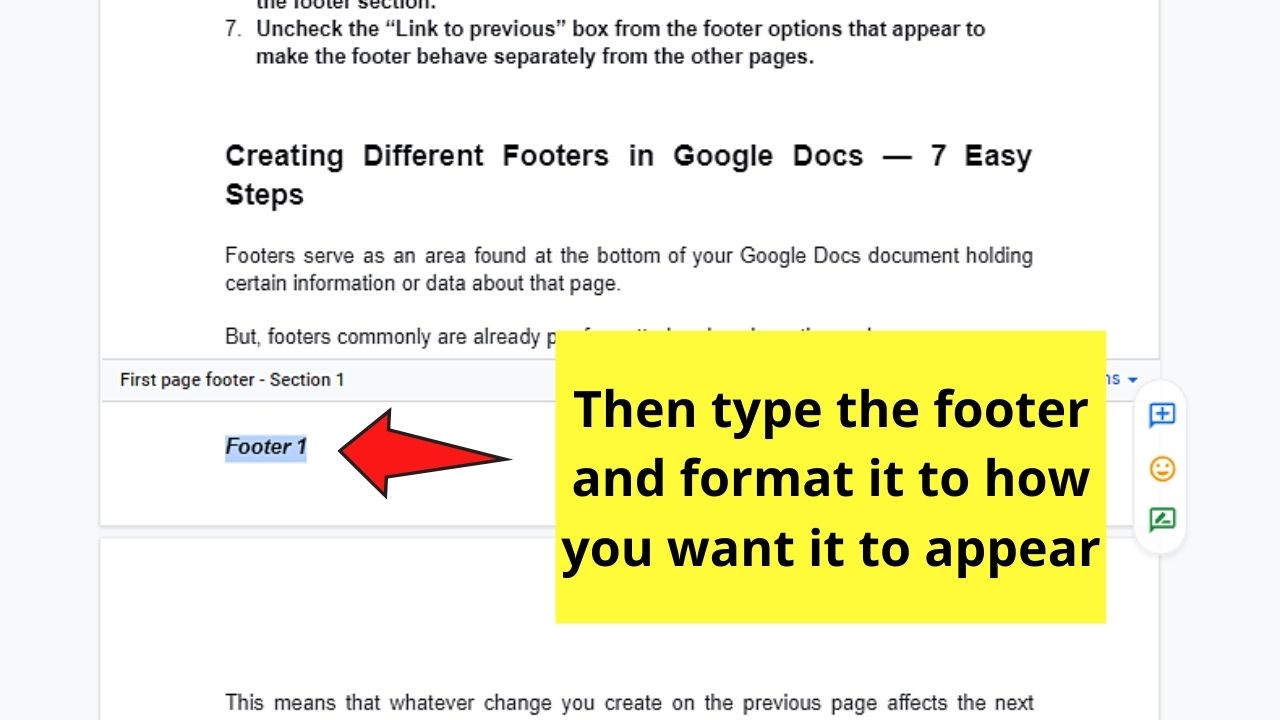
After this, edit your footer and stylize it to the way you want it to appear, like how you do with regular text on the page.

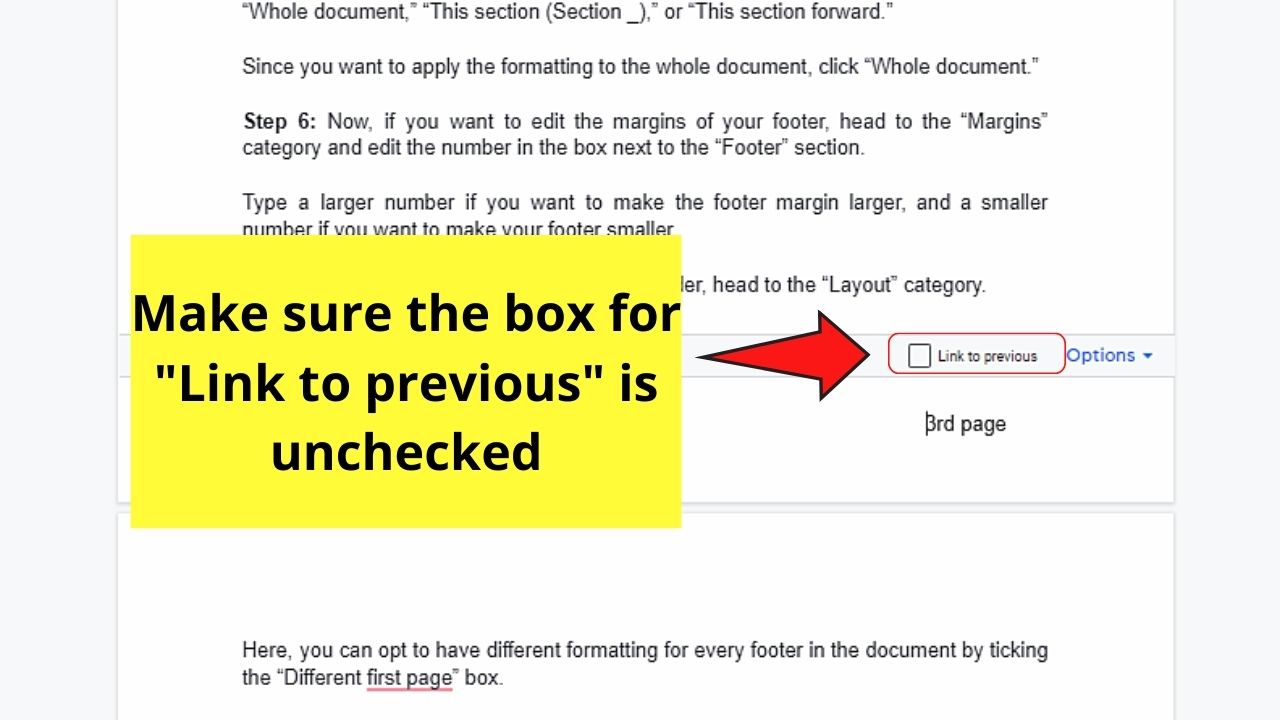
Step 3: For the next few pages of the document (for every page footer you want to customize), repeat what you did in Step 2.
But, this time, when the footer options appear, the box for the “Link to previous” should be unchecked. This move will allow you to create a different footer if you wish to.

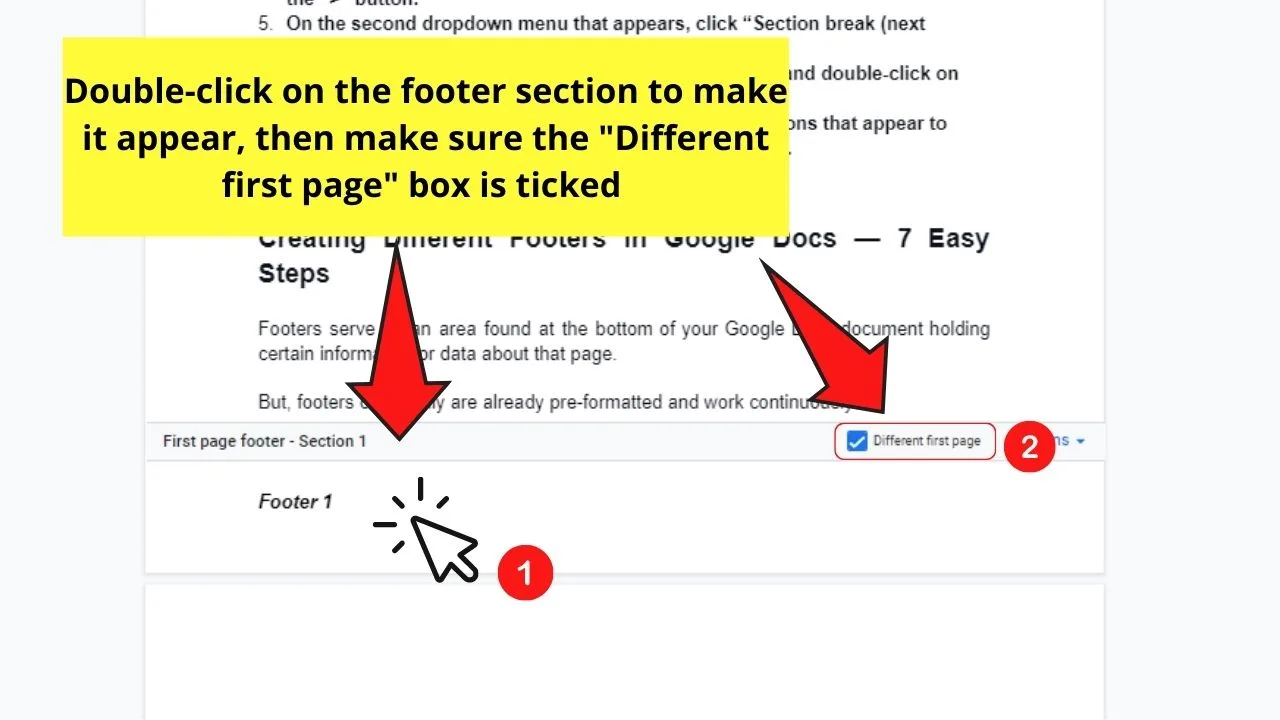
Step 4: To change the margins of the footer, click the “Options” button.
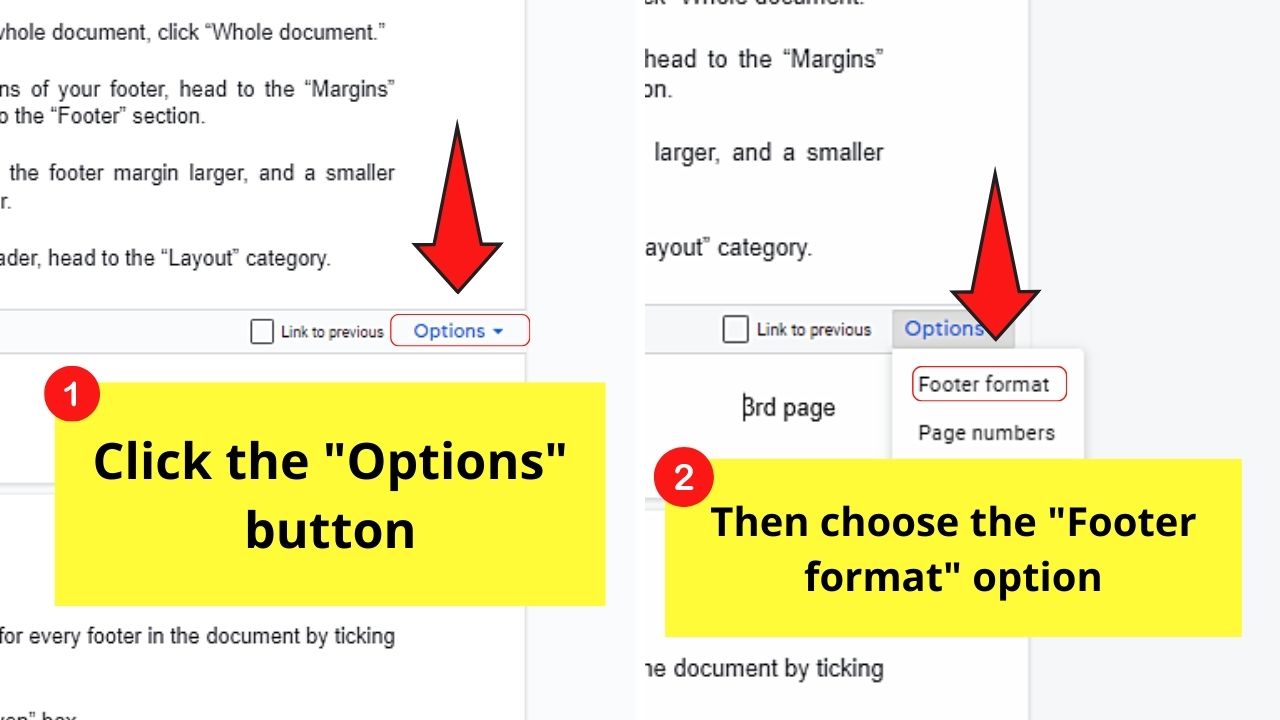
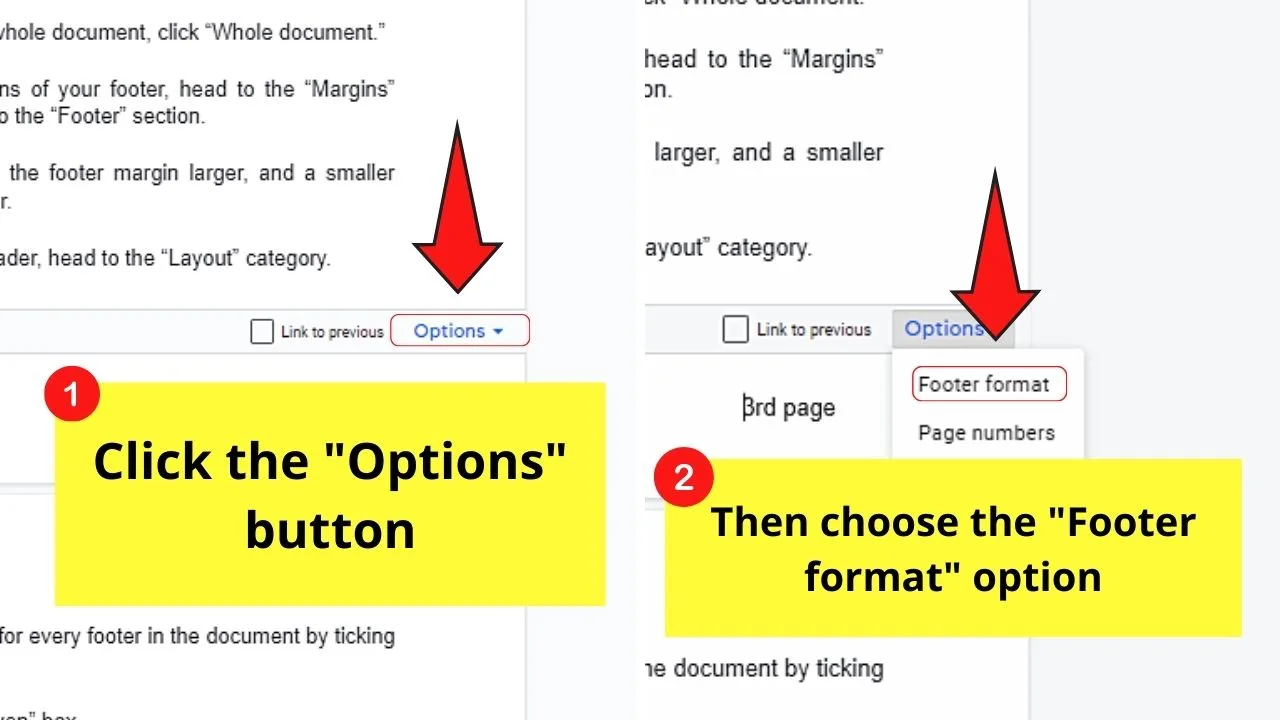
Then, select “Footer format.” You’ll then see a pop-out window appear at the center of the screen.
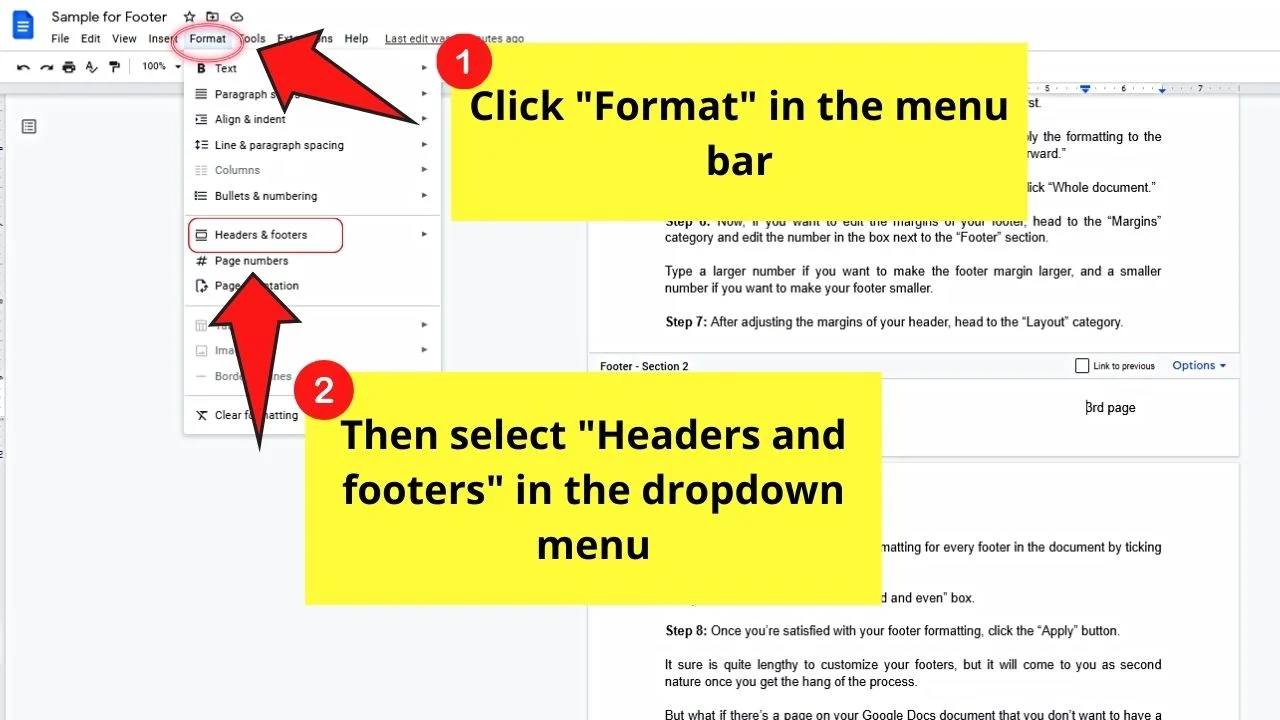
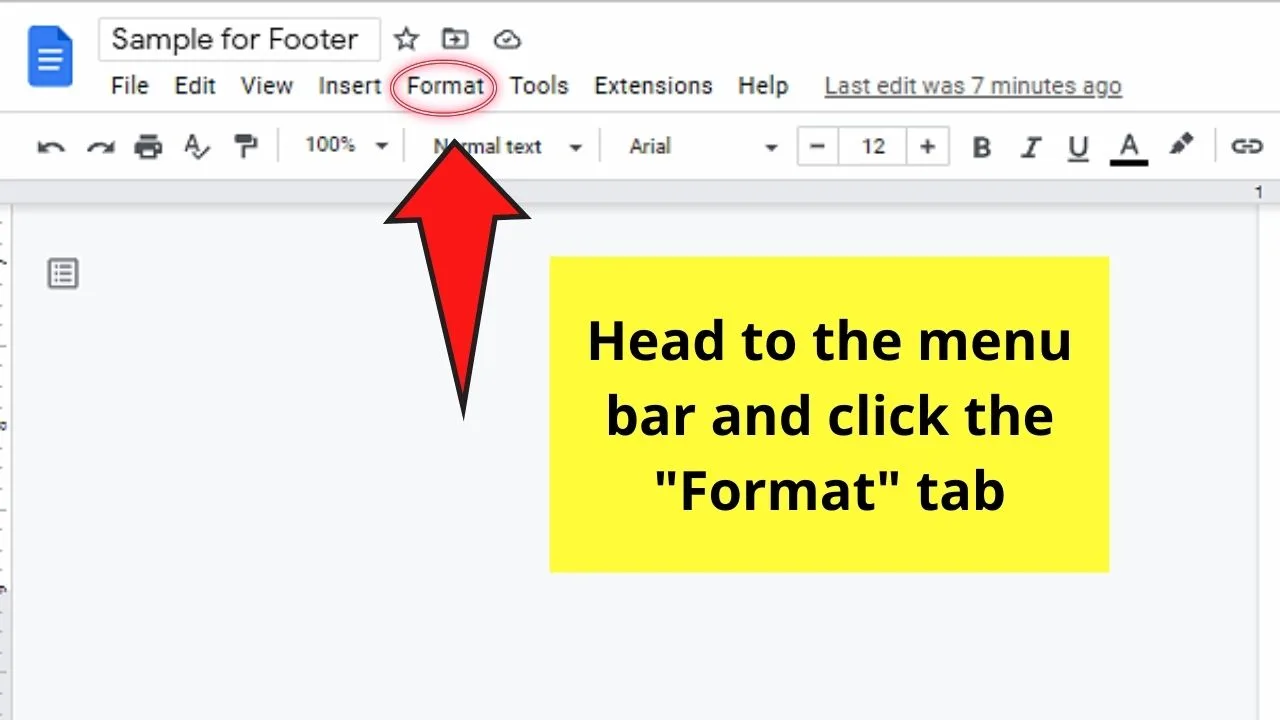
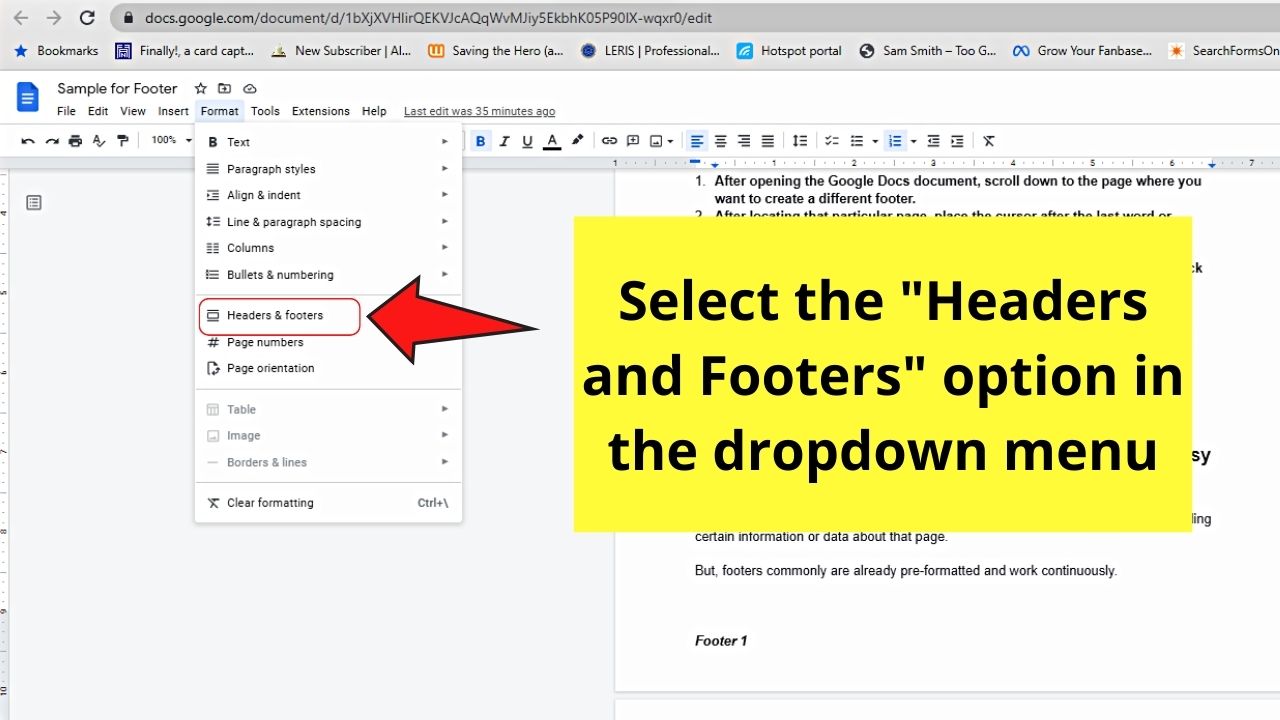
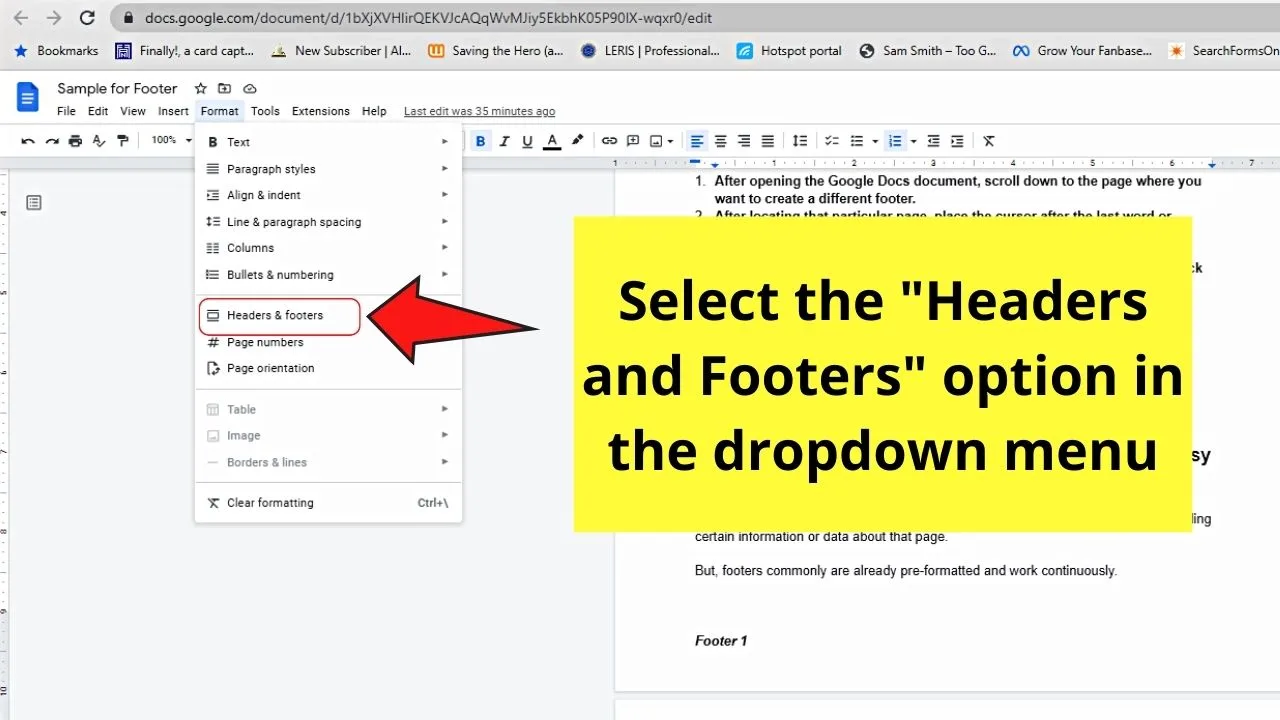
You can also activate the same window by clicking “Format” in the menu tab and selecting the “Headers and Footers” option.

Step 5: On the pop-out window, head to the “Apply to” section first.
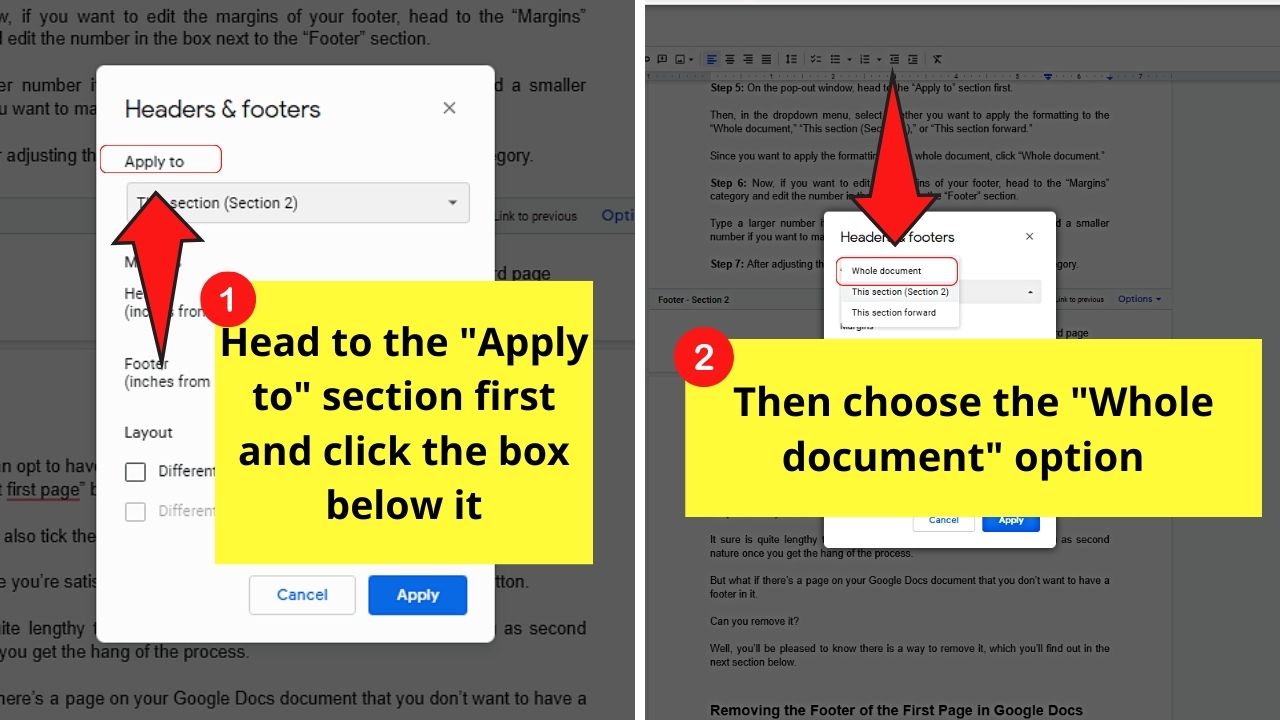

Then, in the dropdown menu, select whether you want to apply the formatting to the “Whole document,” “This section (Section _),” or “This section forward.”
Since you want to apply the formatting to the entire document, select the “Whole document” option.
Step 6: Adjust the footer margins
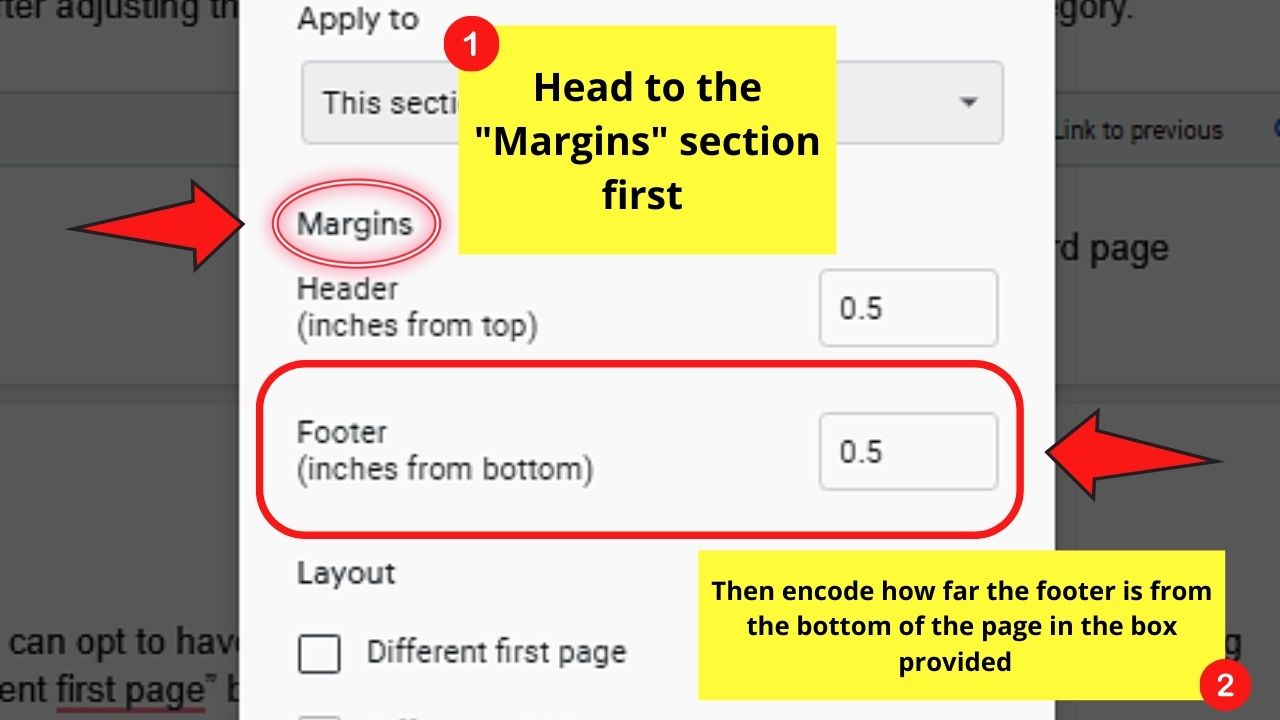

Type a larger number if you want to make the footer farther from the bottom, and a smaller number if you want to make your footer nearer the footer of the page.
Step 7: In the layout section, tick the box “Different first page”
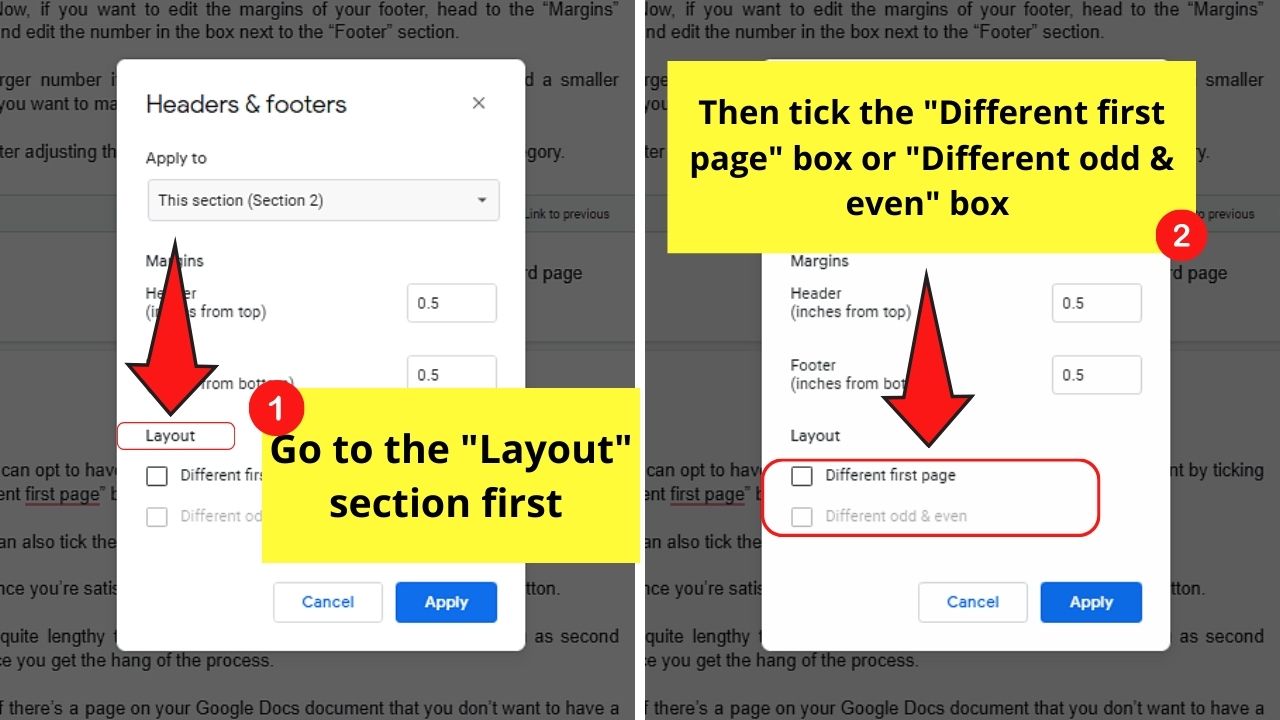
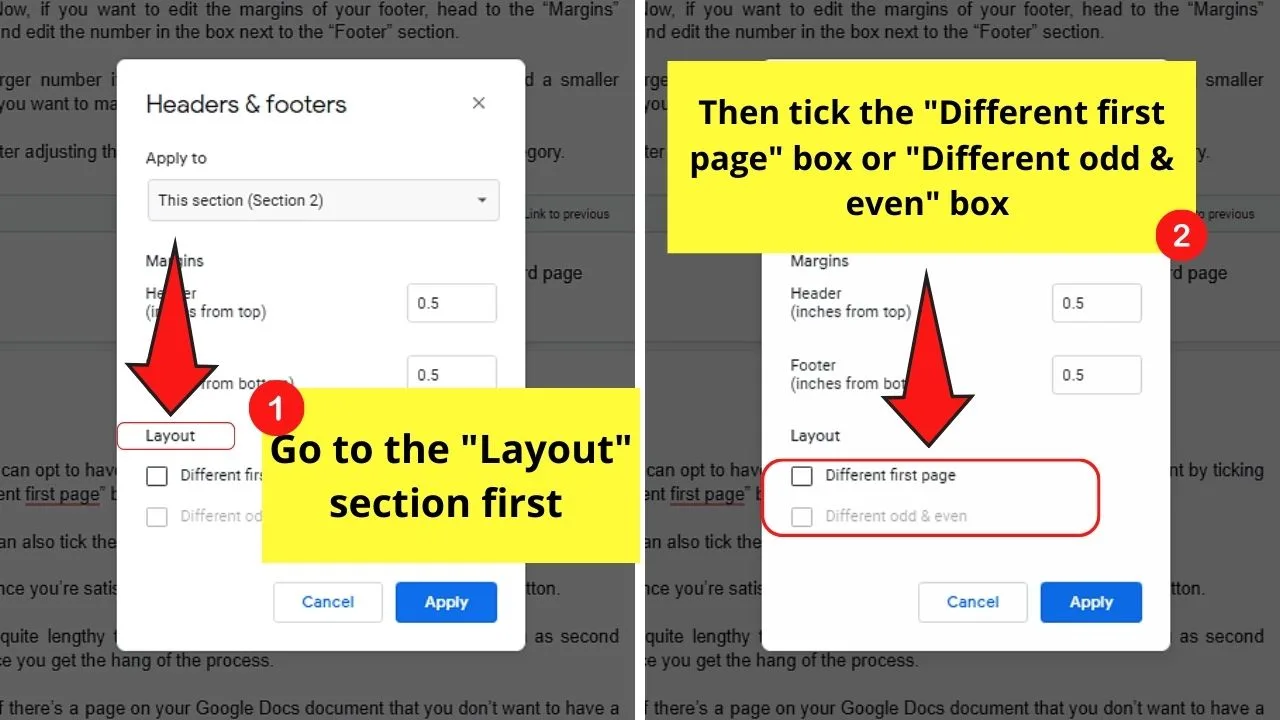
Here, you can opt to have different formatting for every footer in the document by ticking the “Different first page” box.
But, you can also tick the “Different odd and even” box if you want the odd-paged footers to have a different format from the even-paged ones.
Step 8: Once you’re satisfied with your footer formatting, click the “Apply” button.

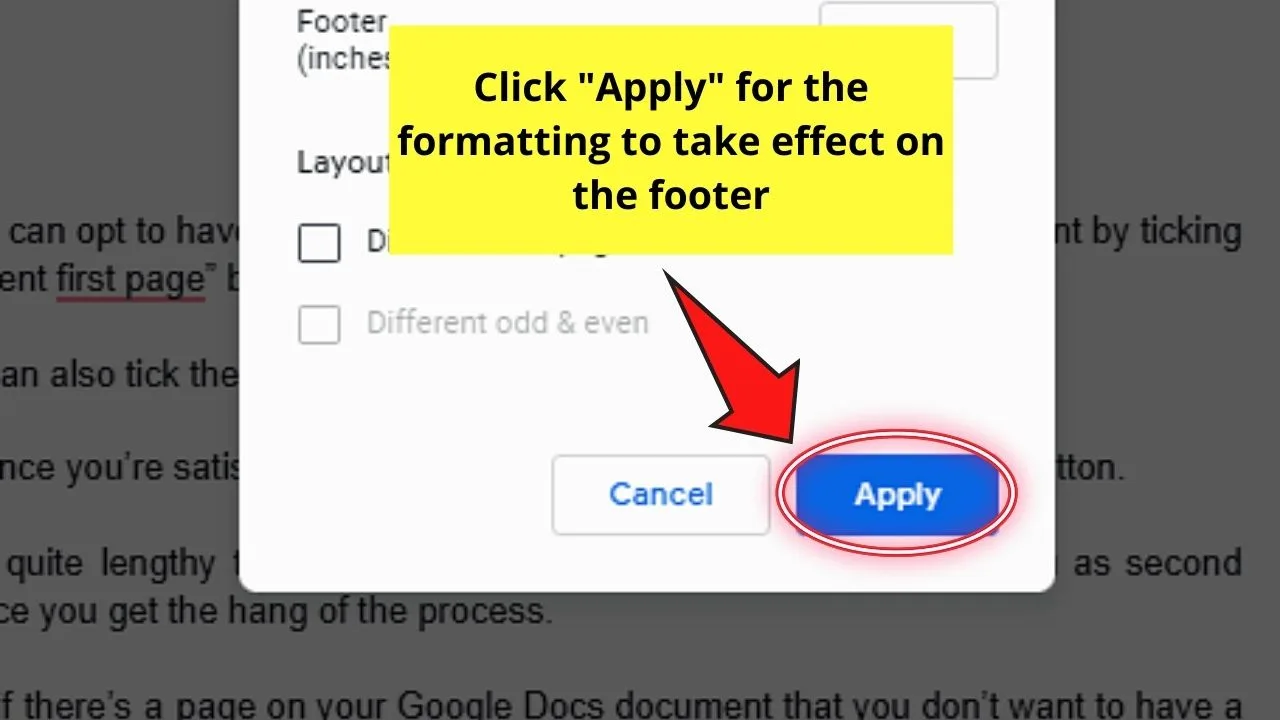
It sure is quite lengthy to customize your footers, but it will come to you as second nature once you get the hang of the process.
But what if there’s a page on your Google Docs document that you don’t want to have a footer in it.
Can you remove it?
Well, you’ll be pleased to know there is a way to remove it, which you’ll find out in the next section below.
How to Remove the Footer of the First Page in Google Docs
To remove the footer of the first page in Google Docs, follow these steps:
Step 1: Double-click in the footer area of the first page and tick the option “Different first page”
Step 2: On the main menu, select “Format”

Step 3: Click the “Headers & Footers” option. This will then activate another dropdown menu beside it.
Step 4: Choose “Remove footer”
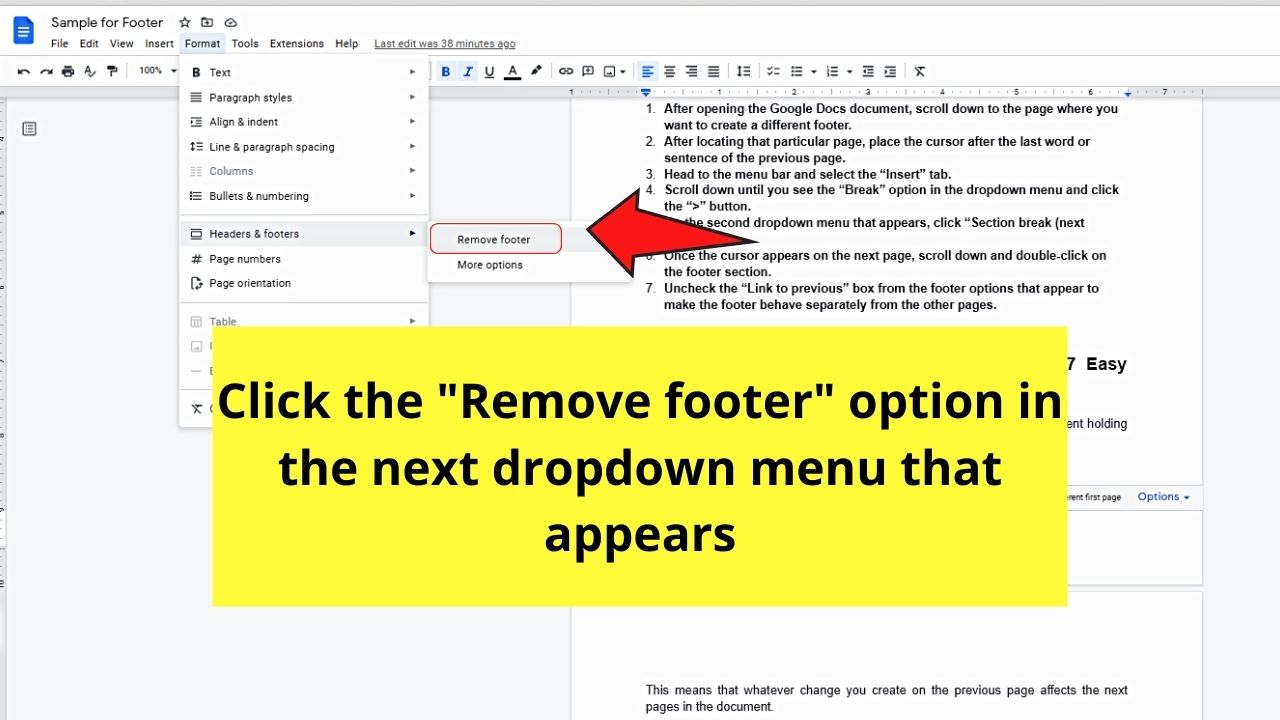

After this step, the footer on the first page will be deleted.
Yet, if you find the 4-step process quite lengthy to simply remove a footer on the first page, there is a shortcut for it.
Removing the Footer of the First Page – Quick Method
Step 1: On your Google Docs document, scroll down until you reach the bottom part of the first page.
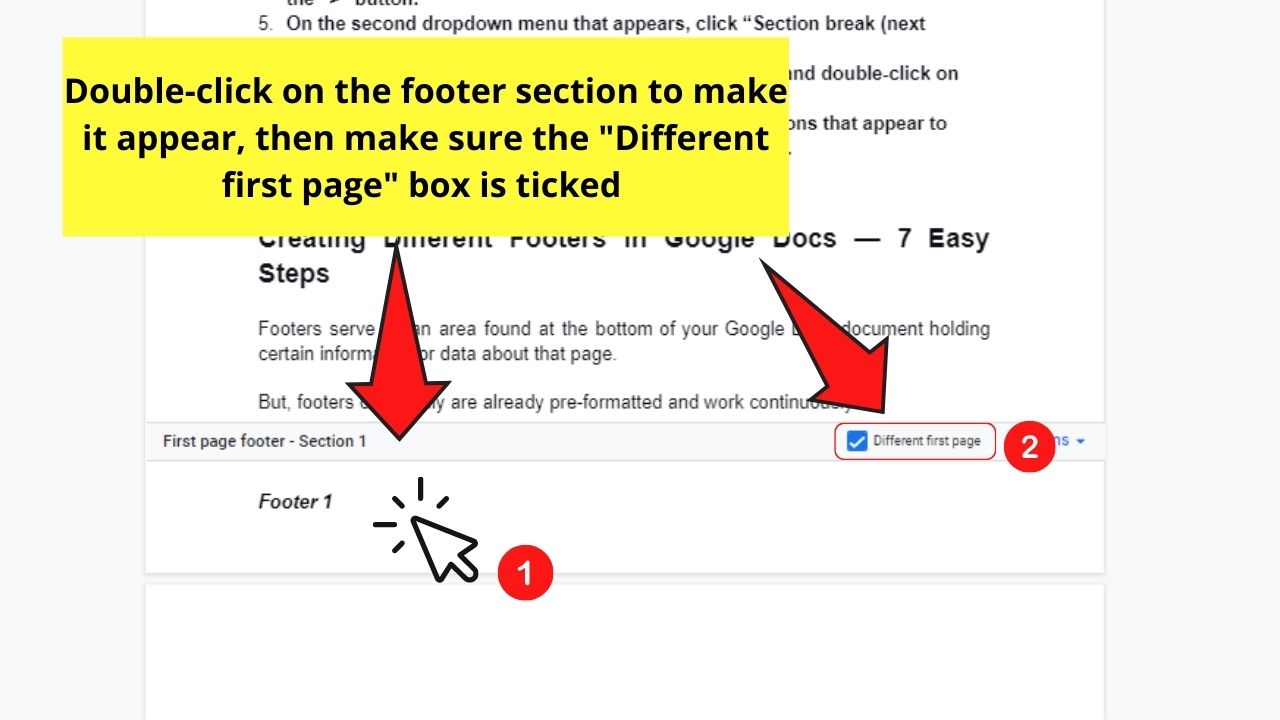
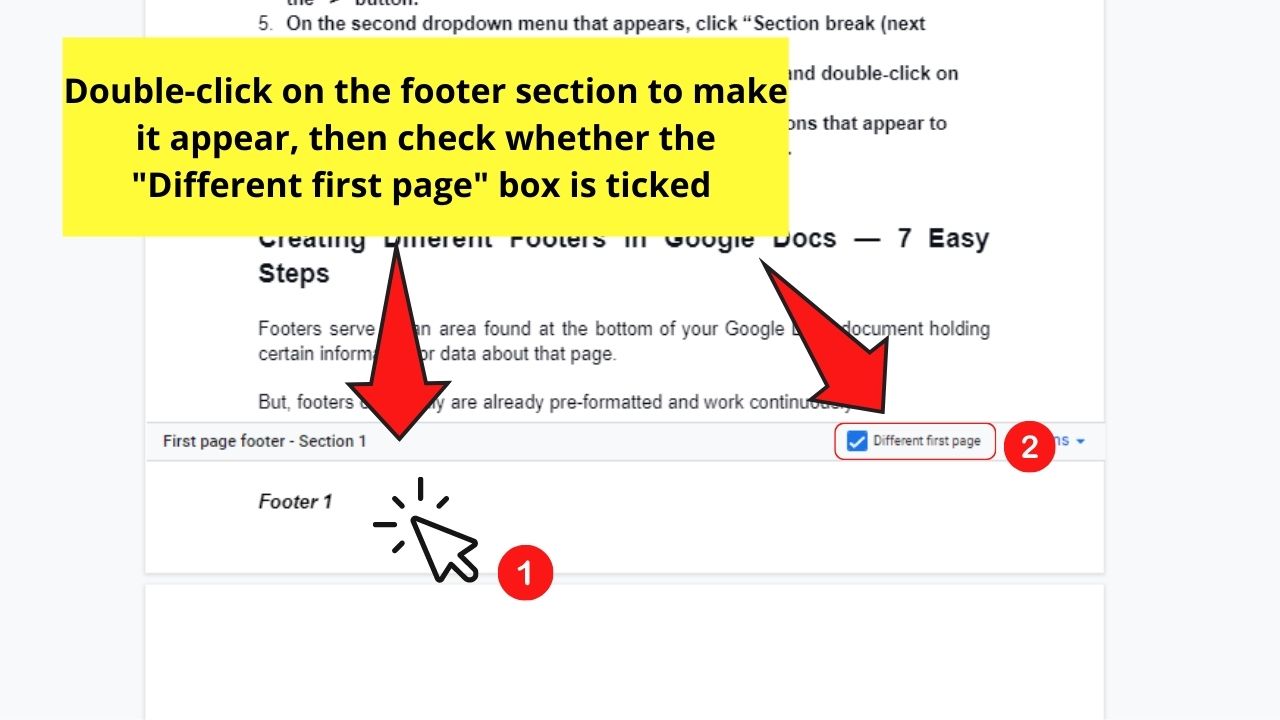
Then, double-click the footer section to make the footer options appear.
Again, make sure the box of the “Different first page” is ticked before heading for the next step.
Step 2: In the footer options menu, click on “Options”

Step 3: Click “Remove footer” from the option list.

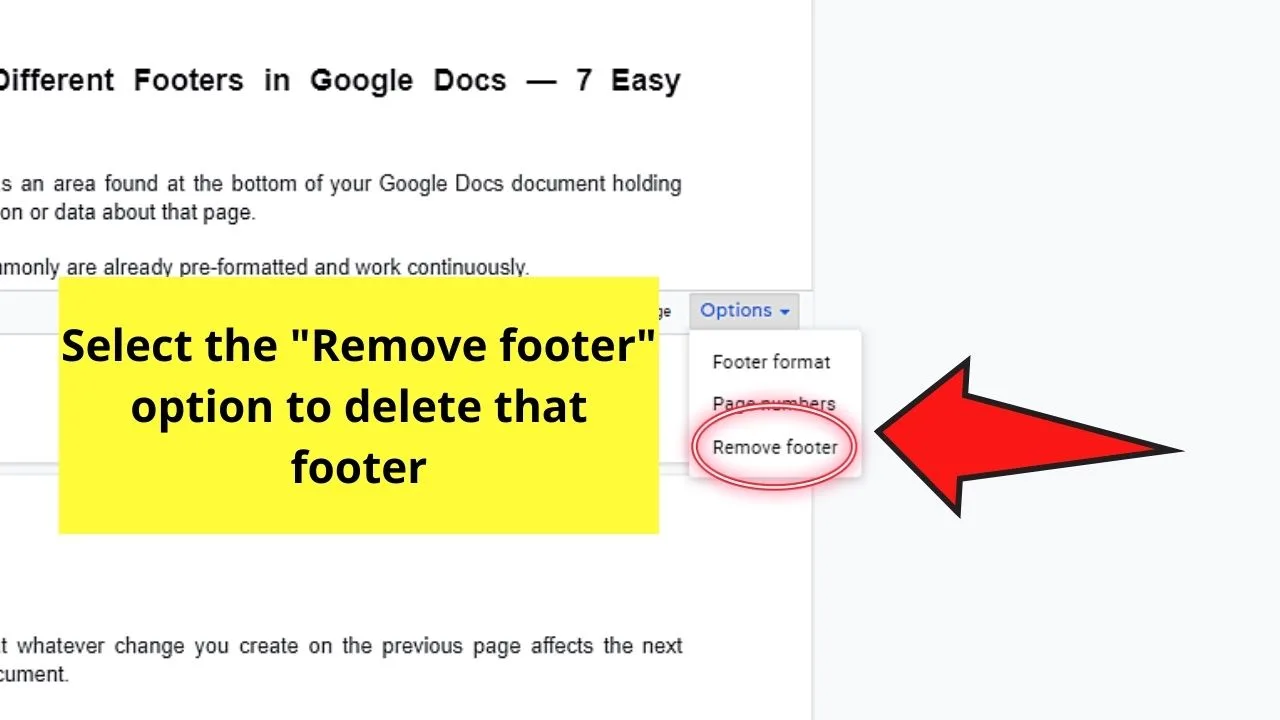
This move will automatically remove the footer from your first page.
Quick and simple, right?
With that said, are you now ready to create your very own footers in Google Docs?
Frequently Asked Questions about How to Have Different Footers in Google Docs
What do section breaks mean in Google Docs?
Section breaks divide your document into different sections. Hence, you’ll be able to format each section independently. With that said, any change made to that section won’t affect the rest of the Google Docs document.
How are section breaks viewed in Google Docs?
To view the section breaks in Google Docs, head to the “View” tab on the menu bar and click it. Then, select the “Show section breaks” option until you see a checkmark appear beside it. You’ll then see a faint line that marks the footer or header of a page, indicating the section break made.
Is it possible to delete a section break I created?
You can delete a section break made in Google Docs. Simply put the blinking cursor at the end of the last sentence found before the section break. Then, press “Delete” to remove the said section break.
How do page breaks differ from section breaks?
Page breaks serve to divide the body of the text in Google Docs. On the other hand, section breaks not only divide the body of the text but include the footers and headers, page margins, page numbers, etc.
Is there a shortcut to view or add a header or footer on a page in Google Docs without heading to the “Insert” tab?
To view or add a header or footer in Google Docs without clicking the “Insert” tab, double-click the header or footer part of the page. You’ll then see the footer or header options appear.
How do you remove a footer or a header in a Google Docs document?
To remove footers or headers in Google Docs, click on the footer or header you want to remove. Then, choose “Format” in the menu bar. Then, choose “Headers and footers.” Next, click the “Remove header” or “Remove footer” option in the second dropdown menu to delete it.


Hey guys! It’s me, Marcel, aka Maschi. On MaschiTuts, it’s all about tutorials! No matter the topic of the article, the goal always remains the same: Providing you guys with the most in-depth and helpful tutorials!

