

Back when we were still students, our teachers taught us the different ways that we can concisely yet clearly relay data. Other than graphs, we can also use tables to show these data in an orderly fashion.
Even as we’re entering the digital era, tables are still an indispensable tool in organizing and presenting data.
Whether you use words or figures in it, a table will allow you as the presenter to properly relay your report.
But can you also insert this nifty table in your Canva template? Well, if you’re new to this whole graphic design tool, don’t dare miss reading this article.
How to make a table in Canva?
Creating a table in Canva can be done in three ways. You can make one by manually adding the cells to the template and adjusting their sizes accordingly. After creating the table, you can then lock the elements you’ve used so you won’t accidentally make any changes. You can also make a table by searching for an editable template in the “Charts” section under the “Elements” tab. If you can’t find one, you can also search for a calendar template using the search box on the “Home” page of Canva.
Step-by-step tutorial in making a table in Canva
Now that we’ve established how nifty and necessary tables are in organizing data, it’s time to learn the basic steps in creating one. But, as said earlier, there are three ways to do this.
Let’s discuss them more in-depth here.
Manual creation
The first method of creating a table in Canva is by manually designing it yourself. While it sounds complicated now, you’ll soon find out that it isn’t.
Just make sure to follow these steps:
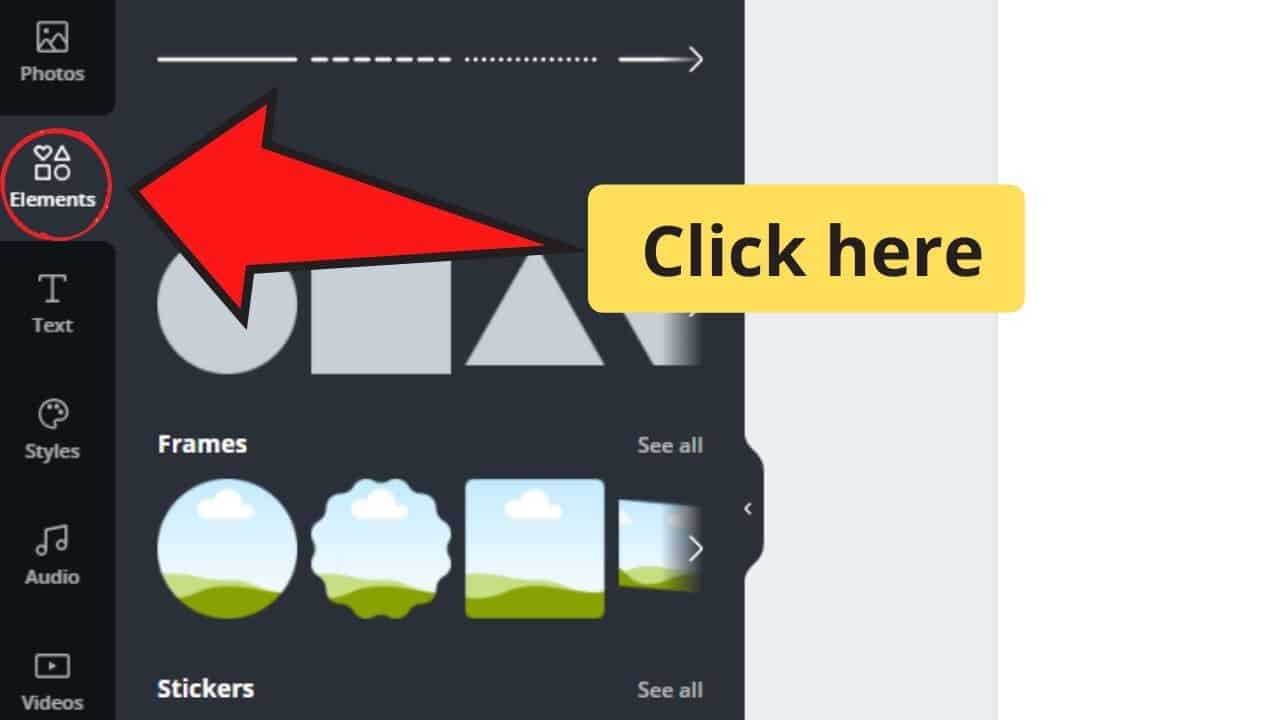
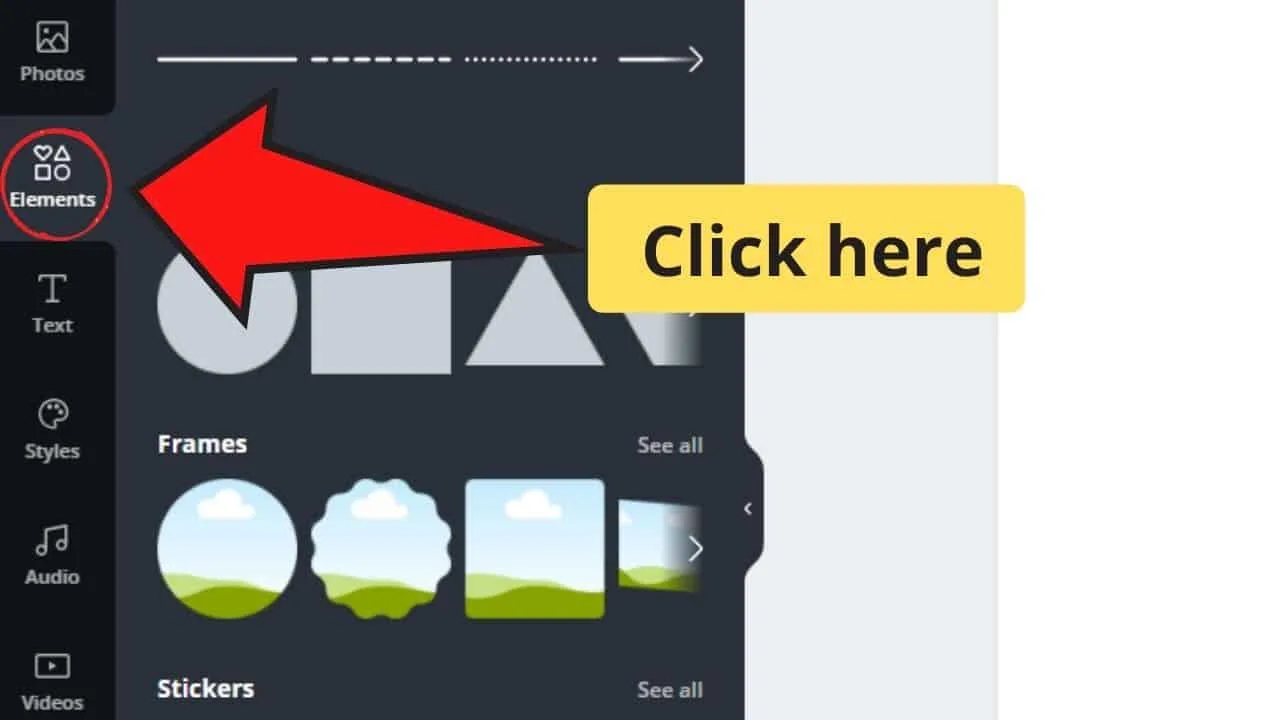
Step 1: Head over to the left side menu on your Canva screen and click on “Elements.”
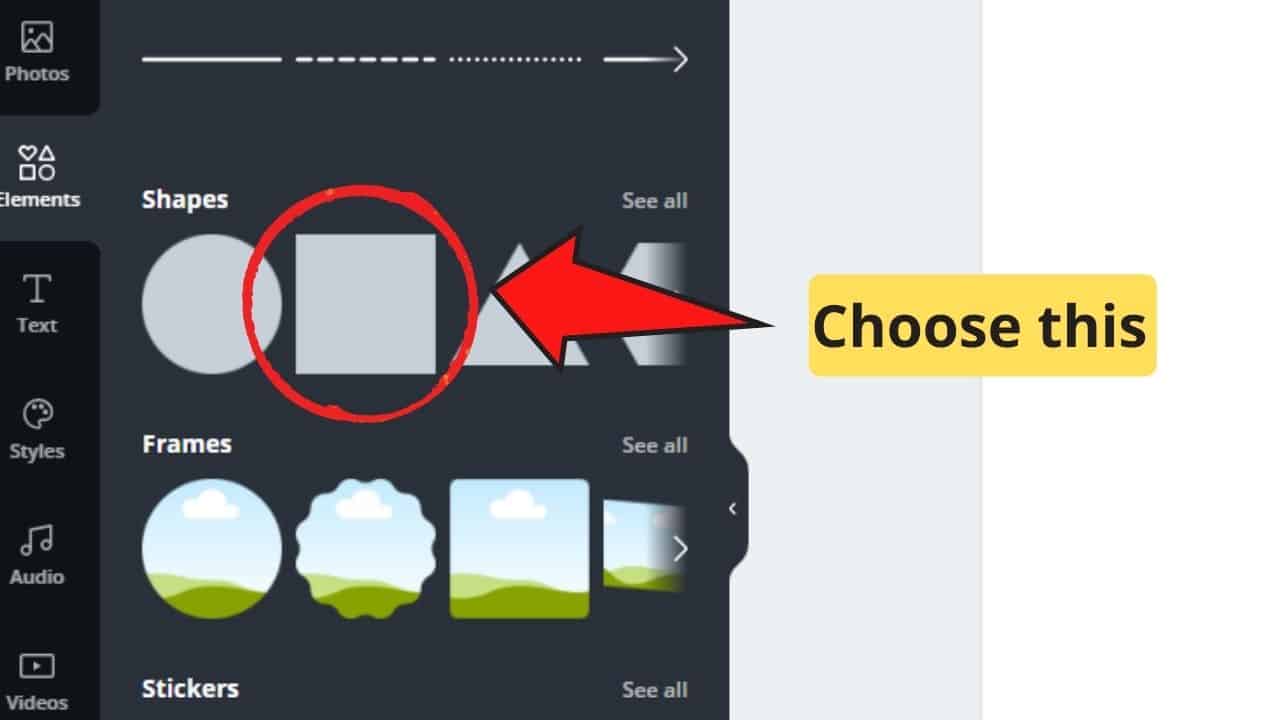
Step 2: Once you’re in the “Elements” tab, find the “Shapes” subsection. Once there, choose either a rectangle or a square (depends on the design you have in mind). This will become your table cell.

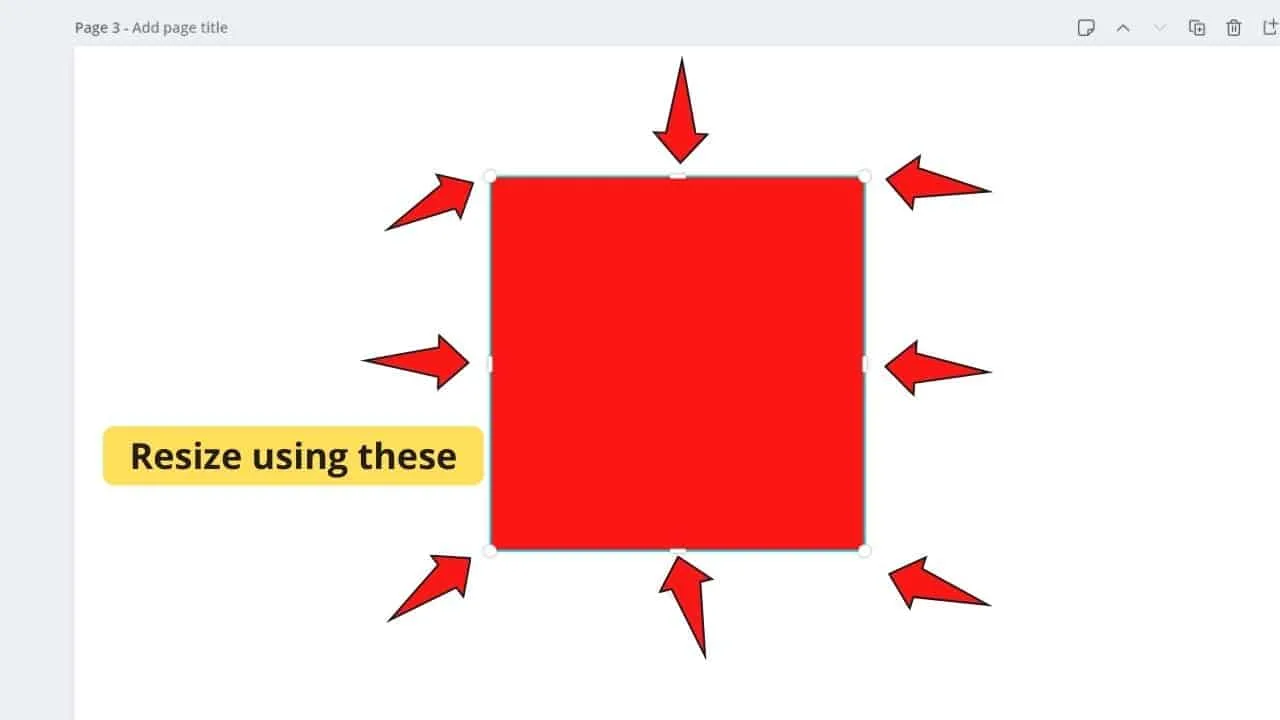
Step 3: Once you’ve chosen the shape you’ll use, resize it accordingly. To do this, drag the white bars on the corners of the square or rectangle you’re using.


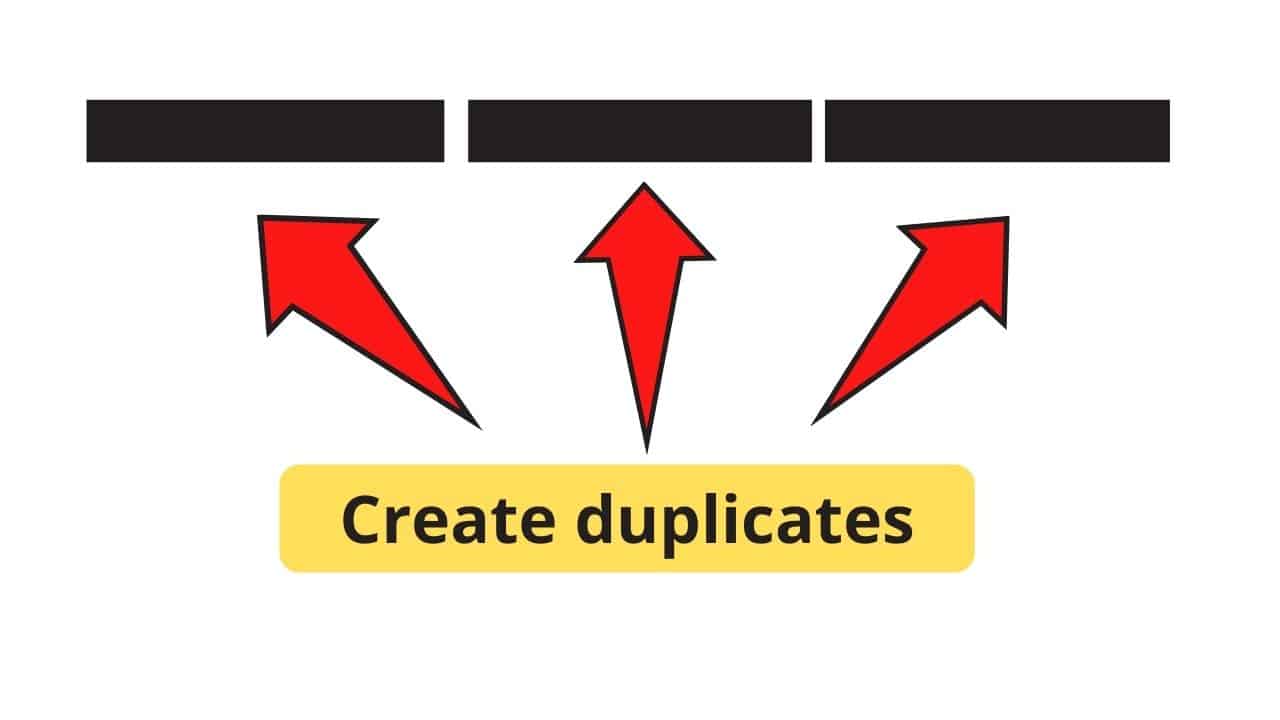
Step 4: After creating your first cell, create duplicates of it depending on how many columns you’ll need to make. Copy and paste the cell and arrange it in a straight row.

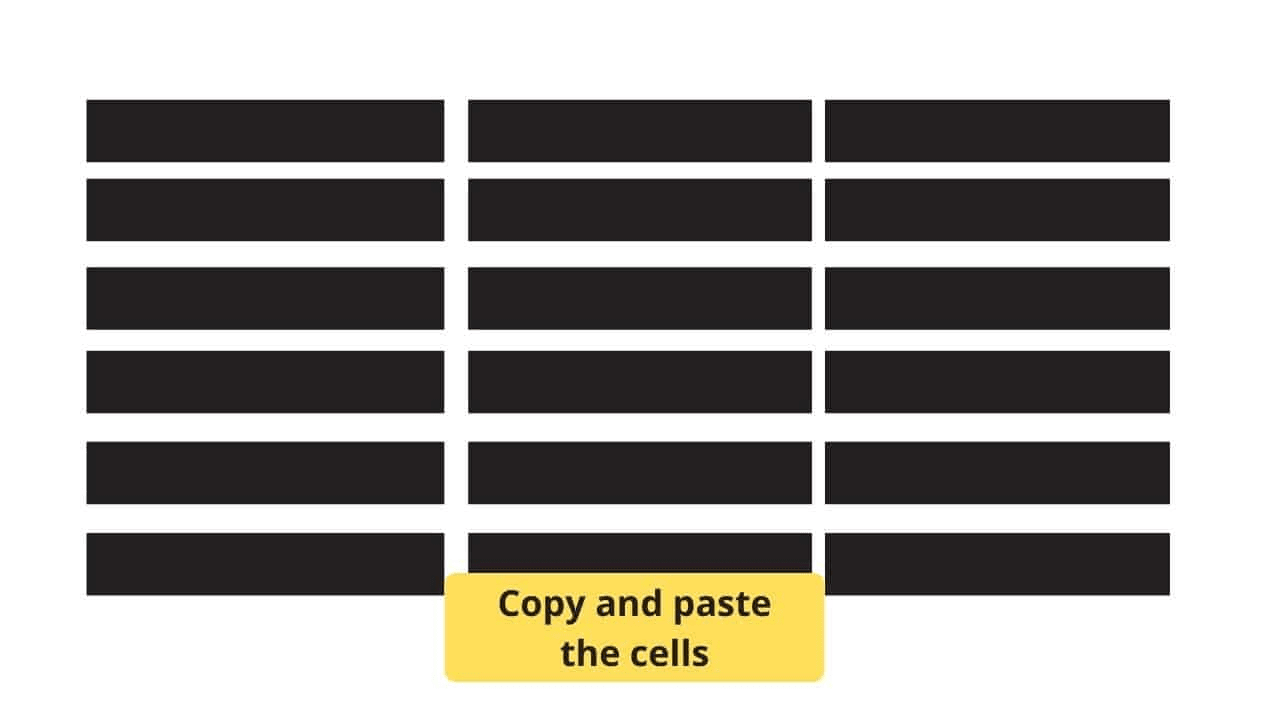
Step 5: Now that you’ve made a row, copy the entire line of shapes you’ve made and paste it beneath the first layer. Do this until you have the needed number of rows for your table.

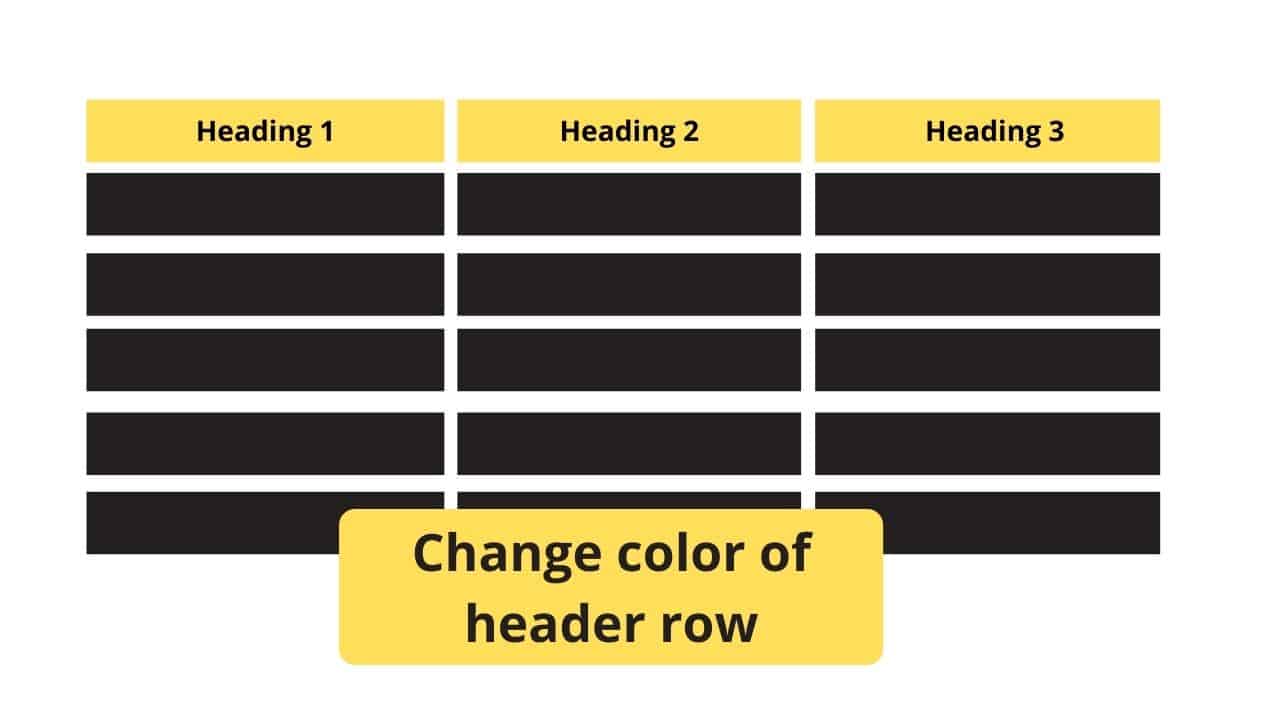
Step 6: Now that you’ve completed your table, create your header row. To highlight it, change the color of the squares or rectangles on the first row. You can also add text to label them accordingly.

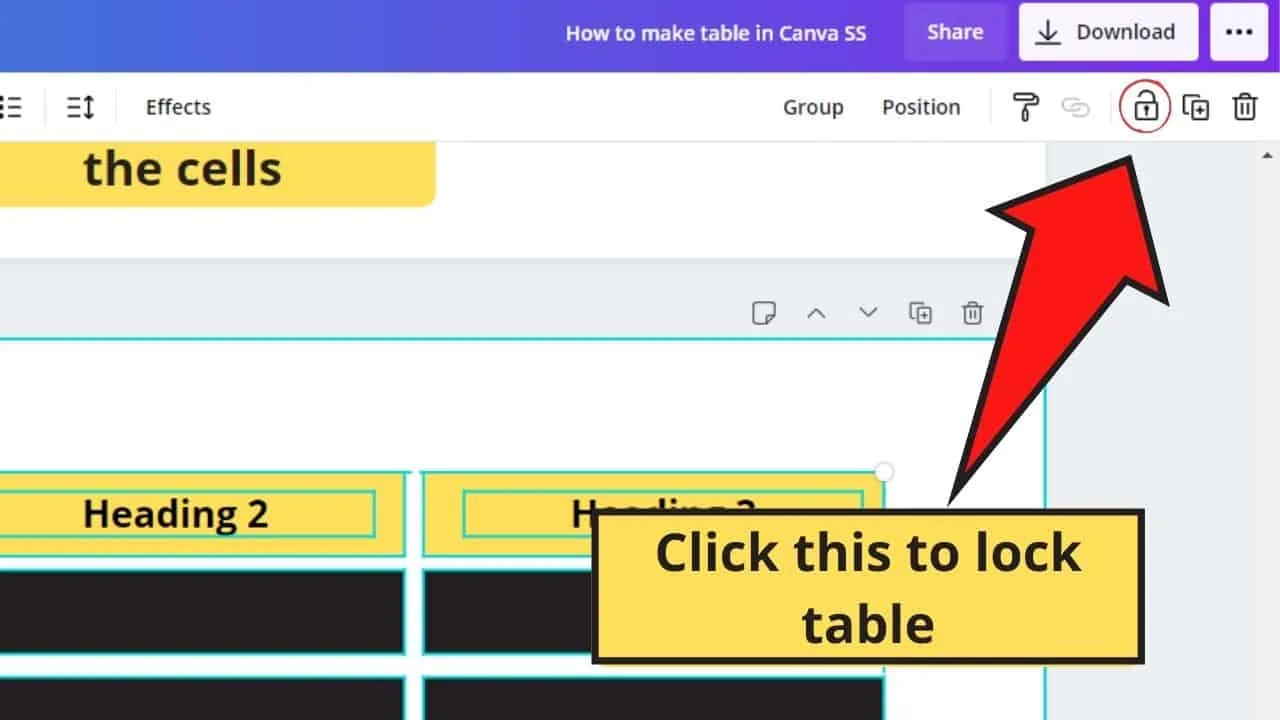
Step 7: Once your table’s taking shape and you don’t want to accidentally move any of the elements you’ve used, highlight the whole table and click on the “Lock” icon from the white toolbar.

Step 8: But, if you want one part of your table to be editable, click on that shape and click the “Lock” icon once to unlock it from the rest of the template.
Use Editable Chart Template
Now, if you don’t want to undergo such a labor-intensive process, you can look for an editable table template from the Canva gallery as well.
I’m emphasizing the word editable as most of the charts you’ll find are mere decorations for your template.
But here’s how you can create a table with this method.
Step 1: Head over to the left side Canva menu and click on the “Elements” tab. Once there, go to the “Charts” subsection.
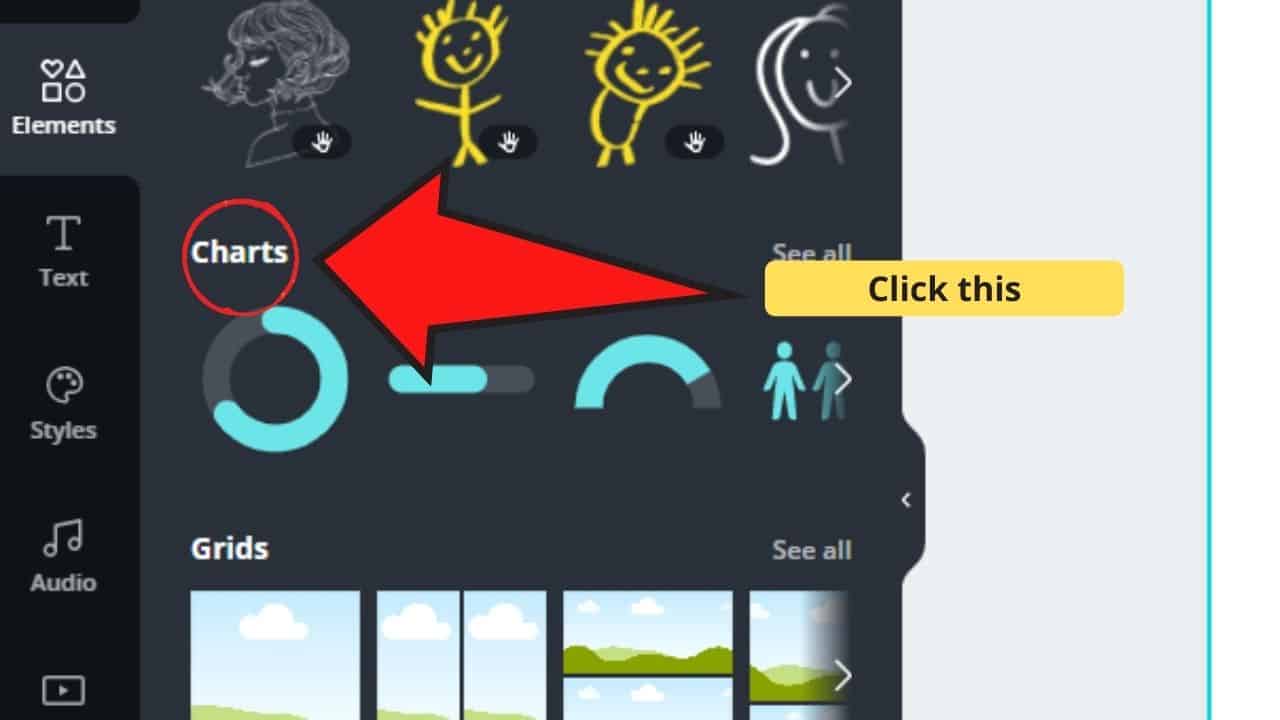

Step 2: Browse through the different chart graphics you’ll find there. Just make sure that the table you end up choosing is editable/customizable.
But, if you can’t find one after a thorough search, you can skip this part and use the third method below.
Use Calendar
Technically, a calendar isn’t an ideal template you can find in Canva. However, if you don’t want to create a table from scratch manually, then this option’s your best bet.
So, how can you use a calendar as a table template? Read the steps below.
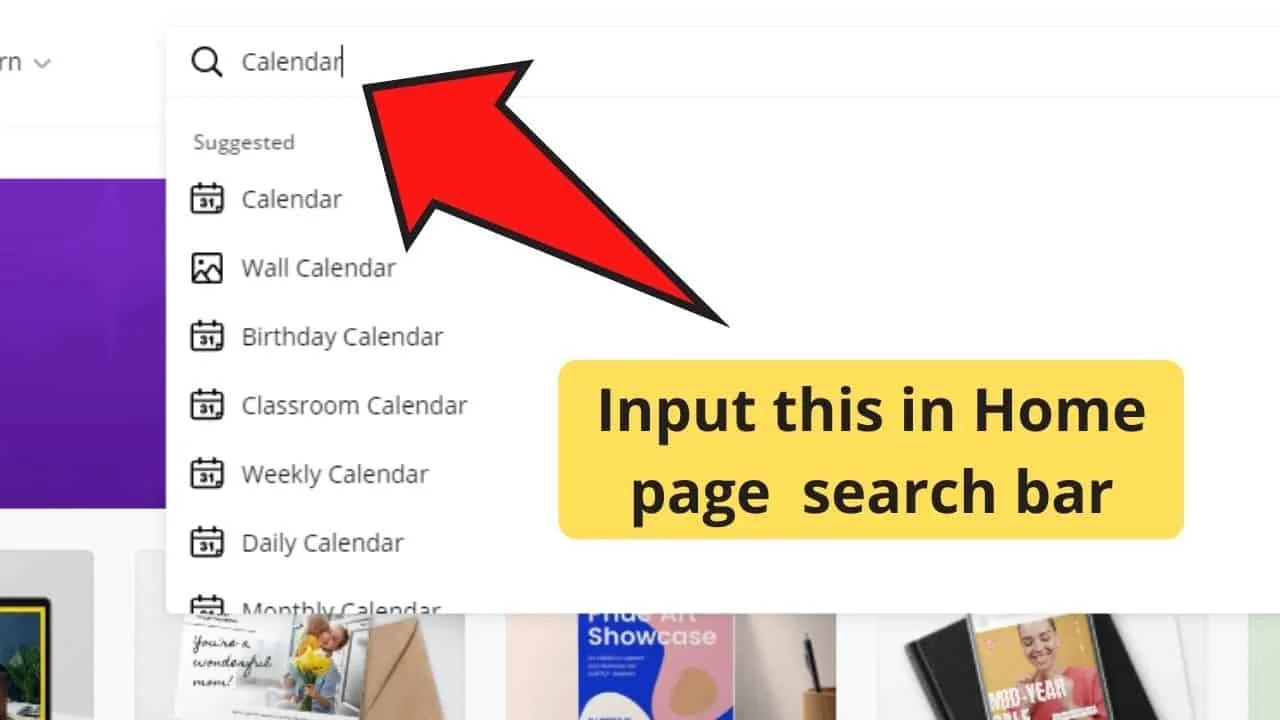
Step 1: On the Home page of your Canva screen, head over to the search bar.
Step 2: Type on the search box the word “Calendar.” Wait until all the available designs from the Canva gallery appear.

Step 3: Select the calendar template you’d like to use by clicking on it. A project window will then appear. Just make sure that you can move or edit the elements in the said template.
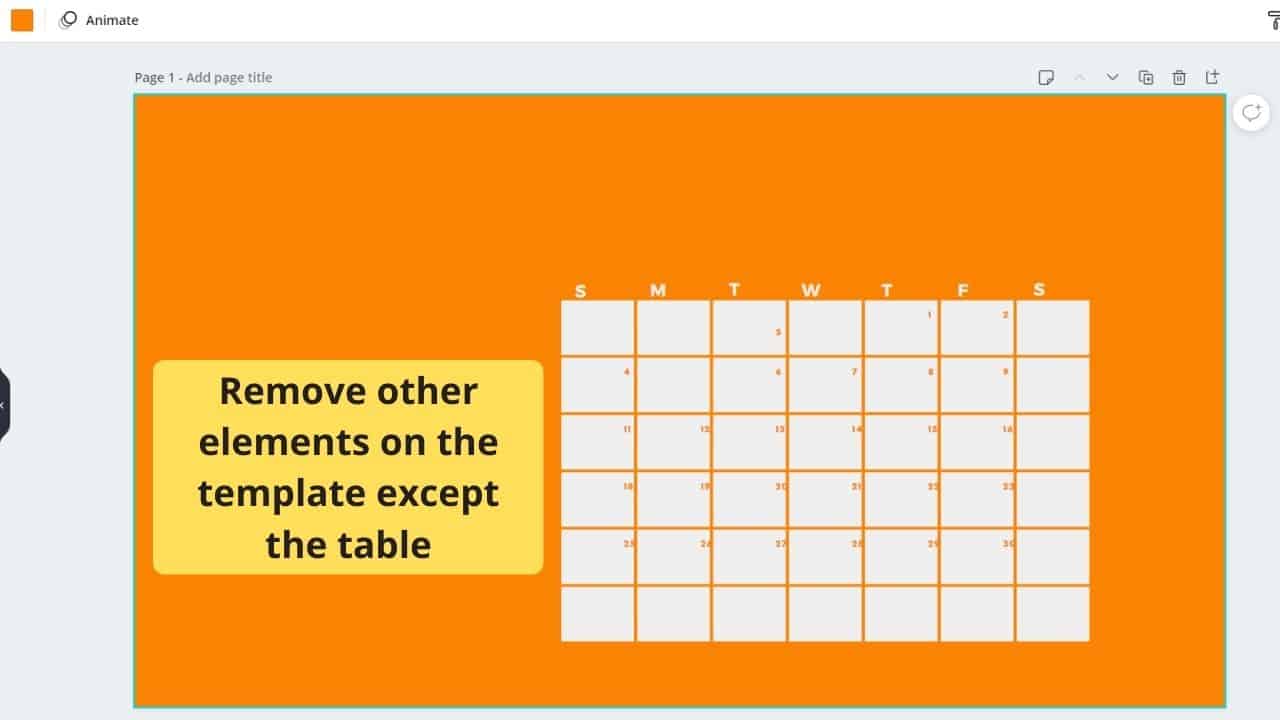
Step 4: Remove unwanted elements in the template until you’re only left with the calendar.

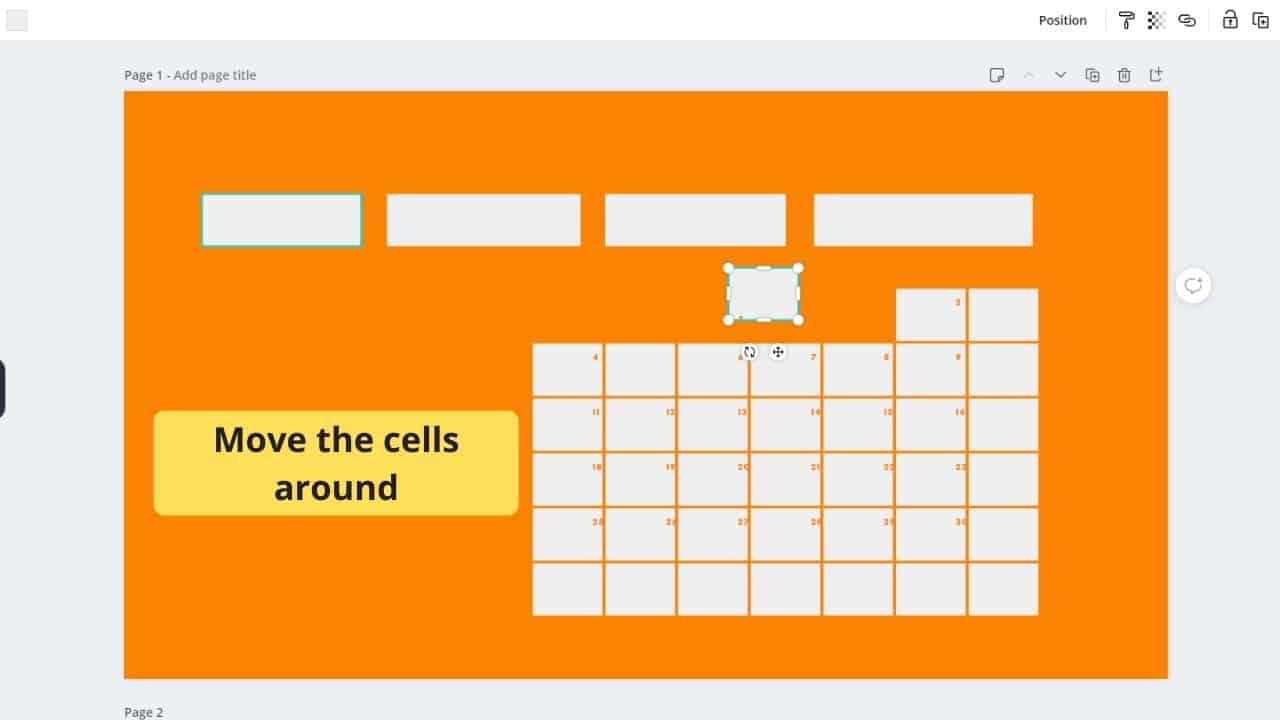
Step 5: Click on the calendar if you can ungroup the elements or shapes used. You can see this option if the “Ungroup” tab appears on the white toolbar above the template. Skip this step if they’re already ungrouped.
Step 6: Once you’ve ungrouped the shapes used, move the squares or rectangles used according to the table design you’ve had in mind. Just delete the excess shapes once you’re done.

Now, it’s up to you which method you’d like to use to create your very own table in Canva. But can you add a personal touch to it?
Customizing your table in Canva
Are you satisfied with your table already? Well, if you think you want a more personal touch to your table and make it prettier, you can definitely do so with Canva.
How? Well, it’s not as complicated as it initially sounds.
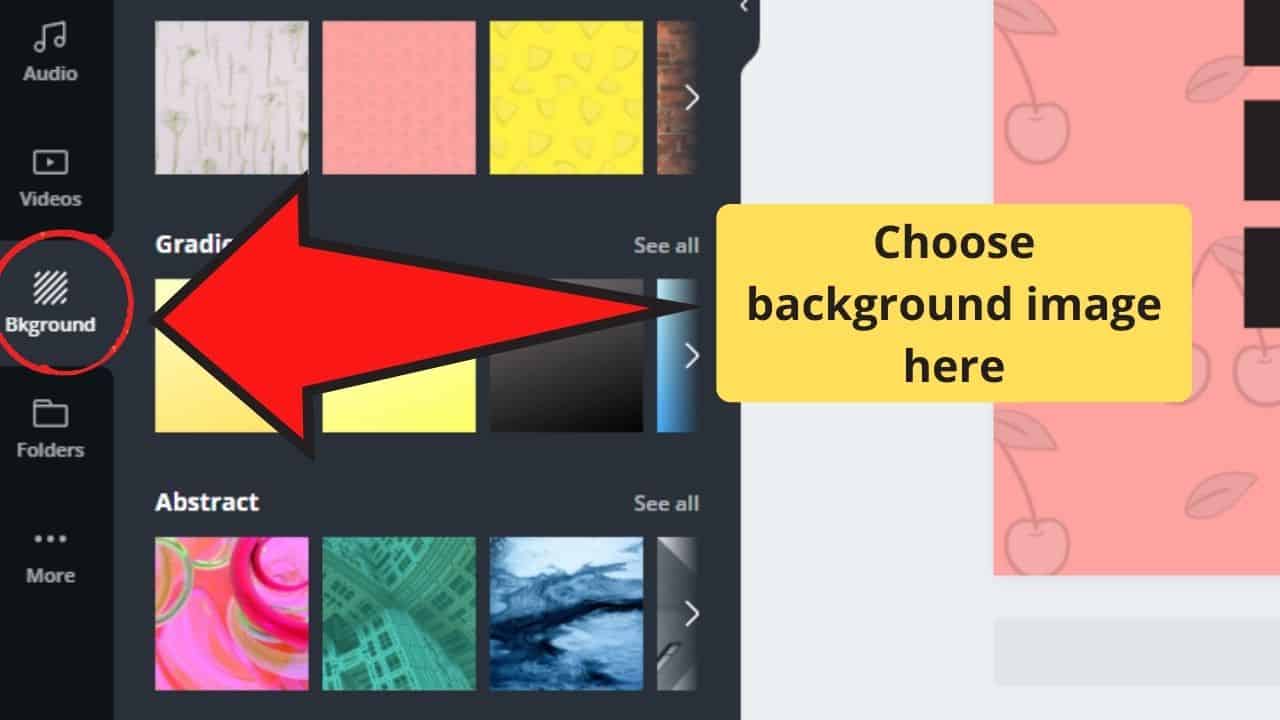
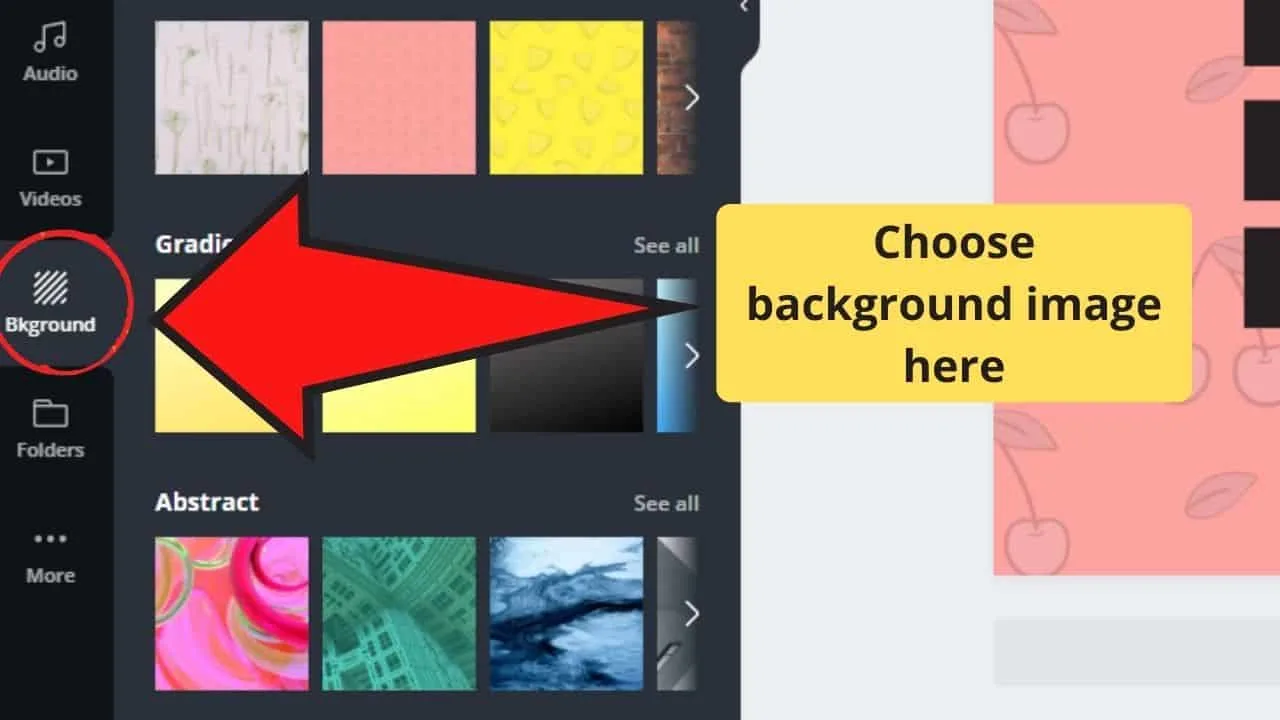
Simply head over to the left side Canva menu and click on “Backgrounds.” You can also search for one in the “Photos” tab. Just make sure to right-click on the said image and choose “Set image as background” accordingly.
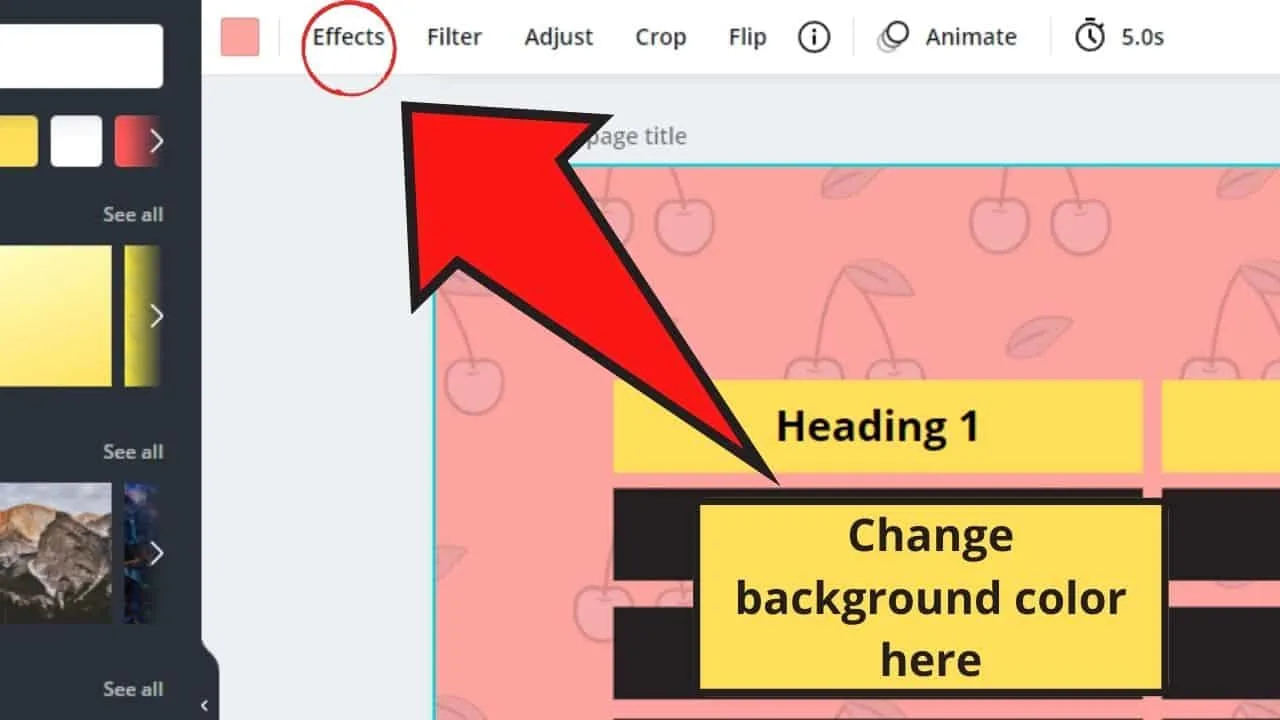
If you don’t want the preset color of the image you’ve chosen, click on the color box preceding the “Effects” tab on the toolbar.

Once you’re okay with the look, you can go ahead and add more elements (even a logo) to the design.
Just make sure that the whole template’s locked so you won’t make unnecessary changes to your table’s overall layout.
Creating Canva tables you can edit
One great feature that Canva users love about the graphics app is its shareability.
You can share the designs you’ve made and even allow others to edit them if there’s a need.
But, how can you share your unique Canva-designed table online?
Thankfully, the Canva people allowed users to download your table template as a PDF file. If you’re curious to learn this step, better make sure to continue reading.
Once your table’s all set up and ready for sharing (including locking the whole table template), click on the “Download” button at the white toolbar above the project template.
From there, choose to download the file as “Standard PDF.” You can do this by clicking the “File type” dropdown menu right beneath the Download option.
Once done, open the Canva PDF file you’ve downloaded in a PDF reader like PDFEscape.
Add a text box onto the fields where you want other people to annotate text using the “Form field” option on the left-side menu.
You can also customize the font accordingly. If you can’t find any font that you like, you can also upload custom fonts to Canva.
Once you’ve set up everything, save the design and download it.
Open the file and check if you can already annotate your table just the way you want to.
So, now that you’re knowledgeable in creating tables in Canva, you might as well put your skills to the test.
Head over to Canva and start making one now!


Hey guys! It’s me, Marcel, aka Maschi. On MaschiTuts, it’s all about tutorials! No matter the topic of the article, the goal always remains the same: Providing you guys with the most in-depth and helpful tutorials!

