
Layer colors may seem like a small and even unimportant part of the Adobe Indesign program, but they are actually one of the most important.
Having a disorganized Layers panel can turn even the most basic of design tasks into a nightmare.
Not only that, but sometimes the colors Illustrator automatically assigns to your layers as you add them can look too similar to each other and make switching between layers confusing.
With all that in mind, knowing how to change the color of a layer in Illustrator seems like a pretty useful skill to have, right?
Here’s a quick guide to changing the color of a layer in Illustrator.
Changing The Color Of A Layer In Illustrator – Quick Guide
- Open the Layers panel by going to “Window”, then clicking on “Layers” or use the keyboard shortcut “F7”.
- Click on the “Create New Layer” icon to create as many layers as you need for your project.
- Select the layer you want to change the color of.
- Open the Layer Options window by double-clicking on the gray space to the right of your layer’s name.
- Click on the drop-down menu on the Layer Options window and select the basic color you want.
- To customize your color, click the colored block next to the drop-down menu.
- Finally, click the “OK” button at the bottom of the Layer Options window to apply your new layer color.
Changing The Color Of A Layer In Illustrator – Step-by-step Guide
Here’s a step-by-step guide to changing the color of a layer in Illustrator.
Step 1:
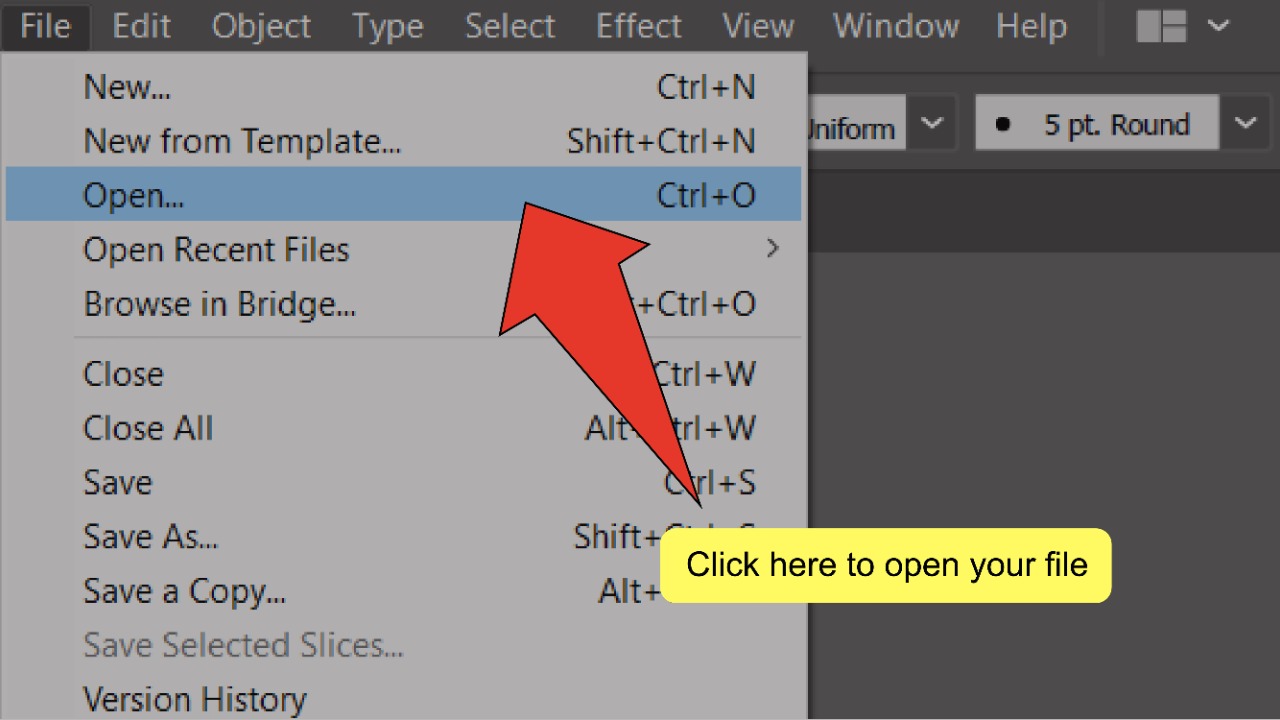
Open your Illustrator file. To start, open your document by double clicking on its corresponding Illustrator file, or if Illustrator is already open, you can go to “File” on the top menu, and then “Open” and choose the file you want to open. To speed things up, you can also use the keyboard shortcut COMMAND+O (MAC) “Ctrl+O” (Windows).
Step 2:
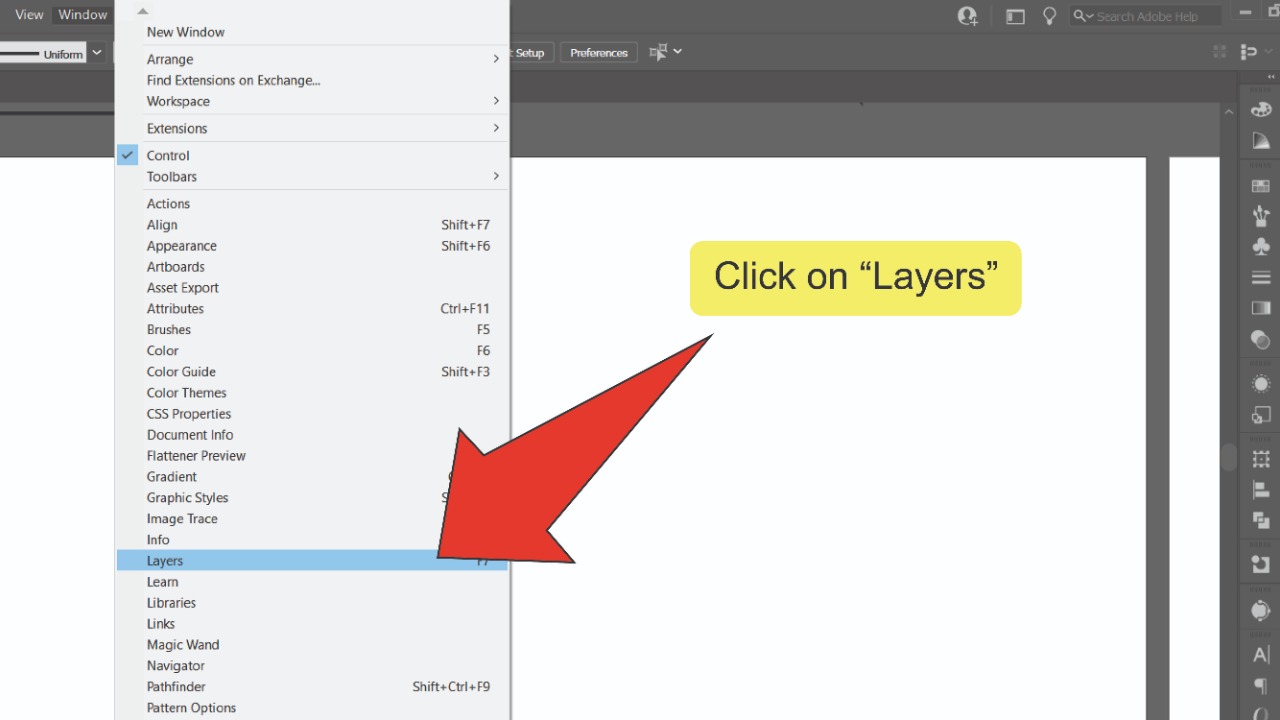
Open the Layers panel. On the top menu, go to “Window” and click on “Layers”. To speed things up, you can also press the “F7” key on your keyboard to open the panel.
Step 3:
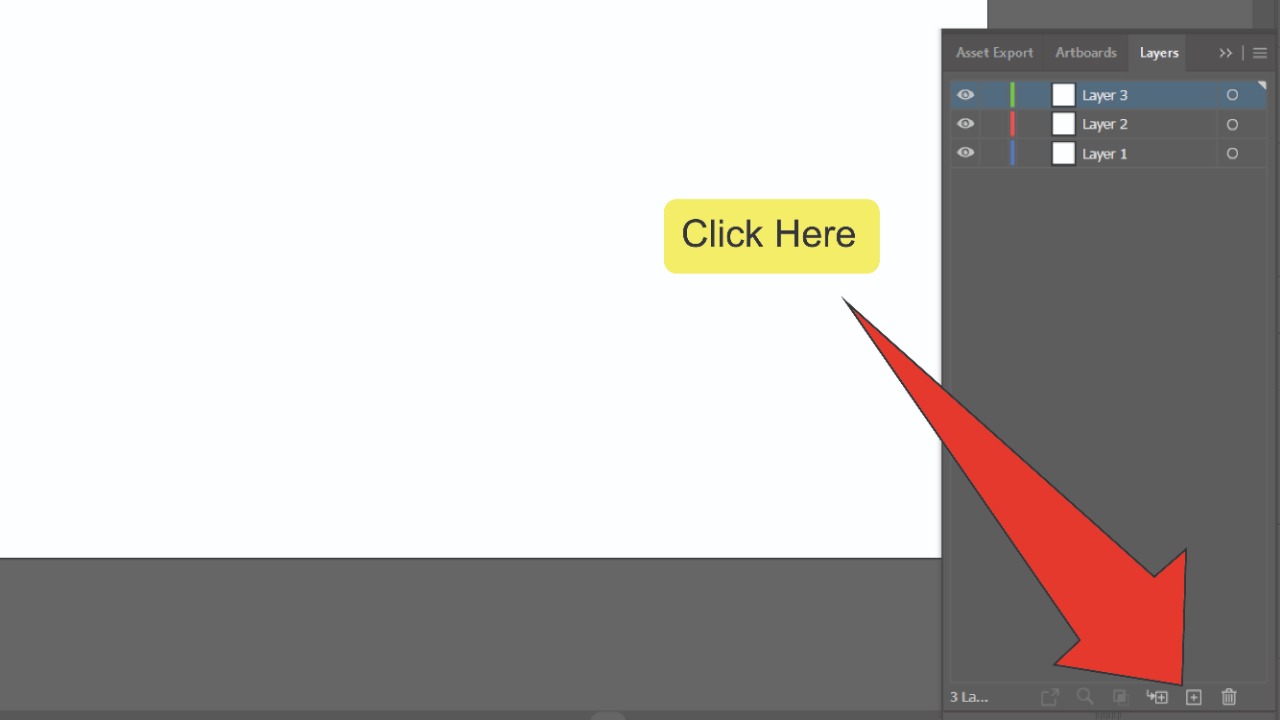
Create some new layers. Click on the “Create New Layer” icon at the bottom of the Layers panel to create a new layer. Repeat this process to create as many layers as you will be needing for your project.
Step 4:
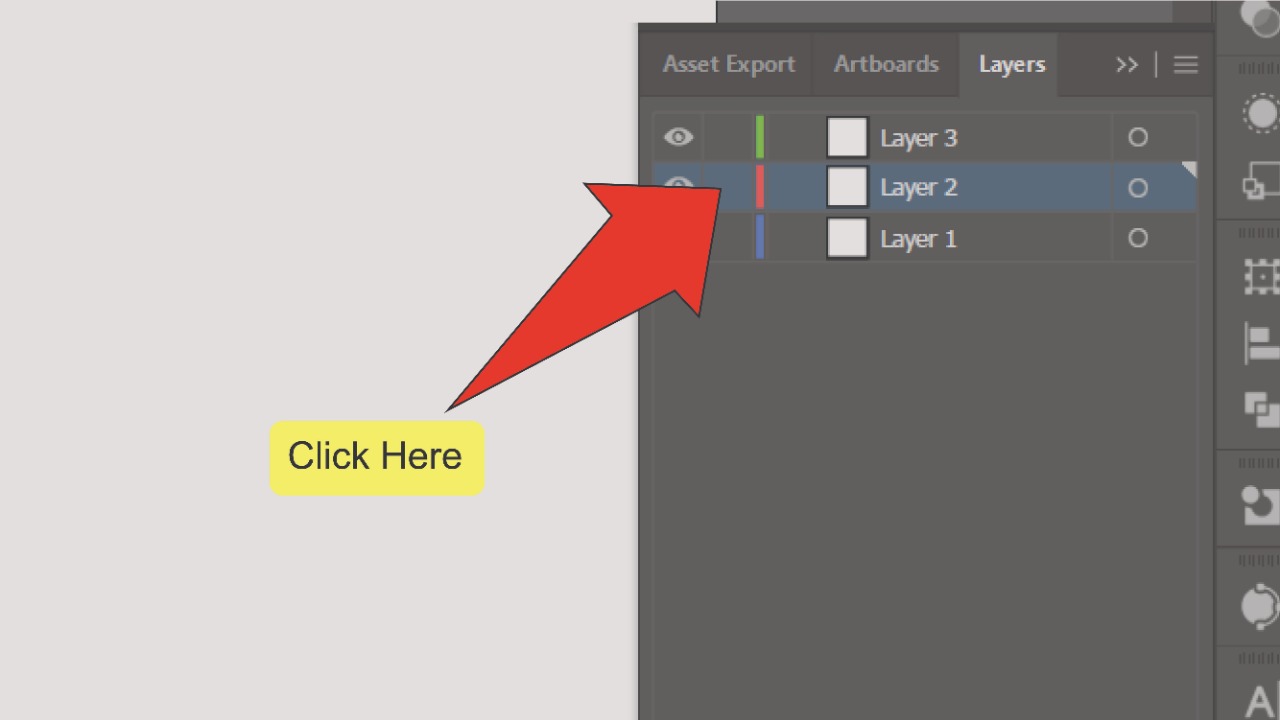
Select your layer. On the Layers panel hover your cursor over the layer you want to alter, then click on it once to select it.
Step 5:
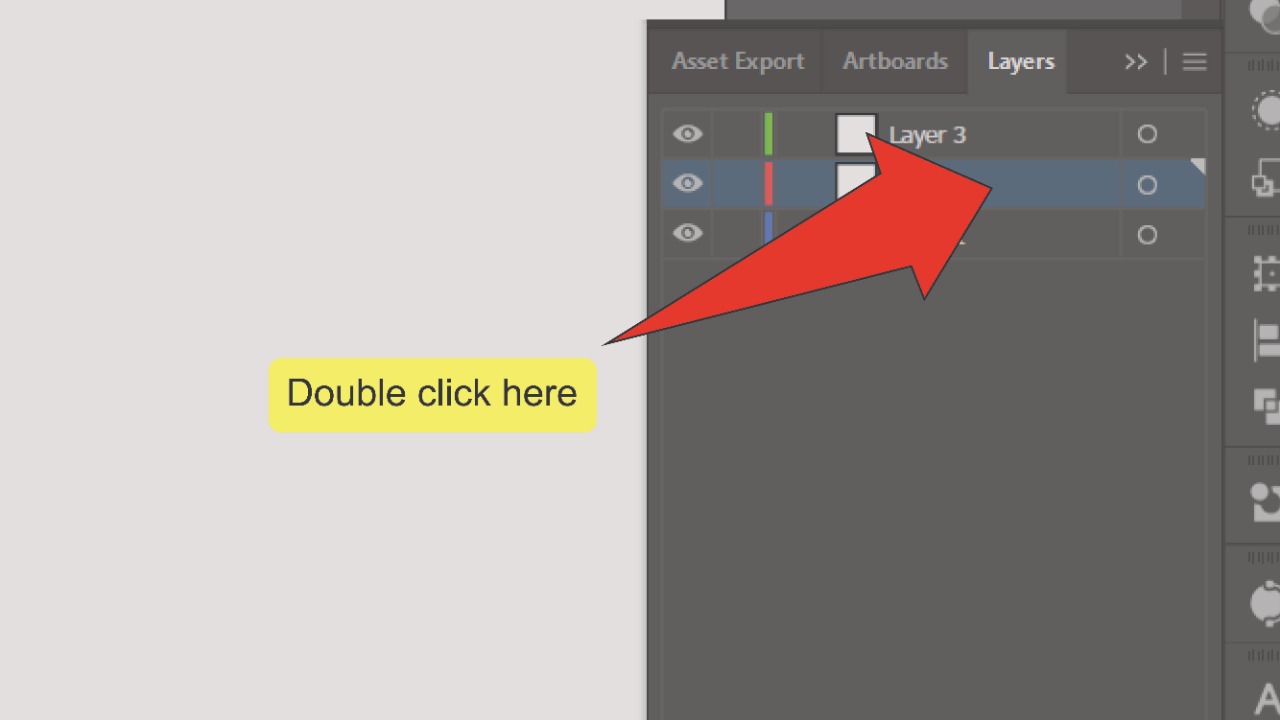
Open the Layer Options window. Double click on the gray space to the right of your layer’s name. The Layer Options window will open on your screen.
Step 6:
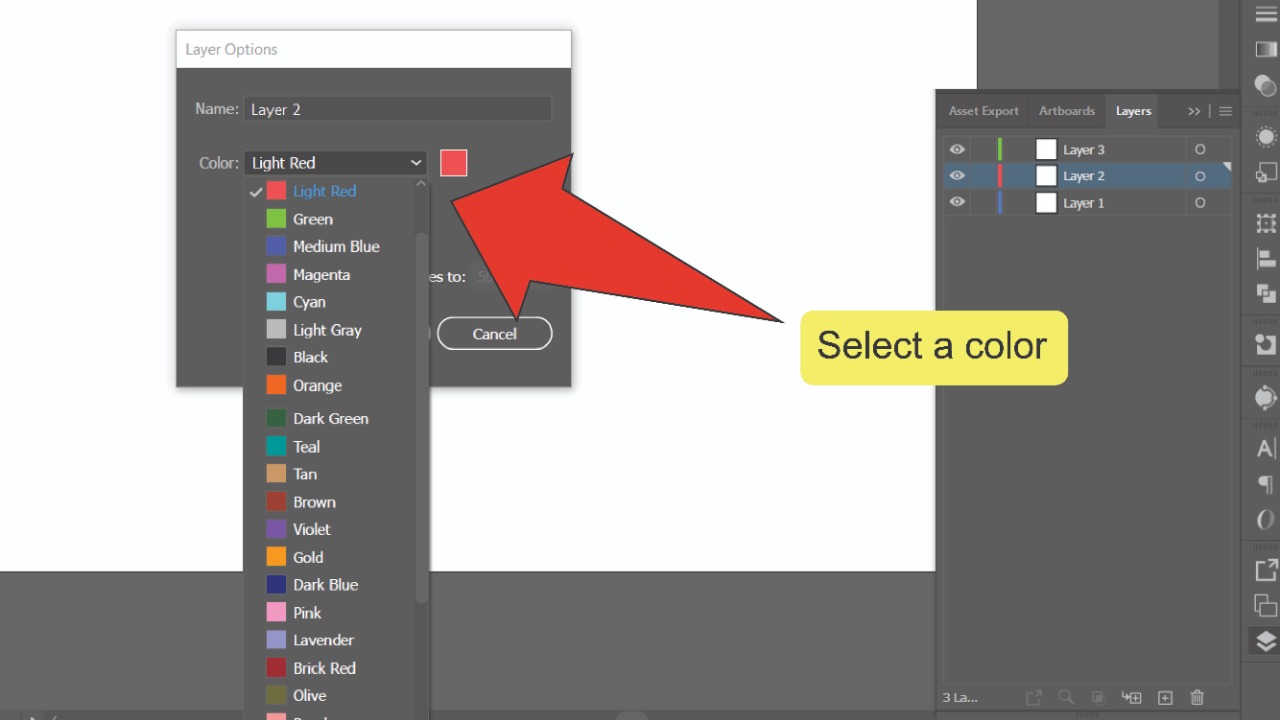
Select your layer color. In the Layer Options window, open the Color drop-down menu and choose your new layer color. This drop-down menu features a limited, basic range of colors. To expand your color options, you can access a second menu with a customizable range by clicking the square next to the drop-down menu.
Step 7:
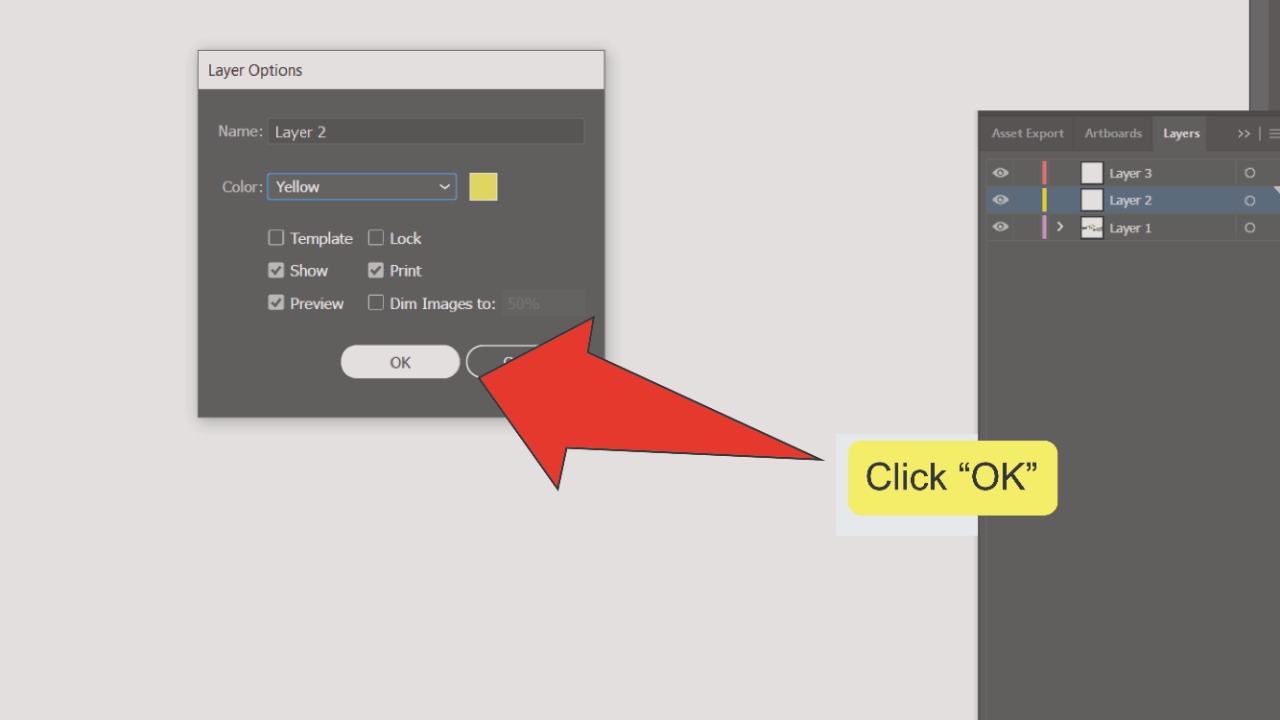
Click “OK”. Once you are finished choosing your new layer color, click the “OK” button at the bottom of the Layer Options window to apply your change to the layer.
Frequently Asked Questions About How to Change the Color of a Layer in Illustrator
Why isn’t the Layer Options window opening when I double-click my layer?
The Layer Options window will only open if you double-click the space directly to the right of your layer’s name. If you are having trouble, you might be clicking on the wrong part of your layer. You may also be clicking on a sub-layer or asset without realizing it. Double-check that you have your layer selected, then try again.