So you want to make a grid in Adobe Illustrator but aren’t sure where to begin.
Or maybe you’re a bit rusty and need a refresher course.
You must first decide what kind of grid will best suit your design needs.
This tutorial teaches you how to make Rectangular, Isometric, and Circular Polar grids.
How to Make a Rectangular Grid In Illustrator
To make a rectangular grid in Illustrator, follow these steps:
Step 1: Find and select the Rectangular Grid tool.
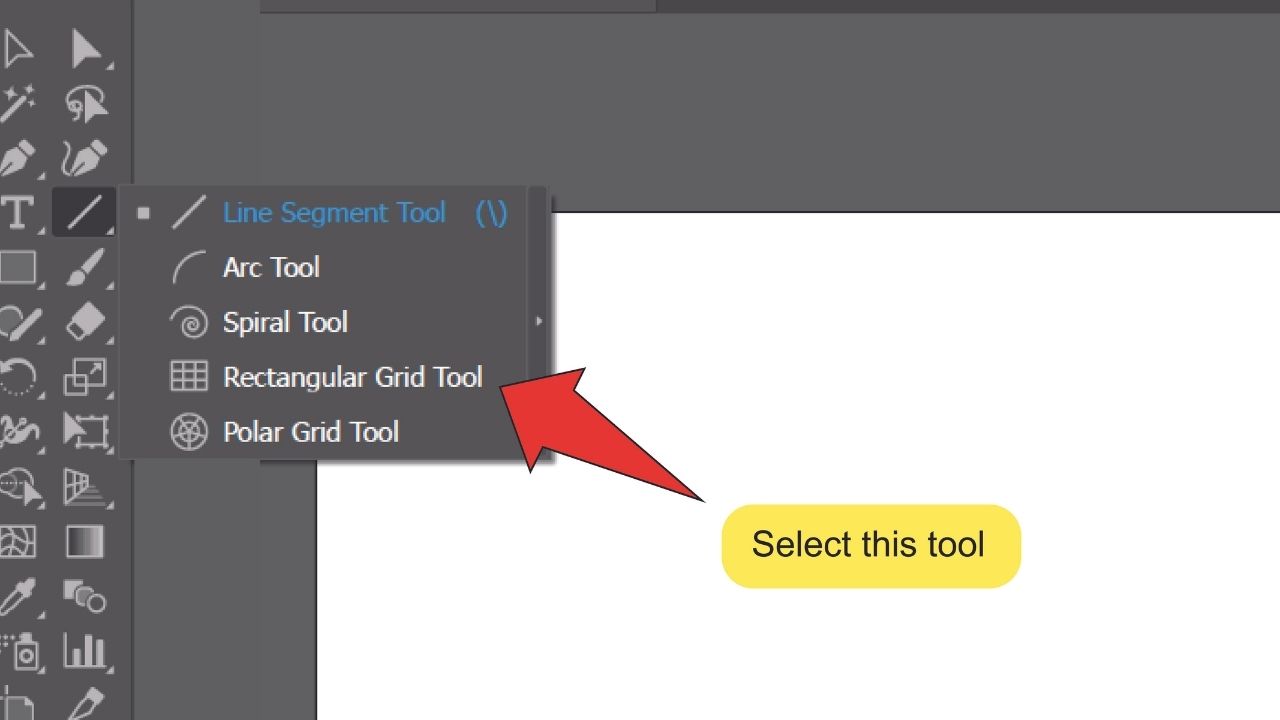 Look for the Line Segment tool on the toolbar on the left side of your screen. Right-click the Line Segment tool icon and click on the Rectangular Grid tool icon that pops up.
Step 2: Adjust your grid settings.

With the Rectangular Grid tool equipped, click anywhere on your artboard to open the Rectangular Grid Tool Options window. Once opened, enter the height and width of your grid under the “Default Size” tab.
Next, enter the amount of horizontal and vertical dividers your grid should have in their respective tabs. The number you enter should be one less than the number of rows and/or columns you want your grid to have.
You can also use the sliders under the tabs to determine how far the horizontal and vertical lines in the grid will be skewed to one side or another.
Step 3: Finalize your grid design.
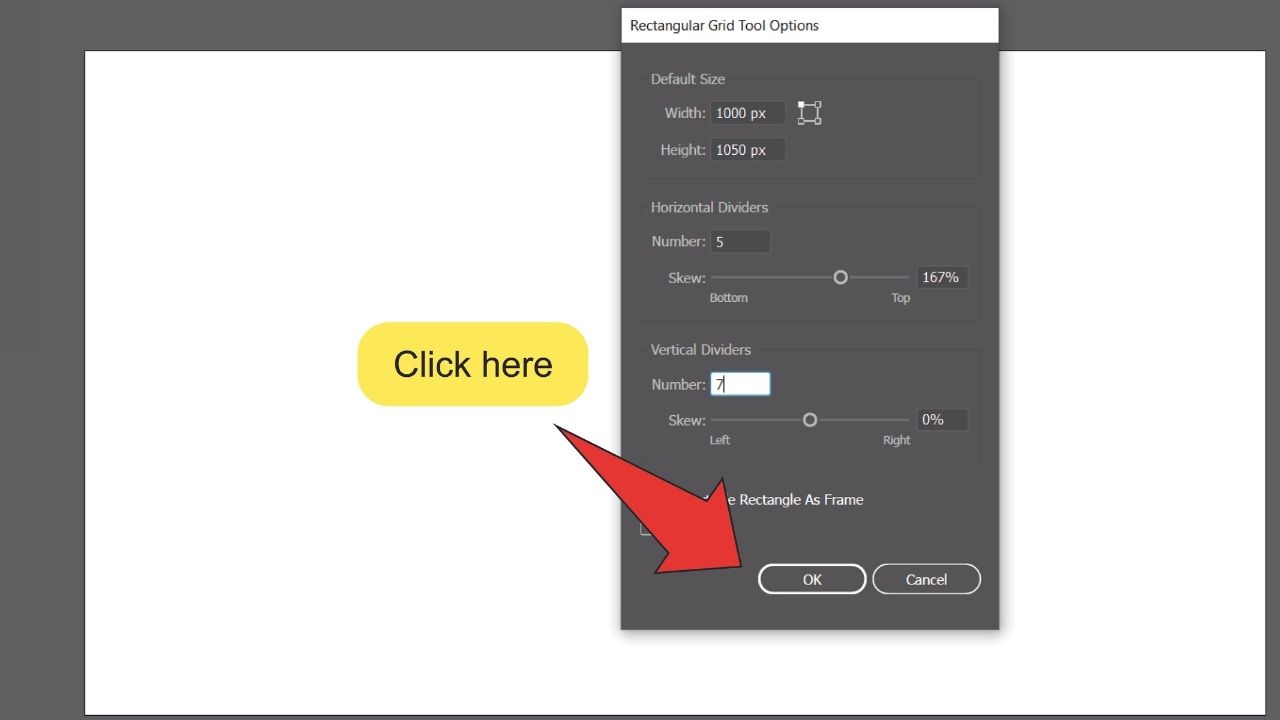
Click the “OK” button at the bottom of the Rectangular Grid Tool Options window to finalize your settings.
Making An Isometric Grid In Illustrator
To make an isometric grid in Illustrator, follow these steps:
Step 1: Make a Rectangular grid.
To start off your Isometric grid, follow the steps listed above for making a Rectangular grid. Make sure to put a high number of rows and columns in your grid.
Step 2: Open the Align panel.
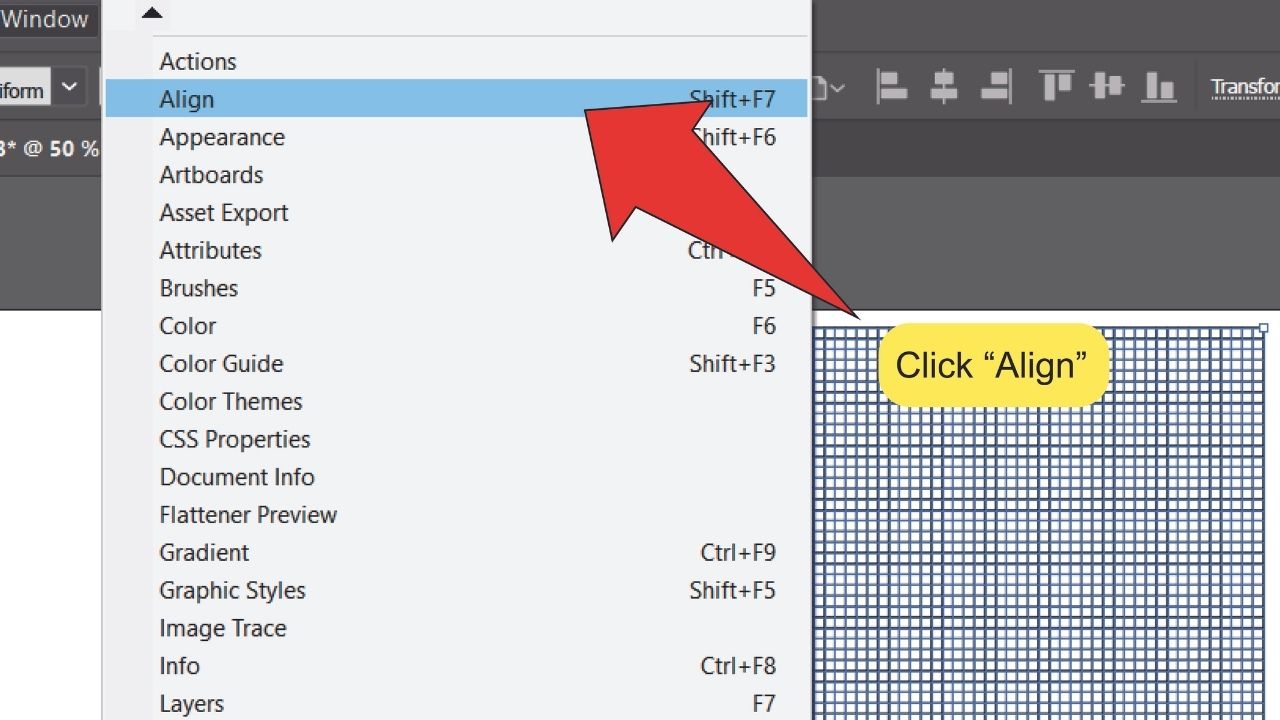
On the menu at the top of your screen, go to “Window”, then click on “Align”. To speed things up, you can also press “Shift+F7” on your keyboard to open the panel.
Step 3: Align your grid.
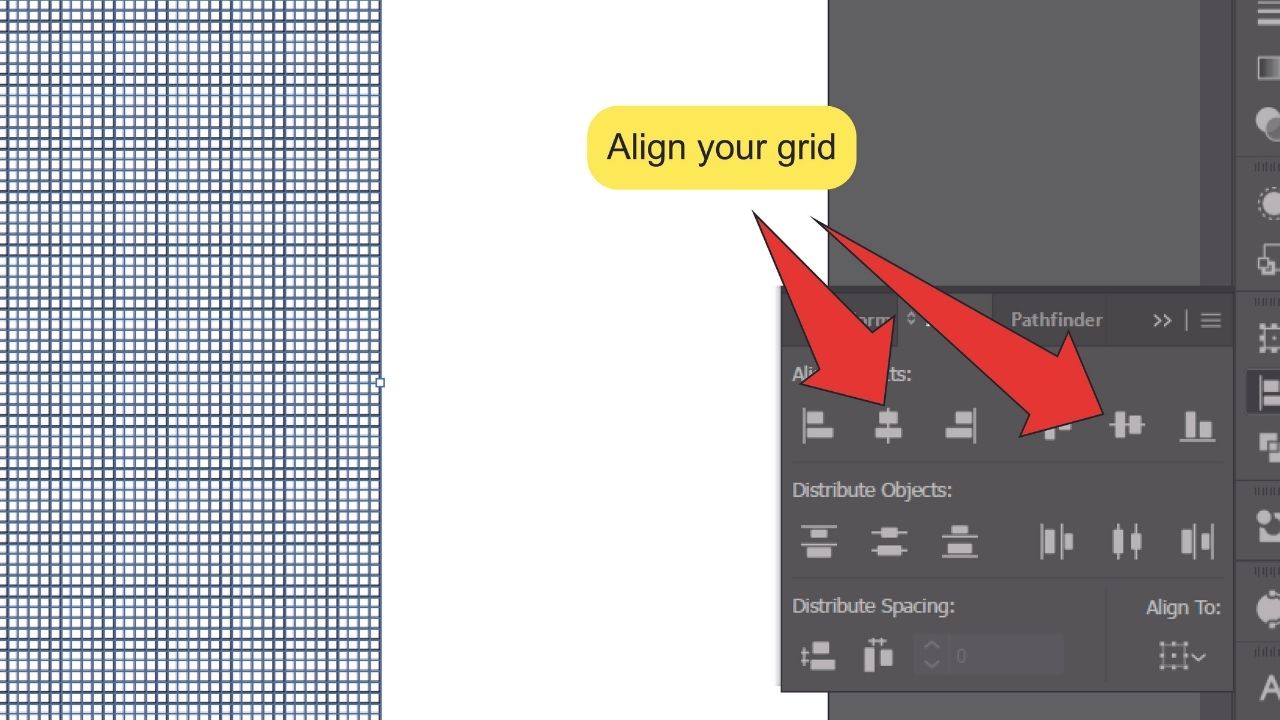
With your grid selected, click the icons under the “Align Objects” section of the Align panel to align your grid to the center of your artboard.
Step 4: Find and select the Selection tool.
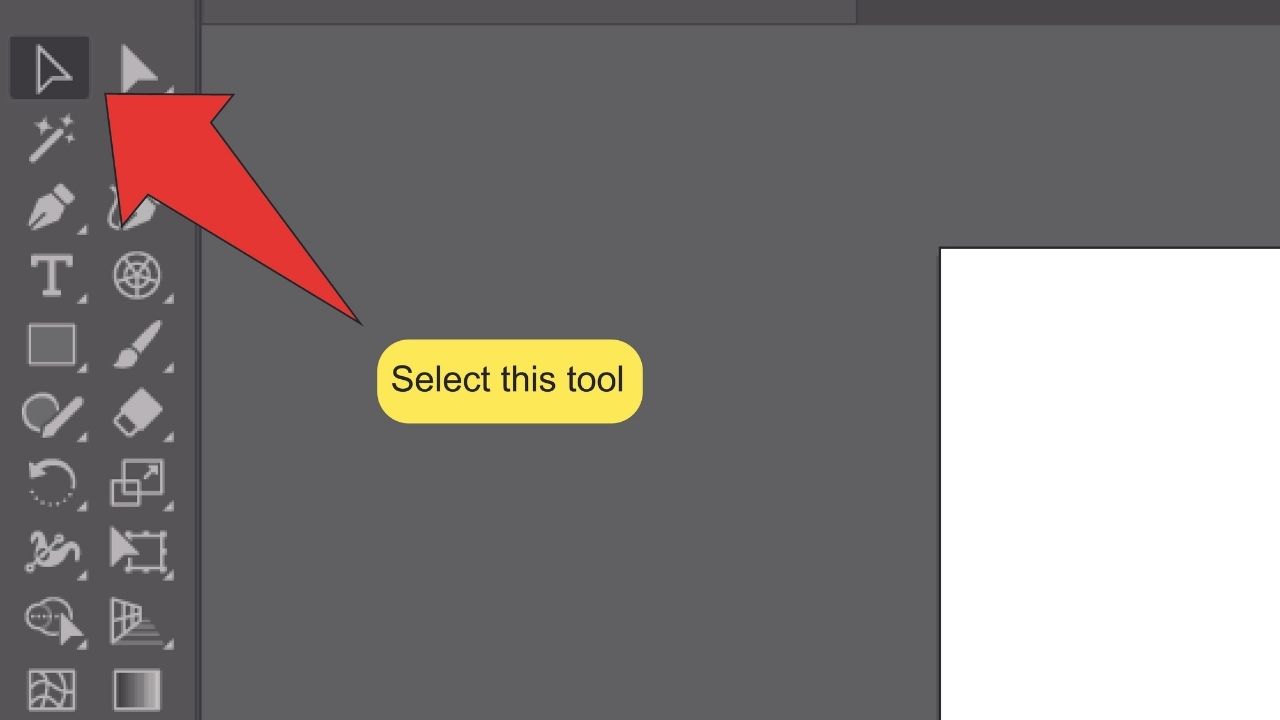
Look for the Selection tool, located on the toolbar on the left side of your screen. Alternatively, you can use the keyboard shortcut “V” to quick-select the tool.
Step 5: Rotate your grid.
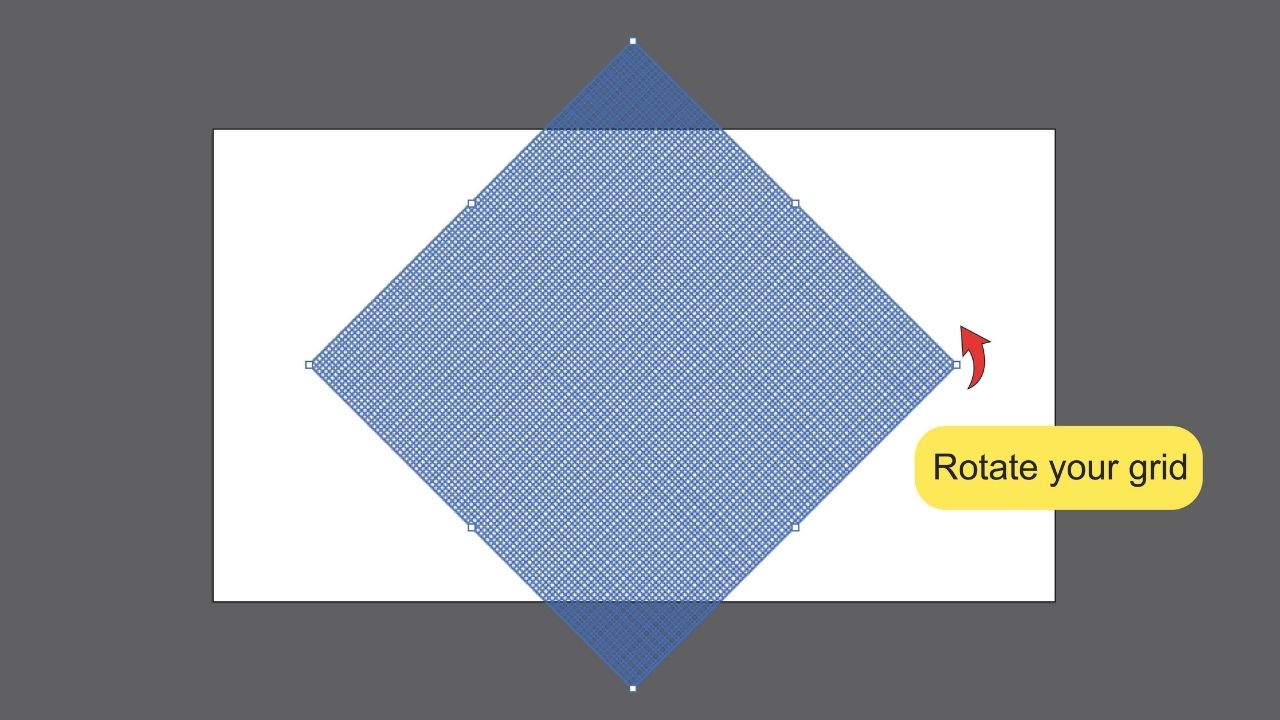
While your grid is selected, its border and the dividers running through it should be highlighted. There should also be anchor points visible on and mid-way between the corners of your grid.
With the Selection tool equipped, hover your cursor outside the border of the grid near any visible anchor point. Hold the “Shift” key while clicking and rotate your grid 45 degrees so it goes from a square shape to a diamond shape.
Step 6: Open the Scale window.
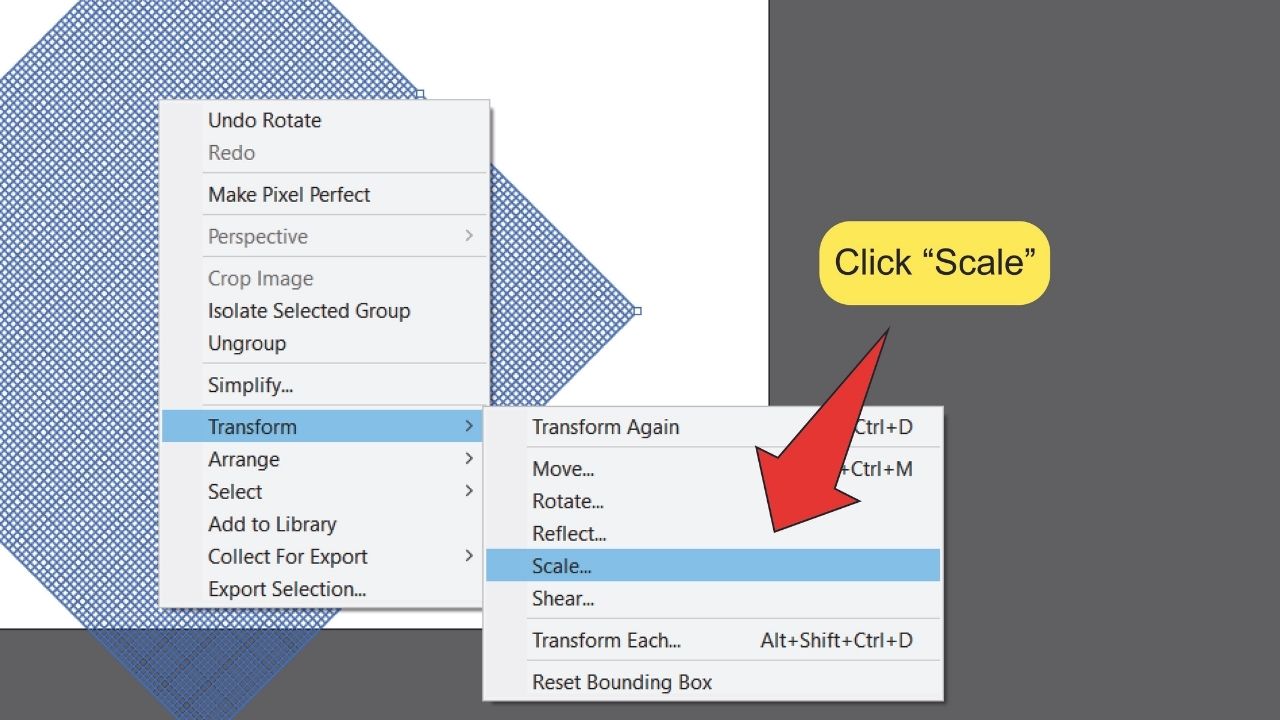
Right-click on your grid, then go to “Transform” and click on “Scale…”. This will open the Scale window.
Step 7: Scale your grid.
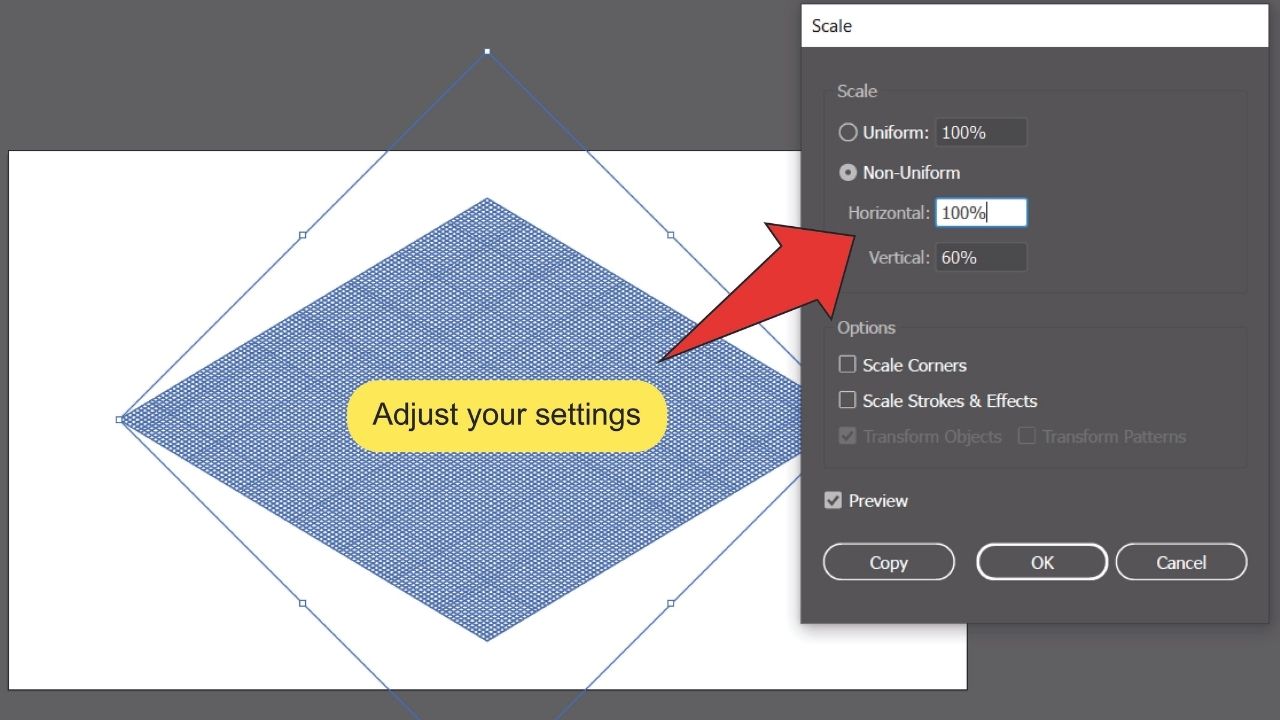
In the Scale window, select “Non-Uniform” and scale your grid horizontally by 100% and vertically by 60%. Next, click the “OK” button at the bottom of the window.
Step 8: Size your grid up. 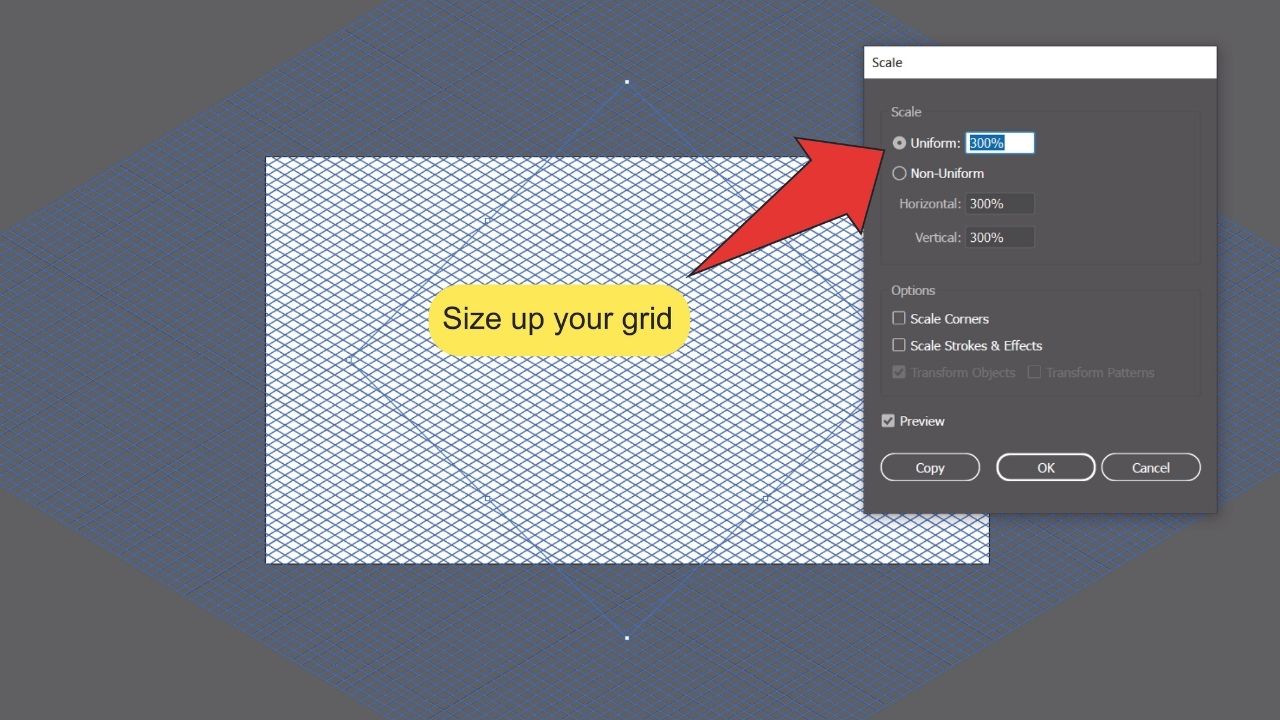
Right-click on your grid and open the Scale window again. This time, select the “Uniform” option and enter the value of the percentage you need to scale up your grid to cover your entire artboard.
It helps to keep the “Preview” option selected while you do this.
After you find the correct value, click the “OK” button at the bottom of the window.
How to Make a Circular Polar Grid In Illustrator
To make a circular polar grid in Illustrator, equip the Polar Grid tool. Click anywhere on your artboard to open the Polar Grid Tool Options Window. Use this window to adjust the size of your grid and the number and skew of the dividers in it. Click on “OK” to confirm.
This method works well for circular designs and infographics.
To make a circular polar grid in Illustrator, follow these steps:
Step 1:
Find and select the Polar Grid tool.
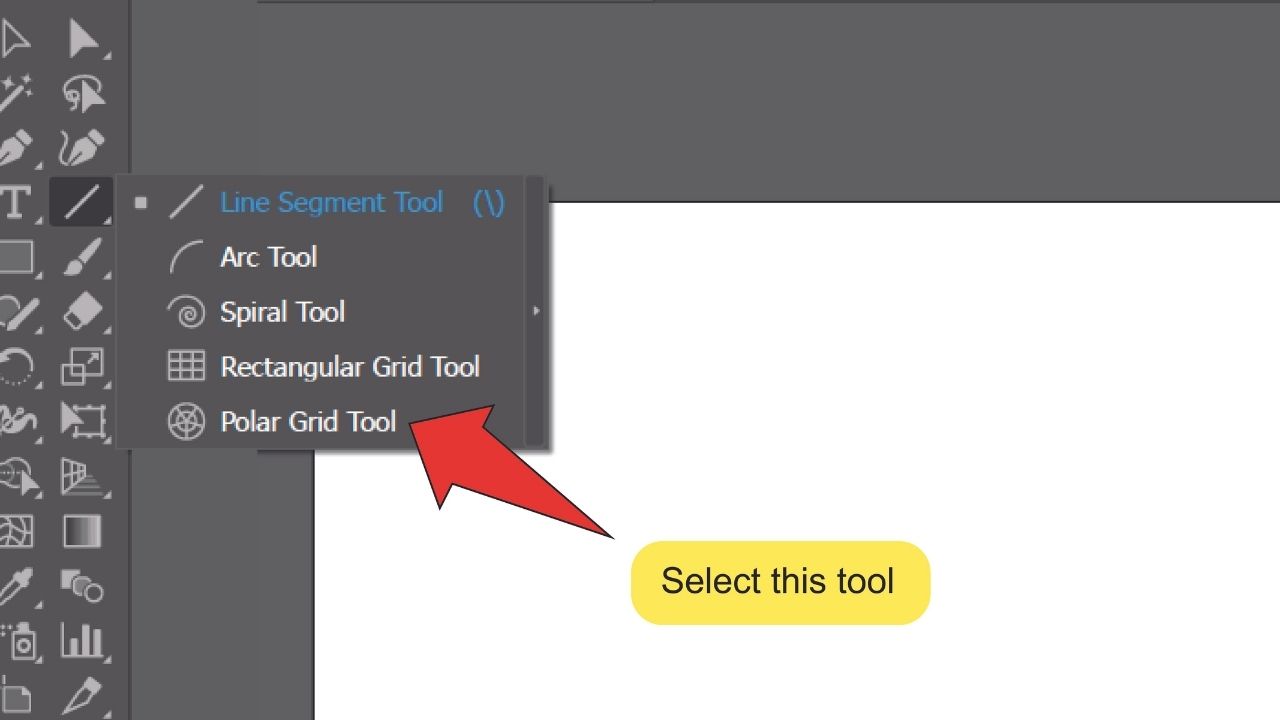
Look for the Line Segment tool on the toolbar on the left side of your screen. Right-click the Line Segment tool icon and click on the Polar Grid tool icon that pops up.
Step 2:
Establish your grid settings.
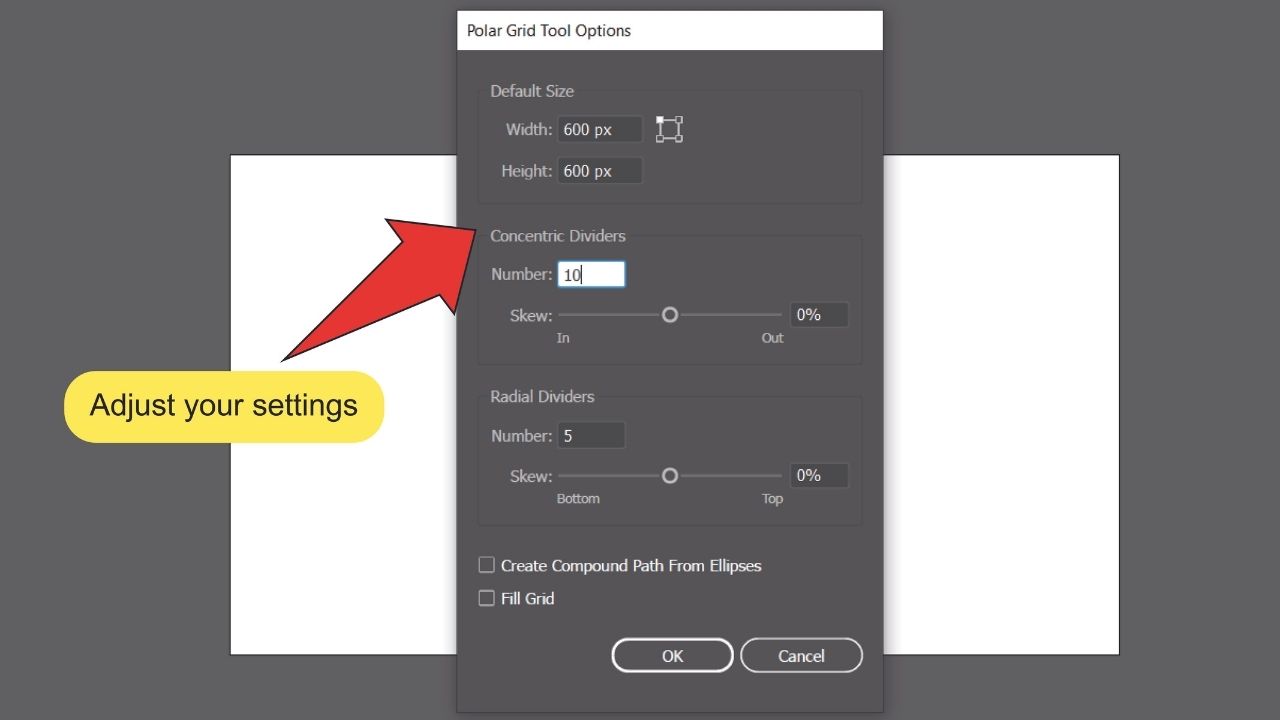
With the Polar Grid tool equipped, click anywhere on your artboard to open the Polar Grid Tool Options window. Like with the Rectangular grid, you can use this window to adjust the size of your grid and the number and skew of the dividers in it.
Step 3:Finalize your grid design. 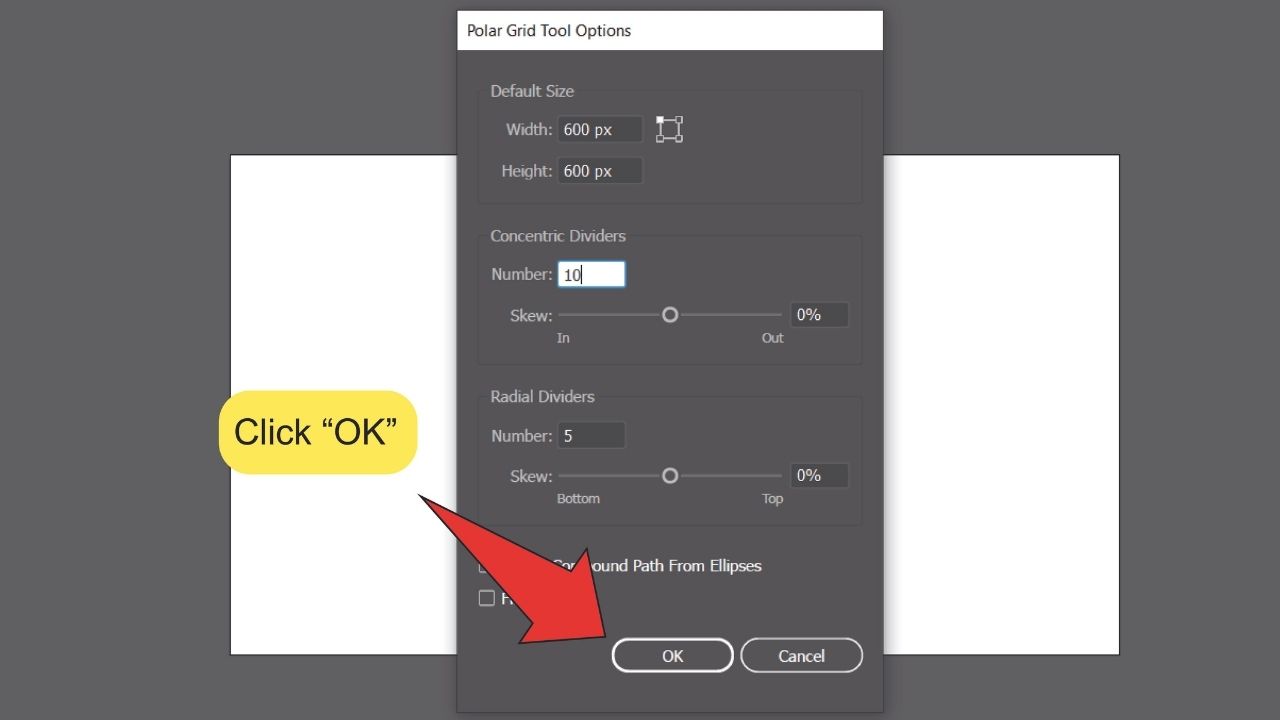
Click the “OK” button at the bottom of the Polar Grid Tool Options window to finalize your settings.
Grids are useful for designing with precision; professional graphic designers use them daily.
The most common grids are square ones, and they are also the easiest to make.
Square grids can be used as guides or objects, so we will cover how to make both.
Let’s dive in!
Bonus: How to Make a Square Grid in Illustrator
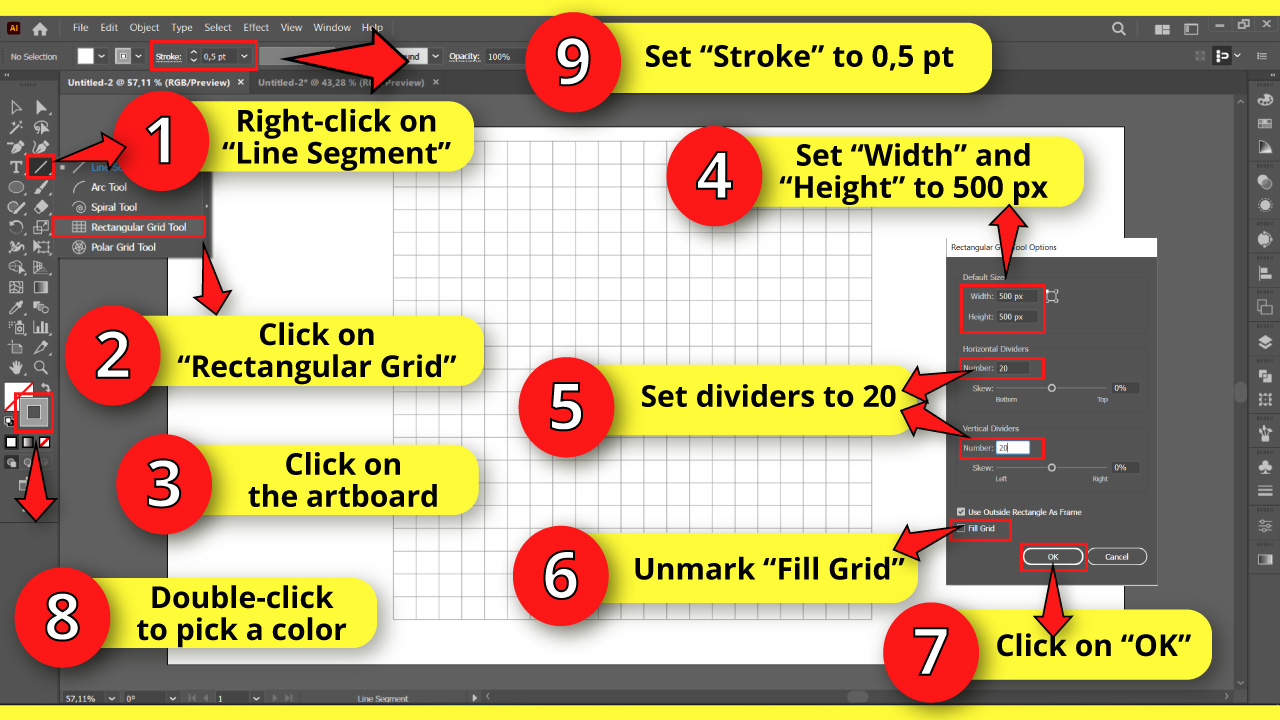
Right-click on the “Line Segment” (\) tool located on the left-side toolbar. Once the hidden tools menu unfolds, click on the “Rectangular Grid” tool.
Then, click anywhere on the artboard to open the “Rectangular Grid Tool Options” window.
If you want to create a perfect square grid, set the “Width” and “Height” to the same size. For example, I’ll go with 500 px as described in the screenshot above but, of course, you can choose whatever pixel size you want here.
Next, enter the number of “Horizontal” and “Vertical” dividers. To get a square grid, you need to enter the same number for both “Horizontal” and “Vertical”. For example, I’ll enter 20.
If you don’t want the grid to have a fill, uncheck the “Fill Grid” checkbox. Then, click on “OK” to save.
After creating the grid, you can change its color by double-clicking on the “Stroke” color box, located on the left-side toolbar, to pick a color. For example, I’ll pick gray.
Finally, to modify the grid lines’ weight, make sure that the grid is still selected and go to the toolbar at the top of the screen.
On the “Stroke” field enter your desired number. For example, I’ll go with 0.5 pt.
One of the possible uses of grids is creating a table in Illustrator.
Frequently Asked Questions About How To Make A Grid In Illustrator
How do I keep my grid from getting in the way while I work?
Lower the opacity of your grid so it’s easier to see through and create a new layer under it to work on.
Is there another way to place my grid?
Yes. Simply click on your artboard while the Rectangular or Polar Grid tools are selected and drag your cursor until your grid reaches the desired scale.