

Oh! I’ve got to create a newsletter for our English project. But, creating a newsletter entails adding vertical lines to my document.
I can easily insert vertical lines when I’m creating my newsletter in Microsoft Word.
But how can you insert vertical lines in Google Docs?
Let’s find out!
How to Add a Vertical Line in Google Docs
How to Draw a Vertical Line in Google Docs with Paragraph Borders
Vertical Line in Google Docs Shortcut
How to Insert Vertical Lines as Text Column Divisions in Google Docs
Frequently Asked Questions about How to Add a Vertical Line in Google Docs
How to Add a Vertical Line in Google Docs
To add a vertical line in Google Docs, go to Insert > Drawing > New. In the Drawing toolbar, select “Line,” then opt for the “Line” option. Click, hold, and drag the cursor downward to create a vertical line. For precise alignment at a 90-degree angle, press and hold the Shift key while drawing.
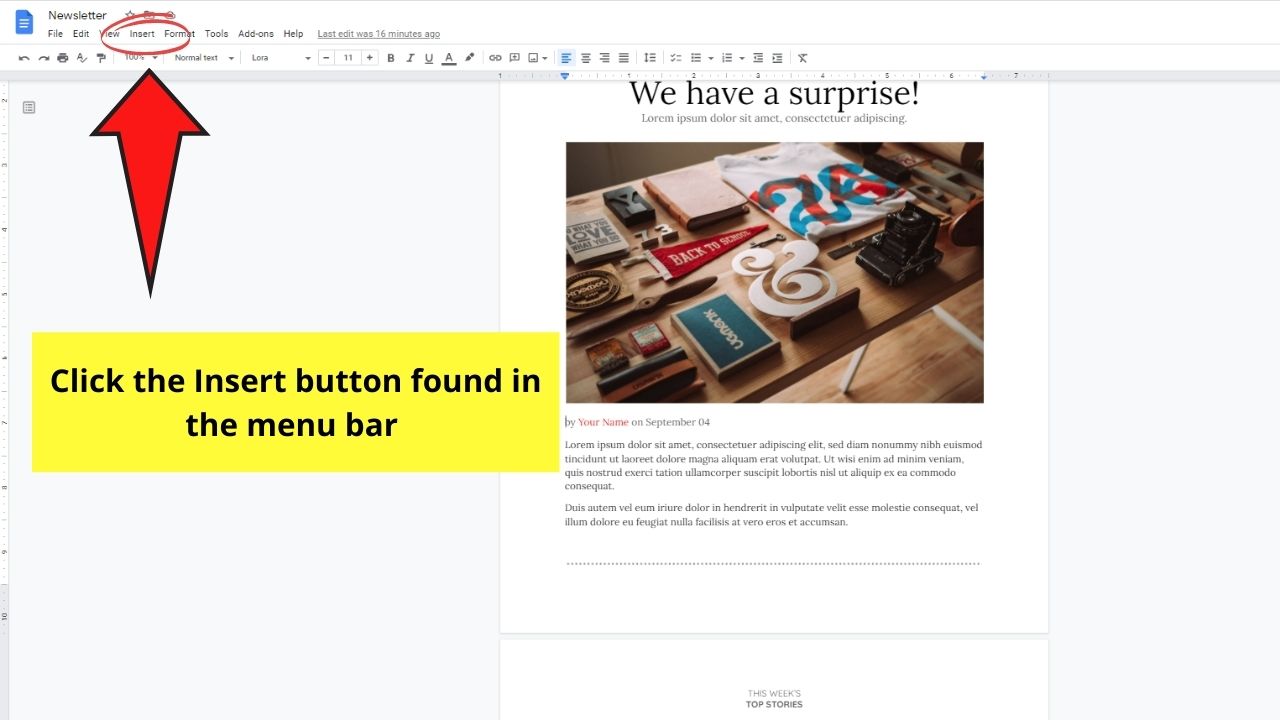
Step 1: Once you’re inside the document, head to the menu bar and select the Insert button. A dropdown menu will then appear after you click it.

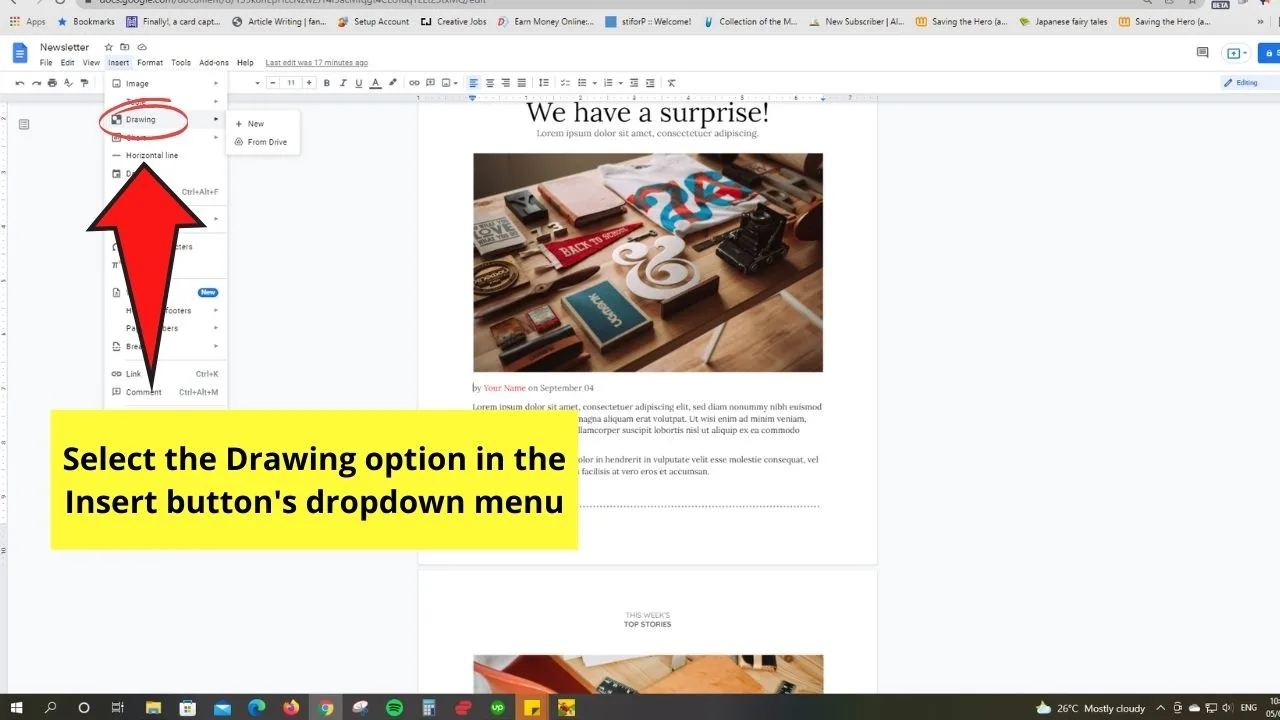
Step 2: On the dropdown menu, choose the Drawing option. Hover the cursor over the right-facing arrow to activate another dropdown menu.

Step 3: Now, it’s time to draw the vertical line.
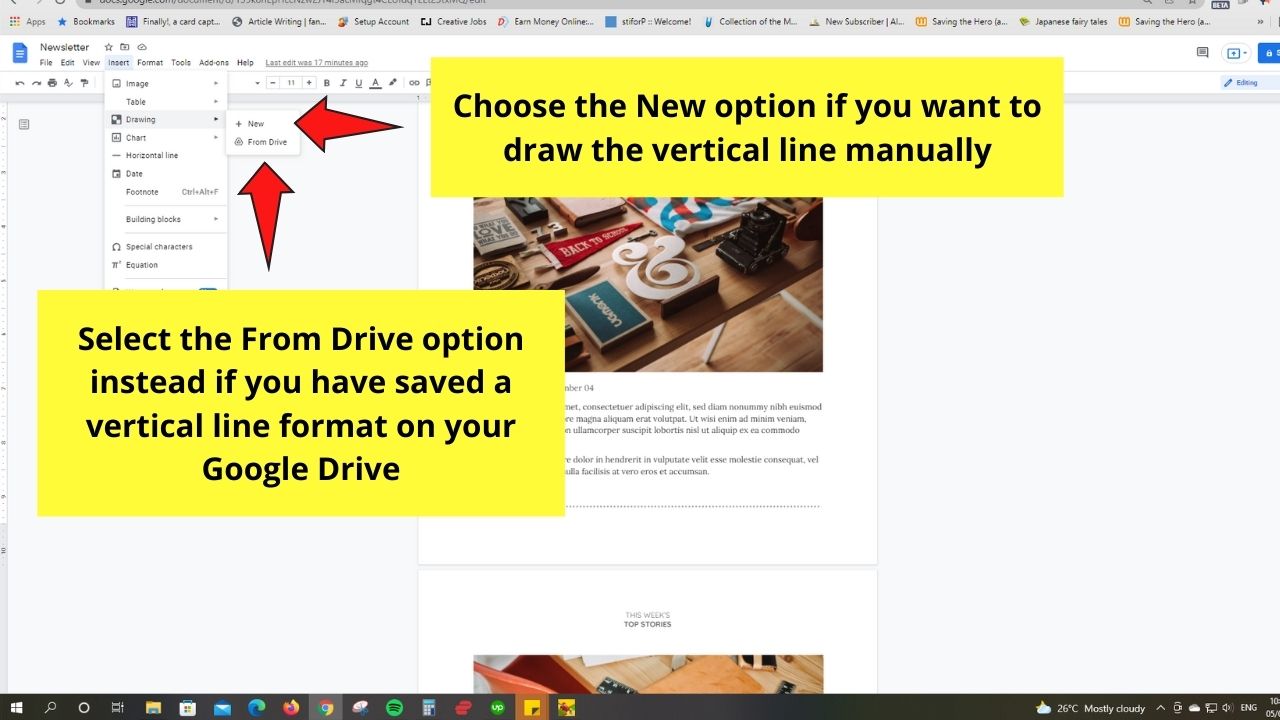

Select the New button if you prefer creating a vertical line manually.
But, choose the From Drive option instead if you already saved a template of a vertical line in your Google Drive.
This move allows you to import the file and seamlessly insert it into the document.
Yet, for this example, we’ll proceed with selecting the New button.
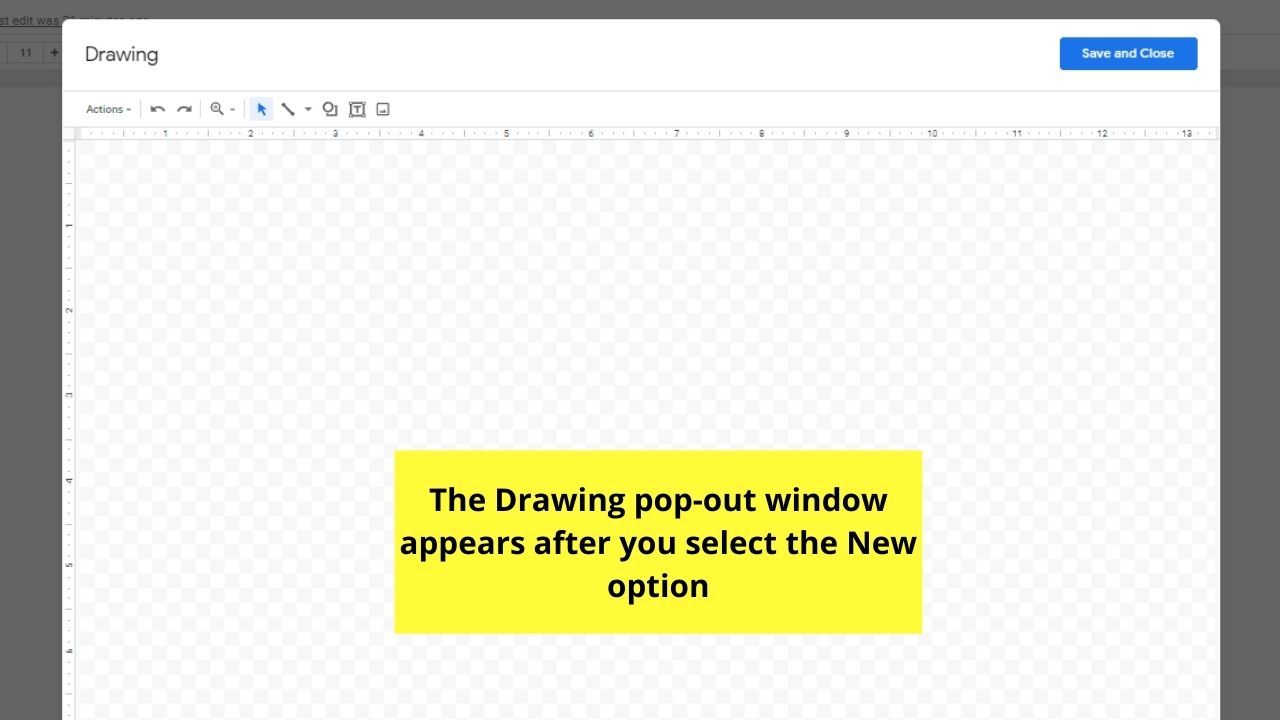
Step 4: After selecting the New button, a window will appear. This window serves as the area where you can draw and format the vertical line you’ll create.

Step 5: Start drawing your vertical line. First, click “Line” on the toolbar. Then, choose the Line option appearing in the dropdown menu.

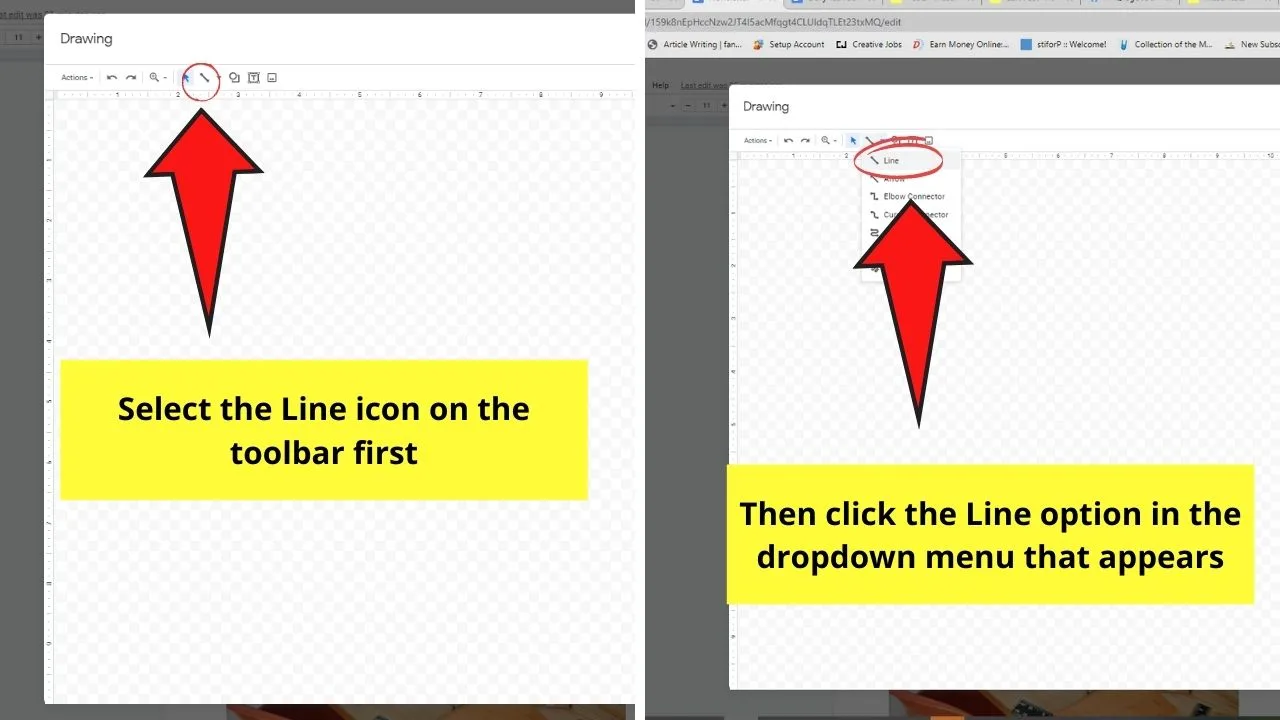


After which, click and drag the cursor downwards until you achieve the length of the vertical line you desire.


You can just create your vertical line with that simple step.
But, if you’re concerned with the line’s straightness, press Shift while dragging the cursor across the drawing window to ensure it stays straight.
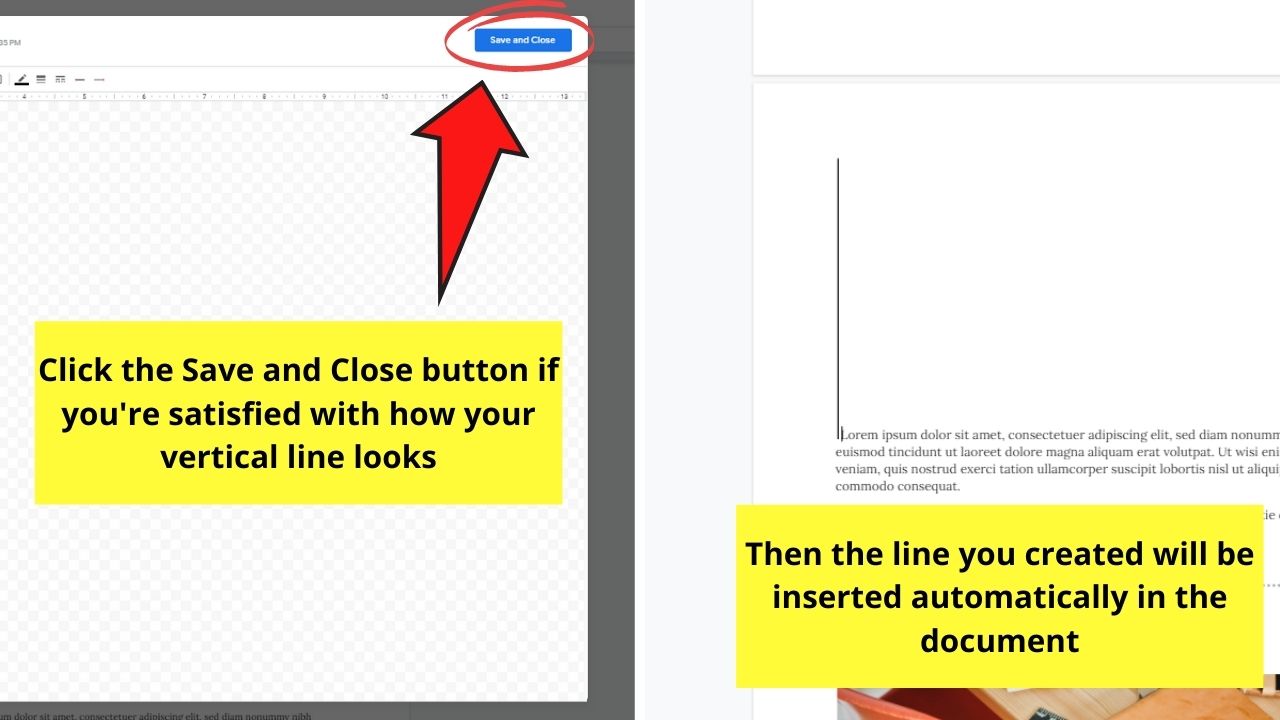
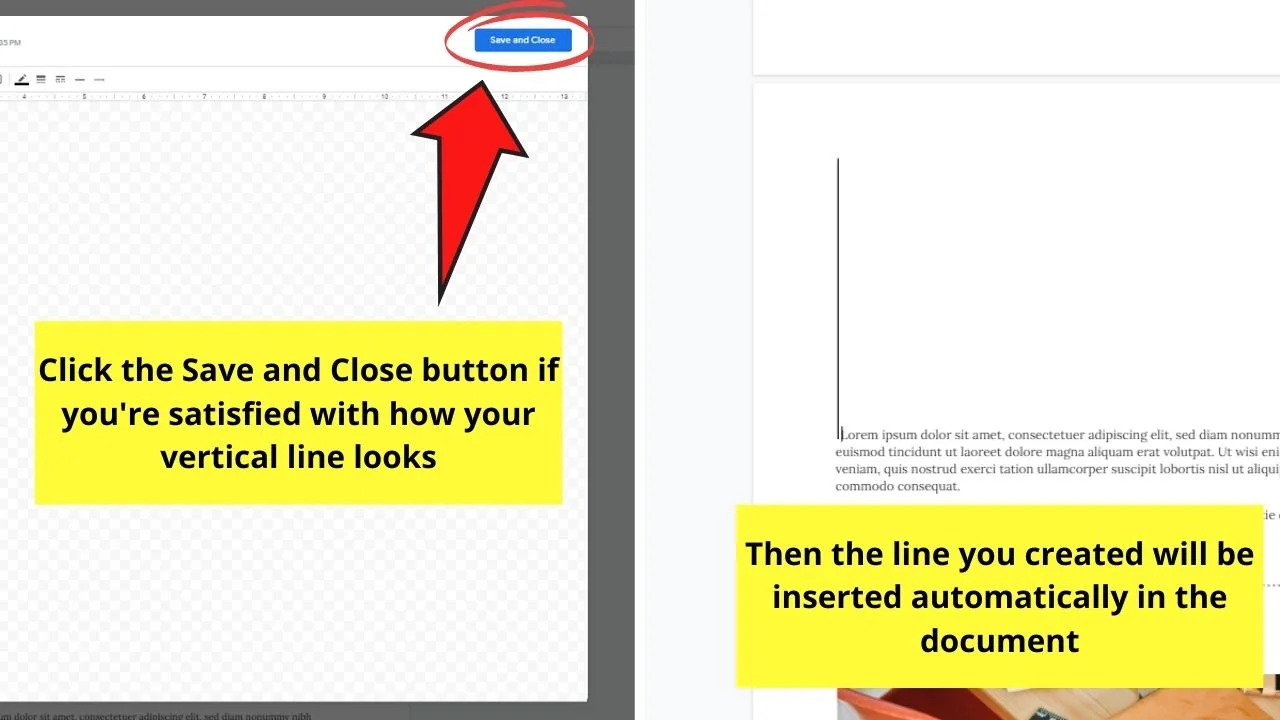
Step 6: If you’re okay with how the vertical line looks, click the Save and Close button to insert it immediately into the document.
But, if you want to enhance the vertical line’s look, format it. Click the Weight button to adjust the line’s thickness.
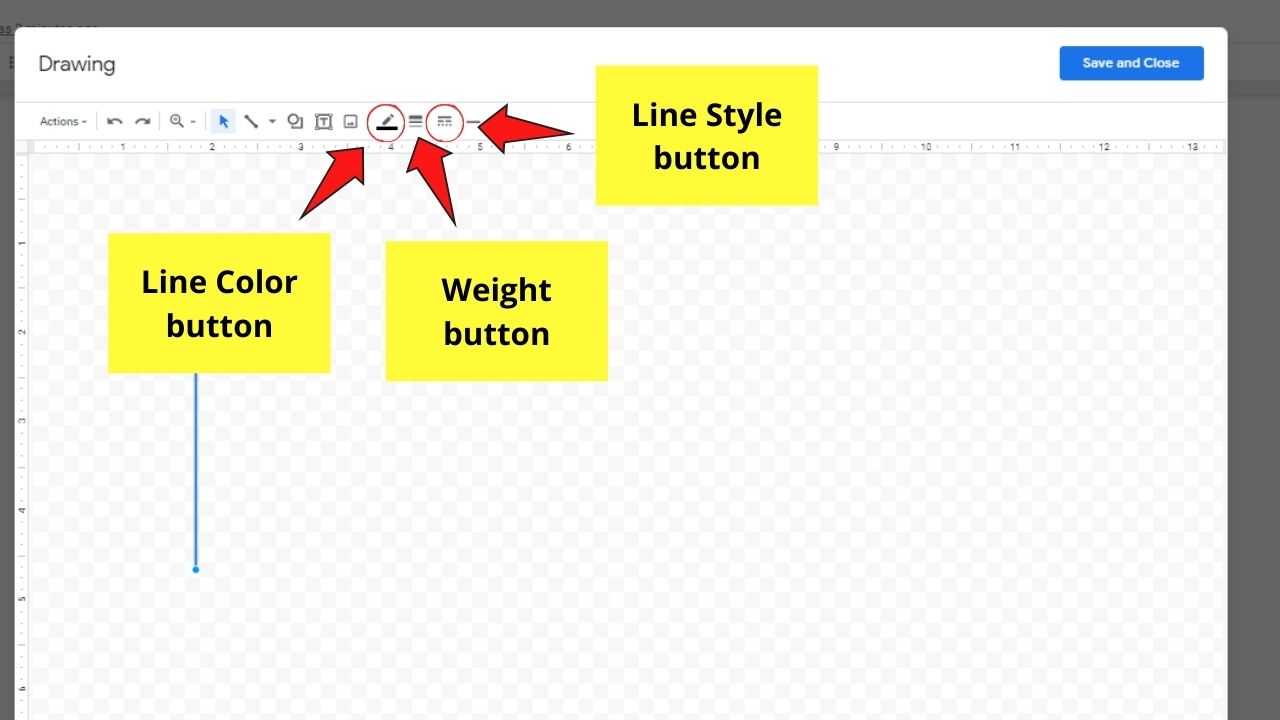

Select the Line Style button beside the Weight button to change how your line looks.
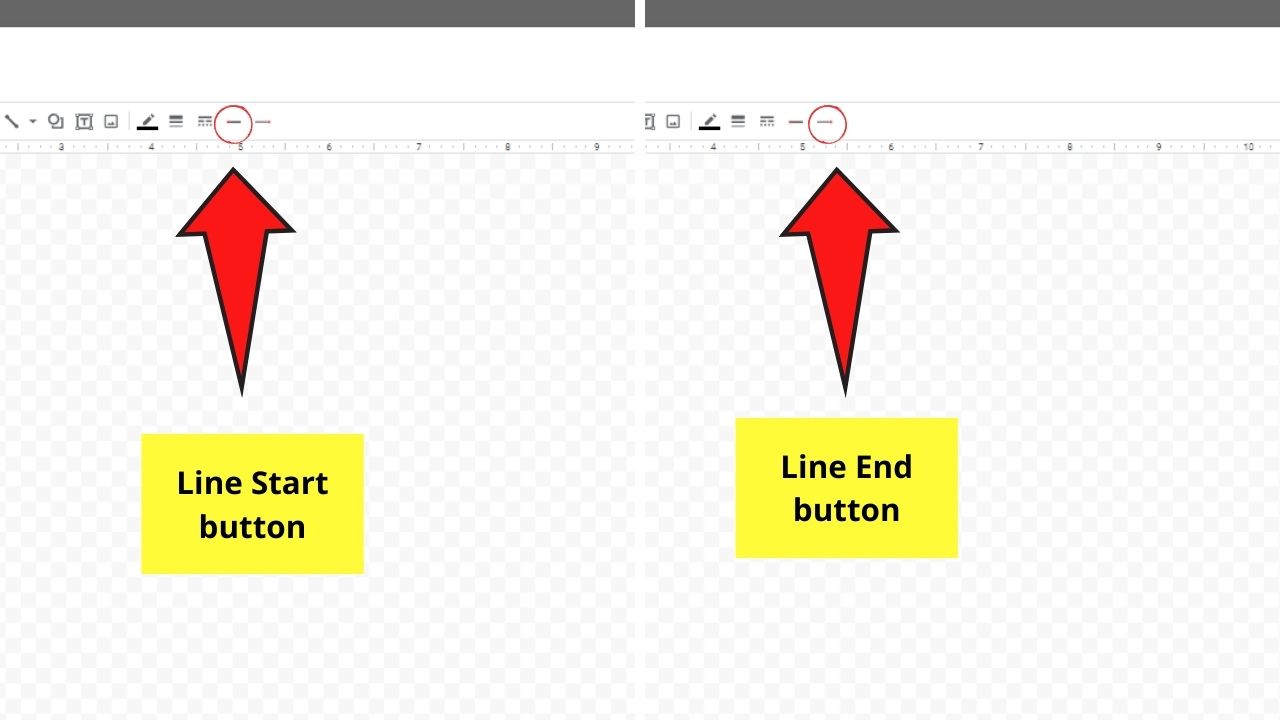
To edit how the start or end of the line looks, click either the Line start or Line end options to change them accordingly.

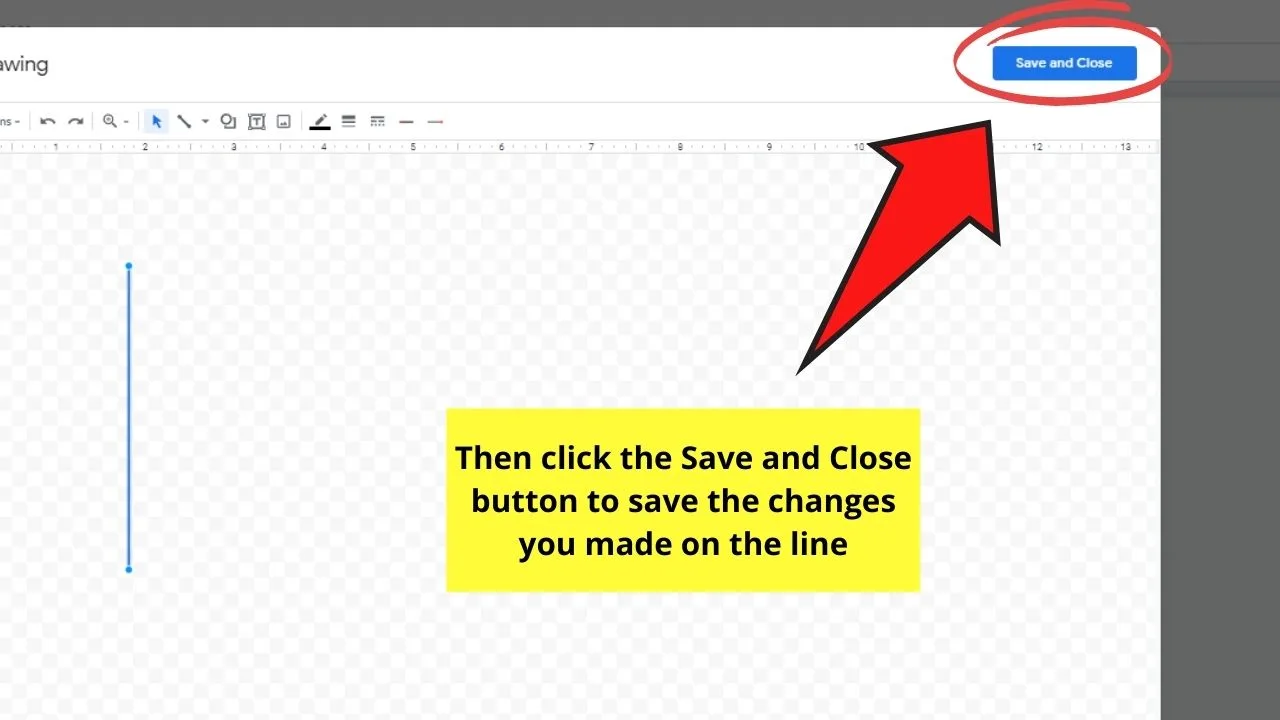
Then, click Save and Close to save and insert the newly-created vertical line into the document.

But, what if you don’t want the vertical line you created to break the text? Well, here’s another workaround that you can use.
How to Draw a Vertical Line in Google Docs with Paragraph Borders
Paragraph borders are vertical lines that surround a particular paragraph in the document.
Whether those paragraph borders are for decorative or for emphasis purposes, here’s how you can add them in Google Docs.
To draw a vertical line in Google Docs with paragraph borders, follow these steps:
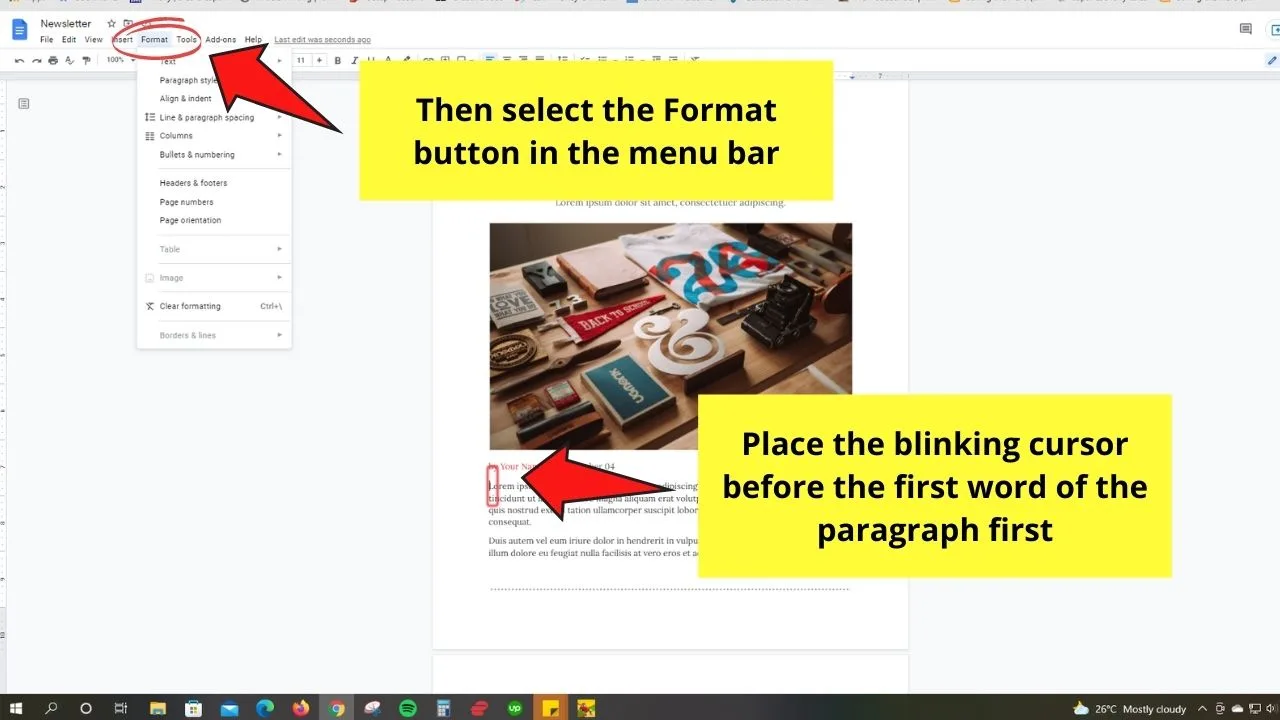
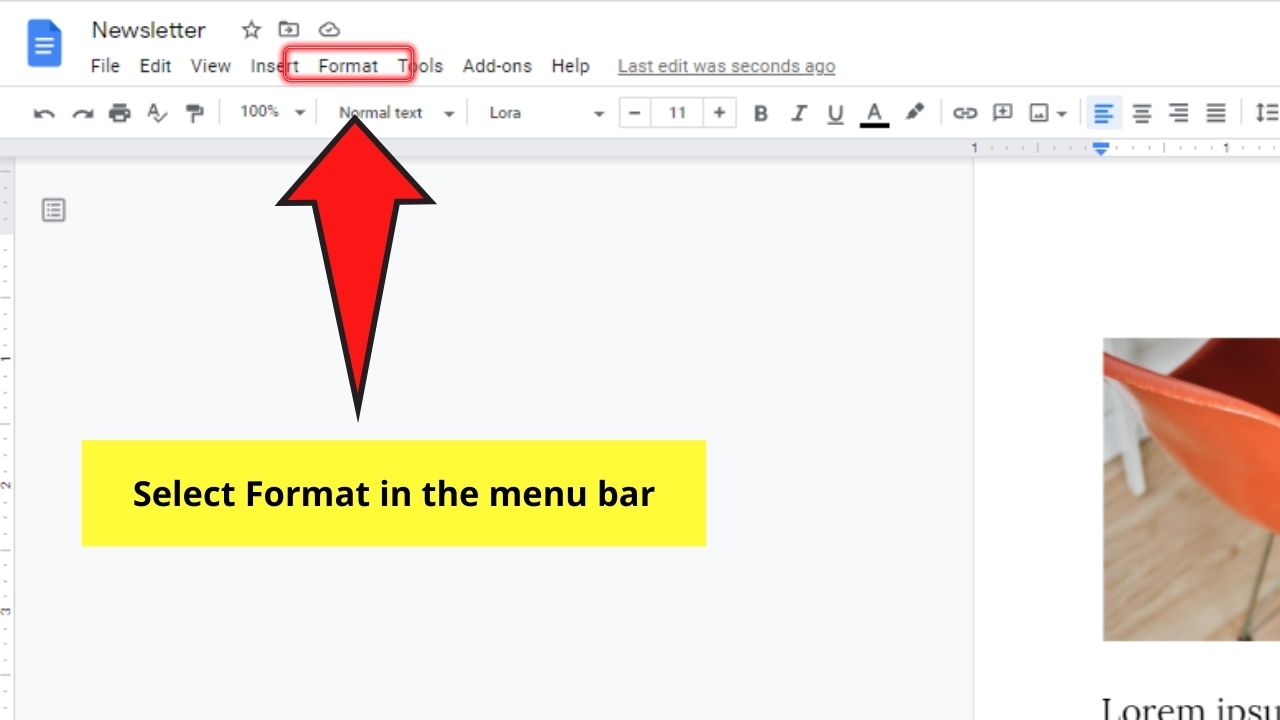
Step 1: First, place the blinking cursor before the first word of the paragraph you want to add the paragraph border. Then, head to the menu bar and select the Format button.

A dropdown menu will then appear after selecting this option.
Step 2: Scroll down the dropdown menu until you see the Paragraph Styles option. Select it to activate another dropdown menu to its right.


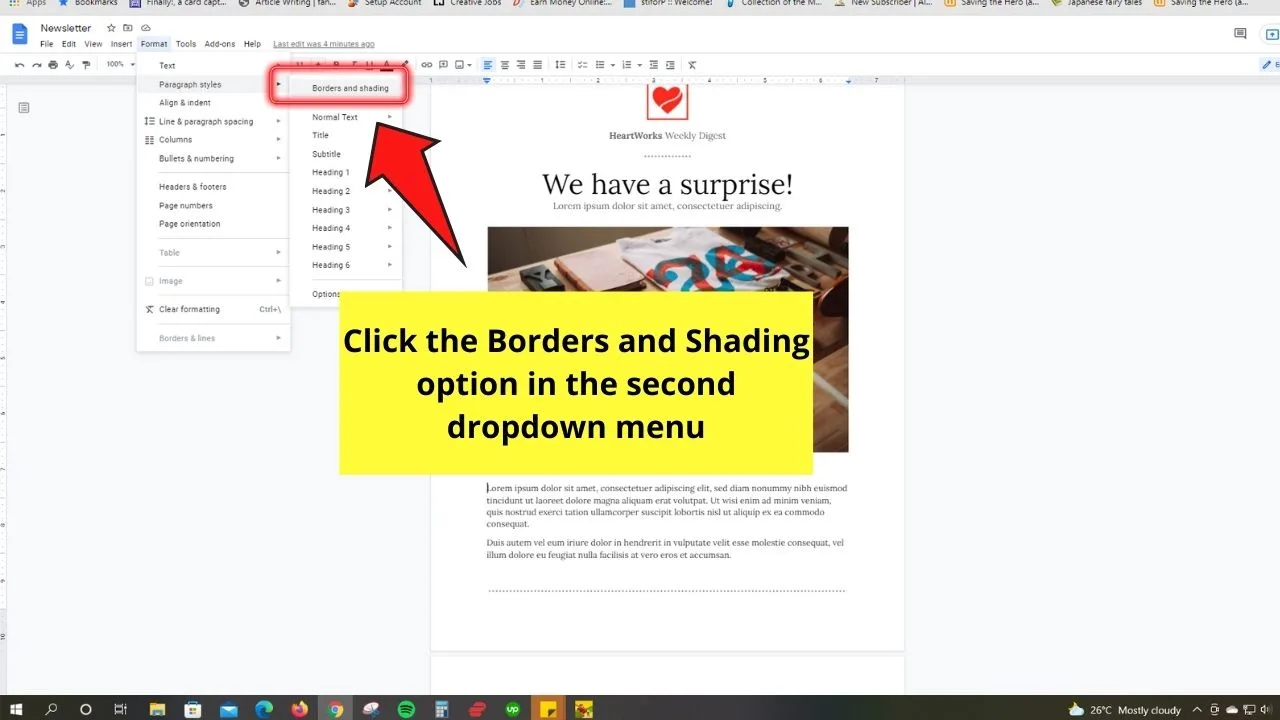
Step 3: In the Paragraph Styles section, choose the Borders and shading button.

This will then activate a window where you can edit the shading and border settings of the paragraph borders.
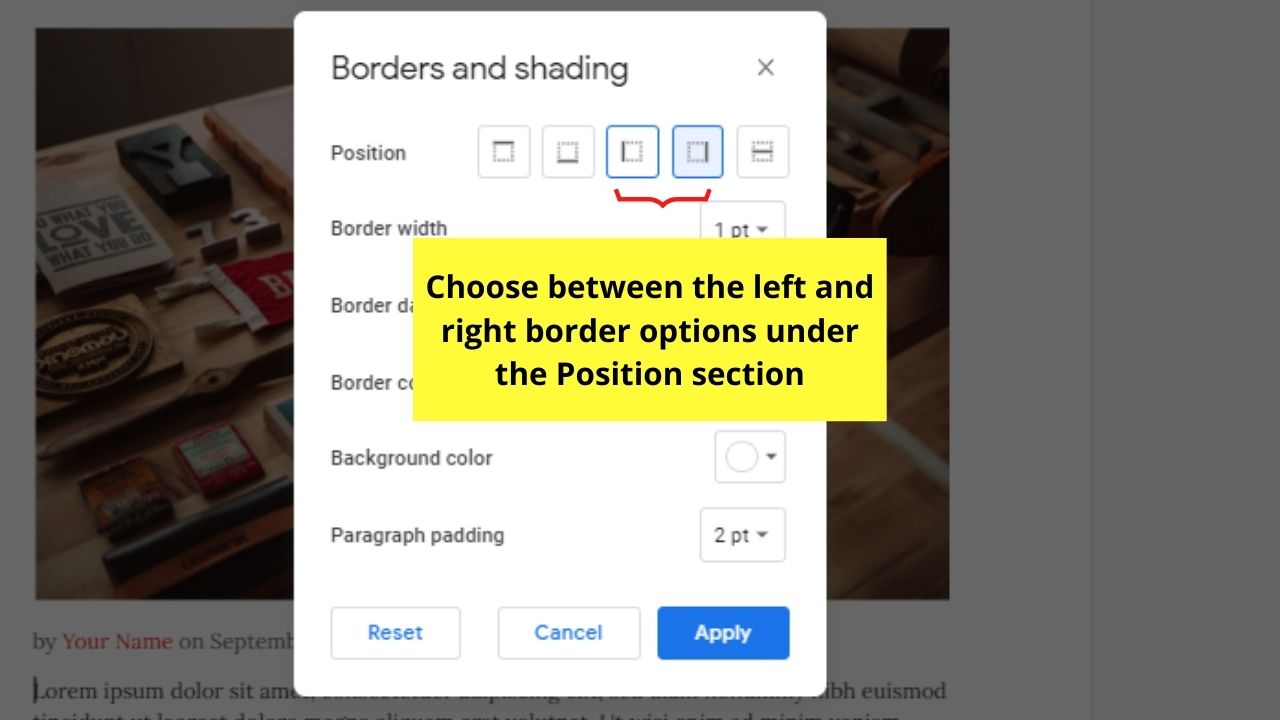

In the Position section, select where you’re adding the line. Since we’re aiming for paragraph borders, only choose from the left and right border positions.
Step 4: If you want to stylize your paragraph borders, adjust the Border dash, Border width, Paragraph padding, and Background colors parameters accordingly.
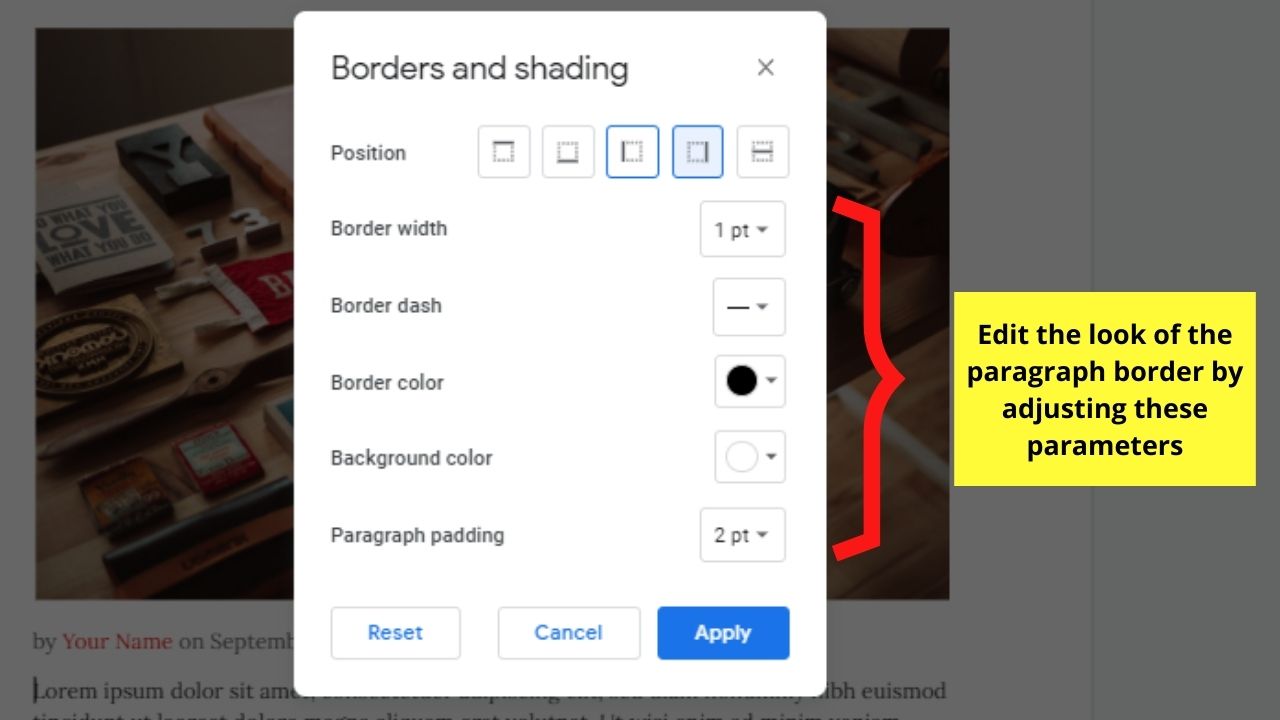

This step’s completely optional. If you only want a simple vertical line as a paragraph border, head to the next step.
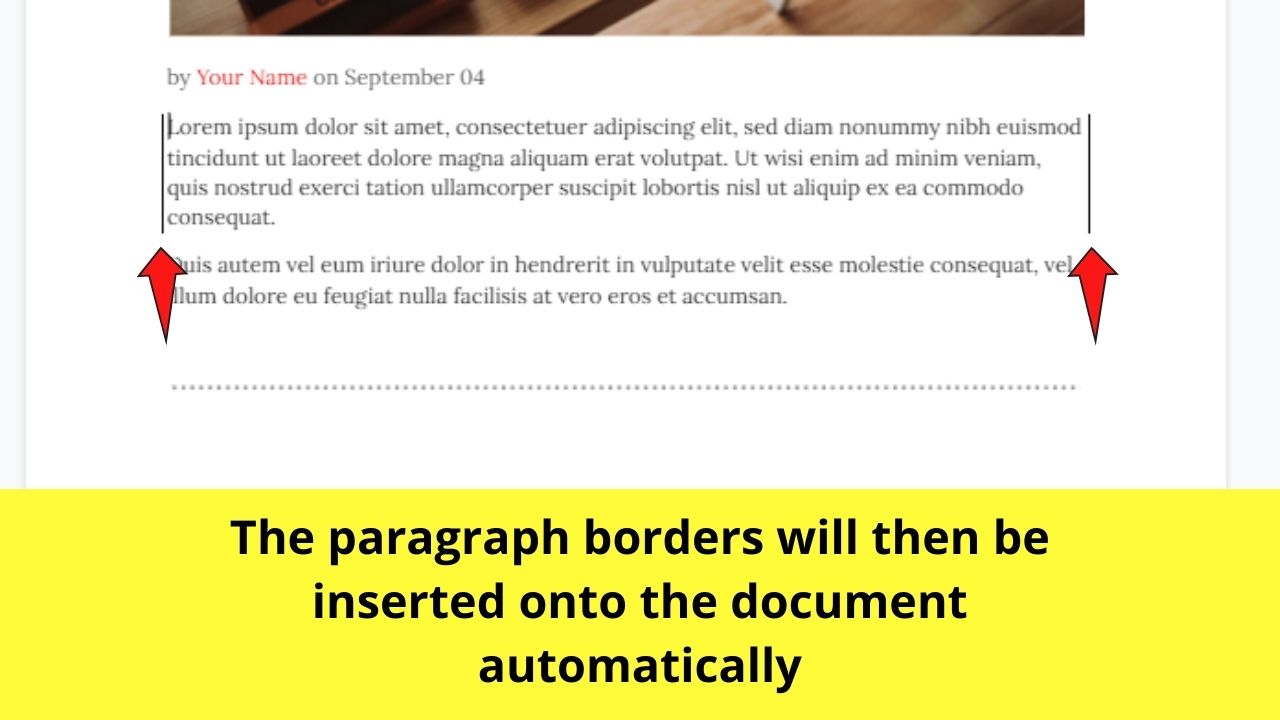
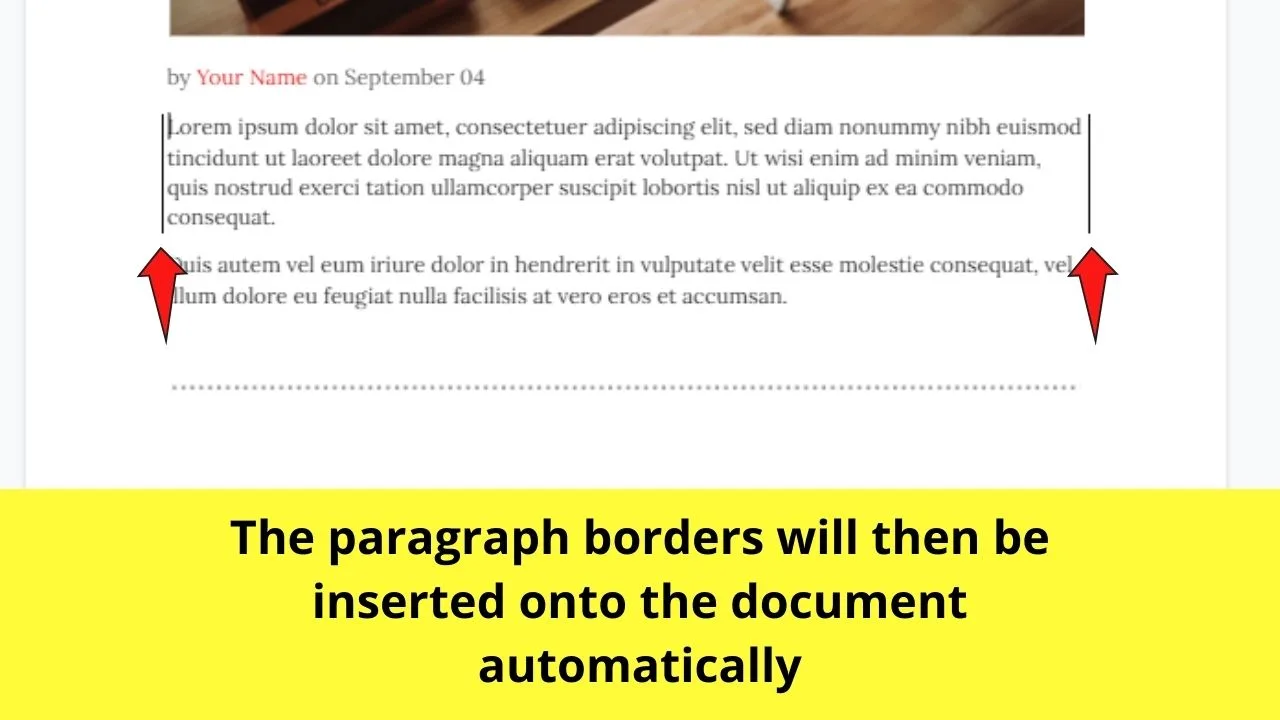
Step 5: To save the paragraph border settings, click the Apply button.
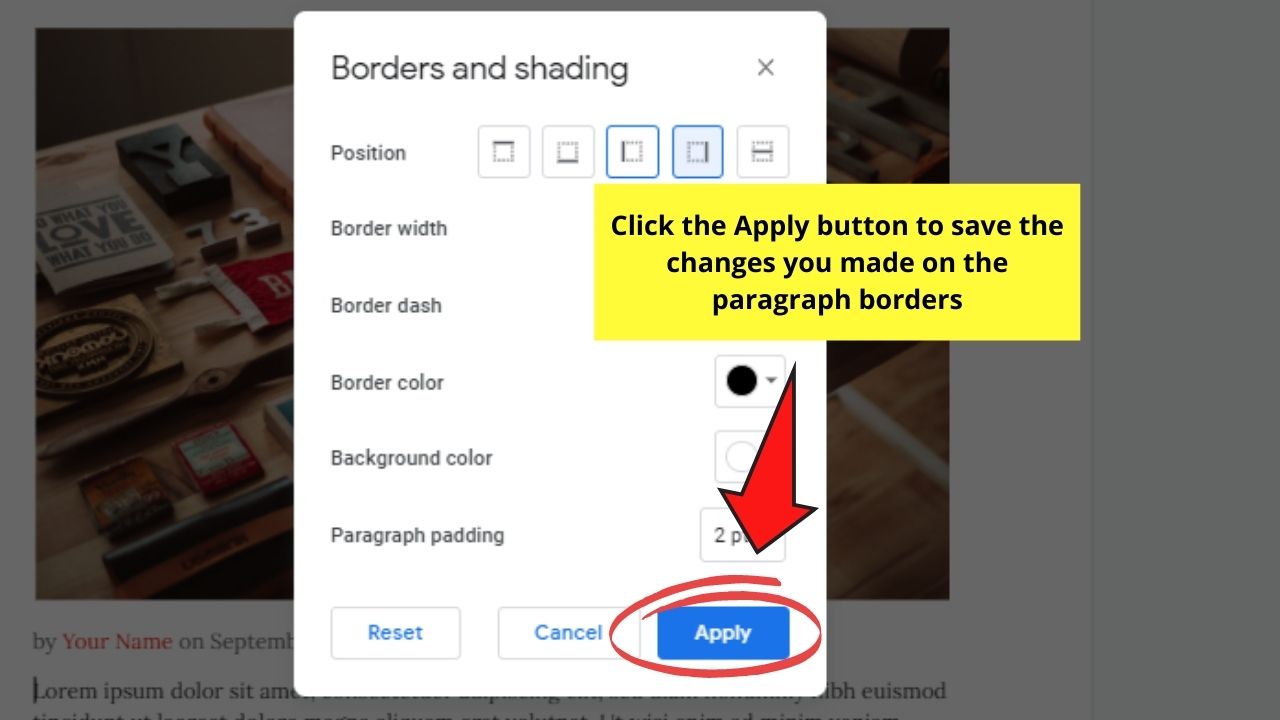
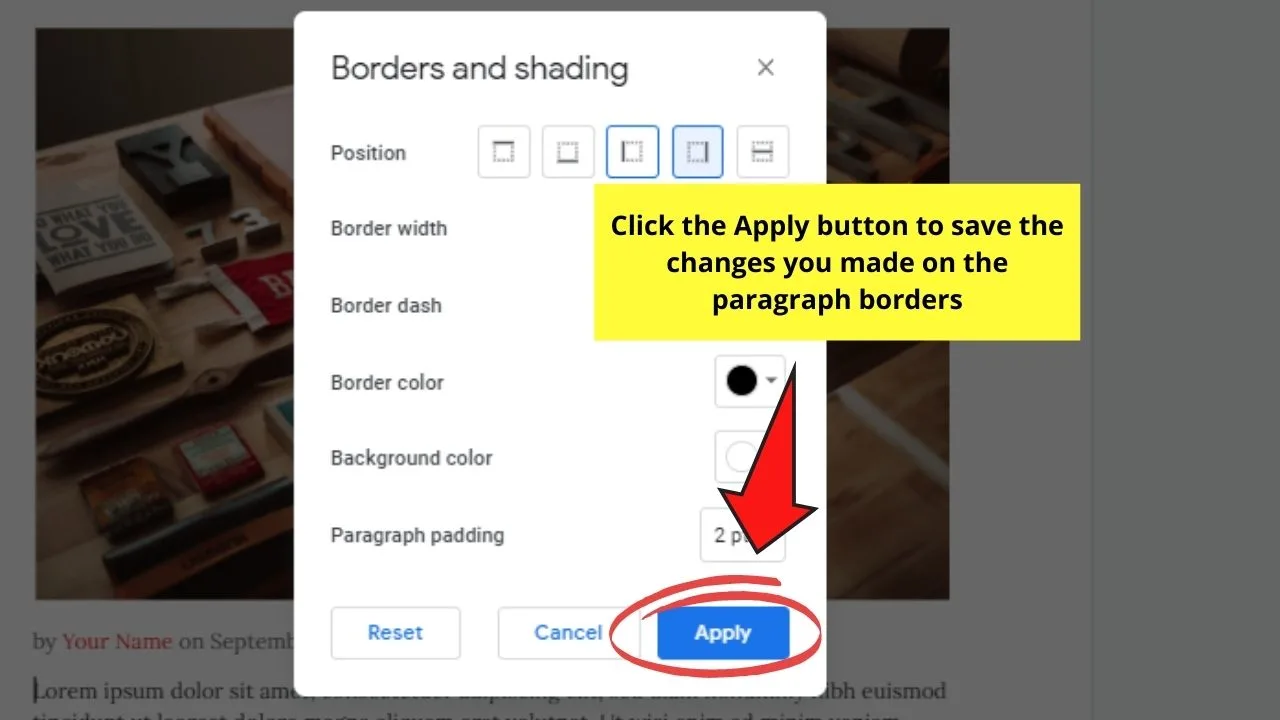
This will then automatically add the vertical paragraph borders into the document.
Nifty, right? But, if you want the simplest option, keep reading for the third method below.
Vertical Line in Google Docs Shortcut
Follow these steps, if you wish to insert a vertical line in Google Docs using a keyboard shortcut:
Step 1: Place the cursor on the part of the document you’re inserting the vertical line into.
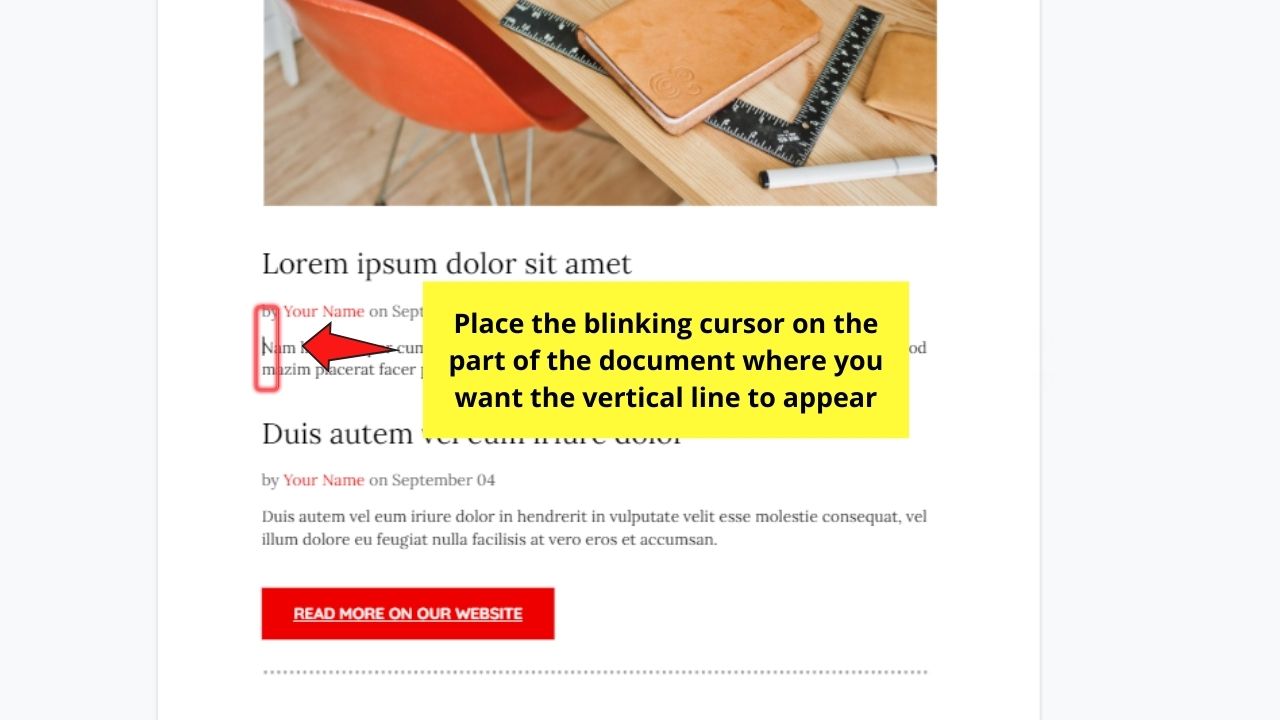
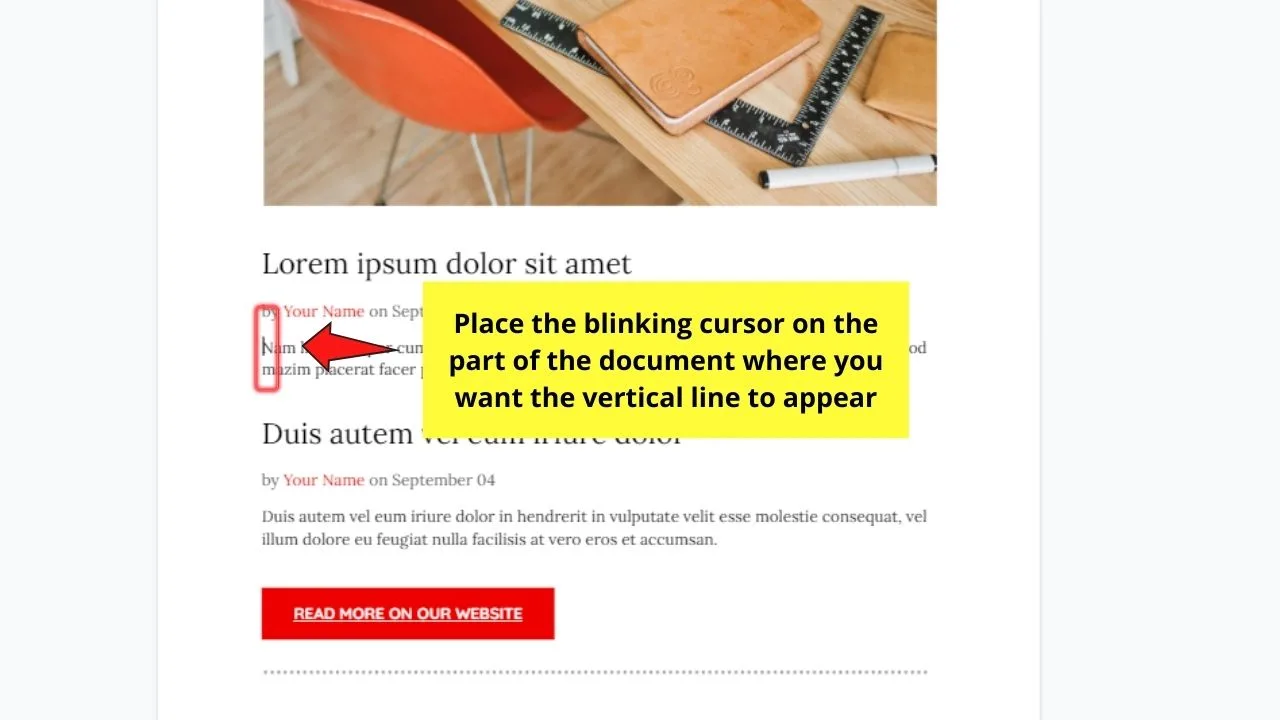
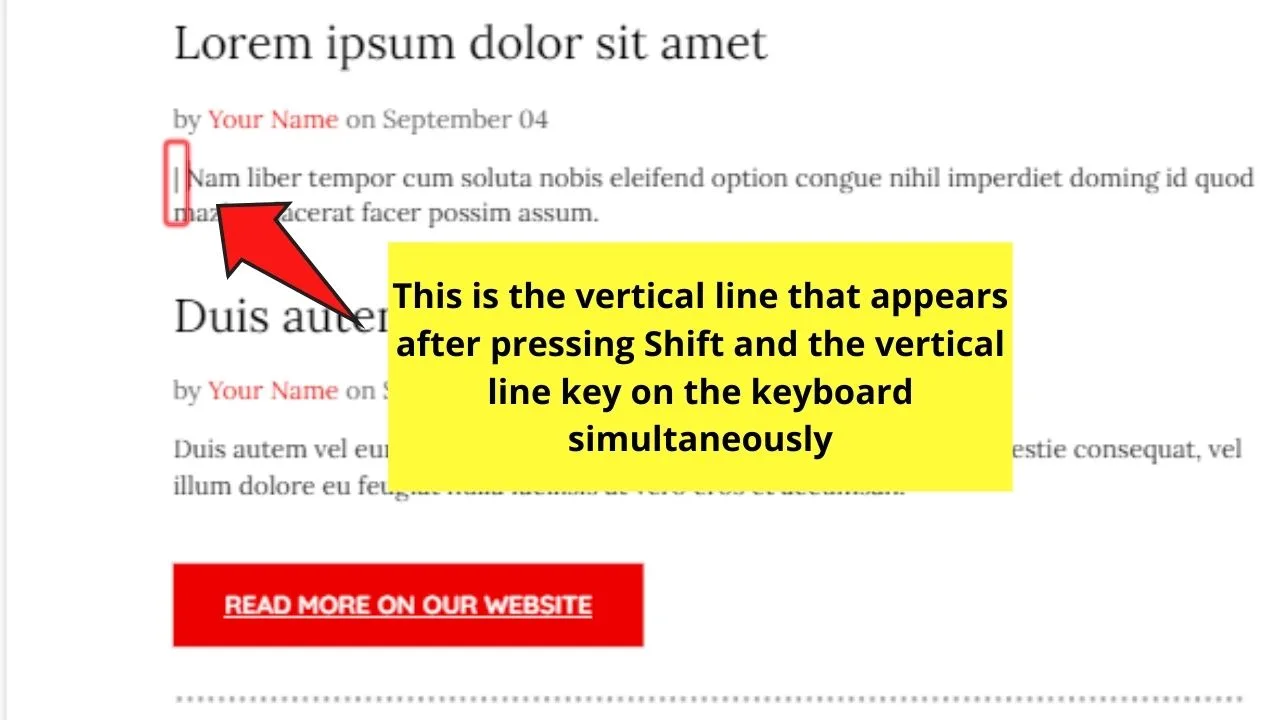
Step 2: Once the cursor’s in the location where you want your vertical line to be, press the Shift key together with the vertical line key on your keyboard.
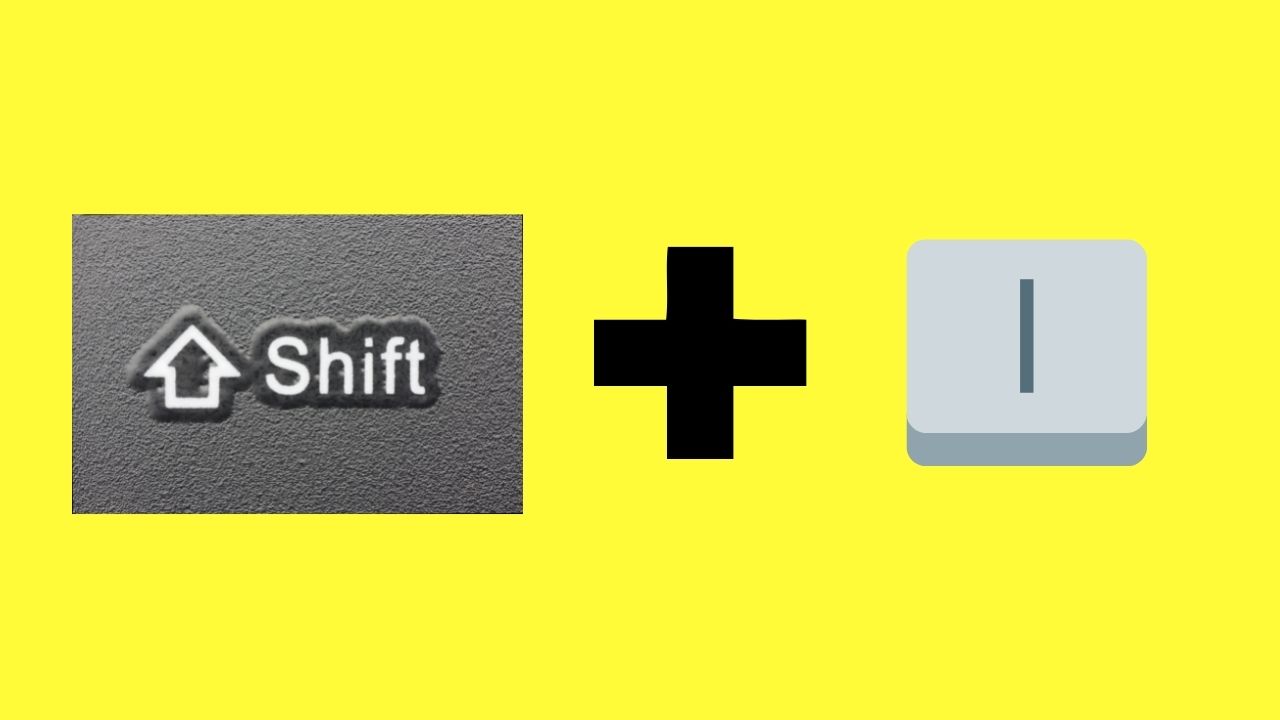
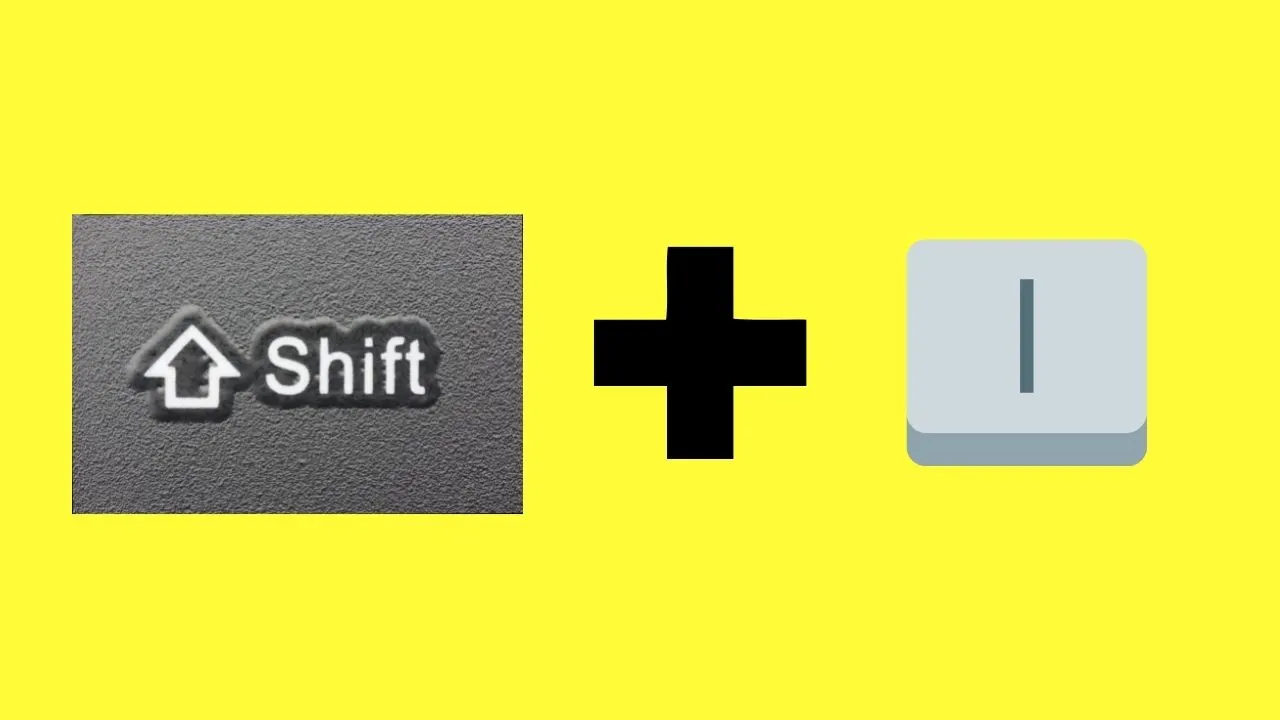
You’ll find this vertical line key below the Backspace button on your keyboard.
The third method is used like the horizontal em dash you add for emphasizing a particular thought.

But, you’re trying to create a newsletter for your English project, right?
Now, if you don’t want to insert vertical lines manually, use this fourth method instead.
How to Insert Vertical Lines as Text Column Divisions in Google Docs
To insert vertical lines as text column divisions in Google Docs, follow these steps:
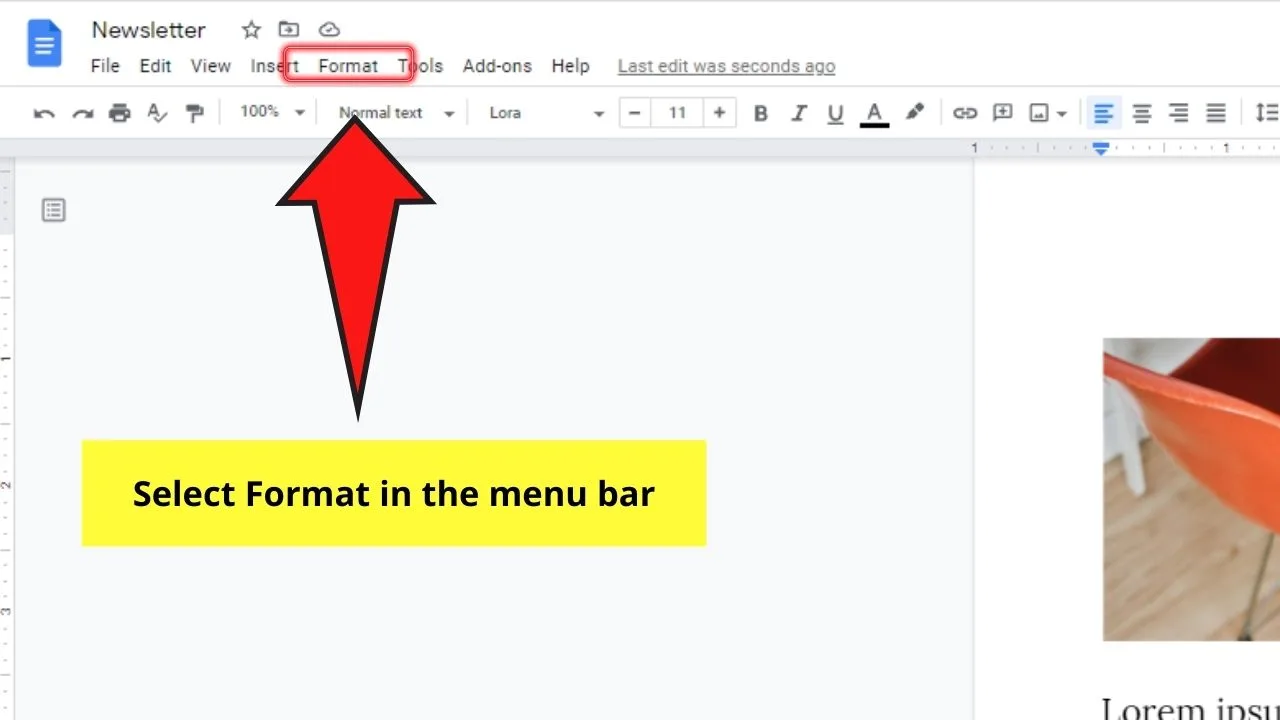
Step 1: Head to the menu bar and choose the Format button.
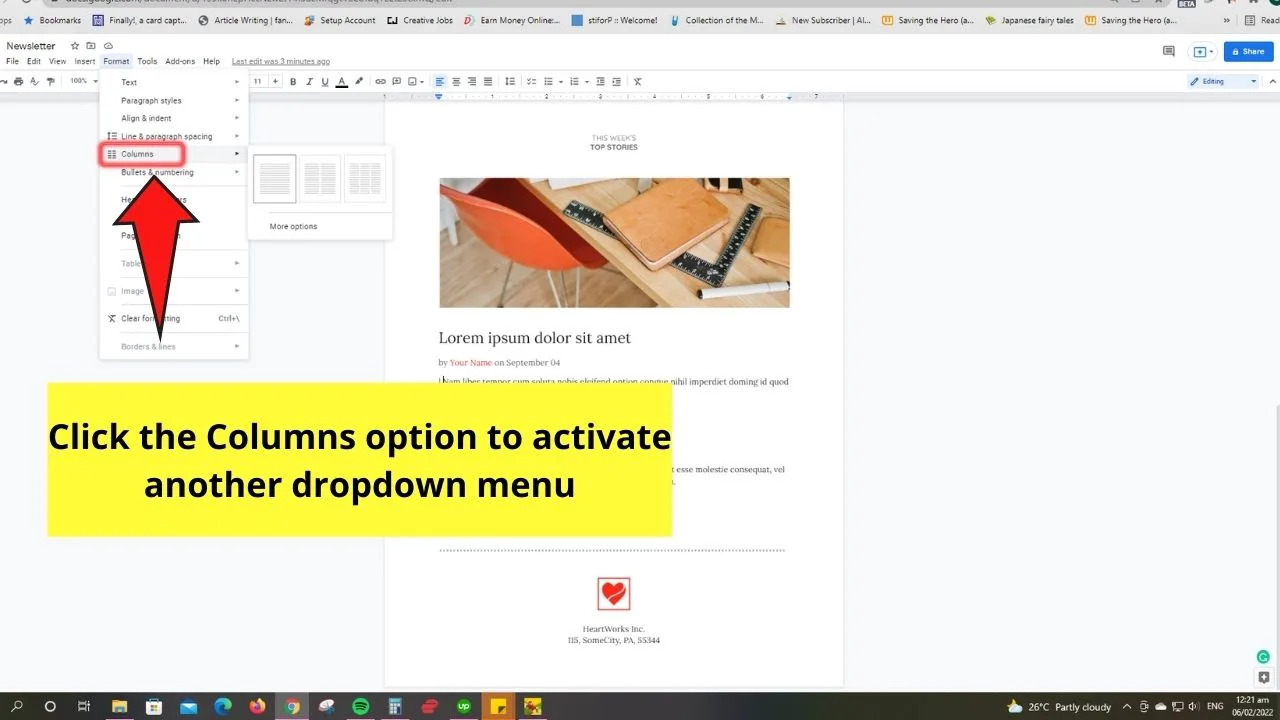
Step 2: In the dropdown menu that appears, scroll down until you see the Columns button. Click on it to activate another dropdown menu.

Step 3: Under the Columns section, choose how many columns you want to divide the text into. Three is the maximum number of columns you can divide the text into.
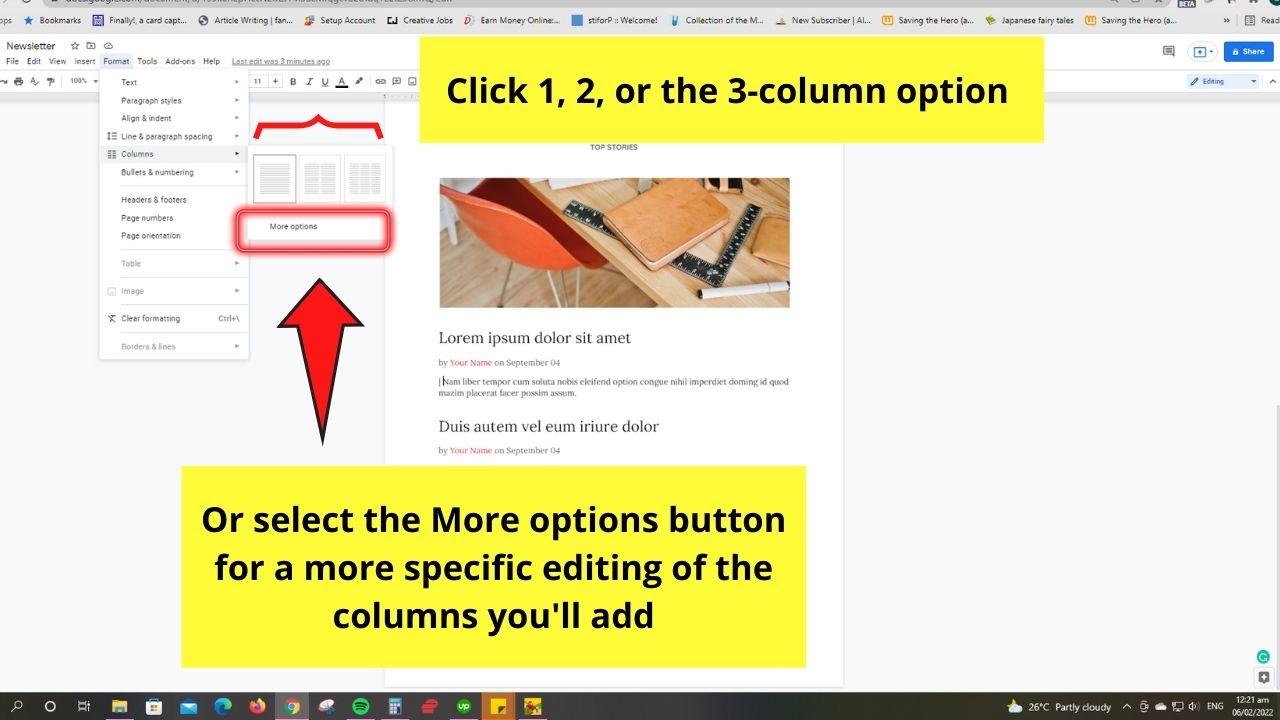

However, if you prefer to be more specific with how the columns appear, select the More options button instead.
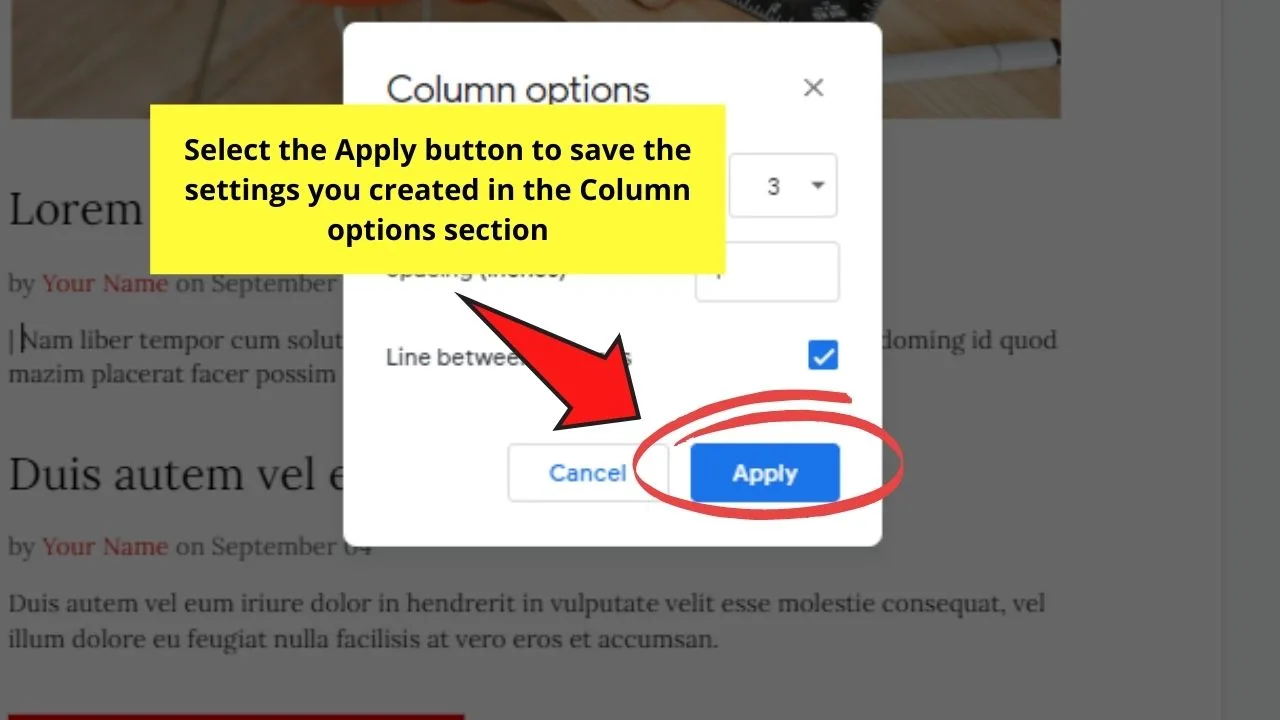
Step 4: After selecting the More options button, a pop-out window will appear. Set the spacing between the text columns and how many columns you’ll add.

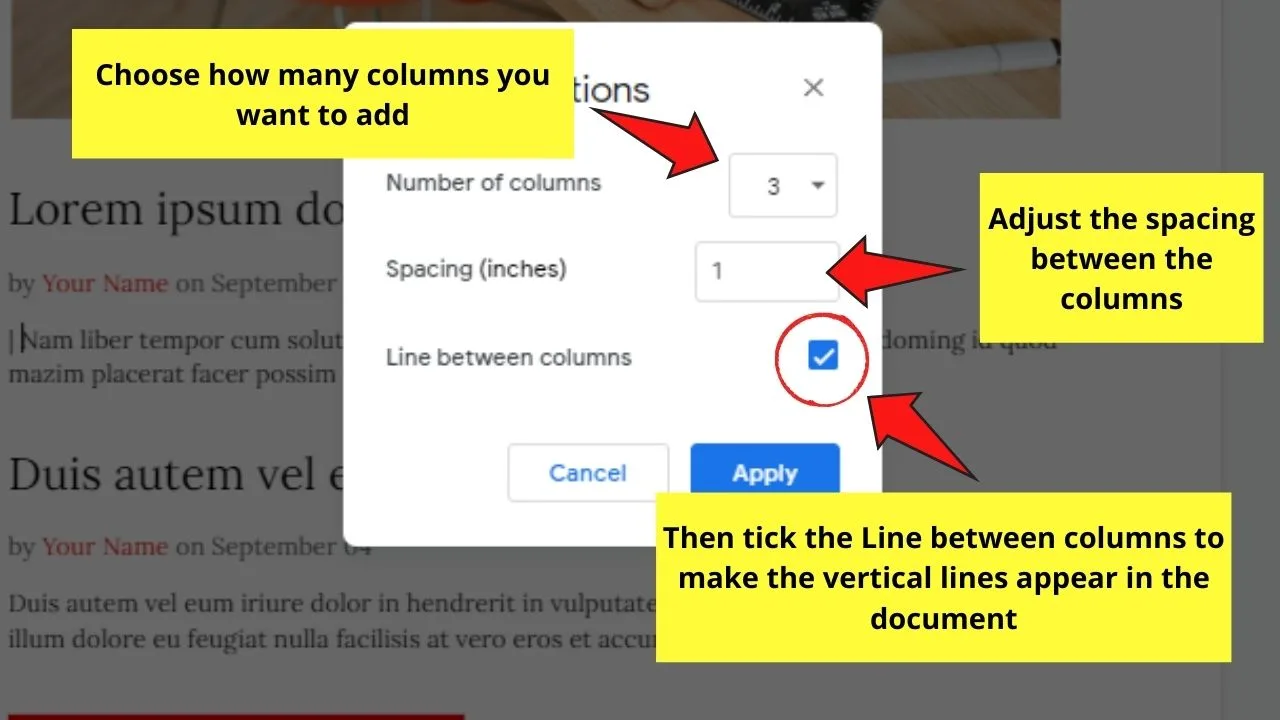
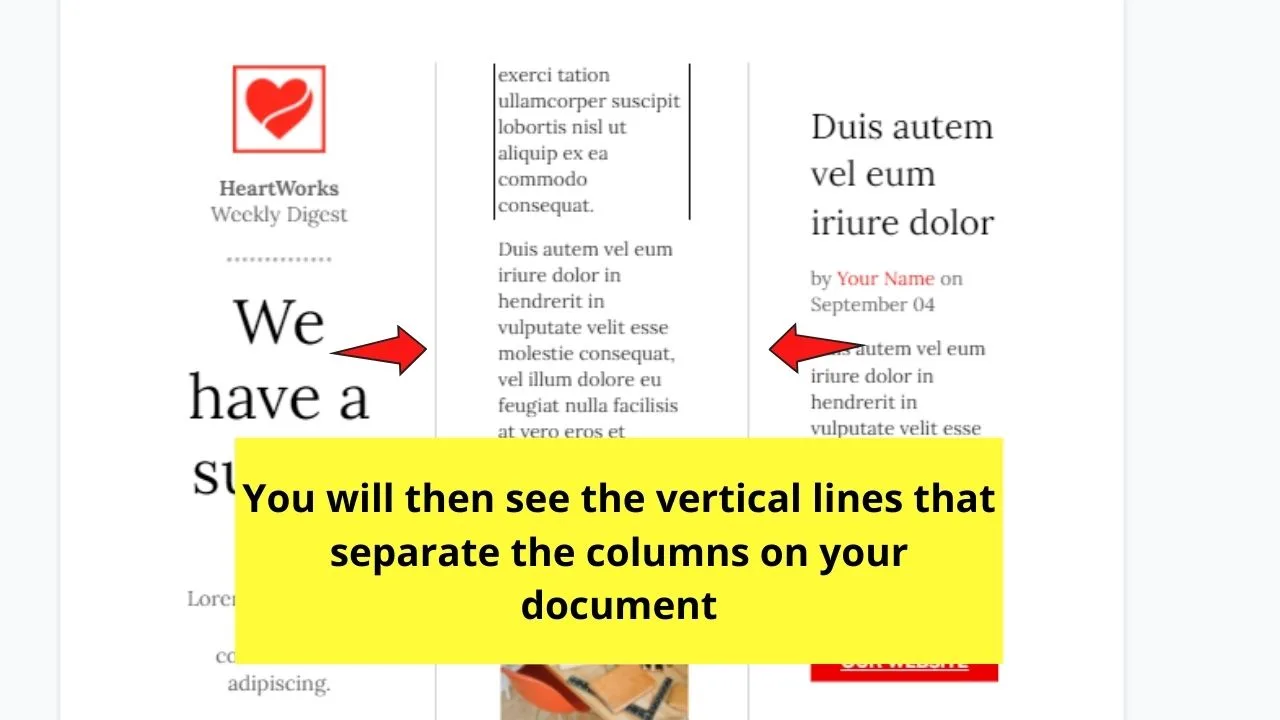
Before you select the Apply button, tick the Line between columns box so the vertical lines appear on your document.

And, just like that, you’ve automatically inserted vertical lines to your document.

So, start practicing these 4 methods of inserting vertical lines in Google Docs so you won’t fret the next time you’ll need to add them to your file.
Frequently Asked Questions about How to Add a Vertical Line in Google Docs
Can you remove a vertical line that you’ve added to your Google Docs file?
Google Docs does allow the removal of vertical lines. Just highlight the line and press Delete. You can also press Backspace to remove the line. But, for paragraph borders, head back to Borders and shading and click Reset before you select the Apply button.
How do you insert a vertical line template when you’re using Google Docs?
To insert a vertical line template, you need to click the Insert button first on the menu bar. Select the Drawing option before you choose the From Drive button to access the vertical line template saved on Google Drive.
Is it possible to insert a vertical line in Google Docs by copying one from Microsoft Word or the web?
You can insert a vertical line from Microsoft Word or the web by directly copying and pasting it onto Google Docs. But, you might encounter some restrictions with formatting the look of the vertical line you added.


Hey guys! It’s me, Marcel, aka Maschi. On MaschiTuts, it’s all about tutorials! No matter the topic of the article, the goal always remains the same: Providing you guys with the most in-depth and helpful tutorials!

