

Making a “Clipping Mask” in Illustrator it’s fairly easy and you can achieve very amazing results.
You can put your imagination to work and make very catchy and modern templates, artworks, banners, just to name a few.
Let’s find out how!
Making a Clipping Mask in Illustrator
Import an image using “Shift + Ctrl + P”. Draw, or type a text in. If it’s a text, or if your drawing has multiple shapes, press “Ctrl + 8” to make a “Compound Path”. Set “Opacity” to 50%. Select all using “Ctrl + A”, and then press “Ctrl + 7” to make a “Clipping Mask”.
Making a Clipping Mask Using a Single Shape in Illustrator
Import an image using the “Shift + Ctrl + P” command. Make a circle using the “Ellipse” (L) tool and set its “Opacity” to 50%. Select both objects with the “Selection” (V) tool and then press “Ctrl + 7” to make a “Clipping Mask”.
In this section we’ll learn how to make a “Clipping Mask” using a single shape.
Step 1: Place an Image

First you have to import or draw an image.
It could be a vector or a bitmap image. This means you can use an artwork created with Illustrator or just use a picture.
I’ll import an image to Illustrator.
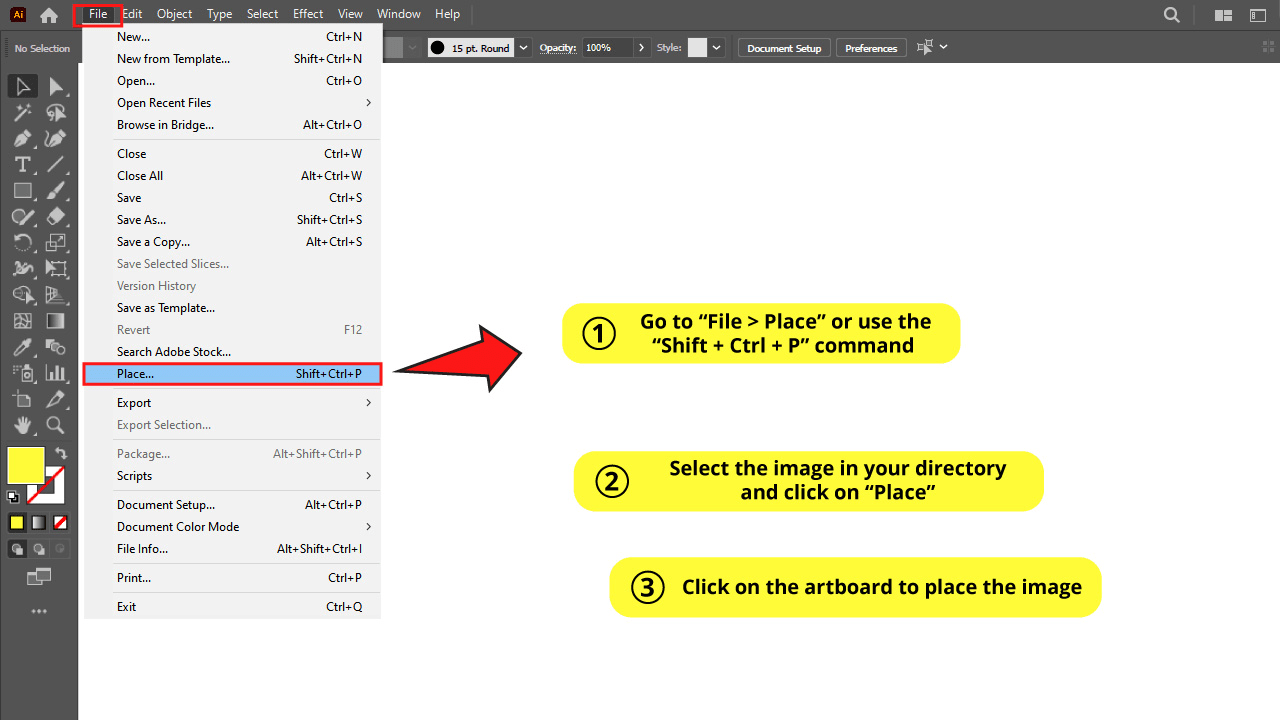
To get this done, go to “File > Place” or use the “Shift + Ctrl + P” command.
Select the image in your directory and then click on “Place”.
Finally, click on the artboard to place your selected image.
Step 2: Draw a Transparent Circle

For this example I’ll use a circle as a clipping mask shape.
You can use any shape you wish.
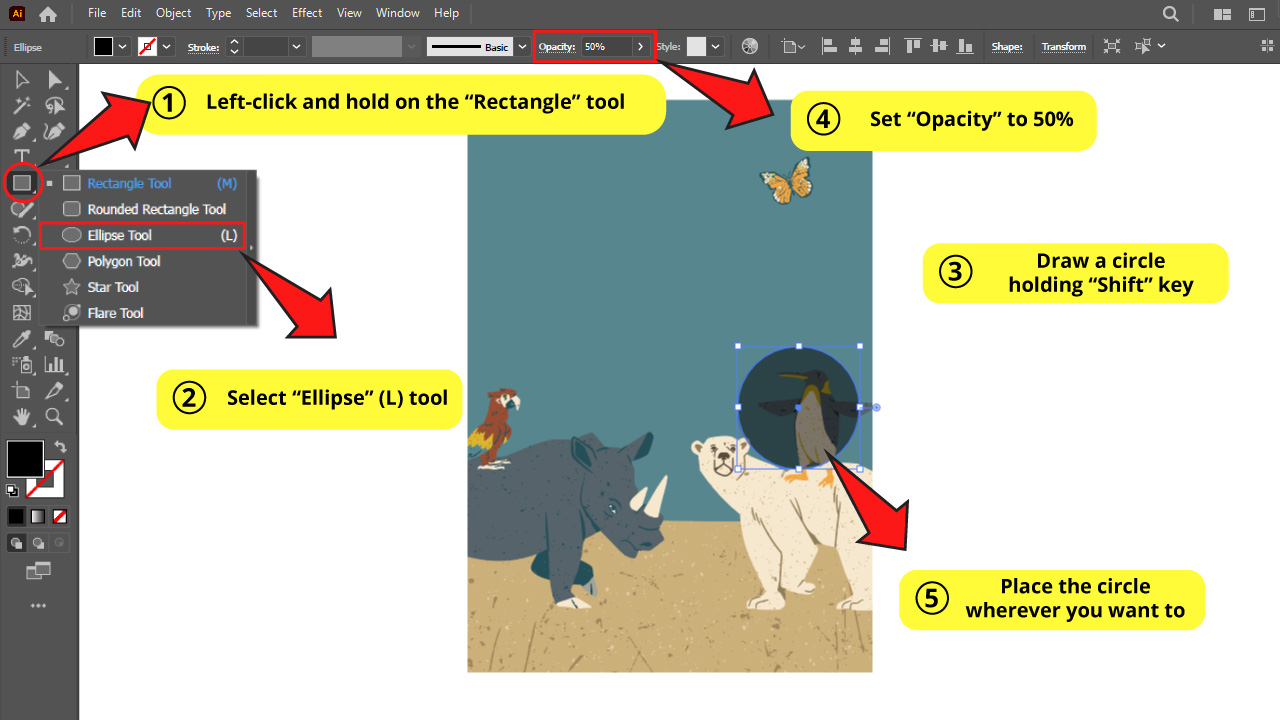
To draw a circle use the “Ellipse” (L) tool hidden in the “Rectangle” (M) tool nest on the left side toolbar.


To open the hidden tools, left-click and hold on the “Rectangle” tool to unfold the menu. Then click on the “Ellipse (L) tool. Or just press the “L” key to shortcut.
Hold the “Shift” key as you use the “Ellipse” (L) tool to get a perfect circle, and not an oval.
Then set the opacity. This is required to be able to see through the circle, so you can place it in the exact desired spot.
On the top side toolbar set the “Opacity” to 50%.
Finally, place your circle wherever you want to.
Step 3: Make Clipping Mask

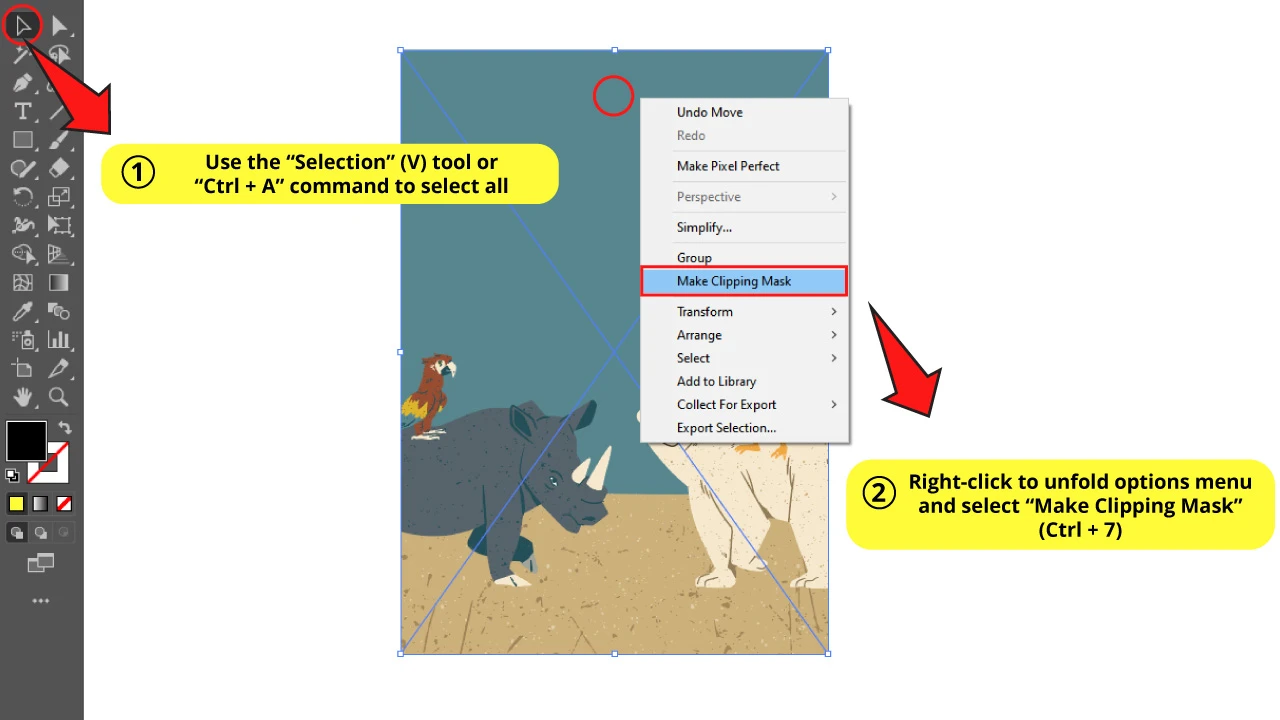
Select both objects using the “Selection” (V) tool or pressing the “Ctrl + A” command to select all.
Then right-click on the selected objects to unfold the options menu.
Select the “Make Clipping Mask” (Ctrl + 7) option.
The Result on “How to Make a Clipping Mask Using a Single Shape in Illustrator”


And this is how it looks after making a “Clipping Mask”.
Would you like to see another example of “Clipping Mask” in action?
Check these two articles about “How to Make Rounded Corners in Illustrator” and “How to Erase Part of an Image in Illustrator”.
Making a Clipping Mask Using a Compound Shape in Illustrator
Write a text using the “Type” (T) tool. Press “Shift + Ctrl + O” to convert it to “Outlines”. Press “Ctrl + 8” to “Compound Path”. Import an image using “Shift + Ctrl + P” and press “Ctrl + [“ to send it backwards. Select both objects and press “Ctrl + 7” to make a “Clipping Mask”.
In this tutorial you’ll learn how to use “Clipping Mask” with several objects at the same time.
Remember that you can use both vector and bitmap images.
Step 1: Type your Text

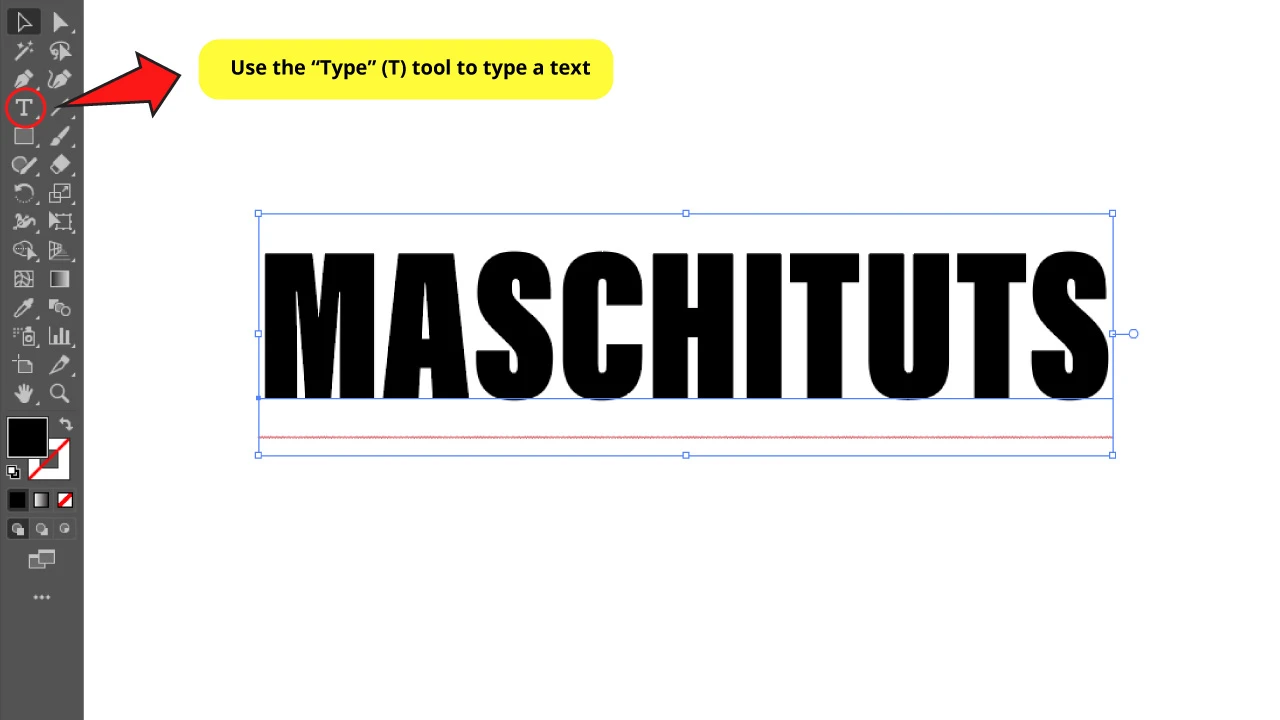
First type a text using the “Type” (T) tool.
Try to use a bold font so the “Clipping Mask” effect can be appreciated better.
I’ll use the “Acumin Variable Concept” font on “ExtraCondensed UltraBlack” style.
Step 2: Create Outlines

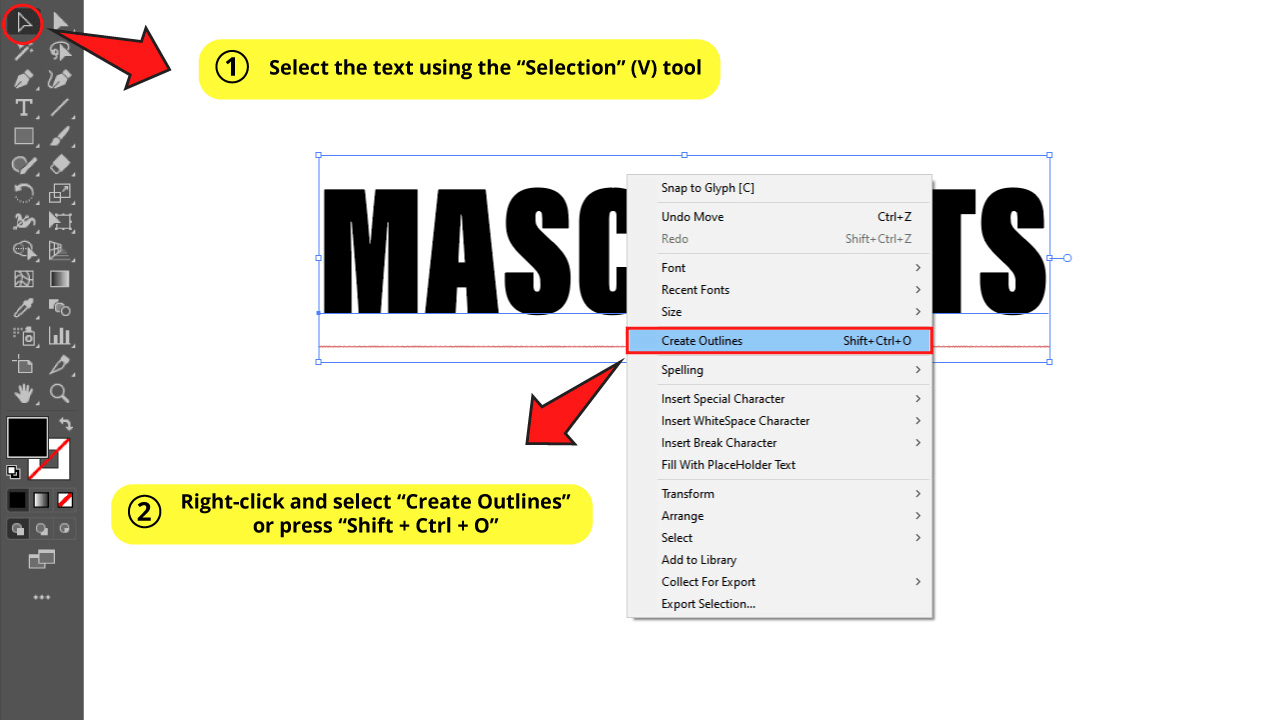
In this step you will convert the text to an object, so you can make a “Clipping Mask” later.
To convert the text to outlines, first select the text using the “Selection” (V) tool on the left side toolbar.
Then right-click on the text to unfold the options menu.
Now select “Create Outlines”, or use the “Shift + Ctrl + O” command.
Step 3: Make a Compound Path
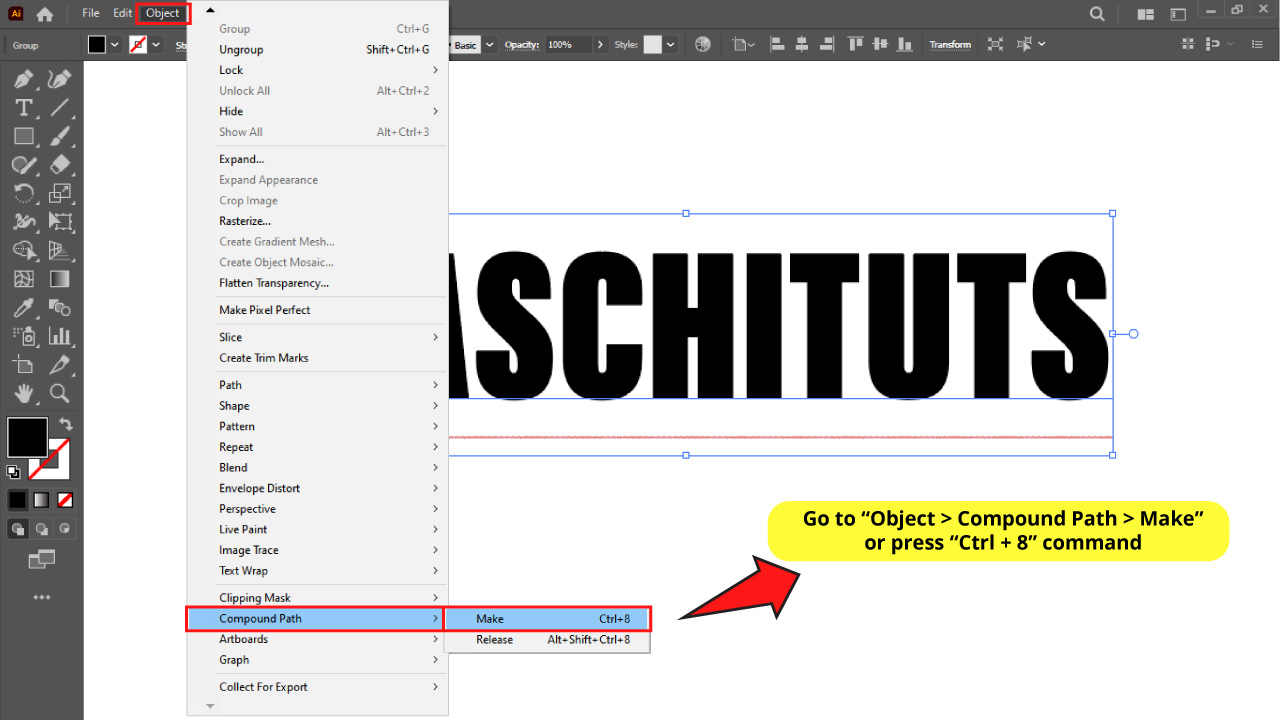

This step is required when you are applying a “Clipping Mask” (Ctrl + 7) to several objects at the same time.
When you make a “Compound Path”, the objects behave as if they were a single shape.
To get this done, with the text selected, go to “Object > Compound Path > Make” on the top side menu. Or press the “Ctrl + 8” command.
Before making a “Compound Path” your object’s color might turn to “none”.
If this is your case, just double-click on the “Fill” color box on the left side toolbar and pick a color.
Would you like to know in what other scenarios you can use the “Compound Path” tool?
Take a look at these two articles about “The 4 Best Ways to Blend Colors in Illustrator” and “How to Make Bubbles in Illustrator”.
Step 4: Place an Image


Click on “File > Place” or use the “Shift + Ctrl + P” command to shortcut.
Select the image in your directory and then click on “Place”.
Then click on the artboard to place your selected image.
Step 5: Send the Image Backwards
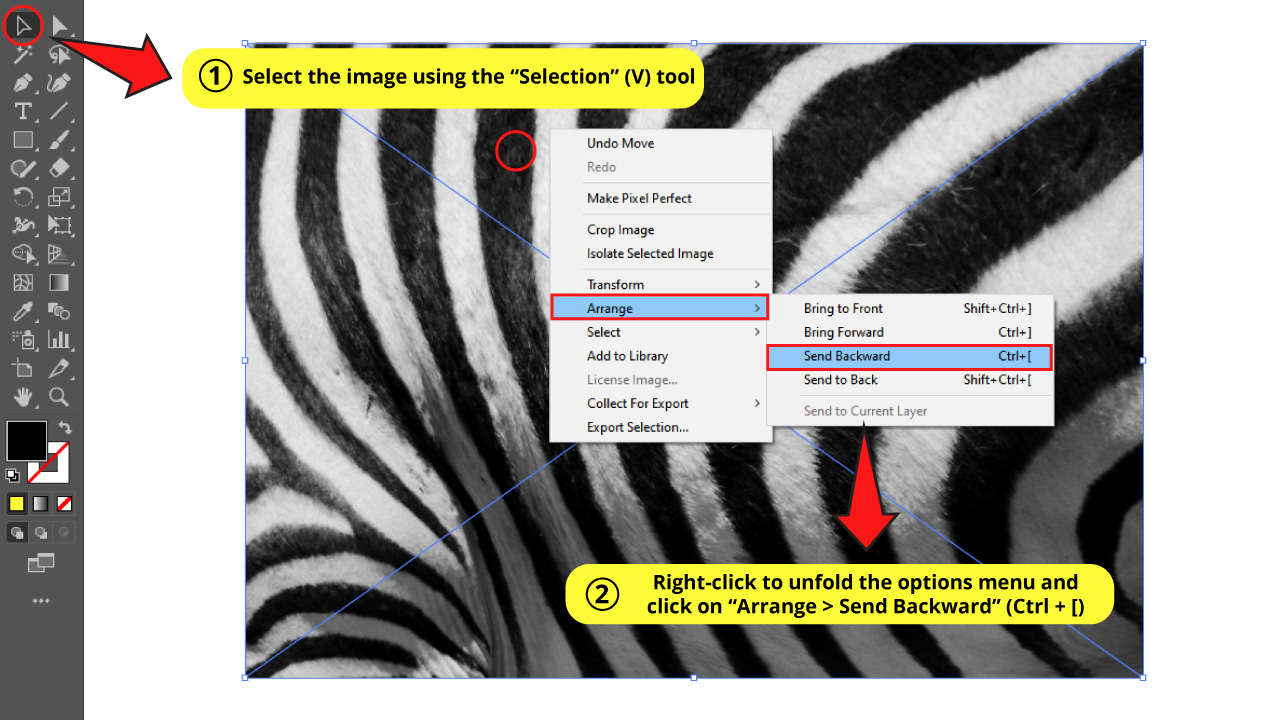
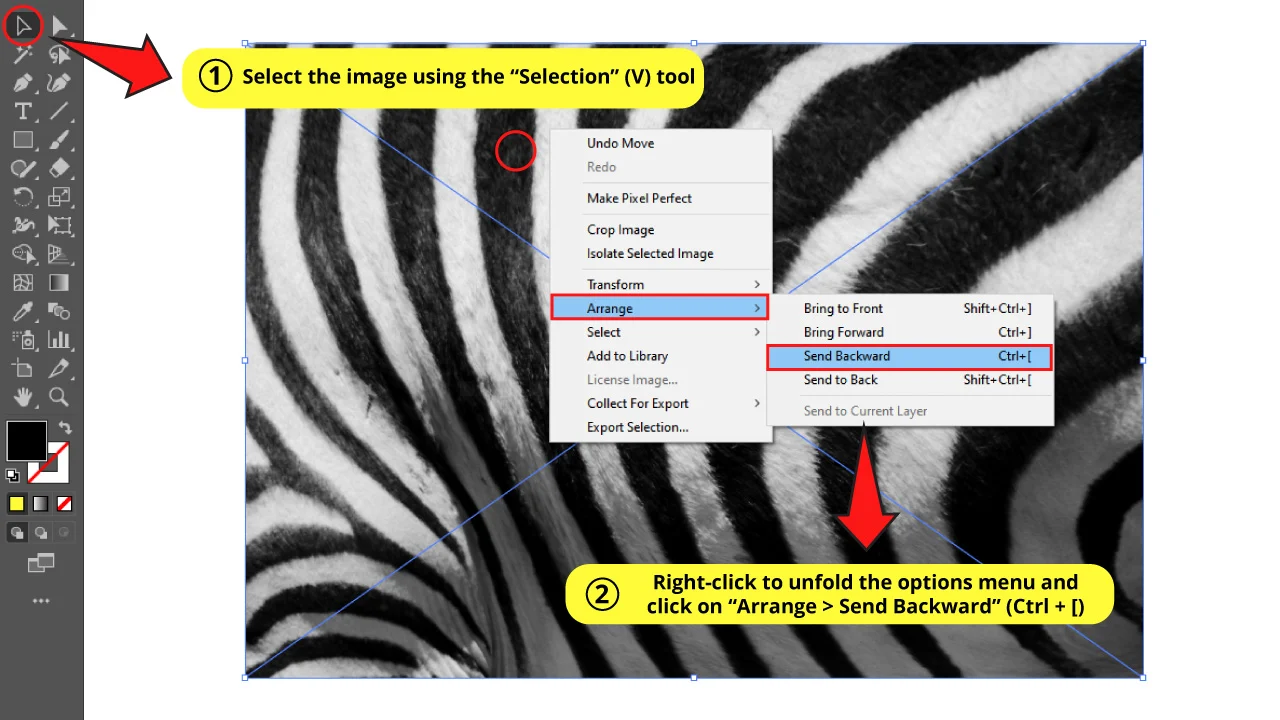
Select the recently imported image with the “Selection” (V) tool.
Then, right-click to unfold the options menu and click on “Arrange > Send Backward” or use the “Ctrl + [“ command.
We move the image to the background because we need the “Clipping Mask” shape in front. That is a must.
Step 6: Set the Opacity for the Text
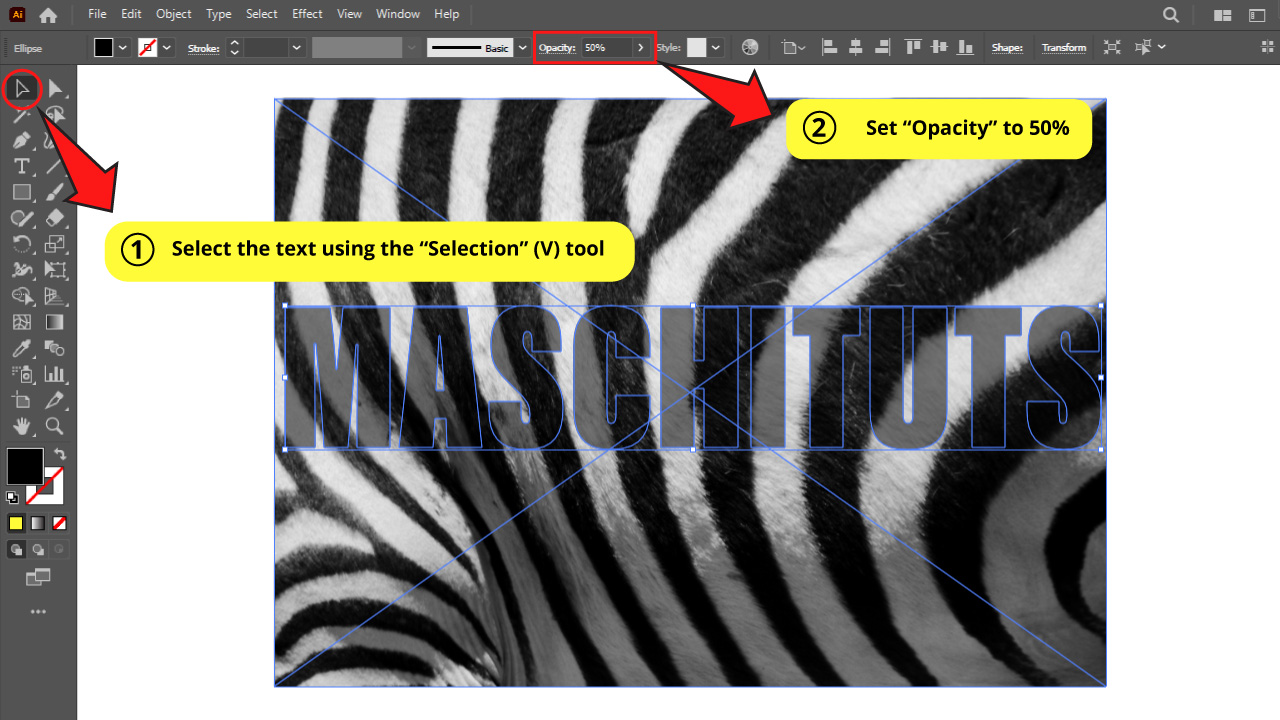

Select the text with the “Selection” (V) tool.
Then, on the top side toolbar set the “Opacity” to 50%.
Now you can place your text in the exact spot you want, because you can now see through the text.
Step 7: Make Clipping Mask
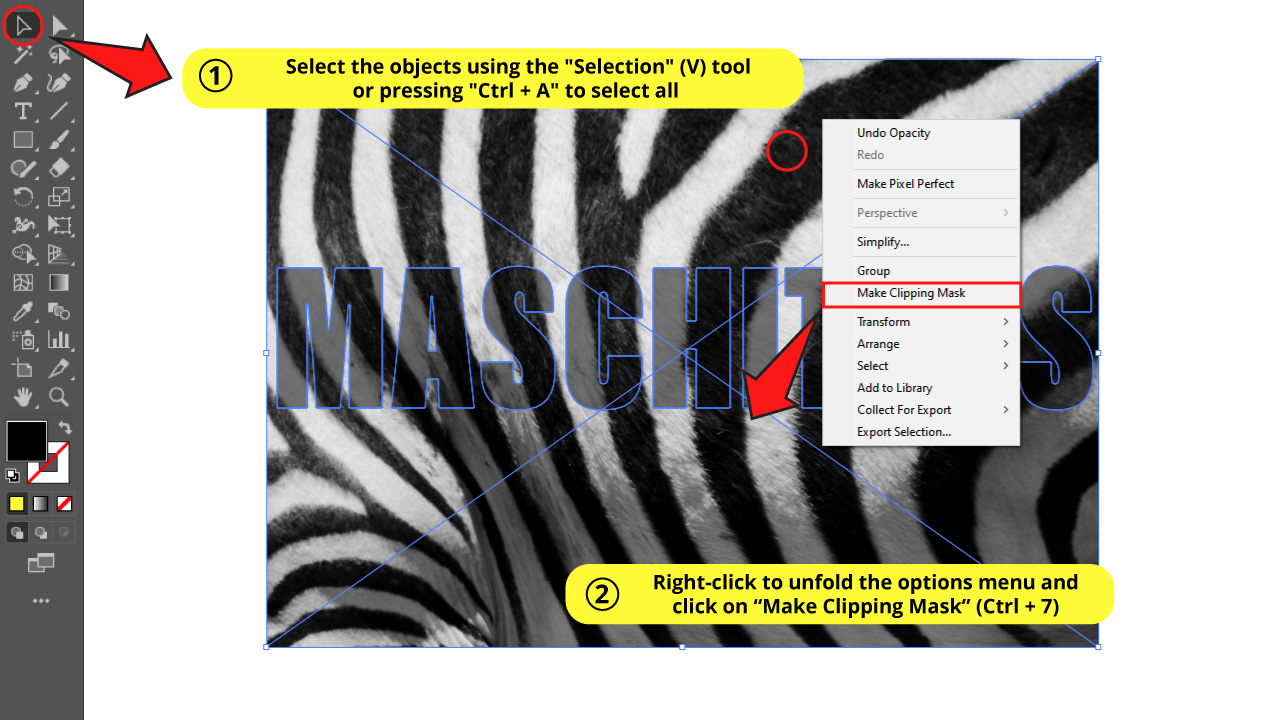
Select both objects using the “Selection” (V) tool or use the “Ctrl + A” command to select all.
Then, right-click on the selected objects to unfold the options menu.
Select the “Make Clipping Mask” (Ctrl + 7) option.
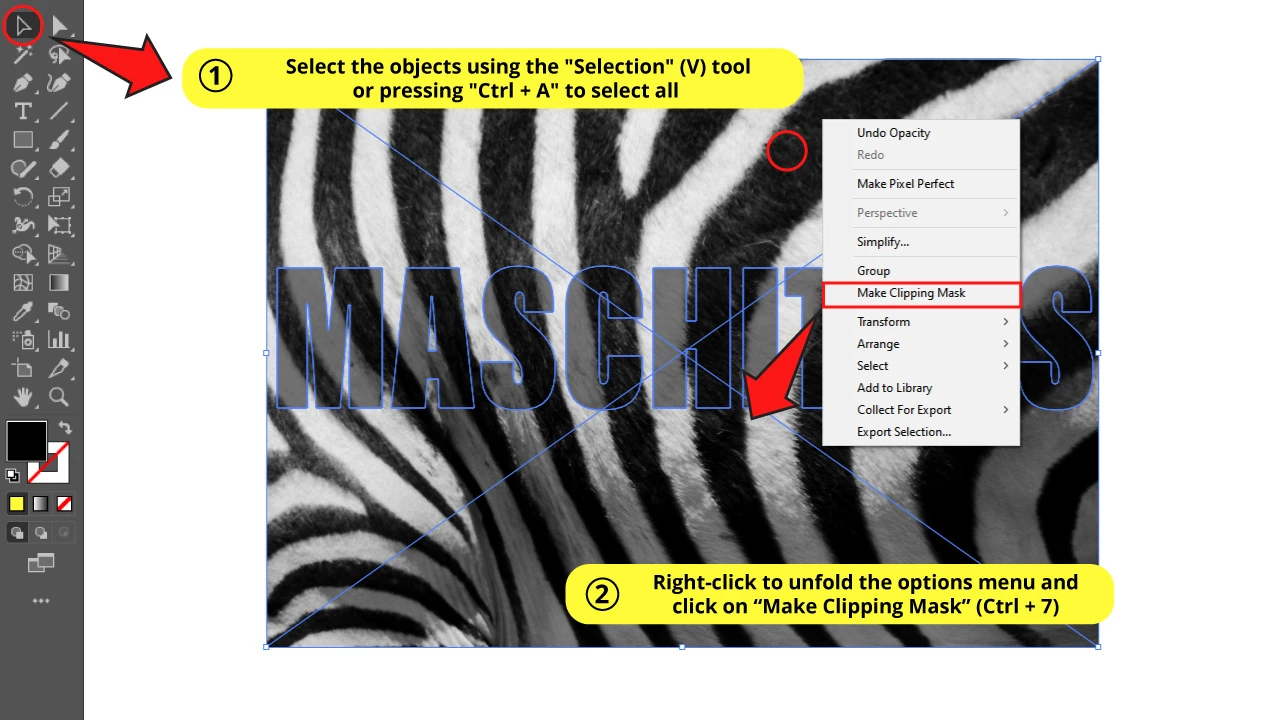
The Result on “How to Make a Clipping Mask Using a Compound Shape in Illustrator”


And this is how it looks after applying a “Clipping Mask” to compound shapes.
Frequently Asked Questions on “How to Make a Clipping Mask in Illustrator”
When using the “Clipping Mask” tool, which object should be at front?
You have to place the object you’re using as a “Clipping Mask” shape at front.
Why when I use the “Clipping Mask” tool with several objects it only applies to one of them, even if I selected all?
That’s because you need to make a “Compound Path” before making a “Clipping Mask”. When you make a “Compound Path”, the objects behave like a single shape. To get this done, select all the objects and then go to “Object > Compound Path > Make”, or use the “Ctrl + 8” command.


Hey guys! It’s me, Marcel, aka Maschi. On MaschiTuts, it’s all about tutorials! No matter the topic of the article, the goal always remains the same: Providing you guys with the most in-depth and helpful tutorials!

