

You finally found the perfect image to put into your artwork, or maybe you want to create a killer png, but that pesky background is in the way. What can you do?
To remove the background of an image in Illustrator, you can either use a clipping mask to isolate your foreground object or use Illustrator’s Image trace feature.
Here are two ways to remove the background of an image using Adobe Illustrator.
Using A Clipping Mask To Remove The Background Of An Image In 10 Steps
To start, press “P” on your keyboard to select the Pen tool. Then use the Pen tool to draw an outline around your foreground object. Hold down the “shift” key and select both the complete outline and the background image. Finally, right click on your image and select “Make Clipping Mask”
Step 1:
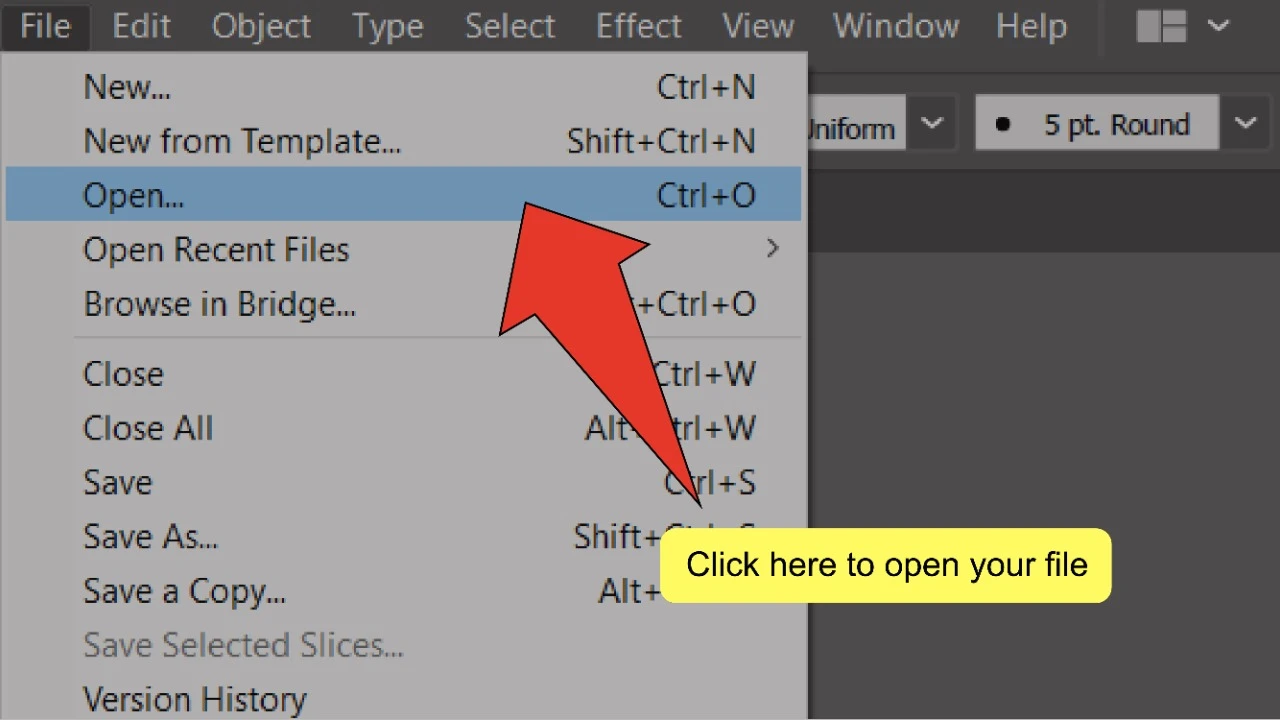
Open your Illustrator file. To start, open your document by double clicking on its corresponding Illustrator file, or if Illustrator is already open, you can go to “File” on the top menu, and then “Open” and choose the file you want to open. To speed things up, you can also use the keyboard shortcut COMMAND+O (MAC) “Ctrl+O” (Windows).

Step 2:
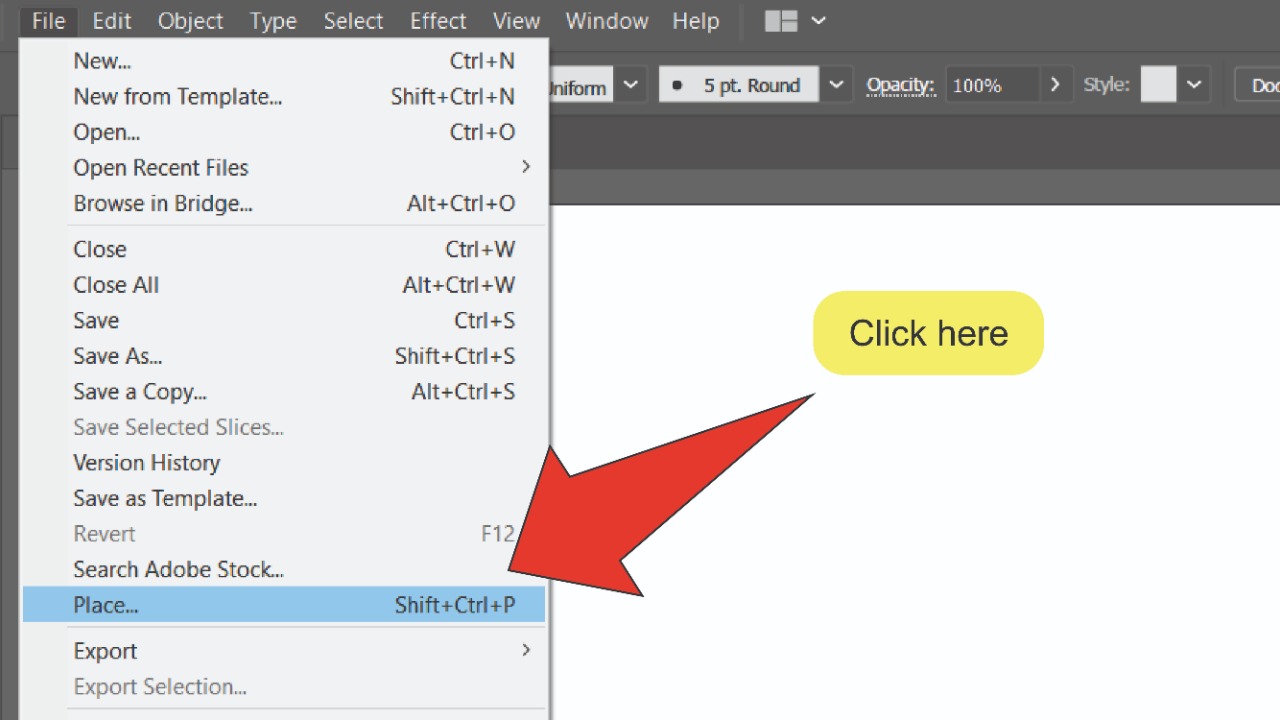
Place your image. Click on “File” on the top menu, then “Place”, or use the shortcut “Shift+Ctrl+P”. Next, select your image and click “Place”.

Step 3:
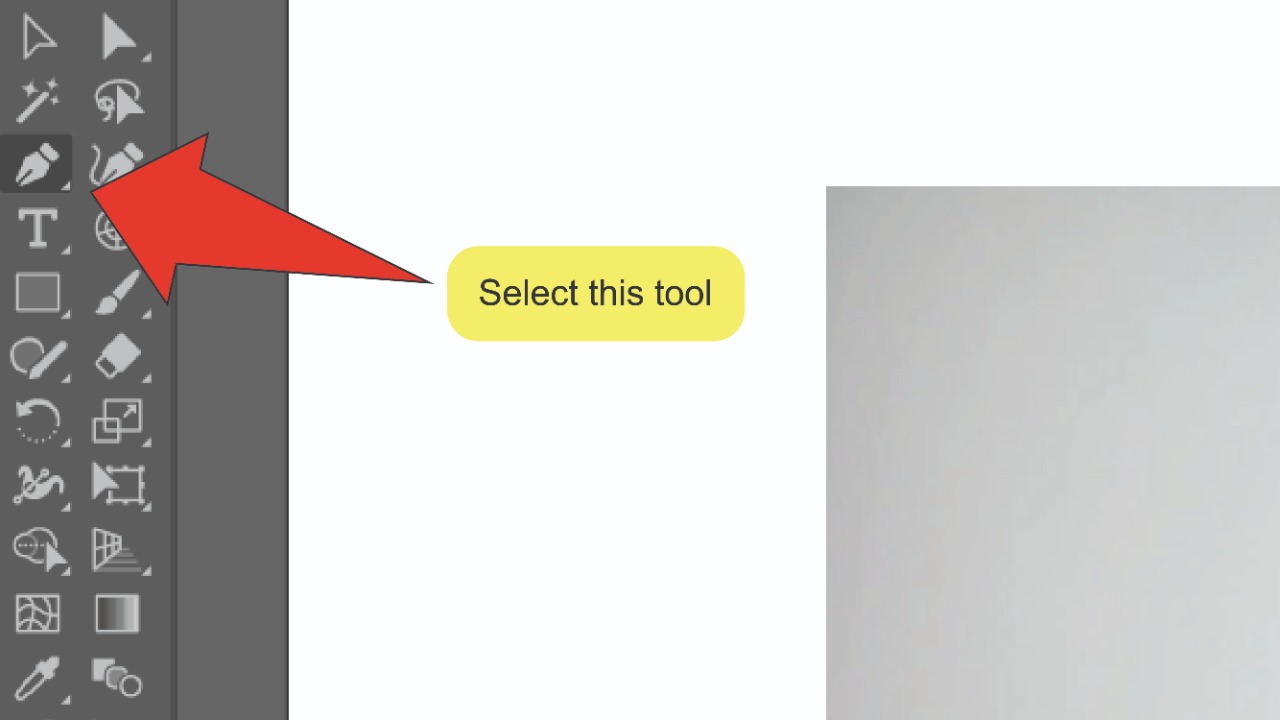
Find and select the pen tool. Look for the pen tool, located on the toolbar on the left side of your screen. Alternatively, you can use the keyboard shortcut “P” to quick-select the tool.
Step 4:
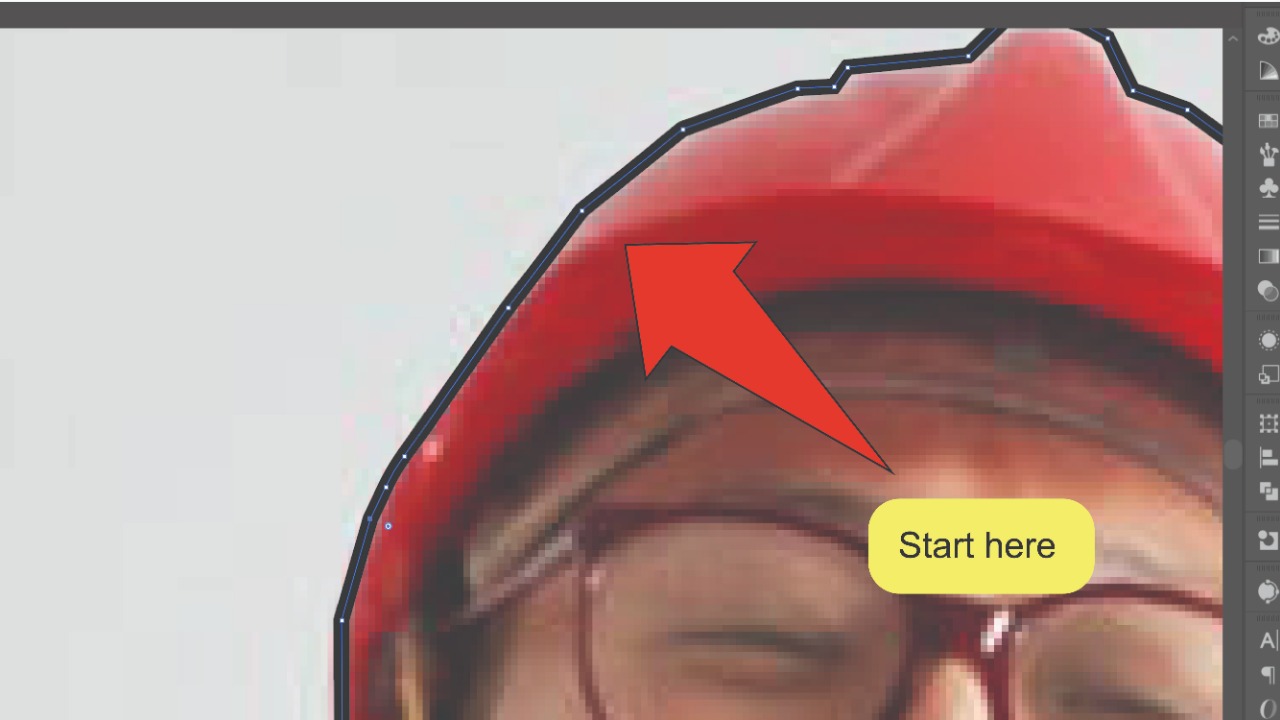
Place your first anchor point. Use the pen tool to click anywhere along the edge of the foreground object to place your first anchor point. You can connect anchor points using paths to create shapes.


Step 5:
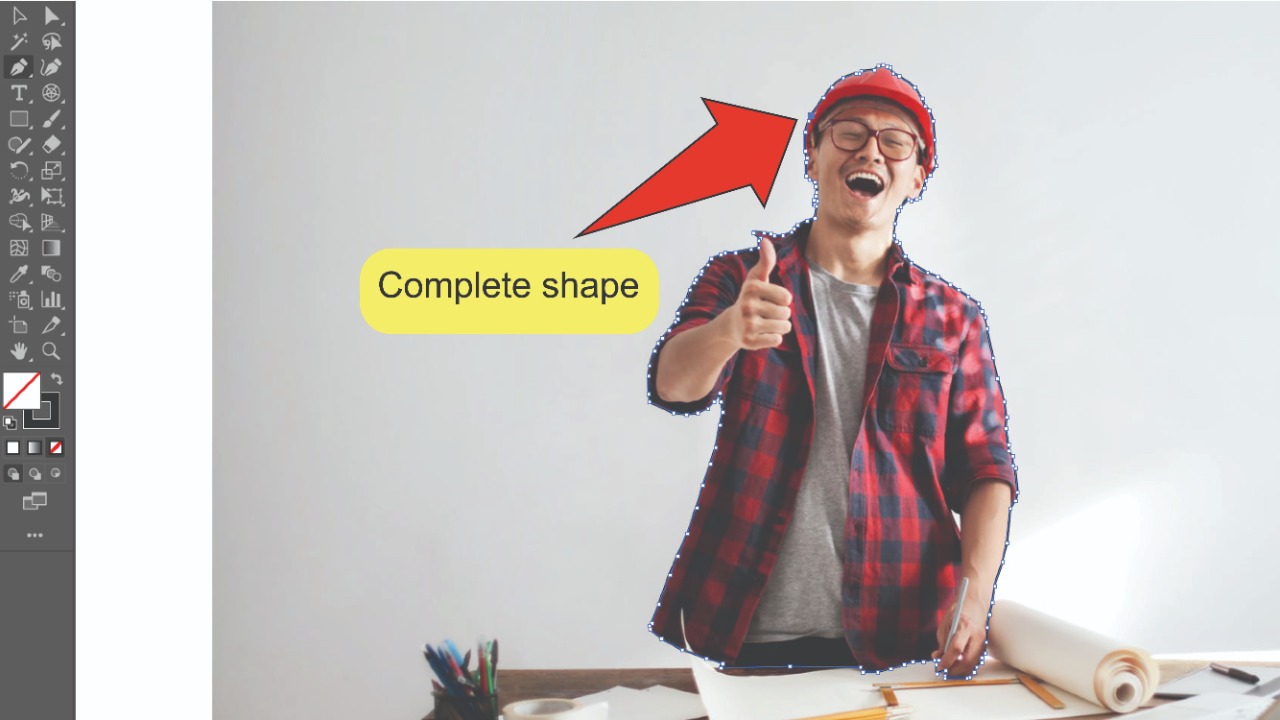
Complete the outline. Keep clicking along the edge of the foreground object in a clockwise direction until you reach the first anchor point you placed. Click on it to complete the path.


Step 6:
Find and select the sub-selection tool. Look for the sub-selection tool, located on the toolbar on the left side of your screen. Alternatively, you can use the keyboard shortcut “A” to quick-select the tool.
Step 7:
Adjust your outline. Use the sub-selection tool to adjust anchor points and paths to fit the shape of your foreground object.

Step 8:
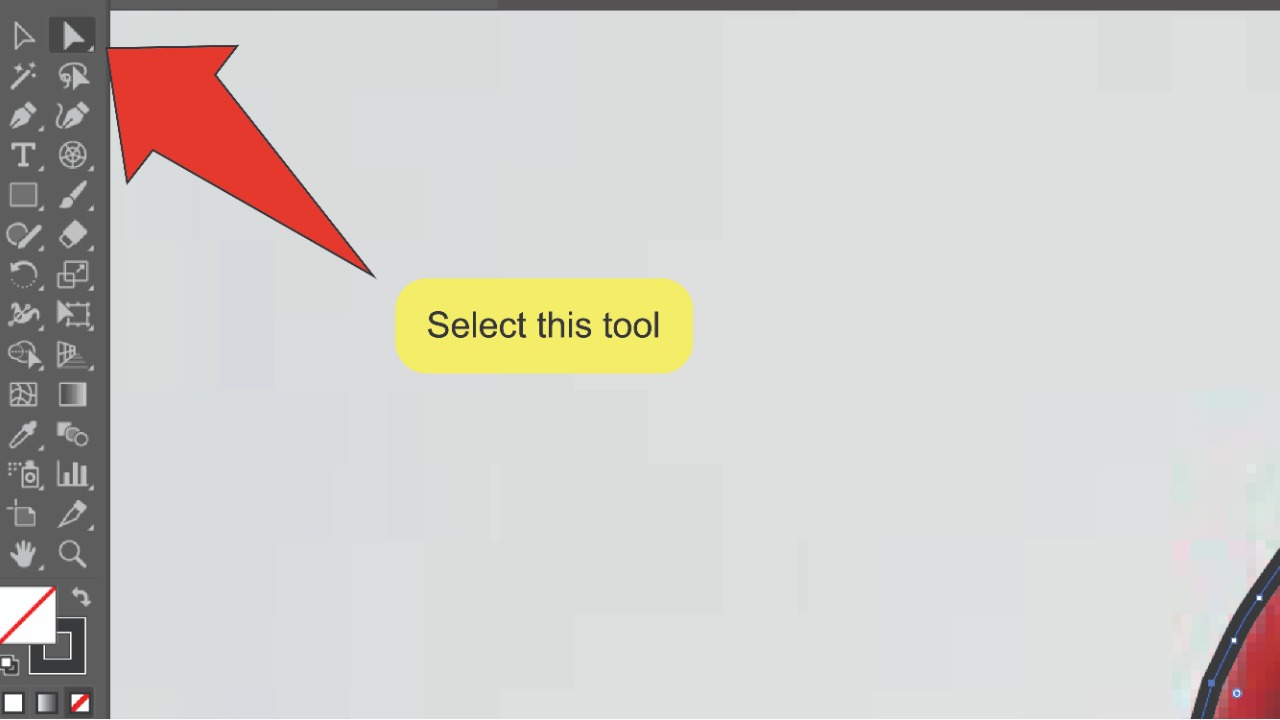
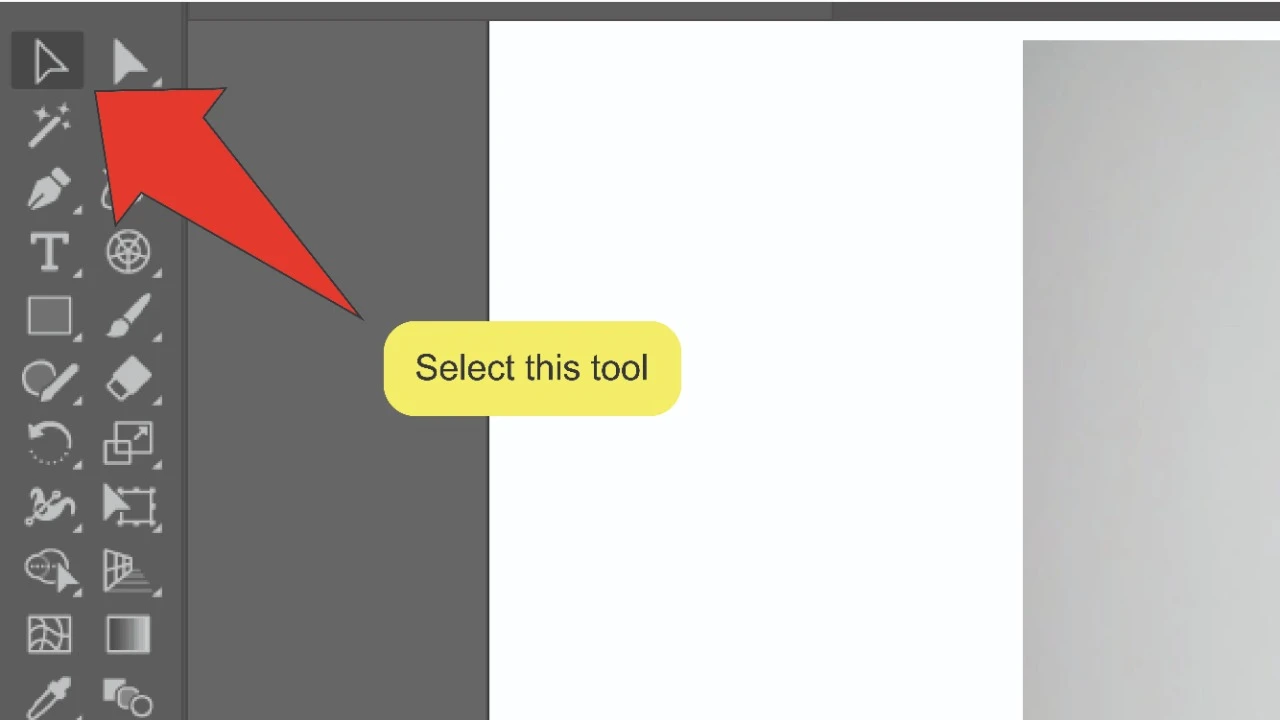
Find and select the selection tool. Look for the selection tool, located on the toolbar on the left side of your screen. Alternatively, you can use the keyboard shortcut “V” to quick-select the tool.

Step 9:
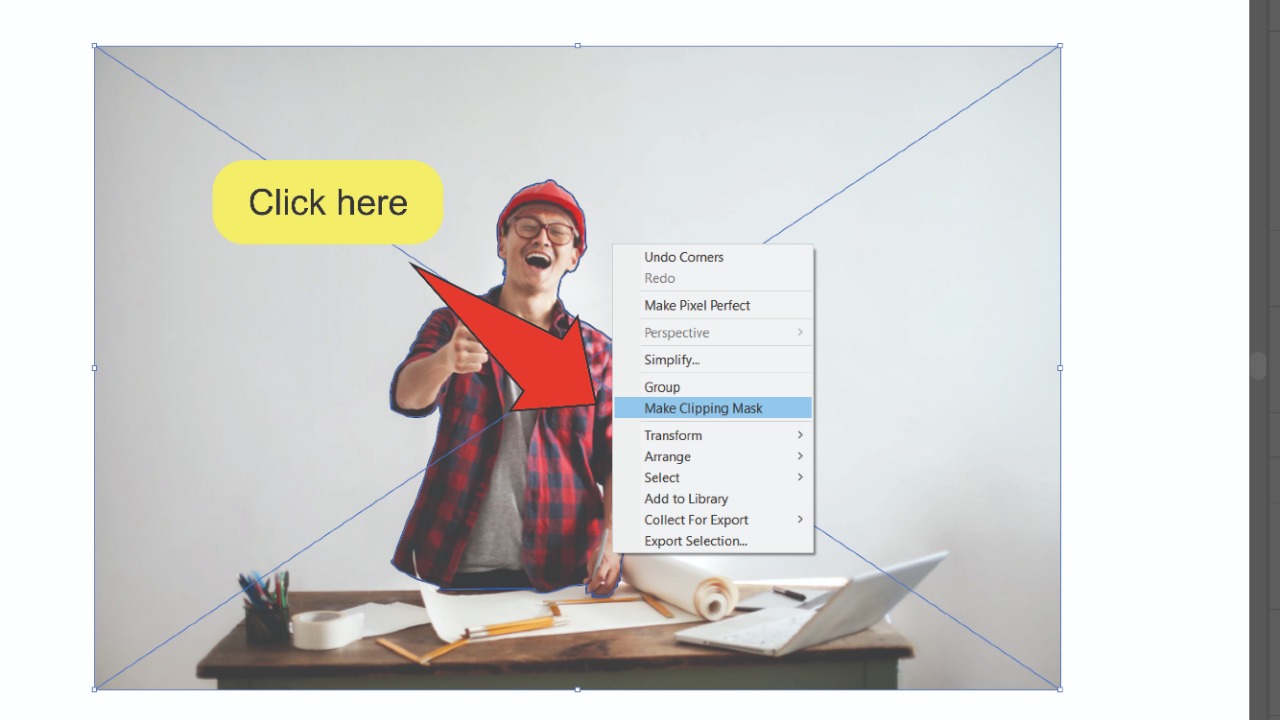
Select your image and outline. To select your image and outline simultaneously, click on each asset while holding down the “Shift” key. You can also click and drag the cursor from beside your artboard over your border and image to select them. Both the outline and your image should be highlighted.


Step 10:
Create a clipping mask. Right-click your image and select the “Make clipping mask” option. This will isolate the foreground image and remove the background.

How To Remove The Background Of An Image in Illustrator Using Image Trace
This method works best for less detailed or complex images like two-dimensional cartoon characters or logos. It breaks your image down into a collection of smaller vector objects that you can select and delete until only your foreground object remains.
Step one when removing a background using Image trace in Illustrator is to select your image. Next, at the top of the screen, select “Window” then “Image Trace”. On the Image trace panel, select “color mode” and set the maximum number of colors in your image. Then click “Trace” on the image trace panel and “Expand” on the top panel. Finally, ungroup the vector objects in your image, select all background objects and delete them.
Using Image Trace To Remove The Background Of An Image In 10 Steps
Step 1:
Select your image. Use the selection tool to select your image.
Step 2:
Open the image trace panel. Go to “Window”, followed by “Image trace”. A small window should pop up at the right side of your screen.

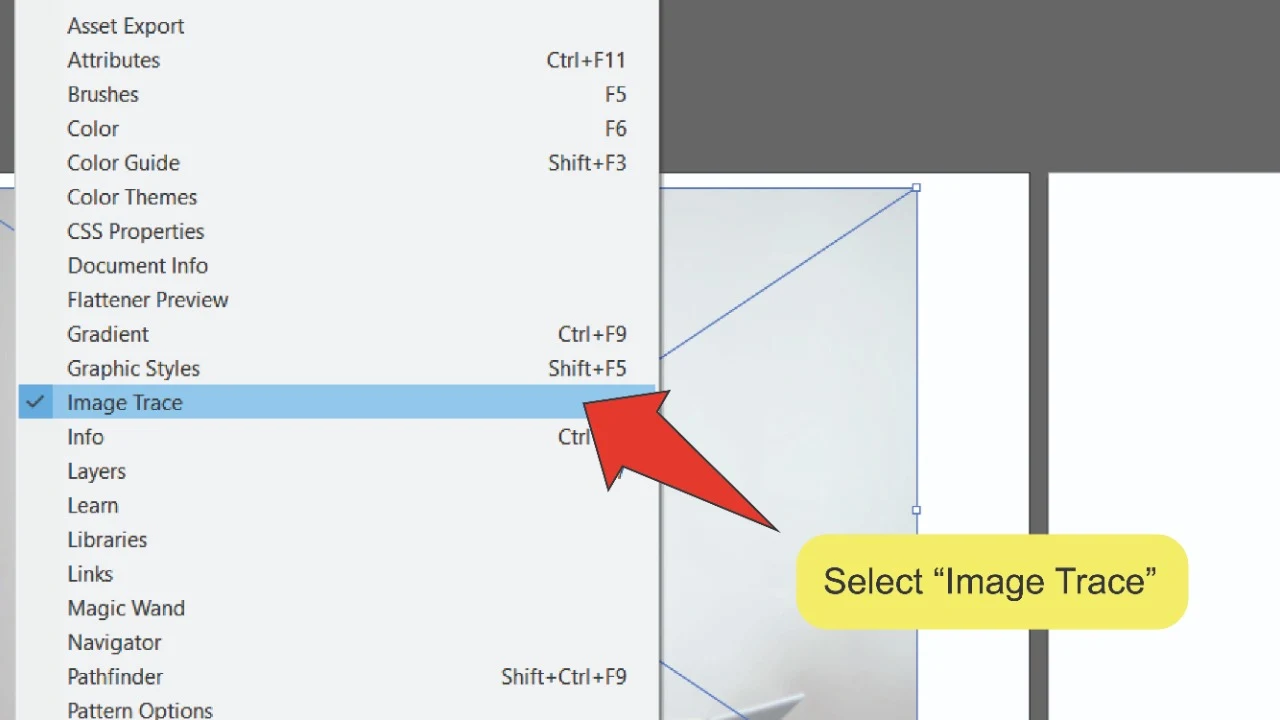
Step 3:
Select color mode. Go to the “mode” tab on the Image trace panel and select “color”.


Step 4:
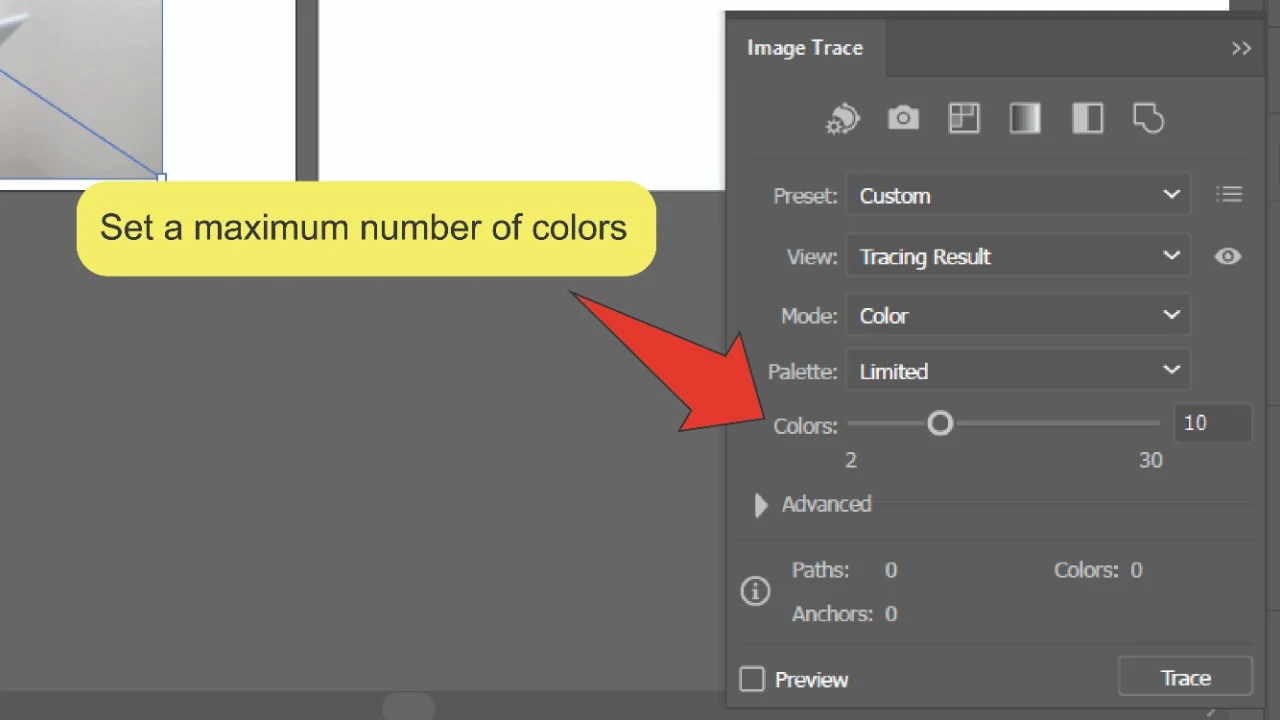
Select a maximum number of colours. Use the slider bar next to ‘colors’ on the Image trace panel to determine the maximum number of colors in your image. Remember, the higher the number of colors you choose, the harder it will be to convert your shapes into objects.

Step 5:
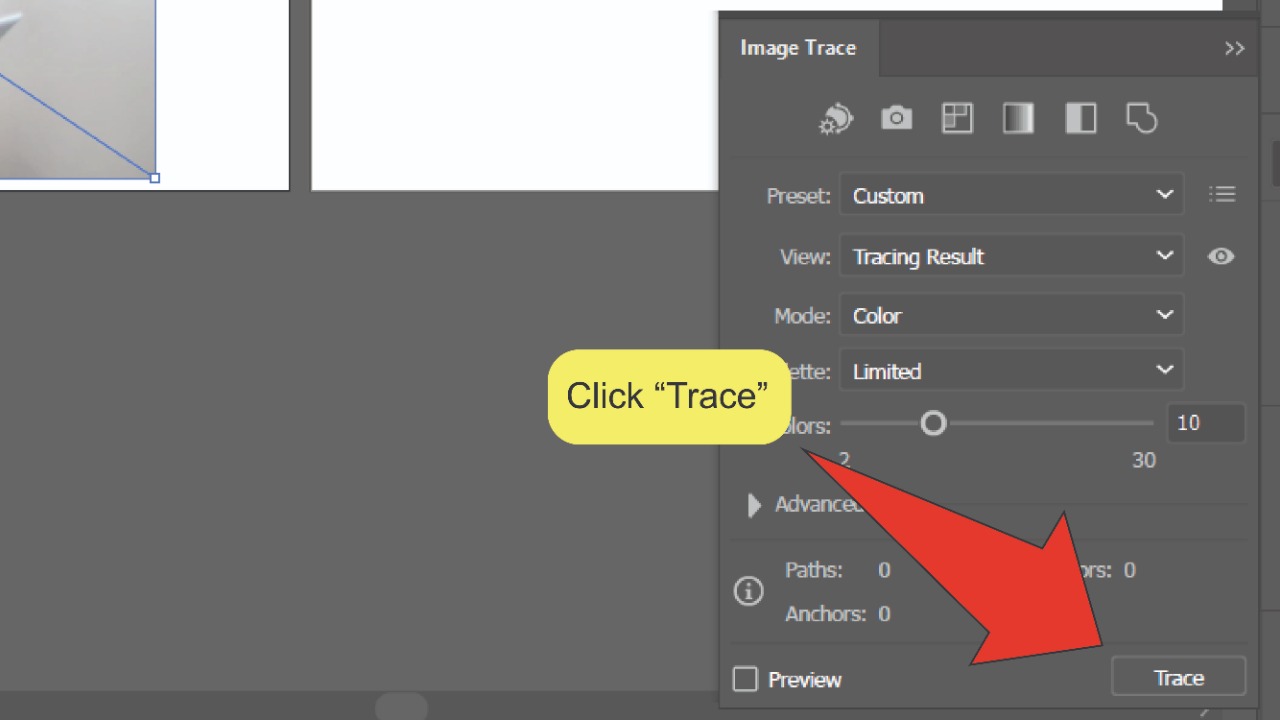
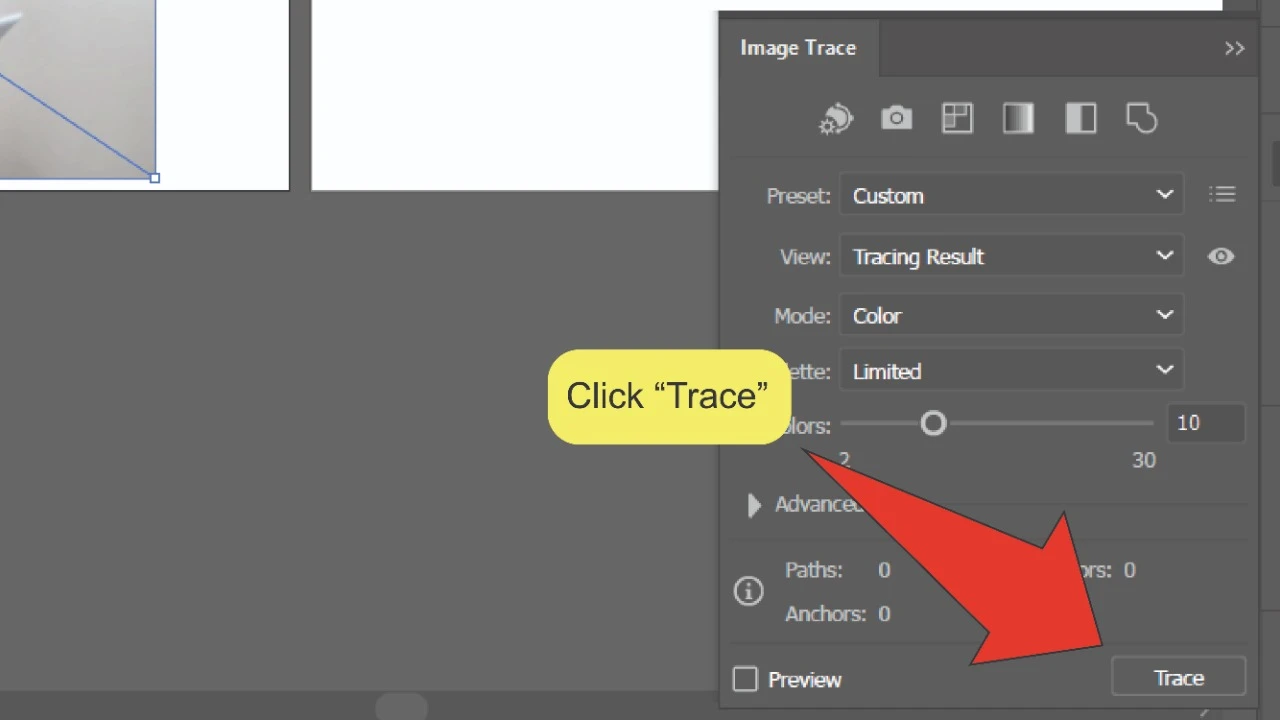
Click trace. Click the “Trace” button at the bottom right of the Image trace panel.
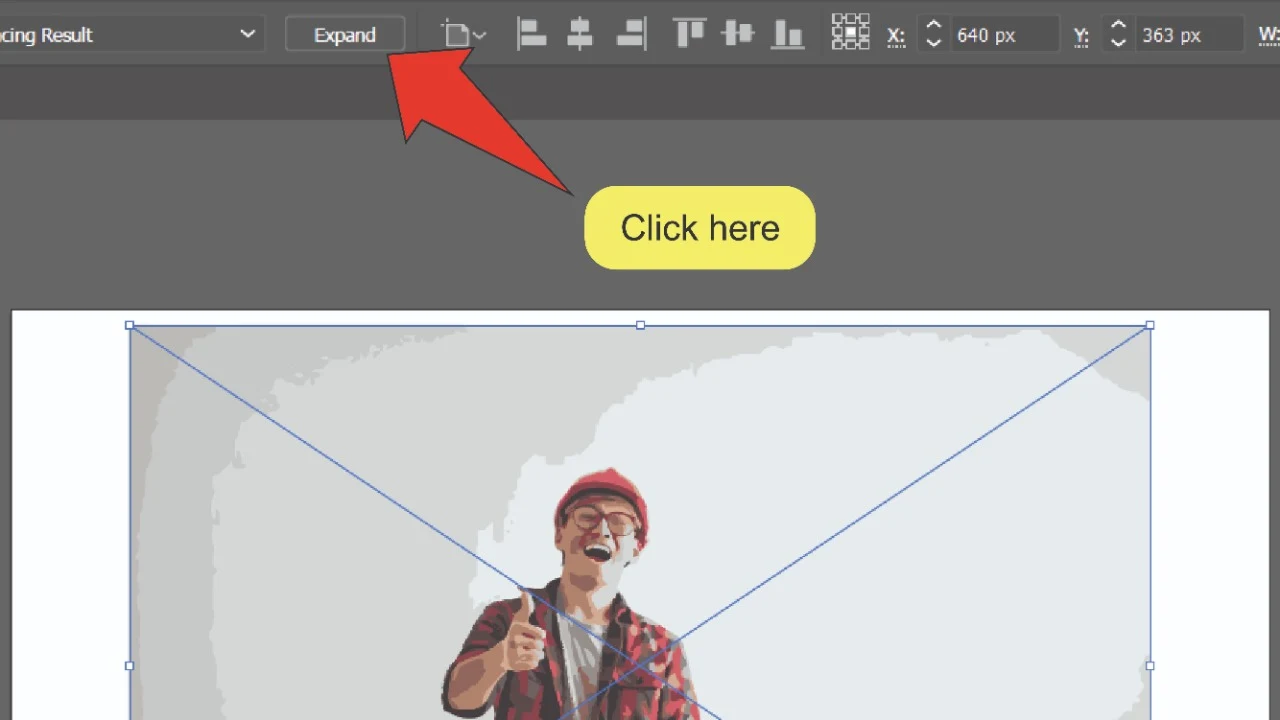
Step 6:
Click expand. Click the “expand” button on the top panel of your screen. This will convert your image into vector objects and when the image is selected, you should see their individual shapes highlighted.

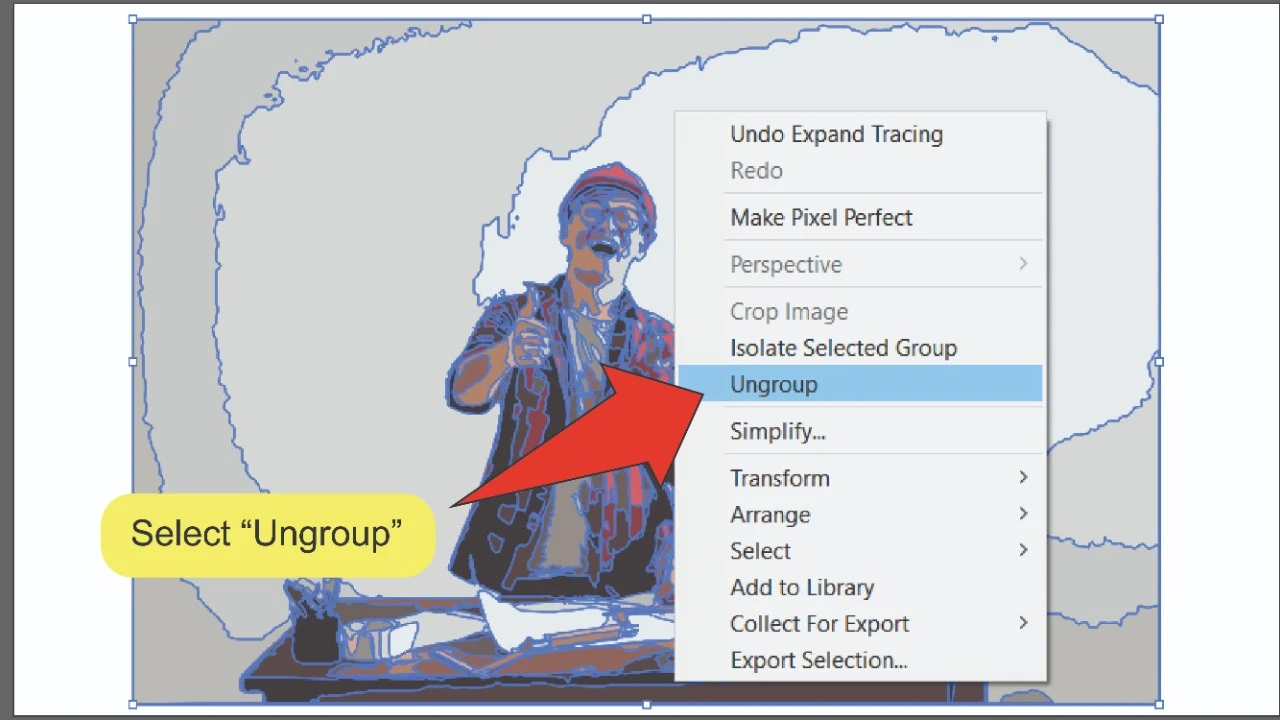
Step 7:
Ungroup objects. Right-click on the image and click on “Ungroup” to separate the vector objects from each other.

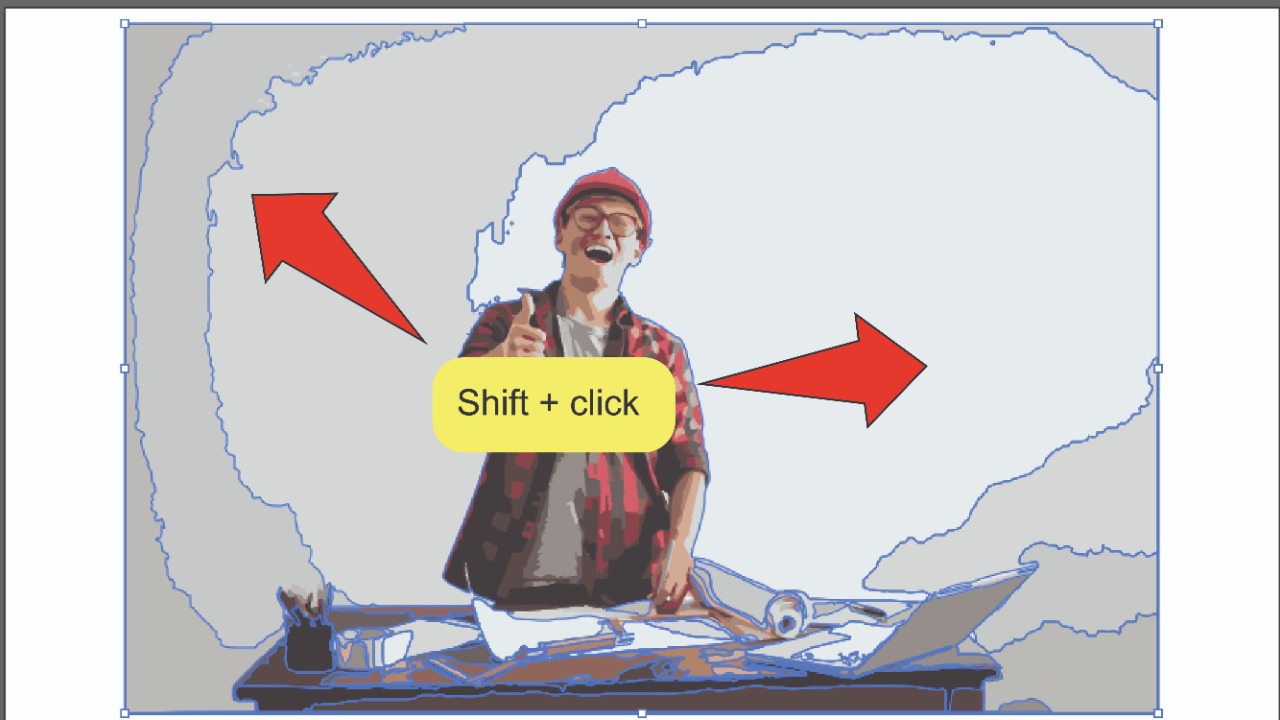
Step 8:
Select background objects. Use the selection or sub-selection tool to select the objects you want to remove. To select multiple objects at once, press and hold the “shift” key and click on all the objects you want to delete.

Step 9:
Delete background objects. Press the “delete” key to remove all the selected background objects.


Frequently Asked Questions About How To Remove The Background Of An Image In Illustrator
How do I curve a line while using the pen tool?
If you want to create a curved line while drawing an outline around your foreground object instead of altering the line using the sub-selection tool, simply click and hold, then drag the mouse until the line is in the right position.
Can I edit my outline after making a clipping mask?
Yes. Just equip the sub-selection tool and alter the anchor points along your image.


Hey guys! It’s me, Marcel, aka Maschi. On MaschiTuts, it’s all about tutorials! No matter the topic of the article, the goal always remains the same: Providing you guys with the most in-depth and helpful tutorials!

