

Who here doesn’t like hearing music?
Now, if you do love music and want to incorporate it in your design on Canva, you can certainly do so and add the audio track. But, what if you made a mistake and want to use another tune.
Can you still remove that audio track?
Thankfully, there is a way, and I’ll show you how exactly you can delete the audio in Canva.
How To Delete Audio In Canva
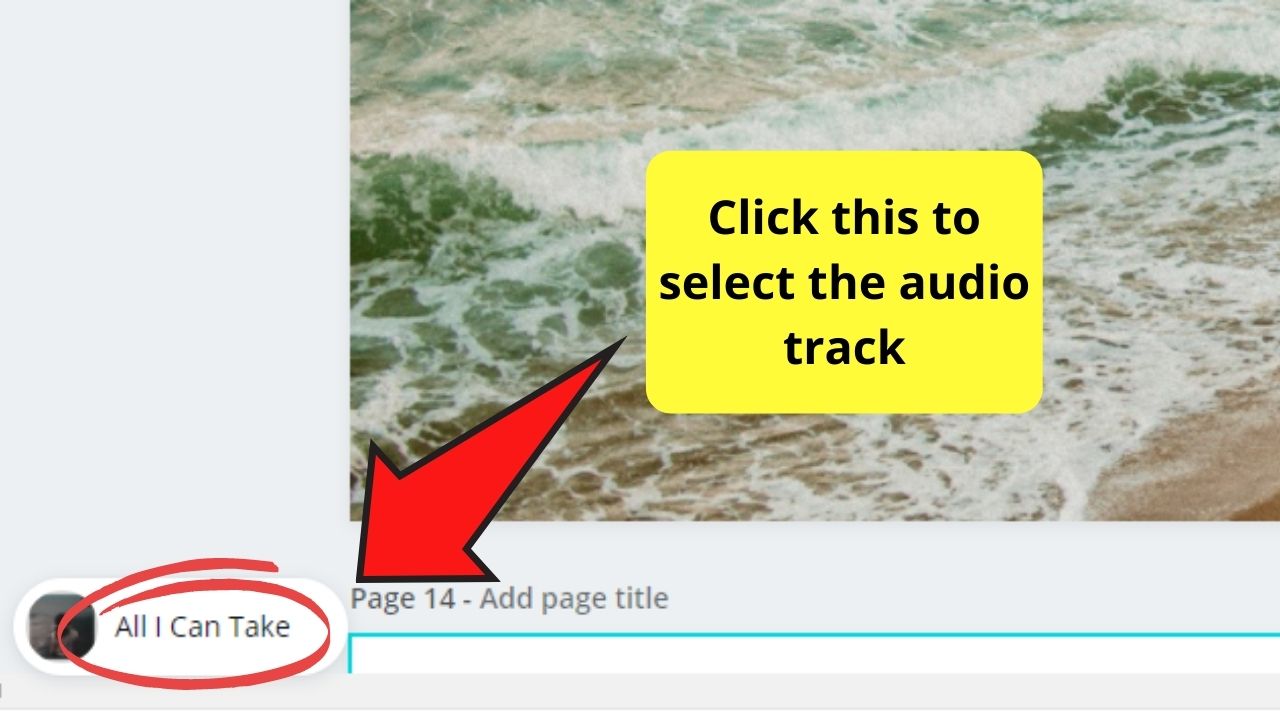
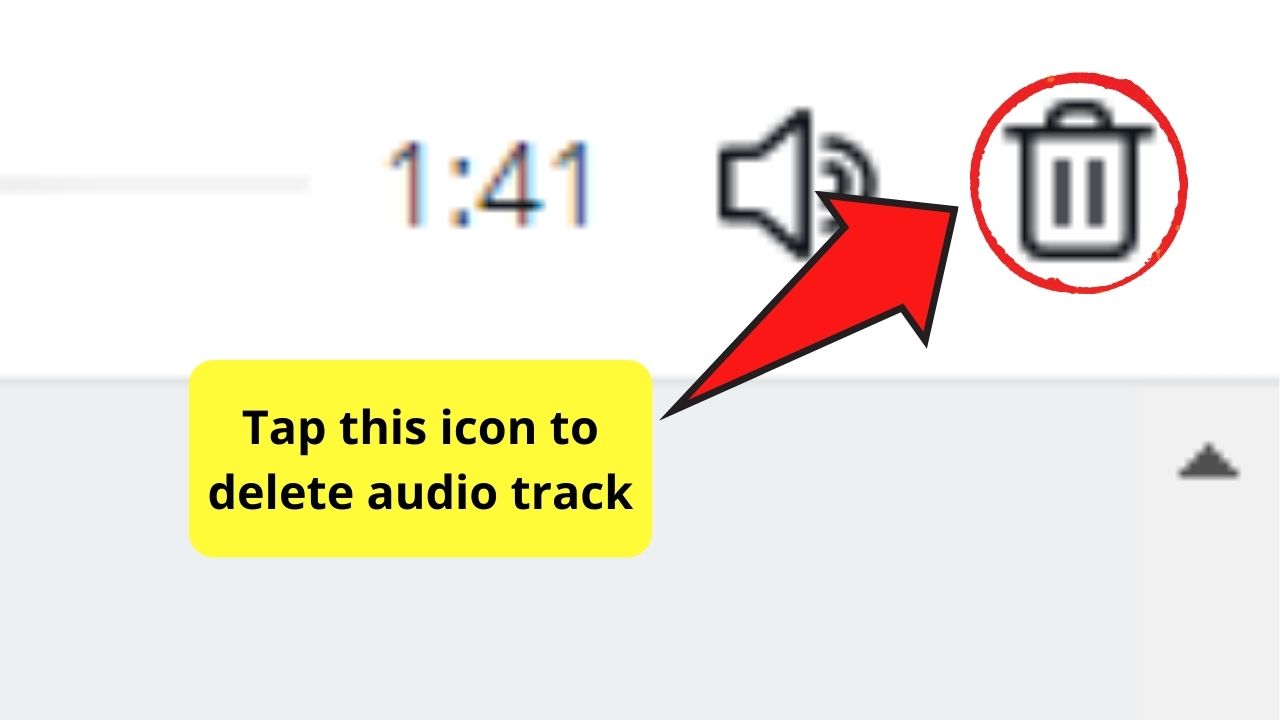
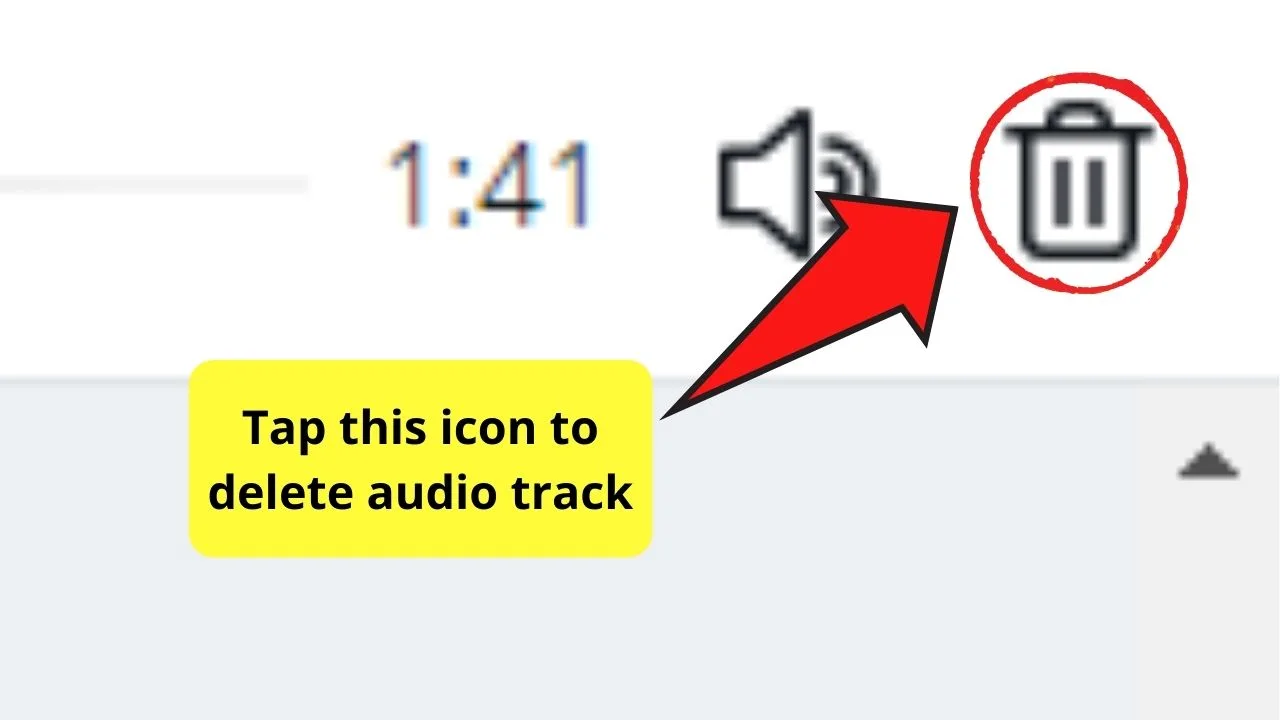
To delete a music track on your Canva design, first select the song title by heading to the bottom left of the editor screen and click on it. Head over to the right upper corner of the Canva screen and click on the delete icon to remove the audio. Another way is to change the audio’s volume to zero by dragging the volume slider to the left.
Steps in Deleting Audio In Canva
Now, let’s say you made a mistake in adding a particular song or background music to your design, and you’d like to remove it.
Can you still delete that particular audio and not affect the entirety of the design?
Thankfully, Canva has 2 easy ways of removing audio tracks from your design.
Use the ‘Delete’ button
Step 1: Log into your Canva account and open an existing design file. You can also make a new design from Canva’s home page.
Step 2: Once you’re in the correct file, head over to the page that contains the audio track.
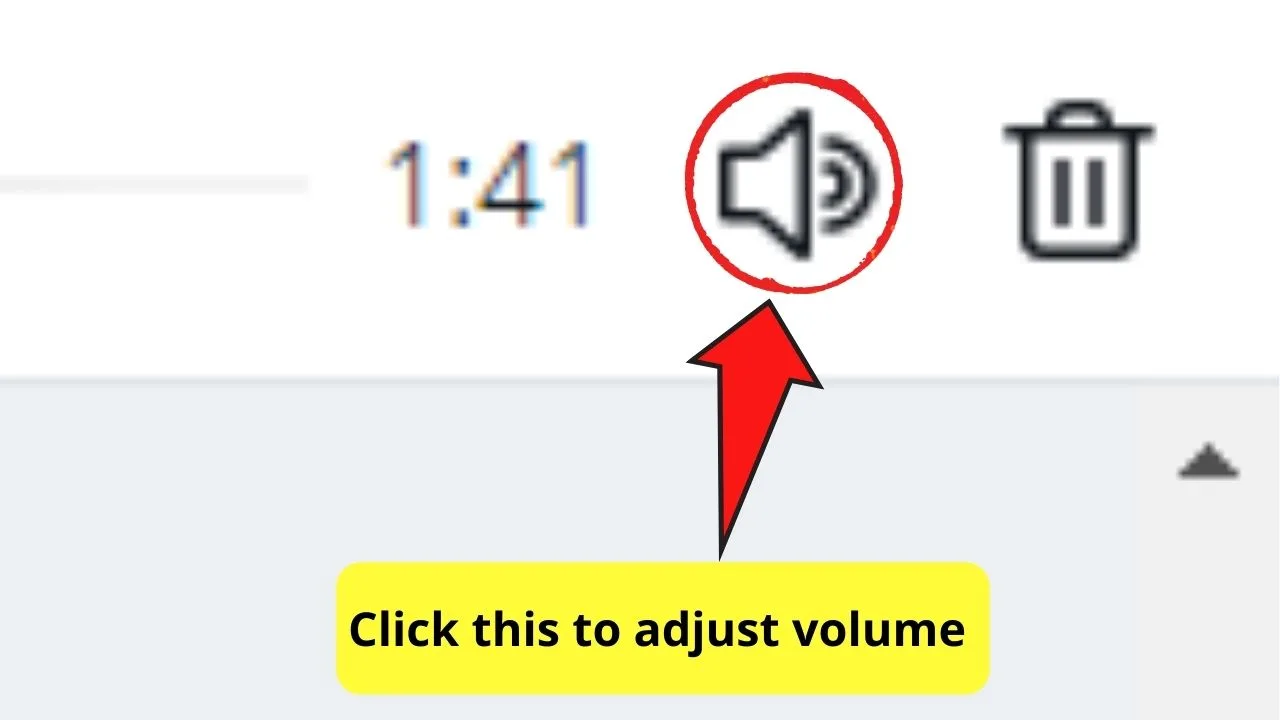
Step 3: At the bottom left corner of the Canva editor screen, you’ll find an oval-shaped button that shows you the title of the music you added. Click to select it.

Step 4: A white toolbar will then appear on top of the Canva editor screen.
Step 5: Head over to the screen’s top right corner and select the “Delete” icon. This icon appears as a trash can symbol.
It’s easy, right? In just a short period, you’ll master removing audio tracks from your Canva designs like a pro.


But, if you want to make sure that the audio’s gone from that particular page, there’s another way to remove the music.
Volume down
Step 1: Log into your Canva account and open the existing file that you’d like to edit.
Step 2: After selecting the correct design file, go to the page that contains the music track.
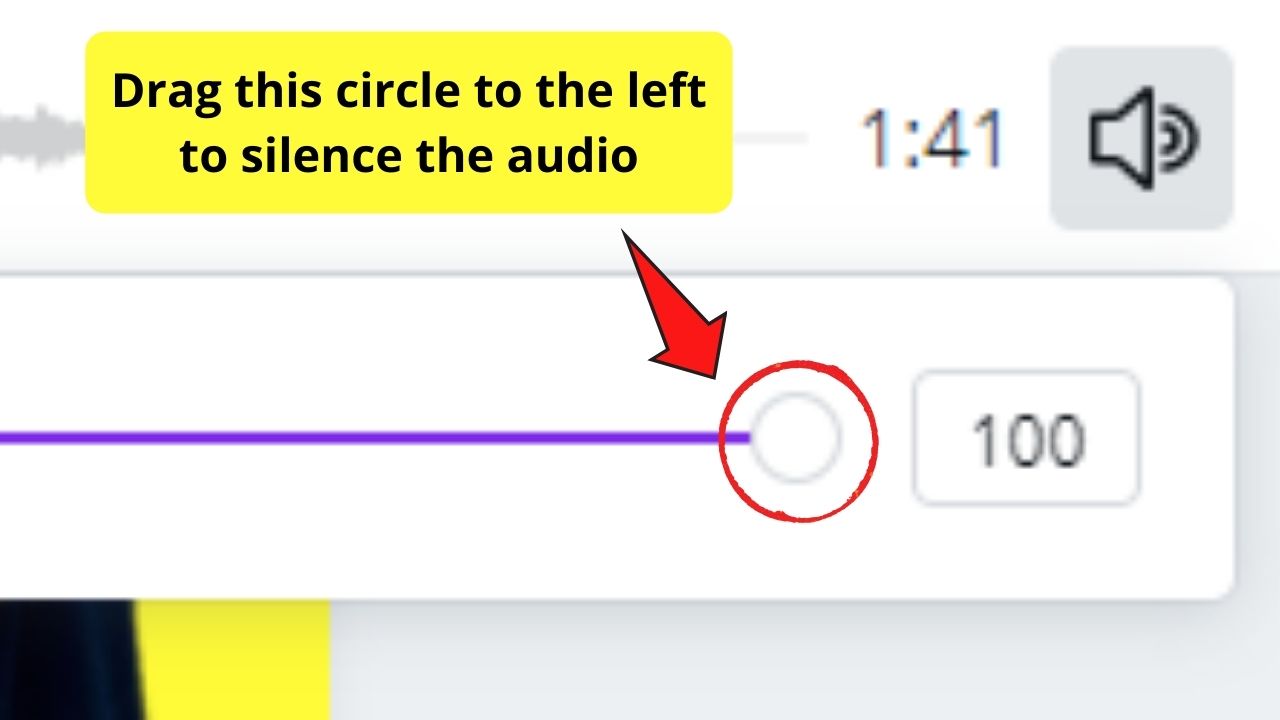
Step 3: At the Canva editor’s bottom left, tap on the audio track to select it. A white toolbar will then appear on top.
Step 4: Go to the volume icon on the said toolbar and click on it. This icon looks like a speaker with soundwaves coming out of it.
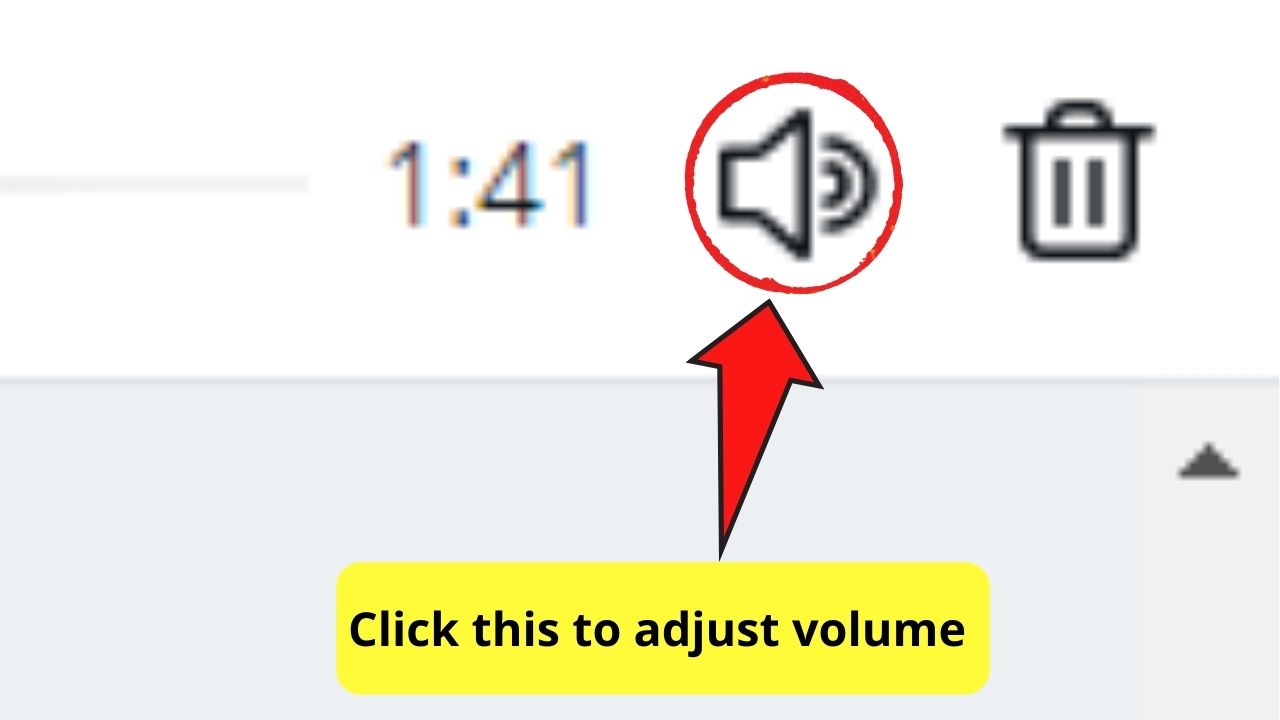
Step 5: On the dropdown menu that appears, the volume slider will appear. Drag the circle to the left until it reaches the zero mark.

Step 6: Once done with silencing the said audio track, click outside of the dropdown menu for the changes to take effect.
Once you’ve muted the audio track, you’ll be sure that the music won’t play on that particular page where you’ve added it.
If you want to be super-duper sure, you can click on the ‘Preview’ button first before downloading it on your device.
Not only does it save time, but it also saves you effort as you won’t need to edit, download, and repeat before you can check if the audio track’s out of your design.
Adding Audio on Canva: The How-tos
So, you’re pretty stoked now that you know how to remove an audio file on your design in Canva.
But, how can you remove one if you haven’t even added a music file to the page, right?
So, let’s take a sneak peek at how this whole adding a music track magic happens in Canva.
Technically, you’ll have to log into your Canva account first and create a new design from the home page.
Open a previous design file if there’s one that you aren’t done editing yet.
Whichever way you choose, you can now head over to the left-side menu on your Canva screen and click on the “Photos” tab.

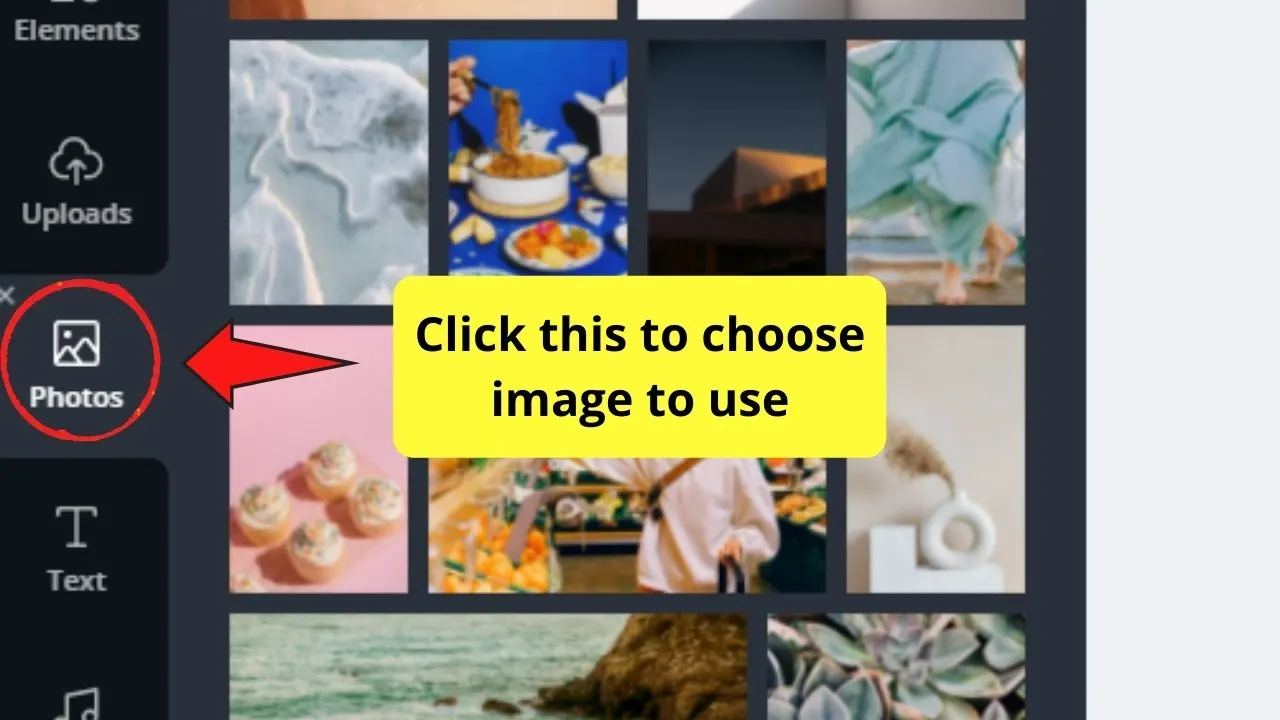
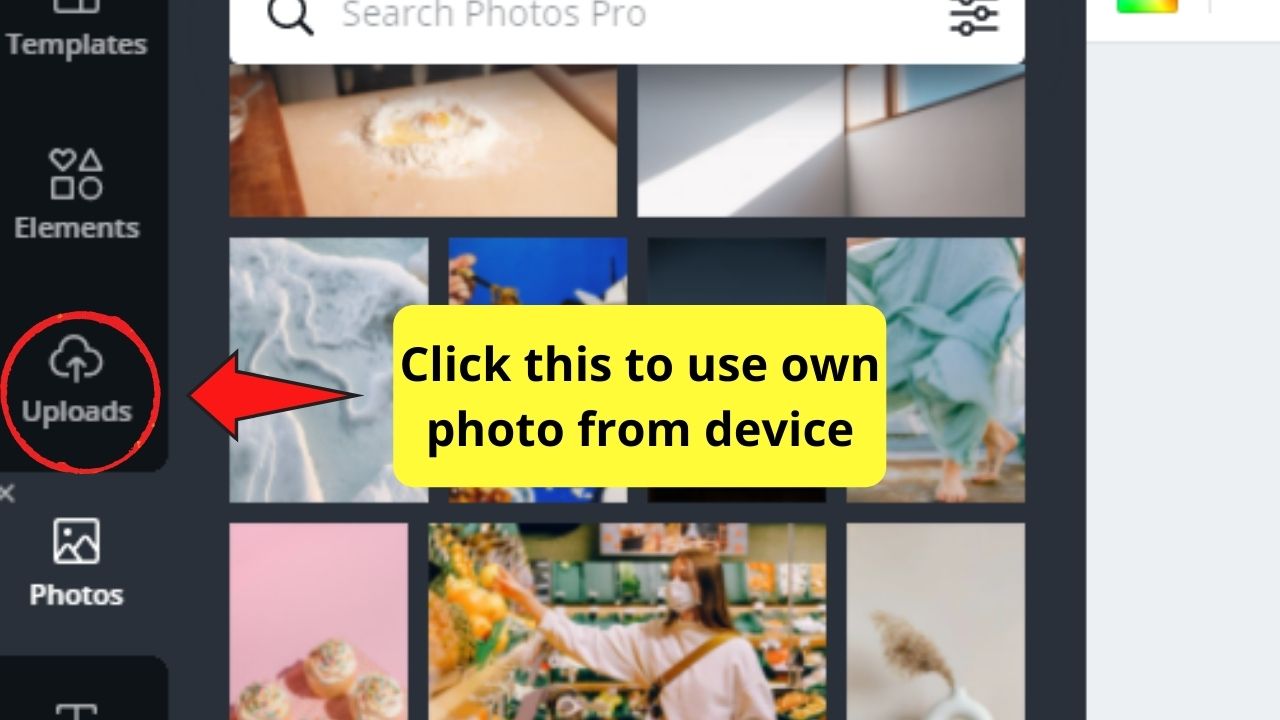
Once you’ve selected that option, Canva’s photo gallery will then appear. You can scroll down to find the perfect picture, or you can add a particular image through the “Uploads” tab instead.

Once you’ve selected an image, click on it and drag it towards the blank canvas on your editor page. Drop the said picture to make it appear on the canvas.

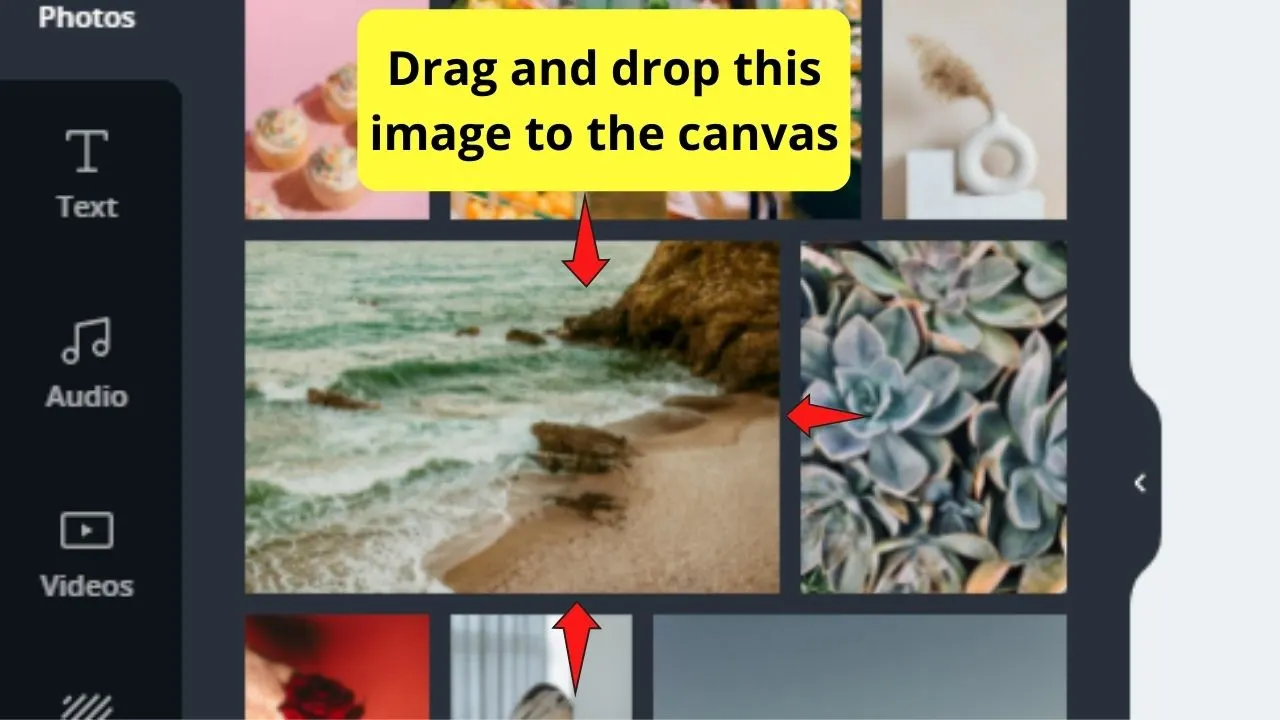
Then, stretch the said picture out so it’ll fit the page. You can either do it manually by dragging the white circles on the image’s corners or right-click on the photo and select “Set image as Background.”
Once you’re all set for the picture, head over to the left-side screen again. This time, though, select the “Audio” tab.

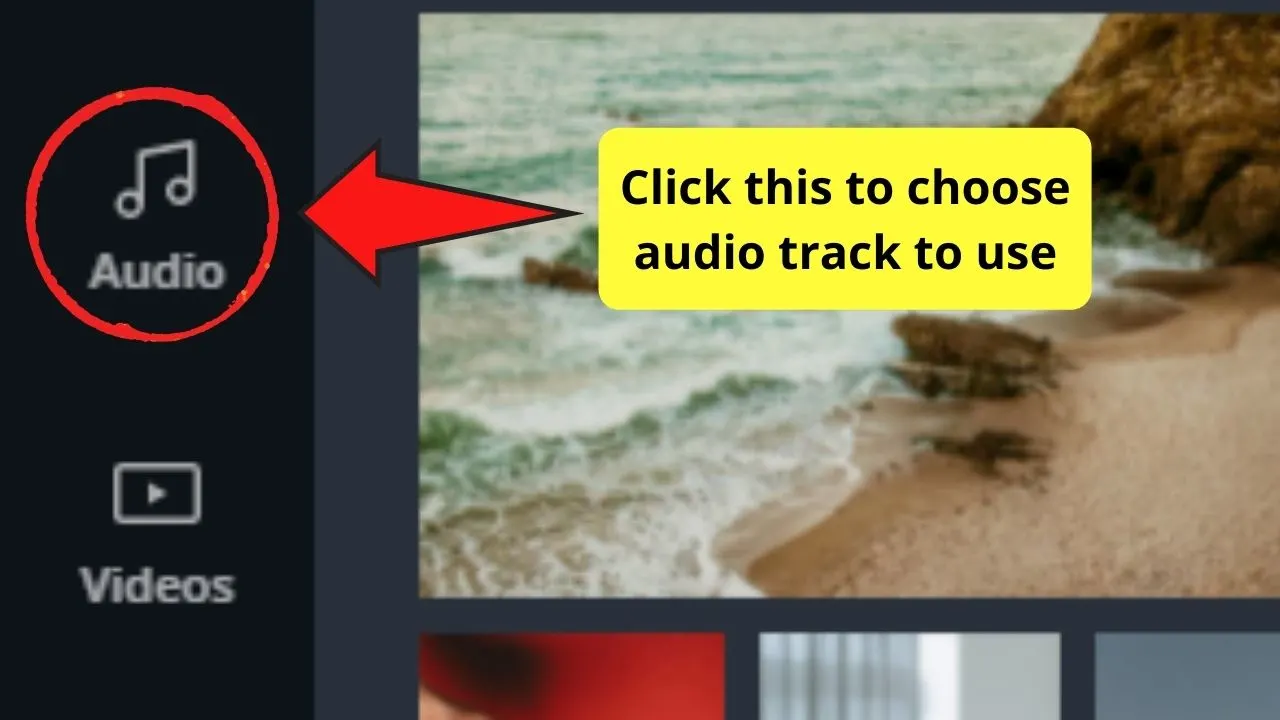
And, just like in the photo gallery, Canva will then present to you a gallery of music clips you can add to your design.

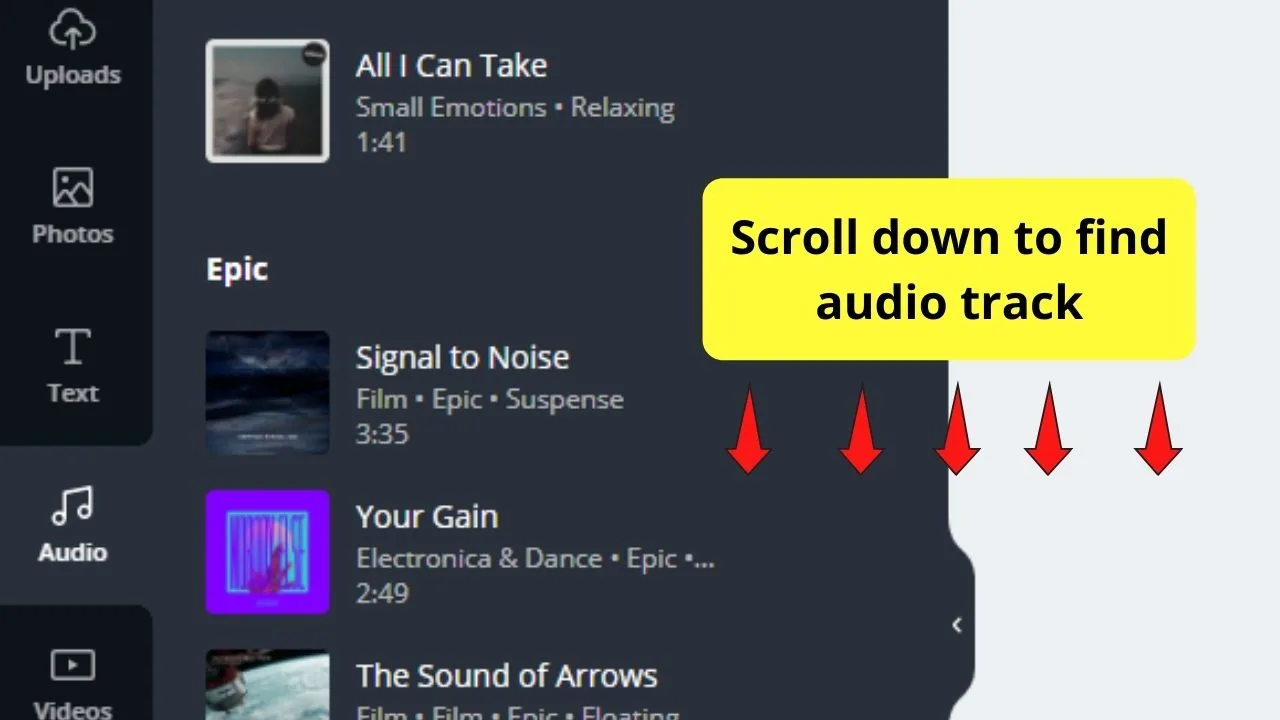
Scroll down to find that particular audio track, or choose from the categories in the said menu.
Once you’ve selected a particular clip, click on it and drag it into the editor portion of your Canva screen. Drop the said music clip to make it appear on the canvas.
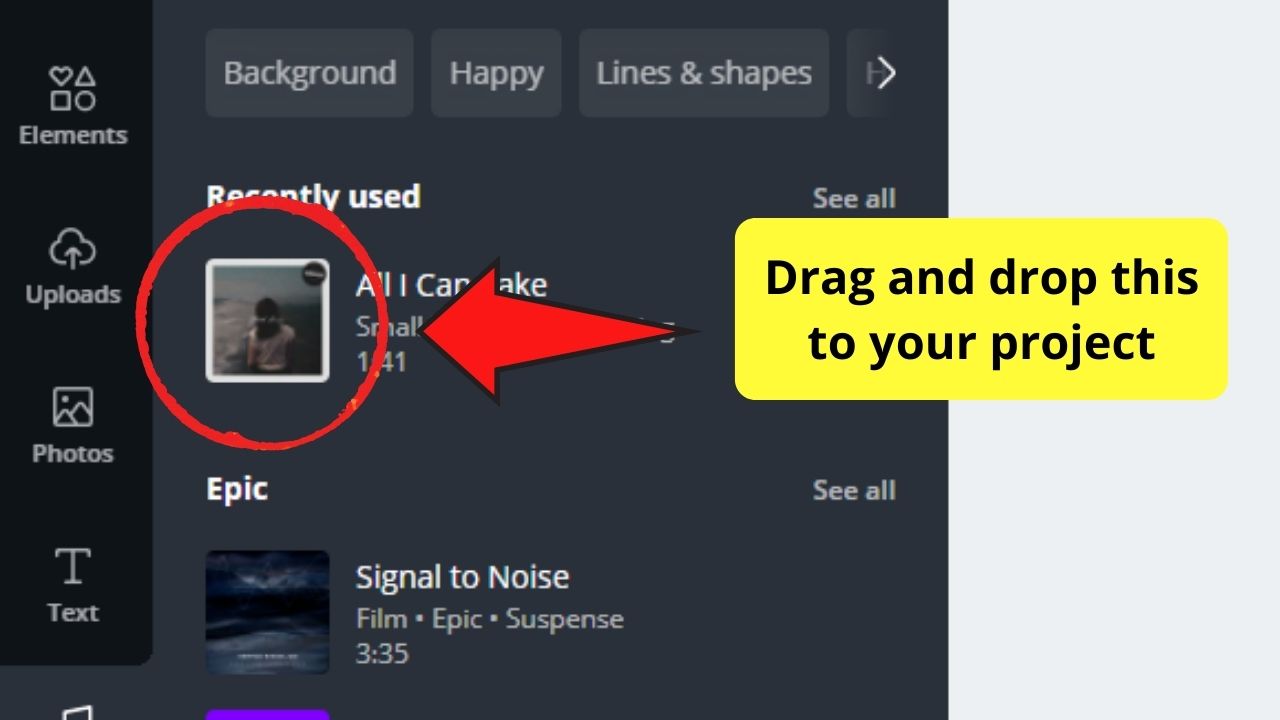

And, just like that, you’ve already added a music track to your design.

But, if you want a more detailed run-through of this process, better read up on How to Add Music to Canva on this website.
How to Remove Audio from Video in Canva
There are a couple of ways to remove audio from video in Canva. First of all, in the timeline, you can simply left-click on the audio track and then press “Delete” on your keyboard to remove audio from video in Canva. Alternatively, you can select the audio track in the timeline and then at the very end of the audio track click on the symbol with the three dots and then select “Delete Track.”
Now, the method as outlined above obviously only works if you have manually added audio to your video either by using Canva’s stock audio or by uploading and adding your own audio tracks to your video via the “Uploads” tab of Canva.
But what about removing audio from a video in Canva that does NOT have a separate audio track displaying in the timeline? (this will be the case for every video that you upload that already comes with sound!).
Well, in this case, you won’t be able to remove the audio track from the video because Canva, unlike professional video software like DaVinci Resolve and Premiere Pro, does not split your video up in both a video track and an audio track on upload.
However, this does not mean that you can’t remove the audio in this type of situation.
What you would do in this case is to simply put the volume of the video to “0.”
While this does not really remove the audio from your video, it will make sure that the original audio track of the video will be completely muted.
To do that, simply left-click on your video, then in the upper-right corner of the screen click on the speaker symbol and then either type in 0 or move the fader completely to the left to mute the audio of your video.
After doing so, you can then indeed add other audio to your video if desired. Simply head over to “Audio” in the left toolbar and look for a suitable audio track and then just left-click on it to add it to your video (it will then appear in the timeline below your video).
How to Remove Music from a Canva Video
To remove music from a Canva video, left-click on your video, then in the timeline below the video select the music track and then press “Delete” on your keyboard. Alternatively, you can also press on the three dots at the very end of the music track and then select “Delete track.”
There are a couple of important things to note here, though.
Most importantly, you can only truly remove the music of your video if we are talking about music that you have chosen on Canva (= Canva’s stock music library).
In case we are talking about a video that you have uploaded by yourself that already comes with music, you won’t be able to truly remove the music from the video within Canva.
The reason for this is that upon import, Canva does not split up videos into both a video track and an audio (music) track such as is the case in other software like Premiere Pro and Cubase, etc.
How to Mute Music in Canva — The other Way of “removing” audio (from) video in Canva
Instead of actually removing audio altogether, you can also just go and simply mute audio. While this does technically not remove the audio file from your video (or any other sort of project) in Canva, it does make sure that no audio is playing when your video or slideshow project (or any other project) is playing. And in many cases, this is all you need.
This works for every video that you work with in Canva, no matter whether it is your own video or a video that you have chosen from Canva’s vast music library.
To mute the music of any video, simply click on the video in your project and then in the upper-right corner of the screen click on the speaker symbol and then make sure to move the fader all the way to the left until it says 0. This will mute the music of your video completely.
If desired, you can then obviously add other music by either choosing something out of Canva’s music library (select “Audio” in the left toolbar to access it) or by uploading and adding your own music to your video.
Frequently Asked Questions About How To Delete Audio In Canva
Can you add Premium audio tracks to your design and download them on your device?
You can add Premium music tracks to your design even if you’re using a free account. You can identify the premium ones if you see the currency or crown symbol on them. However, you’ll need to pay for them first before you can download them on your device.
Is it possible to shorten the music track you’re using?
Though the process requires a bit of effort on your part, you can trim the music you’ll use in your design. Simply click on the song’s title at the bottom right of the editor to make a toolbar appear at the top part. Click and drag the colored part of the soundbar until you reach the song’s part where you want the music to begin playing.
Can you edit music tracks on mobile devices?
Since audio isn’t available on Canva’s mobile apps, you also can’t edit audio tracks from your phones or any mobile device.


Hey guys! It’s me, Marcel, aka Maschi. On MaschiTuts, it’s all about tutorials! No matter the topic of the article, the goal always remains the same: Providing you guys with the most in-depth and helpful tutorials!

