

Wow! That frame’s so cool I want to place it on my Facebook profile photo as well.
But then again, I want to be original at the same time. So, can I create my OWN Facebook frame?
Well, if you’re a Canva user, the good news is, you definitely can make a Facebook frame with this graphic design tool.
How to Make a Facebook Frame in Canva
To make a Facebook frame in Canva, create a new design file using logo template dimensions. Click “Elements” to select a circular frame. Add banners, icons, text, and other graphic elements. Then click “Share” and “Download.” Choose “PNG” and tick “transparent background” before saving the image.
Creating Canva Facebook Frames — Expert Tips!
Now that I’ve piqued your curiosity over creating Facebook frames, let’s get started on how you can make one in Canva.
But, upgrade to a Pro account first as the Canva background remover feature or saving with a transparent background is only available for Pro users.
However, if you’re still on a Canva Free account, no worries. You can use remove.bg as a workaround for that feature you’re missing
So, to proceed…
How to Make Facebook Frames in Canva from Scratch
Step 1: Create a new design file by tapping on the “Create a Design” button
With a Facebook frame, it’s best to use the dimensions of a logo template so that the frame will perfectly fit your profile photo.


However, if you don’t know the exact dimensions of a logo template, simply encode “logo template” in the dropdown menu’s search bar.
Click on the logo template option on the dropdown menu.
Step 2: Head to the left-side menu and tap on “Elements”


Step 3: Search for a circular border or frame in the “Elements” gallery


Either head over to the “Frames” section of the “Elements” gallery or simply type “circle” or “circle border” in the search bar.
Once you find the circular border you fancy, click and then drag it to the canvas. Resize the frame by tapping on it and dragging the white circles surrounding it diagonally.


Step 4: Add photos inside the circular border you added
But, this step is optional depending on what you intend to design.
If you have an image saved on your device you’d like to use, just tap the “Uploads” tab and click the “Upload files” button to jumpstart the import process.
If, however, you prefer to use relevant stock photos instead, head to the “Photos” tab and browse through the gallery or type the keywords in the search bar.


If the photo you use comes with a background you don’t want to include in your design, just tap on the image to activate the “Edit image” feature.
Then, in the side panel menu that appears, click the “Remove background” option. This will prompt Canva to remove the background of that particular photo for you.
Then, click and drag the said photo to your project. Resize it accordingly.
Step 5: Add banners or other graphic elements to your Facebook frame


Click and drag, resize, and position them on the canvas according to the design you have in mind.


You can even polish the positioning of your various elements through Canva’s ruler feature or by tapping Tidy up under the Position button.
Step 6: Click the “Text” tab and select the font sizes or font style combinations that suit your theme


Click and drag on that particular font and edit the text accordingly. Adding colors to the text box can also be done so that your text will pop out more.
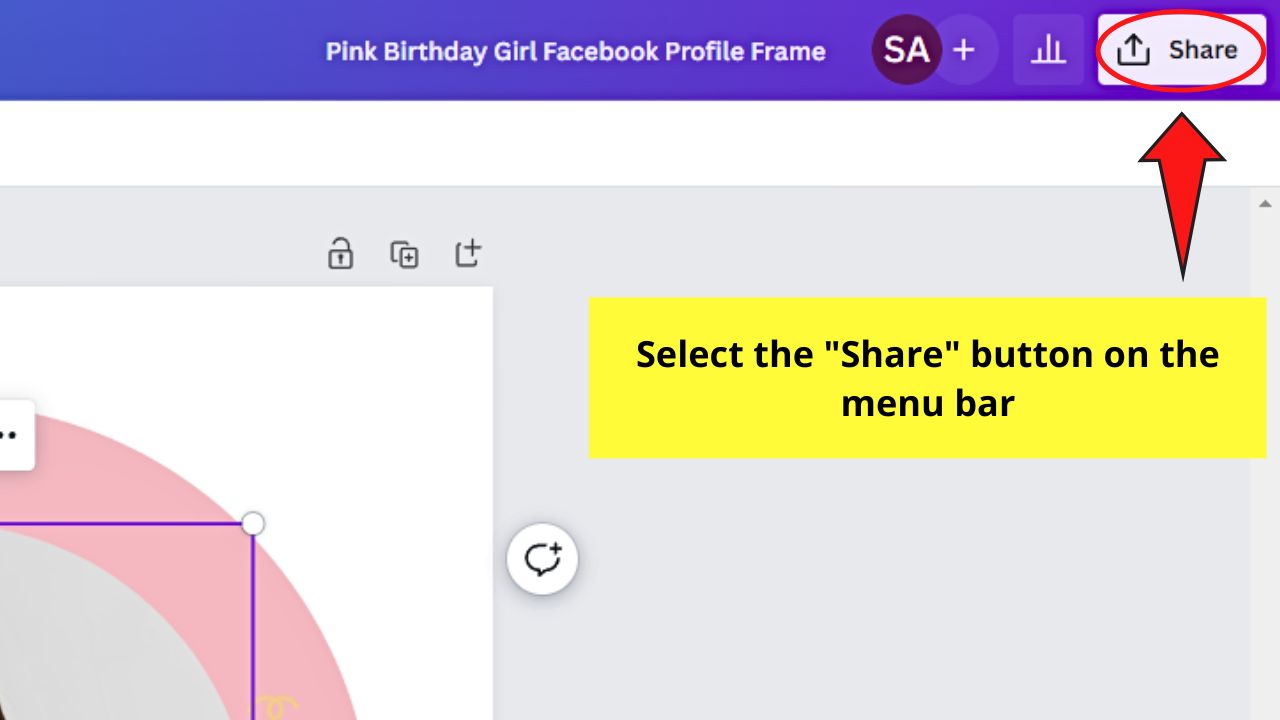
Step 7: Click the “Share” button and select “Download”
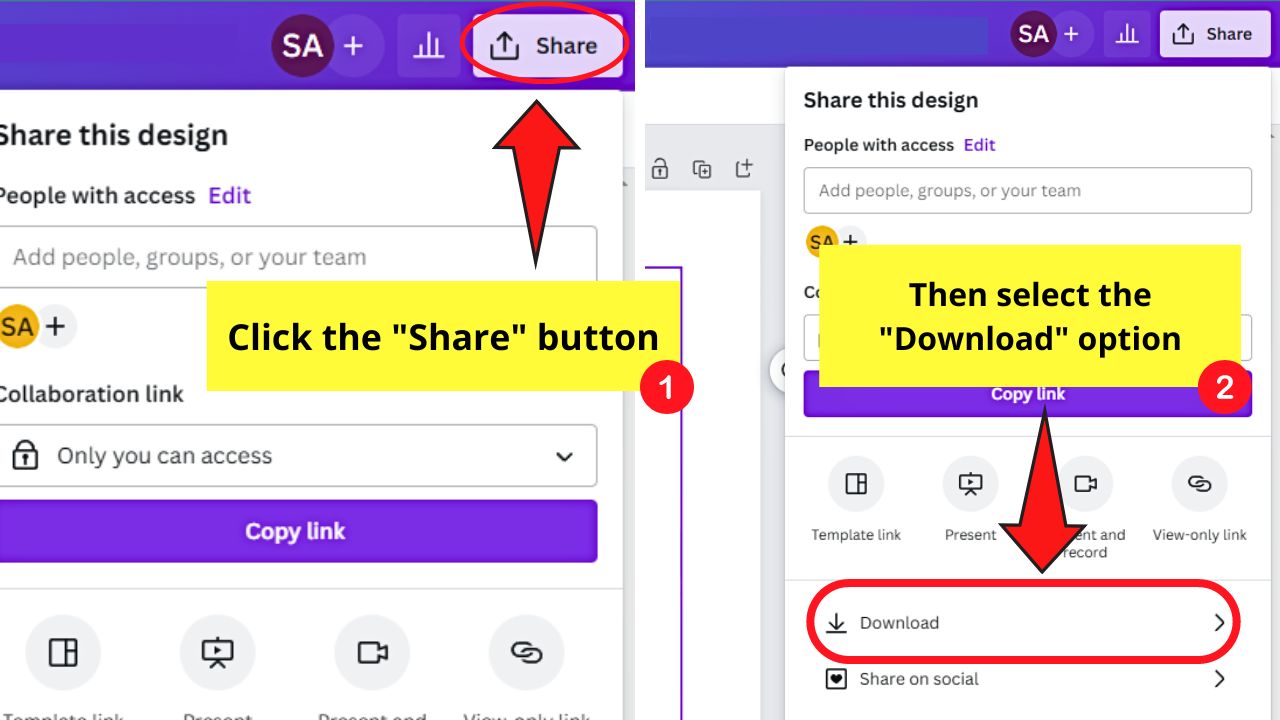

Then choose “PNG” as the file type.
Now, as you’ll add your newly-created frame as an image overlay on your profile picture, you need to save the image with a transparent background.
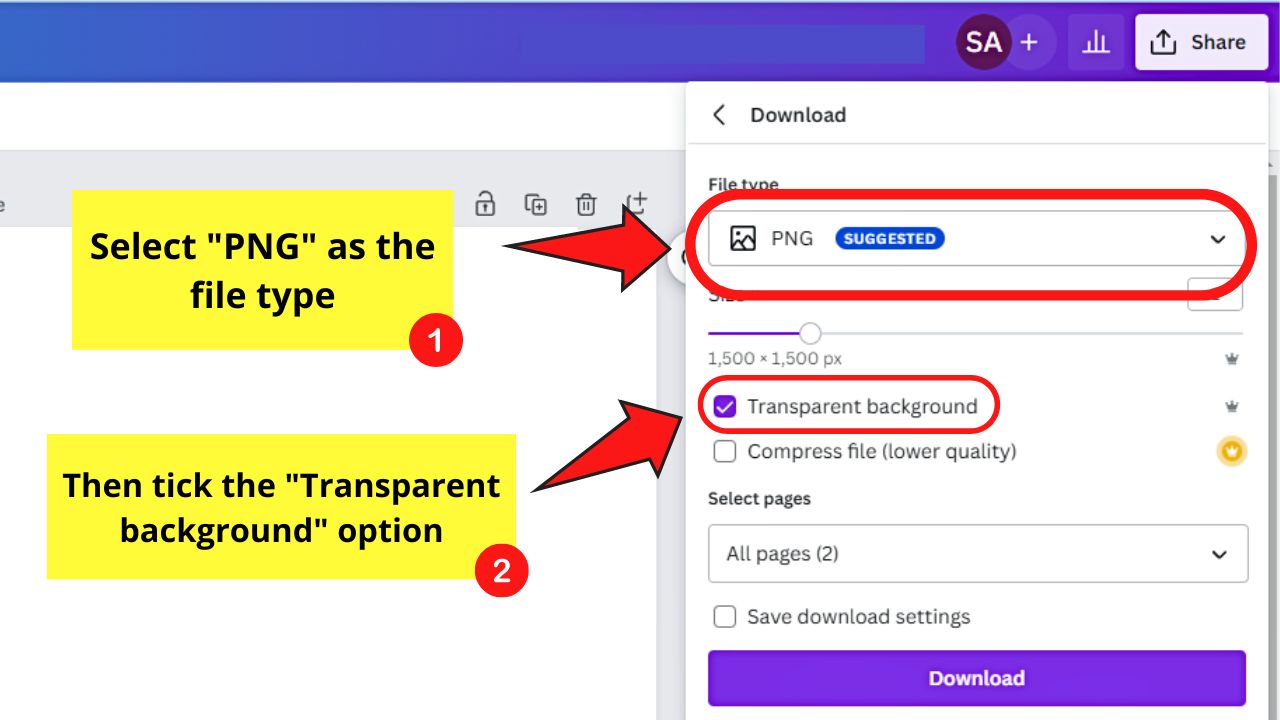

To do this, make sure the “Transparent background” box is ticked before you hit the “Download” button at the bottom of the dropdown menu.
Then, wait for the export process to finish before you can upload your newly created frame on your Facebook profile.
How to Make a Facebook Frame Using Premade Templates
There are also premade Facebook frame templates available if you’re out of creative juice — or you simply do not want to start from scratch!
The good news is that these premade Facebook frame templates are customizable.
Step 1: Type “Facebook frames” in the search bar

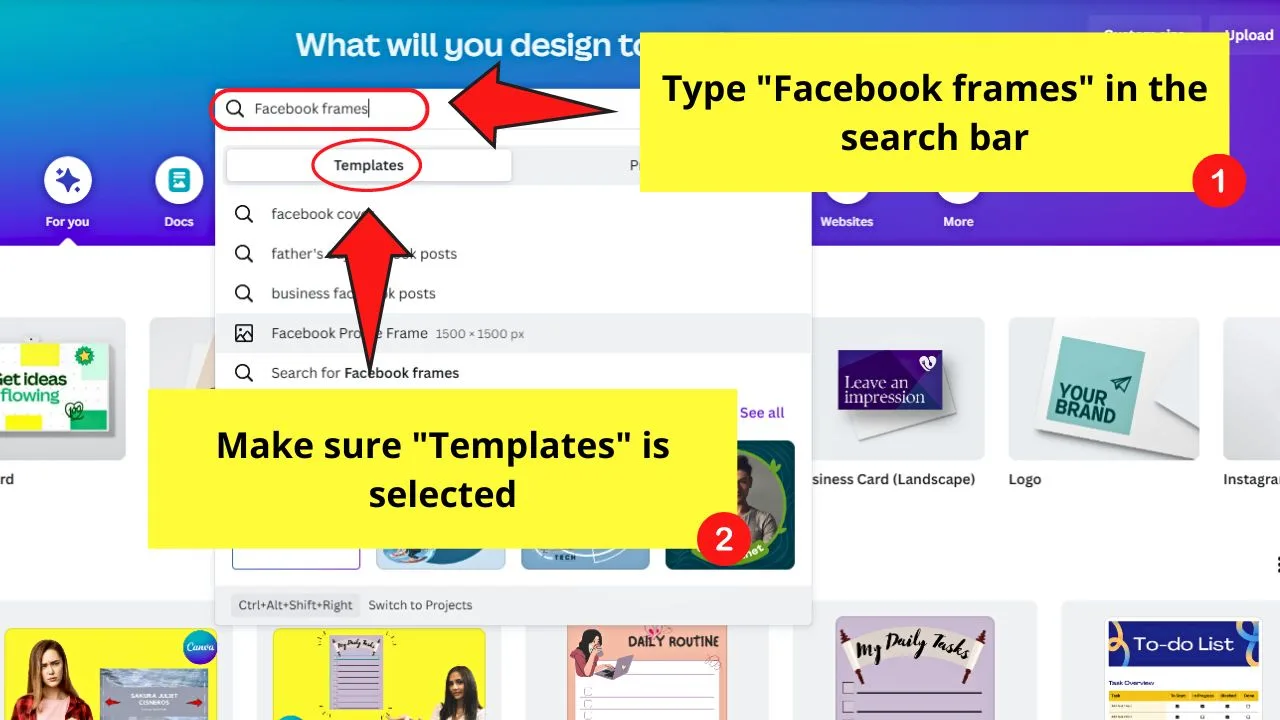
You’ll find this in the middle of Canva’s home page. Make sure that “Templates” is selected. Otherwise, previous projects with the same keyword used will appear instead.
By now, a dropdown menu should appear featuring options closest to the search terms used.
Step 2: Select “Facebook Profile Frame”

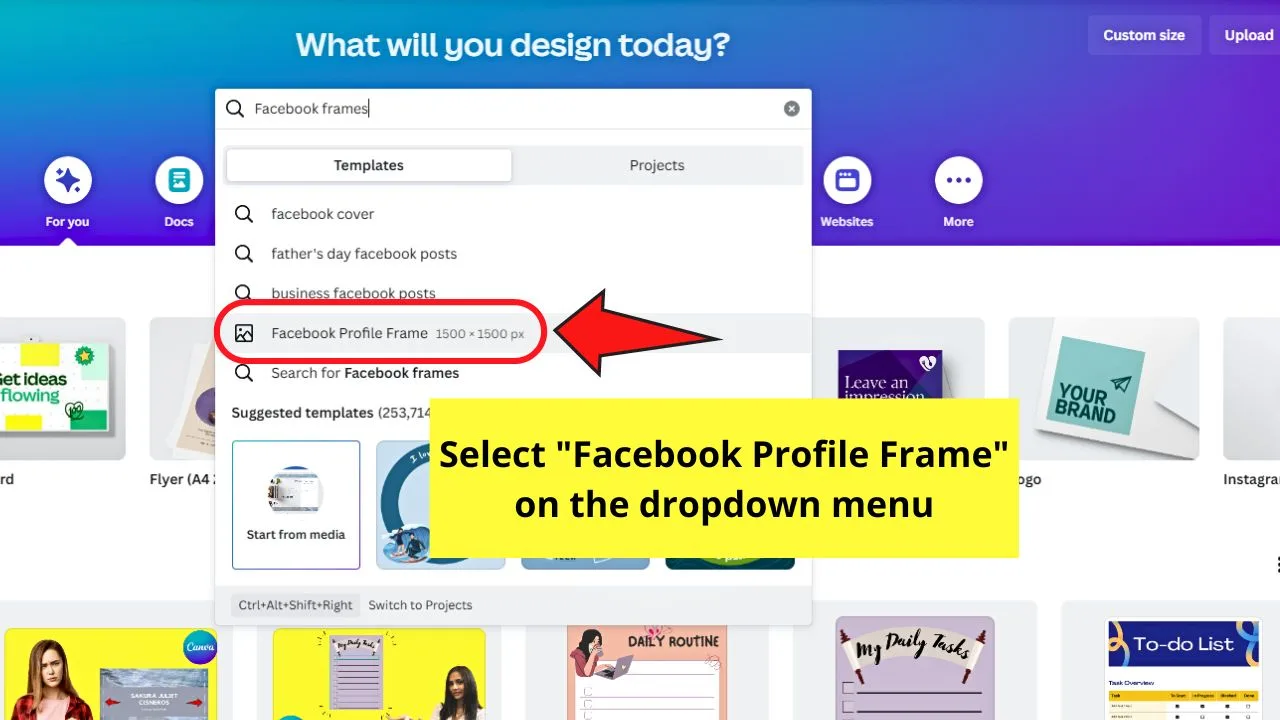
This is the second to the last option that appears on the dropdown menu. The “Facebook profile frame templates” page then appears.
Then click on the FB profile frame template you like.
Step 3: Click the “Customize this template” button

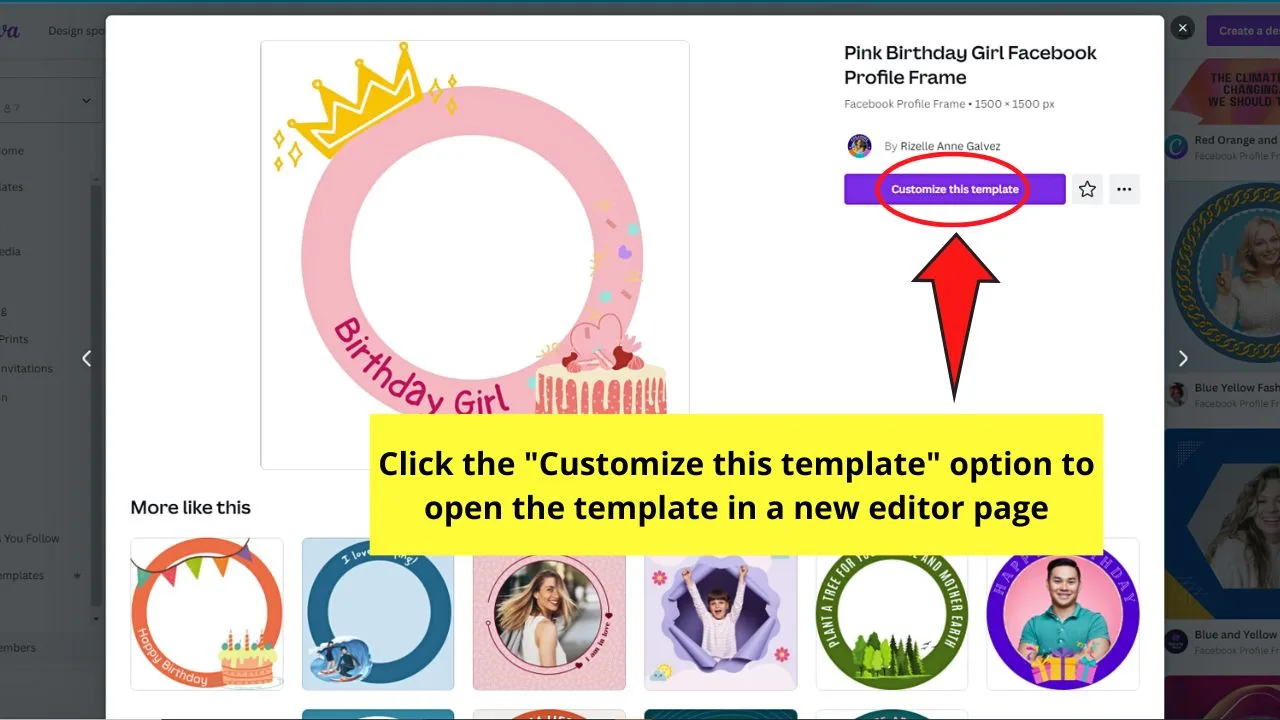
This appears on a pop-out window showing the FB profile frame template you selected and other similar suggestions.
Selecting the button opens the template on the editor page. The templates here use the 1500 x 1500 px size by the way.
Step 4: Edit the Facebook profile frame template
Change the color of the design elements, add your short personal tagline, and curve the text you added to make it fit the frame.
Step 5: Add a circle frame

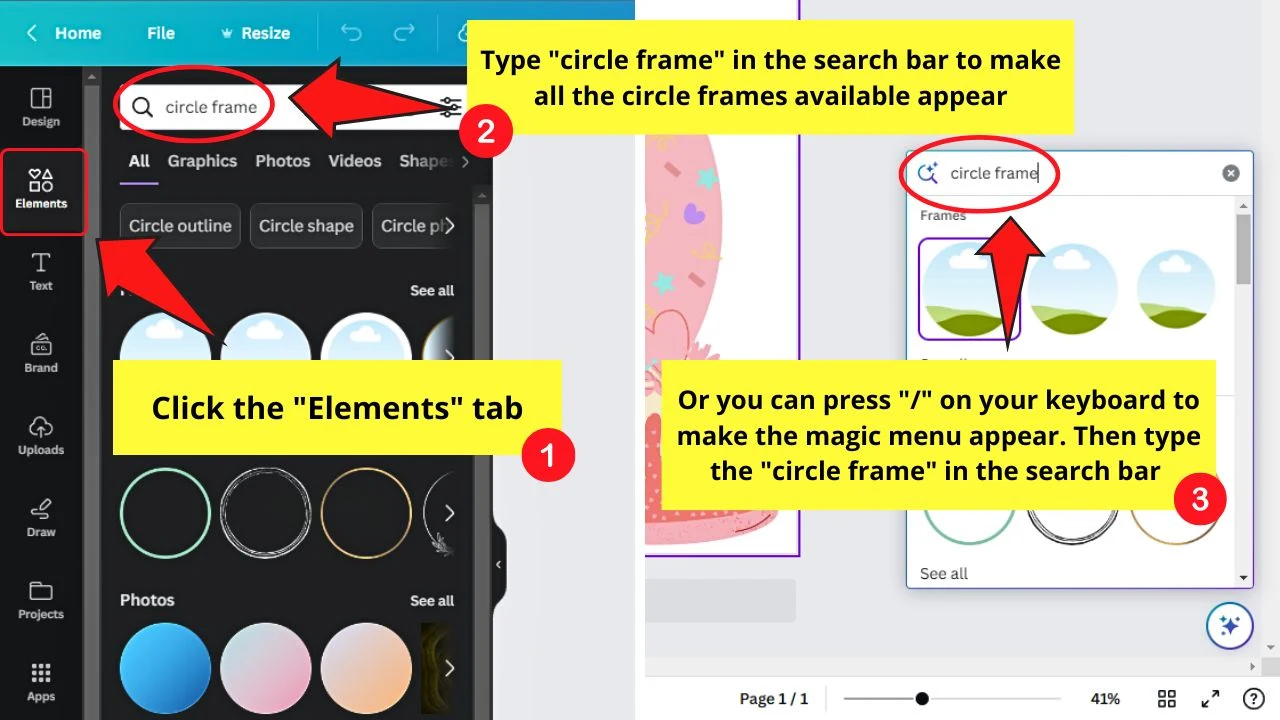
You can visit the “Elements” tab and type “circle frames” in the search bar.
You can also activate the magic menu by pressing “/” before typing the same keywords.
Once the search suggestions appear, click on the circle frame you’ll use.
Step 6: Resize the circle frame
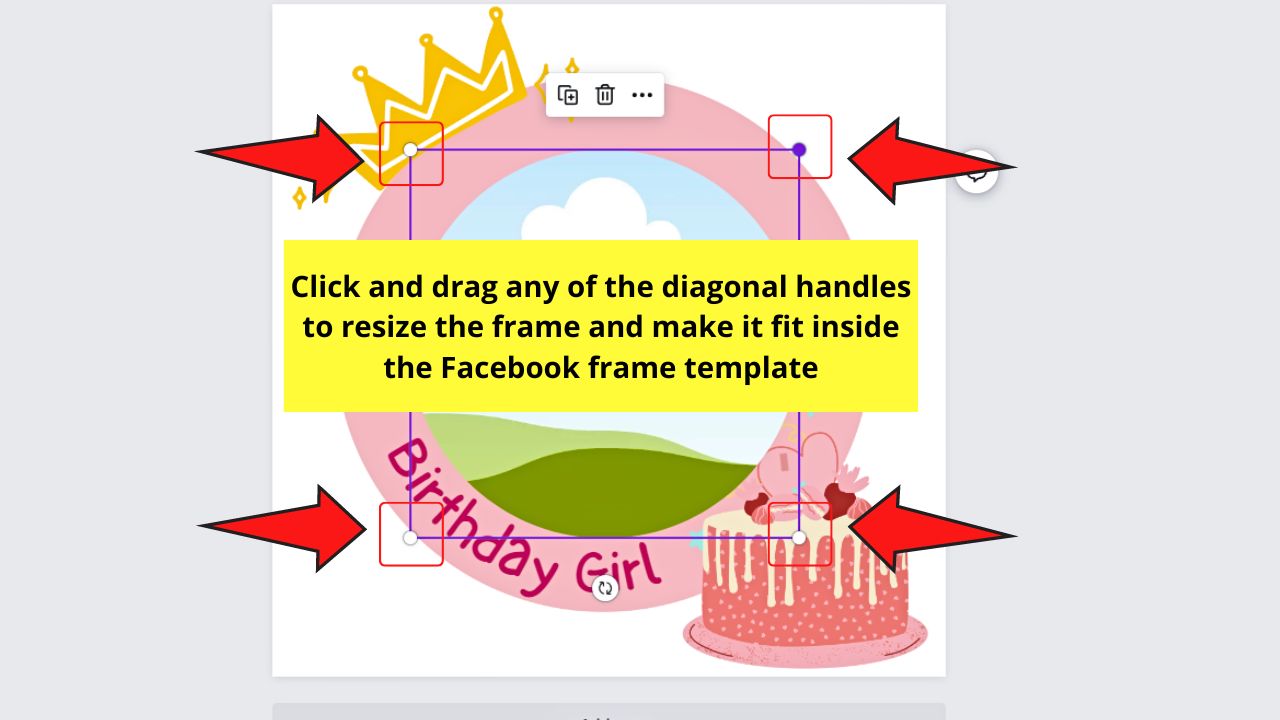

Click and drag the handles at the corners of the frame to make it fit the circle in the template.
Stop once the circle frame has touched the border of the template design.
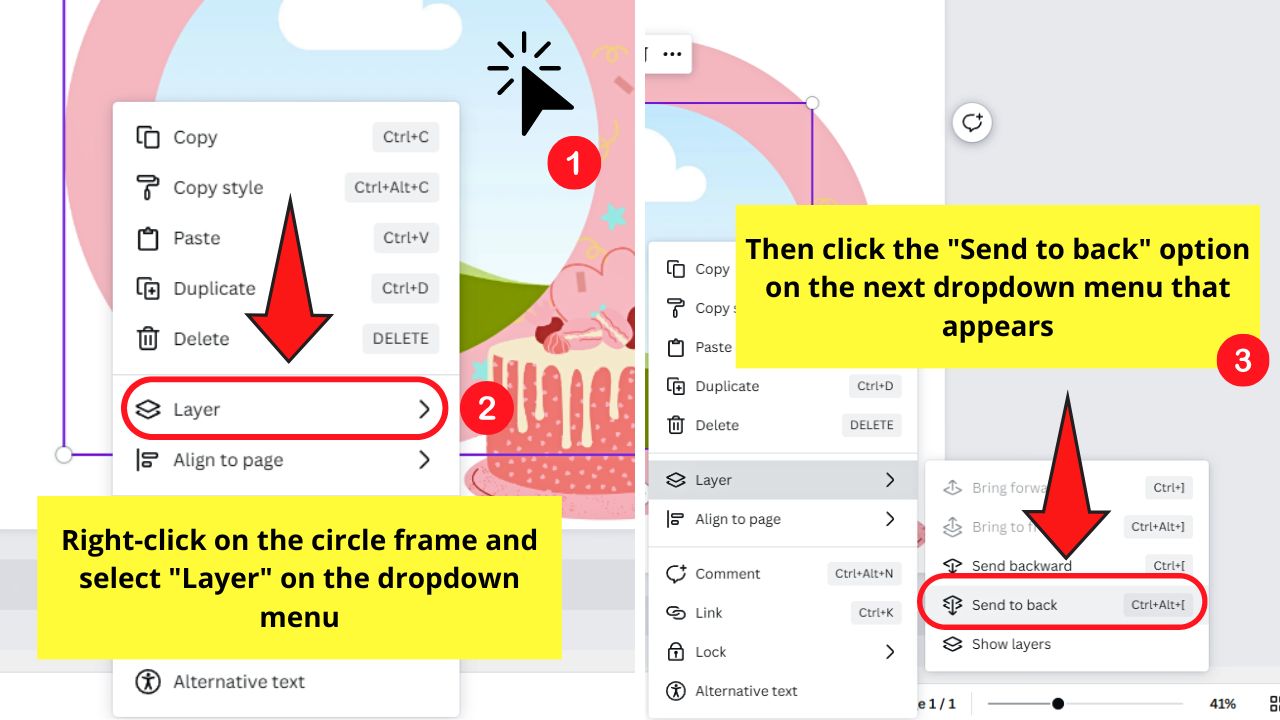
Step 7: Position the circle frame on the back
You can do this in two ways. Just make sure you have selected the circle frame first.
One, you can right-click on the circle frame and select “Layer” > “Send to back.”

The other way is to select “Position” on the taskbar and click “To back” in the “Arrange” tab.
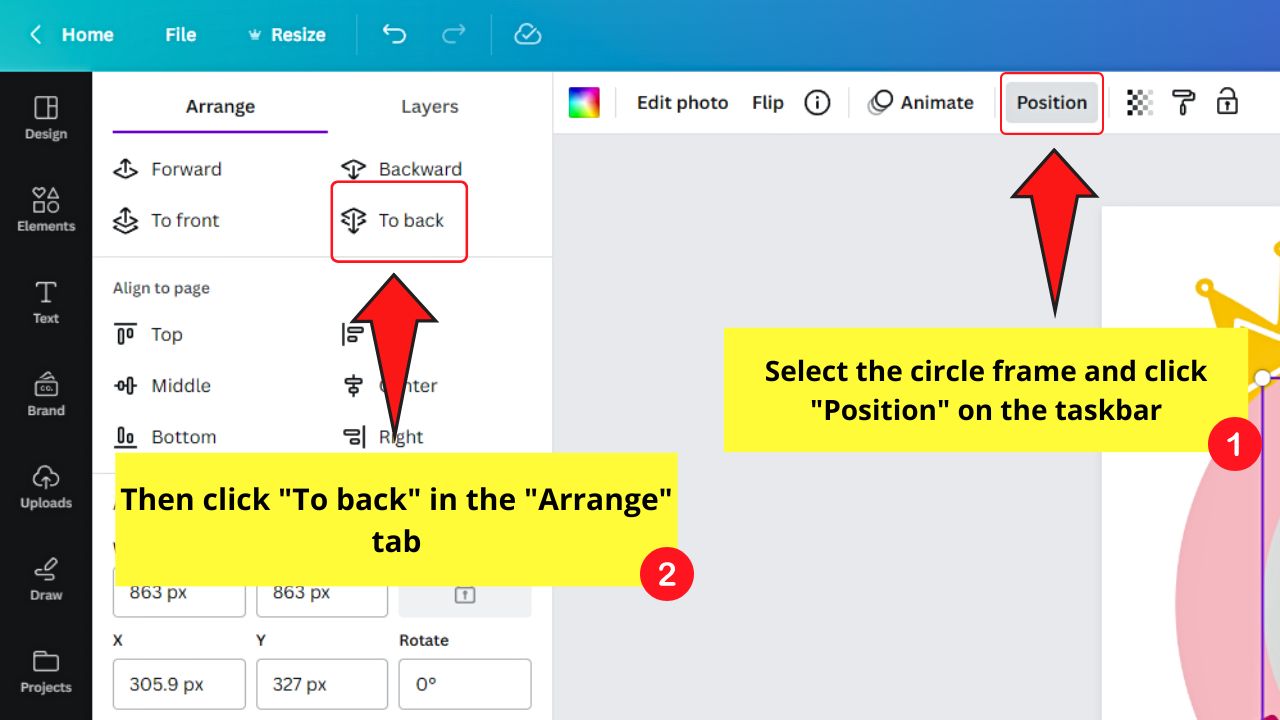
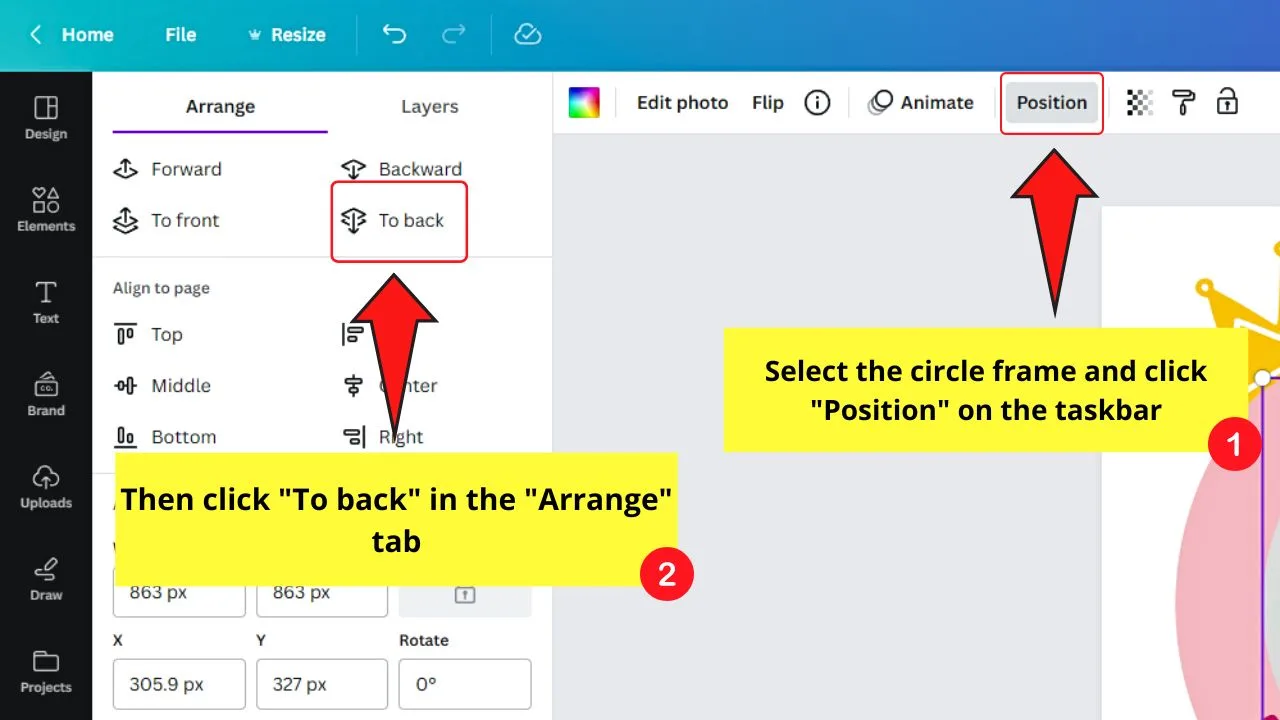
The frame should now be at the back of the design, not obstructing any design elements on the Facebook frame.
Step 8: Upload your profile photo to the frame
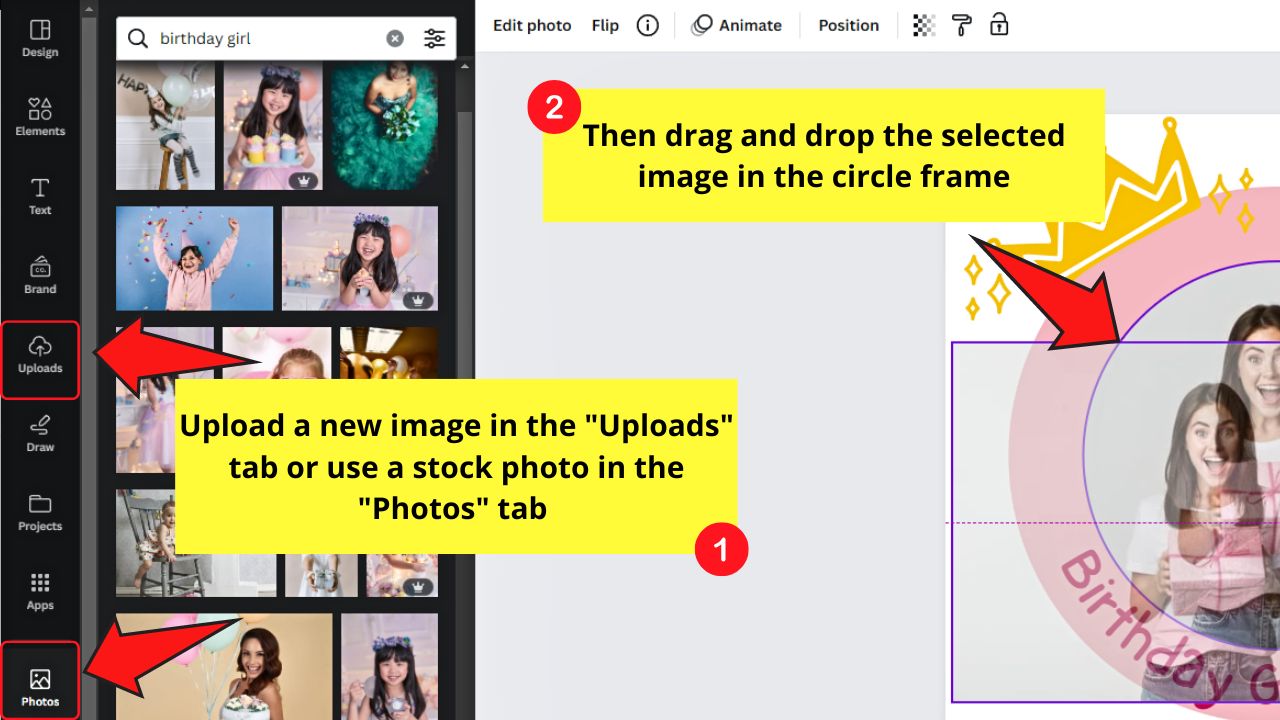

Select “Uploads” and click the “Upload files” button to find the image you want to set as the photo inside the FB frame.
Otherwise, select an image from the “Photos” tab (especially if the design will only be used as a sample).
Regardless, drag and drop the photo selected to the frame. Wait for the picture to take the shape of the circle frame before releasing your mouse hold on it.
Step 9: Adjust the image inside the circle frame

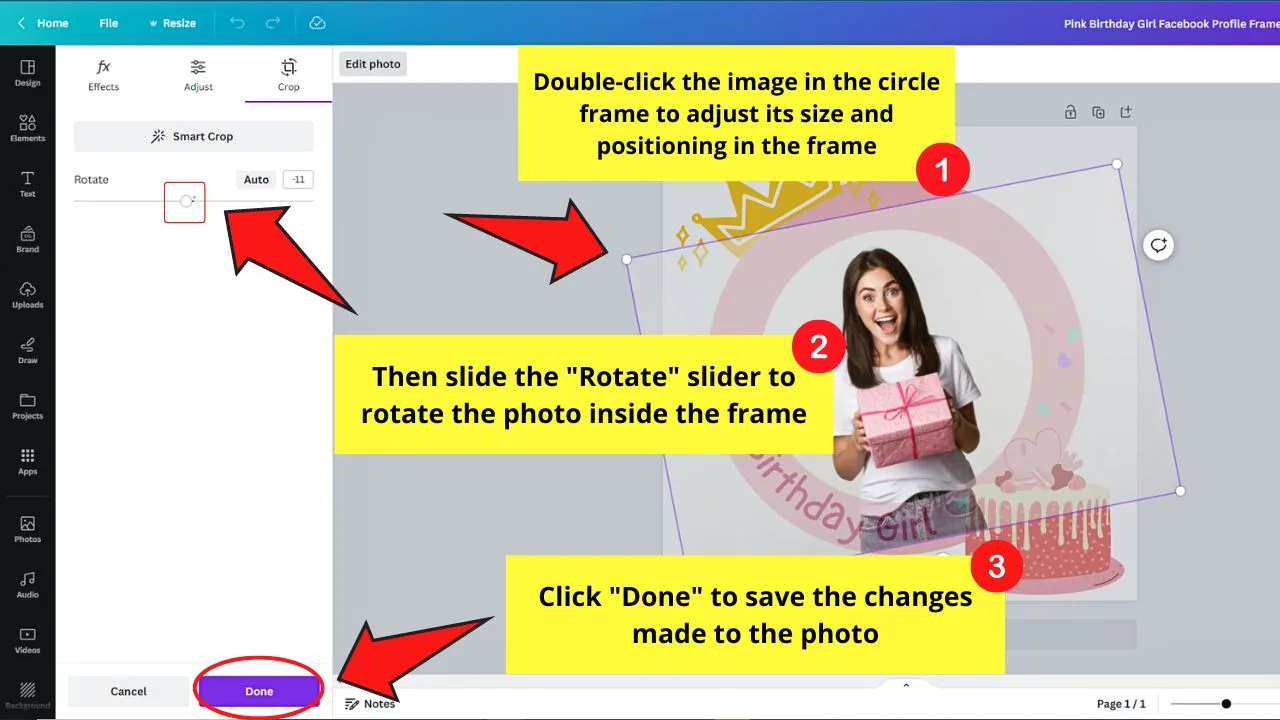
Double-click on the photo inside the frame and resize it accordingly to zoom in or zoom out the image.
You can also rotate the image by dragging the “Rotate” slider in the “Crop” tab on the left-side panel.
Then click “Done” to save the changes made.
Step 10: Click “Share”

This button is found in the editor page’s top right corner.
Step 11: Select “Download”

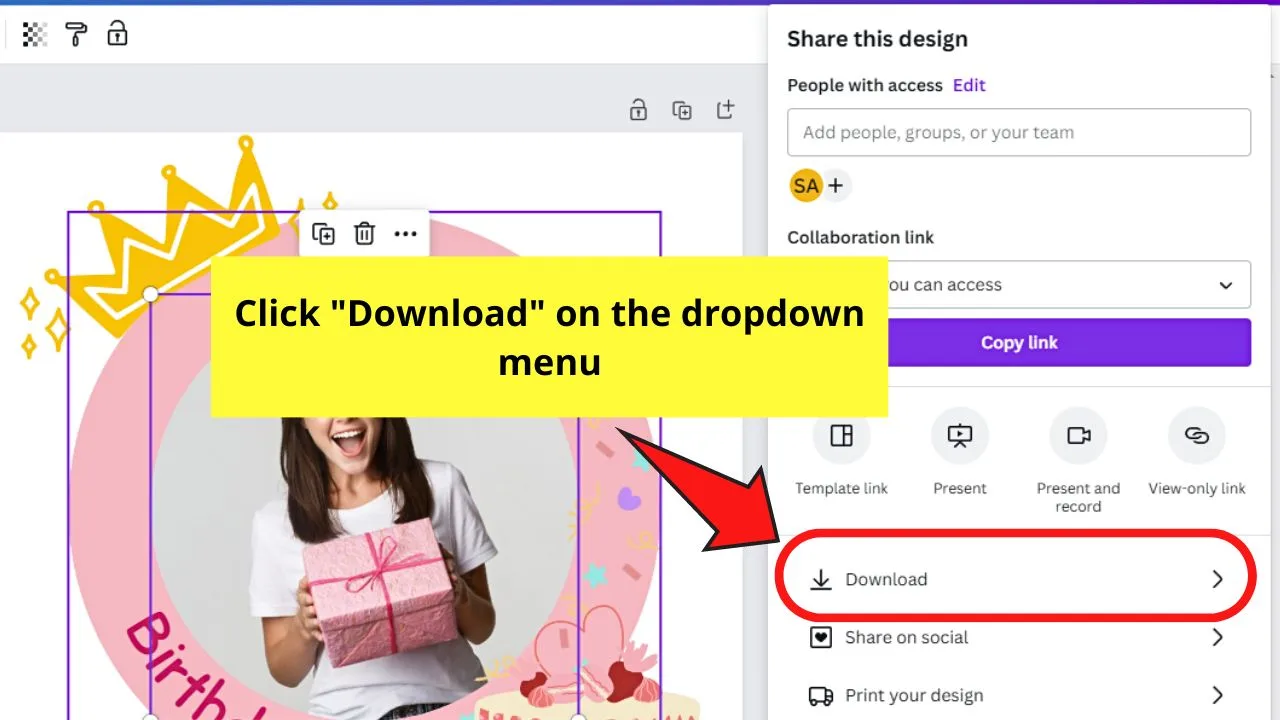
This option is the first one you’ll find below a series of buttons after the “Copy link” button.
You can then choose the file type the image is to be downloaded before saving it to your device.
How to Upload Canva-made Facebook Frames to Your Facebook Account
In 2021, Facebook allowed its users to upload a Facebook frame that they had made. You only have to click on your profile photo before selecting “Upload Profile Picture.”
Then click the “Add Frame” option to find your frame on the list.
But as Facebook limits the frames you can use with the ones designed by well-known companies and brands, you cannot use this method anymore.
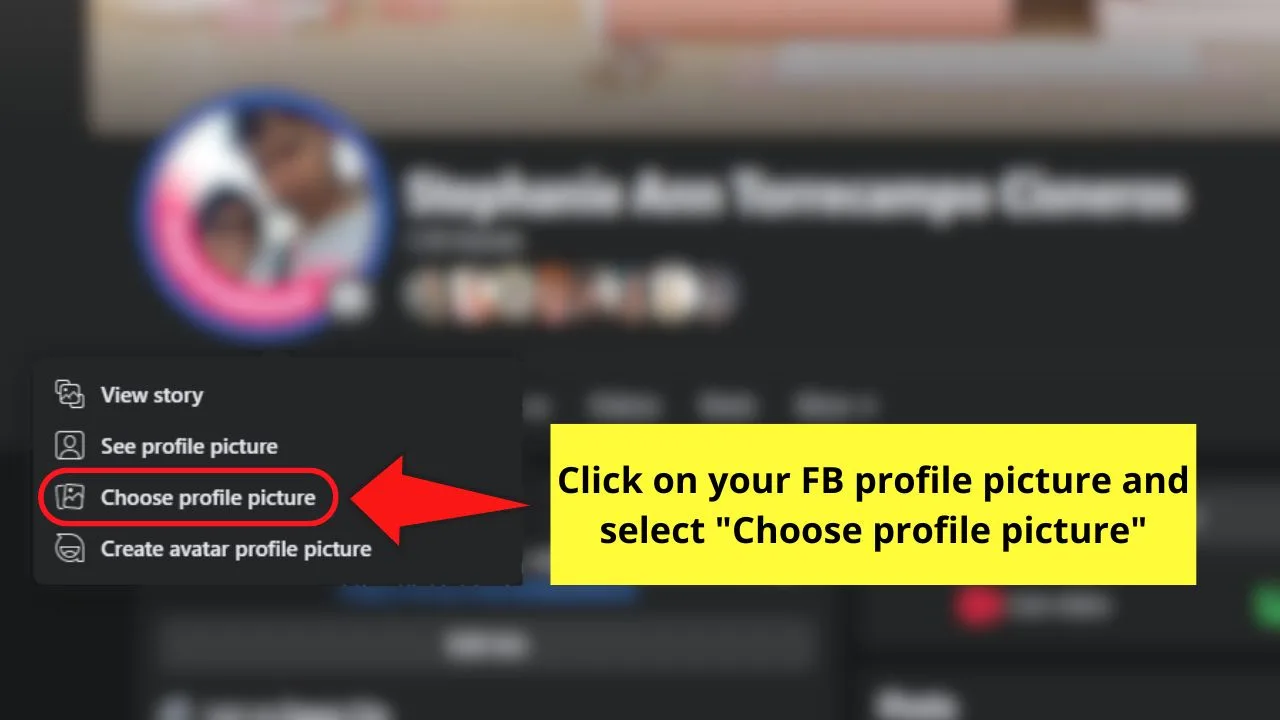
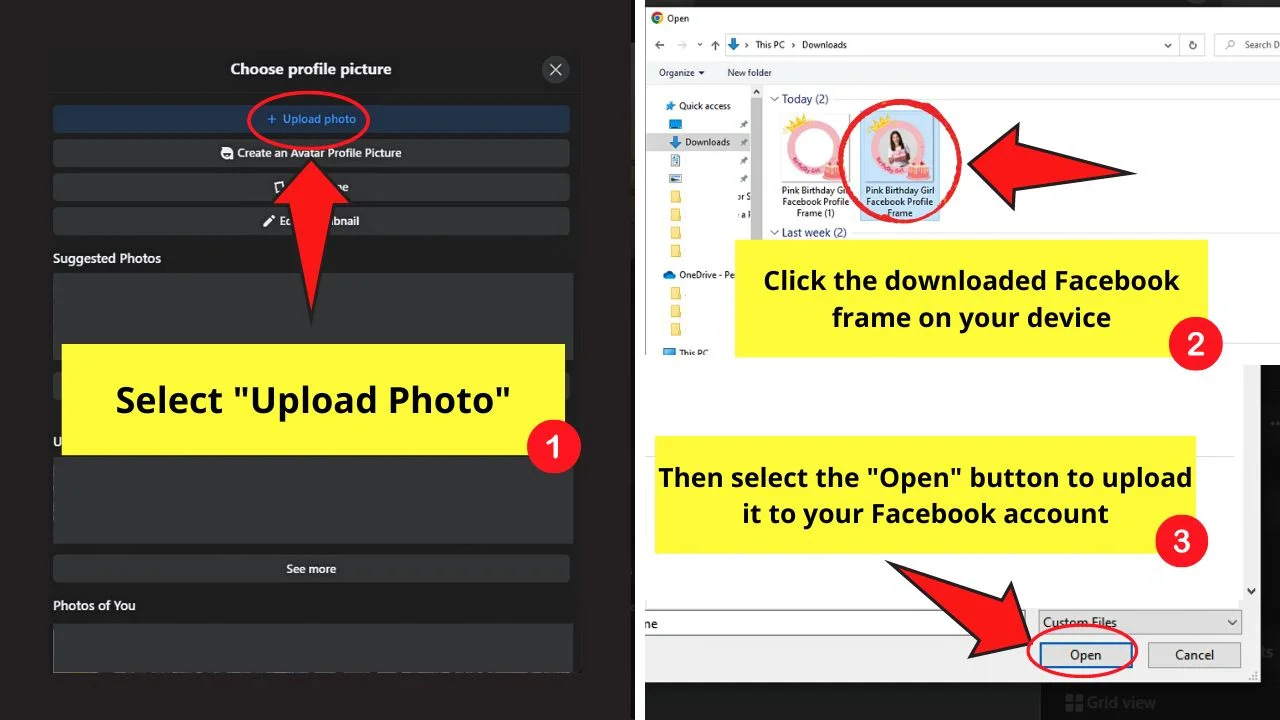
You can still upload a custom Facebook frame though, just not using the same method mentioned. Click on your Facebook profile photo and select “Choose profile picture.”

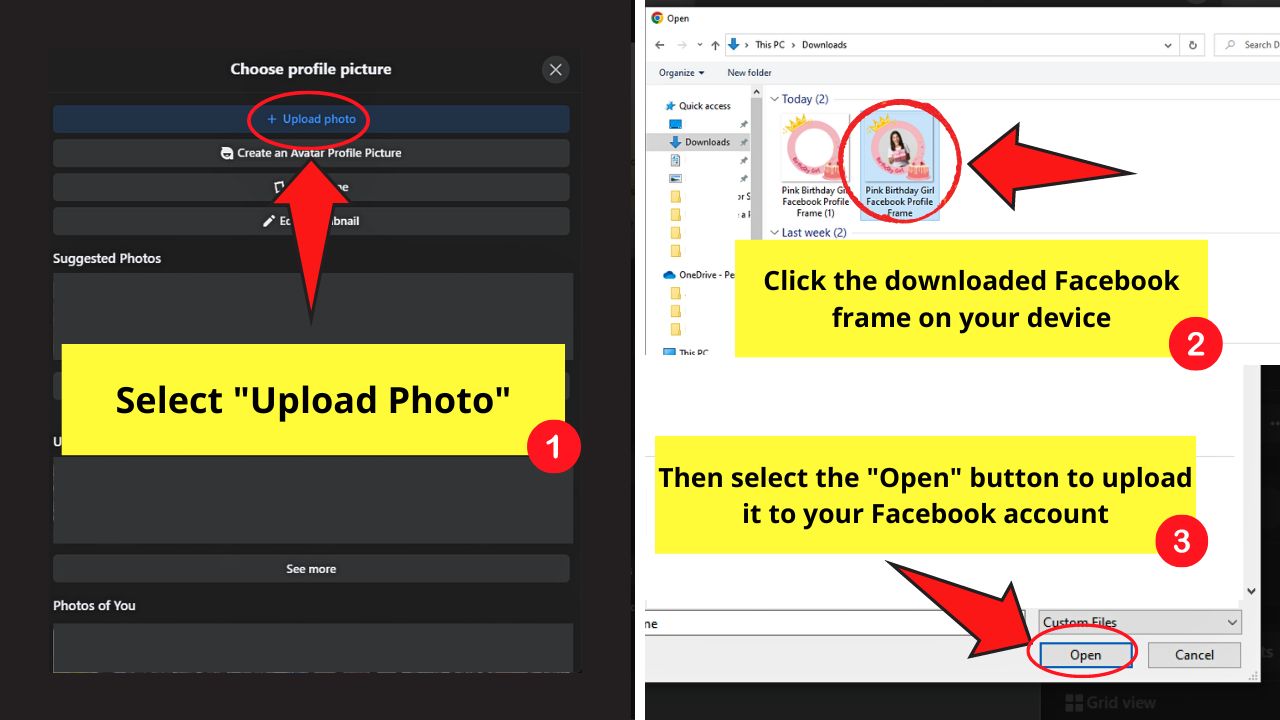
Click “Upload photo,” find the newly-created Canva-made Facebook frame on your device, and upload it.
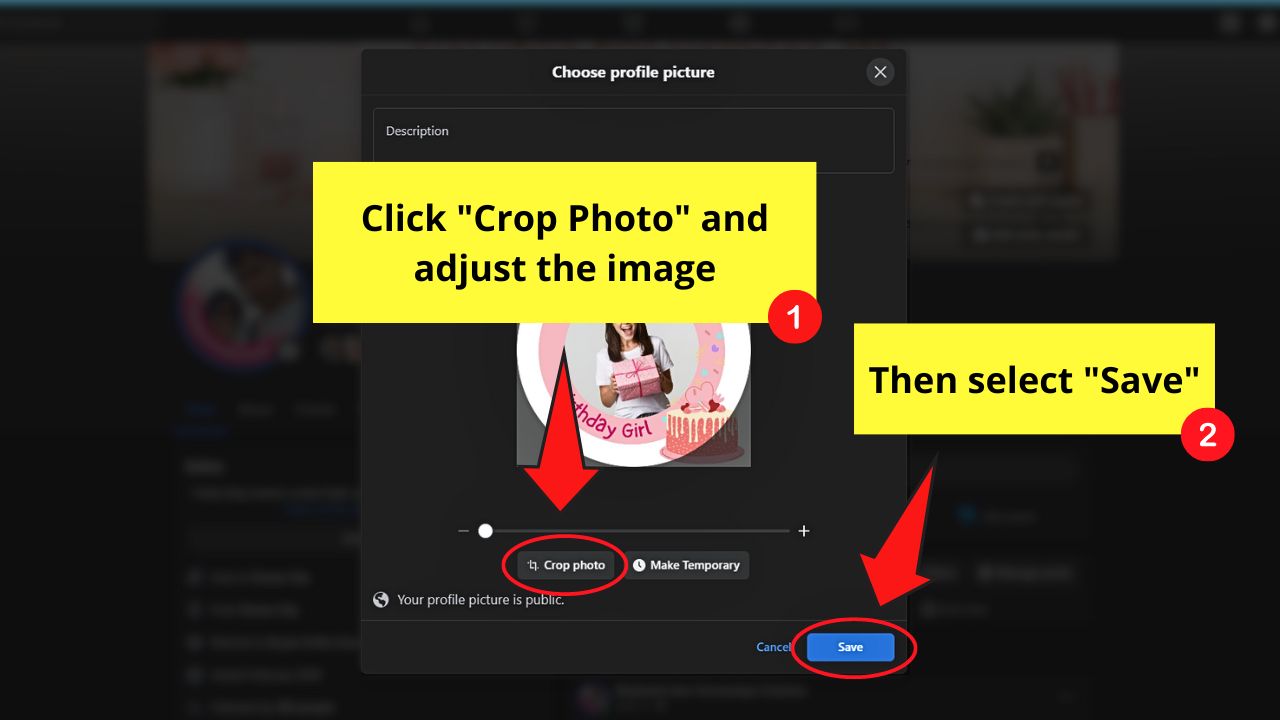
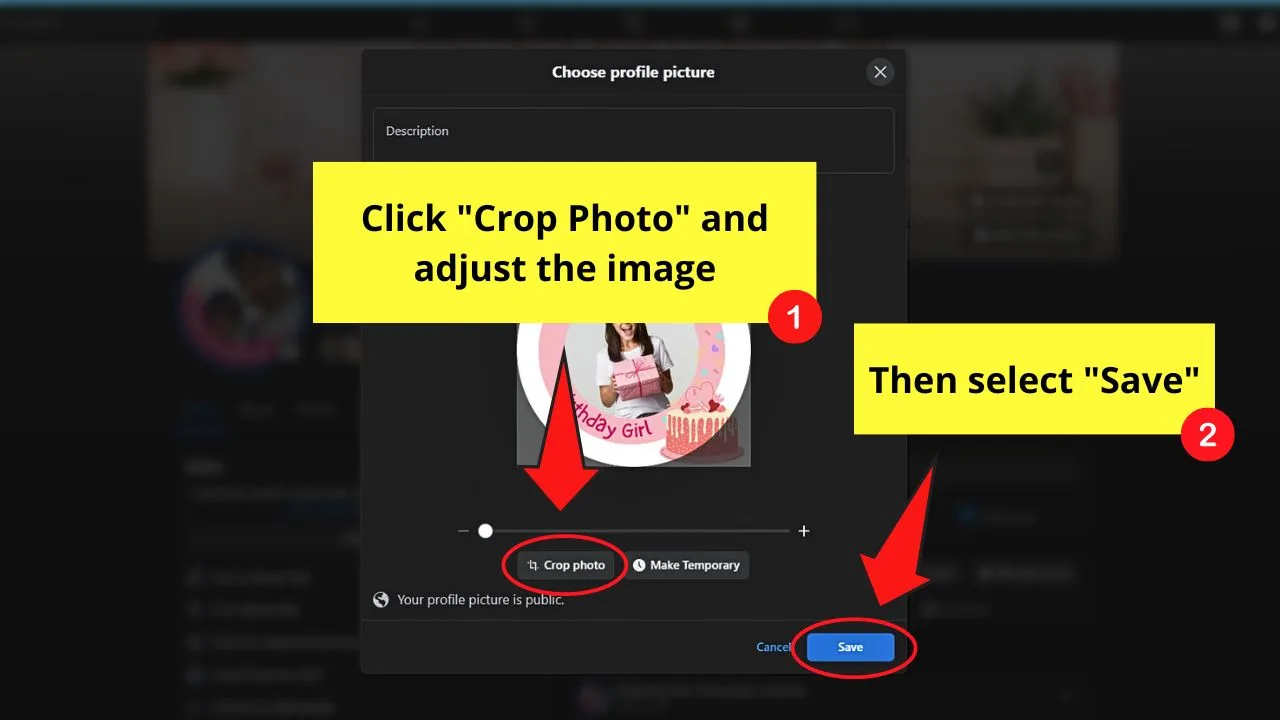
Adjust the uploaded image inside the circle by dragging the “Crop” slider.
Then click “Save” to change your Facebook profile photo with the frame you designed.
So, are you now convinced why a lot of people think of Canva as a great graphic design tool?
If you are, then better sign up for an account now and jumpstart creating Facebook frames now.
Frequently Asked Questions about How to Make a Facebook Frame in Canva
Can I save my design with a transparent background if I’m using the Free account of Canva?
Unfortunately, you cannot save your design with a transparent background if you’re on Canva Free. That feature’s only available to Canva Pro users. However, you can still remove the photo’s background through remove.bg before uploading the frame to your Facebook profile picture.
Why can’t I create or add a frame on my Facebook profile image? Is there something wrong?
Early in 2021, Facebook allowed all its users to create frames for their profile pictures. But, recently, the team limited the frame creation to select partners only. Hence, you cannot make your own Facebook frames now.


Hey guys! It’s me, Marcel, aka Maschi. On MaschiTuts, it’s all about tutorials! No matter the topic of the article, the goal always remains the same: Providing you guys with the most in-depth and helpful tutorials!

