

CapCut is one of the simplest video editing tools that anyone can use.
Even if you’re on a free account on CapCut, you can still create stunning videos — except that there is a watermark.
But the goods news is that unlike in other free video editing software, watemarks can actually completely be removed even in the free version!
So let us have a look at how this is done exactly.
How to Remove Watermark in CapCut
To remove watermark in CapCut, follow these steps:
- Open the video project and go to the end of the video clip
- Tap the CapCut watermark sequence
- Press the “Delete” button
Whether you’re using the CapCut app on an Android phone or iPhone, the steps are the same.
Granting you have already updated the CapCut app, remove the watermark with these steps.
Step 1: Open the video project and go to the end of the video clip
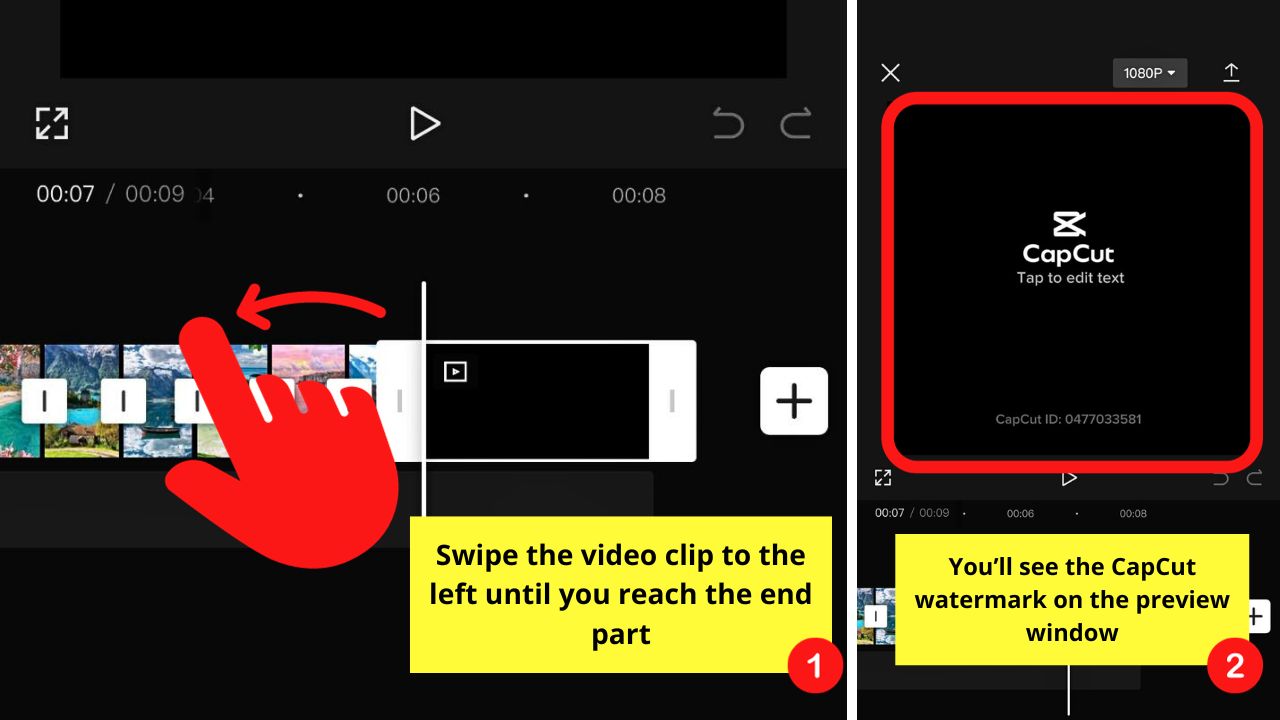

Do this by swiping the video on the timeline to the left until you reach the CapCut watermark sequence.
If you aren’t familiar with how CapCut’s watermark looks, it has a black background with the CapCut logo and ID of your video across it.
But if you need to add motion blur to the video clip, do it before proceeding with the watermark removal process.
Step 2: Tap the CapCut watermark sequence
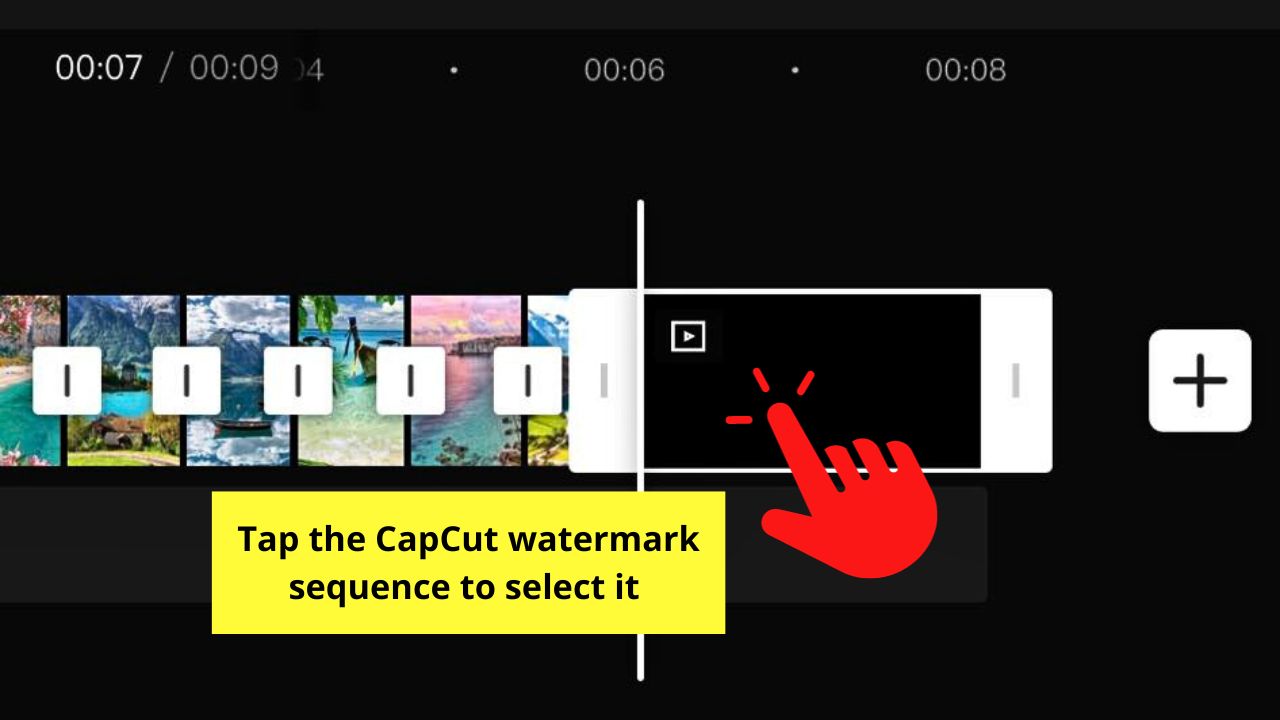

You will then see the white handles surrounding the CapCut watermark sequence.
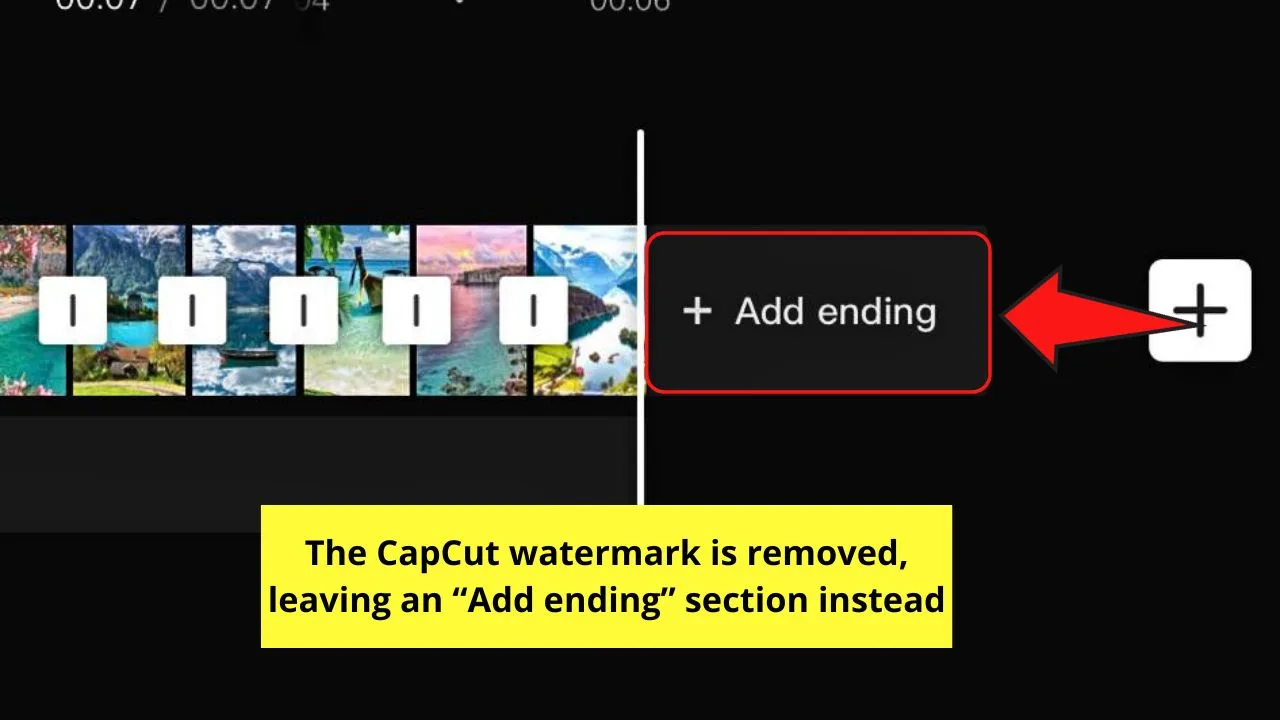
Step 3: Press the “Delete” button
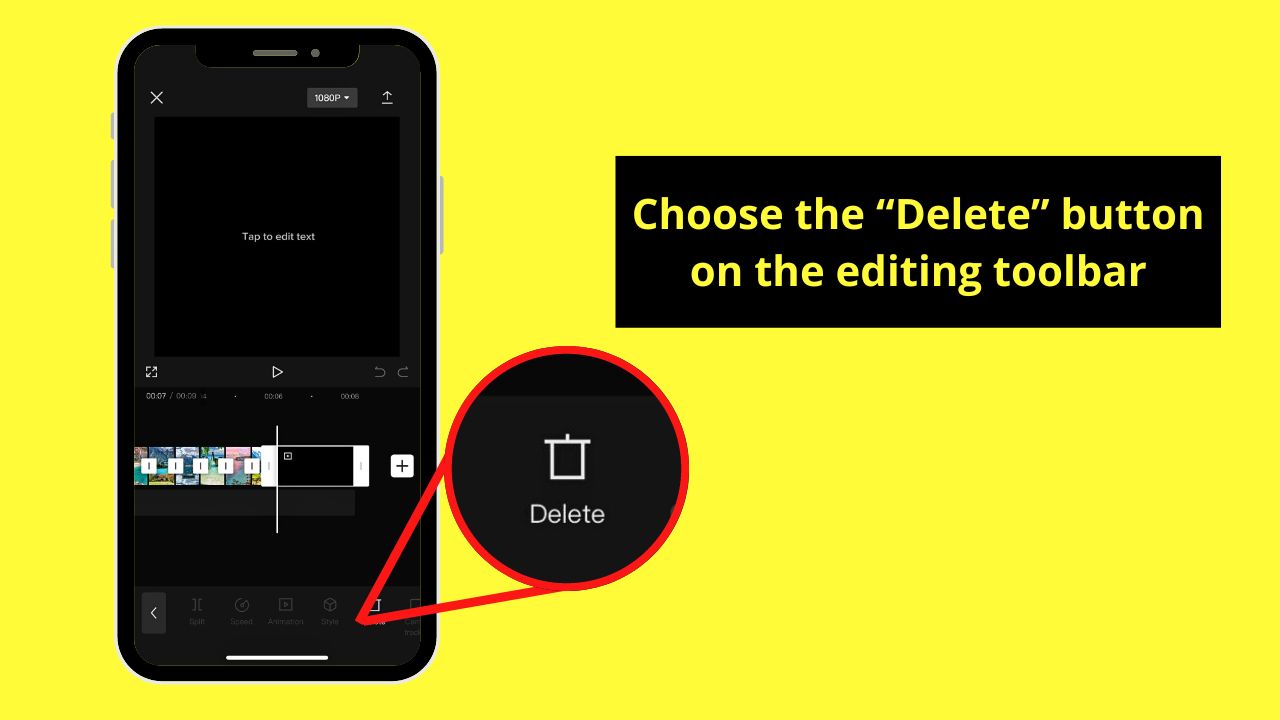
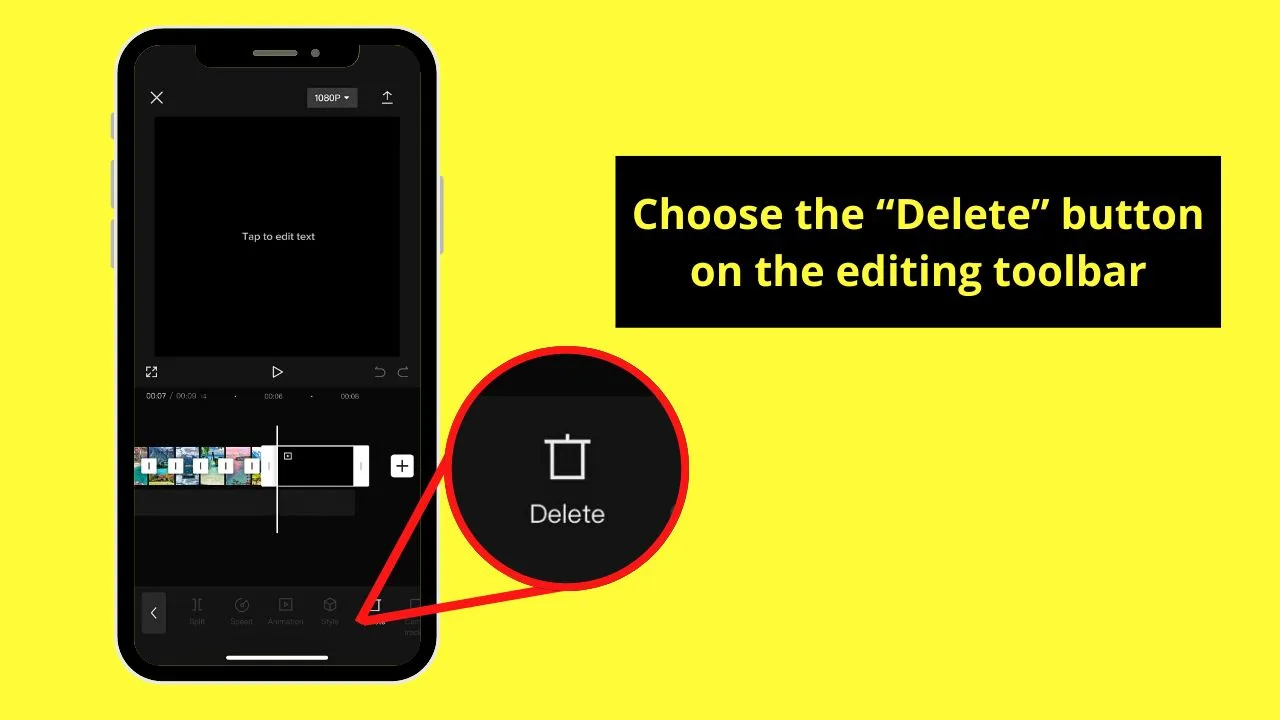
This is the button that is highlighted on the taskbar when you tap the CapCut watermark sequence. It has a trash can as its icon above the “Delete” text.


The watermark sequence is now removed from the video clip. Instead, you’ll see an “+ Add ending” section after the last clip on the video timeline.

Once you tap “Export,” you also won’t see CapCut’s watermark sequence.
If you should still see watermarks in your video footage after removing it manually (for instance after exporting your video), then make sure to continue reading this post and adjust the setting as laid out below.
How to Remove Watermark in CapCut in “Settings”
For new projects you are creating in CapCut, you can avoid having watermarks at the end of your footage altogether.
And you can achieve that by simply adjusting a specific option in the settings.
Here’s how you do it:
Step 1: Tap the “Settings” button
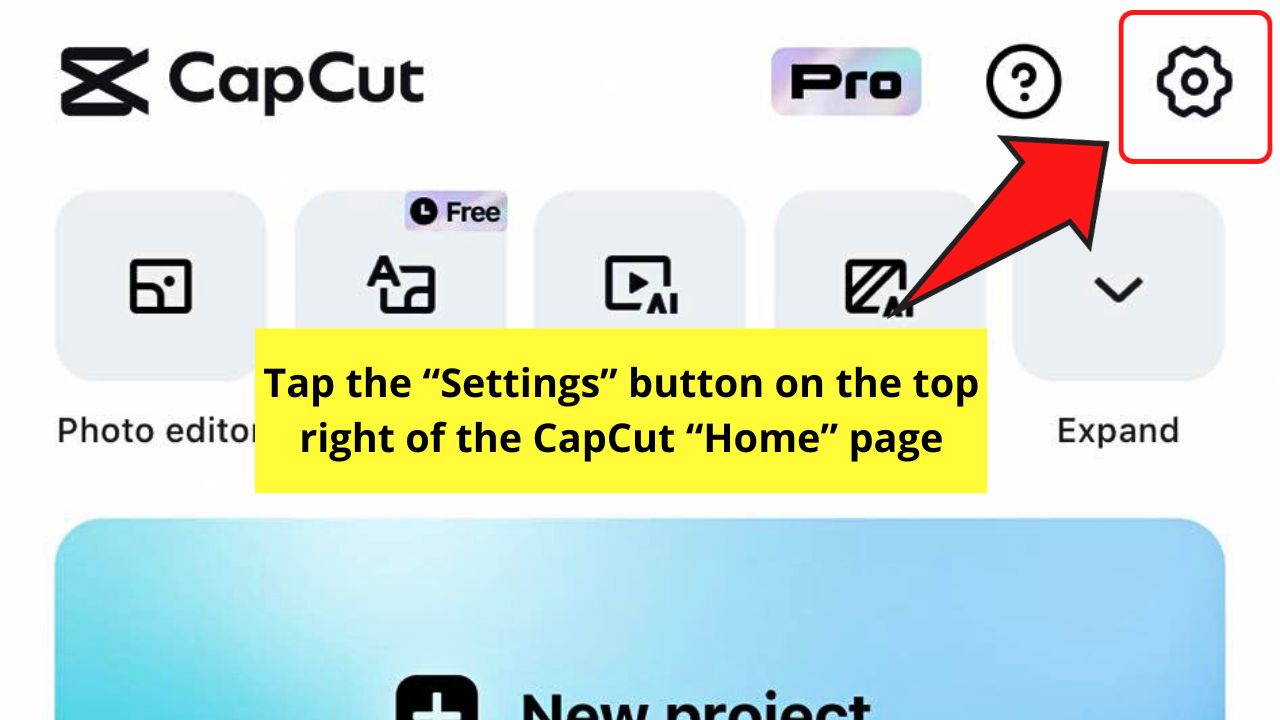

This is the gear icon on the top right corner of CapCut’s “Home” page.
Step 2: Press the toggle for “Add default ending”
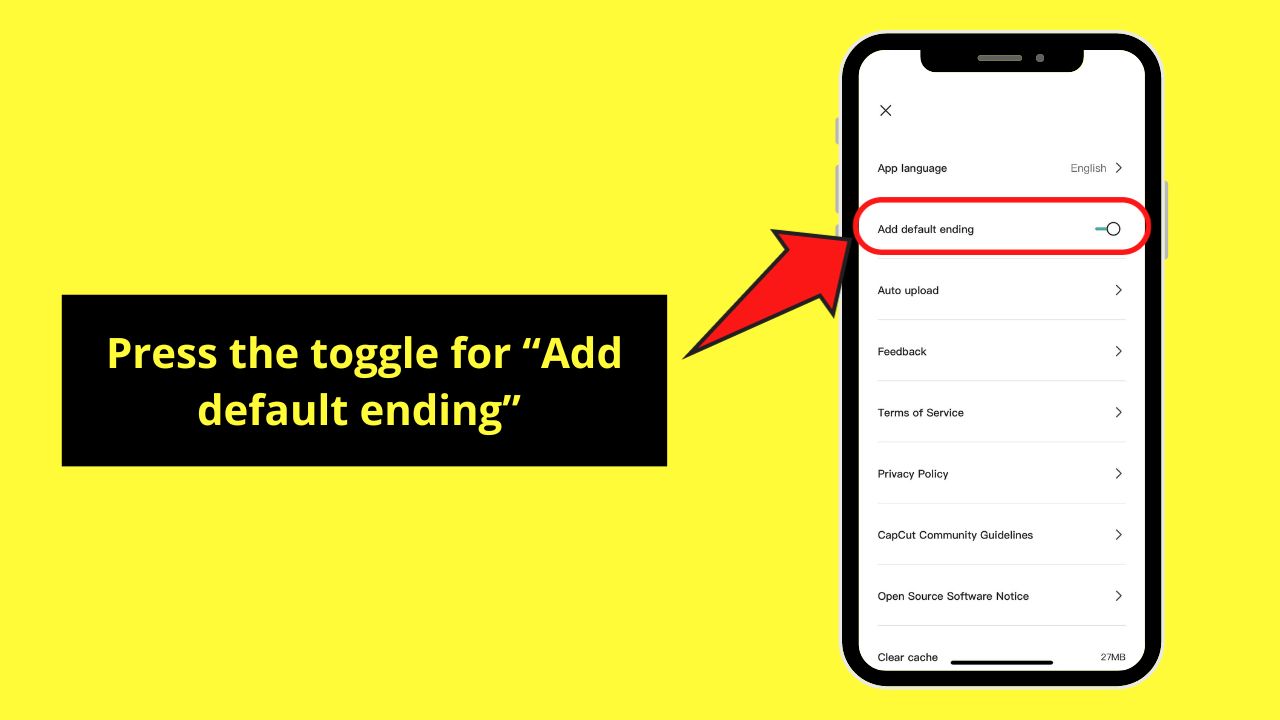

This is the second option on the “Settings” page, between “App language” and “Auto Upload.”
By default, “Add default ending” is activated (circle found on the right side). Tapping on the toggle will turn it off. A pop-out confirmation window then appears.
Step 3: Choose “Discard”


Selecting “Discard” confirms your decision to remove the CapCut watermark sequence on your next projects.
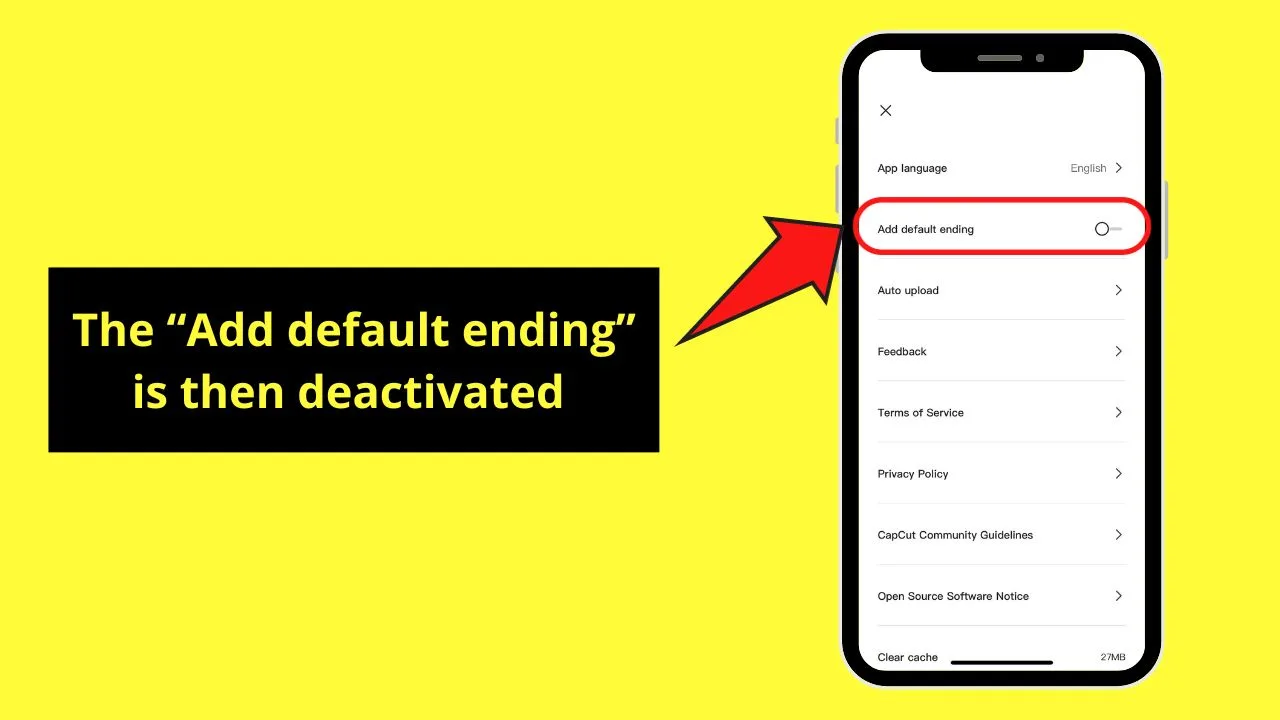
You should now see the “Add default ending” option deactivated (circle found on the left side).

Step 4: Tap the “Close” button
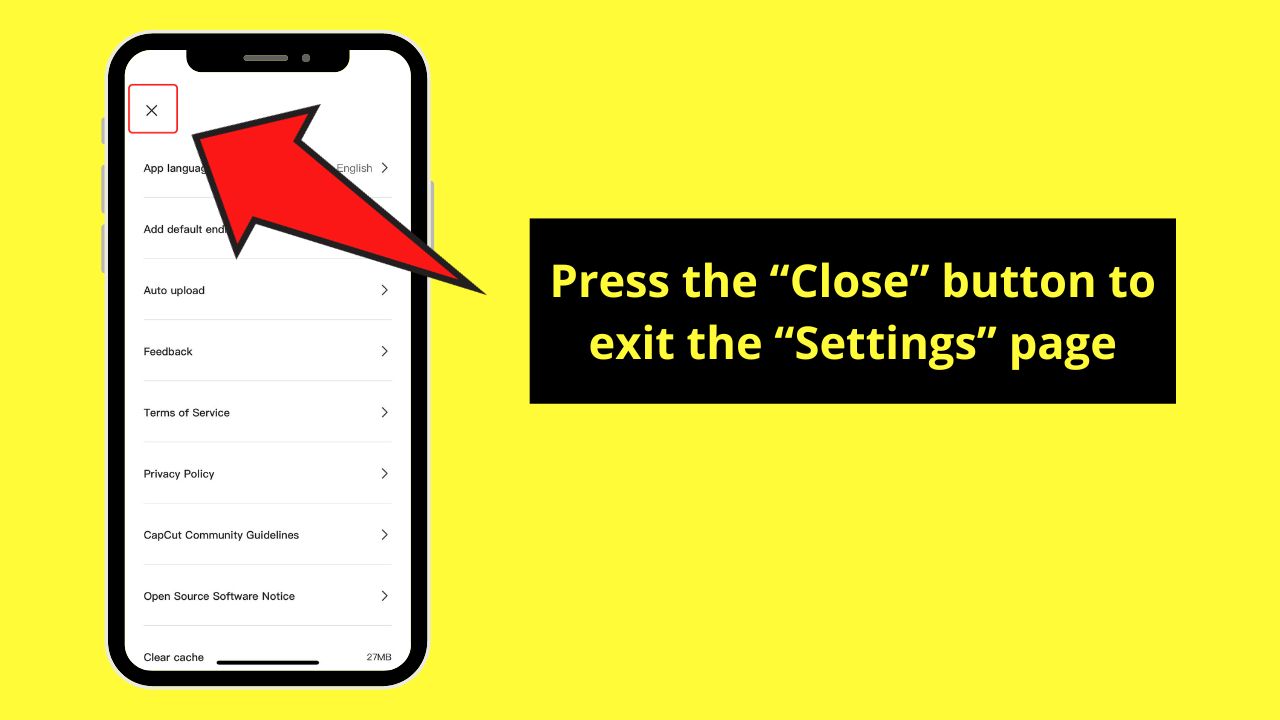

This is the “X” icon you’ll see on the top left corner of the “Settings” page. You should now be back on the CapCut “Home” page.
Now, if you’re using templates to create your social media videos, the third method of removing CapCut watermarks should do the trick.
How to Remove Watermark from Template Videos in CapCut
Template videos are best for people who want to make their videos professional without manually adding effects.
The only thing is that after you import the media to the CapCut template, you won’t see them added to a video timeline.
Instead, the media will be placed next to each other like gallery cards. Hence, you also won’t see the CapCut watermark sequence at the end of the template video.
To remove watermark from template videos in CapCut, follow these steps.
Step 1: Press the “Export” button


This is the teal button you’ll find on the upper right of the template video editor page.
Step 2: Choose “Save and share to TikTok”


This is the third option you’ll see on the menu that appears after tapping “Export.”
Choosing this button makes sure that the video will be posted on TikTok and saved to your phone with the CapCut watermark removed.
You will then see the “Exporting” notification and be redirected to the TikTok editor page. You can then add music, graphics, or effects to the TikTok video.
If you choose the “Share to” option, you will still be redirected to the TikTok editor page and the video saved to your device. But, the CapCut watermark is included in the video clip.
Step 3: Tap “Next” twice
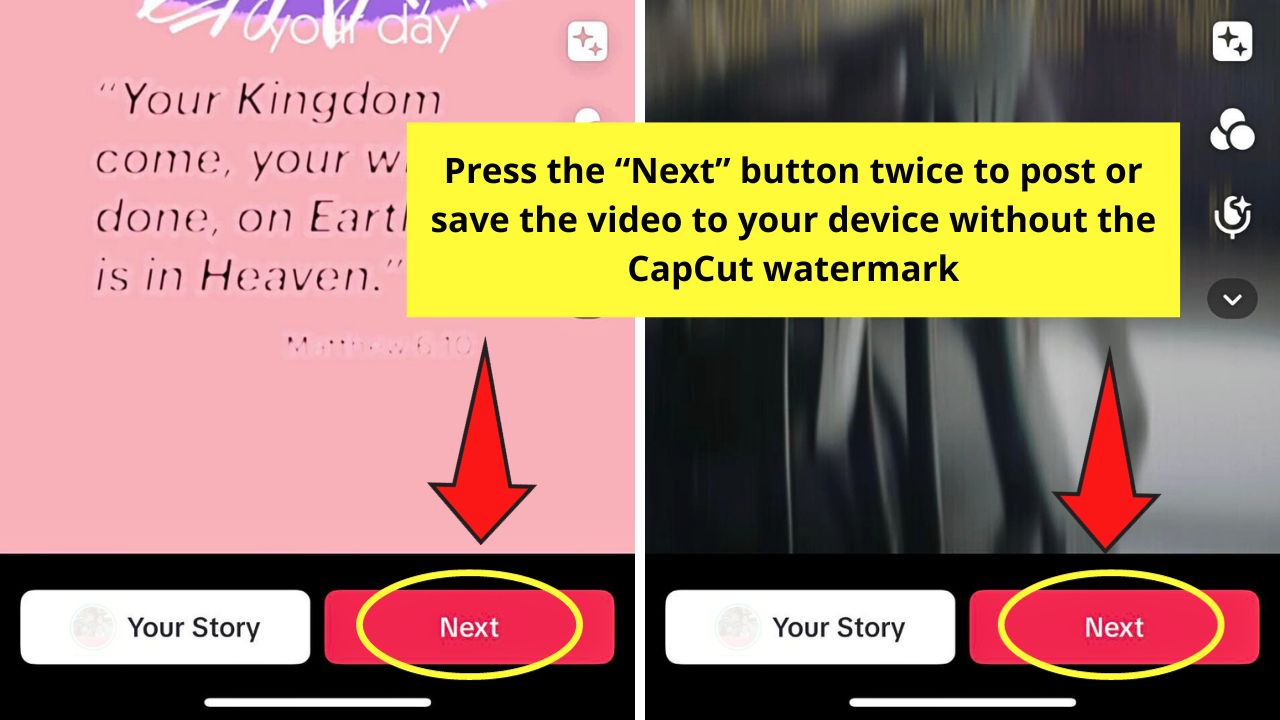

This is the red button on the TikTok editor page’s lower right corner.
Pressing this twice will give you the option to post the video on your TikTok timeline or save it to your device.
But like the other two methods mentioned, the CapCut watermark is already removed.
Whatever stage of video editing or membership type you have on CapCut, you can enjoy the ability to remove the watermark on your video.
Frequently Asked Questions about How to Remove Watermark in CapCut
What is a watermark?
A watermark is any image, text, or overlay placed over a digital asset, whether photo or video. These are usually transparent or monochromatic so others can still view it. Watermarks protect your ownership over that particular digital asset.
How do I remove the watermark on a template video on CapCut?
If you’re using a template video for your CapCut project, you can remove the watermark by choosing “Export.” Then tap the “Save and share to TikTok” option. This will save the video on your device and share it on TikTok with the CapCut watermark removed.
Can you remove the watermark in CapCut even when you’re a free account user?
You can remove the watermark in CapCut even when you’re a free user of the app. You can manually remove the watermark sequence or turn off the toggle for “Add default ending.” For templates, choose “Save and share to TikTok” to save and share the video with the CapCut watermark removed.


Hey guys! It’s me, Marcel, aka Maschi. On MaschiTuts, it’s all about tutorials! No matter the topic of the article, the goal always remains the same: Providing you guys with the most in-depth and helpful tutorials!

