Ever wonder how people have profile pictures in their social media accounts in a circle? Or, do you simply want to put an image in a circle as part of the design you’re making?
Regardless of what reason for making a picture circle, you can always log into your Canva account and achieve the feat there.
But how do you make an image a circle in Canva?
How to Make an Image a Circle in Canva
One way to make an image a circle in Canva is to select a circle frame from “Frames.” You’ll find this in the “Elements” tab. Another way is to find a template whose image is in a circle. Either way, just drag and drop the photo inside the circle to crop it into that shape.
And the good news is you don’t have to upgrade to a Canva Pro account for you to make an image circle in Canva.
The main difference between Canva free and Pro accounts is the availability of photos that you can turn into a circle. It’ll also affect the templates you can use while working on the project.
So, it’s best to stop talking and start learning these 2 methods below.
Method 1: Using a Circular Frame to Make Images Circle in Canva
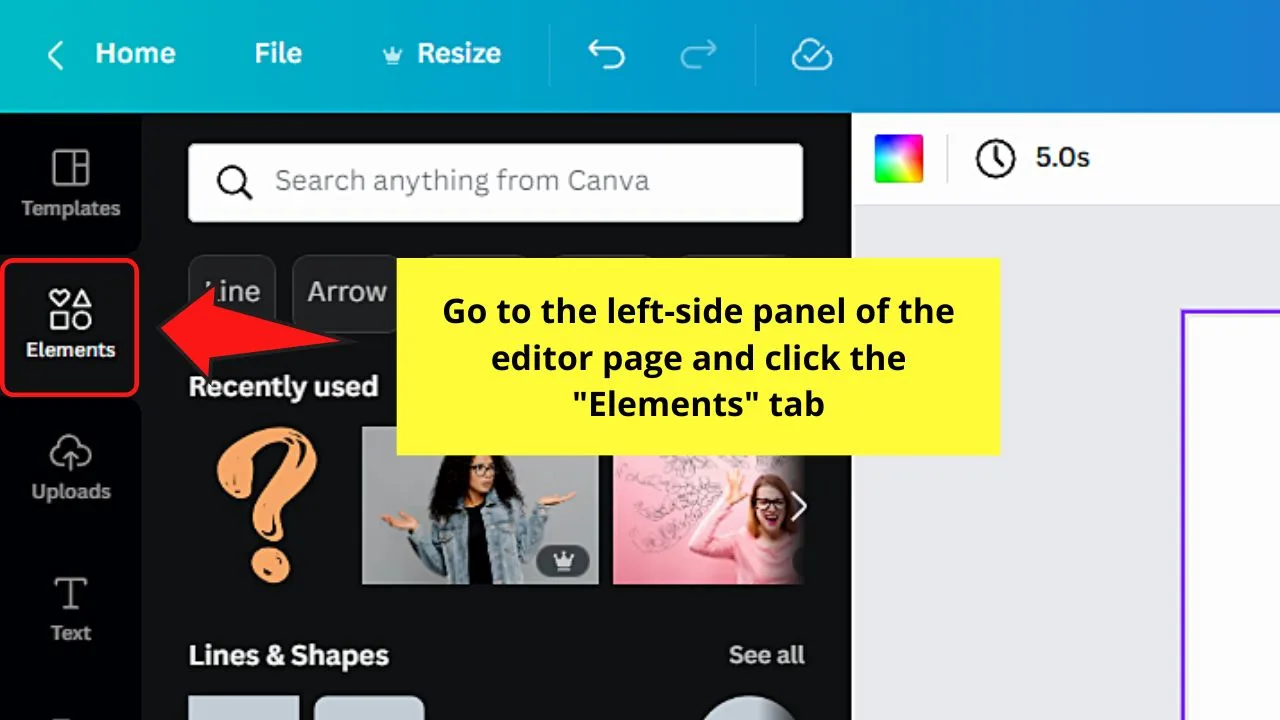
Step 1: Granting that you have already opened a new project in Canva, go to the left-side panel and select “Elements.”
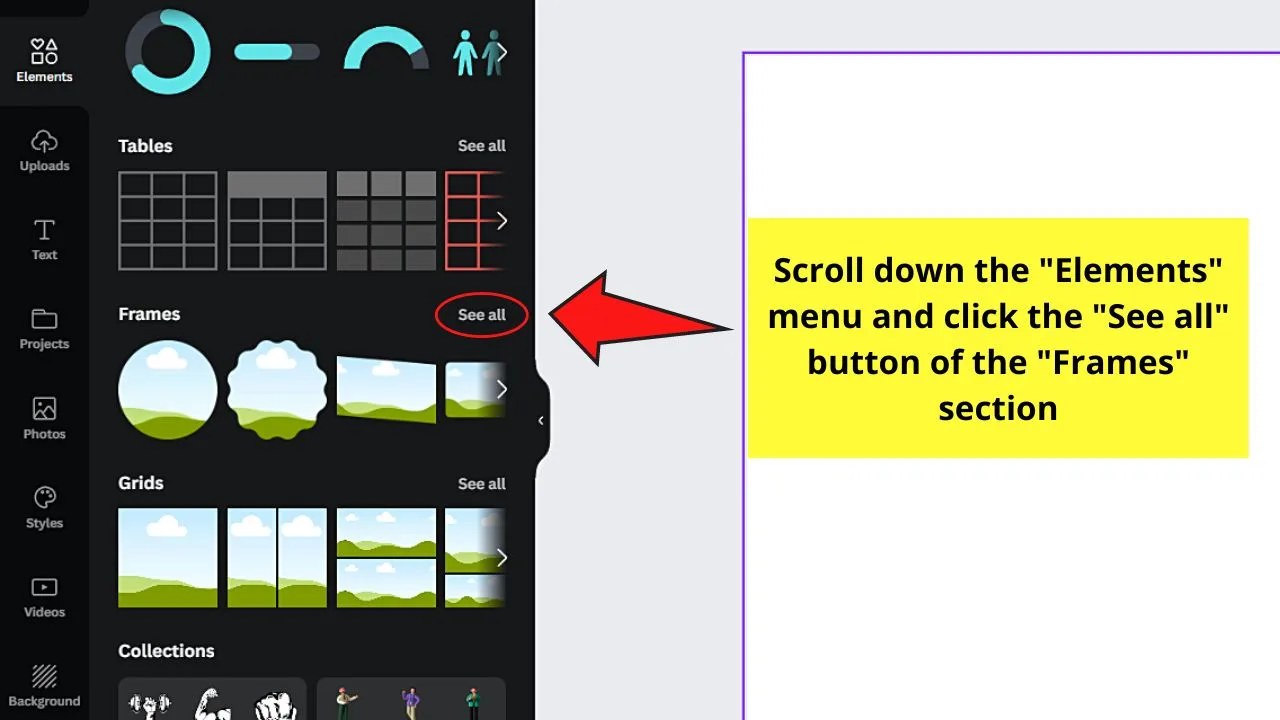
Step 2: Scroll down and look for “Frames.” Once there, select the “See all” button.
Step 3: Look for the circle frame among the frame choices and click it.
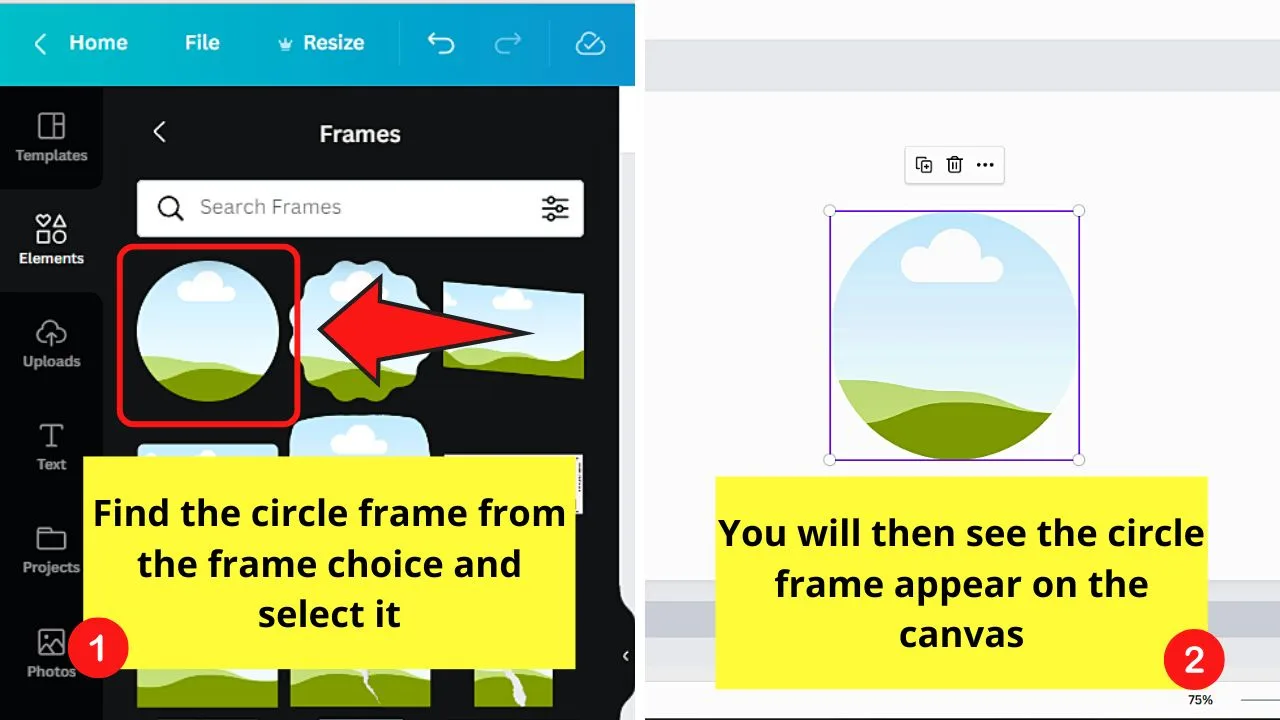
You’ll then see the circle frame on the blank canvas.
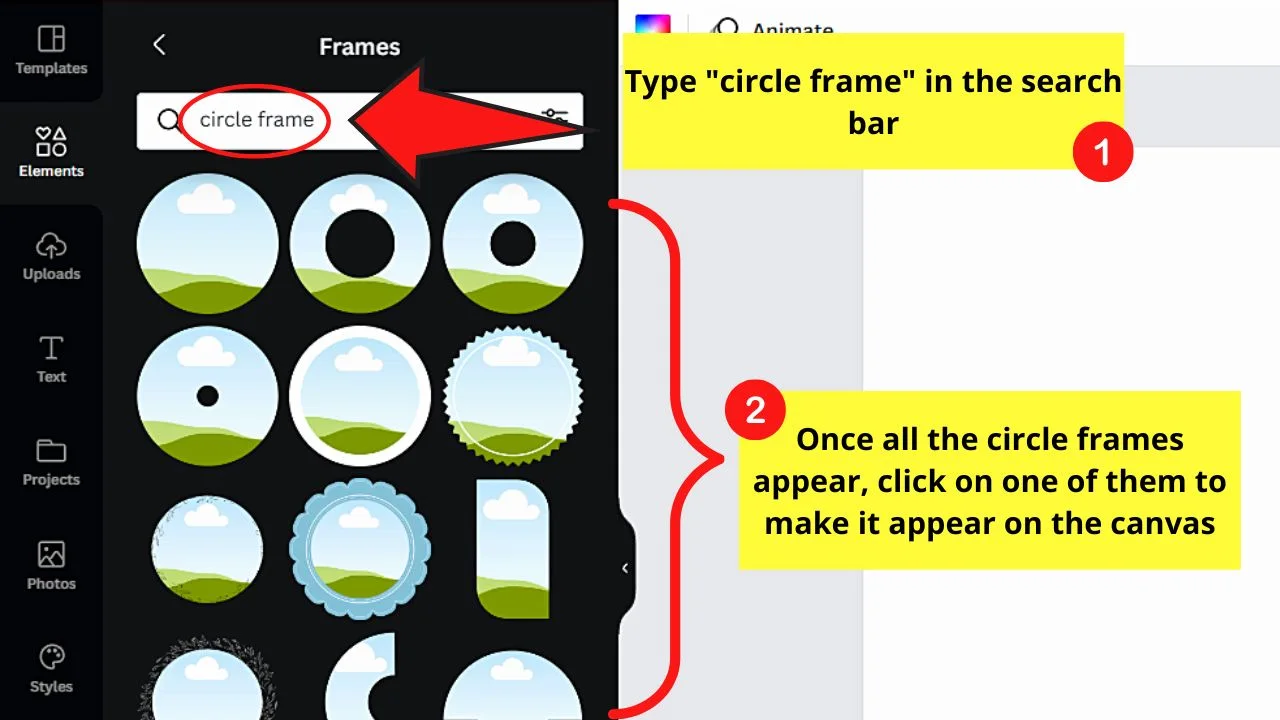
But, if you prefer a more direct method of finding the circle frame, go to the search bar and type “circle frame” in it before pressing “Enter.”
You will then see all the elements that are closest to the keyword you just typed. And, just earlier, click the said circle frame to add it to your design.
Step 4: If you don’t want to click on the left-side menu to add an element, press the “/” button on your keyboard.

You’ll then see Canva’s magic menu appear. From there, click inside the search bar and type “circle frame” before pressing “Enter.”
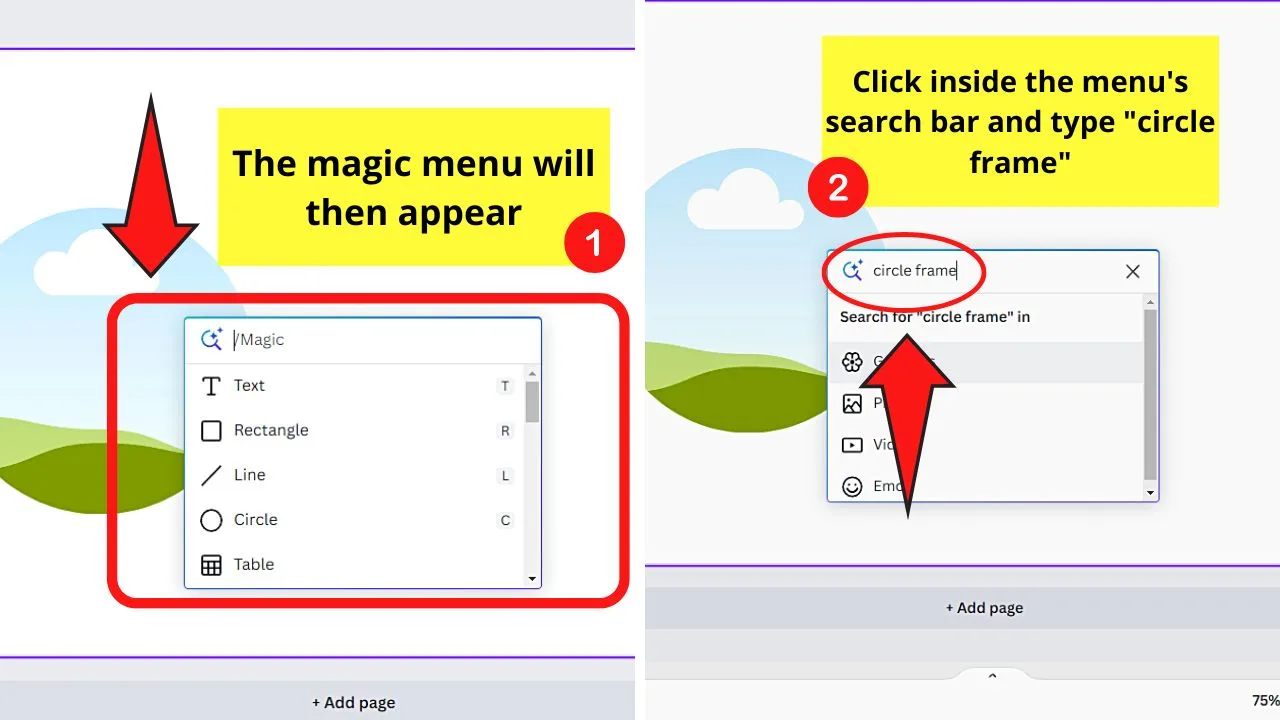
Once you find the circle frame you’ll use, select it by clicking it.
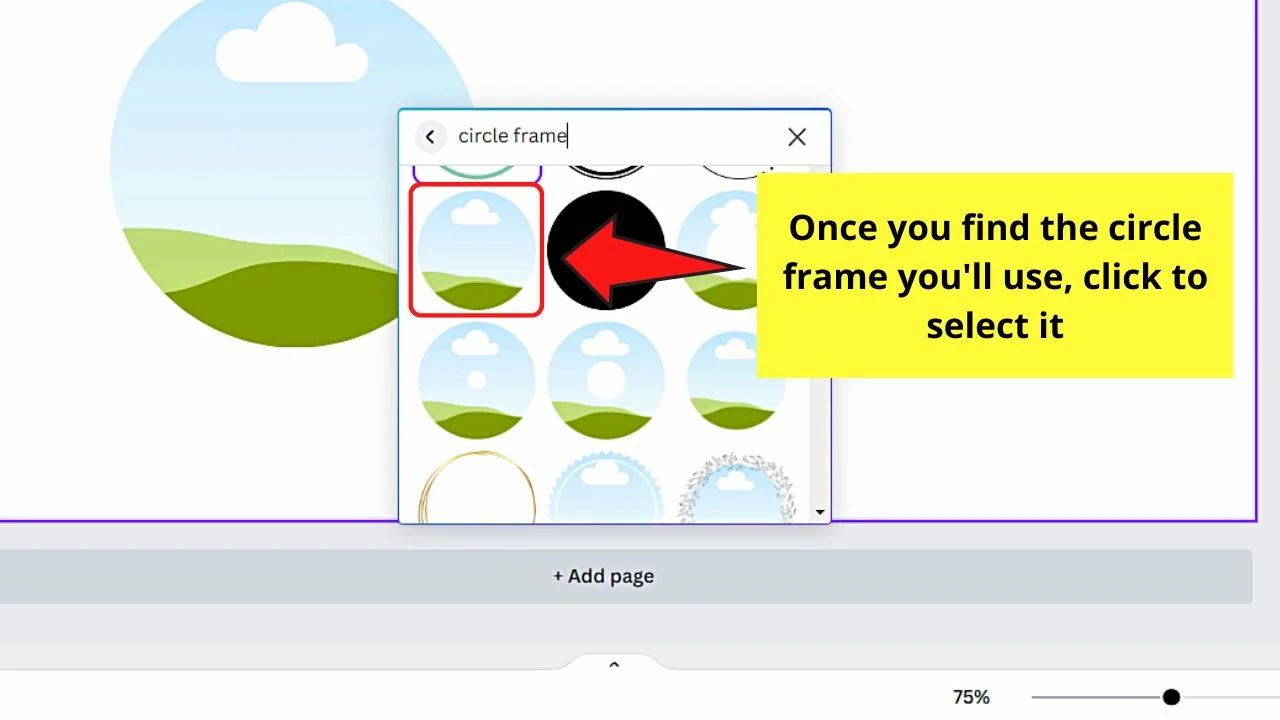
If you want to resize the circle frame, click to select it first. Once a purple outline surrounds it, click and drag the circles on its corners to enlarge the shape.
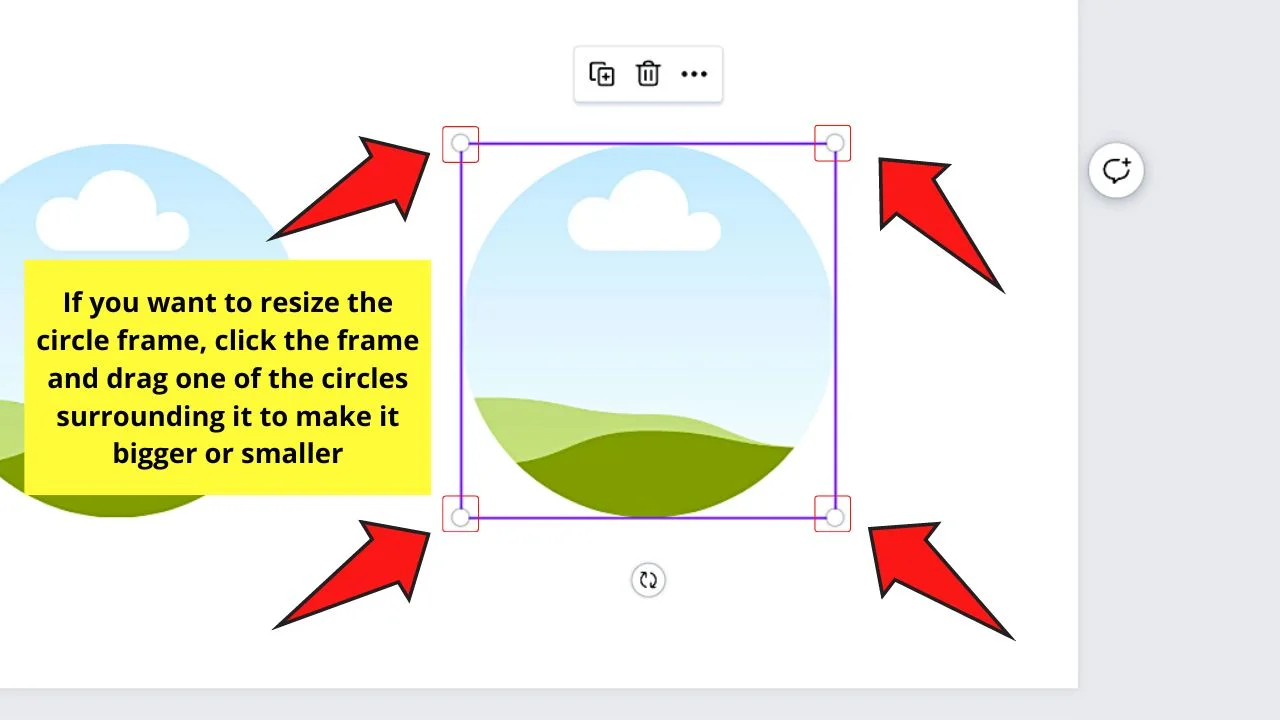
Step 5: Go back to the left-side panel and select the “Uploads” tab if the image file is on your computer.
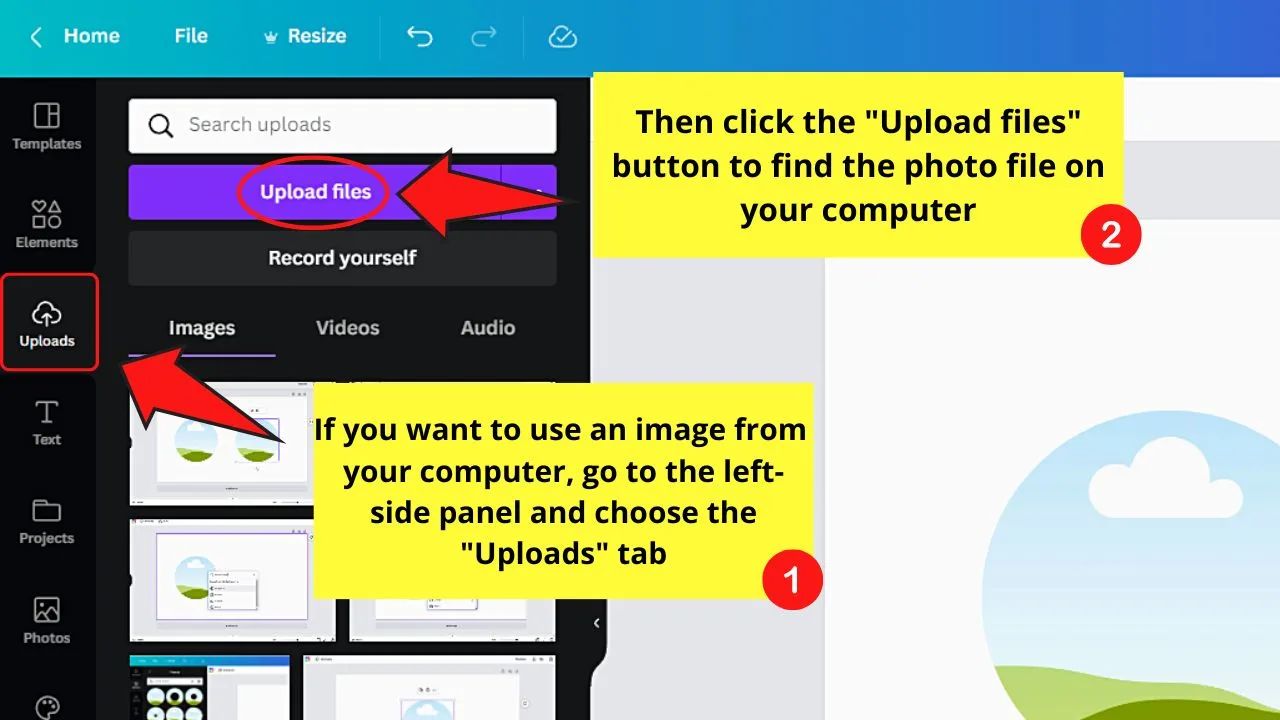
Then, choose the “Upload files” button for you to locate and upload the photo to Canva.
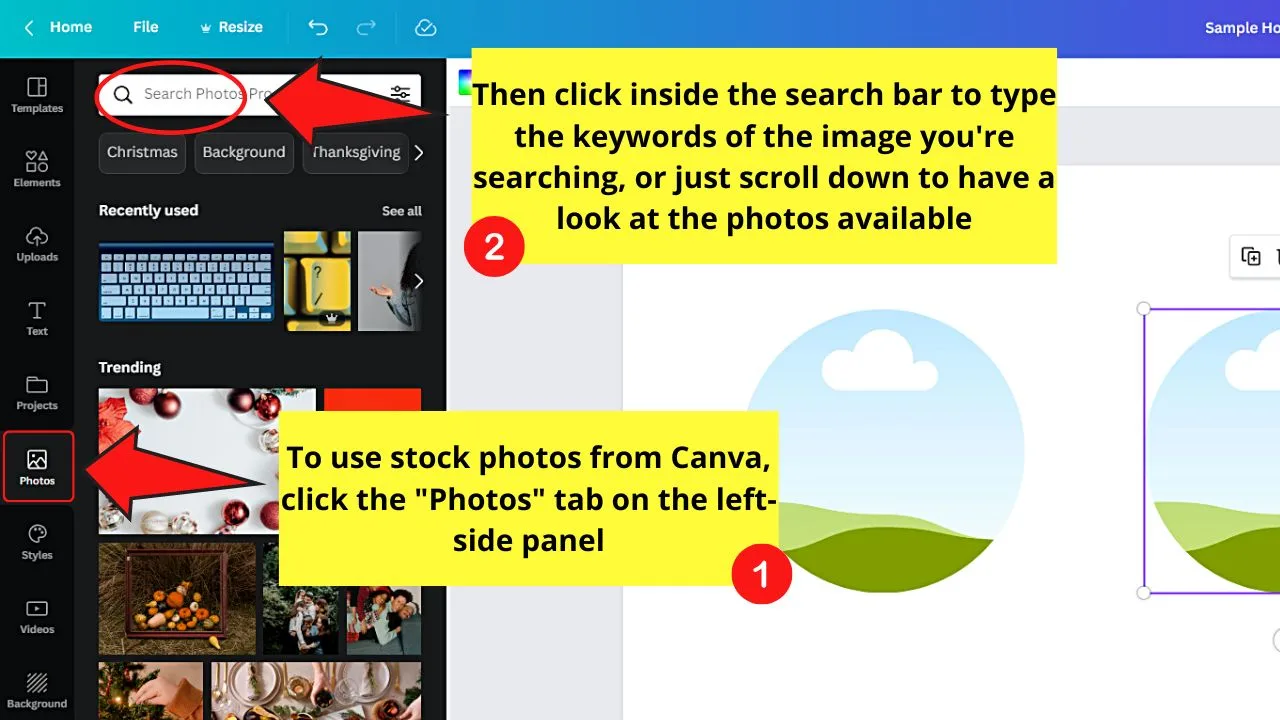
If you prefer a stock image, then select “Photos” instead. From there, you can use the search bar to find the picture or scroll down the available options in the gallery.
Step 6: Once you find the image you’ll use, drag and drop it into the circle frame you added earlier.
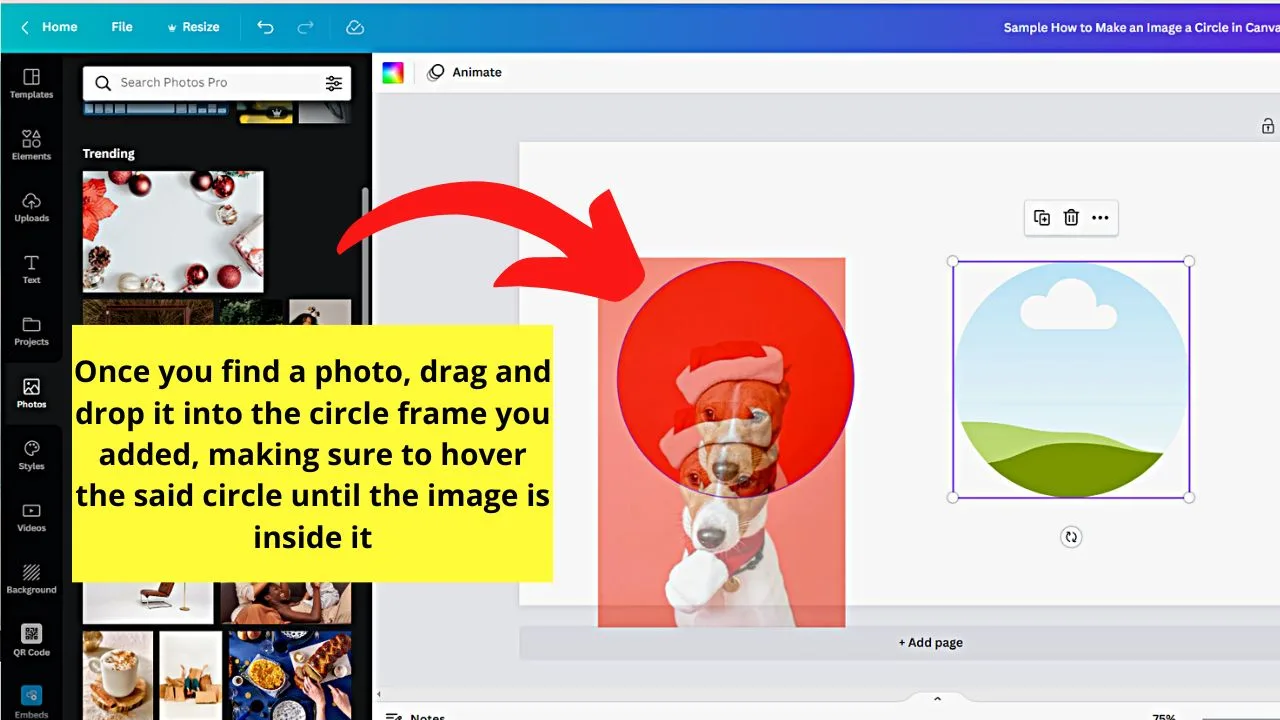
Keep hovering the picture on the circle frame until the said image is inside the frame.
Step 7: To adjust the image’s position inside the circle, double-click on it.
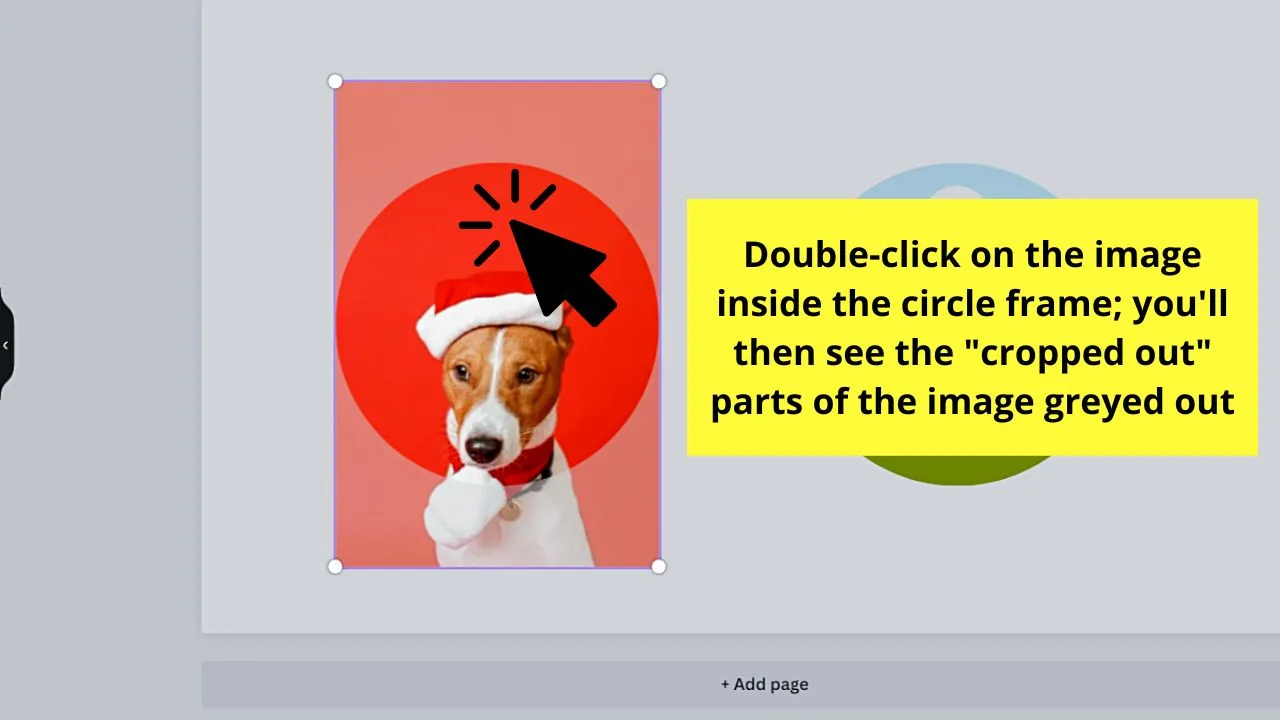
You’ll then see the parts of the photo, which are outside the circle, greyed out.
Now, drag the image to the left or right until you have achieved the position you want.
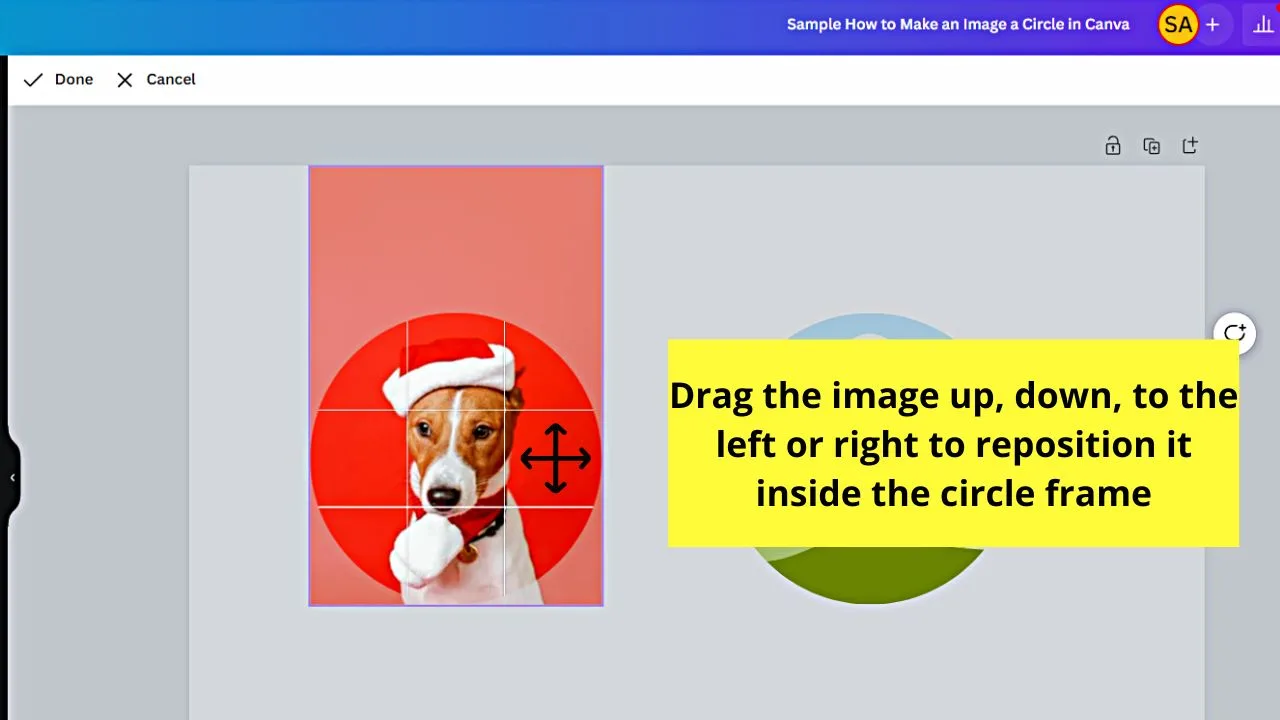
Step 8: If you want to enlarge or zoom the image you added, click and drag one of the circles on its corners.
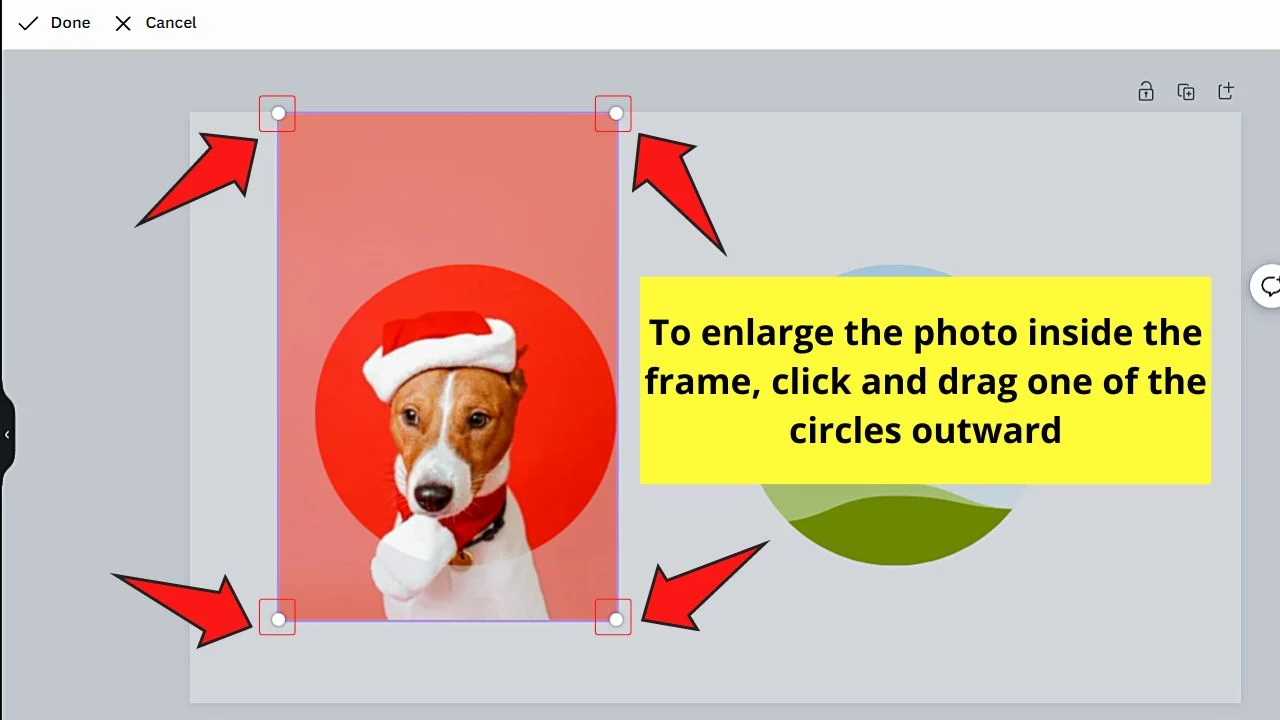
If there’s a need to readjust the newly-enlarged photo, drag it to the right or left again until you achieve the look you want.
Click “Done” on the toolbar that appears if you’re good with how the image looks inside the circle frame.
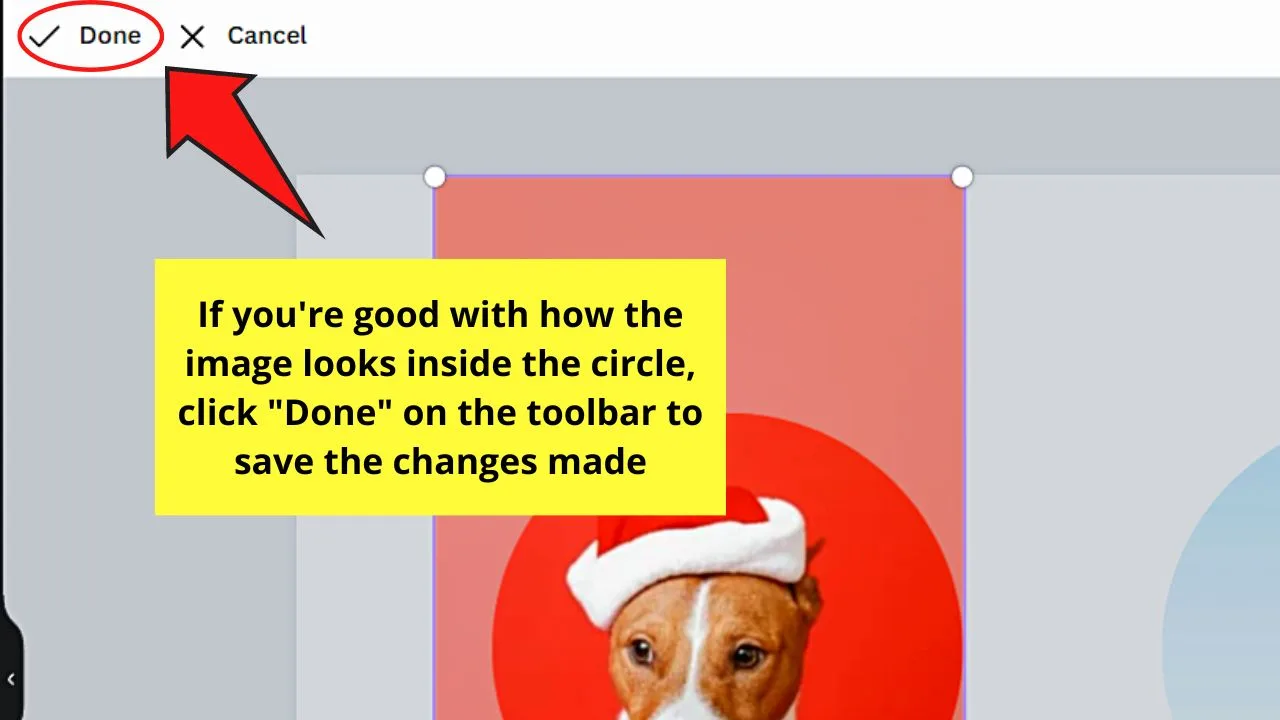
Step 9: To further edit the picture inside the frame, go back to the left-side panel, click “Elements,” and add filters, photo effects, and the like.
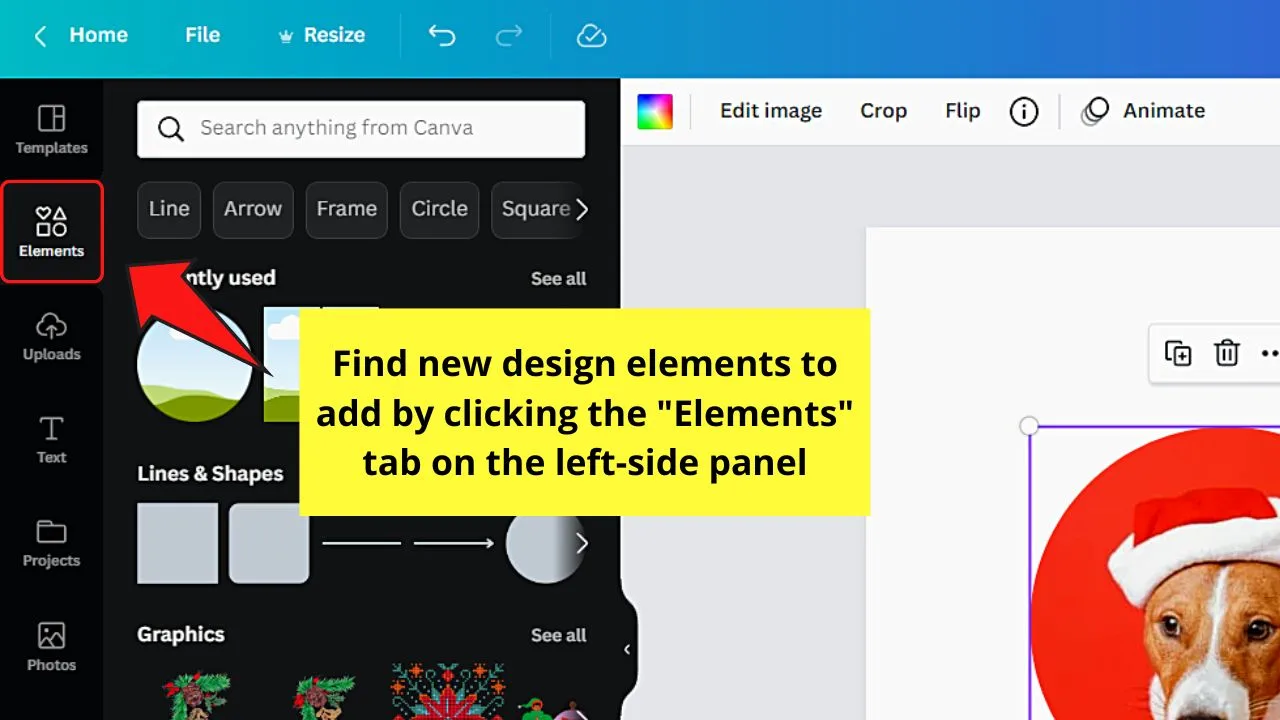
You can even further adjust the image’s parameters by clicking on the “Edit image” tab that appears on the toolbar after selecting it.
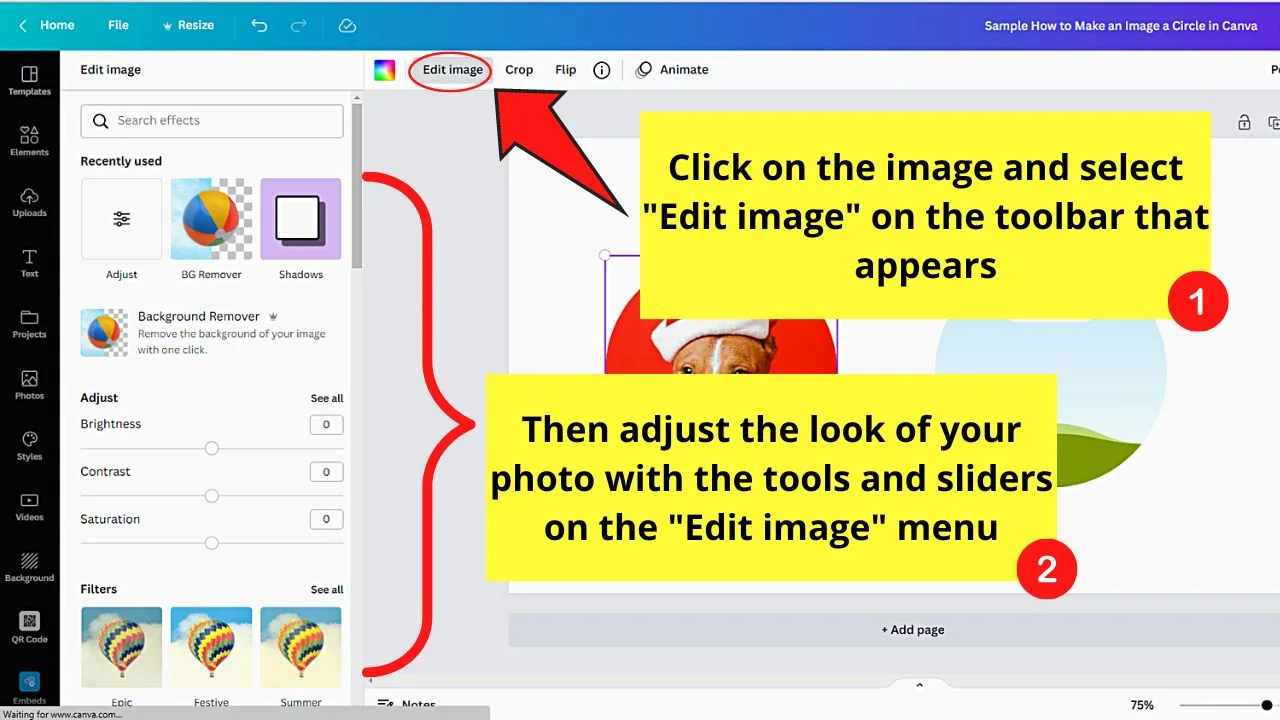
Then, select “Adjust” under the “Recently Used” section. From there, you can drag the sliders in the menu. You can even fade the image from here.
Once you’re done, proceed with adding more design elements to your project. If there’s a need, you can even fill shapes with images to further add a “Wow!” factor to the design.
Now, if you don’t want to start designing from scratch, look for templates with circle images in them instead.
Method 2: Using Existing Templates with Circle Images
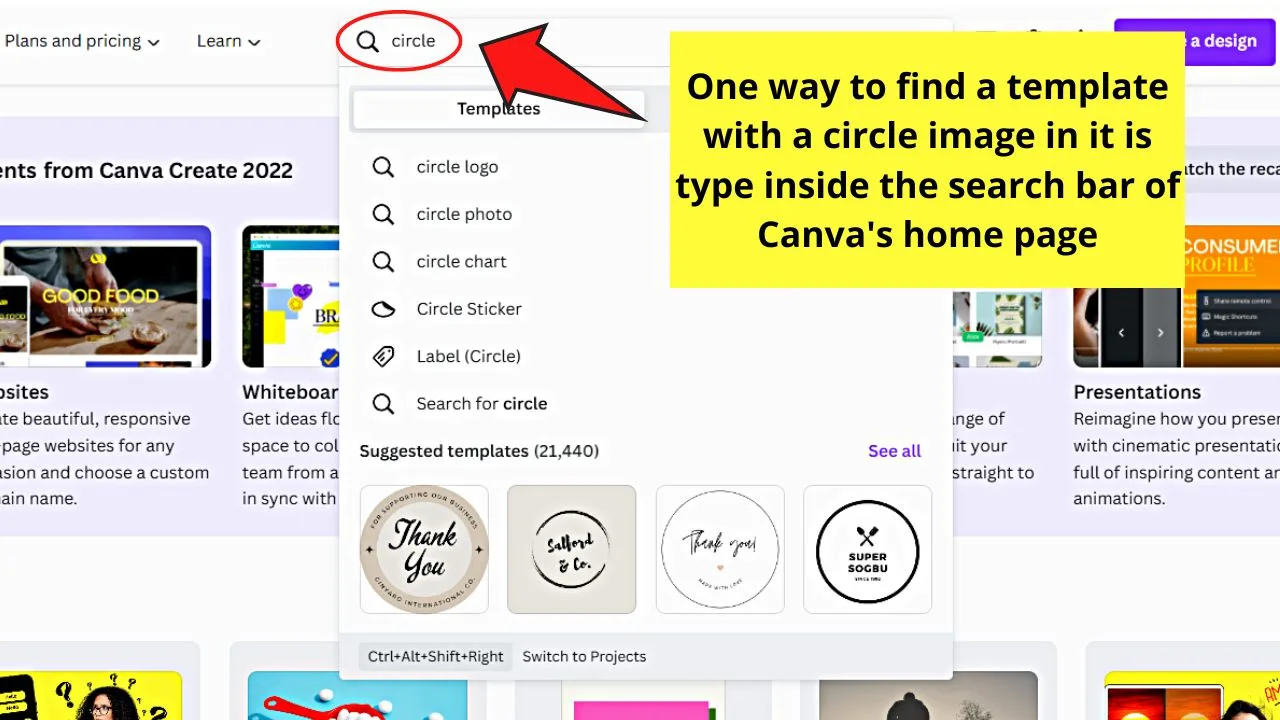
Step 1: Look for a template that has circle images in it by clicking the search bar on Canva’s home page and typing “circle” in it.
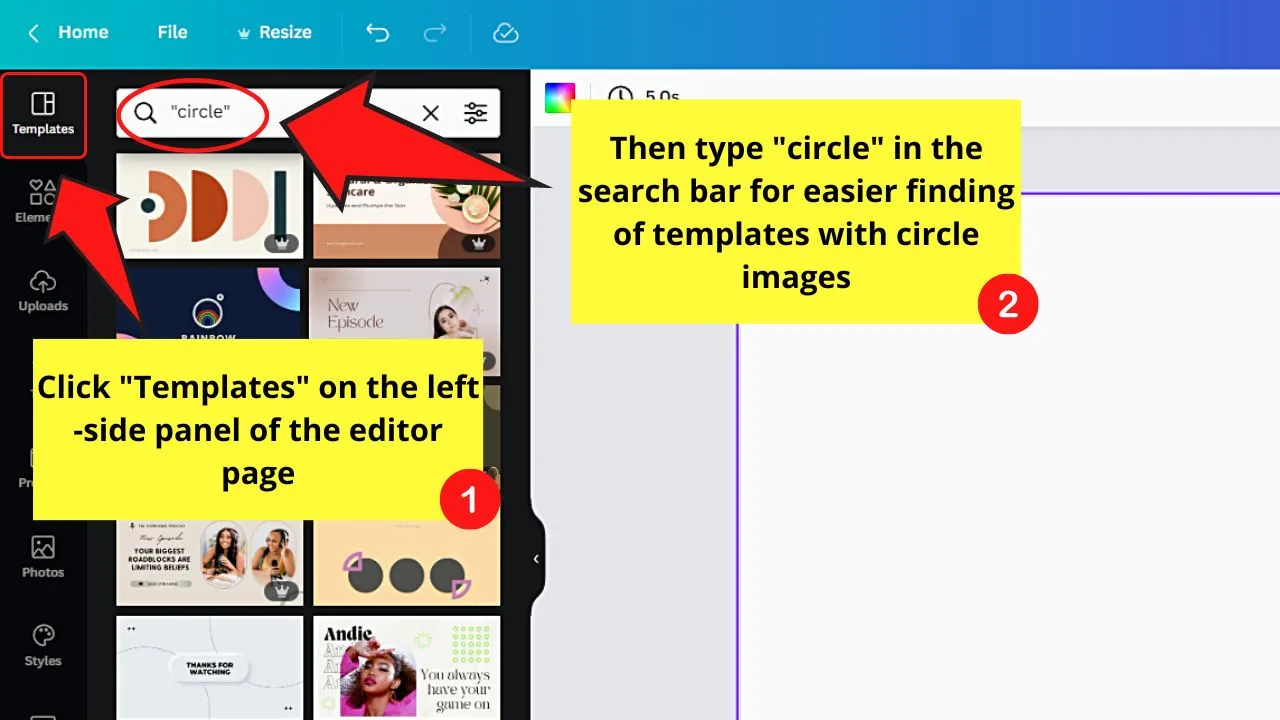
Another way is to go to the “Templates” tab on the left-side panel. Once there, click the search bar and type “circle” in it.
Step 2: Select the template you’ll use by clicking on it.

The said template will then occupy the blank canvas.
Step 3: Once you’re done editing the template, go to the left-side panel and either choose “Uploads” or “Photos” to find the picture you’ll use.
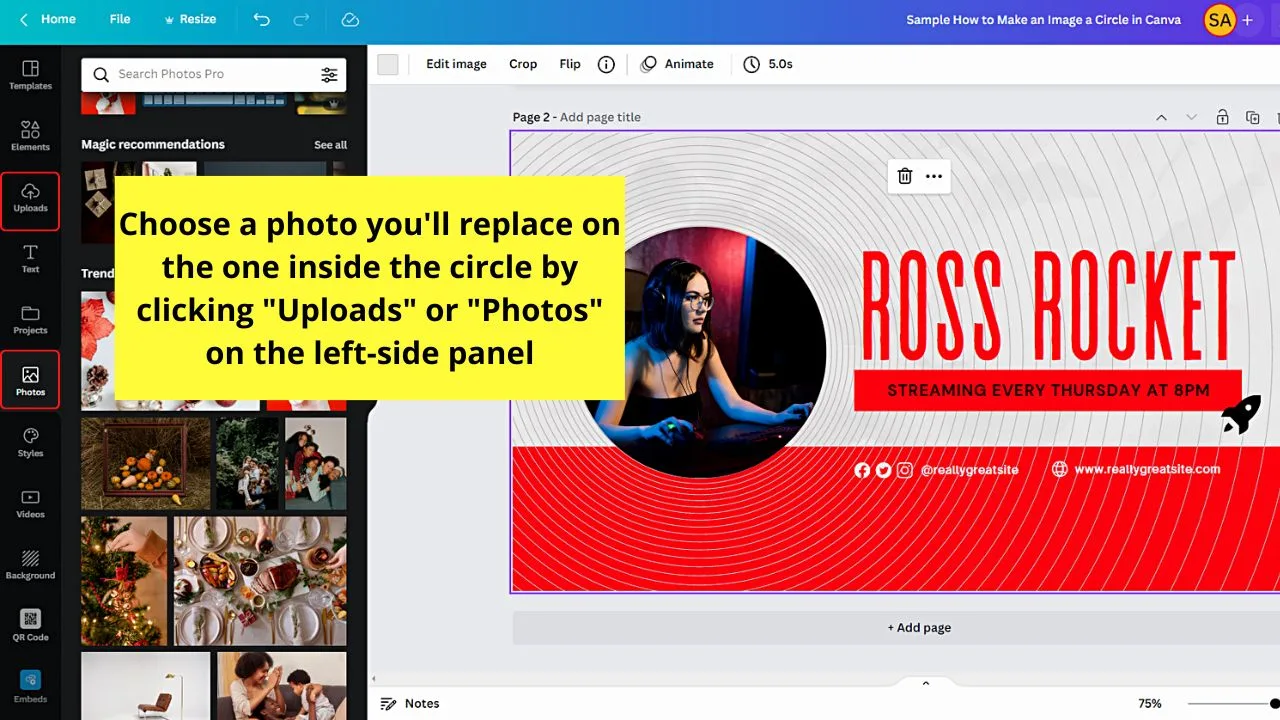
Step 4: After finding the picture you’ll use, drag it to the circle picture, which is an image placed in a circle frame.
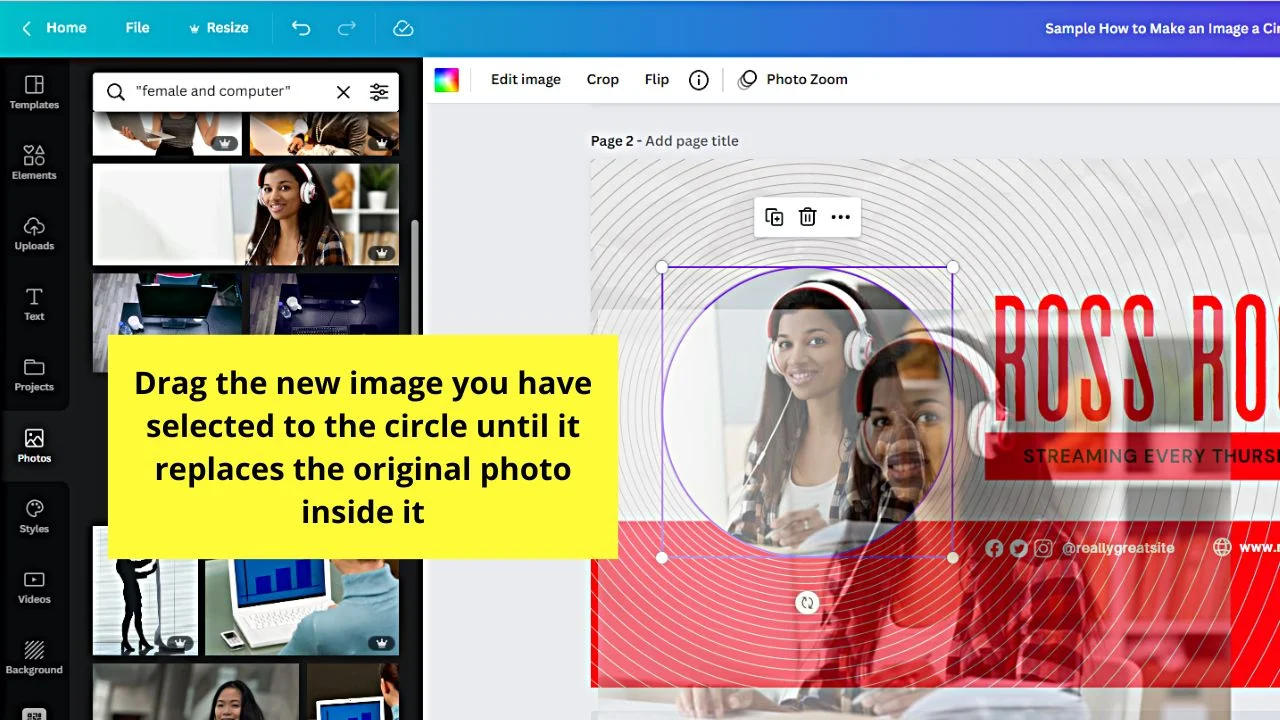
Continue dragging the photo to the circle until it replaces the original image with the one you selected.
Step 5: Now that the photo’s inside the circle, adjust its position accordingly by double-clicking on the photo before dragging it.
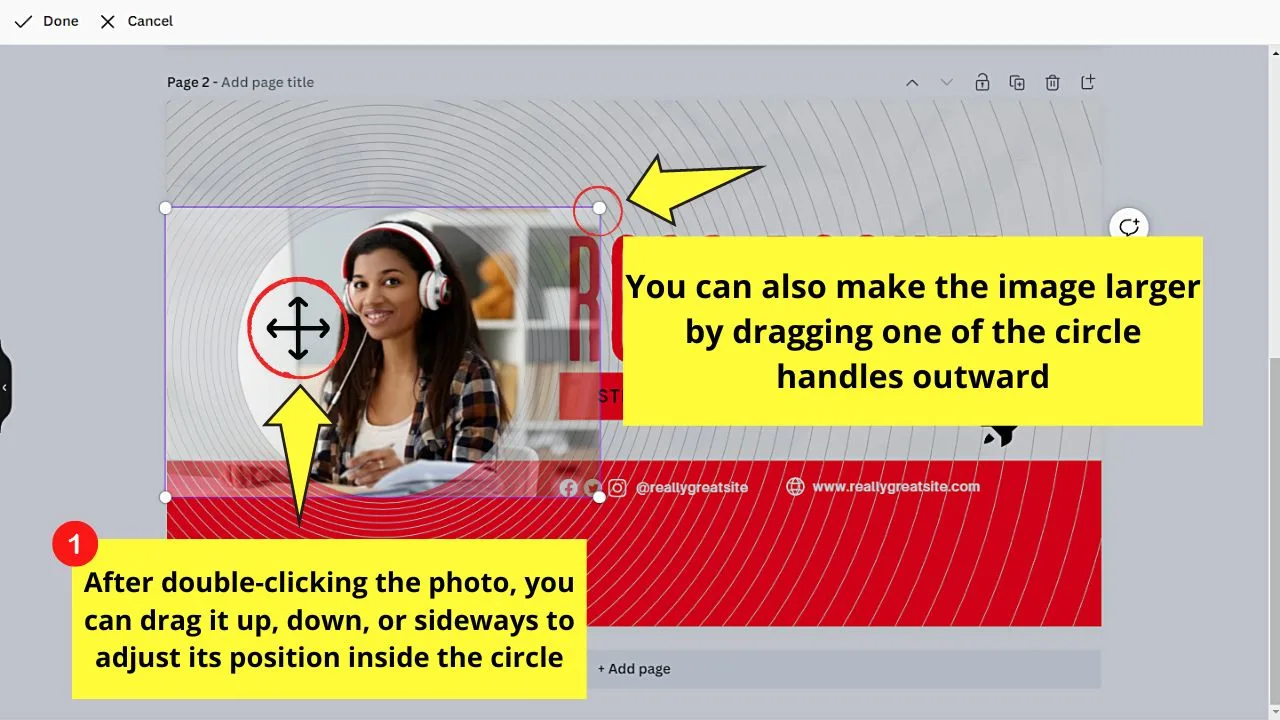
You can even zoom in or enlarge the photo by dragging the circles surrounding it.
Then, choose the “Done” button to save the changes made to your now circular image. After which, proceed with editing the rest of the template.

Now, the next thing you’ll decide is knowing which method will help you achieve making an image a circle in Canva.
Frequently Asked Questions about How to Make an Image a Circle in Canva
Where can you use the circle images you made in Canva?
You can use a circle image as your social media’s profile picture. Another way to use a circle image is to add it to an invitation. You can even use circle images for posters or flyers for your business.
Can you adjust the size of the circle frame even after adding an image to it?
It is possible to adjust the circle frame’s size even if you already added an image to it. Just click the said frame until you see the circle crop marks on the dotted box’s corners. Then, click and drag one of those circles outward to enlarge the frame or inward to make it smaller.
How can you adjust the image’s positioning inside the circle frame in Canva?
To adjust the photo’s positioning inside the circle frame in Canva, double-click the photo first. Then, drag the picture upward, downward, to the left, or the right until you achieve the look you want. Once finished, select the “Done” button to save the changes made.
What’s the easiest way of finding a circle frame in Canva?
Though there are 3 ways to find a circle frame in Canva, the easiest method is to press “/” on your keyboard. A magic menu then appears on the editor page. Then, type the keywords in the search bar and click the element you’ll use, which, in this case, is a circle frame.

Hey guys! It’s me, Marcel, aka Maschi. On MaschiTuts, it’s all about tutorials! No matter the topic of the article, the goal always remains the same: Providing you guys with the most in-depth and helpful tutorials!


