

Fading an image is one of the most common photography effects known to everyone. Aside from making the photos look dreamy, fading also allows you to blend them with their background.
And the said effect even intensifies certain regions of the image and adds that glow effect to it.
With all these benefits, it’s indeed best that you try it out. But, how do you fade an image if you’re using Canva?
How to Fade an Image in Canva
One way to fade an image in Canva is to use the “Fade” slider in “Edit Image.” Another way is to reduce the opacity of an image to create a fade effect. Third, you can layer a solid transparent gradient over the image. Lastly, you can add a fade-to-transparent gradient over the picture to fade an image in Canva.
Method 1: Use the Fade Slider in “Edit Image” to fade a Picture in Canva
Step 1: Select an image you’ll use for the project by clicking the “Uploads” tab on the left-side panel.


Then, choose the “Upload files” button to find the photo from your computer.
But, if you prefer using a stock photo, then select “Photos” instead on the left-side panel. Then, either click or drag and drop the picture into your project.


Step 2: Resize the photo by dragging the circles on its corners.


However, if you prefer to make it a background image, right-click on the said picture and select “Set image as background.”


Step 3: Choose the photo you added by clicking on it.
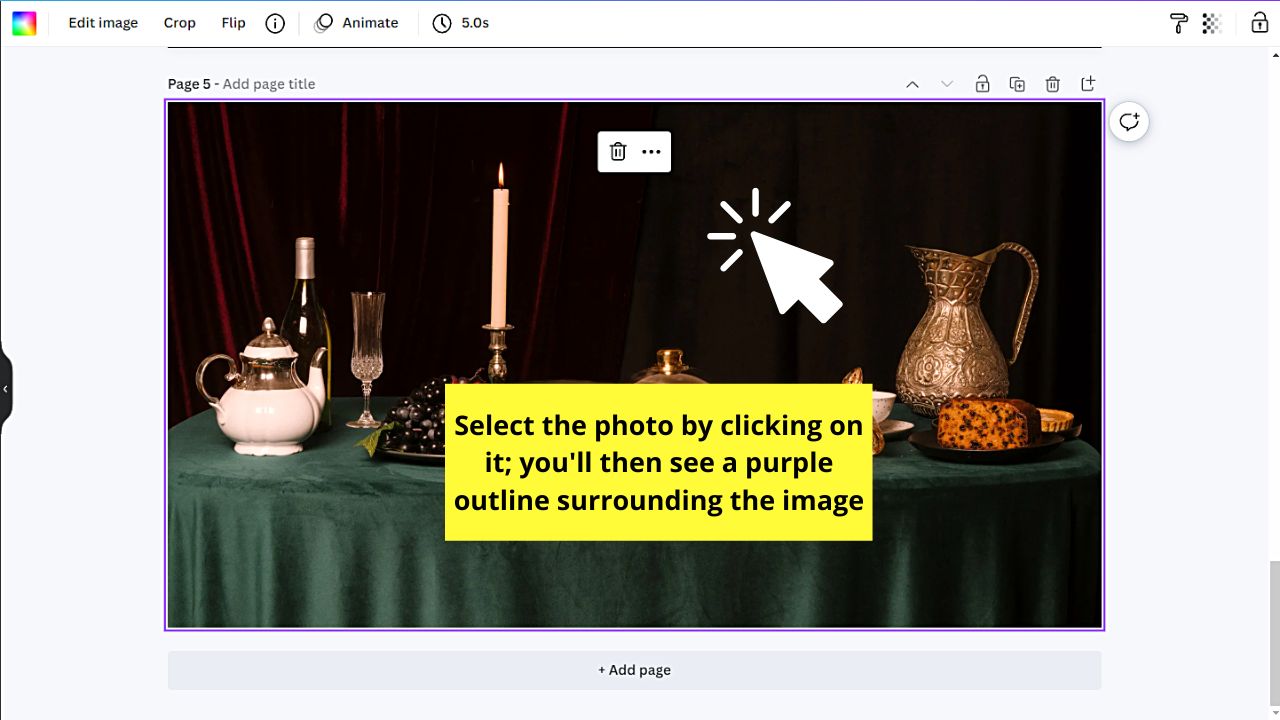

You’ll then see a purple outline surrounding it.


Step 4: Go to the toolbar that appears and click the “Edit image” tab.
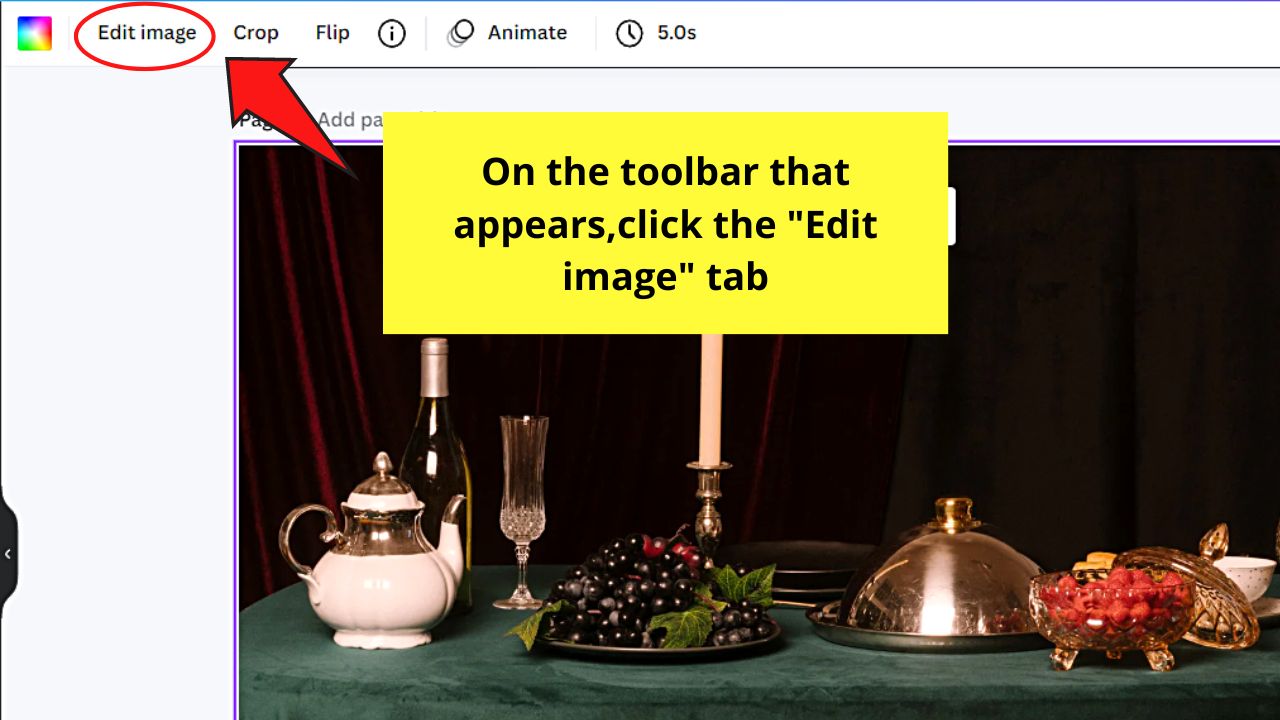

This move will then show you a menu of all the photo effects and settings you can adjust.
Step 5: On the “Recently Used” section, click the “Adjust” button.

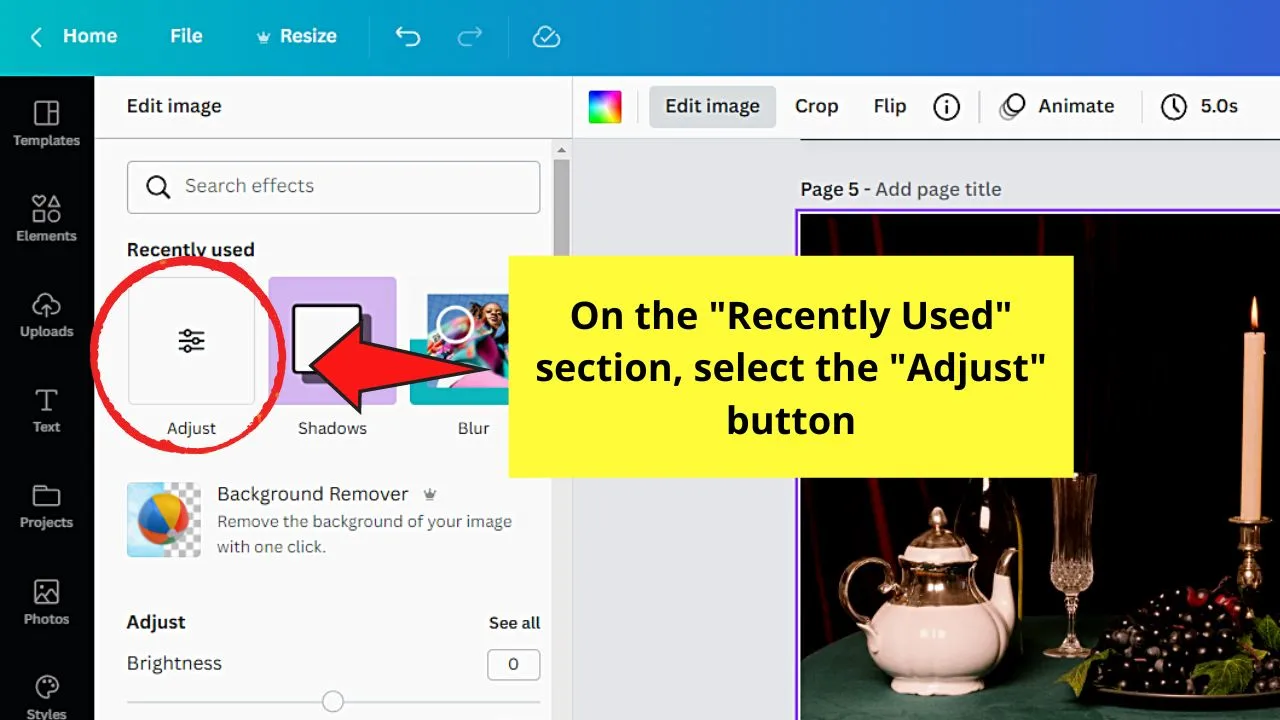
A menu will then appear on the left-side panel, listing out all the parameter sliders that you can adjust.
Step 6: Scroll down the “Adjust” menu and click and drag the slider of the “Fade” parameter to the right until you reach the fade level you want.
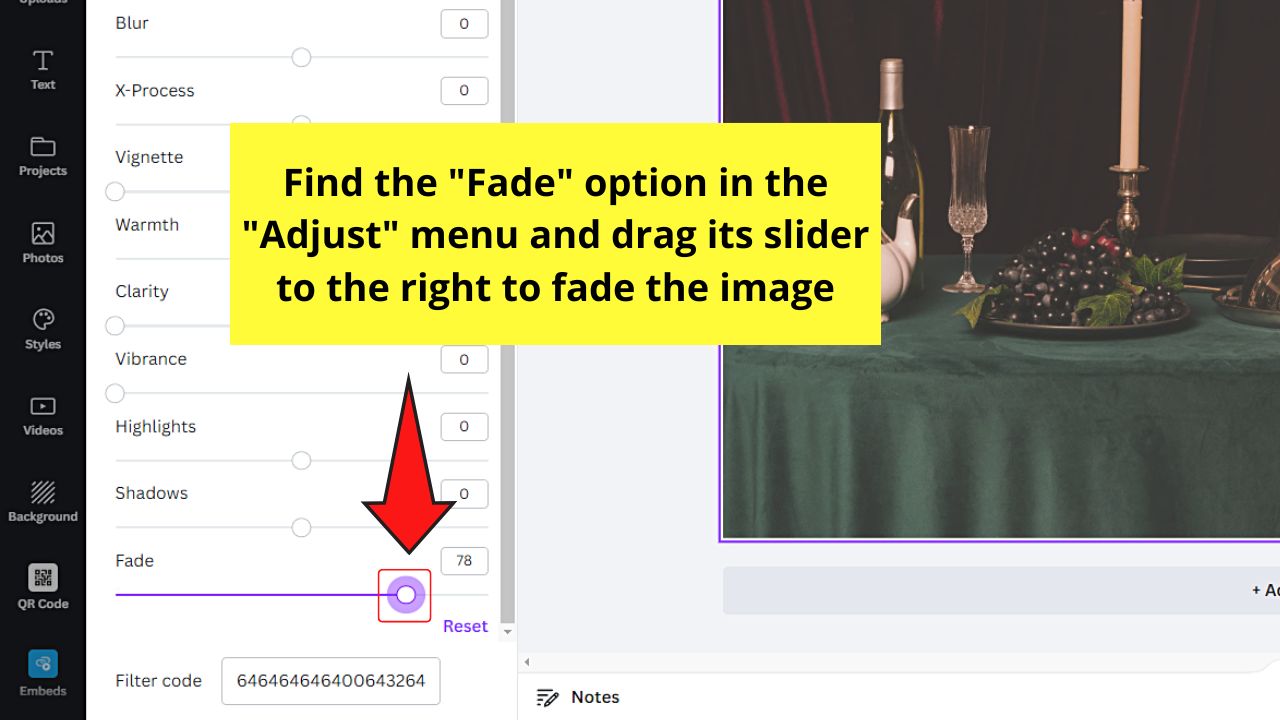

Then, click outside the “Adjust” menu to save the changes you made.
But, if you’re looking for a more direct method of fading an image, check the next method below.
Method 2: Lower the Opacity to Fade an Image in Canva
Using the opacity slider is the easiest way of fading an image in Canva.
Step 1: Choose an image you’ll use for your project by clicking the “Uploads” tab and selecting the “Upload files” button.


Only do this part of the step to use an image from the files on your computer.
If you prefer to use a stock photo, go to the “Photos” tab instead and select the image from the gallery.


Then, click or drag and drop the said image to the blank canvas.
Step 2: Once you have added the photo you’ll fade, click to select it.

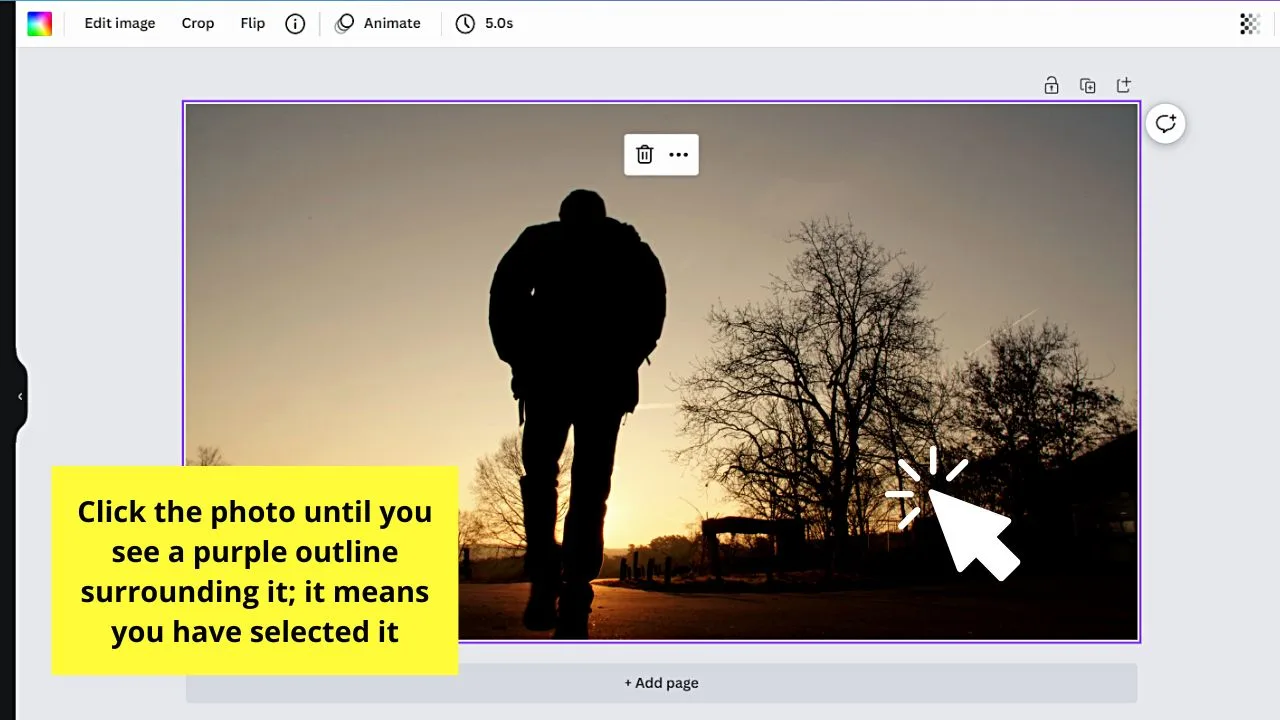
It will then be surrounded by a purple outline with circles at its corners.
In case you made this image as the background, you’ll only see a purple outline surrounding it.
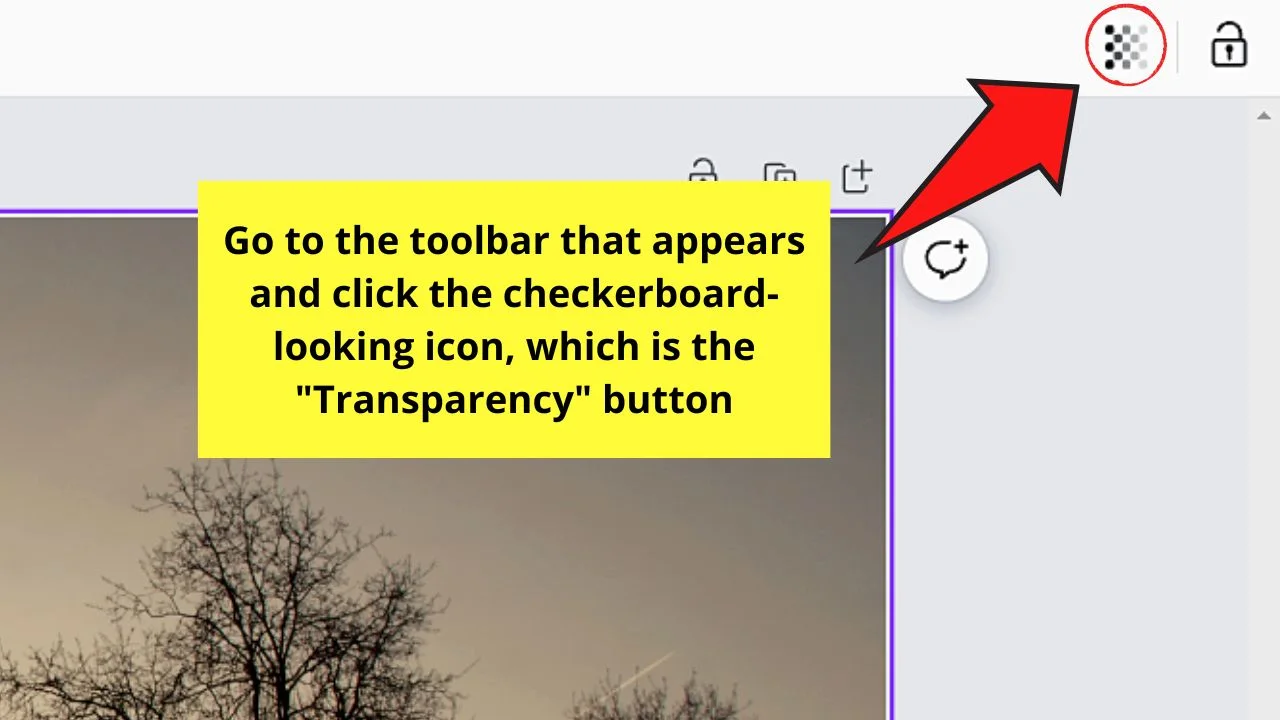
Step 3: Find the icon that looks like a checkerboard on the toolbar and click it. This is the transparency slider.

Step 4:Drag the transparency slider to the left to decrease the transparency of the image. In simpler terms, fading the photo.
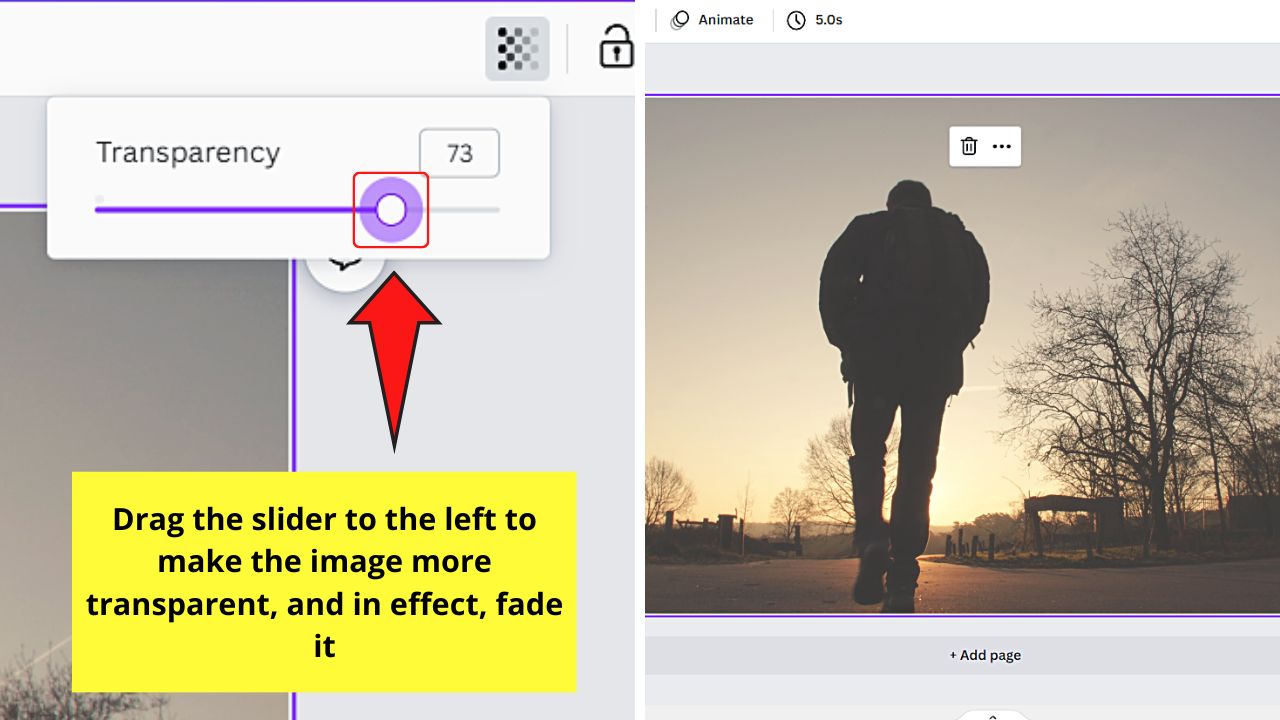

Continue dragging the said slider until you reach the fading level that you desire. Once done, click anywhere outside of the slider to save the changes made.
Now, if using the transparency slider won’t help you achieve the fading effect you imagined, the second method is what you need.
Method 3: Use of Solid Transparent Gradient
Step 1: Choose an image you’d like to use for your design or project either by clicking the “Photos” tab to access Canva’s stock photo gallery.


Or, select the “Uploads” tab on the left-side panel. Then click the “Upload files” instead to select a photo from the computer you’re using.


Step 2: After selecting an image you’ll use, click to make it appear on the blank canvas.


Resize the said image by clicking it and dragging the crop marks surrounding it outwards. This will enlarge the said photo.


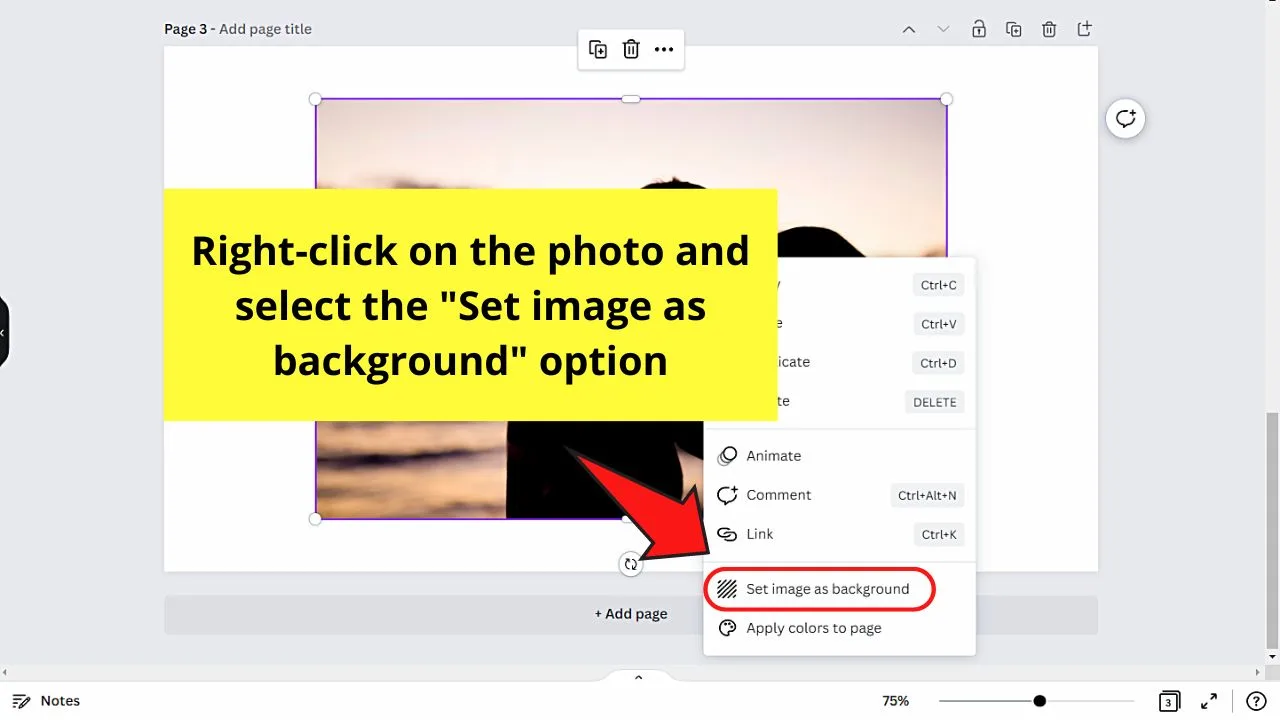
If you prefer for the photo to occupy the canvas’ entire space, right-click on the said image and select the “Set image as background” option.
Automatically, the photo selected will become the background image.


Step 3: Now, go back to the left-side panel and click the “Elements” tab.


Once the “Elements” tab appears, click inside the search bar and type in it “gradients.”
Among all the gradient variants that appear, find one that is square or rectangular and is editable or recolorable. Click to select it.


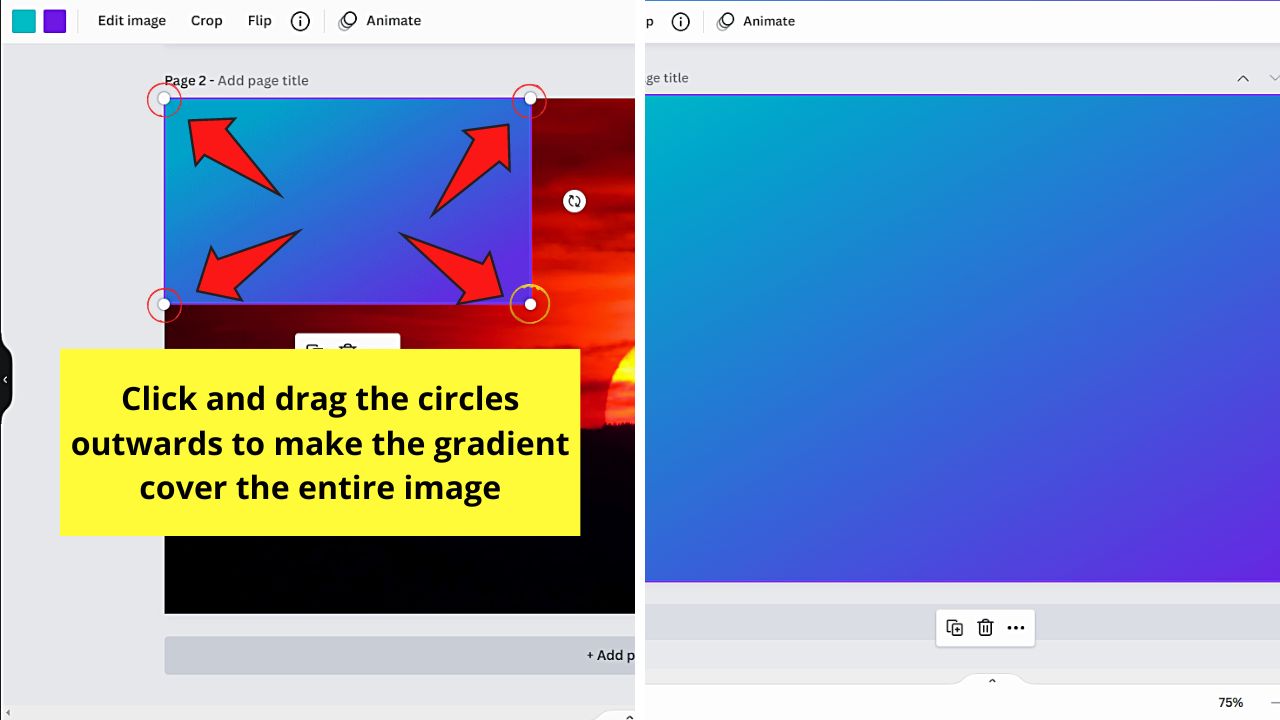
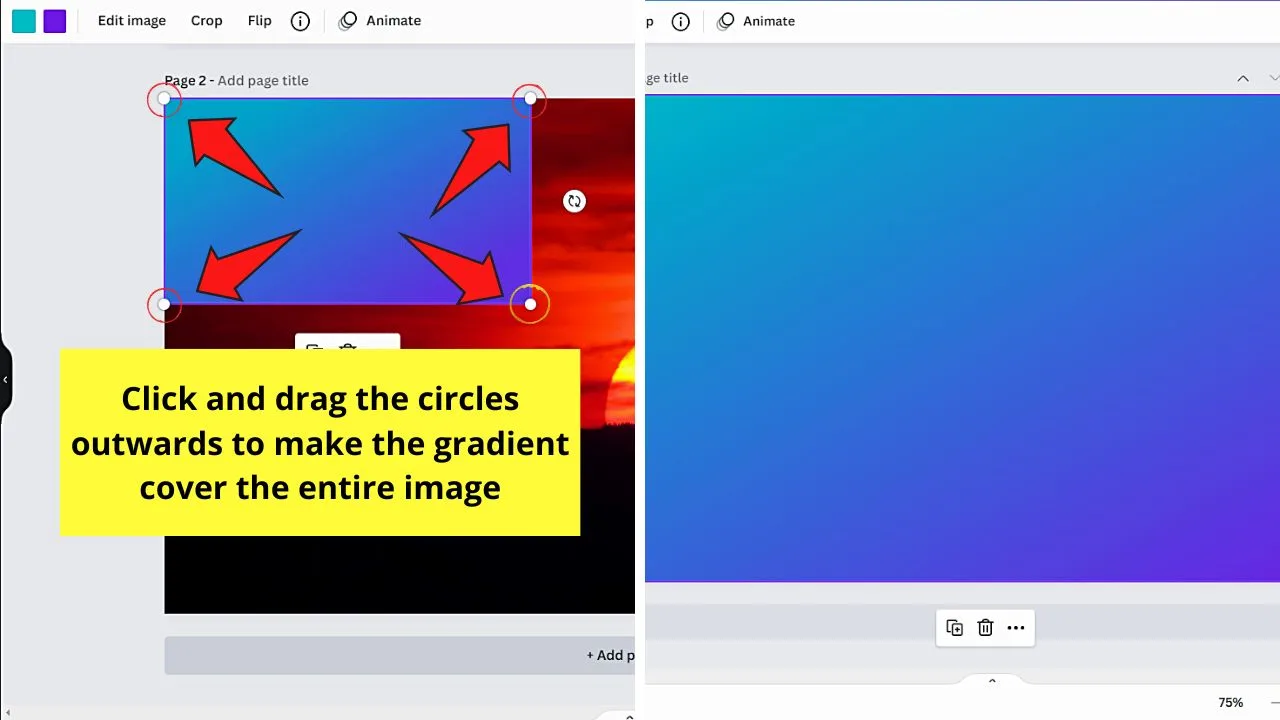
Step 4: Resize the gradient by clicking and dragging its crop marks until it fully covers the first photo you added earlier.
Step 5: Now that the gradient fully covers the first image, customize its colors by clicking on it.


You’ll then see colored boxes on the toolbar. Select one of them until the color palette menu appears.
From there, choose from the default colors available. You can also use the colors from the photo to make the gradient’s color closer to the theme.


Step 6: After customizing the gradient’s colors, go to the toolbar again, but this time, select the transparency slider icon.


Then, make the gradient more transparent by dragging the slider to the left.


You can also type any number from 0 to 100 inside the box. Type in a lower number, and the transparency will be higher.


Now, if you don’t want to affect the entire color of the original image but still fade it, the third method is the best one to use.
Method 4: Use of Fade-to-Transparent Gradient
Step 1: Add an image to your project either by clicking “Uploads” or “Photos” on the left-side panel.


Once you find that photo, click to make it appear on the blank canvas.


Step 2: Right-click the picture and choose “Set as background image.”

Step 3: Go back to the left-side panel and click the “Elements” tab.


Then, on the search bar, type “gradients that fade to transparent.” A bunch of options will then appear on the “Elements” menu.


Select the gradient that you want to use (preferably square or rectangular in shape) by clicking on it.
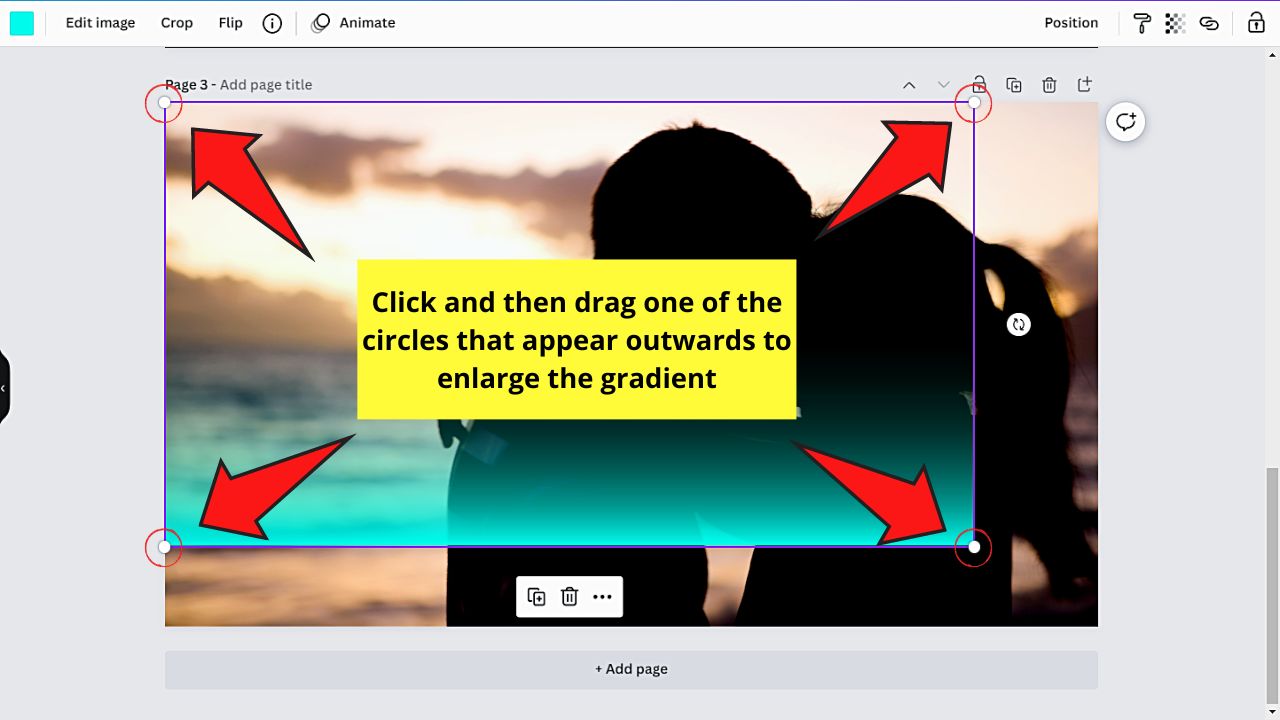
Step 4: Resize the gradient you selected by dragging the circles on its corners.

Step 5: Once the gradient covers the image you added, change its position.
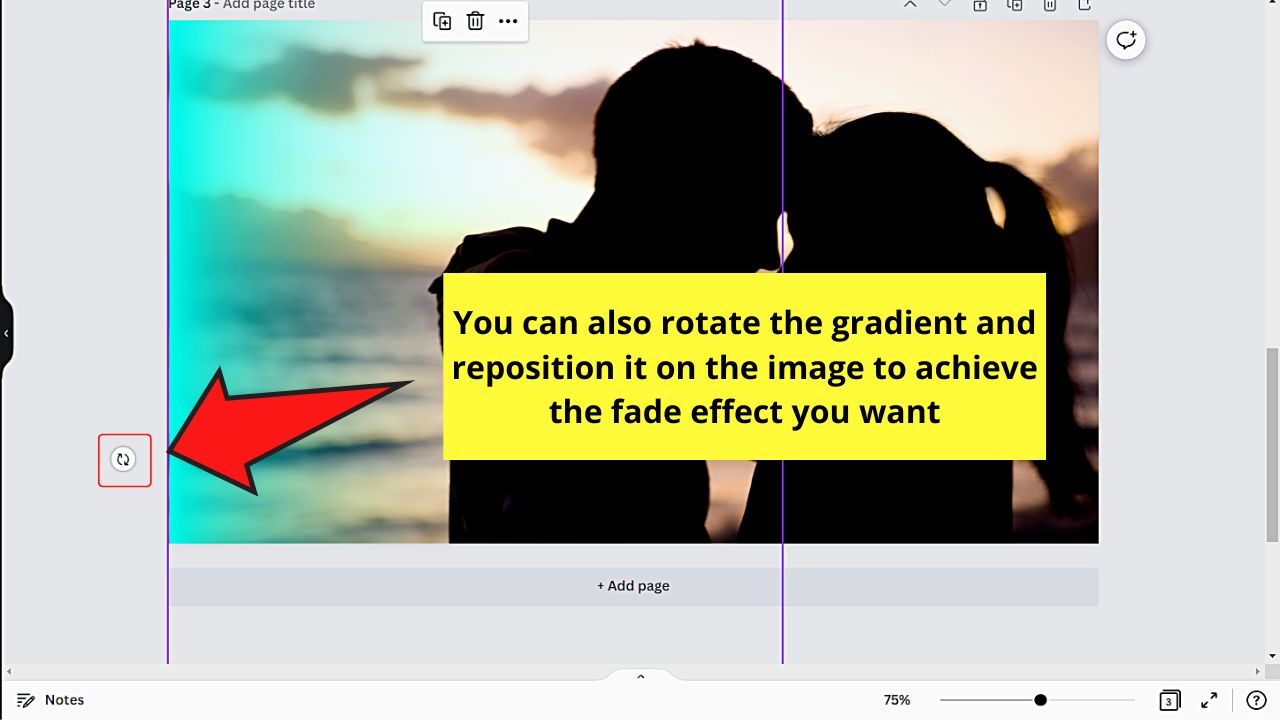
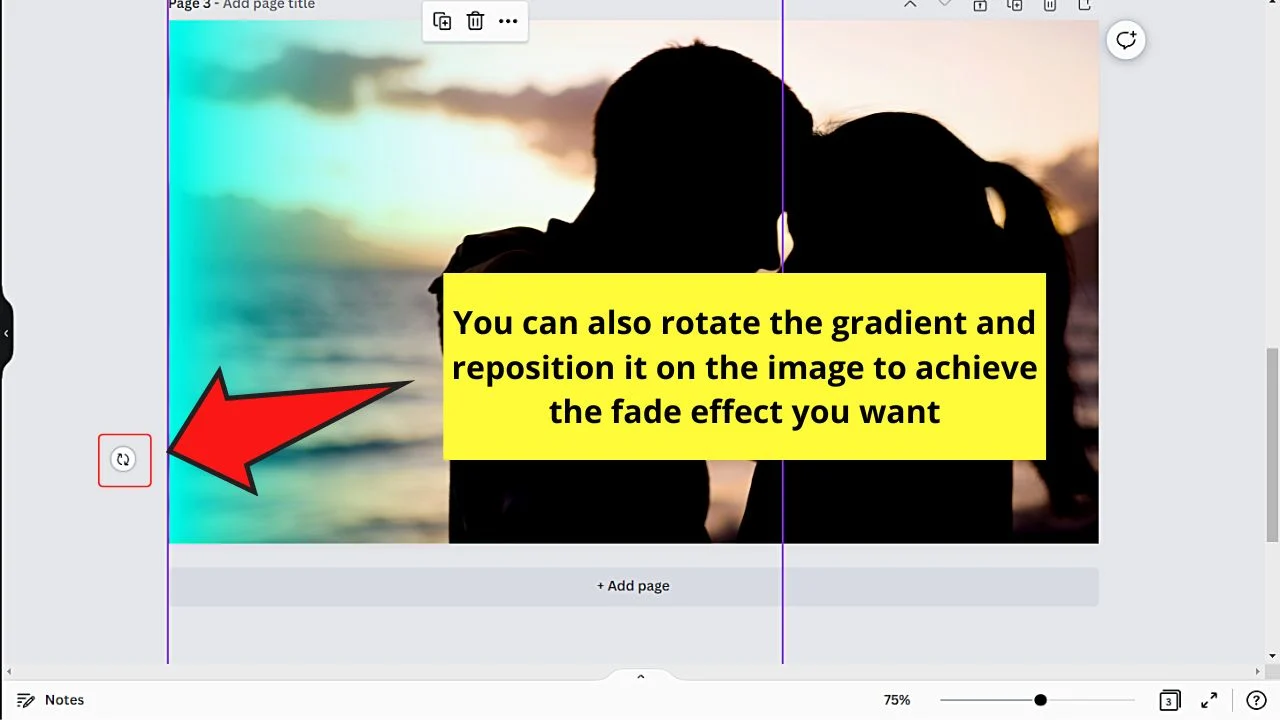
Though it’s not required, sometimes shifting the gradient across the photo will allow you to arrive at the best possible results.
You can even opt to stretch the gradient for better repositioning. If you need to rotate the gradient, you can do so.
Step 6: Customize the gradient’s colors by clicking on the colored boxes that appear after selecting one of the gradient colors.
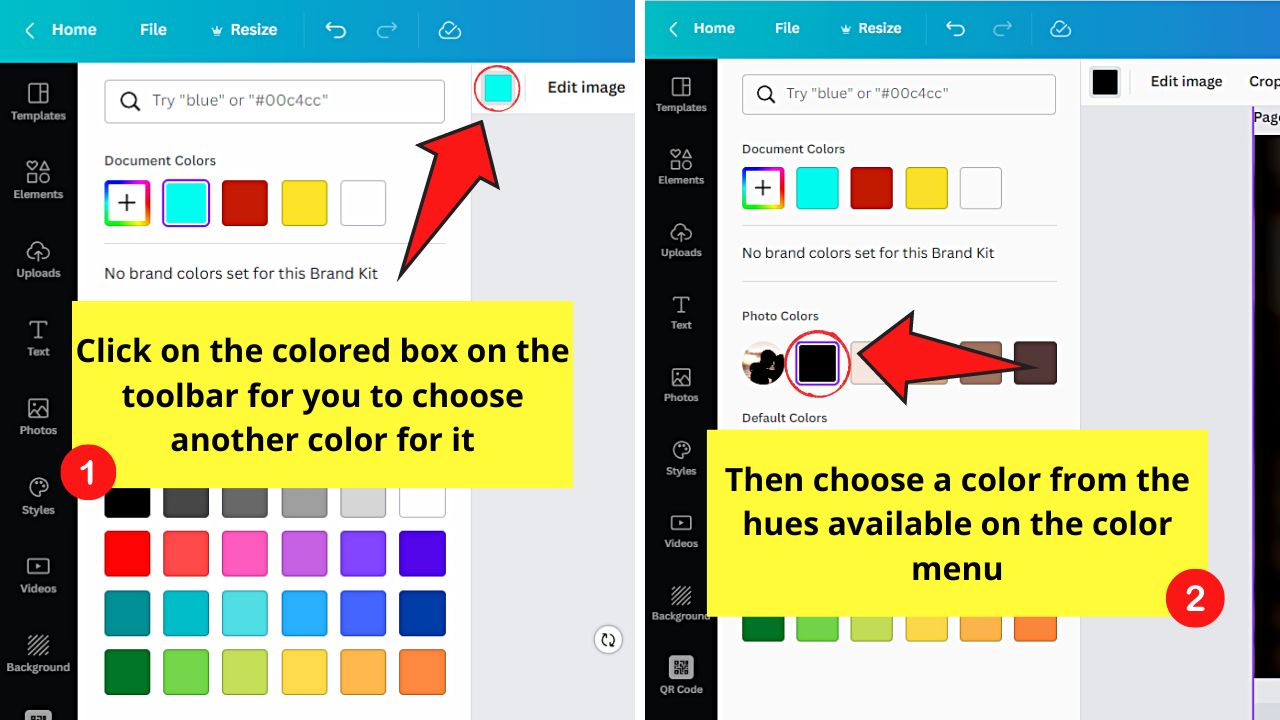
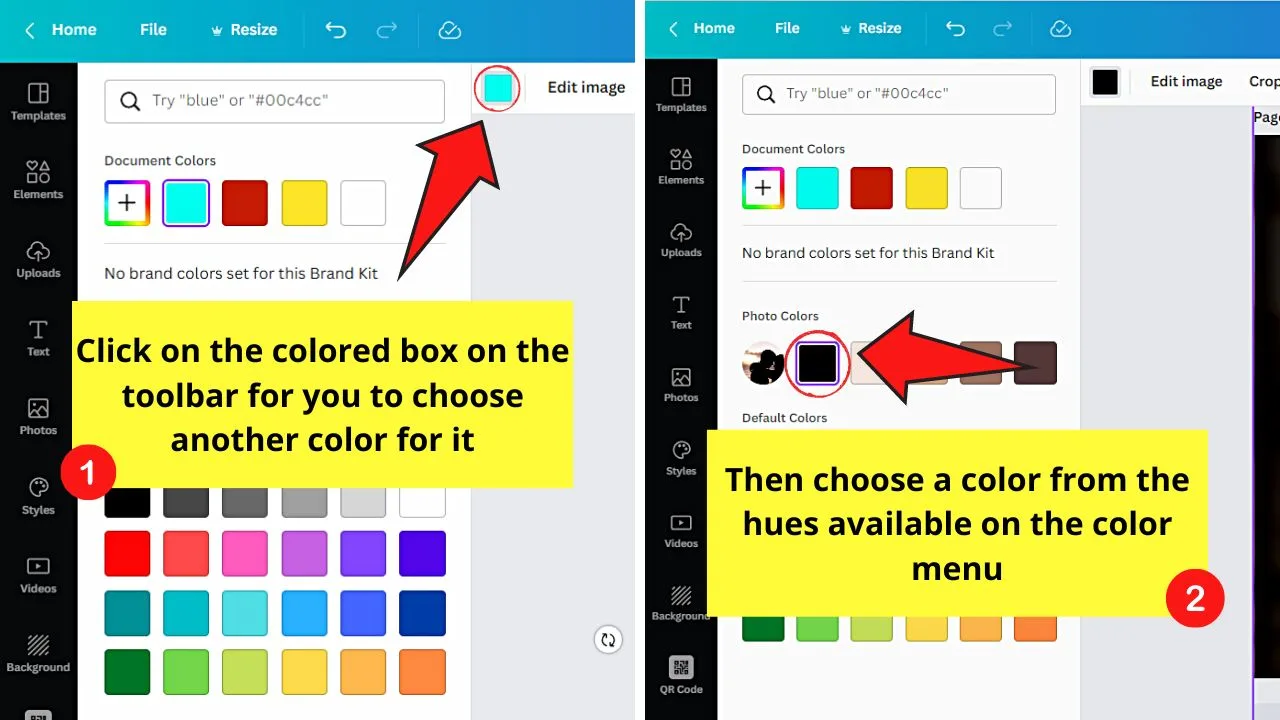
Then, choose from the default colors available or use the document colors.
Step 7: Adjust the gradient’s transparency by clicking the checkered icon on the toolbar that appears after selecting the gradient.


Then, once the transparency slider appears, drag the circle to the left to increase its transparency. You can also type in the box the number for the transparency level you want to assign.


How to Fade Part of an Image in Canva

Sometimes, just fading part of the image is what you would like to do in Canva. This can be tricky.
For instance, when left-clicking on your image and then going into “Edit image” and then “Adjust,” you will indeed find the “Fade” fader there and this works fine whenever you want to fade the whole image.
However, you can’t customize this fade in any way to just apply to part of your image or picture. That’s a pity.
But there’s actually another great way to just fade part of an image in Canva.
What you have to do is to switch over to “Elements” in the left toolbar and then search for “Transparent Gradient.”
Then drag & drop a transparent gradient into your design and you can then simply position it to only cover part of your image.
Now, click on your gradient and then click on “Color” in the toolbar above the design. This is where the magic happens.
On the left-side, you will then see a section “Photo colors.” With the help of this section, you can now match your gradient’s colors with the colors of your image.
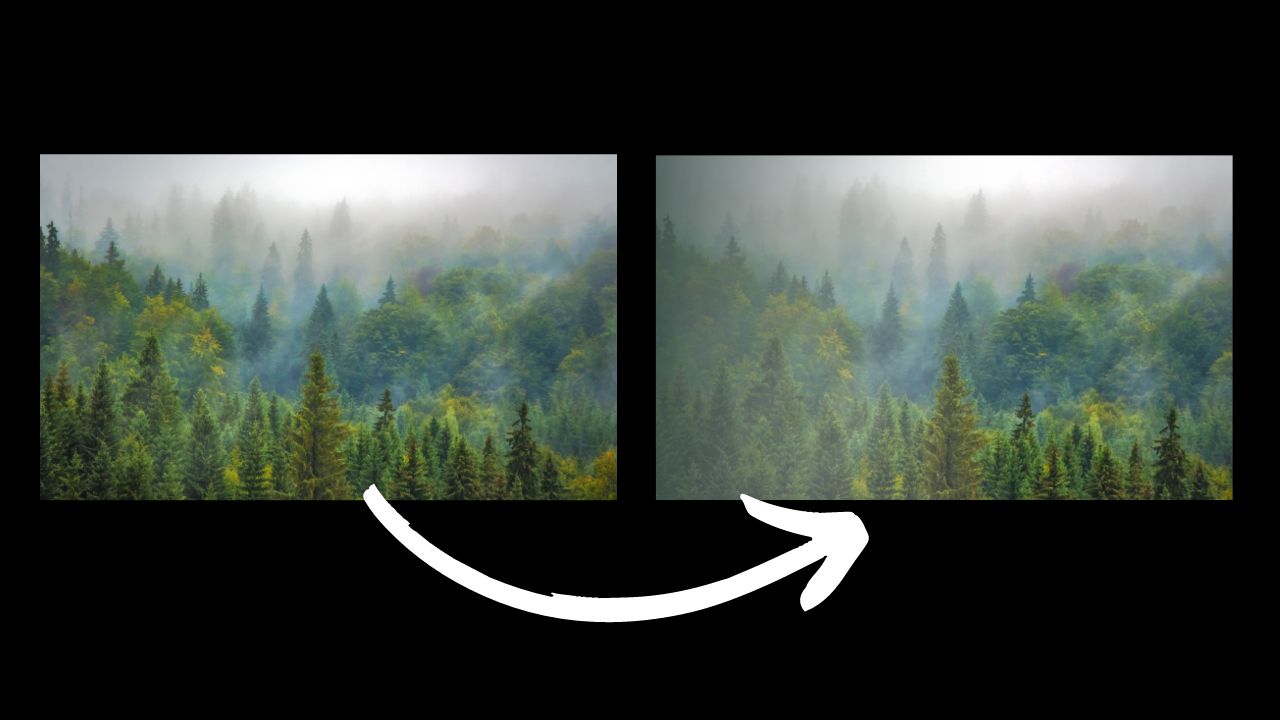
After you have chosen the appropriate colors to match your photo, you should end up with a really nice-looking gradient that only fades part of your image.
How to lower the opacity in Canva
Sometimes, just lowering the opacity of an image in Canva is all you need to do to create a cool-looking fade effect.
Lowering the opacity in Canva always works in the same way. Simply left-click on your image or photo in your design and then in the toolbar above your design, click on Transparency and move the fader to the left to lower the opacity.
This works with any element in Canva, be it Canva elements, pictures, images, graphics or even Canva shapes such as lines and rectangles.
As you can see, Canva makes it really easy to fade images and there are plenty ways to get the job done. I wish it was also that easy to make a superscript in Canva.
Frequently Asked Questions about How to Fade an Image in Canva
What’s the easiest method of fading an image in Canva?
The easiest method for fading pictures in Canva is to adjust their transparency. Just click the image and select the “Transparency” button. Increase the transparency of the photo by dragging the circle to the left. You can also just type the transparency value in the box provided.
What does fading an image mean?
To fade an image means that you lower its opacity, making it more transparent. This will allow you to blend the photo with its background or another layer of the design.


Hey guys! It’s me, Marcel, aka Maschi. On MaschiTuts, it’s all about tutorials! No matter the topic of the article, the goal always remains the same: Providing you guys with the most in-depth and helpful tutorials!

