Ever wonder how graphic designers combine beautiful photos with text without one overpowering the other?
Well, if you’re one of the many few who want to know how to achieve this effect, sign up for an account in Canva.
And, not just any account. Make sure you have the pro version of this powerful web-based graphic design tool to maximize all its brilliant features.
So, if you’re raring to find out the secret behind those stunning overlays of text and photos, you have to master making your background transparent.
Thankfully, Canva has the exact answer to this very need of yours.
How to make a background transparent in Canva?
To turn your background transparent in Canva, first, you have to click on the background image on your design. Then, tap on the transparency button on the Canva toolbar and then drag the slider completely to the left.
Step-by-Step Instructions in Making your Background Transparent in Canva
Using an image from Canva’s photo gallery on your design isn’t hard to do. You just need to click on the photo you like, and it will appear on your template in a few seconds.
Nifty, right? But, if you want to add an extra oomph to your design, you can tweak the photo’s transparency in a few steps.
Here’s how you go about with the process:
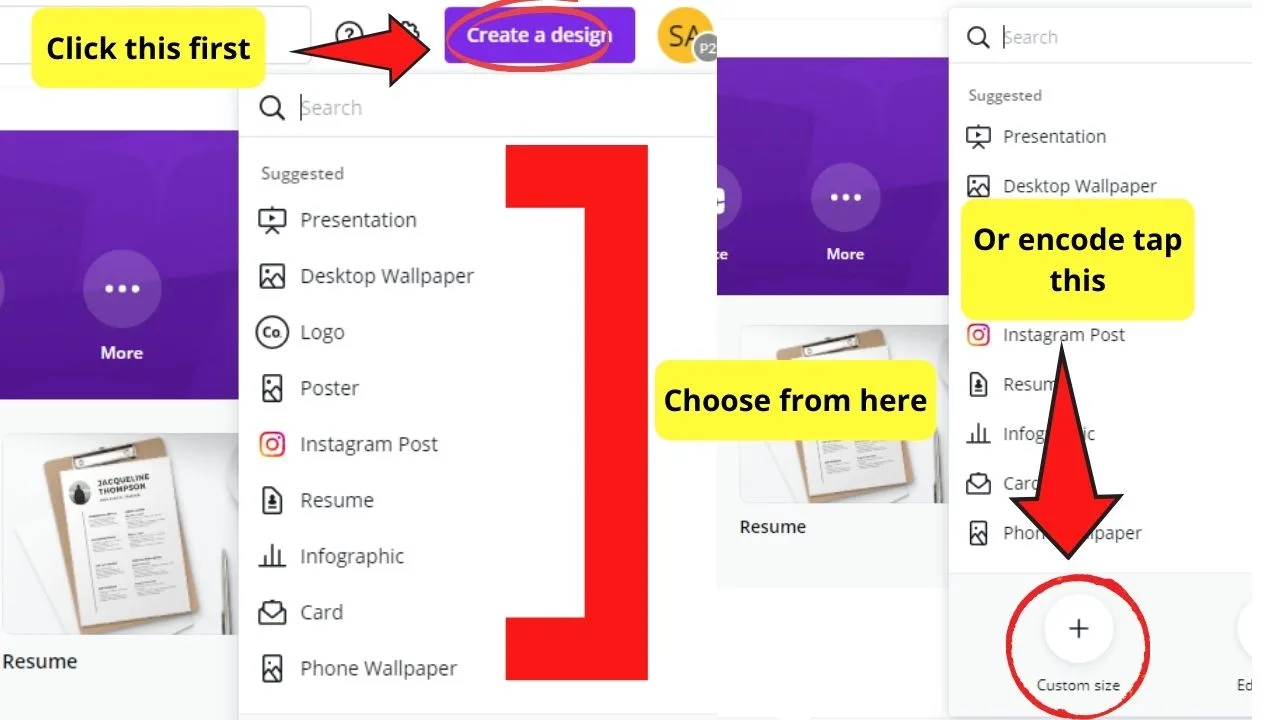
Step 1: Customize your design size by heading over to the “Create a Design” button on Canva’s homepage. Indicate the photo size you’d like to use in the empty boxes, or click on the preset sizes on the dropdown menu.
Step 2: A blank canvas will then appear on your Canva screen. Once there, head over to the left-side menu and click on “Photos.”
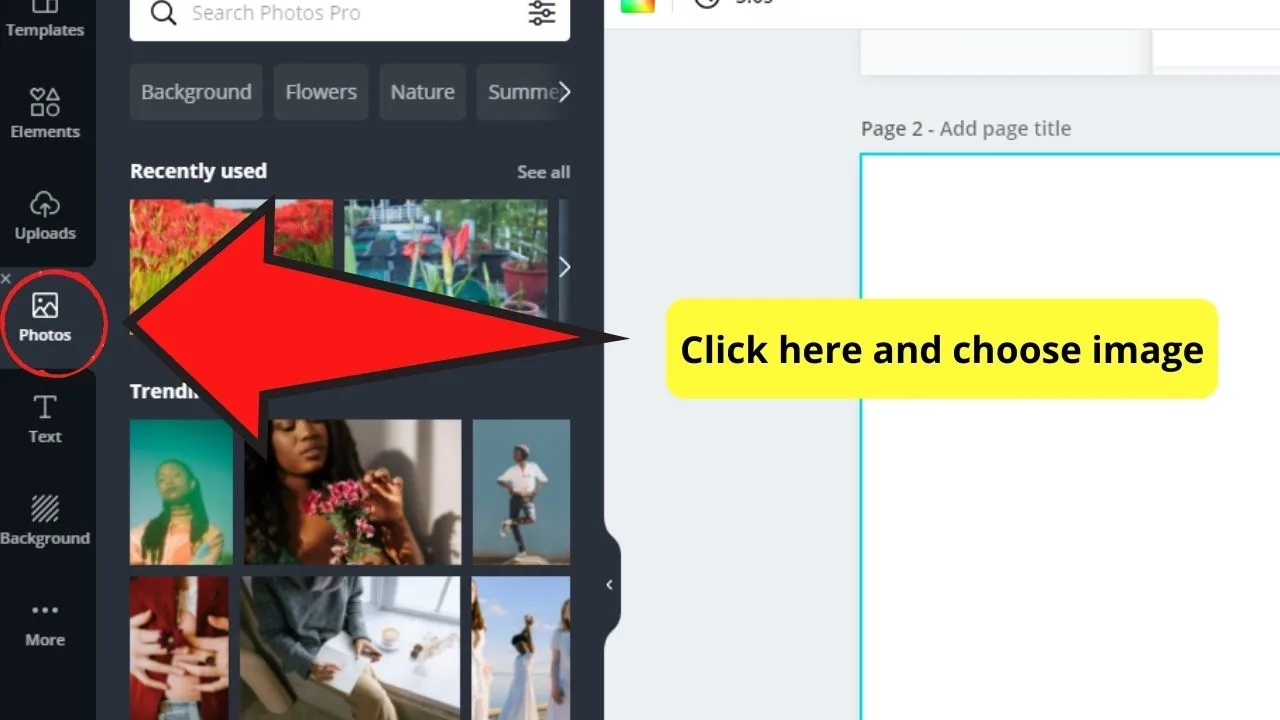
Step 3: Select what image you’ll use from the wide array of choices in Canva’s photo gallery. Click on the picture so it will appear on the blank canvas.
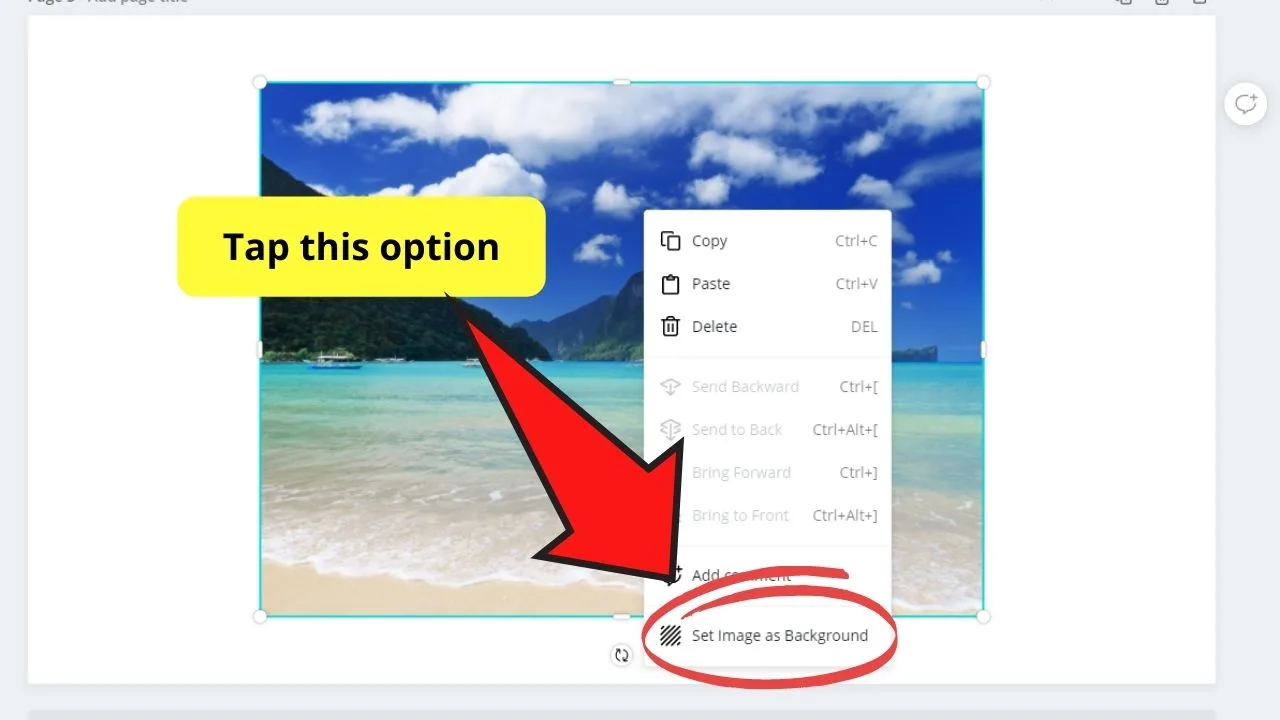
Step 4: Right-click on the photo you chose and tap on the “Set as Background” option in the dropdown menu. The picture will automatically fill up the whole canvas.
Step 5: If you’d like to adjust the background that’s featured, you can crop it by double-clicking on the picture itself. The screen will then be grayed out, revealing a grid box. Tap and drag on the picture to modify its placement.
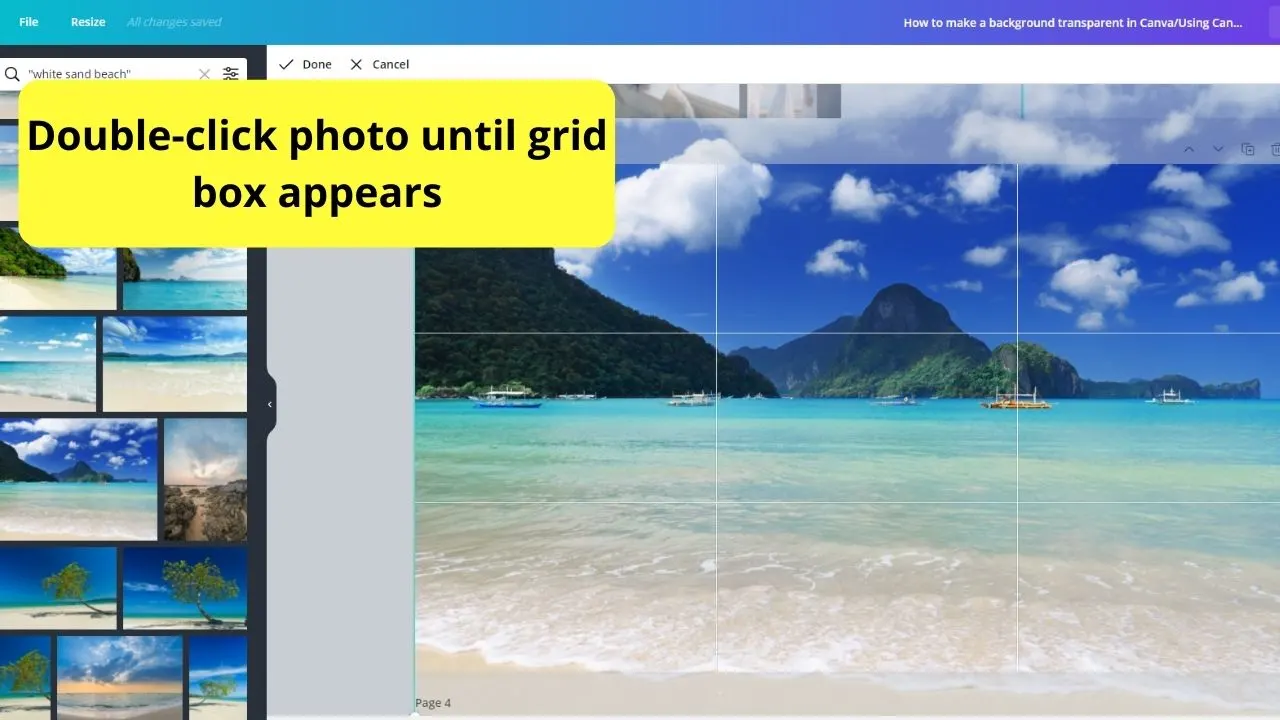
Step 6: If you’re satisfied with the image positioning, tap on the “Done” button on the top left corner of the grey screen.
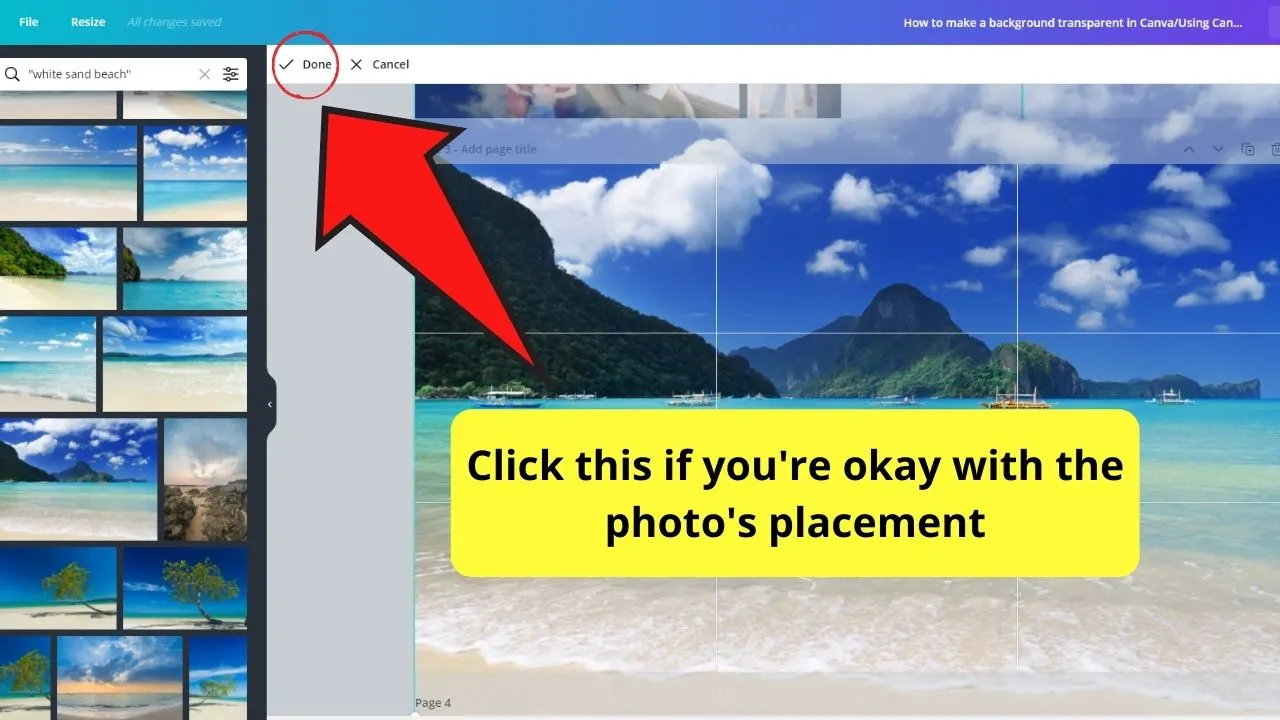
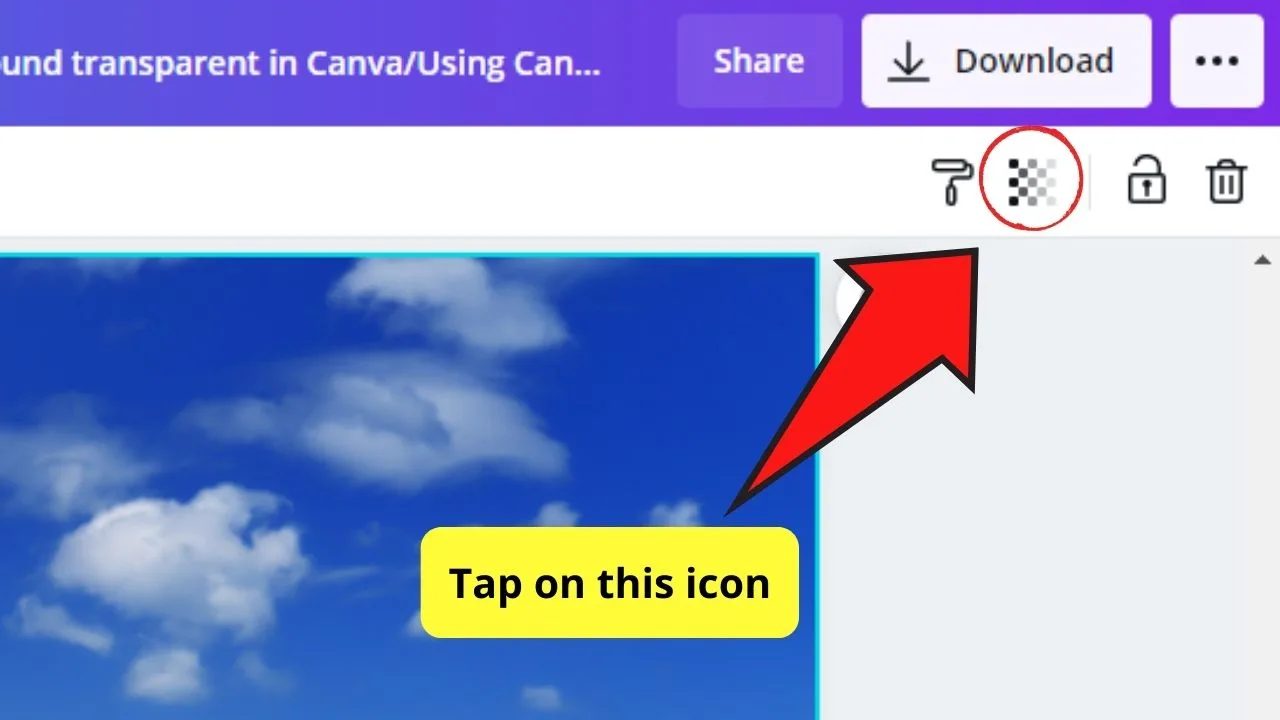
Step 7: To tweak the background image’s transparency, click the photo and head over to the upper right side of the Canva toolbar to click the “Transparency” button. It’s the one that looks like a plaid icon.
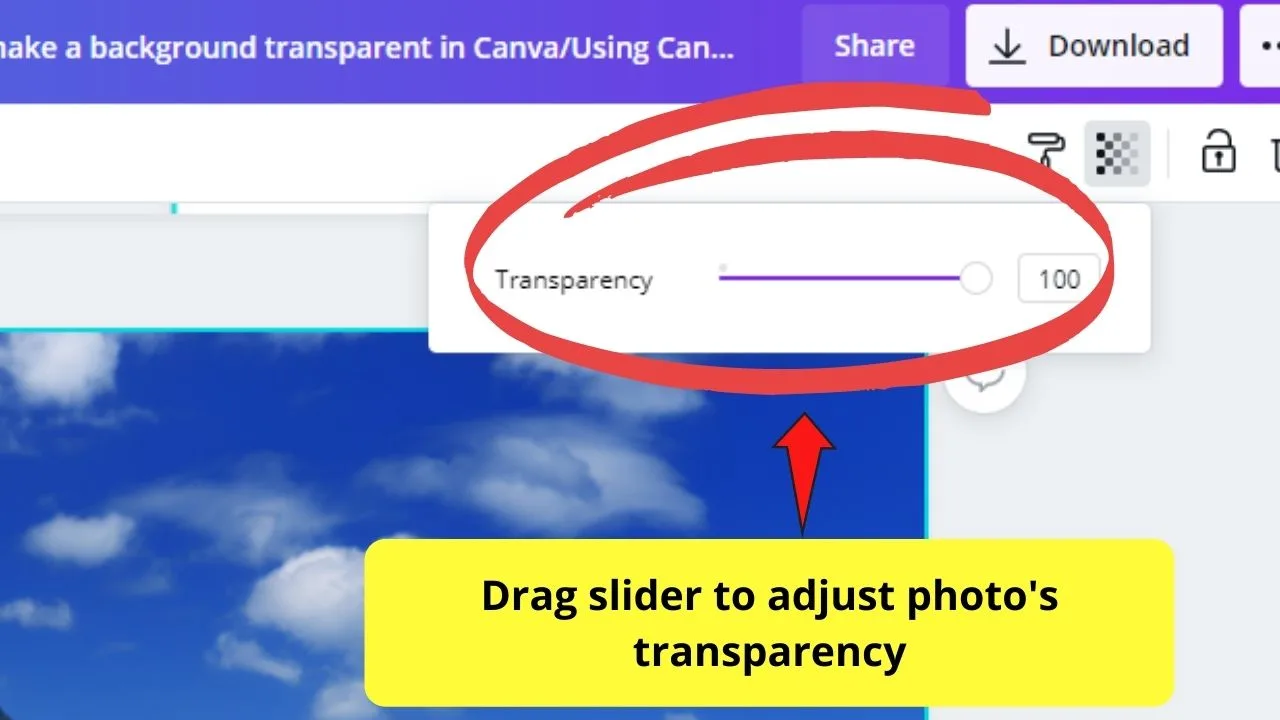
Step 8: A slider will then appear. Drag it to the left if you want to increase the photo’s transparency; to the right if you want to increase its opacity.
 Once you’re okay with the changes you’ve made, proceed with adding the other elements of your design.
Don’t forget to click on the “Download” button if you’re ready to save your project on your device.
When Using Background Colors from Canva’s Background Tab…
When working with images from Canva’s photo library, adjusting the transparency is easy.
However, it needs to be noted that if you choose a background color from Canva’s “Background Tab”, you won’t be able to adjust its transparency.
On Canva Free, this will mean that when exporting your design, you won’t be able to get rid of the Canva background color that you chose from Canva’s background tab.
If you are on Canva Pro, however, you can get this background removed but only if you download your picture in a .png format. If that is what you want to do, make sure that “transparent background” is selected when downloading your picture and you are good to go.
Canva: Export image with transparent background
Now, chances are that you would simply like to download your picture without any background at all. If that is the case, you can certainly do so but only if the following two criteria are met:
- You are on a Canva Pro subscription (you can’t export images with transparent background in Canva free!)
- You are downloading the image in a .png format (you can’t download .jpg files with a transparent background, simply doesn’t work like that)
Creative Takes with Transparent Images
Now that you’ve learned how to tweak the transparency button in Canva, you can do so much more with transparent images other than making it a background.
Transparent Shapes as Text Holder
Textholders, from the term itself, is a text that allows you to mix and match styles and fonts and drag them to your design. This will make the words pop out even more without affecting the overall image quality.
To make one, all you have to do is choose a shape from the “Elements” tab and drag it on the design.
And, like making your background image transparent, tap on the checkered button on the Canva toolbar to adjust the slider accordingly.
Once satisfied with its look, add text by tapping the “Text” panel to choose the font style and size to write your message with. You can also press ”Ctrl + T” to automatically create a text box.
Veiled effect
If you’re betting on creating a mysterious effect on your design, why not increase the transparency of your image?
This is what pro graphics designers call the veiled photo effect. And, just like a veil, your images will have that semi-transparent look.
Not only is it mystifying, but it’ll also add texture to your design overlays.
Transparent watermark
Watermarks serve as protection from other people stealing your design and claiming it as their work of art.
While it’s useful in this aspect, you don’t want a large one splattered across your design just to announce to the world that that design’s yours.
Don’t worry, you can create a transparent watermark with Canva.
Simply drag and drop your logo on the design you’re currently working on and adjust its transparency until it’s barely noticeable. This will inevitably mark your work without ruining the design’s overall impact.
So, what are you waiting for? Test this transparency effect on your Canva account, and see where your creative instincts take you!
Frequently asked questions about Canva & transparent backgrounds
How can I export my Canva project with a transparent background?
First, if you are on Canva Free, exporting with a transparent background won’t work. You need Canva Pro for that. Secondly, if you are on Canva Pro, to export with a transparent background, when downloading, make sure you choose the .png format and tick the option “transparent background.”
Why can’t I remove the background in Canva?
If you can’t remove the background in Canva, it’s most likely due to one of two reasons: You either are using Canva Free or you are trying to export your picture (project) in another format than PNG. Please note that only the PNG-format allows for transparent background. If you download in a JPG-format for instance, this option won’t be available.
How to remove the background in Canva Free?
Removing the background (= download as a transparent PNG) is a Canva Pro feature only. That said, you can’t download your pictures and project with a transparent background in Canva Free.

Hey guys! It’s me, Marcel, aka Maschi. On MaschiTuts, it’s all about tutorials! No matter the topic of the article, the goal always remains the same: Providing you guys with the most in-depth and helpful tutorials!


