

WordPress makes it easy to publish digital content. Making your text look like traditional print requires a little coding know-how.
So, for instance, when trying to indent the first line of a WordPress post, you might face certain problems.
By default, when you use the indent and outdent buttons in the WordPress toolbar of either the Classic Editor or the Classic Paragraph block in Gutenberg, the indent is applied to the whole paragraph.
To indent only the first line of a new paragraph, CSS code must be added to your Cascading Style Sheet (stylesheet.css).
How to indent the first line of a WordPress post
To indent the first line of a WordPress post, use CSS to create a “custom-indent” class, then call it up with HTML by adding <p class=”custom-indent”>. The indent is only created where the HTML is added to the start of a new paragraph.
Why the WP indent buttons do not work for single-line indents
Using the indent and outdent buttons in the WP on-page editor applies the indent to the entire paragraph.
Look in your text editor and you will see the padding-left styling that is applied to the HTML code.
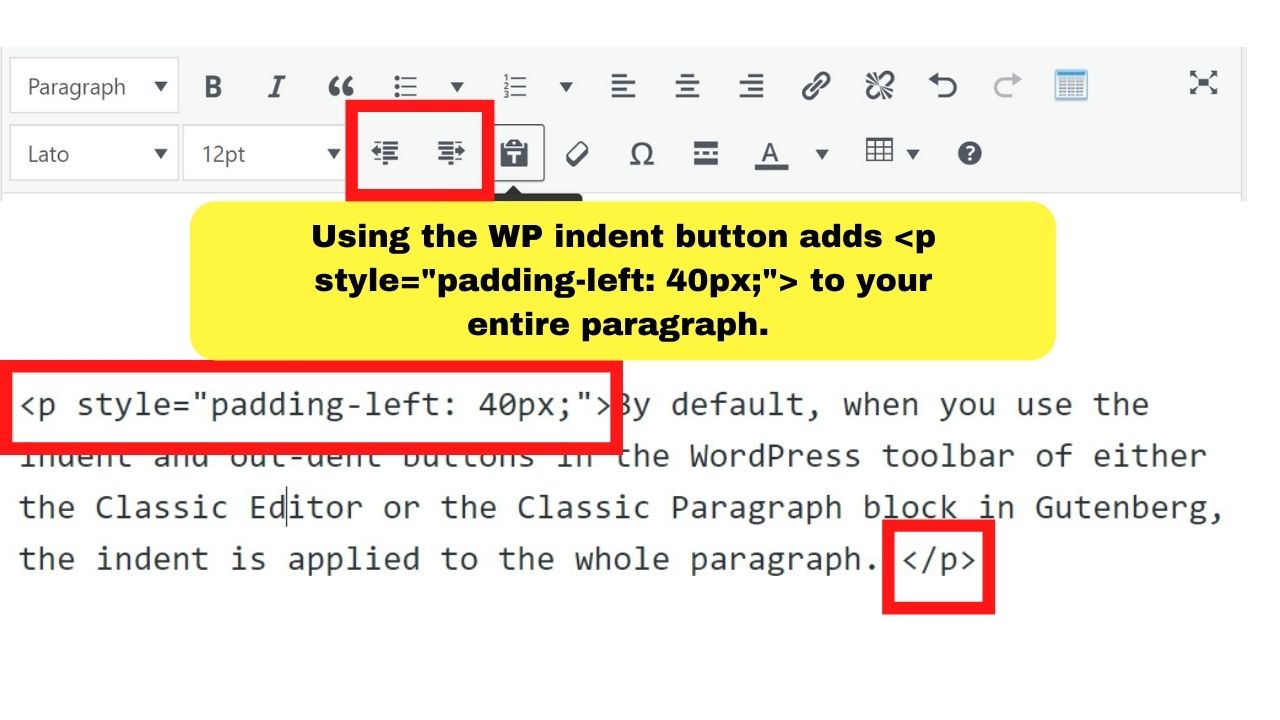
By default, the indent toggle adds 40px of an indent.
<p style="padding-left: 40px;">
That number (40px) can be increased or decreased.
If you move the end code (</p>) it splits the paragraph. It does not apply the indent only to the first line of the paragraph.
The same happens if you use any <p style> in HTML to tweak the indent, such as
<p style="margin-left:10%">
or similar.
The default for the <p> tag in HTML is to apply the styling element to the entire paragraph.
To apply an indent to the first line of a paragraph, you need to add an indent class to your custom CSS.
You can either add this to your stylesheet.css file, or the much simpler route is to use the Additional CSS within your WP admin panel.


Adding a custom indent in CSS (the easy way)
Go to the Appearance menu on the left sidebar, select Customize, then select the Additional CSS option.
Insert the following code:
p.custom-indent {
text-indent:40px;
}
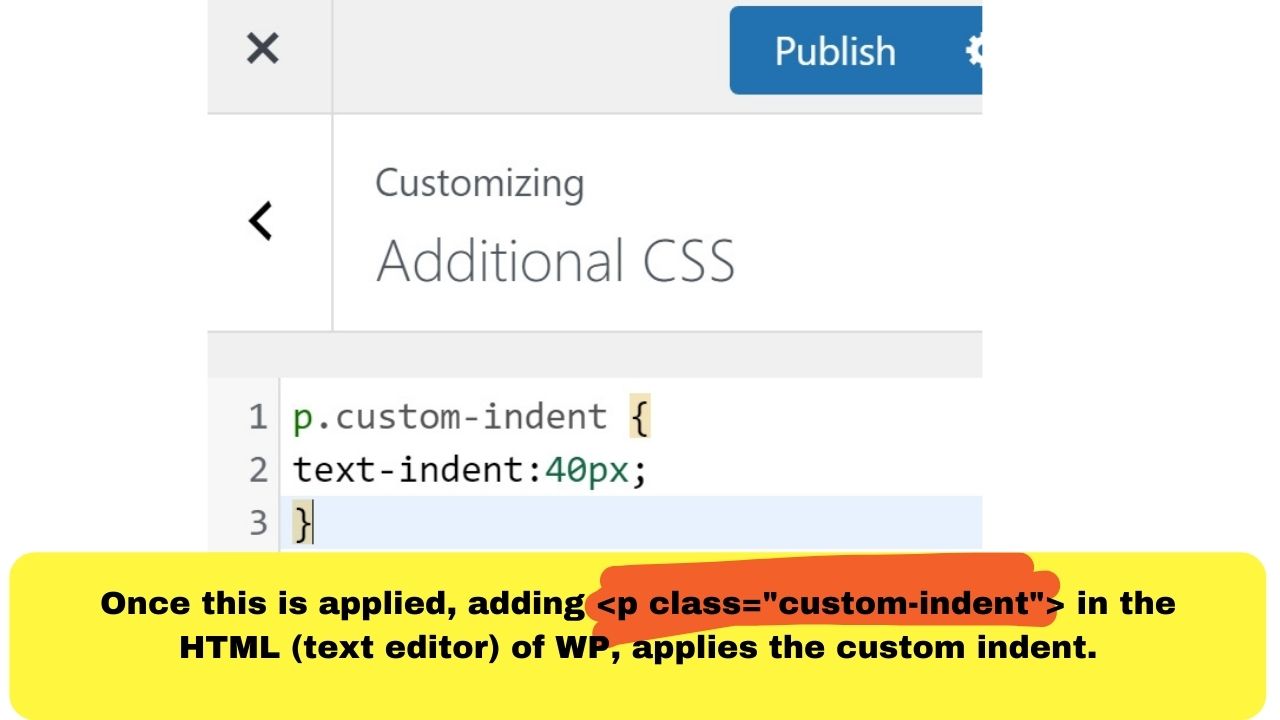

Then press publish.
Until the changes are published, they will not be applied. Once applied, it applies site-wide to wherever the HTML is used.
With the changes added, instead of adding the <p style> element into the HTML, you would insert the <p class> element.
<p class=”custom-indent”>
Applying an indent to the first line of every new paragraph
Applying the custom indent to all paragraphs would be tedious to insert the <p class> element at the beginning of every paragraph.
You can make every new paragraph have an equal indent spacing only applied to the first line of each paragraph without indenting the whole paragraph.
The CSS code to use for that is similar to:
article p {
text-indent:40px;
}
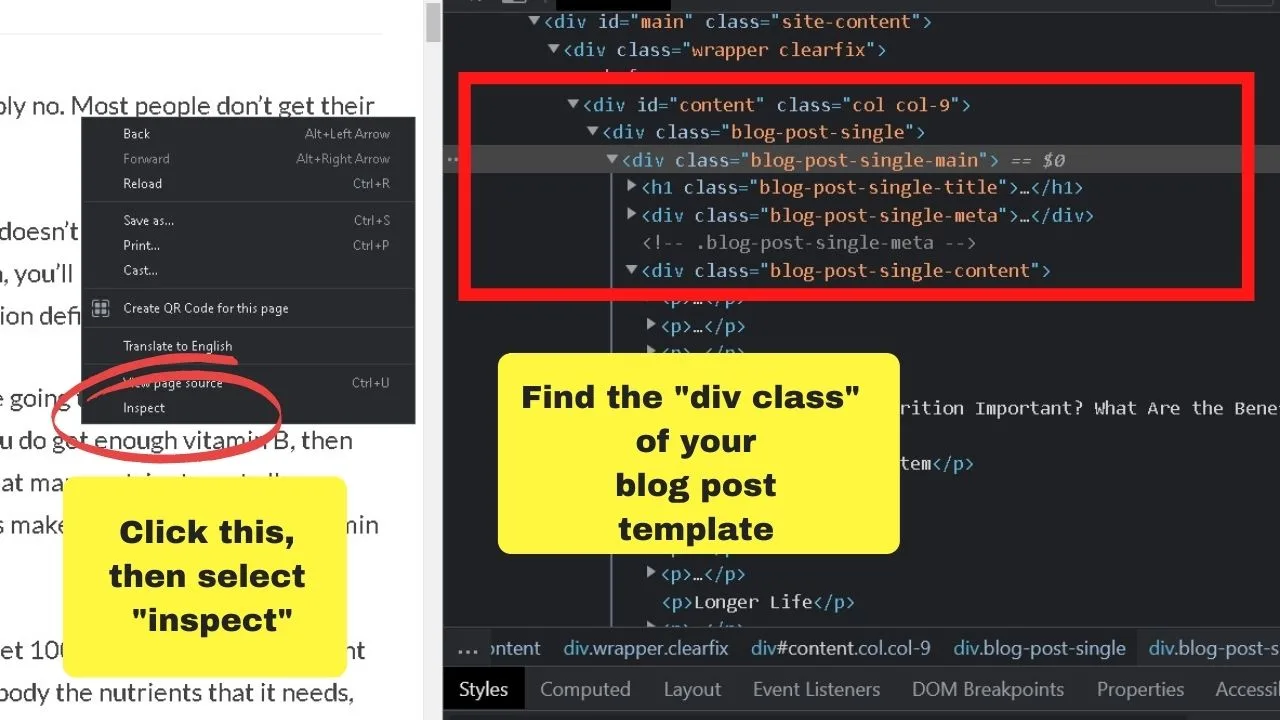
It is mentioned that the codes are similar to the above because each theme has different names to identify various elements in the Stylesheet.
On this site, the blog post’s “body” element is labeled with the “entry-content mvt-content.”
On our test site, it is called “blog-post-single-content.”
The element depends on your theme template. Use your browser inspector to identify the class.
Using Chrome, right-click, then select the “inspect” option.

As with the custom indent, the number of pixels you indent the text from the left margin can be increased or decreased.


Hey guys! It’s me, Marcel, aka Maschi. On MaschiTuts, it’s all about tutorials! No matter the topic of the article, the goal always remains the same: Providing you guys with the most in-depth and helpful tutorials!

