

Having the ability with WordPress to show a different header per page is super useful for sales pages or even funnels.
Create a unique product name, slap up a sales page, and then have a different WP header per page for each stage of your sales funnel…
Launch page, JV page, sign up page, webinar page… you name it. You can really go to town with the WP headers and it ain’t (always) that difficult to do.
In fact, some themes make it point and click simple.
If not, you can always go the plugin route.
As you continue reading below, you’ll get the inside scoop on replacing your WP header on a per-page basis.
All you need is a different header image in the same header size. The methods for getting your image into the header space are detailed below.
WordPress: Different Header Per Page
Use a theme that lets you hide the header, then you can replace it with an in-post image. Alternatively, add the header replacement functionality using the WP Display Header plugin. Should it not override your default header (resulting in two headers showing), hide the default header with CSS.
Disable the header on the page (theme dependent)
Before jumping ahead to mess with any coding or adding more plugins that may or may not be required, check your theme requires your intervention.
In your WP editor, look on the right sidebar for a section titled “elements”.
The header is an element and there are some themes (mostly premium) that give you an option to disable the header on individual pages and posts.
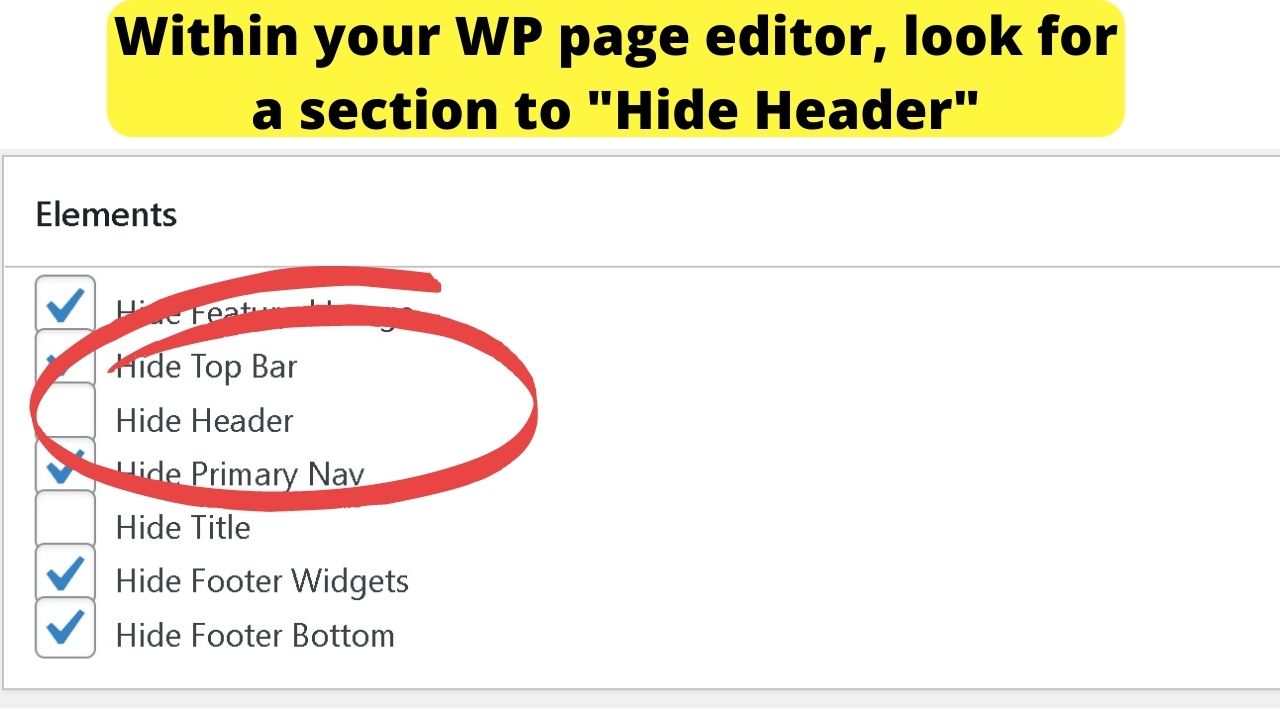

If you have that option, you have the ability to replace the header image on each page with a standard image.
You can insert a header image directly within the editor that matches your template’s header dimensions. Just uncheck the box to show the header image.
Do note that inserting an image within the post editor loads the image within your content area. If you have your sidebar set to show, it will not be placed above it.
For that, you do need to replace the header image. Not hide it then replace it with an in-post image. That only works if your theme has the option to hide the sidebar, too.
Should your theme not support hiding the theme header on a per-page basis…
Turn to plugins to replace your default header on a single page/post basis
We tested two. Neither worked out of the box. Plugins rely on developers making their themes compatible with custom headers.
If your theme does not support the (customer_header) hook in WP, the plugins seem (on the surface) to be useless.


But, being fans of WP CSS customizer, we discovered there is a way to make them work without duplicating your header.php file, editing codes with FTP and possibly breaking your site.
A quick way to tell if either of these plugins will work with no editing…
Go to the Appearance menu, select customizer, open your “header” settings and see what you have.
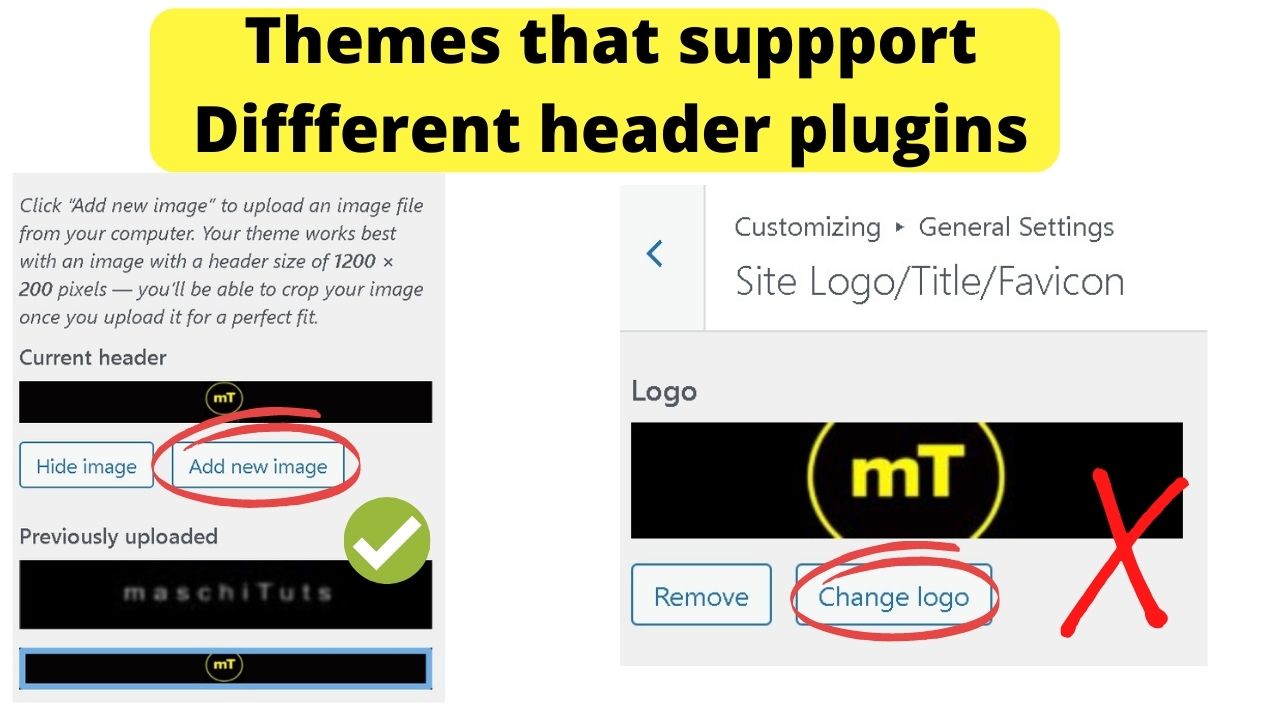
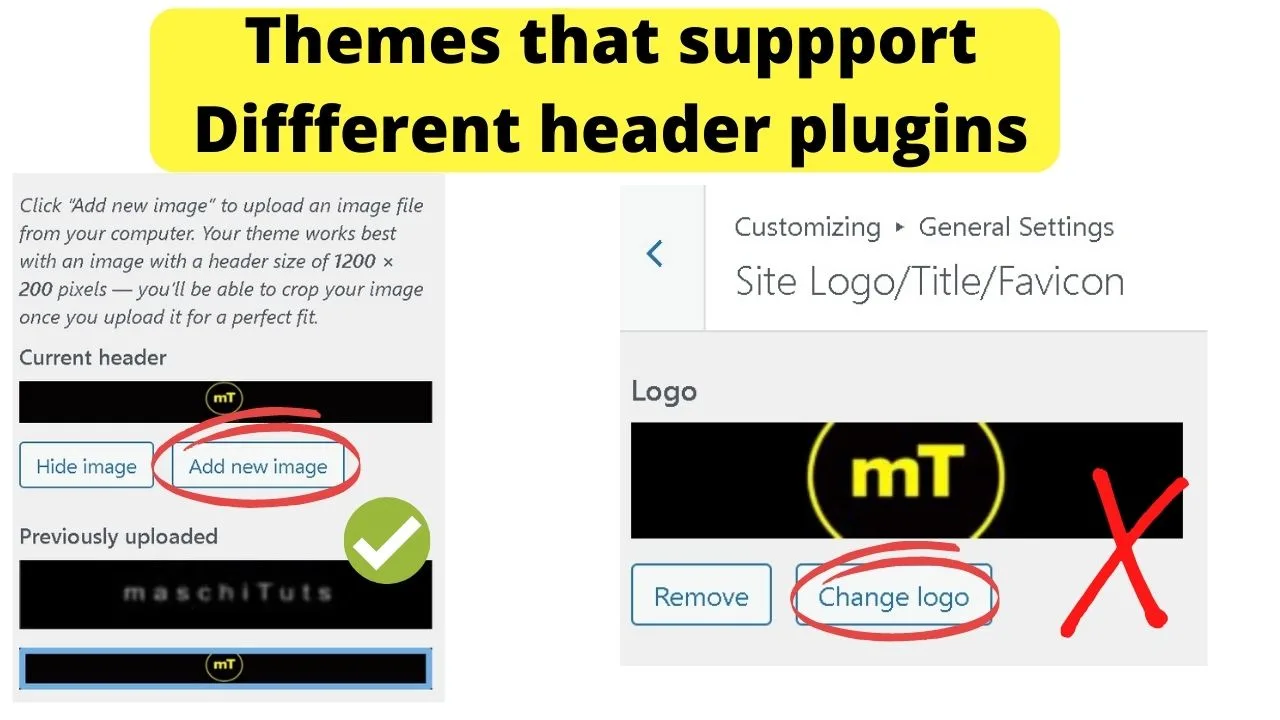
You need your theme to let you add new headers AND keep your previously uploaded headers available for future use. If you can “add new”, your theme is good. If you can only “change” your header or site logo, plugins will not work.
The two plugins to try are “WP Unique Headers and “WP Display Headers.”
WP Unique Headers and WP Display Headers
For either to work in our testing, changes needed to be done with CSS, otherwise, the result was the default header image being placed over the different image.
The result of two header images, one placed over the other, is messy.
So do take note that if you see this happen, it does not mean that the plugin is incompatible with your theme. You can hide elements with CSS and that is the quick fix to get plugins like these working.
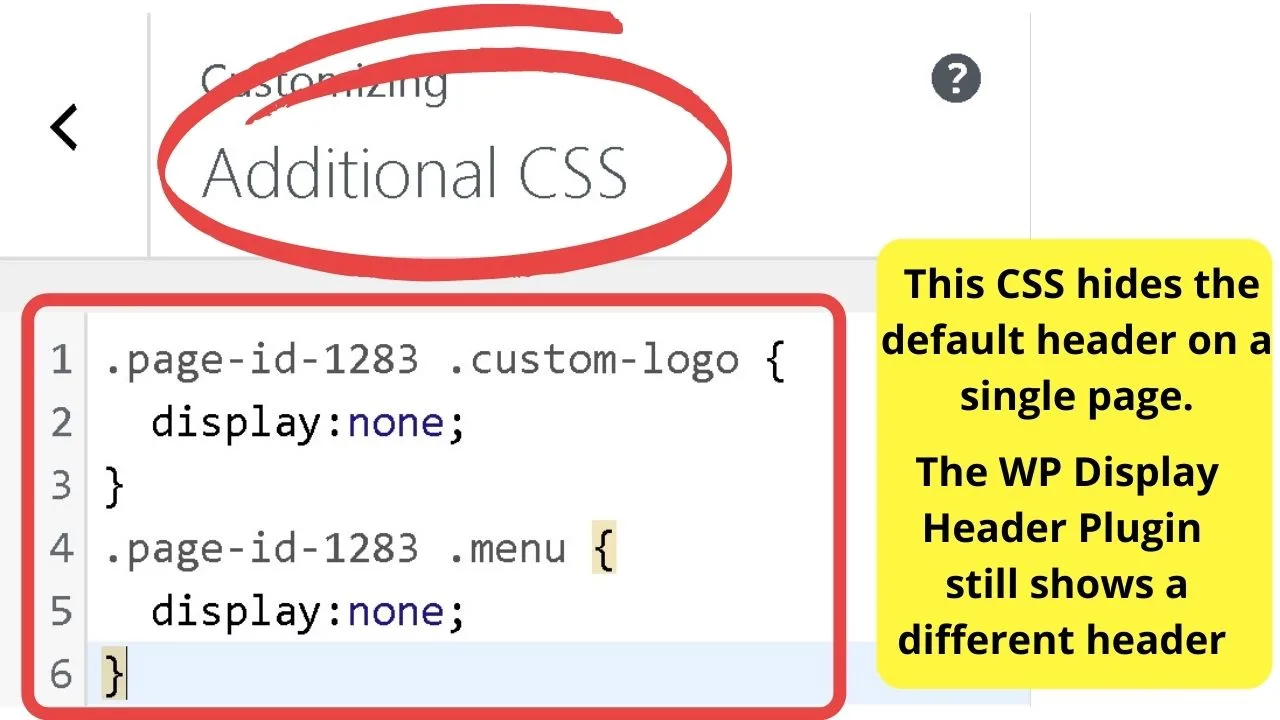
Go to your Appearance menu, select Customize, then go into the Additional CSS menu.
Add in the following code:
.page-id-1283 .custom-logo {
    display:none;
}
.page-id-1283 .menu {
    display:none;
}
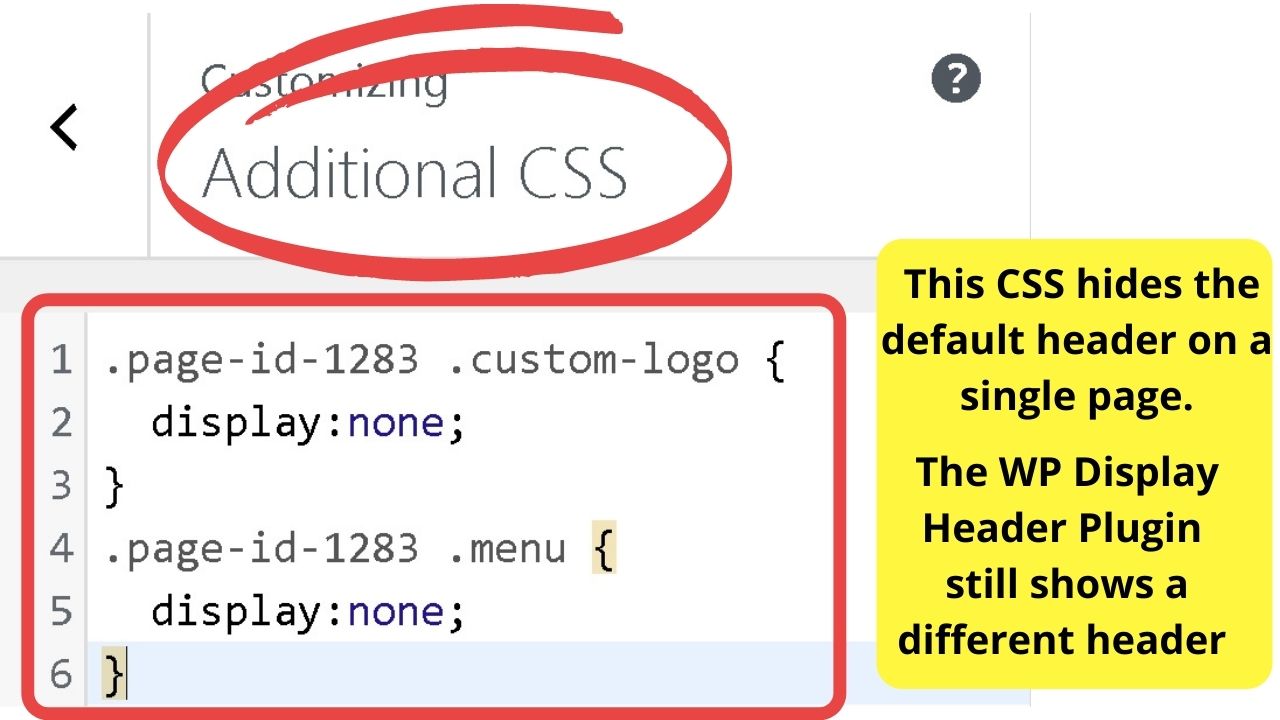
 Where the page ID is, replace that with your page ID. Load the page you want a different header on and the page ID shows in your browser URL address bar.
Where the “.custom-logo” is, replace that with your theme header code.
To find it, right-click on your header image, select inspect and the “class” element is your header class id. Most themes are either “custom-logo” or “custom-header”.
Keep the display set as “none”. That will hide your default header image.
The second section of CSS you may not need
Use this if you find your navigation menu displays within your different header graphic instead of below it.
As the default header is being hidden, the main navigation bar gets pushed up to fill in the white space.
You can either hide it, which is what the CSS code above does, or you can play around with padding elements to push the navbar down below the new header image.
Using the WP Display Header plugin
Once the WP Display Header plugin is activated, when you load a page or post in edit mode, you get an additional header section displayed below your WordPress editor. Select the unique header to show for that page or post, then click update.
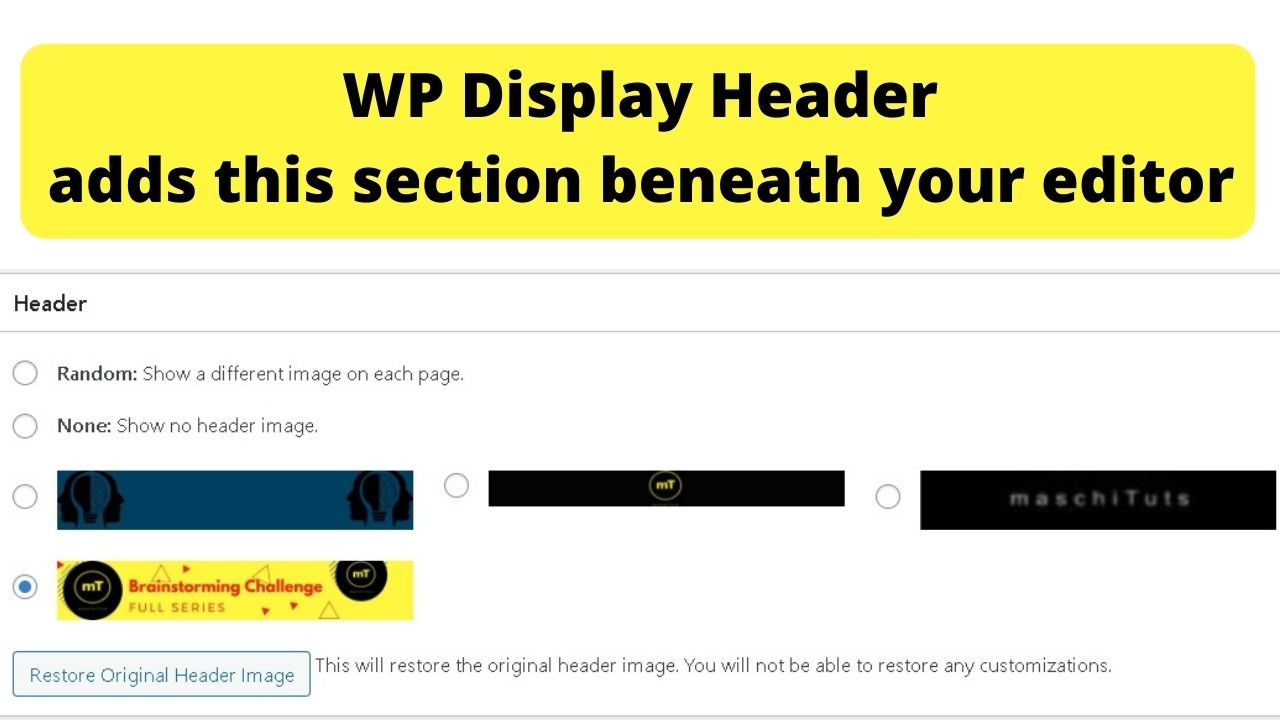

Note: Every header image that shows are the “previously uploaded” headers you can upload in your theme customizer header settings.
This is why you need a theme that saves previous headers. The plugin will not work on themes that only let you change a header or logo.
This replaces the default header with your unique header for that page or post only.
Once you have your different header selected, press preview and you will see the different header show.


How to make a custom header in two minutes
If you find yourself spending WAY too long editing images, do yourself a favor and set yourself up a free account on Canva.
It takes two minutes (Internet connection dependent) to create a custom graphic, save it to your computer then upload it to WP and set it as your custom header graphic.
For the purposes of creating a custom graphic for your page headers, see how to download from Canva, which walks you through the custom image creation stage, and downloading.
Uploading your custom header
Once you have your image, go back to your WP dashboard, go to Appearance, then select “Customizer”. Go into the header settings and this time select “Add new image”.
In all likelihood, it will change your header image on all pages when you first add the image. Click on the header from the “previously uploaded” section to restore your default header graphic.
Now, edit your page or post to show a different header on that specific page.
Click the radio button beside the header image you want for that page. Go back to the top, click the “preview” button and you’ll see your page or post is displayed with a different header image.
A theme and plugin combo that worked to put different headers on different pages is:
If you are starting a site with WordPress and want to go the free route by customizing free WP themes, a combination that works out the box without requiring CSS edits is the Pure and Simple Theme (free version) and WP Display Headers.
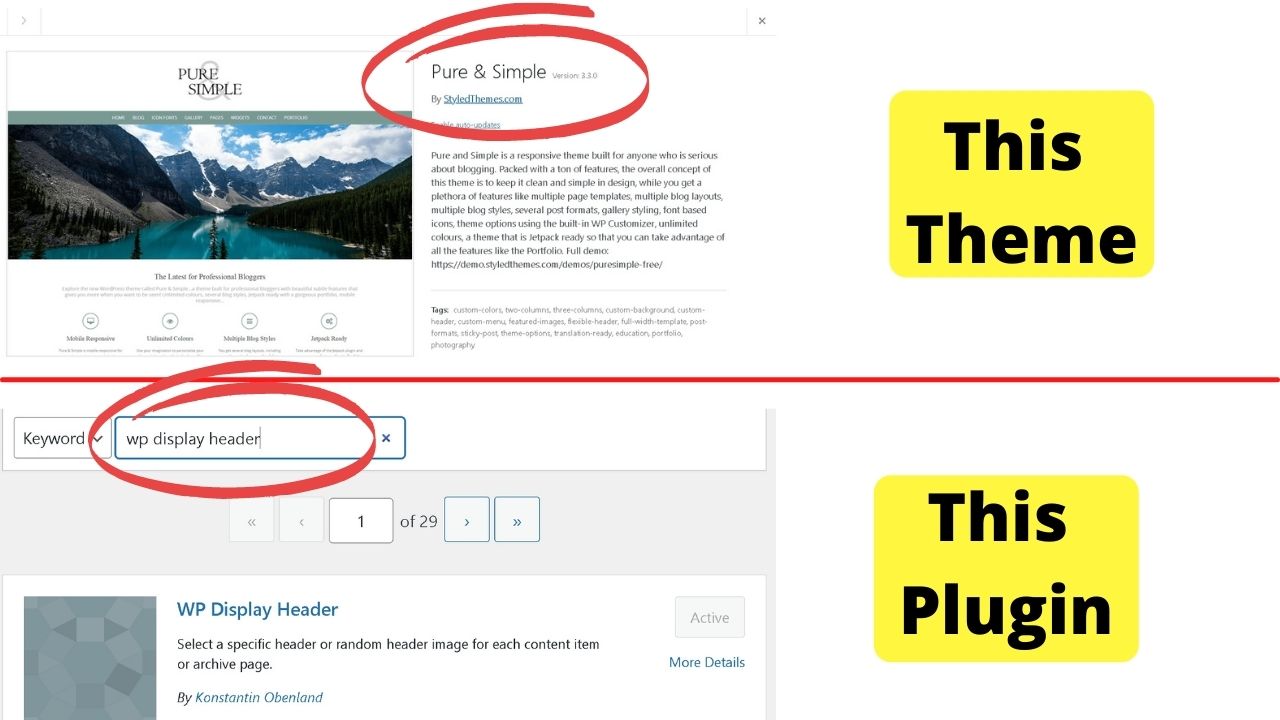
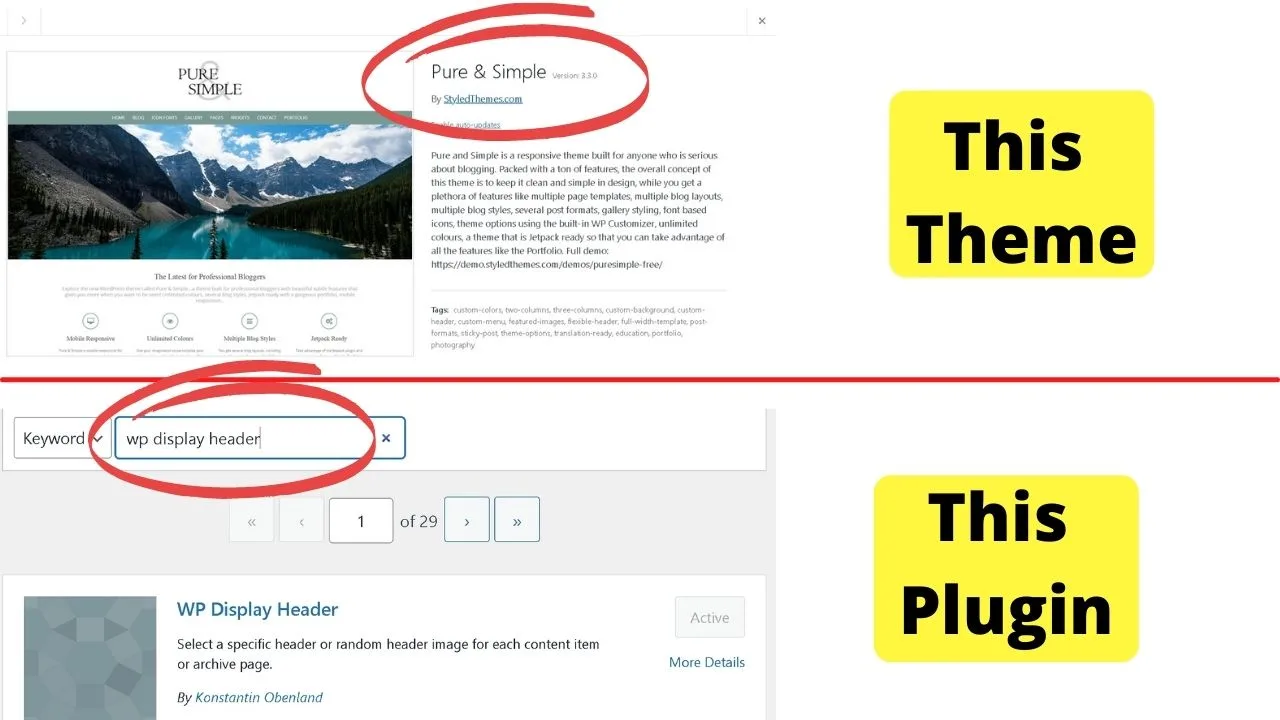
Install and activate the theme and the plugin and you can then select different headers to show on different pages and posts.


Hey guys! It’s me, Marcel, aka Maschi. On MaschiTuts, it’s all about tutorials! No matter the topic of the article, the goal always remains the same: Providing you guys with the most in-depth and helpful tutorials!

